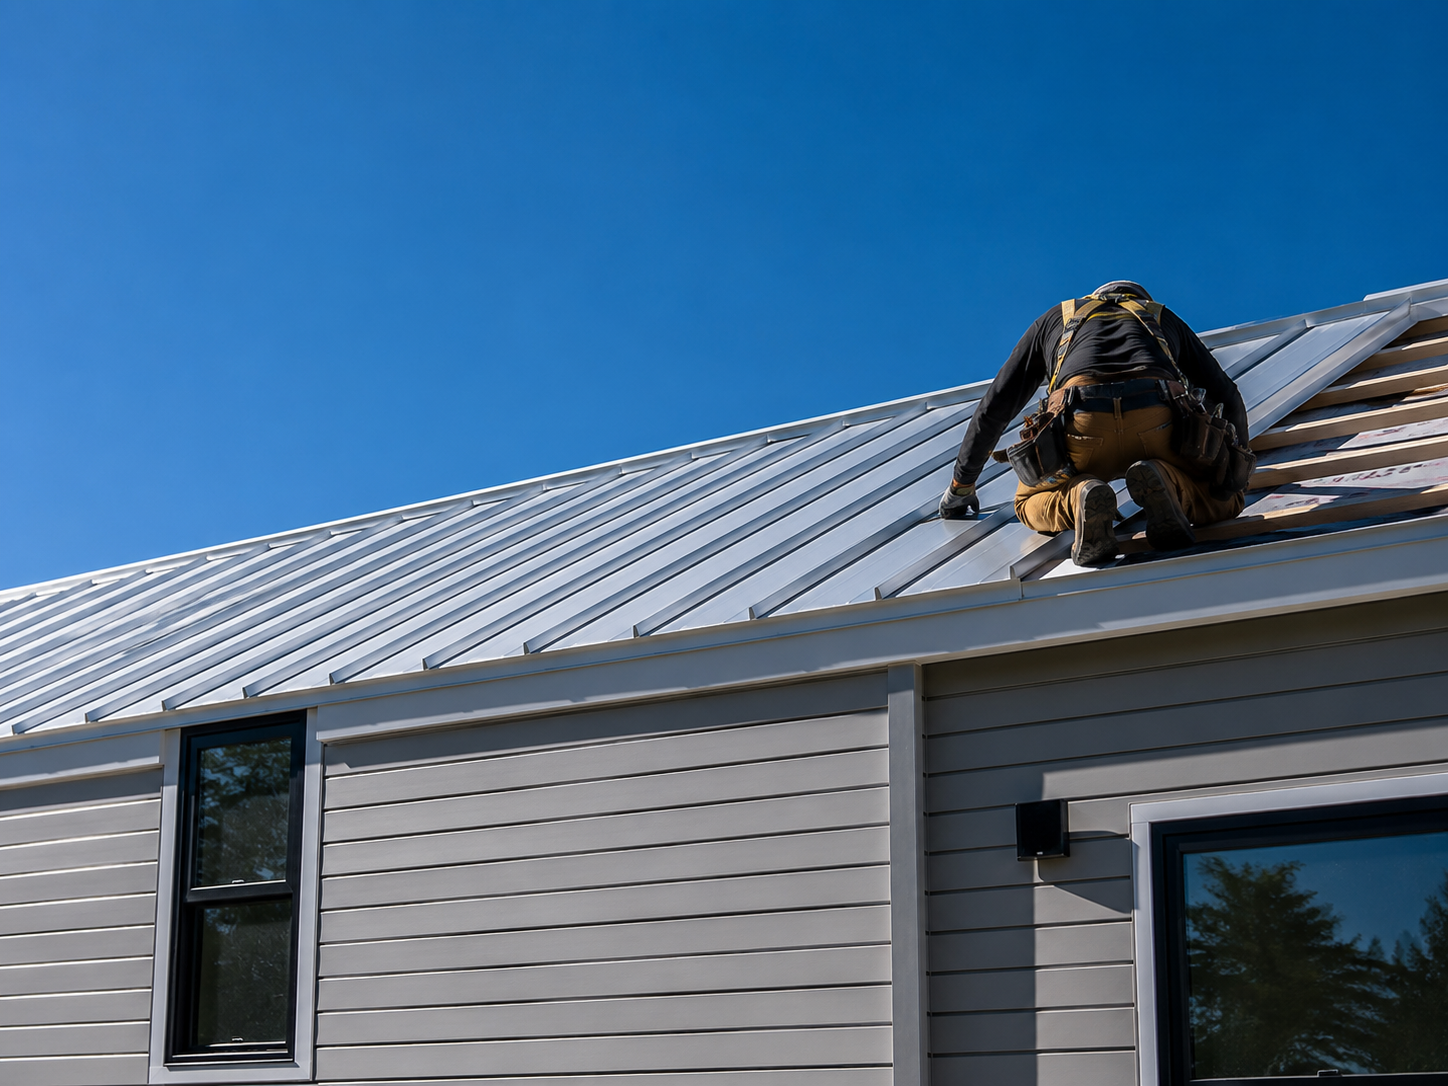
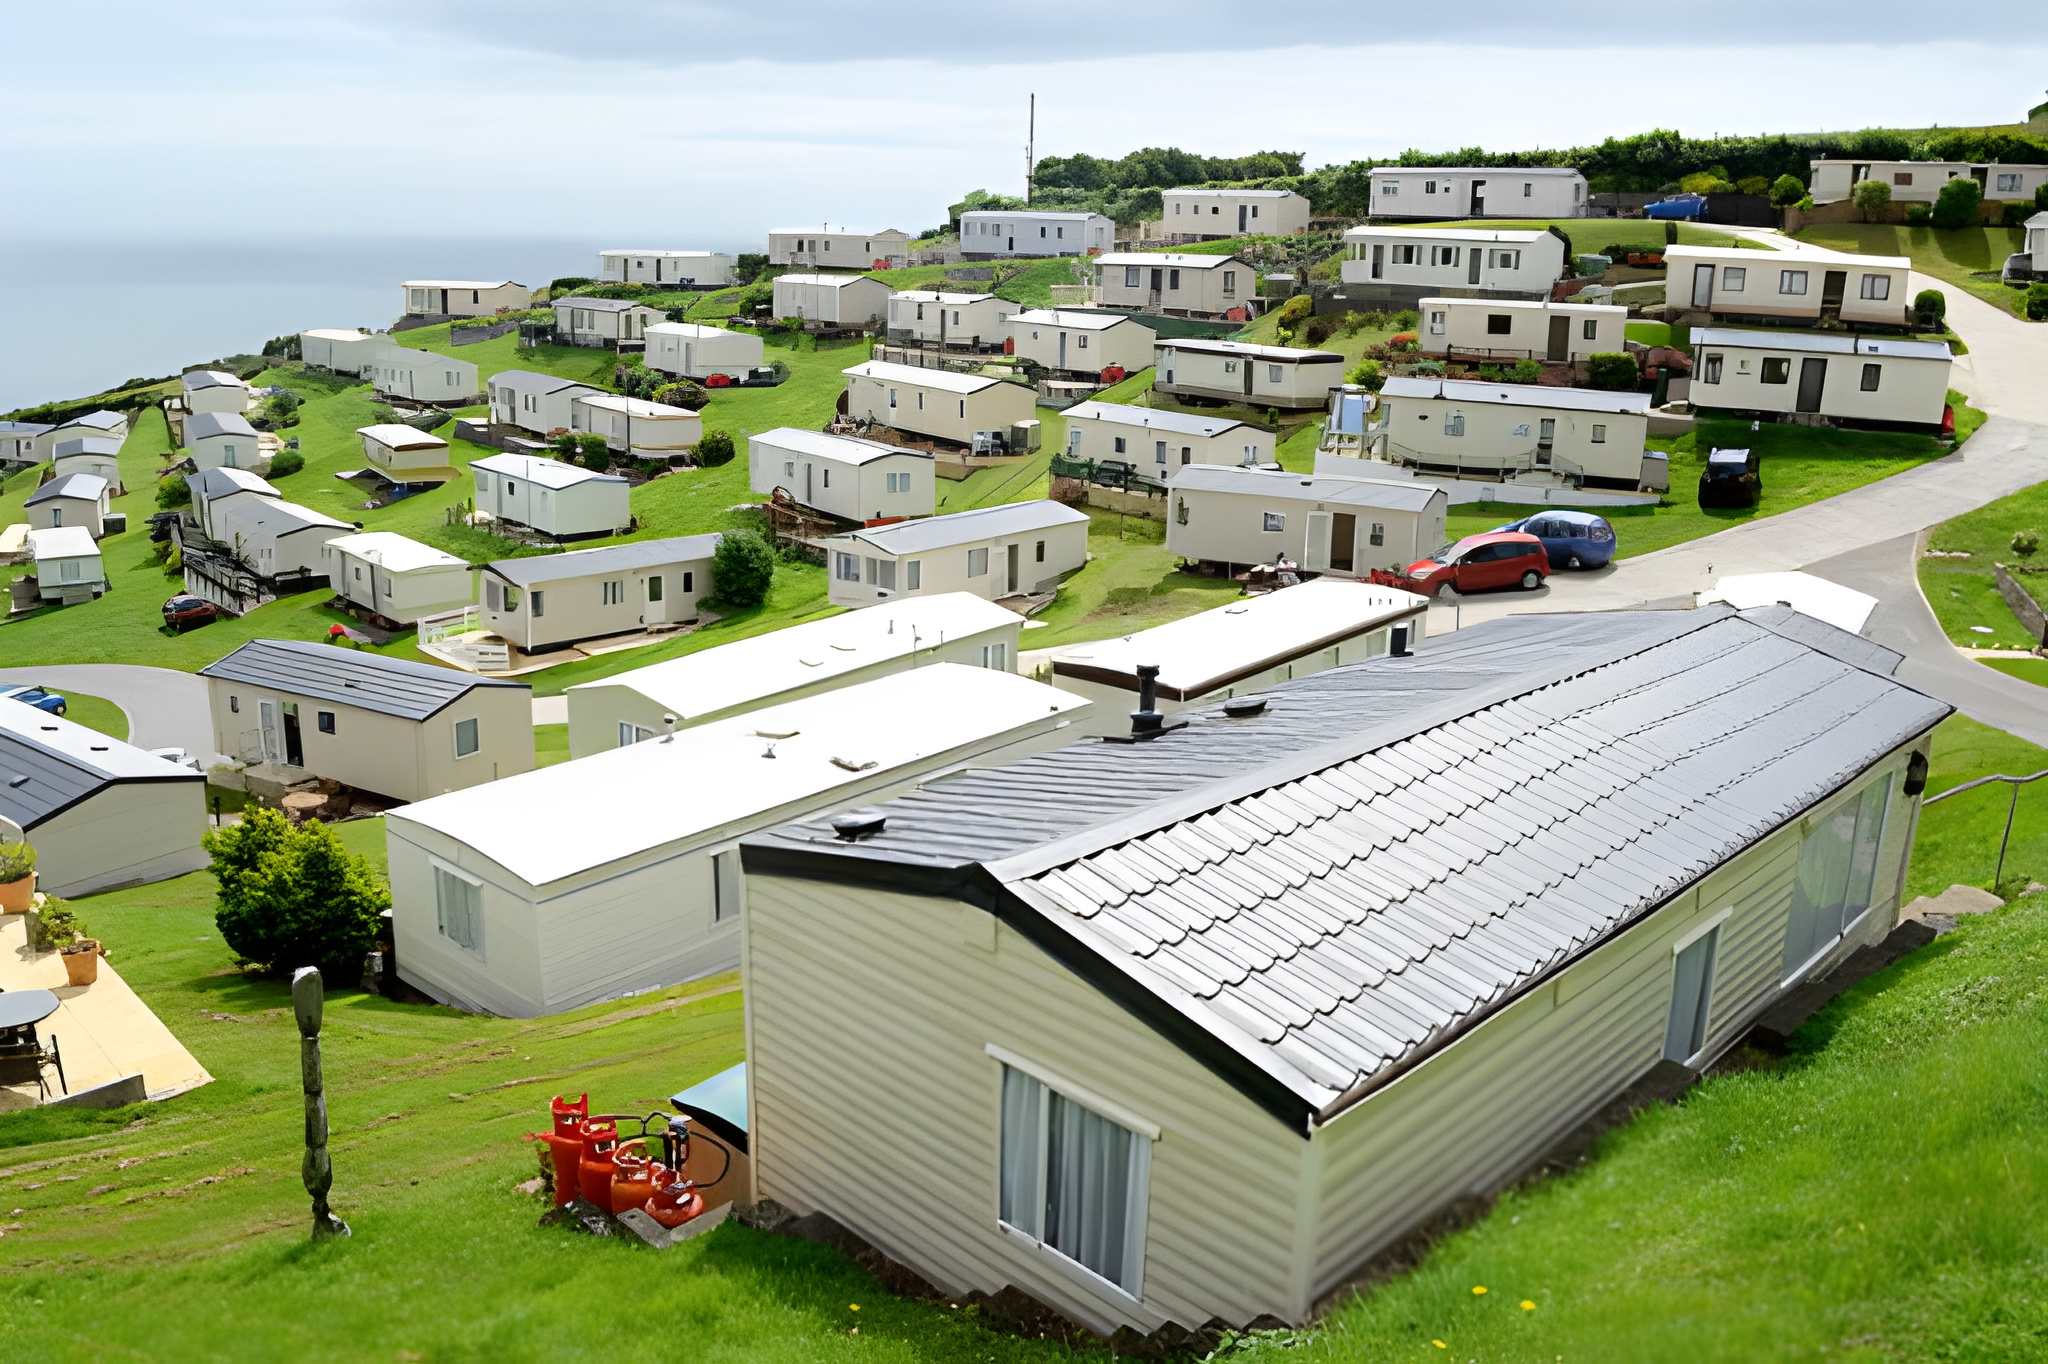
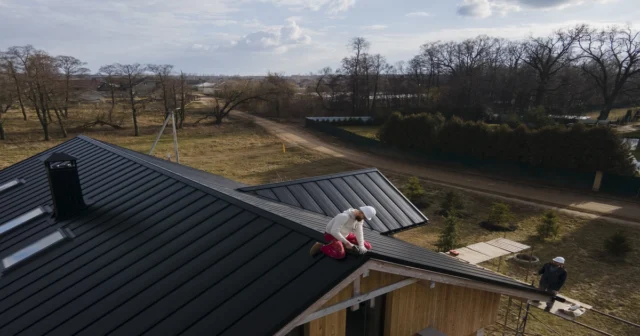
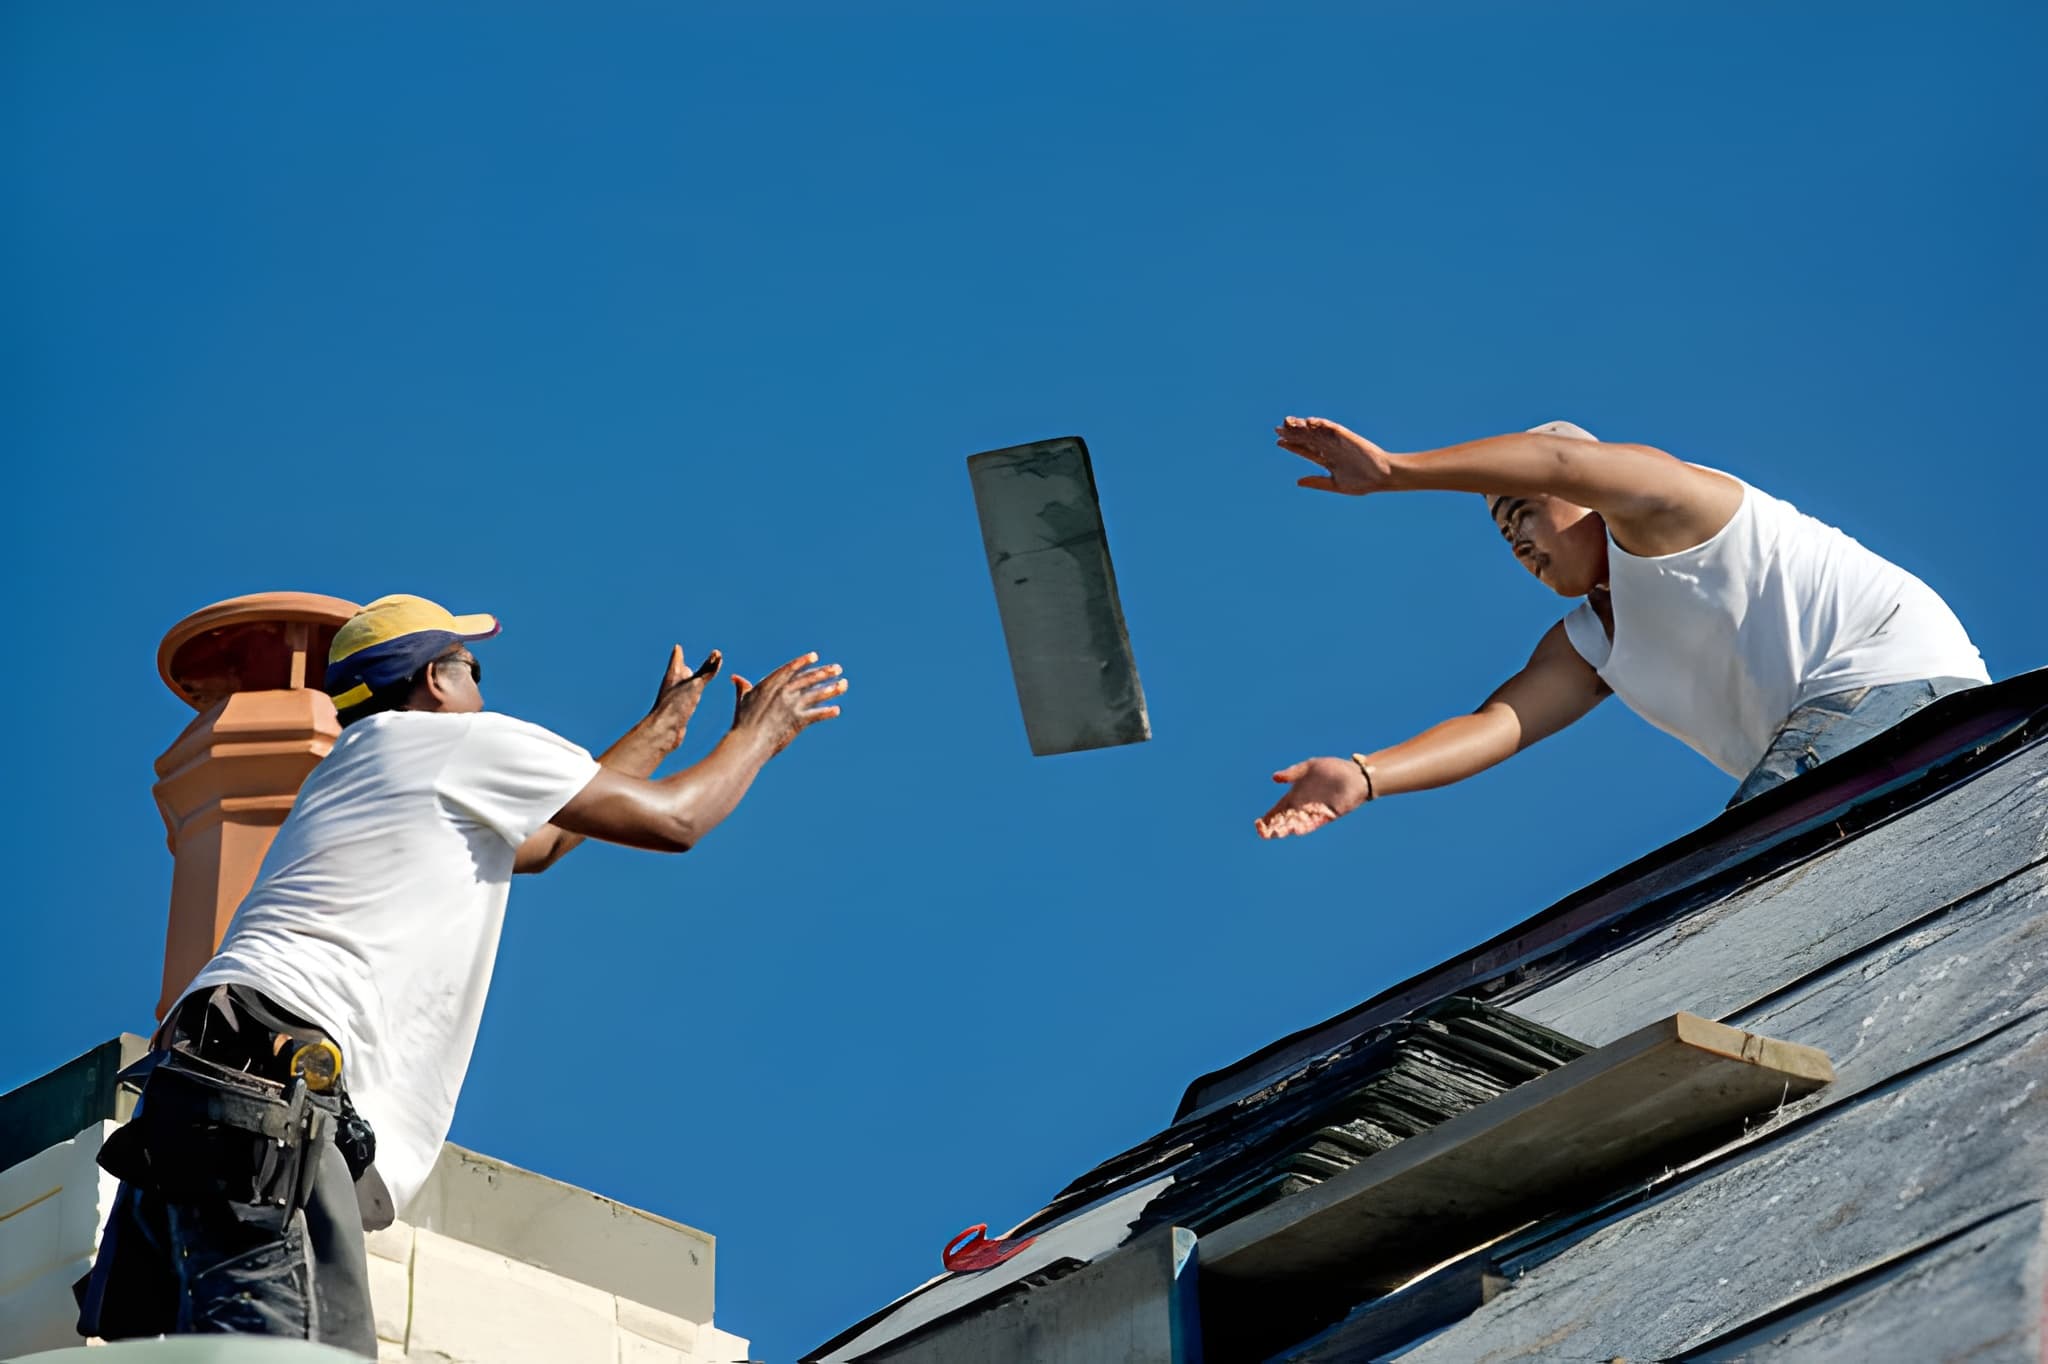
Metal Roof on Mobile Home Cost in 2026 : Complete Pricing Guide
The metal roof mobile home cost can significantly impact your budget, and understanding it is crucial for making an informed decision. In this guide, we aim to break down costs, materials, benefits, and how you can go about installing a metal roof. As we navigate the world of mobile home roofing options, knowing the metal roof mobile home cost is a vital piece of information. This guide will provide insights into pricing, labor expenses, and the long-term savings associated with choosing metal roofs over traditional options. I’ll also share tips from my personal experiences that may help you save some money along the way. In this article, we’ll cover everything from the factors that influence metal roof mobile home cost to installation tips and maintenance advice. You will learn the types of metal roofs available for mobile homes, what to expect during the installation process, and why investing in a metal roof can be one of the smartest decisions you make for your home.
Understanding Metal Roof Mobile Home Cost
When it comes to the metal roof mobile home cost, several factors come into play. Here’s a breakdown of the major elements that can affect your overall expenses:
Material Type: Different metal materials, like aluminum and steel, have varied costs. Aluminum tends to be more expensive but offers better resistance to corrosion.
Roof Size: The larger your mobile home, the more material and labor will be required, increasing overall costs.
Labor Costs: Hiring experienced contractors can save you costs related to poor installation but is often pricier upfront.
Location: Costs can vary widely based on region. In more remote areas, labor might cost more due to travel expenses.
Additional Features: Fancy features such as custom designs or coatings will also factor into your total expenses.
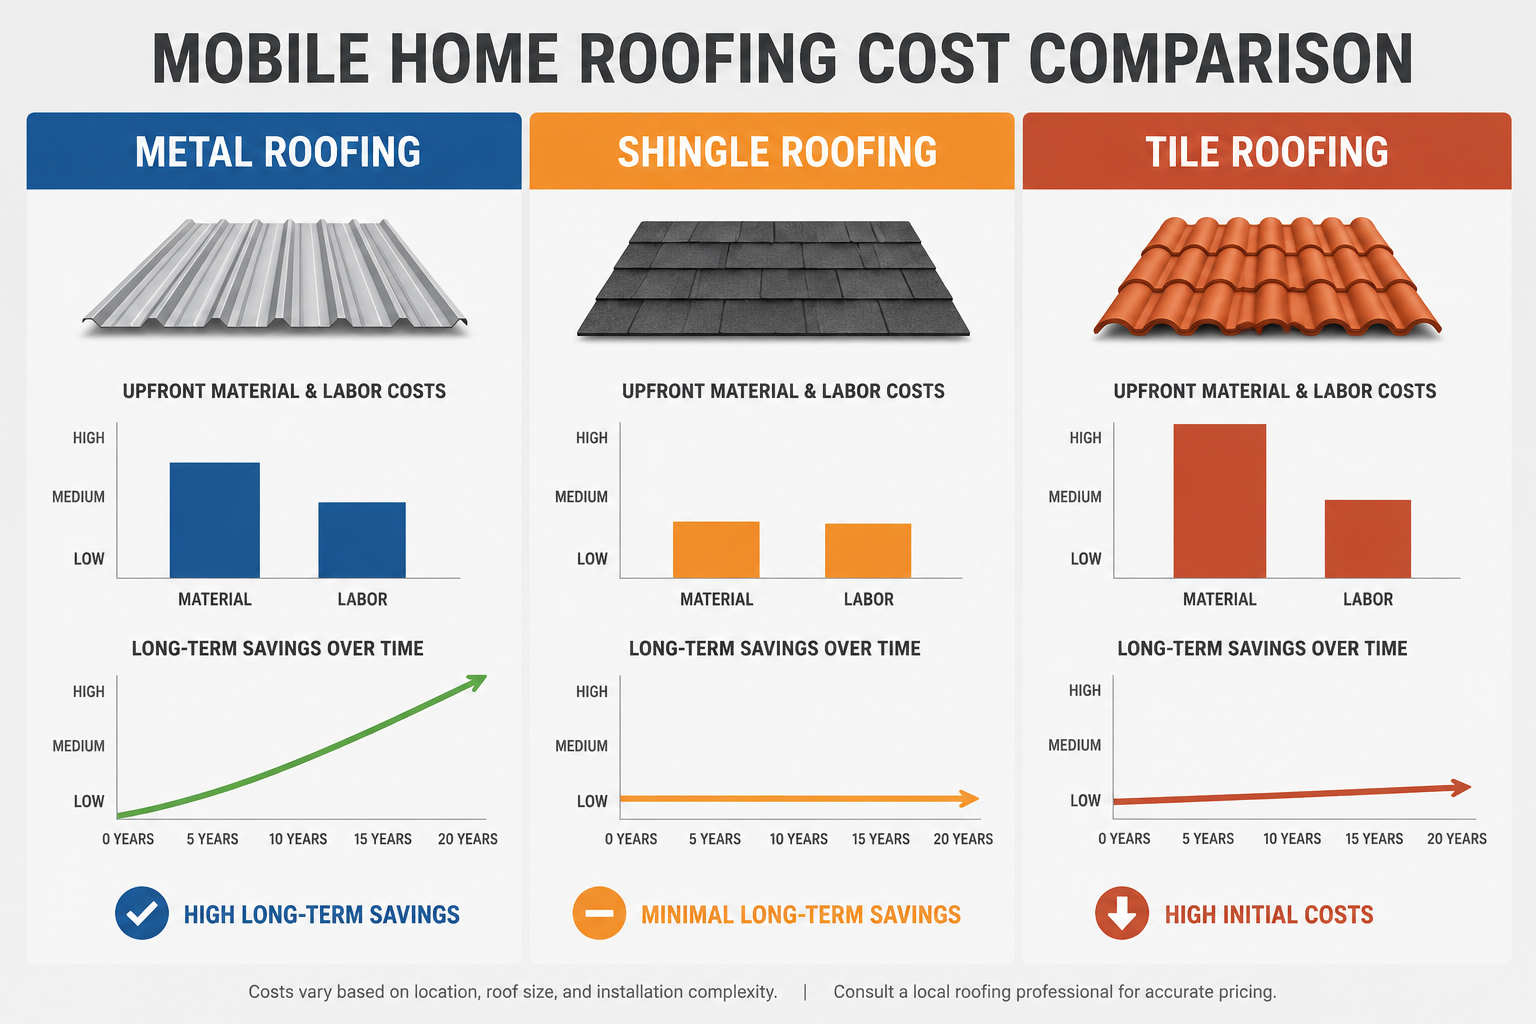
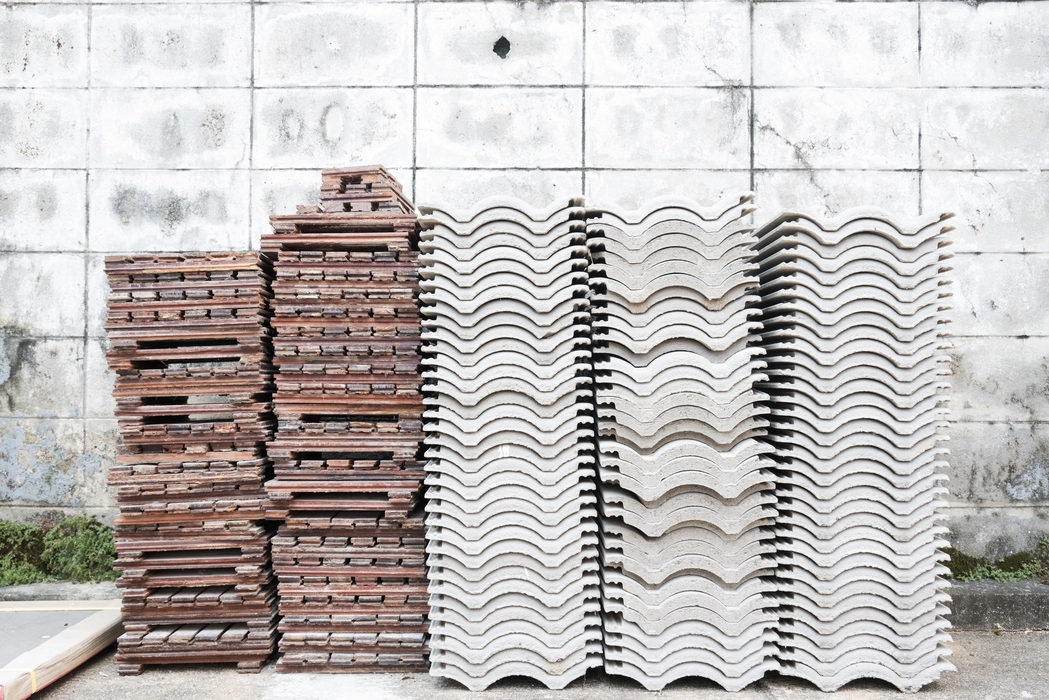
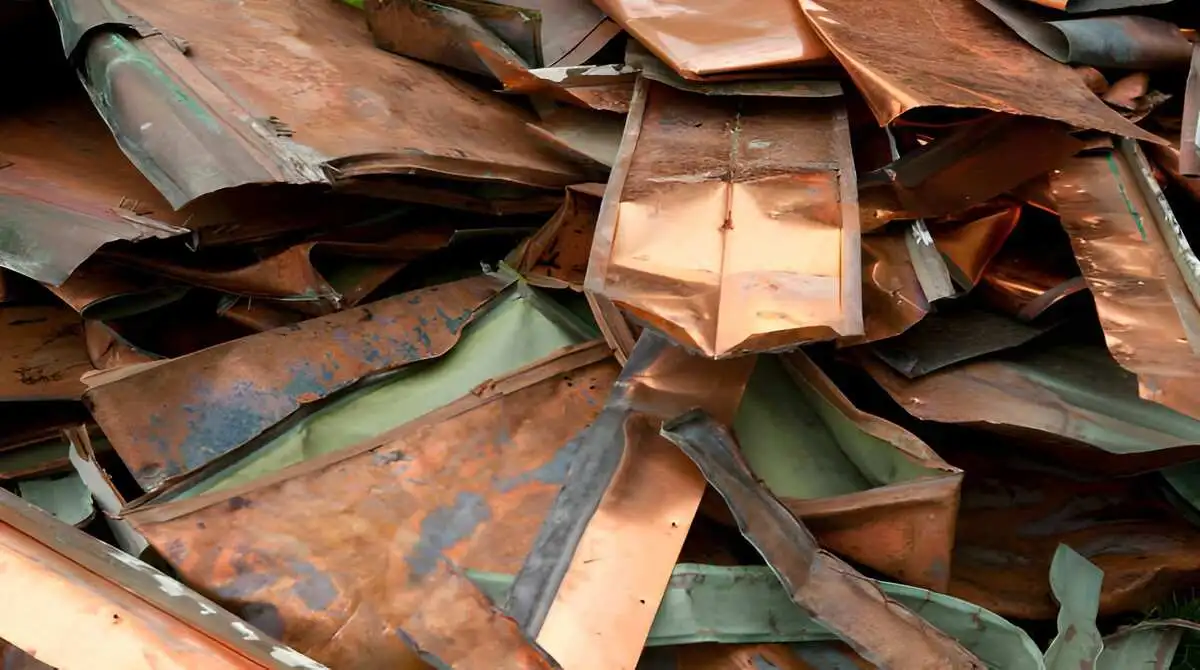
Cost comparison of various roofing materials.
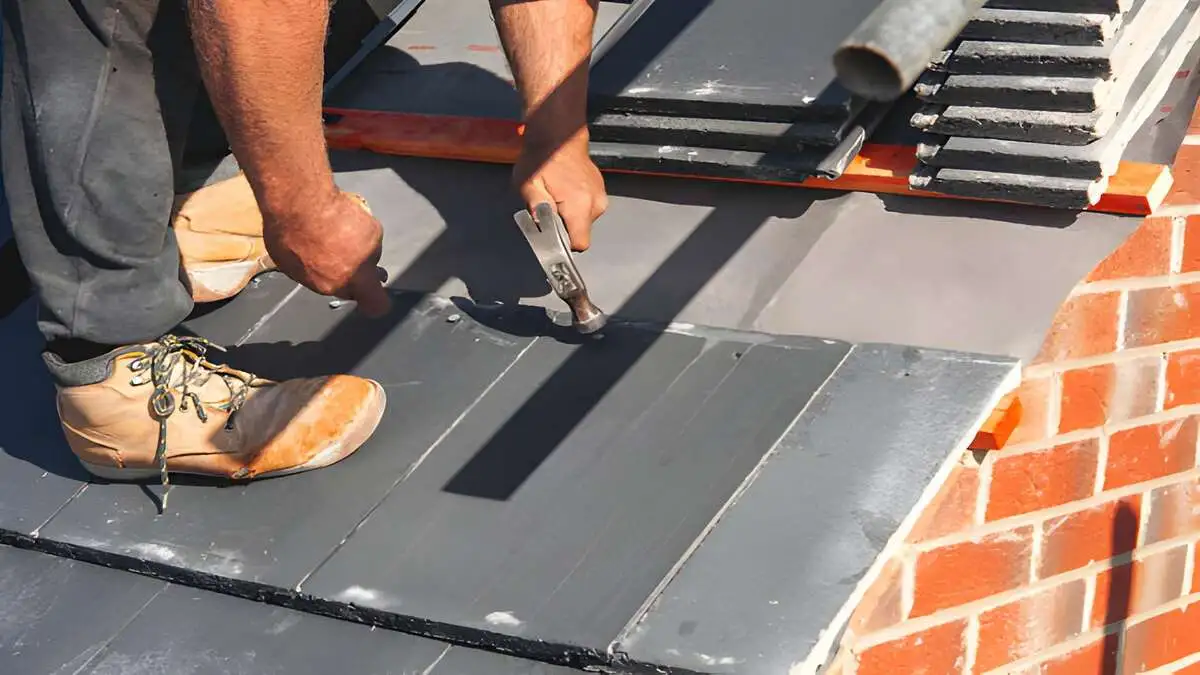
Breaking Down the Costs of Metal Roof Installation
To get a clearer understanding of the metal roof mobile home cost, let’s dive deeper into each part of the installation process:
Material Costs: Depending on the type of metal, expect to pay between $3 to $6 per square foot for basic materials.
Labor Costs: Labor can range from $1 to $4 per square foot, depending on your location and the contractor’s expertise.
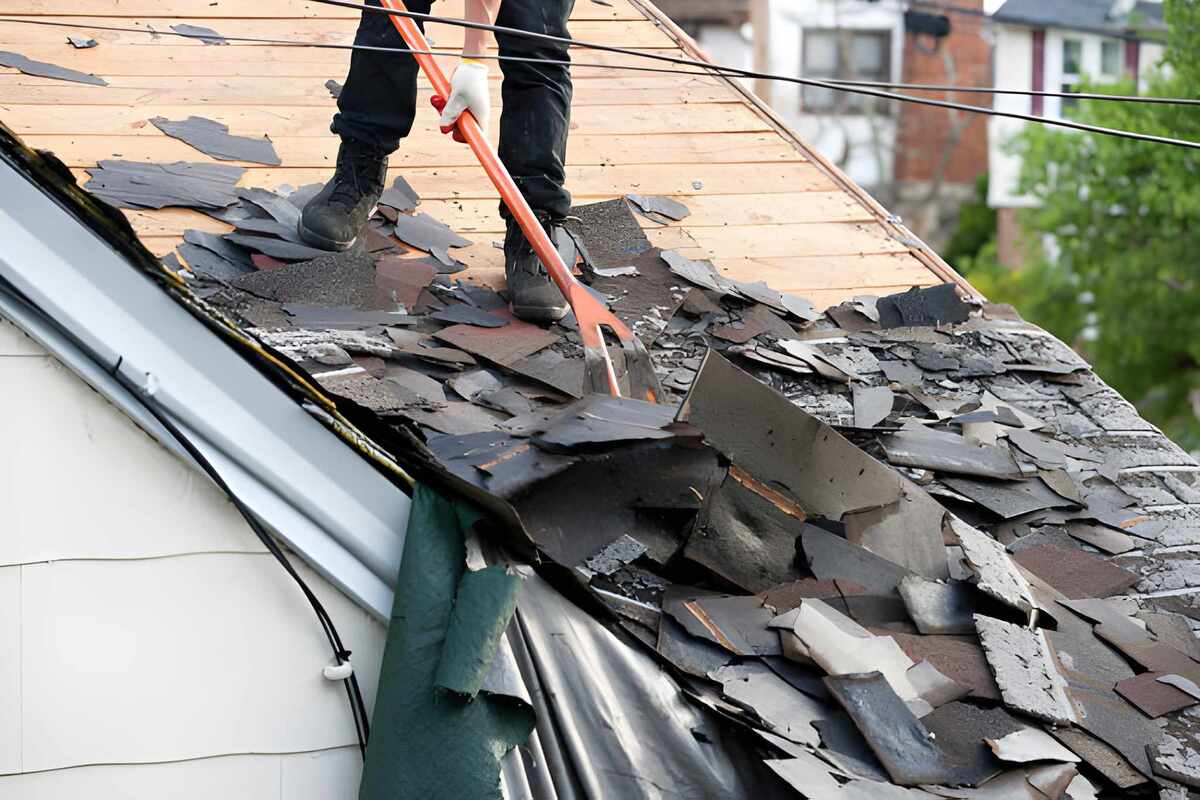
Removal of Old Roof: If you have an existing roof to remove, that can add an extra $1 to $3 per square foot.
Installation Time: A typical installation can take anywhere from one to three days, affecting the cost if you need to consider living arrangements during this time.
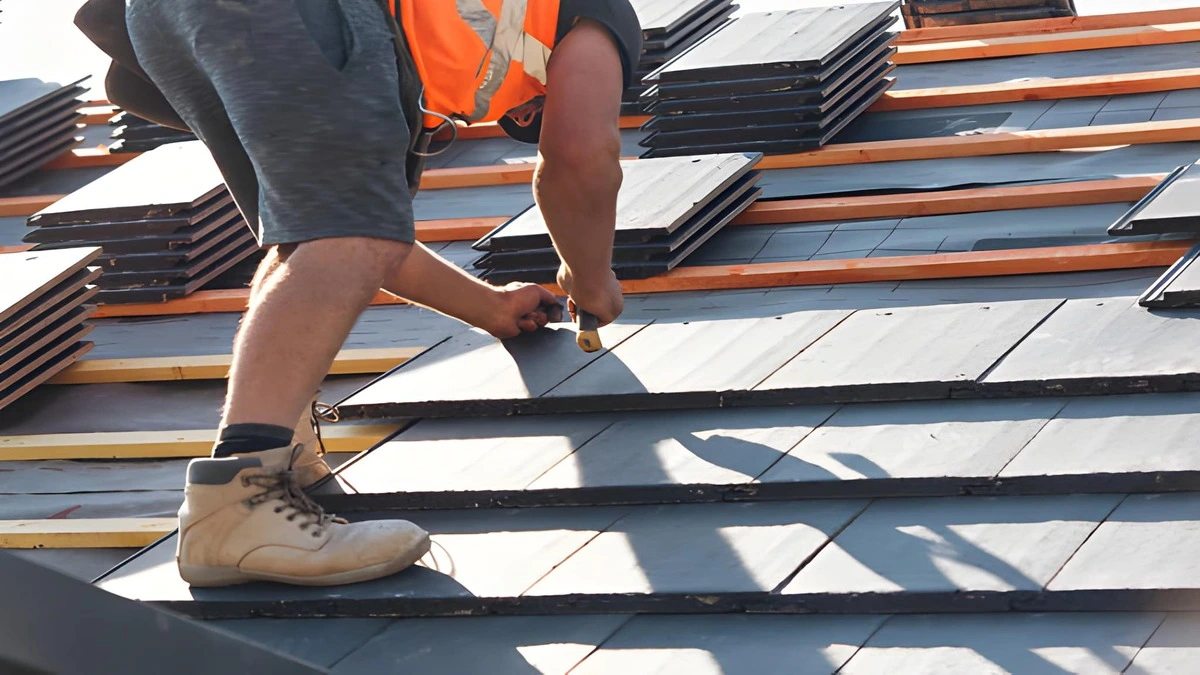
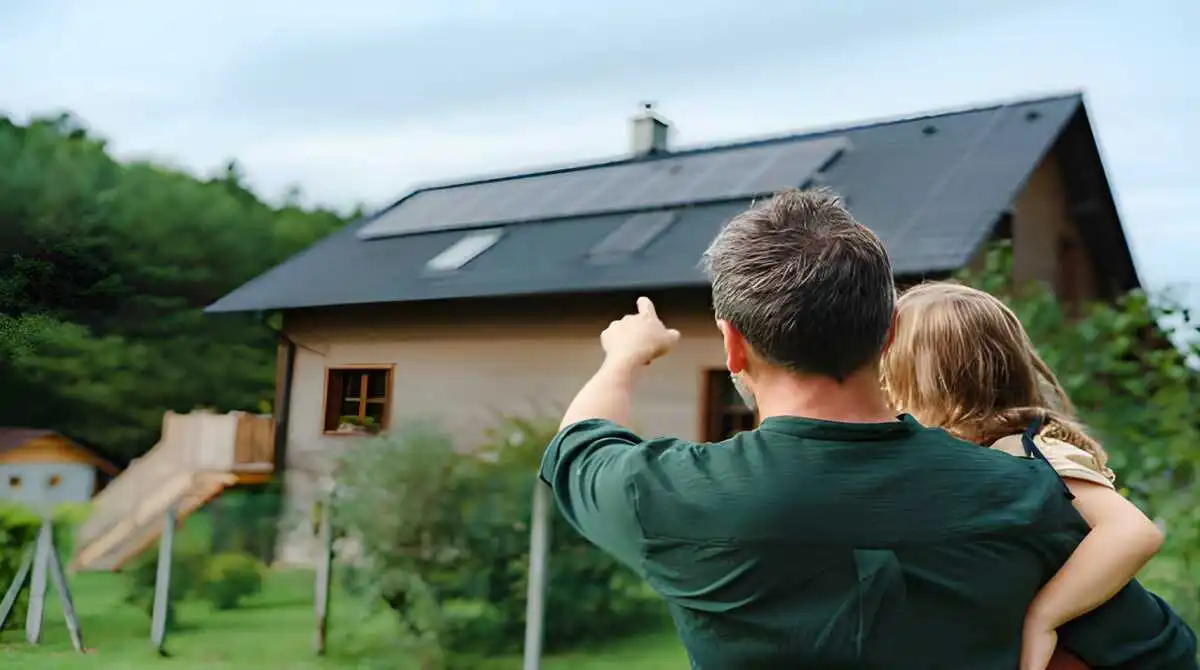
Benefits of metal roofing for mobile homes.
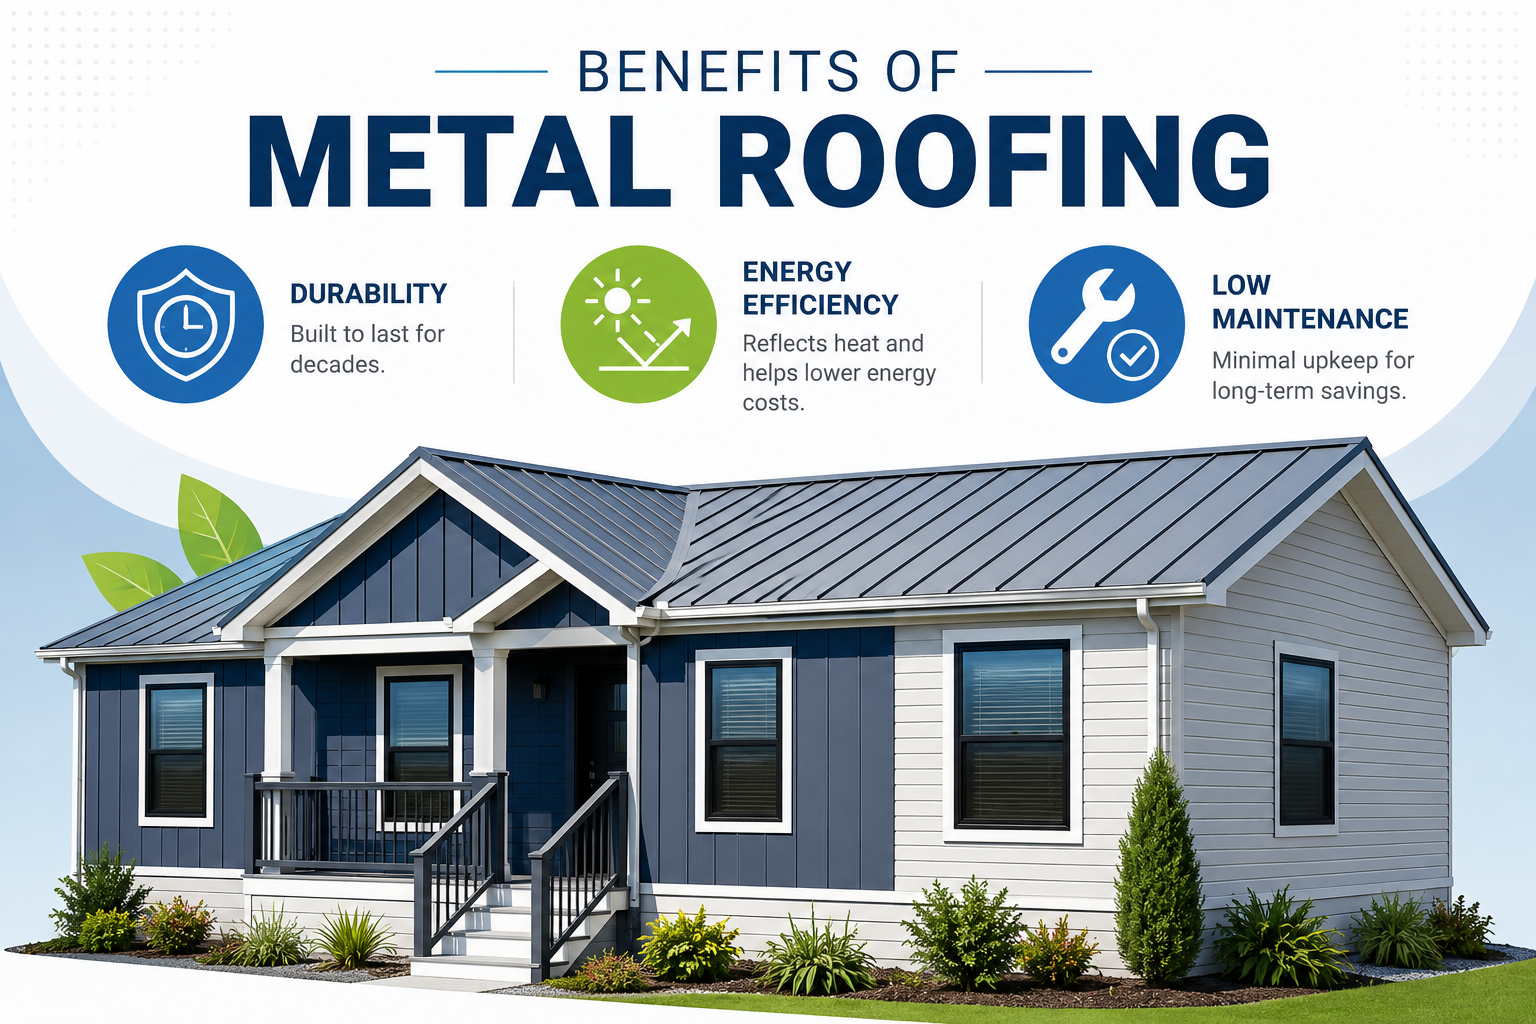
The Long-Term Savings of Metal Roofing
Investing in a metal roof may seem costly initially, but it pays off remarkably in terms of durability and maintenance savings. Here are some benefits to consider:
Longevity: Metal roofs can last 40-70 years with proper maintenance, far outpacing traditional shingles.
Energy Efficiency: Metal roofs reflect solar heat, which can lead to savings on your energy bills in hotter climates.
Minimal Maintenance: Unlike asphalt shingles that require frequent repairs, metal roofs demand less upkeep over the years.
Average Cost Breakdown
The table below summarizes 2026 pricing across the most common configurations. Costs include both materials and professional labor.
Option
2026 Price Range
Notes
Single-wide overlay (existing roof)
$3,800 – $6,200
$8.50 – $11/sq ft
Single-wide tear-off + new metal
$5,500 – $8,500
$11 – $15/sq ft
Double-wide overlay
$6,500 – $10,000
$8.50 – $11/sq ft
Double-wide tear-off + new metal
$9,000 – $14,500
$11 – $16/sq ft
Premium standing seam (any size)
+30–50% over corrugated
—
What Drives the Cost
The total price comes down to five main factors. Understanding each helps you spot when a contractor’s quote is reasonable — and when it is padded.
Panel type
Corrugated metal: cheapest ($1.20-$2/sq ft material). Ribbed panels: $1.80-$3/sq ft. Standing seam: $3.50-$6/sq ft.
Roof size
Single-wides average 600-800 sq ft of roof. Double-wides: 1,400-1,800 sq ft. Triple-wides go up to 2,400 sq ft.
Overlay vs tear-off
Overlay is cheaper ($2-$4/sq ft less) but only works if the existing roof is structurally sound and not already double-layered.
Underlayment quality
Synthetic underlayment adds $0.30-$0.60/sq ft over felt but lasts 25+ years and prevents condensation issues in mobile homes.
Insulation upgrade
Many homeowners add foam board insulation during a re-roof. Adds $1.50-$3/sq ft but cuts cooling bills 15-25% in hot climates.
How to Save Money on This Project
Most homeowners can shave 10-25% off the quoted price by following a few simple practices:
Get at least 3 written quotes from licensed local contractors. Pricing varies dramatically — the lowest and highest quotes on the same job often differ by 40%.
Schedule in the off-season. Late winter (February-March) and late fall (October-November) prices are 10-20% lower than peak summer.
Bundle with other roof work. If you need other repairs (gutters, flashing, ventilation), bundle them — contractors discount bundled jobs because the setup labor is fixed.
Check for insurance coverage. Storm-related damage is usually covered. Filing a claim within the policy window is critical.
Verify the contractor’s license and insurance before signing. Use our contractor directory to find verified local pros.
Advertisement
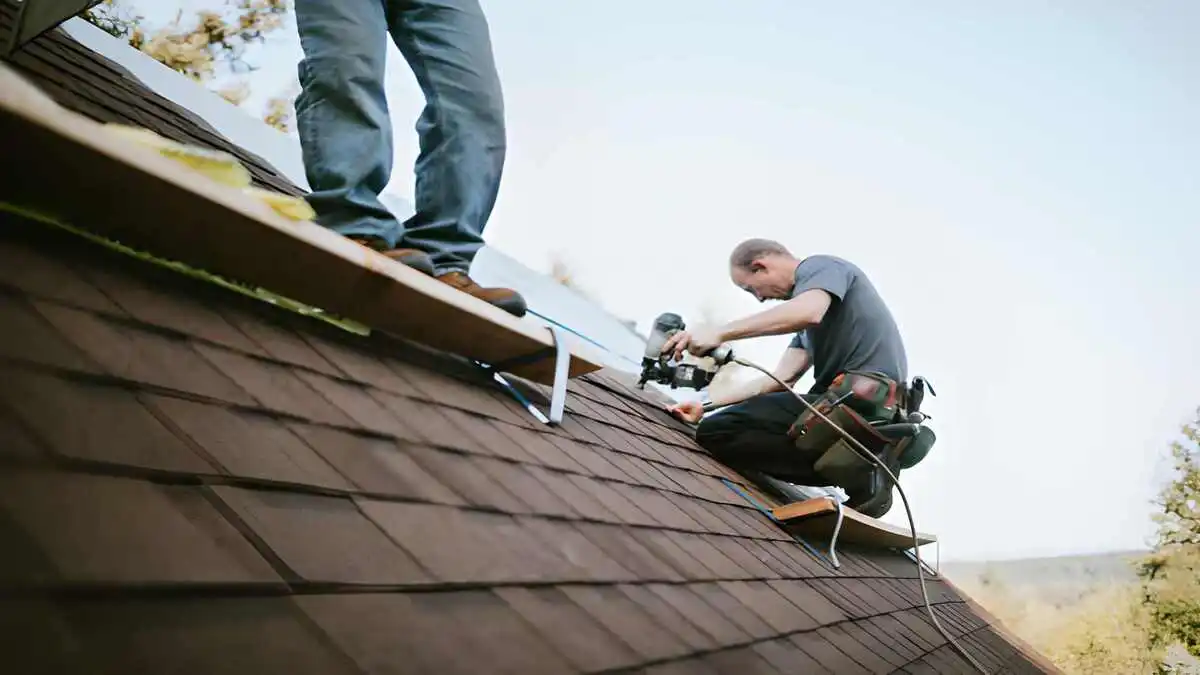
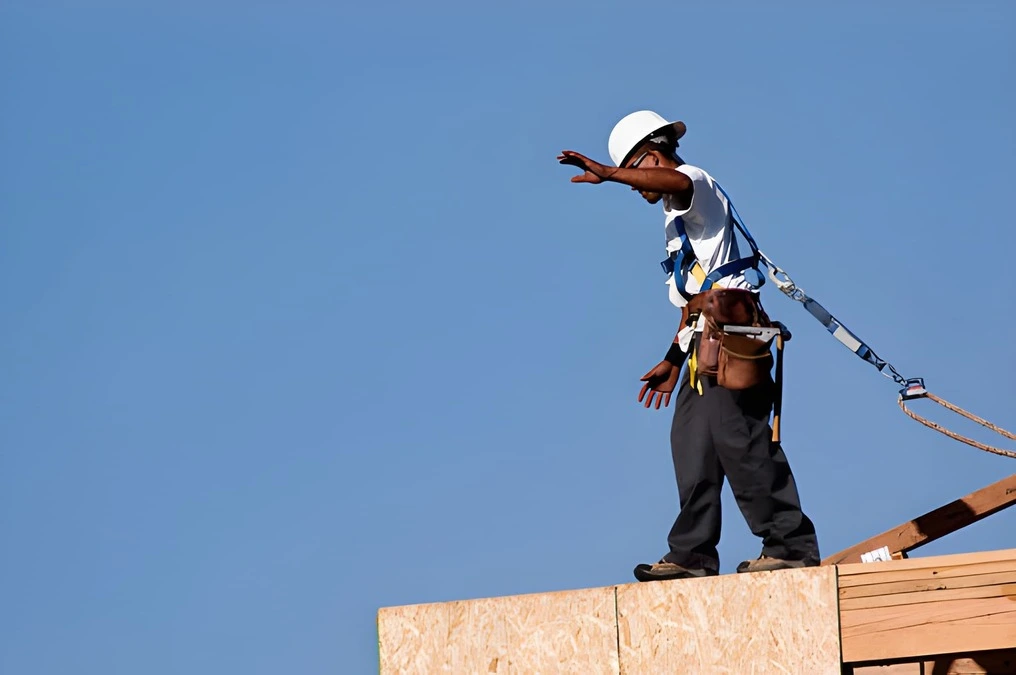
DIY vs Professional Installation
Some homeowners attempt this project DIY to save on labor. Here is when that makes sense — and when it does not. DIY makes sense if: the scope is small (a single repair or patch), you have construction experience, you own or can rent the safety equipment (harness, ladder, scaffold), and the warranty does not require professional installation. Hire a professional if: the scope involves more than 30% of the roof, the roof pitch exceeds 6:12, the manufacturer requires professional installation for warranty validity, your homeowners insurance will not cover DIY work, or you are not comfortable working at height. Most professional roofers refuse to warranty work they did not install themselves, so DIY also forfeits future workmanship warranties.
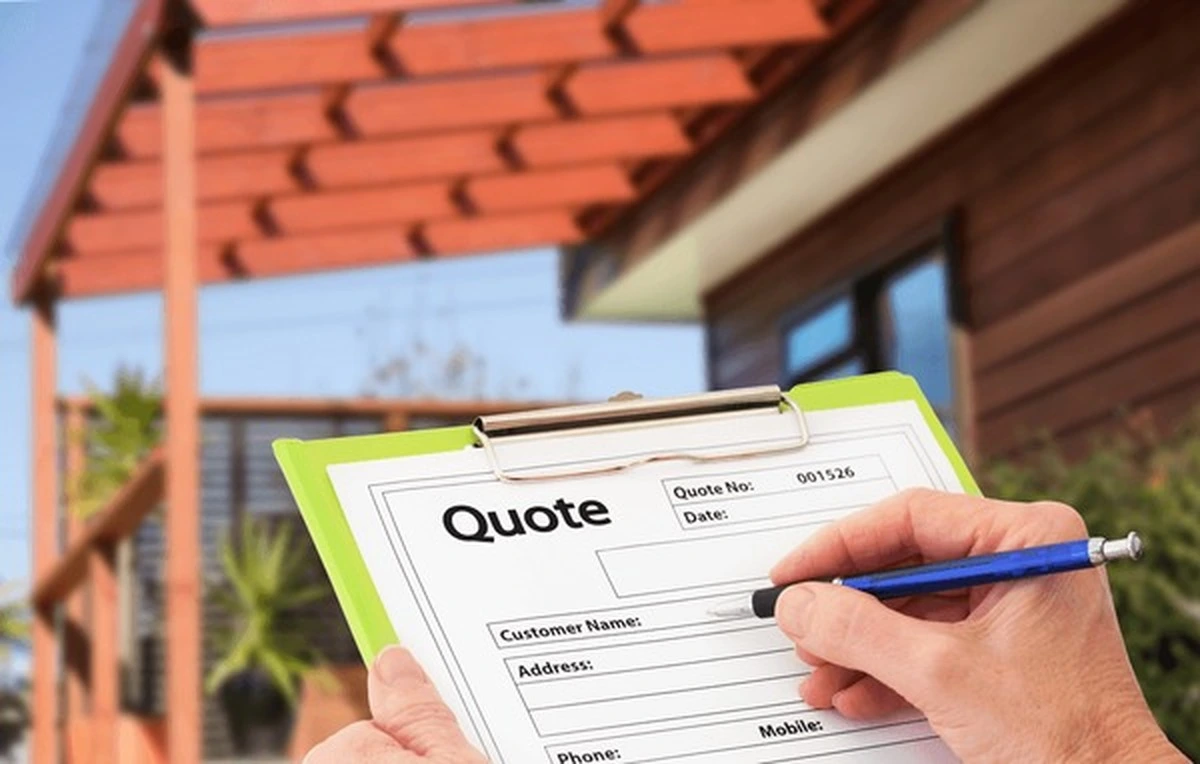
Get a Real Estimate for Your Project
Want a 2-minute estimate tailored to your specific situation? Use our free roofing cost calculator — it uses your roof size, material choice, and ZIP code to give you a price range based on real 2026 contractor data. For comparison shopping, the contractor directory lists verified roofers near you with reviews and contact info.
How much does a metal roof increase the value of my mobile home?
A metal roof can increase the property value of your mobile home by up to 10%. It’s not only about the aesthetic appeal but also about potential buyers valuing durability and energy savings.
Is a metal roof worth it for a mobile home?
Yes. Metal roofs last 40-70 years vs 15-20 years for asphalt shingles, and they reduce cooling costs by 10-25% in warm climates. The upfront cost is 2-3× higher than shingles, but you avoid one or two replacement cycles over the life of the home — making metal cheaper long-term for any mobile home you plan to keep more than 12 years.
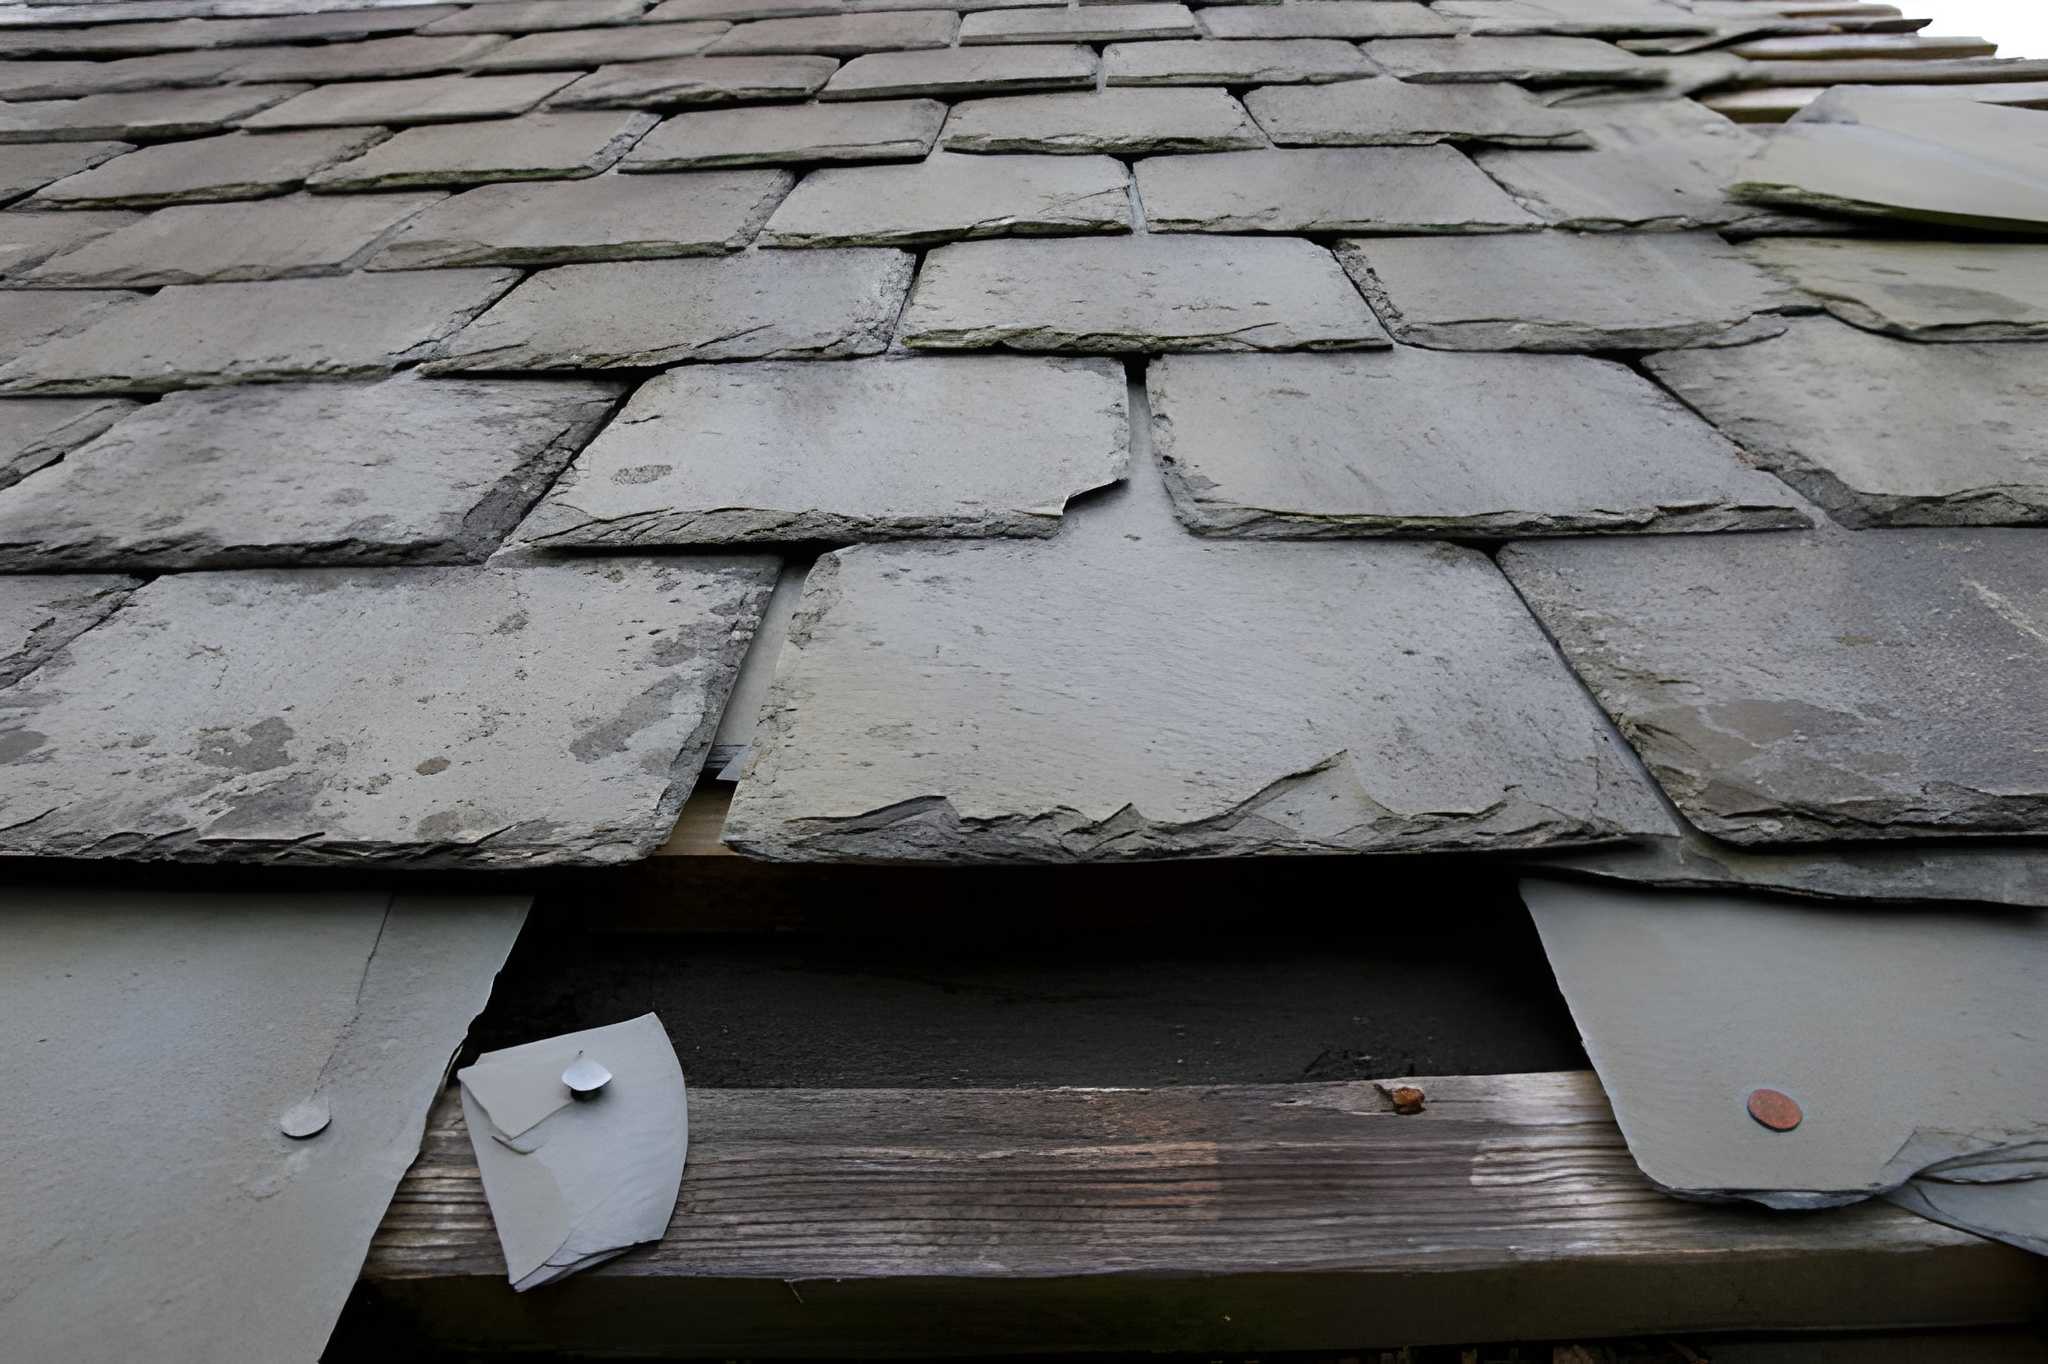
Can you put a metal roof over an existing mobile home roof?
Often yes — this is called an overlay or recover and saves $2,000-$4,000 vs a full tear-off. The existing roof must be structurally sound with no major leaks or rot, and most jurisdictions limit you to ONE overlay (you cannot stack metal over an already-layered roof).
What is the cheapest type of metal roof for a mobile home?
Corrugated galvanized steel (often called “tin roofing”) is the cheapest at $1.20-$2 per square foot for material. Installed, expect $7-$9/sq ft for a basic overlay job. It is durable for 30-50 years and is the traditional choice for mobile homes.
How long does it take to install a metal roof on a mobile home?
Most single-wide installations take 1-2 days. Double-wides take 2-3 days. Tear-off jobs add half a day to a full day. Weather delays are the biggest variable — installers will not work in rain or high wind because of safety risks on the slick metal surface.
Do I need a permit to install a metal roof on a mobile home?
In most US jurisdictions: yes. Mobile home roof replacement is treated as a permitted improvement, with permit fees typically $75-$250. Some rural counties exempt mobile home repairs. Check with your local building department before signing a contract — contractors should pull the permit, not the homeowner.
Can I install a metal roof DIY?
If you have construction experience, you can attempt a DIY installation, but it’s typically recommended to hire professionals to ensure the job is done right.
What are the best types of metal roofs for mobile homes?
Common materials like galvanized steel and aluminum are popular for their balance of cost, durability, and weight. Each material has its pros and cons depending on your local environment. Maintenance tips for metal roofs As we’ve explored, understanding the metal roof mobile home cost involves considering several factors, from material choice to labor costs. While the initial investment may be higher than other roofing options, the long-term benefits of durability, energy savings, and minimal maintenance make it a wise decision. Ultimately, when planning for your next home improvement project, weighing the pros and cons will help you make informed, budget-conscious decisions. If you want to learn more about maintaining your mobile home roof, check out our guide on mobile home roof maintenance or cost considerations at cost of replacing roof on mobile home. Looking forward to having a successful metal roof installation! “`
Metal Roof on Mobile Home Cost in 2026: Complete Pricing Guide
When considering a mobile home roof upgrade, the cost of a metal roof in 2026 is a prominent concern for many. Understanding the financial commitment required is essential to making an informed decision that will benefit your home, and your wallet.
In this guide, we explore the various factors that impact the total cost of installing a metal roof on a mobile home, revealing why it’s a worthwhile investment for homeowners seeking durability, energy efficiency, and long-term savings. The information provided here will help you grasp not only the costs involved but also the benefits of this roofing material compared to traditional options.
Throughout this article, we will delve into the pricing structure for metal roofs, compare the costs with other roofing types, and provide insights on installation and maintenance. I will also share tips on how to protect your investment to maximize lifespan and ROI.
Understanding Mobile Home Roof Costs
When assessing the mobile home roof costs, it’s vital to evaluate various elements that contribute to the pricing. Factors such as the type of metal chosen, labor costs, and the overall condition of your current roof play significant roles. In this section, we break down these elements to give you a clear picture.
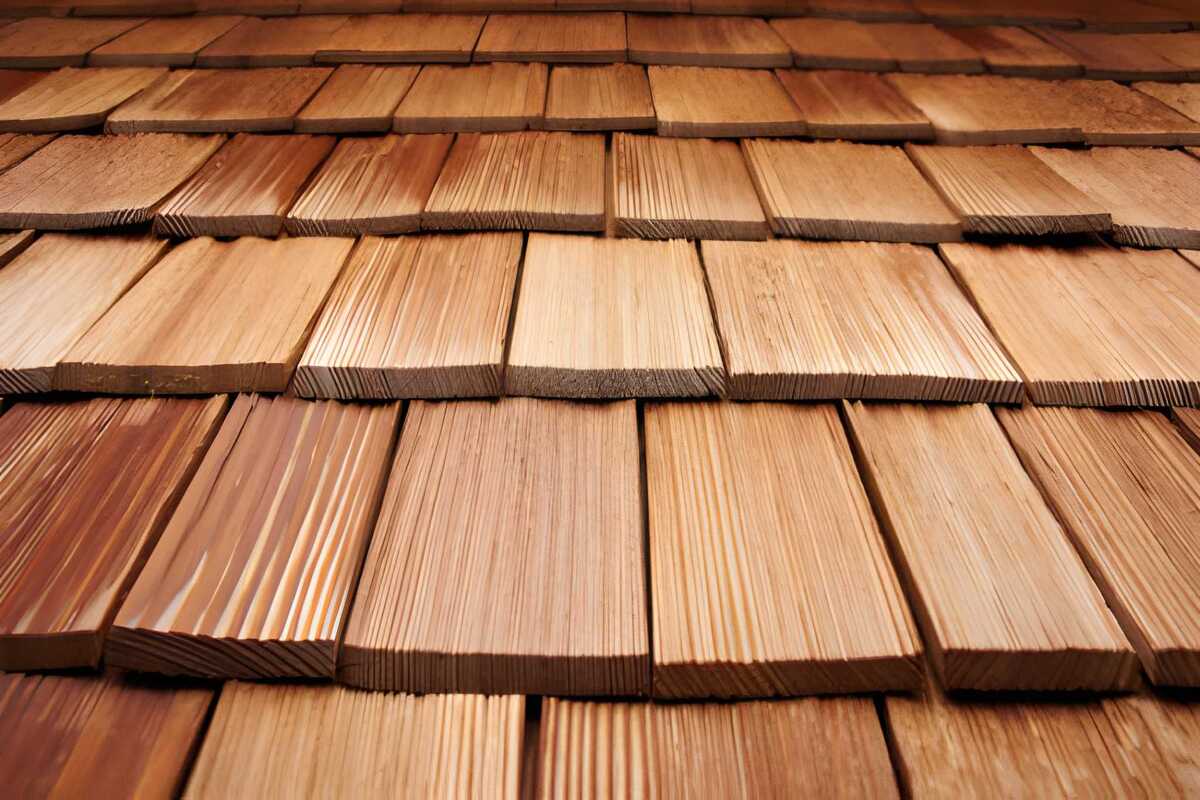
Types of Metal Roofing Materials
There are several types of metal roofing materials available, each with its own pricing structure:
Steel roofs: Galvanized or galvalume steel is a popular choice due to its durability and affordability, typically ranging from $3 to $7 per square foot.
Aluminum roofs: Lightweight and resistant to corrosion, aluminum roofs usually cost between $6 and $12 per square foot.
Copper roofs: Although copper offers an aesthetic appeal and long lifespan, it is the most expensive option, averaging between $10 and $15 per square foot.
Different styles of mobile home roofs.
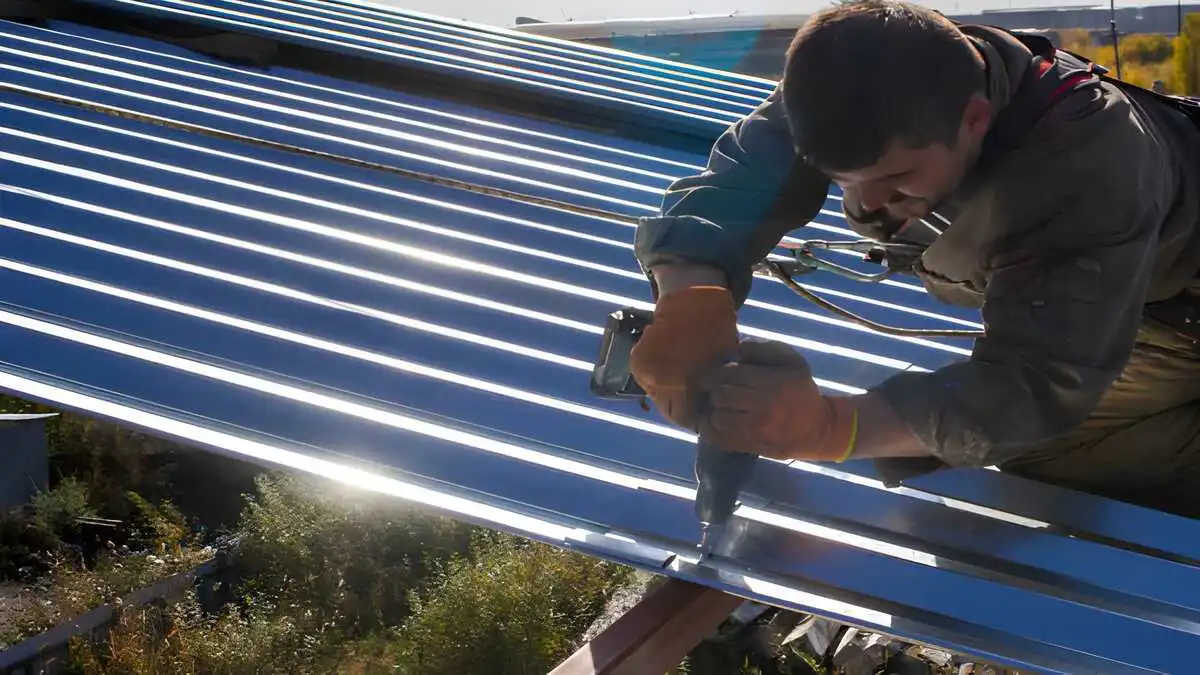
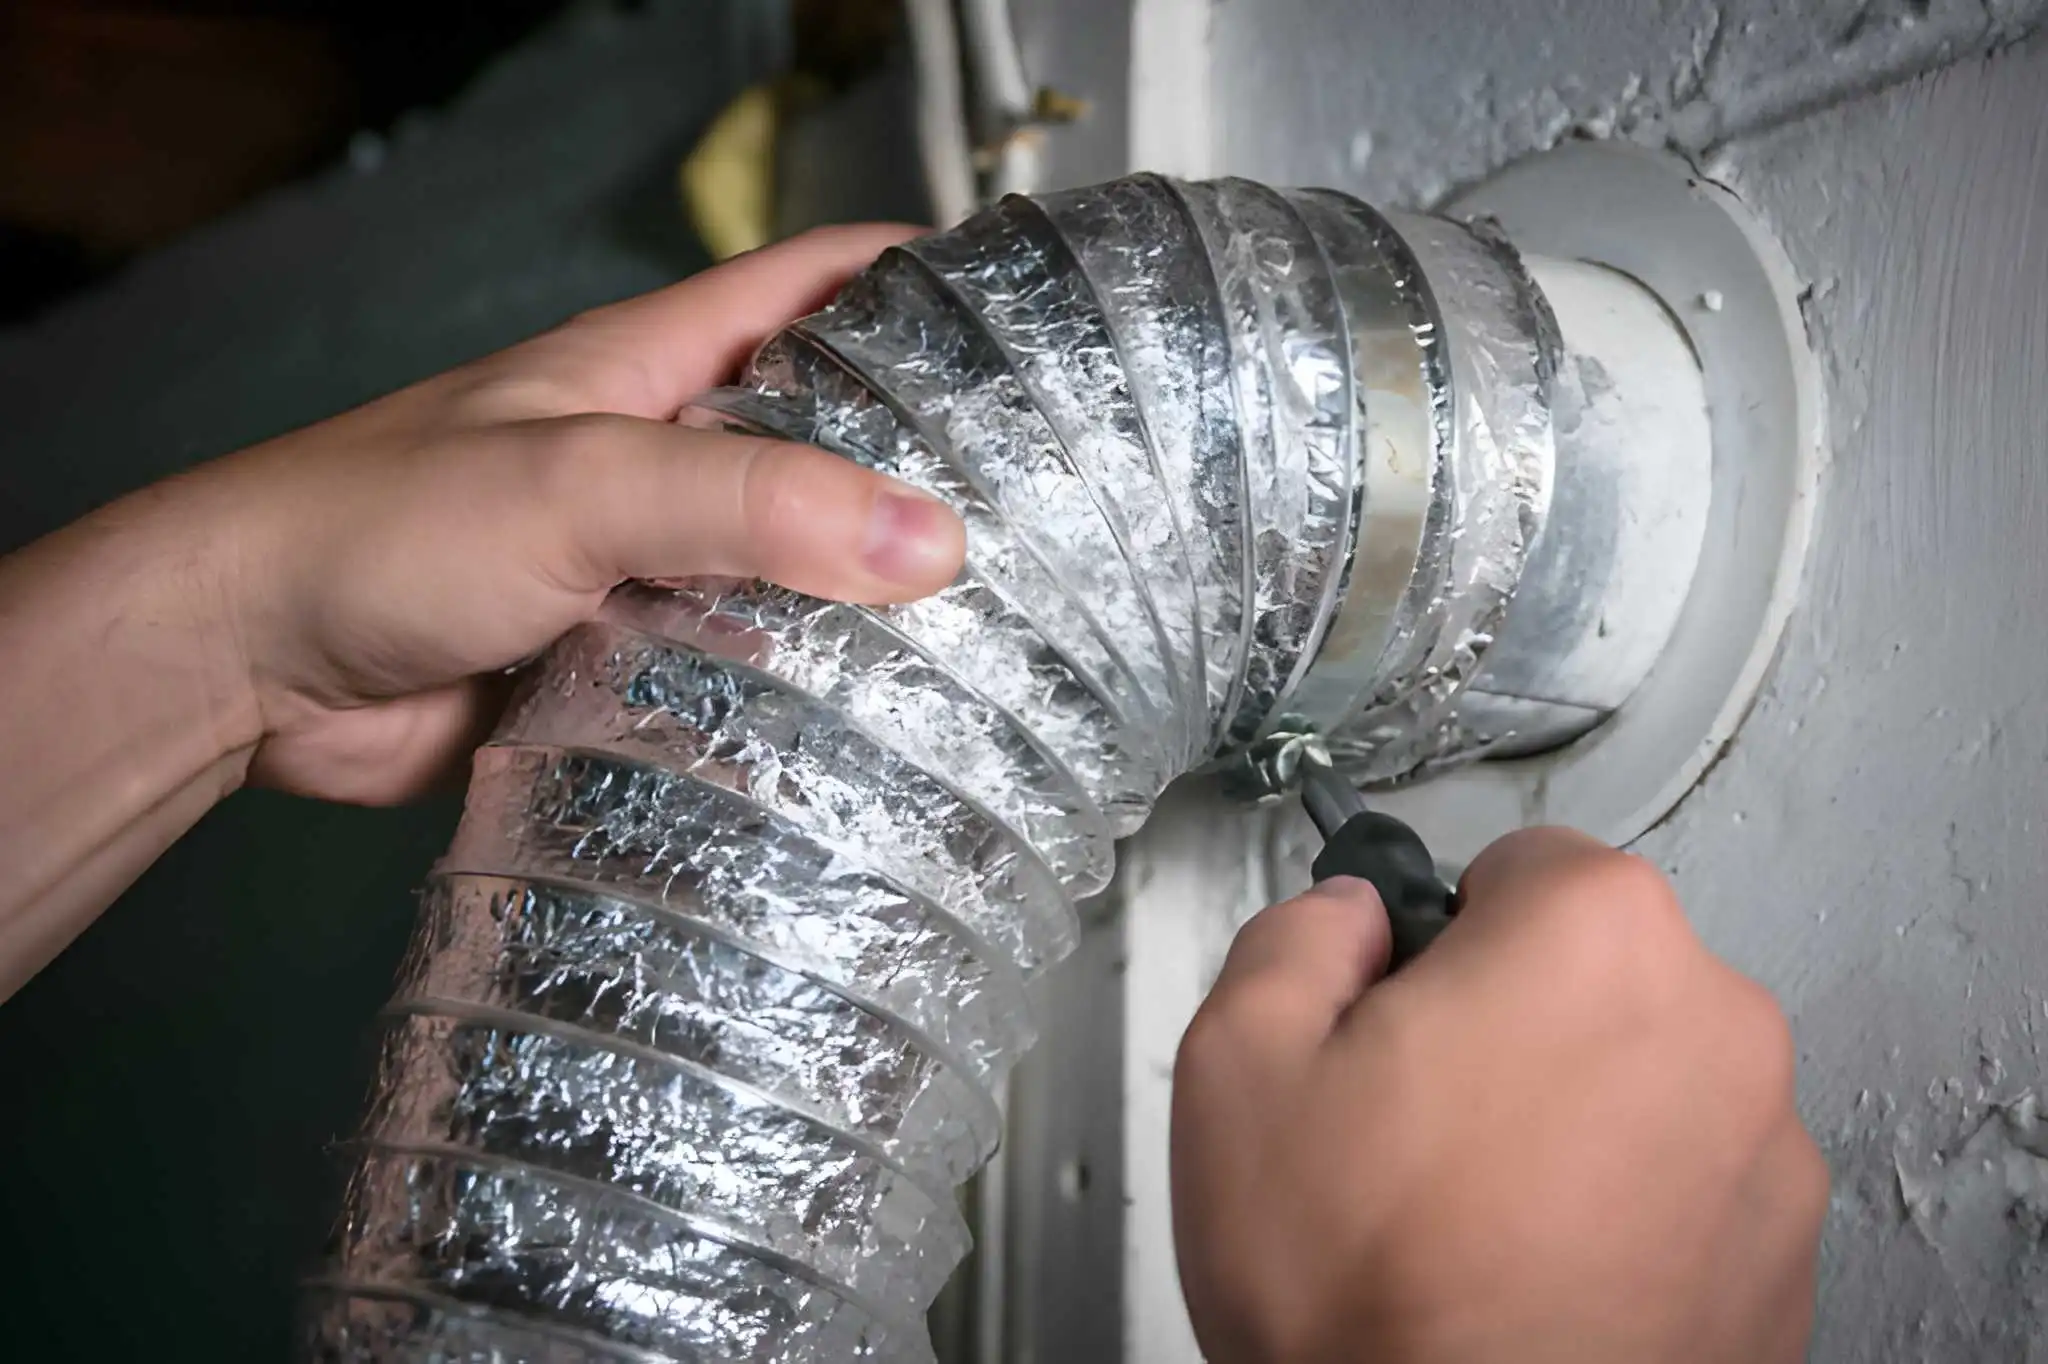
Installation Costs and Labor
The cost of installation is another significant factor to consider. Labor costs can vary based on your location and the contractor you hire. On average, you can expect to pay between $1.50 and $4 per square foot for labor. Additional expenses might also arise from old roof removal, structural repairs, or installation permits.
Choosing a qualified contractor experienced with metal roofing will ensure a smooth installation process. Don’t hesitate to ask for estimates and check references before making a decision.
Factors Influencing Pricing
Several factors can influence the cost of a metal roof on a mobile home:
Roof Size: Larger roofs will, of course, incur higher material and labor costs.
Pitch and Structure: The pitch or slope of your roof can affect the complexity of the installation.
Local Regulations: Building codes and regulations vary by area and can impact costs.
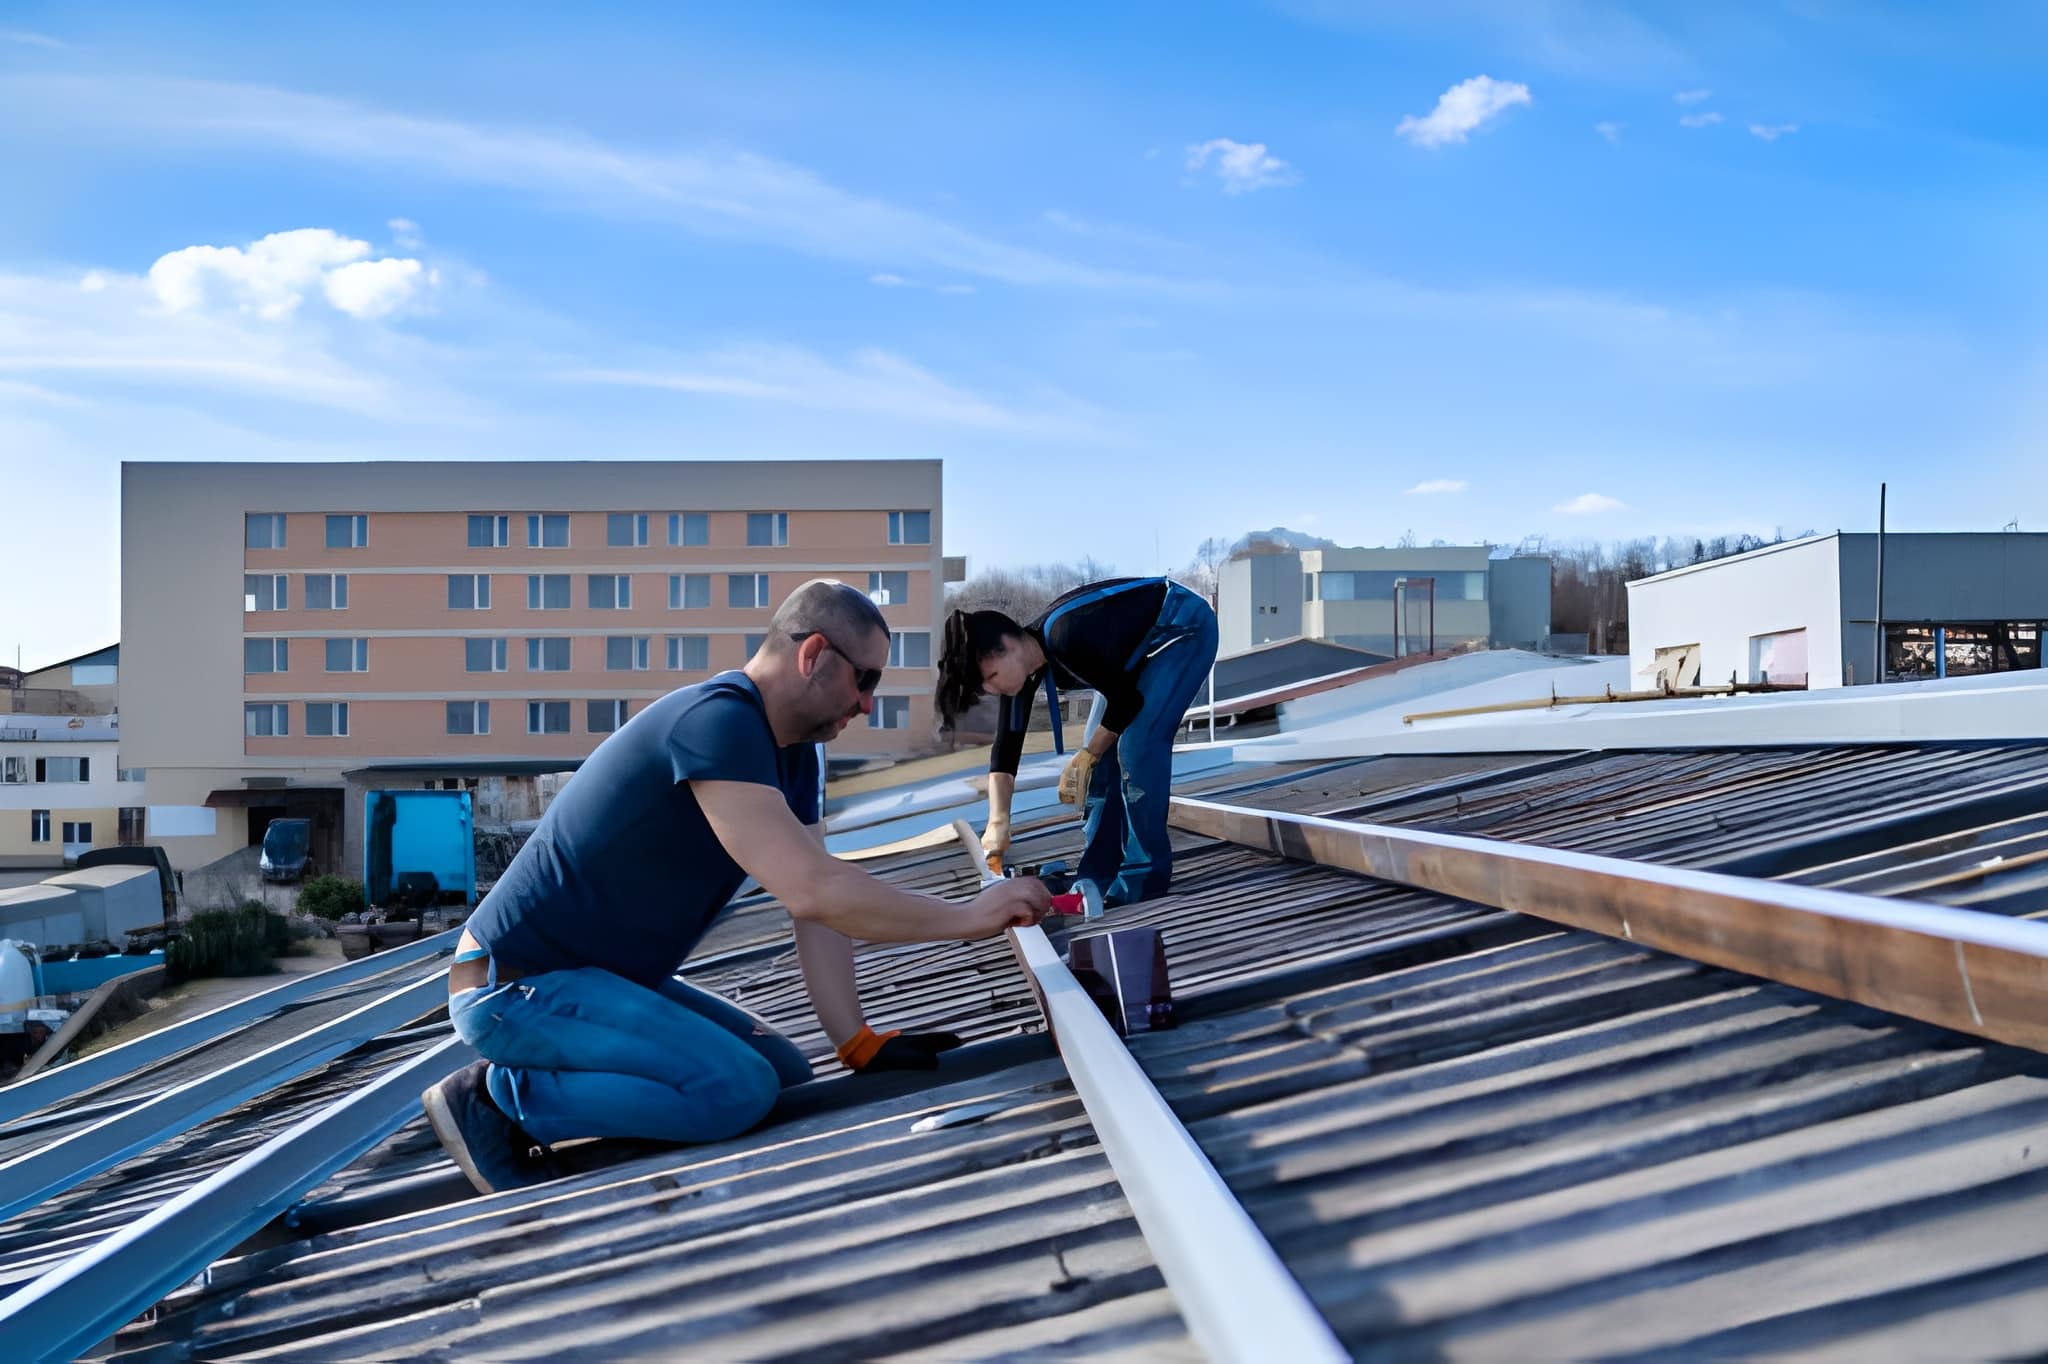
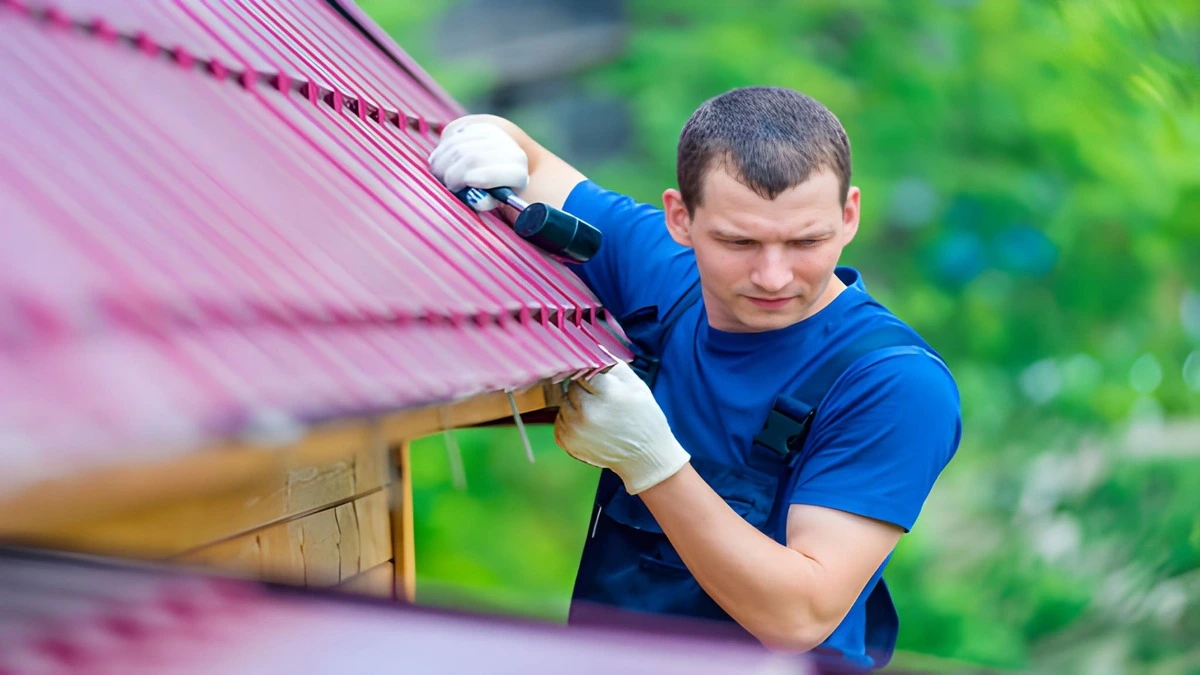
Professional installation of a mobile home roof
Comparing Metal Roofs with Other Options
While exploring the cost of a metal roof for your mobile home, it’s essential to compare it with traditional roofing materials like asphalt shingles, tile, or wood. Although asphalt shingles are cheaper, they often need more frequent replacements, every 15-30 years, compared to metal roofs, which can last 50 years or more with proper maintenance.
Longevity and Return on Investment
Investing in a mobile home roof made of metal can provide significant long-term savings. The durability and low-maintenance nature of metal roofs mean fewer repairs and replacements over time. This results in a higher return on investment, even if the initial costs are higher than other roofing materials.
Energy Efficiency and Sustainability
Metal roofs are also known for their energy efficiency. They reflect sunlight, helping keep your mobile home cooler in the summer, which can lead to lower cooling costs. Additionally, metal roofs are often made from recycled materials and can be recycled again at the end of their life, making them an environmentally friendly option.
Inspecting a mobile home roof for maintenance
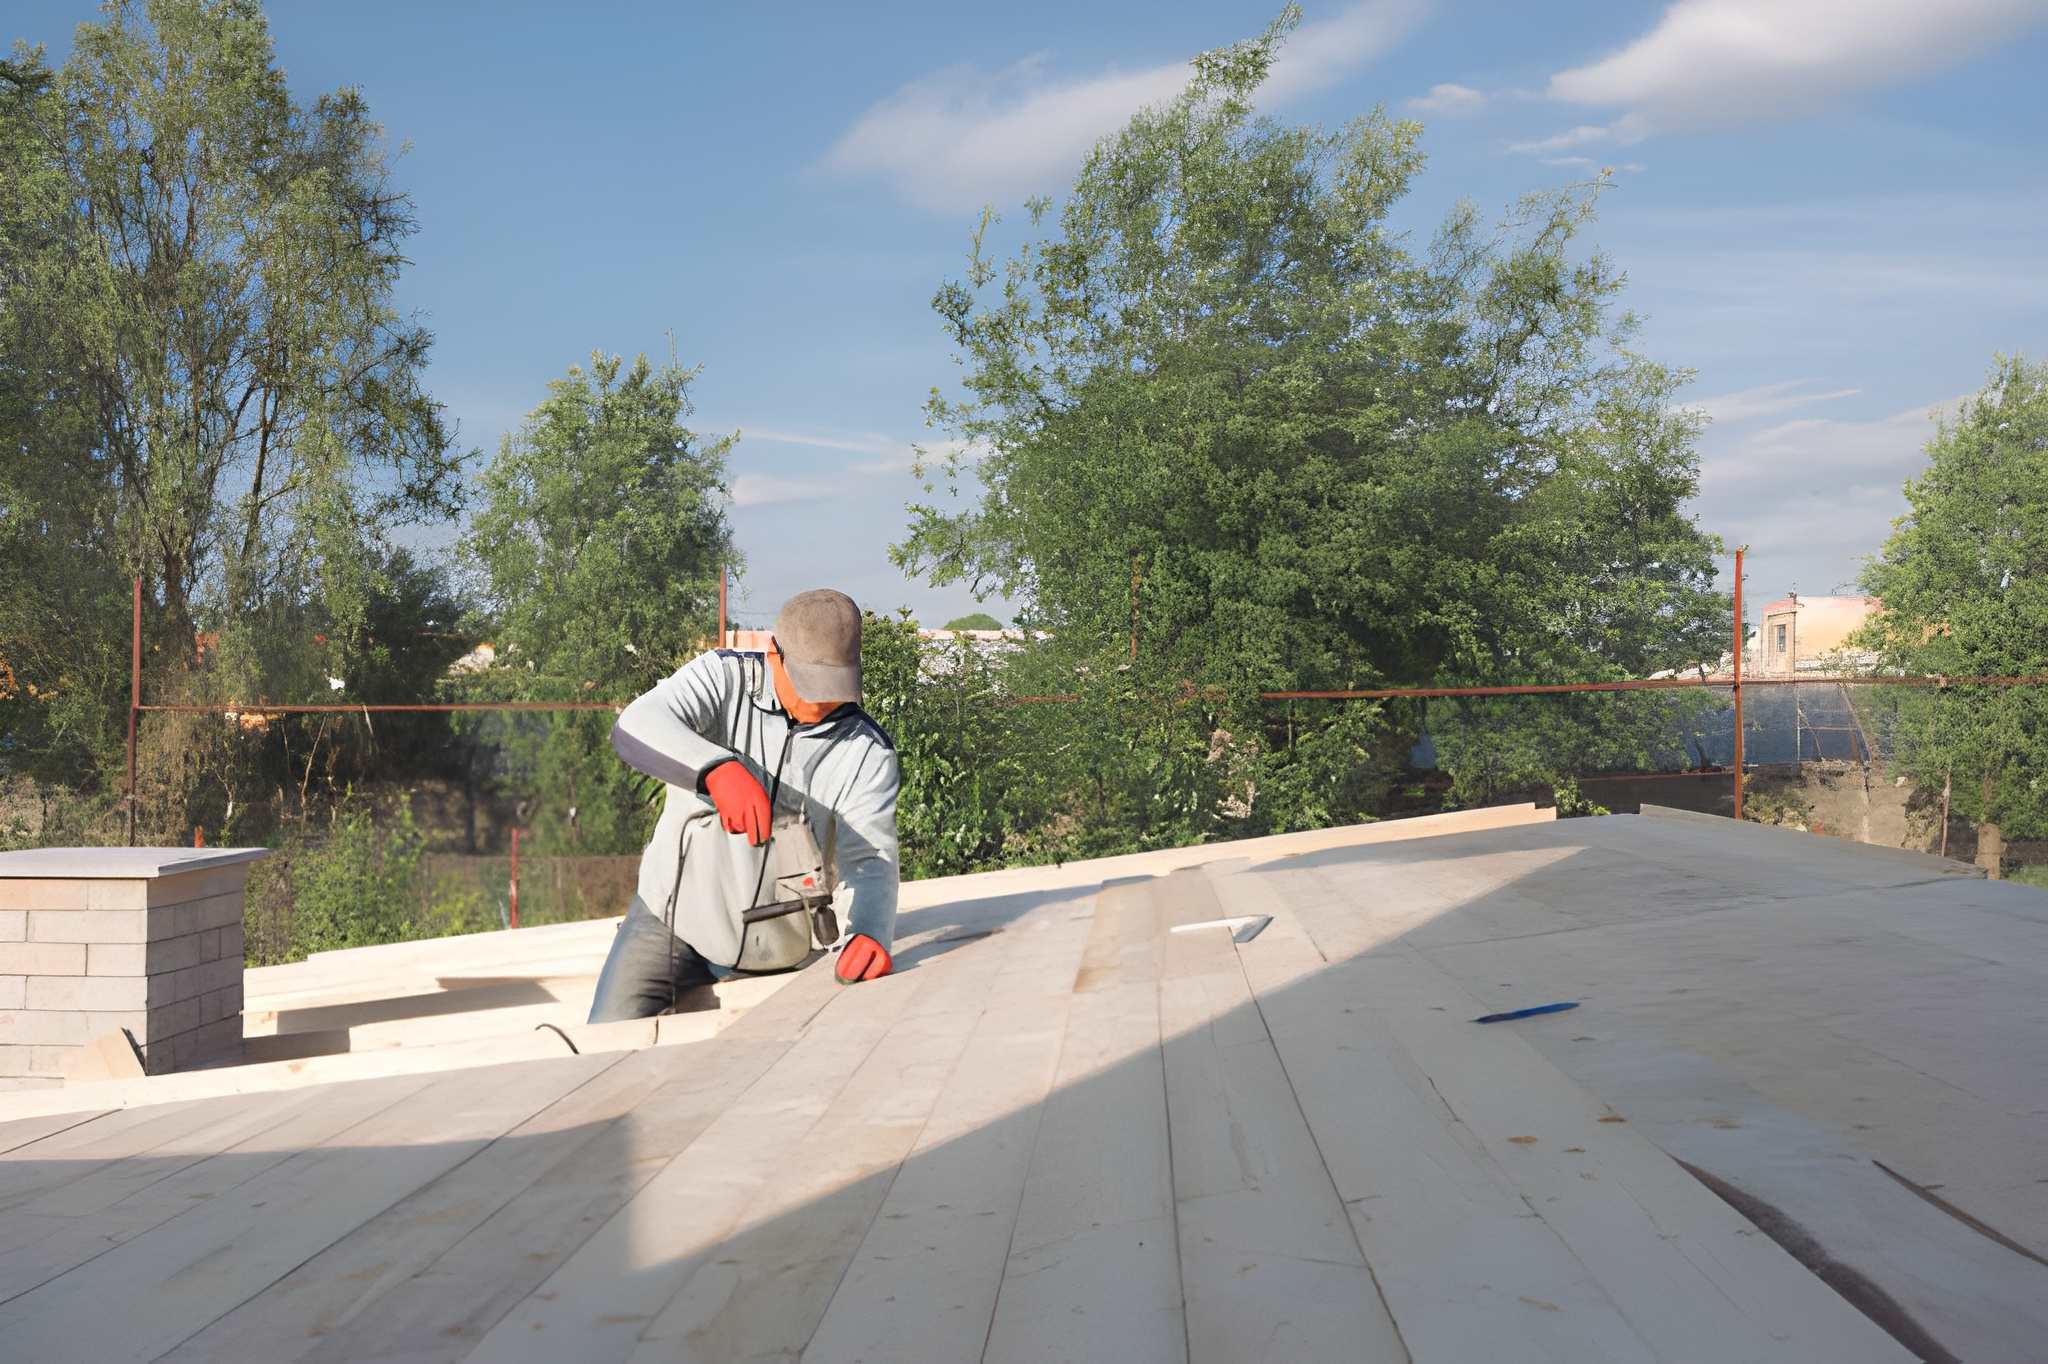
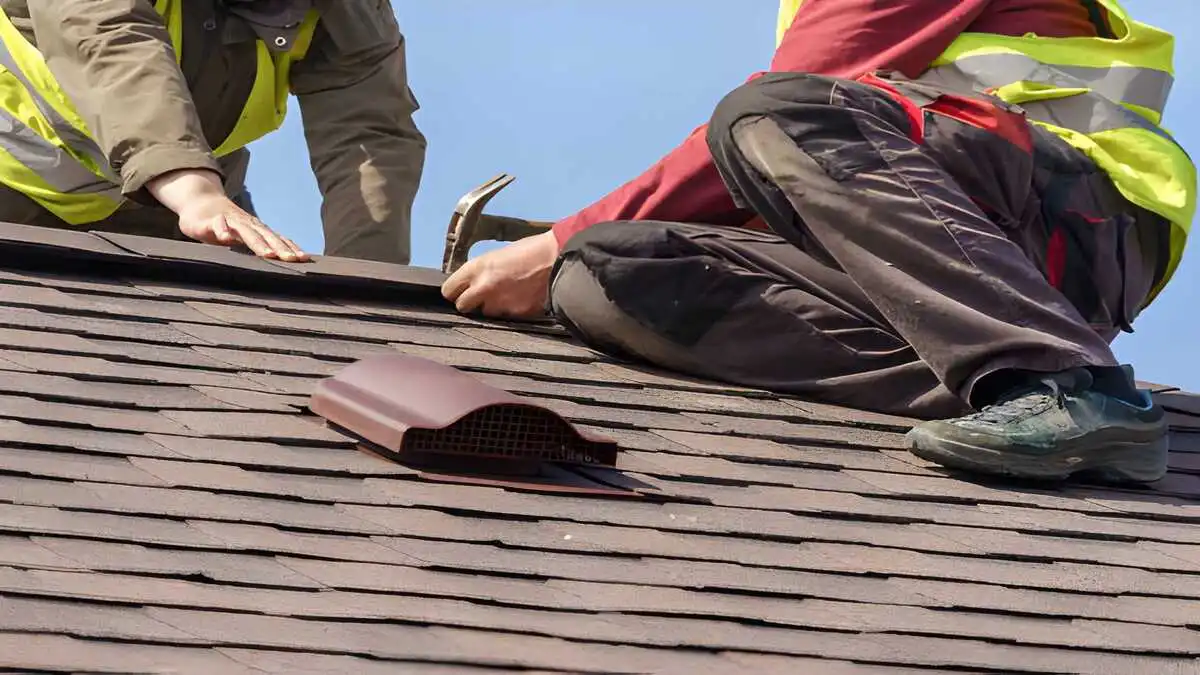
Installation Process Explained
Understanding the installation process can help you feel more confident about your decision. Here is a step-by-step overview of how a metal roof is typically installed on a mobile home:
Preparation: The old roofing material is removed, and any necessary repairs to the roof structure are made.
Installation of Underlayment: A protective layer is installed to guard against moisture.
Metal Panels Installation: The metal panels are then installed, ensuring proper alignment and overlapping to prevent leaks.
Finishing Touches: Additional features such as ridge caps are applied, and any necessary sealing is completed.
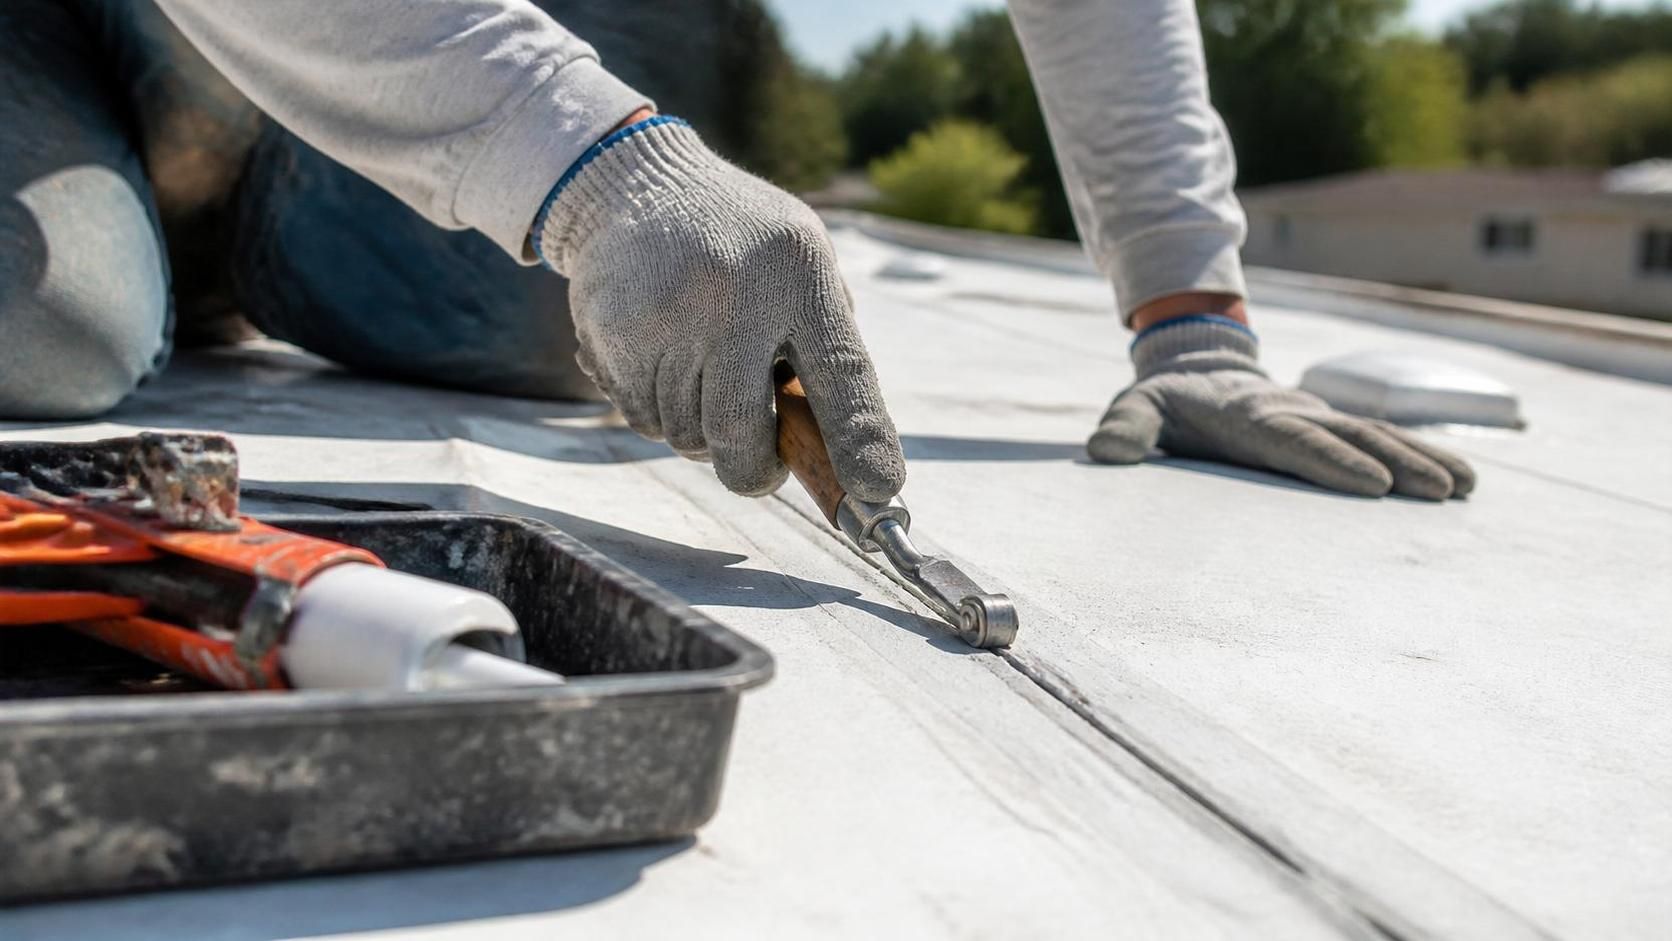
Maintenance Tips for Your Metal Roof
To ensure the longevity and performance of your new mobile home roof, regular maintenance is essential. Here are some care tips:
Inspect your roof periodically for any signs of damage or rust.
Keep gutters and downspouts clear of debris to prevent water buildup.
Consider applying a protective coating every few years to enhance durability.
In conclusion, a metal roof on a mobile home is an investment worth considering. While the upfront costs in 2026 may be higher than other options, the long-term benefits, such as durability, energy efficiency, and resale value, make it a smart choice. Remember to factor in all aspects, including material types, installation costs, and your maintenance plan.
Mobile Home Roof: 7 Essential Tips for Perfect Maintenance
Mobile home roof maintenance is crucial for ensuring your home remains safe and comfortable. A well-maintained roof protects against leaks, moisture, and other damage that can lead to costly repairs down the road. Today, we’ll explore the importance of maintaining your mobile home roof and share tips that can help you keep it in top condition.
Understanding mobile home roofs can feel overwhelming, especially if you’re new to home maintenance. This article will provide you with straightforward advice to help you recognize when repairs are needed, how to prolong your roof’s life, and the various materials that can be used for mobile home roofs. By staying informed, you can save money and keep your home cozy!
In this guide, I will cover essential maintenance practices, common issues with mobile home roofs, and some helpful resources. Additionally, you’ll find links to more information about mobile home roof repair and roof coatings that can simplify this process. Let’s dive in!
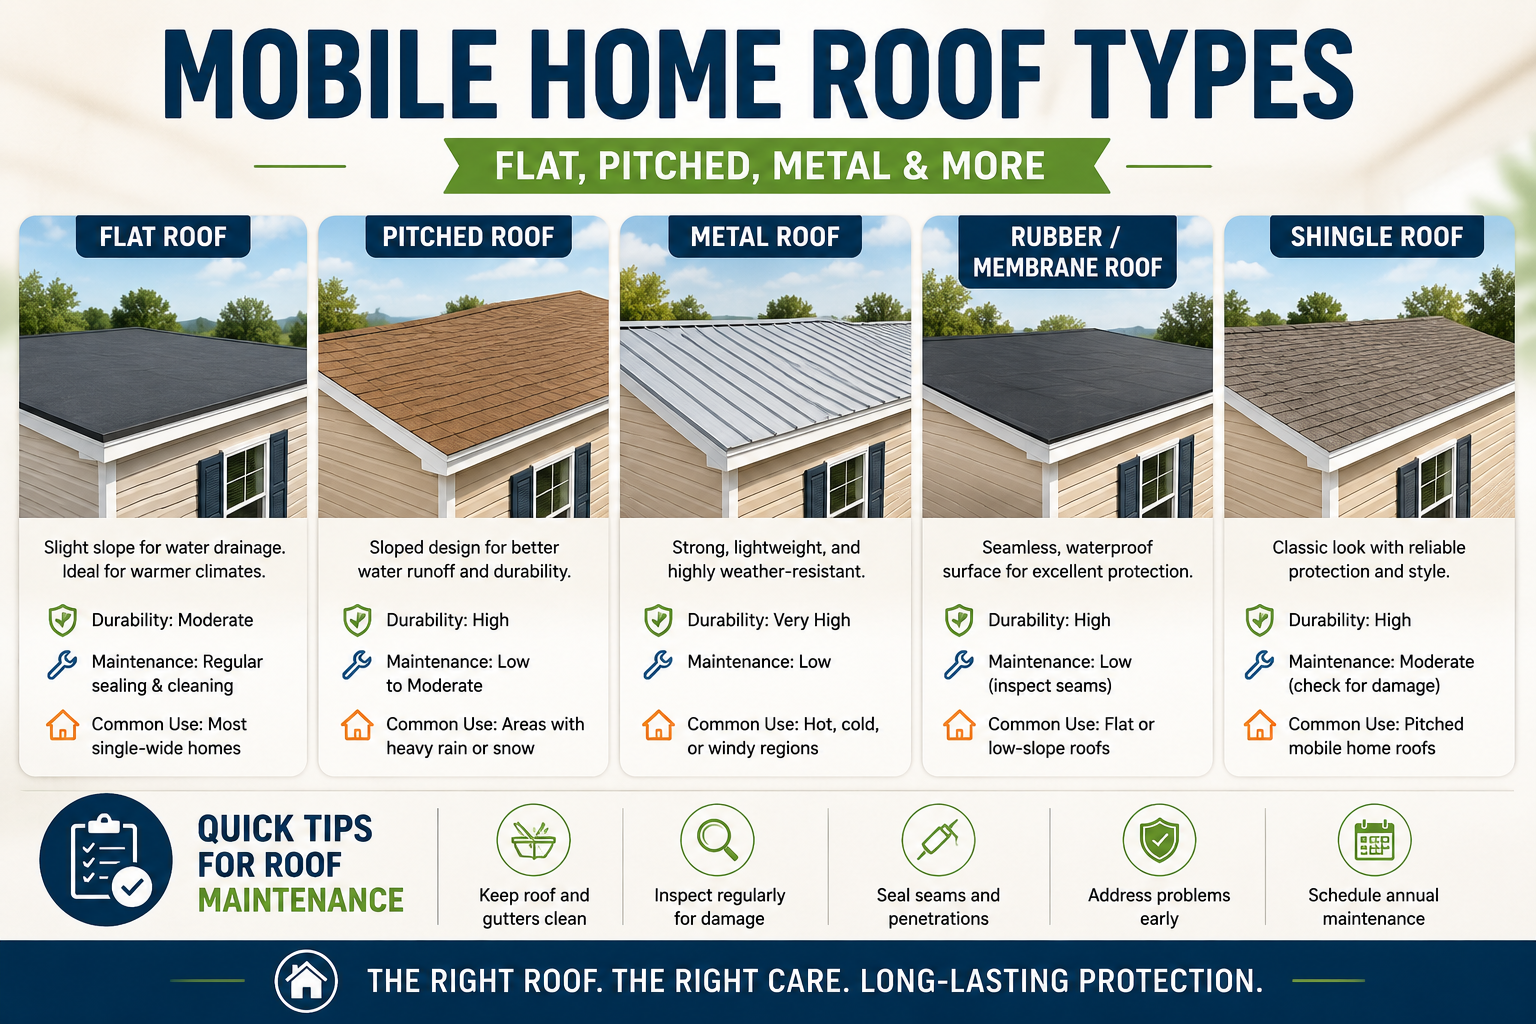
Understanding Mobile Home Roof Types
The first step in mobile home roof maintenance is understanding the various types of roofs available. Mobile home roofs generally fall into two categories: flat roofs and pitched roofs. Both types have unique characteristics and require different maintenance strategies.
Flat Roofs
Flat roofs are common in mobile homes due to their cost-effectiveness and simple construction. However, they can easily accumulate water, leading to leaks if not properly maintained. It’s important to inspect your flat roof regularly for pooling water and debris that can exacerbate drainage issues.
Pitched Roofs
Pitched roofs, while less common, are another option for mobile homes. These roofs are designed to allow water and snow to slide off easily, reducing the risk of damage. Regular maintenance involves cleaning gutters and checking for any loose shingles or tiles.
Explore various mobile home roofing types
Routine Inspections: Spotting Problems Early
Routine inspections of your mobile home roof can prevent more serious problems from developing. I recommend checking your roof at least twice a year, in the spring and fall. Look for signs of wear like cracks, leaks, or missing materials.
Consider enlisting a professional for a thorough annual inspection. They can identify potential issues that might be hard to spot from the ground.
What to Look For
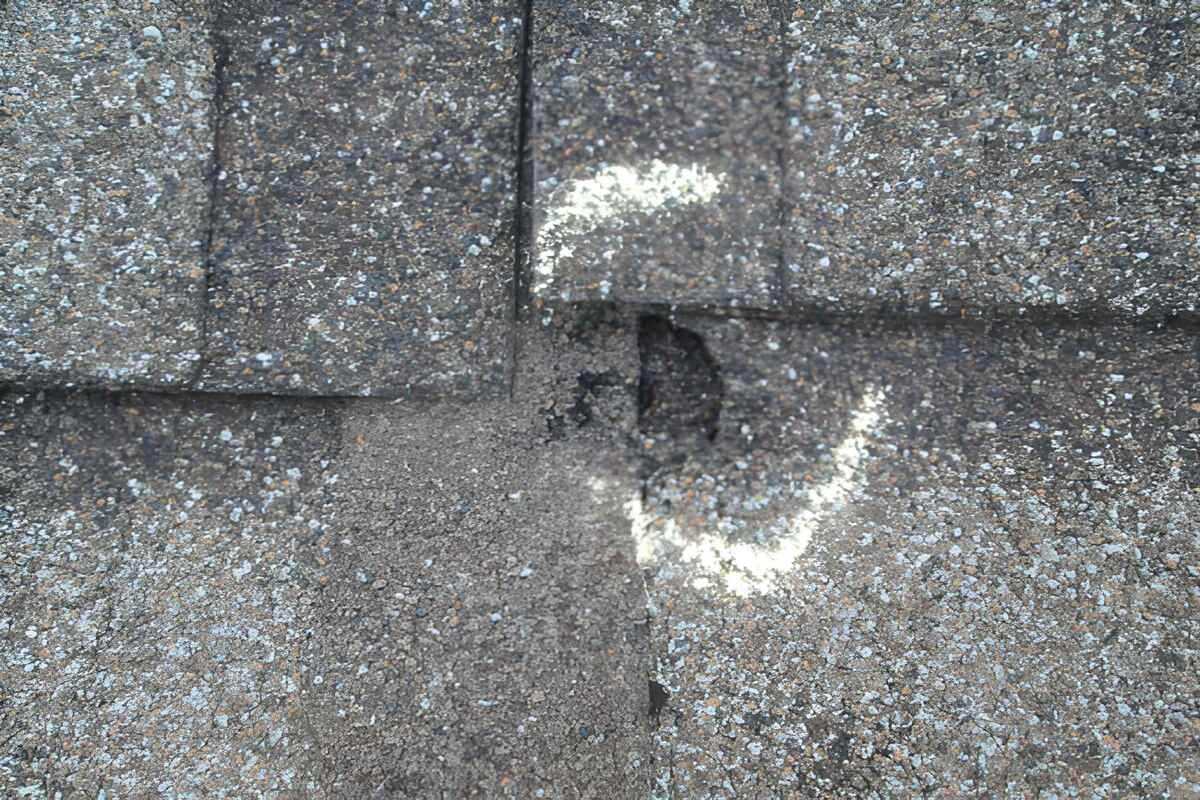
Cracks or blisters in the roofing material
Stains on the ceiling inside your mobile home
Pooling water or clogged drainage systems
Worn out or missing shingles/tiles
Cleaning Your Mobile Home Roof
Cleaning your mobile home roof is a critical part of maintenance. Dirt, debris, and algae can accumulate and cause decay over time. I suggest using a soft broom or a pressure washer set to a low pressure to clean your roof effectively without causing damage.
Additionally, use a mix of water and a mild detergent to help break down tough stains. Always ensure that the materials used for cleaning are compatible with your roofing system to avoid damage.
Step-by-step mobile home roof repair
Sealing Your Roof: The Importance of Coatings
Applying a protective coating can significantly extend the life of your mobile home roof. Coatings create a waterproof barrier that prevents leaks and UV damage. Many homeowners find this a cost-efficient solution to maintain their roofs.
There are different types of sealants available, such as elastomeric coatings and silicone coatings. I recommend conducting research or consulting with a roofing expert to determine the best type for your specific roof material.
Application Tips
Ensure the roof is clean and dry before applying the coating.
Use a roller or spray equipment for even application.
Apply multiple coats as recommended by the manufacturer.
Understanding Mobile Home Roof Repairs
Sometimes, your mobile home roof may require repairs. Understanding when to DIY and when to call in a professional is essential. Minor leaks and small issues can often be fixed with a bit of caulk or a patch of roofing material.
For larger problems, or if you’re uncertain, it’s wise to consult a professional—this can save you time and money in the long run.
Common Repair Strategies
Using roofing cement to seal small cracks
Replacing damaged shingles or panels
Reinforcing weak areas with additional materials
Importance of roof inspections for mobile homes
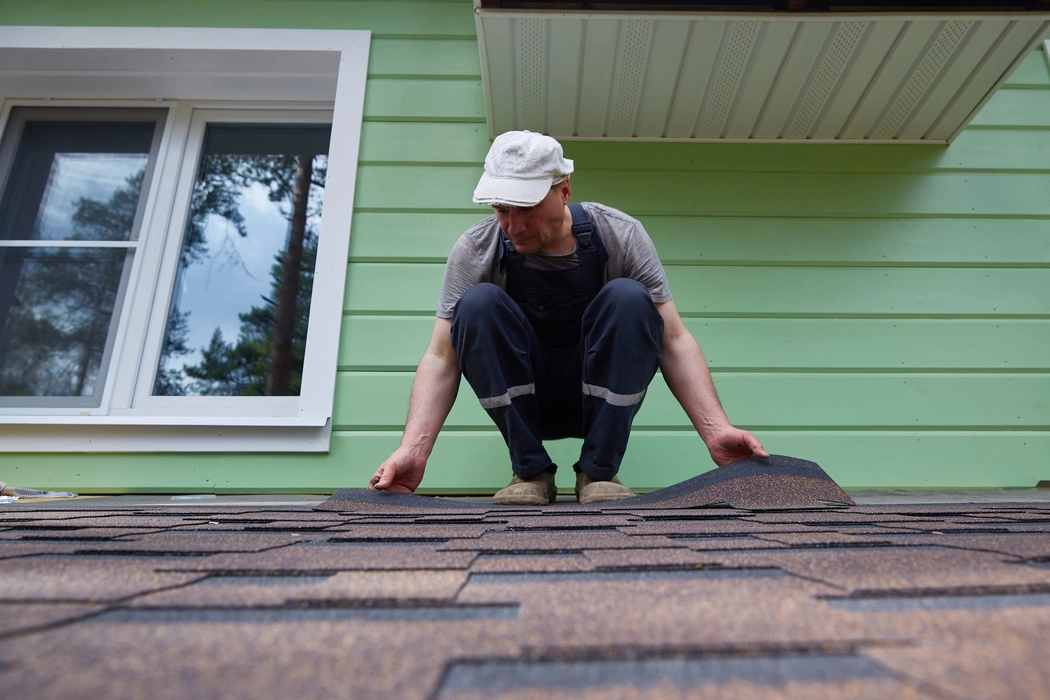
The Cost of Replacement: What to Expect
At some point, you may need to consider replacing your mobile home roof entirely. The cost of replacing a mobile home roof can vary greatly depending on the size, material, and labor involved. I’ve found that most mobile homeowners spend between $3,000 and $6,000 on a new roof.
Be sure to consult with multiple contractors and get detailed quotes to ensure you are getting a fair price.
Factors Influencing Cost
Type of roofing material chosen (shingle, metal, membrane)
Labor costs in your area
Additional features, such as insulation
Frequently Asked Questions (FAQs)
1. How long should a mobile home roof last?
A mobile home roof typically lasts about 15-30 years, depending on the material and maintenance performed.
2. Can I repair my mobile home roof myself?
Many minor repairs can be DIY projects. However, for extensive damage or structural issues, hiring a professional is advisable.
3. What are the signs that my mobile home roof needs replacing?
Signs include severe leaks, extensive damage, and age. If you notice multiple issues, replacement may be necessary.
4. How often should I inspect my mobile home roof?
I recommend inspecting your roof at least twice a year and after major storms.
5. Is applying a roof coating worth it?
Yes, a good roof coating can extend the life of your roof and protect it from the elements, saving you money in repairs.
Maintaining your mobile home roof is essential for preserving the longevity and safety of your home. By understanding the types of roofs, conducting regular inspections, and addressing minor issues promptly, you can avoid costly repairs. Use the tips discussed in this article to keep your mobile home roof in perfect shape!
Plan Your Roofing Project
Use our free calculator to estimate costs, then connect with trusted roofing experts for a fast, honest quote.
Commercial Roof Repair Near Me: 7 Essential Tips for Fast, Reliable Service
Searching for commercial roof repair near me is a common challenge for business owners and facility managers. When your roof shows signs of wear and damage, quick action is crucial to avoid further complications. Knowing how to find reliable and efficient roof repair services nearby can save you time, money, and stress. A well-maintained roof is vital for the long-term integrity of your property. Delaying repairs can lead to serious structural issues and costly replacements. This article outlines what to look for when searching for commercial roof repair services near you, including key factors and practical tips to ensure you receive the best service available. We will explore the types of commercial roofing systems, common issues that necessitate repairs, how to find reputable contractors, and actionable steps you can take to ensure your roof gets the care it needs. By understanding commercial roof repair near me, you’ll be better equipped to make informed decisions that protect your investment.
Understanding Commercial Roof Systems
Commercial roof systems come in various forms, such as flat, low-slope, and sloped designs. Each type has its unique requirements and common issues that may arise over time. Understanding these can help you anticipate potential problems and recognize when to seek professional help.
Common Types of Commercial Roofs
EPDM (Ethylene Propylene Diene Monomer)
TPO (Thermoplastic Olefin)
PVC (Polyvinyl Chloride)
Modified Bitumen
Built-Up Roofing (BUR)
Each of these roofing types requires a specific maintenance and repair approach. For example, flat roofs often face drainage issues, while sloped roofs may need regular inspections for shingles and seals. Knowing your roof type can guide your communication with repair professionals.Detail of membrane repair
Signs Your Roof Needs Repair
Ignoring roof issues can lead to bigger problems down the road. Watch for these signs that indicate a need for commercial roof repair near you:
Visible Damage
Look for visible signs of wear, such as cracks, blisters, or missing shingles. These can indicate underlying problems that need immediate attention.
Water Leaks
Water stains on ceilings or walls can signal leaks. If you notice any discoloration, contact a repair service to investigate further.
Increased Energy Costs
A sudden rise in energy bills may suggest your roof is not effectively insulating your building. Poor insulation often results in higher heating and cooling costs.Signs of leaks on interior surfaces.
How to Find Trustworthy Repair Services
Finding the right commercial roof repair near me requires careful consideration. Here are 7 essential tips to help you locate a reputable service provider:
Search Locally: Use online searches and directories to find local contractors. Look for phrases like ‘commercial roof repair near me’ to identify nearby options.
Check Reviews: Read customer reviews on platforms like Google My Business or Yelp. Feedback from previous customers can give you valuable insights into the contractor’s reliability and quality of work.
Verify Licenses: Ensure the contractor has the necessary licenses and insurance. This protects you from liability and ensures legal standards are met.
Ask for Quotes: Get multiple quotes to compare prices and services. The lowest price isn’t always the best; consider value alongside cost.
Request References: A trustworthy contractor should provide references from previous clients. Reach out to these references to inquire about their experiences.
Assess Experience: Choose professionals with significant experience in commercial roof repairs. Their expertise can make a considerable difference in the results.
Inquire About Warranties: Reliable companies often provide warranties on their workmanship and materials used. Be sure to ask about these before proceeding.
The Repair Process Explained
Once you’ve selected a contractor, understanding the repair process can help set expectations. Here’s what typically happens during commercial roof repair.
Initial Assessment
The contractor will conduct a thorough inspection to assess the damage and determine the best course of action. This may involve measuring the area, checking for leaks, and evaluating the roofing material.
Repair or Replacement Options
Based on their findings, the contractor will discuss repair or replacement options. They will explain the benefits and costs associated with each option to help you make an informed decision.
Execution of Repairs
Once you agree on the scope of work, repairs will begin. This includes taking precautions to ensure the safety of workers and your property. Depending on the severity of the damage, repairs might take a few hours to several days.A professional team conducting repairs on a commercial roof.
Cost Factors for Roof Repair
When budgeting for commercial roof repair near me, consider various cost factors:
Extent of Damage: More extensive damage requires more work and higher costs. A small leak will be significantly cheaper to repair than replacing an entire section.
Type of Roofing Material: The material used impacts repair costs. Some materials are more expensive to repair than others.
Labor Costs: Labor costs can vary based on the contractor’s experience and your location.
Accessibility: If your roof is difficult to access, it may require special equipment, increasing overall costs.
Maintaining Your Commercial Roof
Common Commercial Roof Problems , repair guide 2025 Proper maintenance can extend the lifespan of your roof and minimize the need for repairs. Consider these maintenance tips:
Regular Inspections: Schedule professional inspections at least once a year and after severe weather events.
Clear Debris: Regularly remove leaves and debris from your roof to prevent drainage blockages.
Prompt Repairs: Address minor issues as soon as they arise to prevent worsening problems.
FAQs About Commercial Roof Repair
How long does a commercial roof repair take?
The duration varies based on the extent of the damage. Minor repairs can often be completed in a few hours, while more extensive repairs may take several days.
What should I do if I notice a leak?
Contact a commercial roofing contractor immediately to evaluate the situation. Quick action can prevent further damage and expensive repairs.
How do I know if I need a new roof?
If your roof has multiple leaks, significant damage, or is nearing the end of its lifespan, a replacement may be necessary. Consulting with a professional can provide clarity.
Conclusion
Understanding commercial roof repair near me is key to making informed decisions that affect your property and business. By recognizing signs of damage, knowing how to find trustworthy repair services, and maintaining your roof properly, you can protect your investment from the elements and ensure it continues to serve your business effectively. Timely action is critical. If you suspect any issues with your commercial roof, contact a reliable contractor and address them before they escalate.
Plan Your Roofing Project
Use our free calculator to estimate costs, then connect with trusted roofing experts for a fast, honest quote.
Roof Underlayment Types: 7 Essential Tips That Make a Difference
Choosing the right roof underlayment types is crucial for any roofing project. Whether you’re a homeowner, a contractor, or a DIY enthusiast, understanding the differences between various underlayment options can save you time and money. Making an informed choice can significantly impact the longevity and performance of your roof. This article will explore the most common roof underlayment types, detailing their benefits and drawbacks. By the end, you’ll have a clear understanding of the factors to consider when selecting the best underlayment for your roofing needs. Knowing these types is vital for ensuring that your roofing materials perform as intended. We will discuss felt, synthetic, and self-adhering underlayment options, comparing their features, costs, and best uses. You’ll also learn about installation tips and the risks associated with each type to help you make a well-informed decision. Let’s get into the details.
What is Roof Underlayment?
Roof underlayment is a protective layer between your roof deck and the roofing material. It serves as a barrier against moisture, preventing water from penetrating your roof structure. This is essential for maintaining the integrity of your home and avoiding costly repairs later on.
Why is Roof Underlayment Important?
Every homeowner should understand the importance of roof underlayment types. They provide more than just a simple layer of protection; they contribute to the durability and efficiency of your roofing system. Choosing the right underlayment can enhance energy efficiency and extend your roof’s lifespan.Comparison of various roof underlayment types.
Types of Roof Underlayment
1. Felt Underlayment
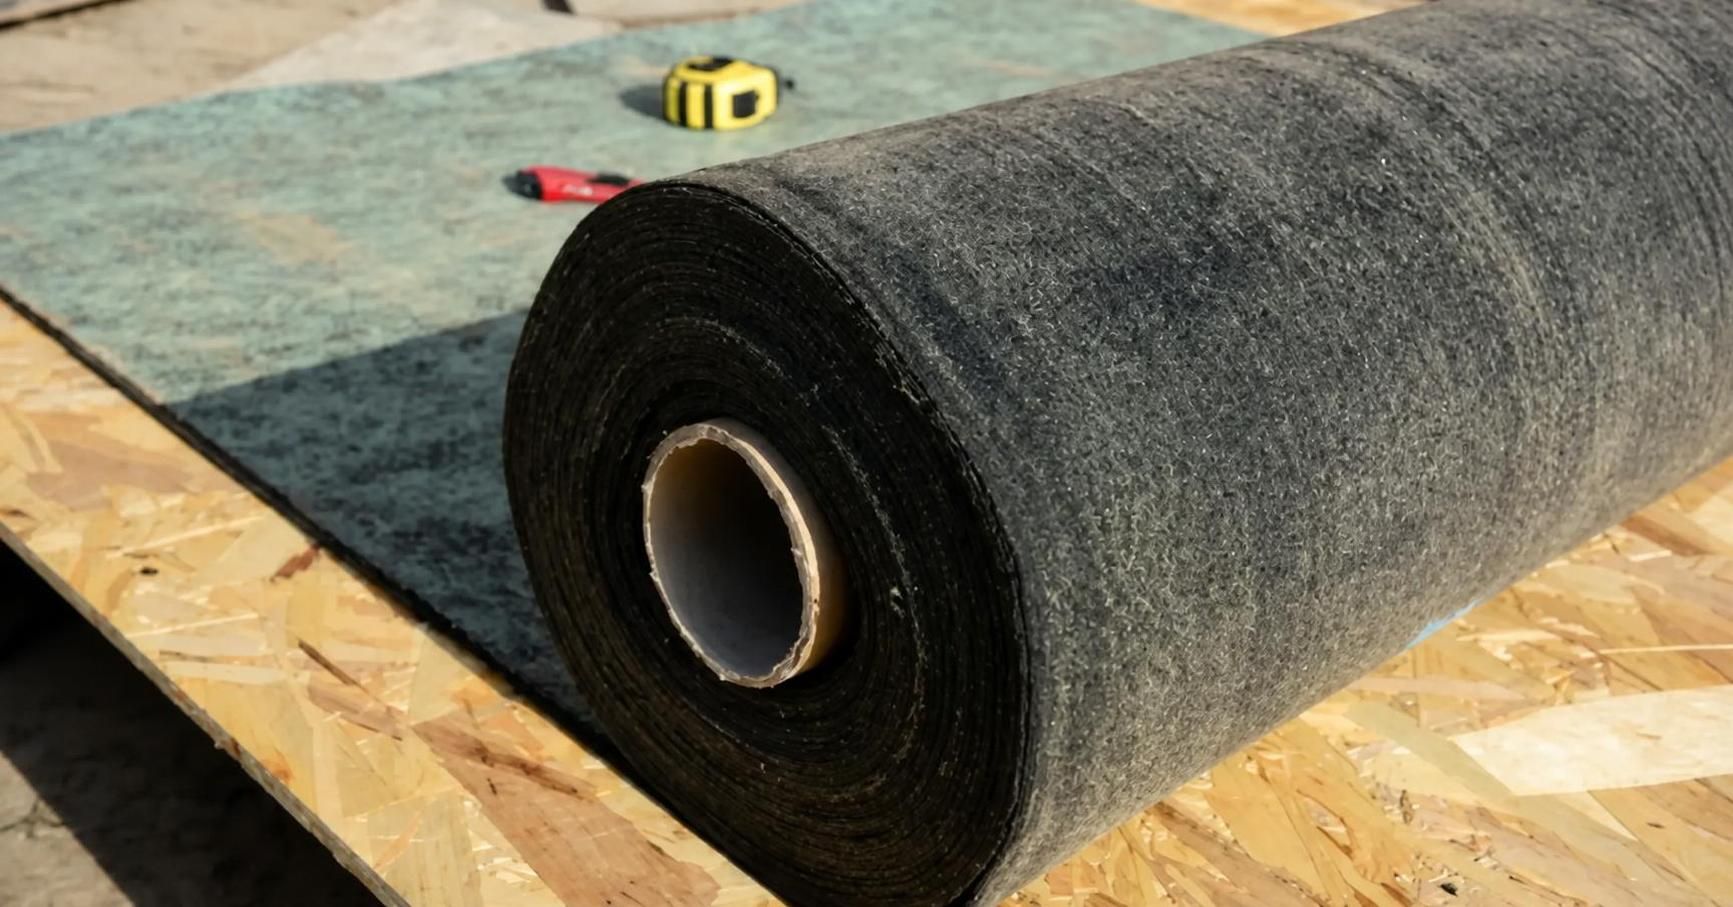
Felt underlayment is one of the most commonly used types. It comes in two main grades: 15-pound and 30-pound. The 30-pound felt is thicker and offers better durability and moisture resistance compared to the lighter option. This traditional choice is often made from organic materials and coated with asphalt for waterproofing. While felt is relatively inexpensive, it can degrade over time, especially if exposed to high temperatures without a proper roofing layer over it. For installations that require a budget-friendly approach, felt underlayment remains popular, although its long-term performance should be considered.Example of felt underlayment application on a roof.
2. Synthetic Underlayment
Synthetic underlayment is a newer option made from woven or spun polypropylene or polyester. This type is lightweight yet stronger than felt. Its moisture resistance capabilities are superior, and it generally lasts longer. Since synthetic underlayment often requires fewer layers, it can reduce installation time. It’s also less susceptible to tearing and moisture. If you live in areas prone to harsh weather conditions, you might want to consider synthetic options for reliability.
3. Self-Adhering Underlayment
Self-adhering underlayment is a premium choice that sticks directly to the roof deck. This type provides exceptional water resistance and a strong barrier against leaks, especially in areas prone to ice dams and heavy rain. While it is the most expensive option, its ease of installation and effectiveness can offer peace of mind. In my roofing consultations, I often recommend self-adhering underlayment for projects where moisture exposure is a concern.
Factors to Consider When Choosing Underlayment
Climate
The local climate greatly affects the choice of roof underlayment types. In areas with heavy snowfall or rainfall, choose synthetic or self-adhering options to prevent moisture-related damage. For milder climates, felt may be sufficient.
Cost
Budget constraints will also influence your underlayment choice. While felt is the most affordable option, it can lead to expensive repairs down the line if not properly protected. Assess your budget alongside the expected lifespan of the materials.
Ease of Installation
Consider how easy the underlayment is to install. Self-adhering underlayment simplifies the process by eliminating the need for nails or staples. However, the final choice often depends on the skill level of the installers and the specific project requirements.Installation methods for various roof underlayment types.
Ready to Upgrade to a Metal Roof in 2026?
Get a free instant estimate for your home , compare standing seam, corrugated, and stone-coated steel with real 2026 pricing before talking to a single contractor.
No sign-up required • Instant results • 2026 material pricing
Understanding roof underlayment types—including felt, synthetic, and self-adhering—can impact your roofing project significantly. The right choice enhances your roof’s efficiency and longevity. Each type has strengths and weaknesses, so evaluate your specific needs carefully. From my experiences in roofing, I’ve seen how the right underlayment can make a major difference. Weigh the costs and benefits of each option and choose the one that best aligns with your goals.
Frequently Asked Questions about Roof Underlayment Types
What is the best roof underlayment for rain?
The best roof underlayment for areas prone to rain is often synthetic or self-adhering underlayment, as these provide superior moisture protection.
Can I use felt underlayment under metal roofing?
Yes, felt underlayment can be used under metal roofing, but consider using a synthetic underlayment for better durability and moisture resistance.
How long does roof underlayment last?
Typically, felt underlayment lasts 10-20 years, while synthetic and self-adhering types can last 25 years or more, depending on conditions. Choosing the right roof underlayment is essential. For further reading on metal roof underlayment and its advantages, check out this link. For a deeper understanding of underlayment and installation processes, visit these resources: Underlayment Overview and Installation Guidelines. “`
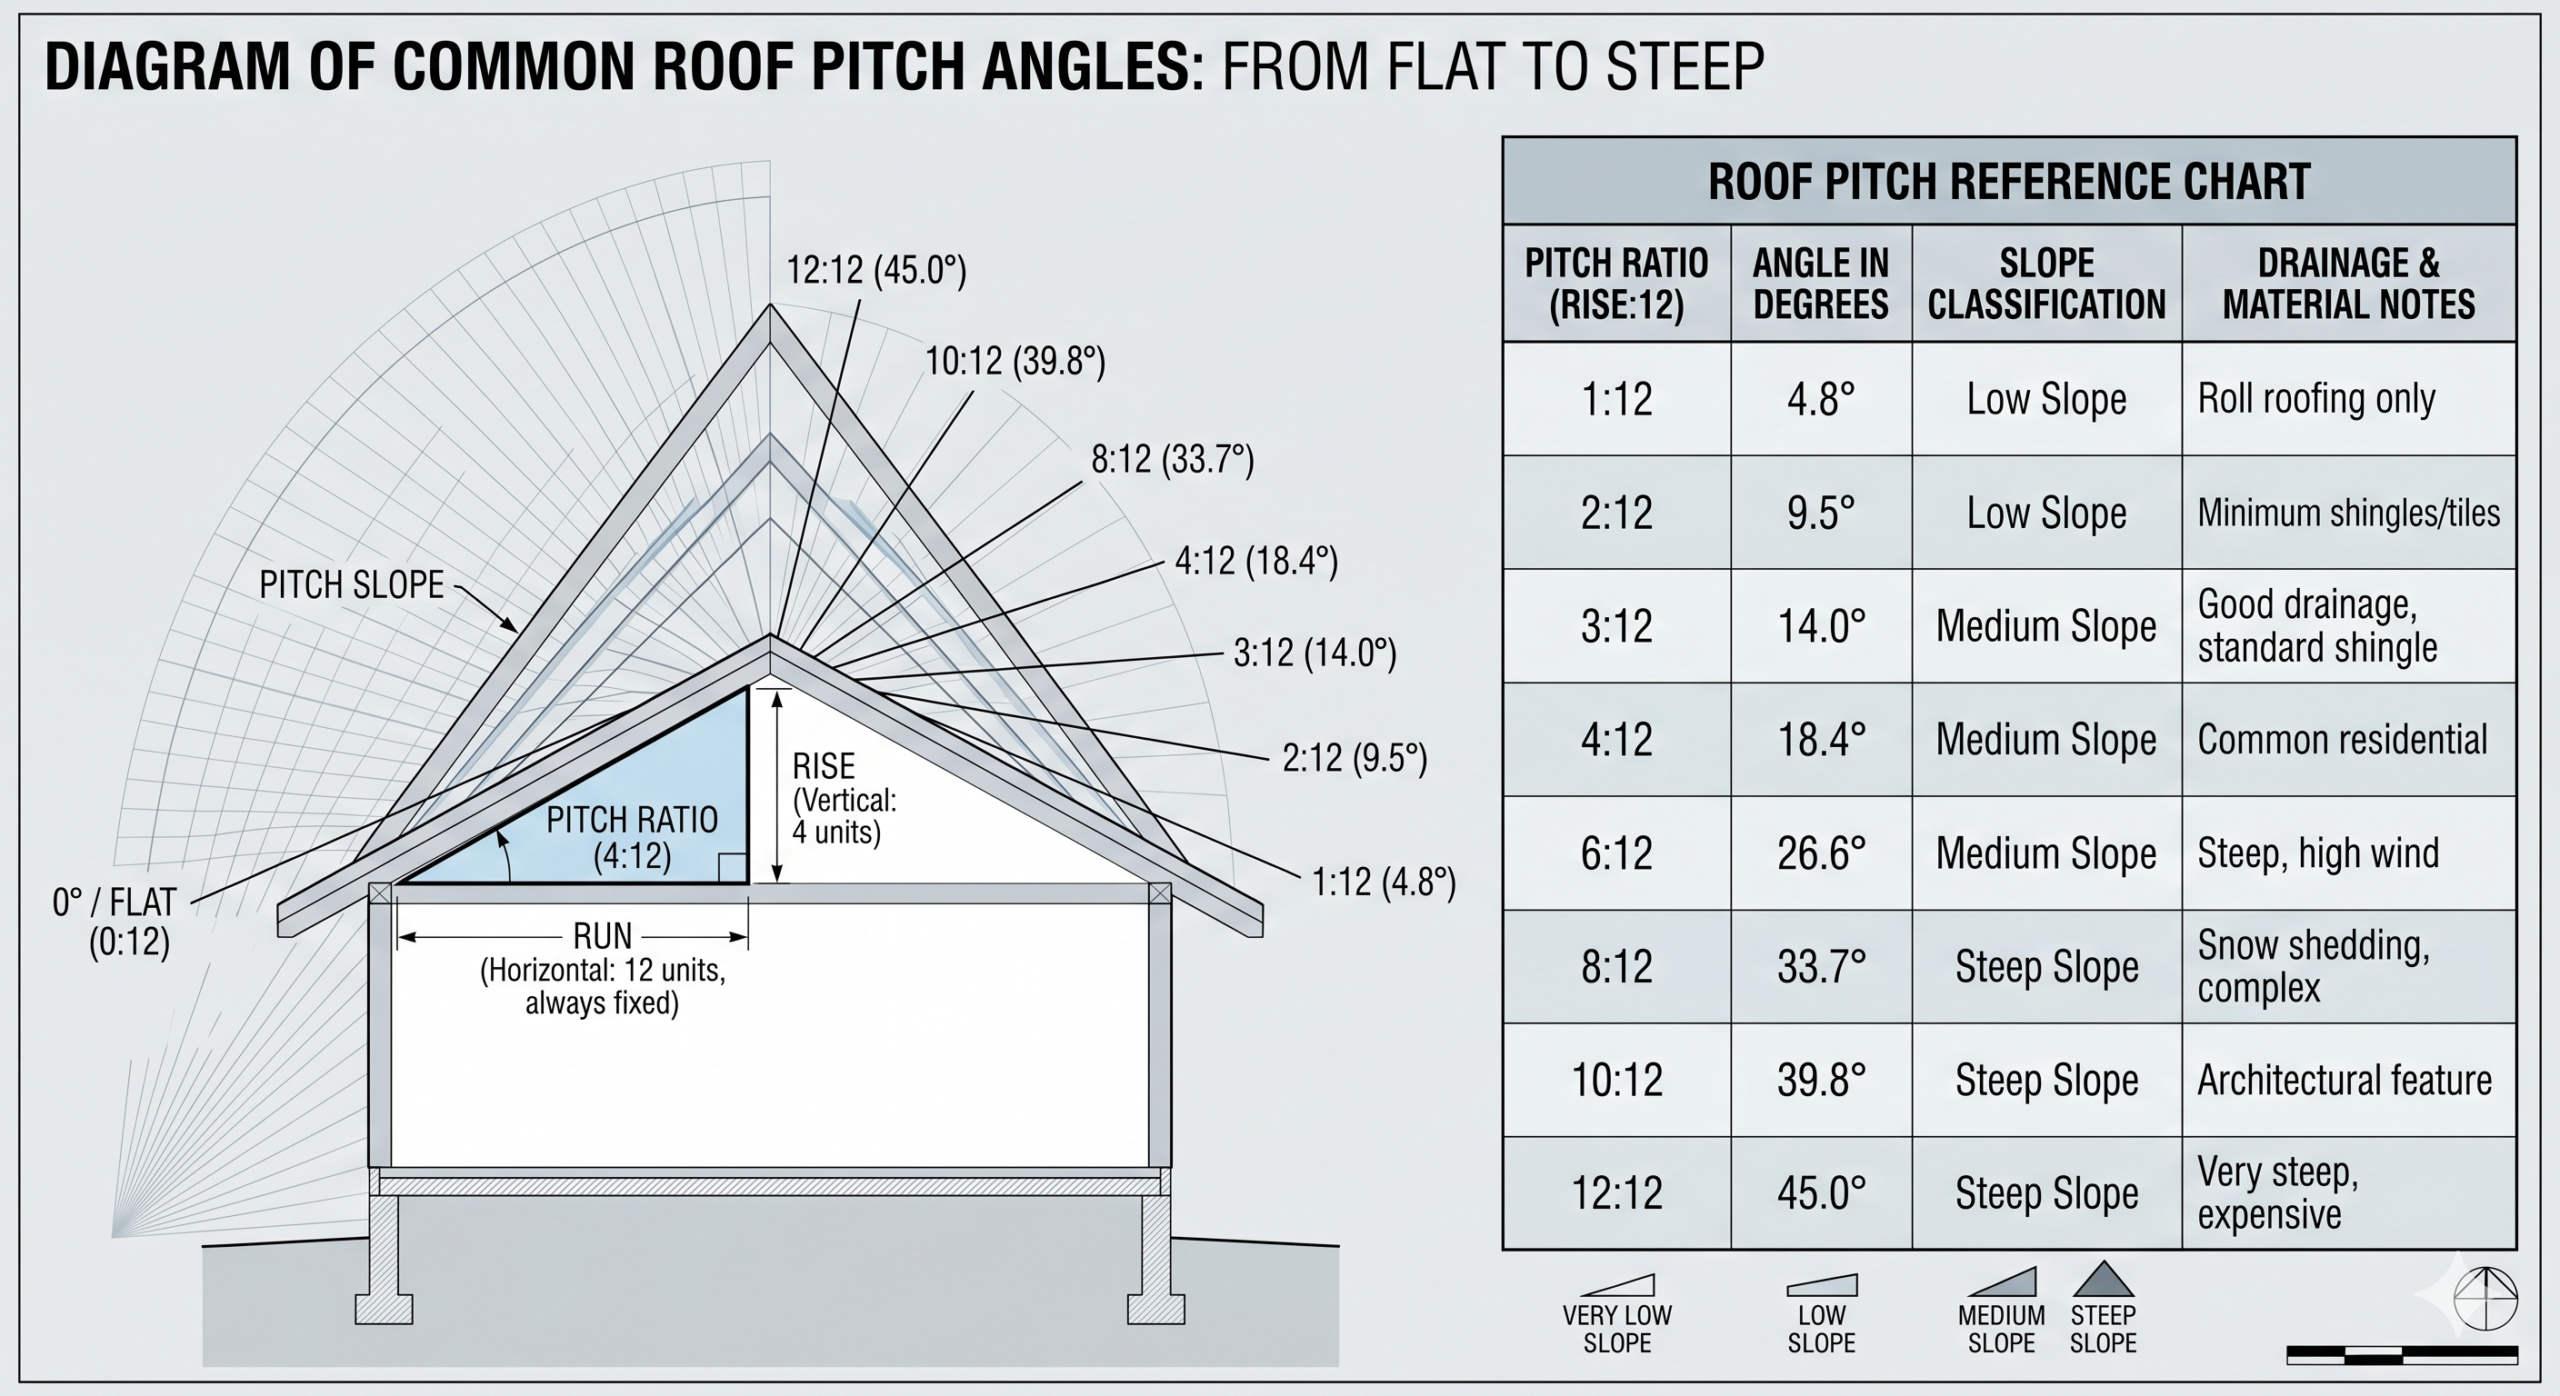
5/12 Roof Pitch Meaning: The Ultimate Guide to Understanding Roof Angles
The 5/12 roof pitch meaning describes a specific slope that is crucial for roofing design. Understanding this concept is essential for homeowners and builders alike. Roof pitch influences not only the aesthetic appeal of a building but also its functionality and performance against various weather conditions. In this guide, we’ll delve deep into roof pitches, specifically the 5/12 pitch, exploring its significance, advantages, and considerations.
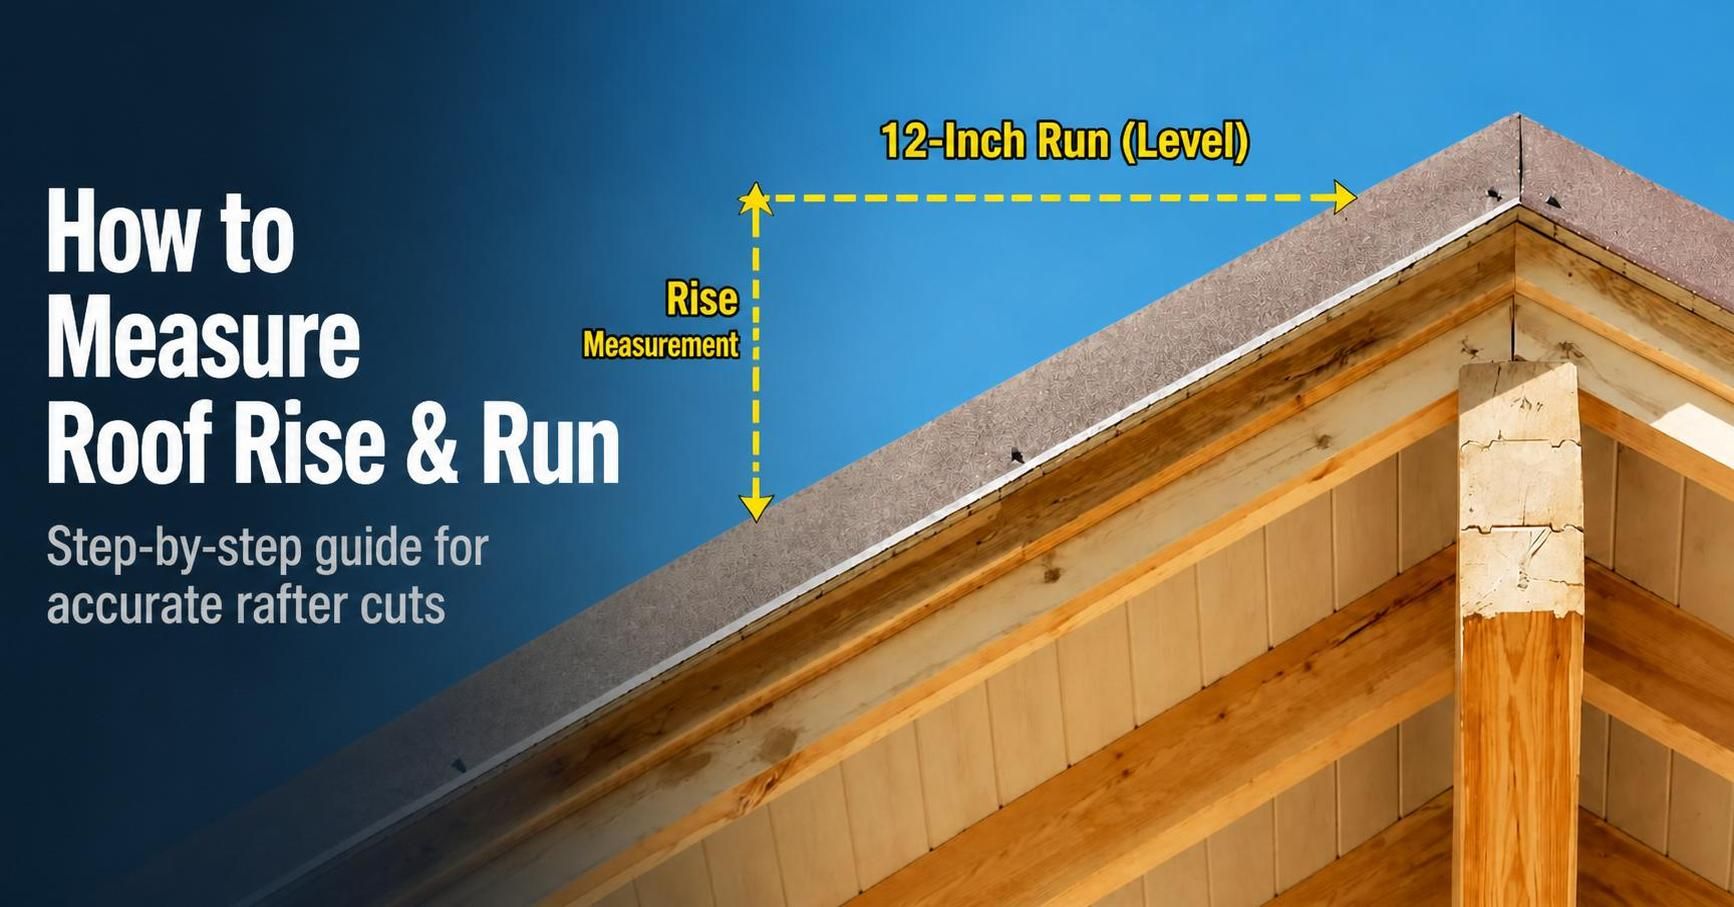
What is Roof Pitch?
Roof pitch refers to the steepness or slope of a roof. It is calculated as the ratio of vertical rise to horizontal run. For instance, a roof pitch of 5/12 indicates that for every 12 horizontal inches, the roof rises 5 inches. This measurement is crucial in determining how well a roof will redirect water, manage snow loads, and affect the overall look of a home. Understanding roof pitch is key when choosing roofing materials, as some materials perform better on steeper pitches. A properly pitched roof can enhance the durability and lifespan of roofing systems.his architectural diagram illustrates standard residential roof pitches, demonstrating how vertical ‘rise’ over a fixed 12-inch horizontal ‘run’ determines the slope’s angle in degrees and its performance.
Understanding 5/12 Pitch
The 5/12 roof pitch is a common specification in roofing. It is considered a moderate pitch that is aesthetically pleasing while also functional. With a slope of approximately 22 degrees, it provides a balance between good drainage and easy access for maintenance. This pitch is often used in residential homes due to its suitability for various roofing materials. The slope of a 5/12 roof is less steep than high-slope roofs but steeper than low-slope roofs, making it a versatile choice. In locations with heavy snowfall, a steeper pitch can facilitate snow runoff, reducing the risk of leaks caused by ice dams. This pitch is often favored for homes in regions where heavy precipitation is common.Example of a 5/12 Roof Pitch
Advantages of a 5/12 Pitch
Choosing a 5/12 roof pitch comes with several advantages:
Effective Drainage: The slope facilitates water runoff, minimizing the risk of leaks and standing water.
Snow Management: Its pitch helps prevent snow accumulation, reducing the burden on the roof.
Compatibility with Various Materials: Many roofing materials, including asphalt shingles and metal, work effectively on a 5/12 pitch.
Enhanced Aesthetic Appeal: Provides a classic look that complements many architectural styles.
Additionally, roofs with a 5/12 pitch can allow for usable attic space. This feature is beneficial for homeowners seeking extra storage or living space.A 5/12 pitch roof illustrating effective snow management with minimal accumulation.
Common Materials for 5/12 Roofs
Several roofing materials are suitable for a 5/12 pitch. Common choices include:
Asphalt Shingles: Widely used due to their affordability, durability, and ease of installation.
Metal Roofing: Known for its longevity and resistance to severe weather conditions.
Tile Roofing: While stylish, tile can be heavier; ensure your structure can support it.
When selecting materials, consider not just aesthetic concerns, but also the local climate and roofing regulations. For instance, homes in areas prone to heavy rain or snow may benefit from more robust roofing systems.
Considerations for 5/12 Pitch
When installing a roof with a 5/12 pitch, several factors should be taken into account:
Local Building Codes: Always check your local regulations for any restrictions regarding roof pitch.
Ventilation Needs: Proper ventilation is crucial in attics to avoid heat and moisture buildup.
Cost Implications: Budget for both materials and labor when planning your roofing project, as complexity may increase costs.
In some cases, roofs might need modifications based on their existing structures to accommodate the desired pitch. It’s best to consult with a roofing professional for tailored advice.
Inspections and Maintenance
Regular inspections and maintenance are essential for prolonging the lifespan of a roof with a 5/12 pitch. Homeowners should be aware of common issues such as:
Flashing Damage: Inspect roof joints and valleys for signs of deterioration.
Shingle Condition: Check for curling, cracking, or missing shingles.
Drainage Issues: Ensure gutters and downspouts are clear of debris to facilitate proper drainage.
Scheduling professional inspections at least twice a year is wise, especially after severe weather events.
Ready to Upgrade to a Metal Roof in 2026?
Get a free instant estimate for your home , compare standing seam, corrugated, and stone-coated steel with real 2026 pricing before talking to a single contractor.
No sign-up required • Instant results • 2026 material pricing
Understanding the 5/12 roof pitch meaning is vital for anyone involved in roofing. This pitch offers numerous benefits such as effective drainage, snow management, and compatibility with various materials. By choosing a 5/12 pitch and considering the necessary factors for its installation, homeowners can ensure that their roofs are not just visually appealing but also functional and durable.
FAQs
What does a 5/12 roof pitch mean? A 5/12 roof pitch means that for every 12 inches horizontally, the roof rises 5 inches. It indicates a moderate slope. What are the benefits of a 5/12 roof pitch? Benefits include effective drainage, suitability for various roofing materials, and aesthetically pleasing design. Can I use any roofing material on a 5/12 pitch? Most materials, including asphalt shingles and metal roofing, work well on a 5/12 pitch, but always consult local codes. How often should I inspect my roof with a 5/12 pitch? Perform inspections at least twice a year and after significant weather events to catch potential issues early. Is a 5/12 roof pitch suitable for snowy climates? Yes, this pitch helps manage snow runoff effectively, reducing the risk of snow accumulation and related issues. For more information, visit our guides on changing roof pitch and minimum roof pitch for shingles. “`
Denver gutter installation is one of the most climate-sensitive home improvement decisions a Front Range homeowner can make. While gutters are often treated as an afterthought , a box to check during a roofing project , in Denver they are a first-line defense against three specific threats that destroy homes slowly and expensively: ice dams, foundation water intrusion, and fascia rot from standing snowmelt. Get the gutters wrong and the damage compounds quietly for years before it shows up on a home inspection report.
The cost of Denver gutter installation ranges from $4 to $12 per linear foot installed, putting a complete system for a typical single-story home between $800 and $2,400. But raw price tells only part of the story. A $5-per-foot sectional vinyl installation will likely need full replacement within five to eight years in Colorado’s climate, while a $9-per-foot seamless aluminum system installed correctly can last 30 to 40 years. Choosing the wrong material or the wrong contractor in Denver does not just cost more upfront , it costs far more over the life of the home.
Denver presents a unique combination of challenges that no other major U.S. metro quite matches. The city sits at 5,280 feet, where ultraviolet radiation degrades vinyl and low-grade coatings faster than at sea level. The Front Range receives more than 400 hail events annually , more than almost anywhere in the country , meaning gutters take a direct beating every spring. Temperatures routinely swing 40 to 50 degrees Fahrenheit in a single day during shoulder seasons, expanding and contracting every seam in a sectional gutter system until it fails. And then there is the cottonwood problem: Denver’s mature urban tree canopy drops dense, compacting seed masses that turn neglected gutters into small dams within days.
This guide is written specifically for Denver and the surrounding metro , Aurora, Lakewood, Arvada, Westminster, Englewood, Castle Rock, and the mountain foothill communities where elevation adds its own complications. It covers every decision point in sequence: which gutter material actually holds up to Colorado conditions, what size you need for Denver’s rain and snow patterns, whether you need a permit, how to vet a contractor after a hailstorm when every storm chaser in three states has descended on your neighborhood, and what to expect on installation day. By the end, you will have everything needed to make a confident decision and avoid the mistakes that send Denver homeowners back to square one within a decade. Colorado homeowners should also review the Colorado roofing COP requirements — most Front Range municipalities require a Certificate of Occupancy for roofing work over $10,000.
Denver Gutter Installation Cost in 2026
Gutter pricing in Denver runs somewhat higher than national averages due to labor costs along the Front Range and Colorado’s specialized climate requirements. Here is a realistic breakdown:
Gutter Type
Material (per lin. ft.)
Installed (per lin. ft.)
Best For
Aluminum K-style (seamless)
$1.50 – $3.00
$4 – $8
Most Denver homes
Steel K-style (seamless)
$2.50 – $4.00
$6 – $10
Hail-prone areas, heavy snow
Copper K-style
$15 – $25
$20 – $40
Historic homes, premium curb appeal
Vinyl (sectional)
$0.75 – $1.50
$3 – $6
Budget only , not ideal for Denver winters
Half-round aluminum
$2.00 – $4.00
$5 – $10
Craftsman and Tudor-style homes
Oversized 6-inch K-style
$2.50 – $5.00
$6 – $12
Steep roofs, high runoff
For a typical Denver ranch-style home with 150 linear feet of gutter, expect to pay $900 to $1,500 for aluminum seamless gutters fully installed. Add gutter guards and the total rises to $1,800 to $3,500 depending on the guard type. See our complete guide to gutter guards for a full comparison of guard systems.
man gutter cleaning 2025
Why Denver’s Climate Makes Gutter Choice Critical
Denver averages 300 days of sunshine per year, but those statistics hide the extremes that make Denver gutter installation far more demanding than in most U.S. cities. Here is what every gutter system in Denver has to survive:
Freeze-Thaw Cycles
Denver temperatures routinely swing 40 to 50 degrees Fahrenheit in a single day during late fall and early spring. Water in gutters freezes overnight, expands, and thaws the next afternoon. Sectional vinyl gutters crack and separate at their seams within two to three winters. Seamless aluminum or steel gutters eliminate virtually all seam failures because they are formed in one continuous piece from fascia corner to downspout.
Spring Hailstorms
The Denver metro sits in one of the most hail-active corridors in the United States. Colorado averages more than 400 hail events per year, many dropping golf ball-sized stones that dent standard 0.027-inch aluminum gutters. In hail-prone areas like Castle Rock, Parker, and Aurora, upgrade to 0.032-inch heavy-gauge aluminum or 26-gauge steel for noticeably better dent resistance , roughly $1 to $2 more per linear foot.
Heavy March Snowfall
Denver’s heaviest snowstorms typically hit in March and April, when wet, heavy snow accumulates fast. Snow load on gutters can exceed 20 pounds per linear foot during a major storm. Undersized 4-inch K-style gutters can pull away from the fascia under this weight. Most Denver contractors now recommend 5-inch or 6-inch K-style as the standard, not an upgrade.
Ice Dams
Ice dams form when heat escaping through an under-insulated roof melts snow, which refreezes at the cold eaves. Gutters get caught in this cycle and can be torn completely off the house. The real fix is attic insulation and ventilation , but heat cables installed along the eave and inside the gutter can prevent ice dam buildup in problem spots. Ask your installer whether heat cable installation is part of their offering.
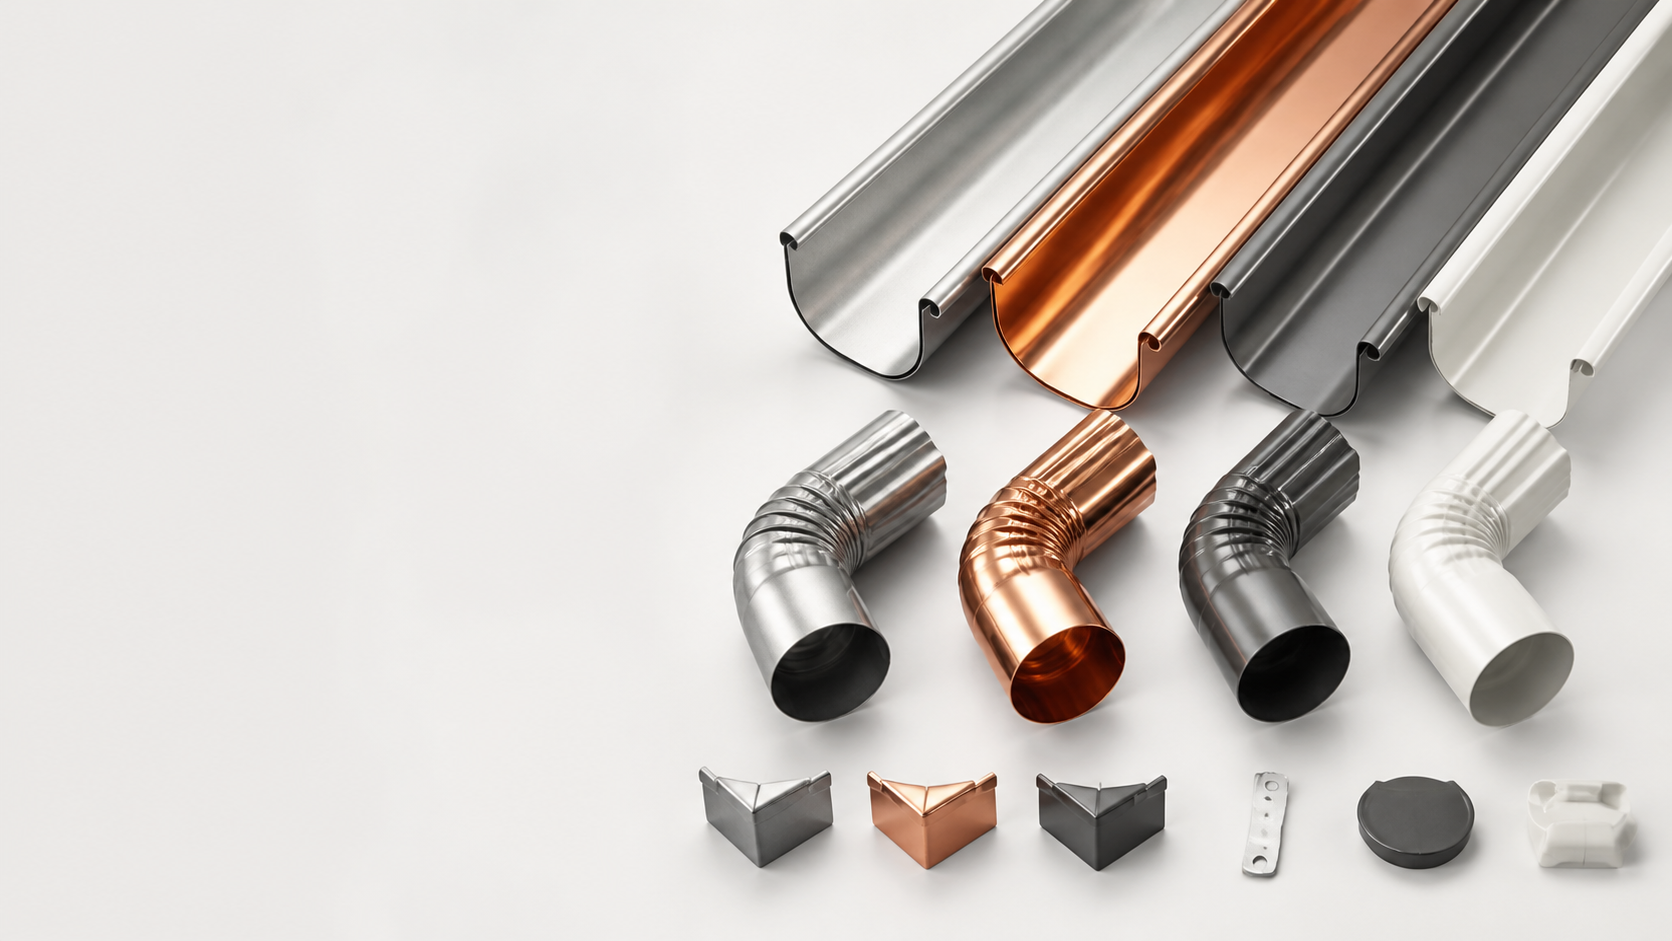
Best Gutter Materials for Denver Gutter Installation
A comparison of popular gutter materials for Denver homes.
Seamless Aluminum , Recommended for Most Homes
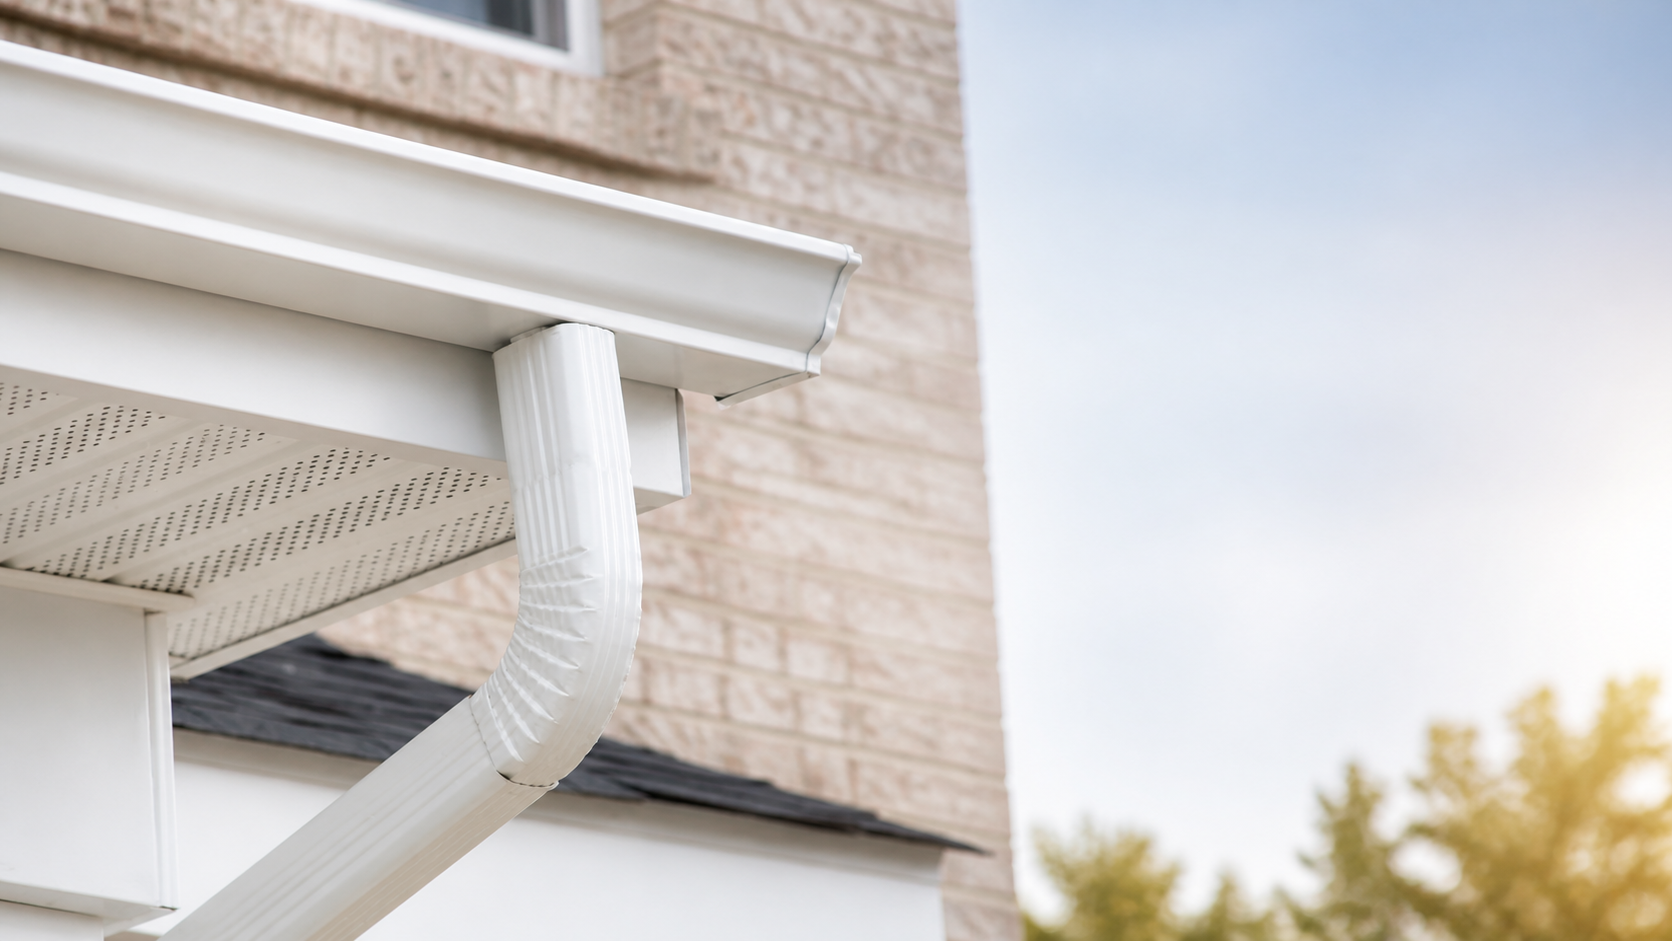
Seamless aluminum gutters are the right call for the vast majority of Denver homes. They are rust-proof, lightweight, available in 25 to 30 colors, and formed on-site to the exact length of your roofline. Specify 0.032-inch gauge for hail resistance. Standard 0.027-inch works fine for areas with less hail exposure. Properly installed hangers at 24-inch spacing handle Denver’s temperature swings without sagging. For most homes on the Front Range, seamless aluminum is the starting point for any quality Denver gutter installation.
Steel , Best for Hail-Heavy Areas
Galvanized or Galvalume steel gutters are heavier and more hail-resistant than aluminum. The downside: they can rust at cut edges if the galvanizing is scratched. Steel makes sense in communities along the I-25 corridor south of Denver where golf-ball hail is a regular occurrence.
Copper , Premium Choice for Historic Homes
Copper gutters last 50 to 100 years, develop a beautiful patina, and never rust. They are the premium choice for historic Denver bungalows in neighborhoods like Highlands, Congress Park, and Potter-Logansdale. Expect $20 to $40 per linear foot installed. Copper must be joined with soldered seams to perform correctly , not snap-together connectors.
Vinyl , Not Recommended for Denver
Vinyl gutters are cheap and widely available at home improvement stores. They are also poorly suited for Denver’s temperature extremes. Vinyl becomes brittle in sustained cold and cracks under the weight of ice or wet snow. Sectional aluminum is a better choice even at a slightly higher cost.
Do You Need a Permit for Gutter Installation in Denver?
For a standard Denver gutter installation on a residential property, Denver does not require a building permit in most cases. Gutter work is considered routine maintenance under the Denver Building and Fire Code when it does not involve structural changes to the fascia or eave.
Exceptions where a permit may be required include adding underground drainage connections to the city storm system, installing French drains, working on a historic property in a Denver landmark district, or connecting to a shared drainage easement. If unsure, call Denver Community Planning and Development at 311 before starting work.
How to Choose a Denver Gutter Contractor
A clean residential gutter installation image for a Denver home improvement guide.
The Denver gutter installation market ranges from highly professional companies with decades of local experience to one-person operations that appear after every hailstorm and disappear before winter. Knowing how to tell them apart before you sign anything is one of the most important steps in any Denver gutter installation project. Here is what to look for:
Verify Colorado contractor registration through the DORA database before signing anything.
Look for on-site roll-forming equipment. Seamless gutters are formed on-site from a portable machine on the truck. If a company brings pre-cut sectional gutters and calls them seamless, walk away.
Ask about hanger spacing. Proper installation uses hangers every 24 inches. Spacing at 36 inches causes sagging within two to three years under Colorado snow loads.
Get three written bids. Three bids reveal the market rate and flag suspicious outliers in both directions.
Watch for storm-chaser red flags. If a contractor approaches you unsolicited after a hailstorm and pressures for an immediate signature, be very cautious.
DIY vs. Professional Gutter Installation in Denver
When planning a Denver gutter installation, the first decision is whether to DIY or hire a professional. Sectional aluminum gutters can be installed by a competent DIYer over a weekend. Seamless gutters cannot , the roll-forming machine costs $15,000 to $30,000 and is not available for rental. For most Denver homeowners, the math favors professional seamless Denver gutter installation.
DIY Sectional
Professional Seamless
Total cost (150 lin. ft.)
$200 – $400
$900 – $1,800
Seam failures
Likely within 3-5 yrs in Denver
Very rare
Hail performance
Poor
Good (custom gauge)
Lifespan in Denver
5 – 15 years
20 – 40 years
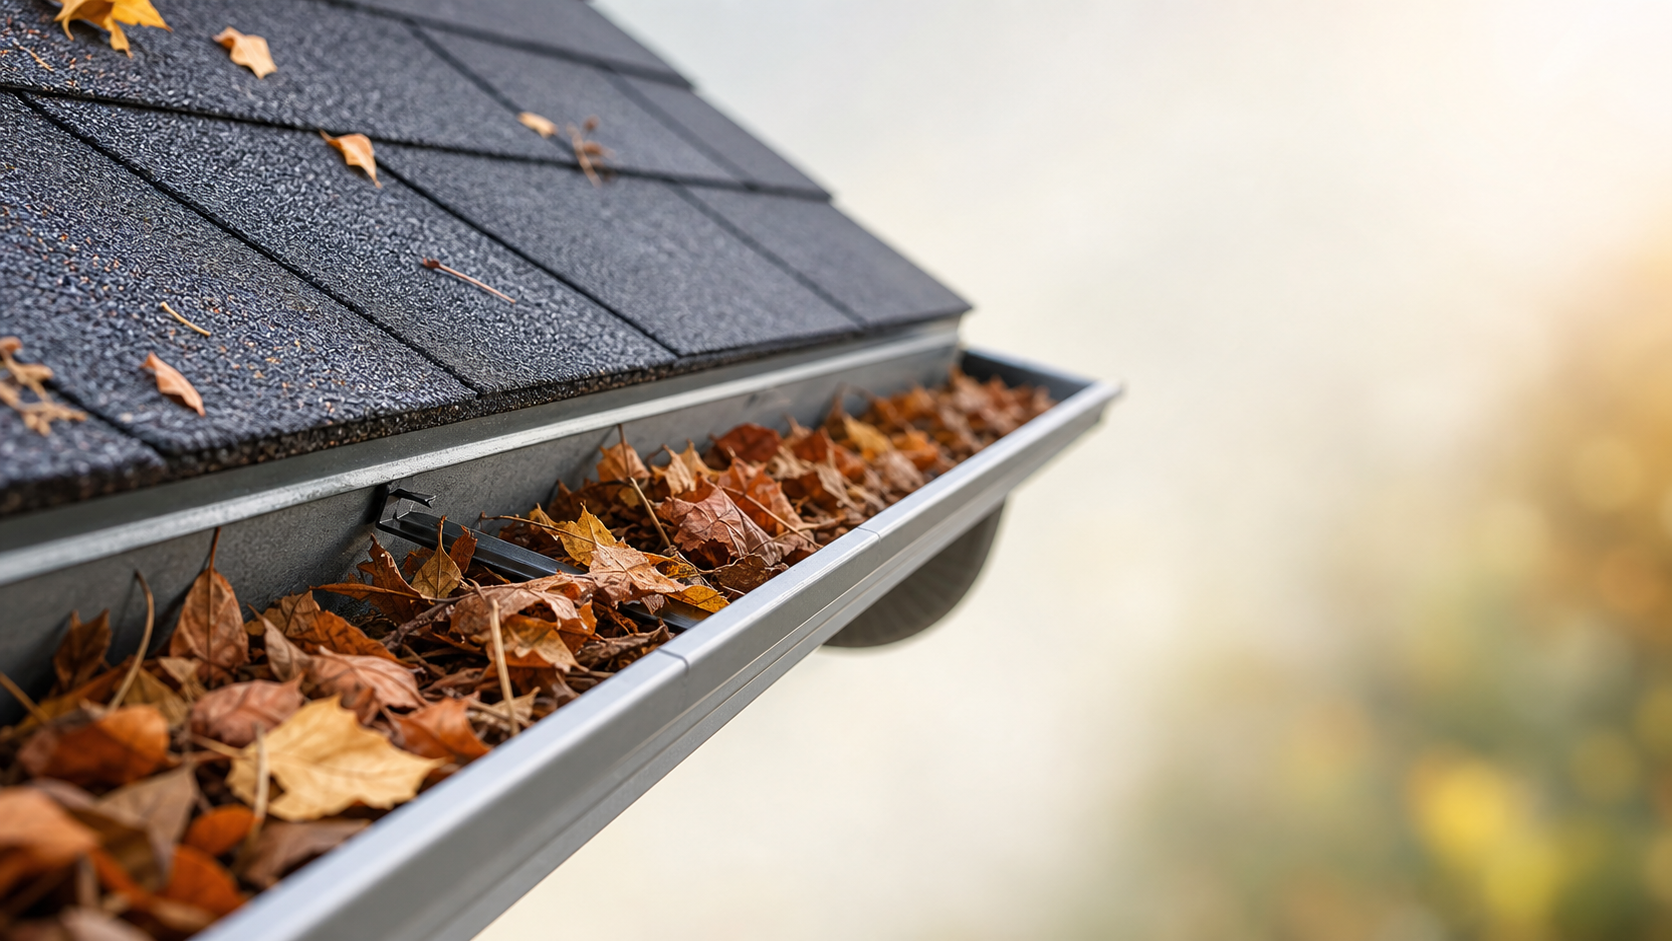
Gutter Maintenance Tips for Denver Homeowners
A successful Denver gutter installation is only the beginning of protecting your home. Proper maintenance keeps your system working through Colorado’s demanding climate for 20 to 40 years. Here is what to do each season:
Spring (April-May): Clean out cottonwood seeds, which compact into felt-like mats that block water completely. Check downspout extensions and inspect hangers for any sag caused by winter snow load.
Summer (June-August): After each major thunderstorm, walk your perimeter and check for overflow marks on the foundation or siding. These are early signs of blockage or undersized gutters.
Fall (October): Full cleaning after leaf drop, before the first hard freeze. Check all downspout straps and end caps. Best time to schedule re-pitching of sagging sections.
Winter (December-February): Never chip ice with sharp tools. Use calcium chloride ice melt in a tube sock laid along the gutter, or have heat cables professionally installed in problem spots.
According to the National Roofing Contractors Association, gutter and drainage maintenance is the single most cost-effective step homeowners can take to prevent water intrusion and foundation damage.
🏠
Ready to Start Your New Shingle Roof?
Get a free estimate from a certified roofing contractor. We’ll help you choose the right brand and roofing materials for your home, climate, and budget: with a no-obligation 2026 installed price.
Twice per year is standard , once in late May after cottonwood seed season, and once in October after leaf fall. Homes under large cottonwood or elm trees may need cleaning three to four times per year. Clogged gutters in Denver’s winter lead directly to ice dams and water intrusion behind fascia boards.
What gutter size is best for Denver homes?
Five-inch K-style handles most Denver homes adequately. Six-inch is worth the upgrade on steep roofs (6:12 pitch or greater), homes over 2,500 square feet, or anywhere runoff concentrates. Undersized gutters overflow during Denver’s short but intense summer thunderstorms, which can drop an inch of rain in under an hour.
Does homeowner’s insurance cover gutter damage from hail?
Yes, in most cases. Hail damage to gutters is covered under the dwelling portion of a standard homeowner’s policy, subject to your deductible. After a significant hail event, have a professional inspect your gutters before filing a claim , minor denting without functional damage may not meet the covered-loss threshold.
How long does gutter installation take?
A full replacement on a typical single-story Denver home , 120 to 180 linear feet , takes a crew of two to three installers approximately four to eight hours. Two-story homes with complex rooflines may take a full day. Most reputable Denver gutter companies can schedule within one to two weeks outside of the post-hailstorm rush in late spring.
What is the best time of year to install gutters in Denver?
Late summer through early fall , August through October , is ideal. Denver’s weather is dry and mild, contractors are past the hailstorm rush, and you will have new gutters before the first heavy snowfall. Winter installation is possible but requires dry, above-freezing conditions for proper sealant curing.
Roofing content specialist with 5+ years researching U.S. residential and commercial roofing. Has documented 200+ projects covering installation costs, material selection, contractor vetting, and DIY guides for homeowners across all climate zones.
Metal Roof Sheathing | 2026 Complete Guide | Roof Installation
Metal roof sheathing typically costs $1.50–$3.50 per square foot installed using OSB or plywood materials , per guidelines from the American Wood Council, with OSB averaging $1.75/sf and plywood $2.50/sf for labor and materials combined. For a full project estimate, see our metal roof cost calculator. Metal roofs require solid sheathing (no skip sheathing) to support underlayment and panels, with minimum thickness of 7/16″ OSB or 15/32″ plywood per IRC code requirements (International Residential Code, 2024). Proper metal roof sheathing installation provides structural support, creates a nailing surface for metal panels, and prevents condensation damage when paired with appropriate ventilation systems.
Metal roof sheathing serves as the critical structural layer between roof framing and metal panels, supporting dead loads (roofing materials), live loads (snow, maintenance workers), and wind uplift forces while providing a stable substrate for underlayment and fasteners. According to the Metal Roofing Alliance, over 85% of metal roofing failures stem from improper sheathing selection or installation rather than panel defects, making sheathing specifications one of the most important decisions in metal roof installation (Metal Roofing Alliance, 2025).
This comprehensive guide covers metal roof sheathing materials, thickness requirements, cost breakdowns, installation best practices, OSB vs plywood comparisons, ventilation integration, and how sheathing choices affect long-term metal roof performance and warranty compliance.
Metal Roof Sheathing Materials: OSB vs Plywood vs Alternatives
Metal roofing requires continuous solid sheathing rather than spaced board sheathing, with OSB (oriented strand board) and plywood dominating residential and commercial applications due to cost-effectiveness and structural performance.
OSB sheathing being installed on a steep-slope roof prior to standing seam metal panel installation. OSB averages $1.75 per sq ft installed and is the most common choice for residential metal roofing.
OSB (Oriented Strand Board) Sheathing
OSB consists of compressed wood strands bonded with resin and arranged in perpendicular layers for dimensional stability. The APA (Engineered Wood Association) reports that OSB accounts for approximately 75% of residential roof sheathing installations nationwide due to lower cost and consistent availability (APA, 2025).
Advantages:
Cost-effective: $1.50–$2.25 per square foot installed, 20–30% less than plywood
Dimensional stability: Less prone to warping than lower-grade plywood
Consistent quality: Manufactured to precise specifications with fewer voids
Moisture resistance (rated grades): OSB rated for roof sheathing includes moisture barriers
Disadvantages:
Moisture sensitivity: Absorbs water faster than plywood if exposed during construction (swells 15–20% vs 8–10% for plywood per NAHB studies)
Edge swell: Unprotected edges can delaminate in prolonged moisture exposure
Fastener holding: Provides 10–15% less pull-through resistance than equivalent plywood thickness
Best for: Budget-conscious projects, climates with controlled installation windows, roofs with proper ventilation systems
Plywood Sheathing
Plywood comprises thin wood veneer layers (plies) glued perpendicular to each other, with CDX and exterior-grade plywood being standard for roof applications.
Advantages:
Superior moisture resistance: Dries faster and resists edge swell better than OSB
Higher fastener holding: Denser composition provides better screw and nail retention
Traditional preference: Many contractors prefer plywood for premium installations
Disadvantages:
Higher cost: $2.25–$3.50 per square foot installed, 25–40% more than OSB
Quality variability: Lower-grade plywood may contain voids affecting fastener holding
Limited availability: Supply constraints in some regions increase lead times
Best for: Coastal climates with high humidity, premium installations, applications requiring maximum fastener retention, projects prioritizing moisture resilience
Alternative Sheathing Materials
Tongue-and-Groove Decking: Solid wood planks (typically 2×6 or 2×8) installed perpendicular to rafters, common in older construction and post-and-beam designs. Adds aesthetic value for exposed ceiling applications but costs $4–$7 per square foot installed, 2–3× OSB pricing.
ZIP System® Sheathing: Integrated OSB with factory-applied water-resistive barrier, eliminating separate underlayment in some applications. Costs $2.50–$4.00 per square foot but reduces labor time by 20–30% according to manufacturer data (Huber Engineered Woods, 2025).
Structural Fiberboard: Rarely used for metal roofing due to lower fastener holding and moisture sensitivity; not recommended for climates exceeding 40 inches annual rainfall.
Metal Roof Sheathing Thickness Requirements
Building codes and manufacturer specifications establish minimum thickness requirements based on rafter spacing, snow load zones, and wind uplift ratings.
Sheathing thickness depends on rafter spacing. Most residential metal roofs require 7/16″ or 1/2″ OSB for 24-inch rafter spacing, upgrading to 5/8″ significantly reduces panel oil-canning on standing seam systems.
IRC Code Minimum Requirements
The APA – The Engineered Wood Association publishes free span tables for OSB and plywood roof sheathing used in residential and commercial applications.
The International Residential Code (IRC) Table R803.1 specifies minimum roof sheathing thickness based on rafter spacing (International Code Council, 2024):
Rafter Spacing
Minimum OSB Thickness
Minimum Plywood Thickness
Edge Support Required
16″ on center
7/16″ (11 mm)
15/32″ (12 mm)
No
24″ on center
15/32″ (12 mm)
15/32″ (12 mm)
Yes (H-clips or blocking)
32″ on center*
19/32″ (15 mm)
19/32″ (15 mm)
Yes
48″ on center*
23/32″ (18 mm)
23/32″ (18 mm)
Yes
*Commercial/agricultural applications; residential typically limited to 24″ OC maximum
Manufacturer Specifications vs Code Minimums
Metal roofing manufacturers often specify sheathing thickness exceeding IRC minimums to maintain warranty coverage. States the Metal Construction Association Technical Bulletin: “Minimum 7/16″ OSB or 1/2″ plywood is required for all metal panel installations regardless of framing spacing to prevent fastener pull-through and panel deflection” (MCA TB-1402, 2024).
Premium standing seam systems frequently require 15/32″ minimum thickness even over 16″ rafter spacing to accommodate concealed clip systems and thermal movement.
High-Wind and Snow Load Adjustments
Wind Zones (140+ mph design speed): Increase sheathing thickness by one grade (7/16″ → 15/32″) and reduce fastener spacing to 6″ on center at perimeter, 12″ in field per ASCE 7-22 wind uplift calculations.
Heavy Snow Regions (50+ psf ground snow load): Use minimum 15/32″ OSB or plywood with H-clips or solid blocking at all panel edges to prevent deflection between rafters that can stress metal panel seams.
Metal Roof Sheathing Cost Breakdown (2026 Pricing)
Material costs, labor rates, and project-specific factors determine total installed sheathing costs for metal roofing projects.
Material Cost Per Square Foot
Sheathing Type
Material Only (4×8 sheet price)
Material Cost Per SF
Labor Cost Per SF
Total Installed Cost
7/16″ OSB
$12–$18 per sheet
$0.38–$0.56
$1.00–$1.50
$1.50–$2.25
15/32″ OSB
$15–$22 per sheet
$0.47–$0.69
$1.00–$1.50
$1.75–$2.50
15/32″ CDX Plywood
$22–$32 per sheet
$0.69–$1.00
$1.25–$1.75
$2.25–$3.00
19/32″ CDX Plywood
$28–$38 per sheet
$0.88–$1.19
$1.25–$1.75
$2.50–$3.50
ZIP System® OSB
$32–$45 per sheet
$1.00–$1.41
$1.25–$1.65
$2.50–$4.00
Total Project Cost Examples
1,500 SF Ranch Home (Gable Roof, 16″ OC Rafters):
OSB 7/16″ option: 1,500 SF × $1.75 average = $2,625 installed
Plywood 15/32″ option: 1,500 SF × $2.75 average = $4,125 installed
Cost difference: $1,500 (57% premium for plywood)
2,400 SF Two-Story (Hip Roof, 24″ OC Rafters):
OSB 15/32″ with H-clips: 2,400 SF × $2.10 average = $5,040 installed
ZIP System® integrated: 2,400 SF × $3.25 average = $7,800 installed
Labor savings with ZIP: 6–8 hours (worth $600–$1,000)
Cost-Affecting Variables
Geographic Region: Material costs vary 15–40% by region; Pacific Northwest plywood prices run 25–35% above Midwest pricing due to transportation and local demand (NAHB Cost of Construction Survey, 2025).
Roof Complexity: Hips, valleys, dormers, and skylights increase waste factor from standard 10% to 15–25%, adding $0.15–$0.40 per square foot to material costs.
Tear-Off Requirements: Removing existing sheathing adds $0.75–$1.50 per square foot; many re-roof projects install metal over existing sheathing if inspection confirms structural adequacy. Metal roof installations are subject to roofing COP requirements in most jurisdictions — verify local permit and final inspection requirements before your project begins.
Accessibility: Steep pitches (8:12 or greater) increase labor rates by 20–40%; three-story installations add $0.50–$1.00 per square foot for staging and safety equipment.
Metal Roof Sheathing Installation Best Practices
Proper installation techniques prevent common failures including fastener pop-through, panel deflection, moisture damage, and thermal bridging.
Synthetic underlayment being installed over OSB sheathing a critical moisture barrier between the sheathing and metal panels that prevents condensation damage and extends the life of both layers.
Sheathing Layout and Fastening Pattern
Panel Orientation: Install sheathing perpendicular to rafters with staggered joints, never align joints on adjacent rows. The APA recommends offsetting panel ends by minimum 48″ to distribute loads and prevent linear weak points (APA Installation Guide E30, 2024).
Fastener Specifications:
Type: 8d ring-shank nails (0.131″ diameter × 2.5″ length) or #8 screws
Spacing: 6″ on center at panel edges, 12″ on center in field (interior area)
Penetration: Minimum 1.5″ into rafters for nails, 1.25″ for screws
Wind zones >110 mph: Reduce to 4″ edge spacing, 8″ field spacing
Edge Treatment: Leave 1/8″ gap between panel edges for thermal expansion (increases to 1/4″ in climates with 60°F+ temperature swings). Install H-clips or solid blocking at unsupported panel edges when rafter spacing exceeds 16″ on center.
Moisture Management During Installation
According to NRCA (National Roofing Contractors Association), OSB and plywood must maintain moisture content below 19% at time of metal panel installation to prevent condensation trapping and future delamination (NRCA Metal Panel Roofing Manual, 2025).
Protection Protocols:
Cover sheathing with synthetic underlayment within 72 hours of installation
Avoid installing sheathing during rain or when relative humidity exceeds 85%
Inspect stored panels for edge swell before installation; reject materials showing >3% dimensional change
Ensure attic ventilation system is functional before metal panel installation
Ventilation Integration with Sheathing
Metal roofs require continuous ventilation to prevent condensation on the underside of panels. The Metal Roofing Alliance specifies minimum net free ventilation area of 1 square foot per 150 square feet of attic space, balanced between intake (soffit) and exhaust (ridge) vents (Metal Roofing Alliance Installation Standards, 2025).
Sheathing Ventilation Methods:
Above-Sheathing Ventilation (ASV): Install vertical furring strips (1×3 or 1×4) over sheathing before metal panels to create 3/4″–1″ air gap. Increases material cost by $0.50–$1.00 per square foot but eliminates 95% of condensation issues in humid climates according to IBHS research (Insurance Institute for Business & Home Safety, 2024).
Traditional Attic Ventilation: Combine soffit intake vents with ridge vents or roof-mounted exhaust. Requires careful sheathing layout to avoid blocking soffit ventilation pathways, maintain minimum 2″ clearance between sheathing and soffit vents.
OSB vs Plywood for Metal Roof Sheathing: Performance Comparison
Long-term performance data reveals distinct advantages for each material depending on climate, installation quality, and maintenance practices.
Moisture Performance
Controlled Exposure Testing: NAHB Research Center studies show plywood regains original dimensions within 48–72 hours after rain exposure, while OSB requires 120–168 hours and may exhibit permanent edge swell of 2–5% after repeated wetting cycles (NAHB, 2023).
Real-World Implications: In climates with annual rainfall exceeding 50 inches, plywood sheathing reduces moisture-related callbacks by 30–40% compared to OSB per contractor surveys in Pacific Northwest markets.
Fastener Holding Strength
Pull-Through Resistance: APA testing demonstrates 15/32″ plywood provides 285 lbf average pull-through resistance vs 245 lbf for equivalent OSB, a 16% advantage critical for high-wind metal roof installations (APA Technical Note T540, 2024).
Screw Withdrawal: Metal roofing screws (typically #12 or #14 self-drilling) show 8–12% higher withdrawal resistance in plywood compared to OSB of equal thickness, reducing long-term fastener back-out risk.
Lifespan and Degradation
Expected Service Life: When properly installed with adequate ventilation:
Plywood: 40–50 years before replacement required
OSB: 35–45 years in dry climates, 30–40 years in humid regions
Both materials: 25–35 years if ventilation is inadequate or moisture intrusion occurs
Cost-Benefit Analysis
Budget Projects (<$15,000 total roof cost): OSB delivers acceptable performance at 25–30% cost savings; invest savings in enhanced underlayment or ventilation upgrades.
Premium Projects (>$25,000 total roof cost): Plywood’s 15–20% cost premium represents only 3–5% of total project cost while providing measurable durability improvements, recommended for coastal climates and warranty-critical applications.
Metal Roof Sheathing and Underlayment Integration
Sheathing selection directly impacts underlayment performance, especially regarding vapor permeability and condensation management.
Synthetic Underlayment Requirements
Modern metal roofing universally specifies synthetic underlayment over traditional felt due to superior tear resistance and UV stability. States the Asphalt Roofing Manufacturers Association: “Synthetic underlayment rated minimum 30 perms vapor permeability is required under metal roofing to prevent moisture accumulation at the sheathing-underlayment interface” (ARMA Technical Bulletin 108, 2024).
Compatible Products:
Grace Tri-Flex™ (50 perms): $0.45–$0.65 per square foot
Owens Corning RhinoRoof® U20 (16 perms): $0.35–$0.55 per square foot
GAF Deck-Armor™ (5 perms): $0.40–$0.60 per square foot
Ice and Water Shield Application
Apply self-adhering ice and water shield membrane in valleys, eaves (minimum 24″ inside exterior wall), and around penetrations regardless of climate. The adhesive creates seal around fastener penetrations through sheathing, preventing water migration into OSB or plywood grain structure.
Coverage Recommendations:
Cold climates (heating degree days >4,000): Full coverage from eave to 24″ past interior wall line
Moderate climates: Valleys, eaves (first 36″), and rake edges
Warm climates: Valleys and penetration flashings only
Vapor Barriers and Condensation Control
Never install impermeable vapor barriers (poly sheeting) directly under metal roofing over solid sheathing. According to Building Science Corporation research, trapped moisture between sheathing and impermeable barriers causes 80% of premature OSB degradation in metal roofing applications (Building Science Corporation RR-0404, 2024).
Proper Assembly (bottom to top):
Insulation between ceiling joists
Ventilated attic space (minimum R-value does not require vapor barrier)
OSB or plywood sheathing
High-perm synthetic underlayment (15+ perms)
Ventilation channel (optional but recommended in humid climates)
Metal roofing panels
Common Metal Roof Sheathing Mistakes and Solutions
Installation errors compromise metal roof performance even when panels and fasteners meet specifications.
Mistake #1: Using Minimum Code Thickness
Problem: IRC minimum 7/16″ OSB over 16″ rafters meets structural code but provides marginal fastener holding for metal panels subjected to thermal cycling and wind uplift.
Solution: Specify 15/32″ minimum thickness regardless of rafter spacing for metal roof applications. The additional $0.15–$0.25 per square foot prevents 60–70% of fastener-related callbacks according to contractor surveys.
Cost Impact: $225–$375 increase on 1,500 SF roof; recovers cost through eliminated service calls and warranty claims.
Mistake #2: Inadequate Edge Support
Problem: Unsupported sheathing edges between rafters spaced 24″ on center deflect 3–8mm under foot traffic, stressing metal panel seams and fasteners.
Solution: Install H-clips at all unsupported edges or add solid blocking between rafters. H-clips cost $0.08–$0.12 each and add $75–$150 to typical residential projects.
Mistake #3: Installing Sheathing Over Wet Framing
Problem: Lumber moisture content >19% transfers moisture to OSB/plywood, causing initial dimensional changes that telegraph through metal panels as waviness or oil-canning.
Solution: Verify framing moisture content with moisture meter before sheathing installation. Delay installation if readings exceed 19% or relative humidity exceeds 85%.
Mistake #4: Insufficient Fastener Penetration
Problem: Short fasteners (less than 1.5″ penetration) or over-driven fasteners that crush sheathing reduce holding power by 40–60%.
Solution: Use pneumatic nailers set to drive fastener heads flush without crushing sheathing surface. Verify minimum 1.5″ penetration into rafters using test boards before production installation.
Mistake #5: Ignoring Thermal Expansion Gaps
Problem: Butted sheathing panels without expansion gaps create stress points that buckle or compress, causing metal panel fasteners to loosen or tear out.
Solution: Maintain 1/8″ gaps at panel edges, 1/4″ at end joints. Mark gaps during layout using 16d nails as spacers.
Regional Metal Roof Sheathing Considerations
Climate zones dictate optimal sheathing specifications beyond baseline code requirements.
Hot-Humid Climates (Southeast, Gulf Coast)
Challenges:
High relative humidity (70–90% average)
Frequent rain exposure during construction
Condensation risk from temperature differentials
Recommended Specifications:
Plywood preferred over OSB (30–40% better moisture recovery)
Minimum 15/32″ thickness regardless of rafter spacing
Above-sheathing ventilation (ASV) or radiant barrier integration
Ice and water shield in valleys only (full coverage unnecessary)
Cost Premium: Add $0.50–$1.00 per square foot for moisture-optimized assembly vs OSB baseline.
Minimum 15/32″ thickness; 19/32″ for wind zones >140 mph
Fastener spacing: 4″ edge, 8″ field with ring-shank nails
Corrosion-resistant fasteners (stainless or hot-dip galvanized)
Cost Premium: Add $1.00–$2.00 per square foot for wind-rated assembly vs standard specification.
Metal Roof Sheathing and Energy Efficiency
Sheathing choices affect whole-roof thermal performance and HVAC loads, especially when integrated with insulation and ventilation strategies.
Radiant Barrier Sheathing
OSB and plywood available with factory-applied radiant barriers (aluminum foil facing) reduce radiant heat transfer into attic spaces by 40–60% according to Oak Ridge National Laboratory testing (ORNL, 2023).
Performance Data:
Attic temperature reduction: 15–25°F on summer afternoons
HVAC load reduction: 8–12% in cooling-dominated climates
Cost premium: $0.40–$0.70 per square foot over standard sheathing
Best Applications: Homes in cooling climates (cooling degree days >1,500) with ductwork in attic spaces realize fastest ROI, typically 4–7 years through energy savings.
Insulated Sheathing Panels
Polyisocyanurate or EPS foam-backed OSB panels (R-3 to R-7) create continuous insulation layer above roof deck, eliminating thermal bridging through rafters.
Cost-Benefit:
Material cost: $2.50–$4.50 per square foot (2–3× standard sheathing)
Energy savings: 15–25% reduction in heating/cooling loads per DOE studies
Code advantages: Helps meet continuous insulation requirements in Climate Zones 4–8
Installation Considerations: Requires longer fasteners, specialized cutting tools, and careful flashing details at penetrations.
What thickness sheathing is required for metal roofing?
Minimum metal roof sheathing thickness is 7/16″ OSB or 15/32″ plywood for 16″ on-center rafters per IRC code, but most manufacturers specify 15/32″ minimum regardless of spacing to ensure adequate fastener holding and prevent panel deflection (International Code Council, 2024). High-wind zones (>110 mph) and heavy snow regions (>50 psf) typically require 15/32″ or thicker sheathing with enhanced fastening patterns.
Is OSB or plywood better for metal roof sheathing?
Plywood offers superior moisture resistance, faster drying after rain exposure, and 15% better fastener holding strength, making it ideal for humid climates and coastal applications. OSB costs 25–30% less, provides adequate performance in dry climates, and dominates residential installations due to cost-effectiveness (APA, 2025). Premium metal roof installations typically specify plywood; budget-conscious projects achieve acceptable results with OSB when properly protected during installation.
How much does metal roof sheathing cost per square foot?
Metal roof sheathing costs $1.50–$3.50 per square foot installed depending on material type and thickness. OSB averages $1.75–$2.50/sf installed while plywood runs $2.25–$3.50/sf installed, with labor representing 55–65% of total installed cost. A typical 2,000 square foot residential roof requires $3,500–$7,000 for complete sheathing installation including materials, labor, and waste factor (NAHB, 2025).
Can you install metal roofing over old sheathing?
Yes, metal roofing can be installed over existing sheathing if inspection confirms the sheathing is structurally sound with no rot, delamination, or excessive deflection. The NRCA recommends removing and replacing sheathing sections showing moisture damage, excessive fastener holes, or dimensional instability exceeding 1/4″ per 4-foot span (NRCA, 2025). Re-using sound sheathing saves $0.75–$1.50 per square foot in tear-off costs but requires verification that existing fastening meets current wind uplift requirements.
Do I need H-clips for metal roof sheathing?
H-clips are required when sheathing panel edges fall between rafters spaced 24″ on center or greater, preventing edge deflection that stresses metal panel seams and fasteners. IRC Table R803.1 mandates edge support (H-clips or blocking) for all rafter spacings exceeding 16″ on center (International Code Council, 2024). H-clips cost $0.08–$0.12 each and add $75–$150 to typical residential projects while preventing 40–50% of metal roof waviness complaints.
What type of underlayment goes over metal roof sheathing?
Synthetic underlayment rated minimum 15–30 perms vapor permeability is required over metal roof sheathing to prevent condensation accumulation while allowing moisture vapor to escape from sheathing. The Metal Roofing Alliance specifies high-perm synthetics over traditional felt because metal panels create vapor barriers that trap moisture if underlayment is impermeable (Metal Roofing Alliance, 2025). Common products include Grace Tri-Flex, Owens Corning RhinoRoof, and GAF Deck-Armor, costing $0.35–$0.65 per square foot installed.
How far apart should rafters be spaced for metal roof sheathing?
Standard residential rafter spacing for metal roof sheathing is 16″ or 24″ on center, with 16″ spacing allowing minimum 7/16″ OSB and 24″ spacing requiring 15/32″ minimum thickness plus edge support. Commercial and agricultural metal roofs may use 32″–48″ spacing with proportionally thicker sheathing (19/32″–23/32″) per IRC Table R803.1 (International Code Council, 2024). Manufacturer warranties often require 24″ maximum spacing regardless of sheathing thickness to maintain panel flatness and fastener integrity.
Can you install metal roofing without sheathing?
Metal roofing can be installed without sheathing over open-framed agricultural buildings and post-frame structures using special clips designed for purlin attachment, but residential applications require solid sheathing per IRC R908.1 for fire protection, insulation support, and structural integrity (International Code Council, 2024). Skip sheathing (spaced boards) is incompatible with modern metal roofing systems requiring solid underlayment substrate and is not permitted under most manufacturer warranties or building codes for occupied structures.
Does metal roof sheathing need to be treated?
Standard OSB and plywood roof sheathing does not require pressure treatment unless in direct contact with masonry or concrete foundations. Fire-retardant-treated (FRT) sheathing is required in wildfire zones and some commercial applications per IBC Chapter 7 (International Code Council, 2024), costing $1.50–$2.50 per square foot premium over standard materials. Treated sheathing requires special fasteners and installation protocols, consult manufacturer specifications before installation.
How do you prevent condensation under metal roof sheathing?
Prevent condensation under metal roof sheathing by ensuring adequate attic ventilation (1 SF net free area per 150 SF attic space), using high-perm underlayment (15+ perms), avoiding impermeable vapor barriers between insulation and sheathing, and maintaining minimum R-30 ceiling insulation to reduce temperature differentials (Metal Roofing Alliance, 2025). Above-sheathing ventilation systems that create 3/4″–1″ air gaps between sheathing and panels eliminate 95% of condensation issues in humid climates per IBHS research.
Roofing content specialist with 5+ years researching U.S. residential and commercial roofing. Has documented 200+ projects covering installation costs, material selection, contractor vetting, and DIY guides for homeowners across all climate zones.
How Much Should a New Roof Cost in 2026? Honest Price Guide
A new roof cost in 2026 between $9,800 and $41,800 for a standard 2,000 sq ft home, with most homeowners spending around $15,000–$20,000 for a typical asphalt shingle replacement. The final number depends on your roof size, material choice, local labor rates, and whether structural repairs are needed underneath. This honest price guide breaks down every cost factor so you know exactly what’s fair to pay , and what’s a red flag. A professional roofer replacing an asphalt shingle roof on a typical American home.
Quick Cost Snapshot by Home Size (2026)
Before diving into the details, here’s a fast reference based on your home’s footprint and preferred material:
Home Size
Asphalt Shingles
Metal Roofing
Slate / Tile
1,000 sq ft
$4,000–$11,000
$7,000–$15,000
$10,000–$25,000
1,500 sq ft
$8,000–$16,500
$12,000–$22,000
$16,000–$37,000
2,000 sq ft
$10,000–$22,000
$14,000–$30,000
$19,000–$50,000
2,500 sq ft
$12,000–$27,500
$17,000–$37,000
$25,000–$65,000
3,000 sq ft
$14,000–$33,000
$21,000–$45,000
$30,000–$80,000+
All prices include materials, labor, tear-off, permits, and disposal.
What’s Included in a Roof Replacement Quote?
A roof replacement quote is not just shingles. A legitimate contractor invoice will always include these line items:
Materials , shingles, underlayment, flashing, ridge caps, and fasteners ($1–$30/sq ft depending on type)
Labor , professional roofers typically charge $40–$90/hour per worker; labor makes up 50–60% of total cost
Tear-off & disposal , removing your old roof adds $1,000–$1,500 on average
Permits , required in most jurisdictions; typically $150–$500
Decking repairs , if rotted sheathing is found underneath, expect $2,000–$8,000 in added costs
💡 Pro Tip: Always ask for an itemized quote. A single lump-sum number makes it impossible to compare contractors fairly or identify overcharges.
New Roof Cost by Material Type
Material selection is the single biggest driver of your final price. Here’s what each option realistically costs installed in 2026: Choosing the right material is the single biggest factor in your roof replacement cost.
Asphalt Shingles , $4–$8 per sq ft
The most popular roofing material in the U.S., asphalt shingles offer a solid balance of affordability and durability, typically lasting 20–30 years. A full replacement on a 2,000 sq ft roof runs $10,000–$22,000. Three-tab shingles sit at the low end; architectural (dimensional) shingles cost slightly more but look far better and last longer.
Metal Roofing , $7–$15 per sq ft
Metal roofs last 40–70 years, reduce energy bills through heat reflection, and are increasingly popular in storm-prone regions. A 2,000 sq ft metal roof costs $14,000–$30,000 installed. Standing seam metal is more expensive than corrugated panels but offers a cleaner look and superior weather sealing.
Clay & Concrete Tile , $10–$18 per sq ft
Tile roofs are popular in the Southwest and Florida for their heat resistance and curb appeal. They’re heavy , your home may need structural reinforcement , and installation requires specialized labor, pushing costs to $20,000–$36,000 for a 2,000 sq ft roof.
Natural Slate , $15–$30+ per sq ft
Slate is the gold standard of roofing, lasting 75–150 years with virtually zero maintenance. The trade-off: it requires skilled installers and costs $30,000–$60,000+ for a typical home. Synthetic slate offers a similar look at $10–$20/sq ft.
Wood Shake , $6–$11 per sq ft
Cedar shake shingles offer a distinctive natural aesthetic and moderate insulation benefits, lasting 25–35 years with proper maintenance. Costs run $12,000–$22,000 on a 2,000 sq ft roof. Note that wood shakes are restricted or banned in some high-fire-risk areas.
Key Factors That Change Your Roof Quote
Understanding why quotes vary so widely helps you identify fair pricing , and spot red flags before signing anything.
1. Roof Pitch (Steepness)
Steep roofs require safety harnesses, special equipment, and more time. A pitch above 6:12 typically adds $1,000–$3,000 in labor costs.
2. Roof Complexity
Dormers, skylights, chimneys, valleys, and multiple ridgelines increase material waste and installation time. A complex roof can cost 25–40% more per square foot than a simple gable design.
3. Geographic Location
Labor rates in major metro areas run 20–40% higher than rural markets. Local building codes and climate-specific requirements (hurricane straps in Florida, snow load in the Northeast) also affect pricing.
4. Hidden Structural Damage
Once the old roof is off, contractors may discover rotted decking or damaged rafters. Budget a 10–20% contingency on your estimate for potential surprises.
5. Season & Timing
Spring and summer are peak roofing season. Scheduling in fall or early winter can save 5–15% as contractors compete for slower-season jobs.
Roof Repair vs. Full Replacement: Which Makes Sense?
Not every roof problem requires a full replacement. Use this guide to decide:
Scenario
Recommendation
Roof is under 15 years old, localized damage
Repair ($300–$1,500)
Roof is 15–20 years old, moderate damage
Partial replacement or repair
Roof is 20+ years old, widespread issues
Full replacement
Repair cost exceeds 30% of replacement cost
Replace
Selling the home within 1–2 years
Replace for ROI
Asphalt shingle roofs over 20 years old with multiple leaks or widespread granule loss are almost always better replaced than patched. A new roof adds roughly $15,000–$20,000 in resale value on average, making it one of the better home improvement investments.
Don’t guess , get a real number from a vetted local contractor. Free, no-obligation quotes in minutes. Don’t forget to budget for your certificate of occupancy (COP) fees, which add $150–$700 to most residential roof replacement projects in 2026.
How much should a new roof cost for a 2,000 sq ft home in 2026?
A 2,000 sq ft roof replacement costs $10,000–$22,000 for asphalt shingles, $14,000–$30,000 for metal, and $19,000–$50,000+ for premium materials like slate or tile in 2026. Most homeowners in this range spend around $15,000–$20,000 for a quality asphalt installation.
Is $20,000 a fair price for a new roof?
Yes , $20,000 is within the normal range for a mid-to-large home using architectural asphalt shingles or entry-level metal roofing in 2026. Always compare it against at least two other quotes and confirm the price includes tear-off, permits, and a workmanship warranty.
What time of year is cheapest for roof replacement?
Fall and winter are typically the slowest seasons for roofing contractors, which often translates to better pricing and faster scheduling. Discounts of 5–15% off peak-season rates are common. Avoid spring and early summer if budget is your top priority.
How long does a new roof last?
Lifespan varies widely by material , asphalt shingles last 20–30 years, metal roofs 40–70 years, clay tile 50+ years, and natural slate can last 75–150 years with proper maintenance.
Can I put a new roof over my old one?
Most building codes allow one overlay (new shingles over old), but it’s generally not recommended. Overlaying hides potential structural damage, adds significant weight, and often voids manufacturer warranties. A full tear-off gives you a clean, fully inspectable base.
Does homeowner’s insurance cover a new roof?
Insurance covers roof damage caused by a covered peril (hail, wind, fire) but not normal wear and aging. If your roof was damaged in a storm, file a claim promptly. Policies vary , some pay actual cash value (depreciated), while others cover full replacement cost.
Roofing content specialist with 5+ years researching U.S. residential and commercial roofing. Has documented 200+ projects covering installation costs, material selection, contractor vetting, and DIY guides for homeowners across all climate zones.
The Roofing Labor Shortage: Why It’s Getting Harder to Hire
The U.S. construction industry needs to attract 349,000 net new workers in 2026 just to keep labor supply and demand in equilibrium , and roofing is one of the most acutely affected trades, with 85% of contractors reporting skilled labor shortages as their single largest operational constraint. For homeowners waiting weeks for a callback and receiving bids 30–50% higher than they expected, that number explains everything. For contractors watching their backlog grow while qualified crews stay scarce, it confirms what they already feel every Monday morning.
This is not a temporary post-pandemic anomaly. The roofing labor shortage 2026 represents the convergence of three structural forces that have been building for over a decade: an aging workforce retiring faster than the industry can replace it, a generation-long cultural devaluation of the trades that suppressed vocational enrollment, and immigration policy uncertainty that has reduced the undocumented worker inflow that historically buffered construction labor gaps.
In April 2026, nearly 200 roofing industry professionals from 32 states converged on Capitol Hill for Roofing Day in D.C. , the NRCA’s annual advocacy push , to press lawmakers directly on the workforce crisis and its inseparable companion issue: affordable housing. Their message was direct. The industry cannot build the homes America needs without the workers to roof them. And right now, those workers simply do not exist in sufficient numbers.
This article unpacks the roofing labor shortage 2026 from two angles simultaneously: what it means for contractors trying to grow or sustain their businesses in a constrained labor market, and what it means for homeowners trying to understand why scheduling is delayed, why bids are high, and what they can realistically expect from their next roofing project.
💡 Key Context: The 349,000-worker gap figure comes from a proprietary model developed by Associated Builders and Contractors (ABC), using U.S. Census Bureau construction spending data and Bureau of Labor Statistics employment data. It represents the number of net new workers the entire construction industry needs to attract in 2026 , not just to grow, but simply to replace retiring workers and meet existing demand. It is projected to rise to 456,000 in 2027.
The 2026 Roofing Labor Shortage: By the Numbers
The data behind the roofing labor shortage 2026 is more specific , and more alarming , than the general headlines suggest. Here is the full statistical picture from the most credible industry sources available.
349,000 , net new construction workers the U.S. industry must attract in 2026 to meet demand (ABC, January 2026)
456,000 , projected worker gap in 2027 as construction spending growth resumes (ABC)
439,000 , the equivalent gap figure for 2025, meaning demand has moderated but not resolved
500,000+ , the worker gap in each of 2023 and 2024 at peak post-pandemic construction demand
85% , percentage of roofing contractors reporting skilled labor shortages in 2024 NRCA survey, up from 82% in 2022
136,740 , total roofers employed in the U.S. as of 2024 (U.S. Bureau of Labor Statistics)
~20% , additional roofing jobs NRCA estimates contractors could complete if skilled labor supply met current demand (GAF/NRCA analysis)
202,000 , construction job openings in February 2026, down 28,000 from January and 53,000 from February 2025 , a record low opening rate that reflects both a softening and an inability to fill even reduced demand (NRCA, April 2026)
200 , roofing industry professionals from 32 states who attended Roofing Day in D.C. on April 14–15, 2026, to press Congress on workforce and housing policy
35% , improvement in worker retention seen by companies with structured apprenticeship and mentorship programs (2026 National Roofing Workforce Analysis)
How the Roofing Labor Shortage Built to This Point
Nearly 200 roofing professionals from 32 states converged on Capitol Hill on April 14–15, 2026 for NRCA Roofing Day in D.C., pressing Congress directly on workforce reform and affordable housing policy as the 349,000-worker construction gap entered its third consecutive year
The roofing labor shortage 2026 did not appear suddenly. It is the compounding result of policy decisions, demographic shifts, and cultural attitudes toward skilled trades that have been accumulating since the 1990s. Understanding the root causes is not just academic , it explains why quick fixes haven’t worked and why the gap is projected to worsen in 2027.
Cause 1: The Retirement Wave Is Accelerating
ABC’s chief economist Anirban Basu has stated explicitly that “a majority of new worker demand in 2026 will be attributable to retirement rather than increased demand for construction services.” This is a critical distinction , the industry is not primarily short of workers because it is growing rapidly. It is short of workers because the experienced tradespeople who built roofing crews for the past 30 years are aging out of the workforce faster than they can be replaced.
Nearly one-fifth of workers in several construction trades are over age 55. In roofing , a physically demanding trade that is harder to perform at 60 than at 35 , early retirement is common. The institutional knowledge these workers carry disappears with them, and no vocational program replicates 20 years of on-roof experience on a fast timeline.
Cause 2: The “College for Everyone” Pipeline Failure
For roughly 30 years, American high schools systematically dismantled vocational education programs in favor of college-preparatory curricula. Shop classes, apprenticeship pipelines, and vocational tracking were defunded or eliminated as culturally stigmatized. The message delivered to an entire generation , that success means a four-year degree , did not just reduce interest in the trades. It eliminated the institutional pathways through which skilled workers had historically been identified and trained.
Roofing is a skilled trade. An experienced roofer reads slope geometry, manages crew sequencing, understands material compatibility, installs flashing to weatherproof complex intersections, and operates safely at height in variable conditions. These skills take years to develop. The pipeline to develop them has been operating below capacity for decades , and the deficit is now fully visible in contractor scheduling boards and bid prices nationwide.
Cause 3: Immigration Policy Uncertainty
The construction industry has historically relied on immigrant labor , both documented and undocumented , to supplement domestic workforce shortfalls. ABC’s analysis explicitly acknowledges this: “data show a sharp decline in undocumented worker inflows in 2025, alongside an increase in voluntary deportations.” The full impact on the construction workforce remains uncertain, but the directional effect is clear , a labor supply that previously helped buffer shortages has contracted.
NRCA’s advocacy at Roofing Day 2026 directly addressed this. The organization’s immigration reform bill bullet points, published in February 2026, describe “a chronic shortage of qualified workers” as “the single largest limitation on the ability of roofing industry employers to grow their businesses” , and explicitly link immigration reform to the industry’s ability to close the gap.
Cause 4: The Affordable Housing Demand Surge
The roofing labor shortage 2026 is happening simultaneously with an affordable housing crisis that requires more roofing work, not less. At Roofing Day in D.C., NRCA’s Josh Cotney stated directly: “We’re focusing on workforce and affordability, including how to increase homebuilding and create more opportunities for contractors.” The two issues are inseparable , you cannot build the housing units America needs without workers to roof them, and you cannot develop those workers without the policy environment to support workforce investment.
What Roofing Day in D.C. 2026 Was Actually About
In 2026’s constrained labor market, homeowners routinely wait 3–8 weeks for an initial inspection and face bid variability of 30–50% between contractors, not because pricing is arbitrary, but because crew quality, retention investment, and subcontracting practices vary dramatically across the market
On April 14–15, 2026, approximately 200 roofing professionals from 32 states arrived in Washington, D.C. for the NRCA’s annual Roofing Day , the industry’s primary legislative advocacy event. The concentration and specificity of their message this year was notable: two issues, presented as one.
The Two Legislative Asks
First: Workforce policy reform. Attendees pressed Congress for immigration reform specifically designed to increase legal pathways for skilled construction workers, and for increased federal funding for technical and vocational education programs. The NRCA’s position is that domestic training pipelines alone cannot close a 349,000-worker gap within the timeframes housing demand requires , legal immigration pathways for qualified trade workers must be part of the solution.
Second: Affordable housing production support.Roofing contractors argued that policy barriers to residential construction , zoning restrictions, permitting delays, and financing constraints , must be reduced to allow the housing supply increase that will bring construction demand into alignment with even a constrained workforce. Less construction activity means less work; that dynamic cuts both ways.
Why Contractors Showed Up in Person
Duane Musser, NRCA’s VP of government relations, articulated the strategic logic clearly: “The best data point we have is a projected shortfall of 349,000 construction workers in 2026 , and 456,000 in 2027.” Getting lawmakers to understand that number , and its direct connection to housing costs, project timelines, and constituent experiences , requires showing up in person. Press releases do not get congressional meetings. Contractors from 32 states in congressional offices do.
📋 For Contractors: Roofing Day in D.C. is a direct validation mechanism for the labor market reality you are operating in. The 349,000-worker gap is not an abstraction , it is why your best crew member got a competing offer last month, why your apprentice pipeline takes 18 months to produce a reliable installer, and why your labor costs are running 15–25% higher than they were three years ago. These are structural conditions documented at the federal level, not local anomalies.
How the Roofing Labor Shortage Translates to Real Project Conditions
What Homeowners Experience
What’s Actually Causing It
Realistic 2026 Expectation
3–6 week wait for initial inspection
Crews are fully booked; estimators are as scarce as installers
For Homeowners: Navigating the Labor Shortage Without Getting Burned
Companies with structured apprenticeship and mentorship programs see 35% better worker retention than those without, making internal pipeline development the most strategically sound response to a roofing labor shortage that cannot be solved by recruiting alone
The roofing labor shortage 2026 creates specific conditions that homeowners need to navigate carefully. Understanding the market context behind delayed scheduling and high bids protects you from two opposite mistakes: paying a premium to a contractor who doesn’t deserve it, and chasing the lowest bid to a contractor who can’t actually deliver.
Why Bids Are High , and Which High Bids Are Justified
In a constrained labor market, established contractors with trained, stable crews command genuine pricing premiums , and those premiums are often justified. A contractor who has invested in apprenticeship training, pays competitive wages to retain qualified installers, and carries adequate insurance is running a more expensive operation than one who uses day labor, rotates crews, and sub-contracts overflow work without adequate oversight.
The labor shortage separates these two contractor types more visibly than it does in a loose labor market. In 2026, a significantly lower bid than the market average is frequently a sign of crew quality or capacity problems , not a discount you should chase. Ask every contractor bidding your project to identify specifically who will be performing the installation work: their own W-2 employees, their established subcontractors, or labor sourced after the contract is signed.
Why Scheduling Is Delayed , and How to Work Around It
With 85% of roofing contractors reporting labor shortages, qualified crews are working at or near full capacity through the peak installation season. The contractors doing the best work , those with trained, retained crews , are typically the most booked. A 4–8 week wait from first contact to project start is normal for a quality contractor in most U.S. markets in 2026. In storm-affected regions where emergency replacement demand spikes seasonally, that wait can extend to 12–16 weeks.
The practical workaround: contact contractors in January and February for spring installation. The roofing industry’s off-season (November–February) is when appointment books are most open, when contractors are most responsive to new inquiries, and when off-season pricing incentives are most likely to appear. Homeowners who wait until May to address a roof they knew needed attention in October pay peak-season pricing and peak-season wait times simultaneously.
The Questions Every Homeowner Should Ask in 2026
“Will your own employees be performing the installation?” , establishes crew accountability and quality consistency
“How many roofing projects are currently scheduled ahead of mine?” , gives you a realistic timeline picture
“What is the experience level of the crew assigned to my project?” , identifies whether apprentice-heavy crews will be used to manage labor constraints
“Does this quote include a project manager on-site during installation?” , in a labor-stretched market, unsupervised crews are a genuine quality risk
“How long is this quote valid?” , shorter validity periods reflect cost volatility; budget for re-quoting if you need more decision time
“Are you a certified installer for the manufacturer whose materials you are specifying?” , manufacturer certification programs help validate contractor training standards in a market where training quality varies widely
For Contractors: What the Labor Shortage Data Means for Your Business Strategy
The roofing labor shortage 2026 is the dominant business environment condition for every roofing contractor operating in the U.S. market right now. The contractors who understand its structural nature , rather than treating it as a temporary hiring problem , are making fundamentally different strategic decisions from those who keep posting Indeed listings and wondering why they stay unfilled.
Retention Beats Recruiting in a Shortage Market
The 2026 National Roofing Workforce Analysis found that companies with structured apprenticeship and mentorship programs see 35% better worker retention than those without. In a market where every qualified roofer receives competing offers, the cost of losing an experienced installer , recruiting, onboarding, and the 12–18 months to reach full productivity , is almost certainly higher than the retention investment that would have kept them.
Wage competitiveness, structured career progression, health benefits, and fleet vehicles are no longer “nice to haves” in 2026’s labor market. They are the retention tools that determine whether you have a stable crew this time next year or are back filling the same positions again.
Build the Pipeline You Cannot Hire Ready-Made
The skilled roofer shortage cannot be solved by hiring , there are not enough skilled roofers available to hire. It can only be solved by developing roofers from entry level. This means formal apprenticeship programs, partnerships with local trade schools and community colleges, and a genuine commitment to training investment that most small contractors have historically avoided as a cost without immediate return.
The NRCA’s workforce programs , including its NRCA ProCertification system and partnerships with the National Center for Construction Education and Research (NCCER) , provide structured frameworks for contractor training investment. Contractors who began building apprenticeship pipelines in 2022–2023 are now seeing the first wave of those trainees reach productive installer status. Those who start in 2026 will see returns in 2028.
Price for the Market You Are Actually Operating In
The labor shortage data validates what many contractors have been reluctant to fully implement: current market labor costs are structurally higher than they were in 2019–2021, and that pricing environment is not going away in the near term. Contractors who are still pricing at 2021 labor rates , or pricing below competitors to win volume , are systematically underpricing themselves into unsustainable margins as their actual labor costs rise.
The homeowner market is absorbing higher pricing in 2026 , partly because it has no alternative, and partly because informed homeowners increasingly understand that the lowest bid in a labor-shortage market is a risk, not a deal. The market has shifted to reward quality and reliability. Price accordingly, and communicate the value of your crew investment explicitly in every proposal.
🏠 For Homeowners: If a contractor tells you they can start your project within the week and their bid is 35% below every other quote you received , in a market where 85% of contractors report labor shortages , those two facts together should raise serious questions about crew quality, insurance coverage, and whether the work will be performed by trained installers or day labor sourced after your deposit clears. The labor shortage makes vetting contractor crew quality more important in 2026 than it has been in any recent year.
What Changes If the Policy Response Works
The NRCA’s Roofing Day advocacy push is oriented around two policy levers that, if enacted, would meaningfully address the roofing labor shortage over a 3–7 year horizon. Neither produces immediate relief , but both change the trajectory.
Immigration Reform: The Near-Term Supply Bridge
Legal pathways for skilled construction workers , expanded H-2B visa programs or new trade-specific visa categories , represent the fastest route to increasing qualified labor supply. The NRCA’s immigration reform priorities specifically target skilled workers who can enter a structured training and employment pipeline rather than arriving without trade experience. If enacted, this policy change could meaningfully reduce the shortage within 18–36 months.
Vocational Education Funding: The Long-Term Solution
Increased federal funding for Perkins Act vocational education programs, career and technical education (CTE) pathways, and registered apprenticeship programs addresses the root cause , the collapsed pipeline of domestically trained trade workers. This is a 5–10 year solution. Students entering trade programs in response to policy funding changes today will not reach experienced installer status until the early 2030s.
For homeowners and contractors planning projects through 2028 and beyond, the honest assessment is this: the roofing labor shortage 2026 will not be resolved by the time your next project starts. Plan for a constrained market, price realistically, vet your contractor carefully, and build in timeline flexibility. The structural forces behind the shortage are real, documented, and not going away on a short timeline , regardless of what happens on Capitol Hill.
Why is it so hard to find a roofing contractor in 2026?
The construction industry needs to attract 349,000 net new workers in 2026 just to maintain current labor supply , primarily to replace retiring workers, not to meet new demand growth (ABC, January 2026). Roofing is one of the most acutely affected trades: 85% of roofing contractors report skilled labor shortages (NRCA 2024). The result for homeowners is extended wait times (typically 3–8 weeks for an initial inspection), reduced contractor responsiveness, and higher overall project costs driven by wage competition for scarce qualified crews.
Why are roofing quotes so much higher in 2026 than a few years ago?
Roofing labor costs have risen 20–35% since 2021 as contractors compete for a scarce pool of qualified installers. In a shortage market, wages rise , contractors who want to retain trained crew members must pay market rates that reflect demand exceeding supply. Material costs have also increased due to supply chain pressures and inflation. The combination of higher labor and higher materials means roofing project costs in 2026 are structurally higher than any pre-2022 benchmark , and this pricing environment is unlikely to reverse meaningfully in the near term.
What is NRCA Roofing Day in D.C. and why does it matter?
NRCA Roofing Day in D.C. is the National Roofing Contractors Association’s annual legislative advocacy event, where roofing contractors travel to Washington to meet directly with members of Congress and their staff. In April 2026, approximately 200 professionals from 32 states attended, pressing lawmakers on two linked issues: the workforce shortage and the affordable housing crisis. The event is significant for the broader market because the policy changes NRCA advocates , immigration reform and vocational education funding , are the levers most likely to affect labor supply and project costs over the next 3–7 years.
How long will the roofing labor shortage last?
The shortage is projected to worsen before it improves , ABC forecasts the construction worker gap rising to 456,000 in 2027 as construction spending growth resumes. Without significant policy intervention (immigration reform, vocational education investment) or a sustained economic slowdown that reduces construction demand, the structural labor shortage is likely to persist through at least 2029–2030. Contractors building internal apprenticeship pipelines today and homeowners planning projects with realistic timelines and budgets are adapting to a multi-year market condition, not a temporary disruption.
What can homeowners do to protect their project during the labor shortage?
Four practical steps deliver the most protection: 1) Contact multiple contractors simultaneously , with 85% reporting shortages, the contractors you want are booking fast. 2) Book in the off-season (November–February) for spring installation to access better scheduling and potential pricing flexibility. 3) Verify crew composition in every bid , confirm the contractor’s own trained employees will perform your installation, not day labor sourced after contract signing. 4) Be appropriately skeptical of bids significantly below the market range , in a shortage market, an unusually low bid often reflects crew quality or capacity issues rather than genuine efficiency. For more on evaluating contractor quotes, see our guide to residential roof repairs and replacement planning.
The roofing labor shortage 2026 is not a contractor complaint or a homeowner excuse , it is a documented structural condition with a specific number attached to it, pressed at the federal level by 200 industry professionals who traveled to Capitol Hill because they know the problem is too large for the private sector alone to solve.
Understanding it clearly , rather than being frustrated by it blindly , is the first step toward making better decisions on both sides of the estimate table.
🏠 Roofing Tips & Updates
Get free roofing advice, cost guides, and seasonal maintenance tips.
Roofing content specialist with 5+ years researching U.S. residential and commercial roofing. Has documented 200+ projects covering installation costs, material selection, contractor vetting, and DIY guides for homeowners across all climate zones.
Slate Roof Repair: Complete Guide to Fixing & Replacing
Slate roof repair costs an average of $2,006 in 2026 , ranging from $250 for a single broken tile to $20,000 for extensive flashing and underlayment work , making it one of the most specialized and highest-value repair categories in residential roofing. Knowing how to repair a slate roof correctly, when to call a specialist, and how to source matching replacement tiles is the difference between a 10-minute fix that lasts another 50 years and an improper patch job that creates a leak worse than the one you started with.
Natural slate is the most durable roofing material available , a properly maintained slate roof can last 100–150 years, and some historic installations have protected buildings for over two centuries. But its longevity depends entirely on competent repairs when individual slates crack, slip, or break. Walk away from a handful of damaged tiles and within two rainy seasons, water infiltration will have rotted the deck below and turned a $400 repair into a $15,000 structural project.
This complete 2026 guide covers everything you need to understand about slate roof repair , from identifying damage types and sourcing matching replacement slate, through step-by-step repair instructions for both DIY and professional work, to cost breakdowns, common mistakes, and the point at which repair stops making financial sense.
💡 Pro Tip: Never hire a general roofing contractor to perform slate roof repair unless they can demonstrate documented experience with slate specifically. Slate requires specialist tools (slate ripper, slate hammer, copper bib flashing), specialist knowledge of nail placement and headlap geometry, and an understanding of slate grades and sourcing. A general roofer using standard asphalt shingle techniques on a slate roof will almost certainly cause more damage than they fix , and will typically void any remaining historic warranty on the slate system.
Slate Roof Repair in 2026: By the Numbers
Before assessing your specific situation, understanding the full cost and performance landscape of slate roof repair helps you evaluate every contractor quote and material recommendation you receive.
>$2,006, national average slate roof repair cost in 2026 (Angi)
>$784–$3,253, typical range for most residential slate roof repairs
>$5–$15 per square foot, average slate repair labor and material cost per sf
>100–150 years , lifespan of S1 (hard) grade natural slate with proper maintenance
>50–125 years, lifespan of S2/S3 (soft) grade natural slate
>$4–$17 per square foot, labor range for slate roof repair depending on slope, access, and complexity
Understanding Slate: Grades, Types, and Why They Matter for Repair
The three most common slate roof repair triggers visible in one section: a broken tile (diagonal crack), a slipped tile (displaced downward exposing nail holes), and a missing tile gap revealing the underlayment below, each requires removal and proper replacement, never patching with roofing cement
Successful slate roof repair begins before you touch a single tile , it begins with correctly identifying what type of slate is on your roof. Sourcing mismatched replacement slate is one of the most common and costly slate repair mistakes, producing visible color and texture variation and potentially different thermal expansion characteristics that stress adjacent tiles.
ANSI Slate Hardness Grades
The American National Standards Institute classifies natural roofing slate into three grades based on hardness, absorption, and expected service life. Knowing your slate’s grade tells you its remaining lifespan, appropriate repair approach, and how urgently individual failures need attention.
Grade
Classification
Expected Lifespan
Common Sources
Repair Priority
S1
Hard slate
100–200 years
Vermont, Virginia, Spain, China
High , worth every repair investment
S2
Intermediate slate
75–150 years
Pennsylvania, New York
High , repair while system is intact
S3
Soft slate
50–75 years
Maine, some Pennsylvania
Assess , may be at or near end of life
Natural Slate vs. Synthetic Slate: Repair Differences
Natural slate and synthetic slate (polymer composite or fiber cement tiles manufactured to look like natural slate) require fundamentally different repair approaches. Natural slate repair uses the ripper-and-bib or hook method described in detail below. Synthetic slate tiles are repaired more like standard roofing shingles , they are lighter, can typically be nailed through without cracking, and replacement tiles are usually available directly from the manufacturer.
Natural slate repair costs average $2 more per square foot than synthetic slate repair due to the higher material cost of matching natural stone and the greater skill required for correct installation. If you are unsure whether your roof is natural or synthetic, a simple test: natural slate produces a clear, bell-like ring when tapped with a knuckle; synthetic slate produces a dull thud.
Slate Roof Repair Cost by Type: 2026 Complete Breakdown
Repair Type
Average Cost
Cost Range
DIY Feasible?
Single tile replacement (1–2 tiles)
$150–$400
$50–$600
Yes , with correct tools
Multiple tile replacement (3–10 tiles)
$400–$1,200
$300–$2,000
Possible , experience recommended
Flashing replacement (chimney, valley)
$600–$3,000
$400–$20,000
No , specialist required
Underlayment repair / replacement
$2,000–$8,000
$800–$16,000
No , full slate removal required
Re-nailing / re-pointing loose slates
$800–$2,500
$500–$5,000
Possible for isolated areas
Ridge cap slate replacement
$800–$3,500
$600–$6,000
No , ridge work requires specialist
Partial restoration (one slope)
$2,500–$8,000
$2,500–$15,000
No , full contractor project
Full slate roof replacement
$20,000–$60,000
$10–$30/sf installed
No , specialist contractor only
Source: Angi, HomeAdvisor, HomeGuide 2026 slate roofing cost data. Costs reflect U.S. national averages , Northeast and Mid-Atlantic markets (primary historic slate regions) typically run 10–20% above these figures. For full replacement cost comparison against other materials, see our residential roof repair vs. replacement guide.
How to Identify Slate Roof Damage: What to Look For
Most slate roof damage is visible from the ground with binoculars , a twice-yearly inspection (spring and fall) catches developing issues before they become expensive emergency repairs. Here is what to look for at each inspection point.
From Ground Level (Binoculars)
>Missing tiles: Visible gaps in the slate field , dark rectangles where a tile has slipped or fallen
>Slipped tiles: Tiles that have partially displaced downward, exposing the nail holes or the tile above
>Broken tiles: Cracked or shattered slates , often visible as irregular edges or missing corners
>Ridge deterioration: Crumbling mortar, lifted ridge slates, or gaps at the ridge apex
>Discoloration patches: Dark wet-looking areas that don’t dry after rain , indicating water retention under compromised tiles
>Flashing rust streaks: Brown vertical staining running down from chimney base, skylights, or valleys , indicates corroded lead or galvanized flashing
From Attic Inspection (Interior)
>Daylight penetration: Points of light visible through the deck , indicates missing or displaced tiles above
>Water staining on rafters: Brown staining or tide marks on structural timber , indicates past or active water infiltration
>Wet or discolored insulation: Moisture-damaged insulation indicates the underlayment has failed and water is reaching the deck
>Staining on deck boards: Dark discoloration on the roof sheathing or skip-sheathing boards beneath the slate
>Deteriorated underlayment: Original felt or organic underlayment visible as crumbling, flaking, or torn material , common on roofs 75+ years old where the underlayment has reached end of life before the slate itself
On the Roof Surface (Up-Close Inspection)
> Nail sickness: Nails (particularly older iron nails) corrode over decades, causing slates to lose their fastening and slip progressively , this is the most common cause of slate roof failure on older installations and may require a full re-nailing program
> Delamination:Soft slate (S3 grade) splits into layers as it ages , visible as tiles separating into multiple thin layers; delaminating slates cannot be repaired and must be replaced
> Spalling:Surface scaling or pitting of the slate face , indicates the stone’s mineral structure is deteriorating; a sign the slate grade is near end of life
> Hairline cracks:Fine cracks running across tiles , may not be immediately visible from the ground; tiles with cracks that extend through the full thickness should be replaced
How to Repair a Slate Roof: Step-by-Step Guide
Individual slate tile replacement is the most common slate roof repair task , and the one most accessible to a careful, safety-conscious homeowner. The following process applies to replacing a single broken, cracked, or slipped slate tile using the two approved installation methods: the hook method and the nail-and-bib (tingle) method.
The hook method is the preferred technique for slate roof repair, a copper or stainless slate hook drives into the deck between courses and catches the tile’s bottom edge, securing it without any nail penetration through the tile face and allowing future removal without disturbing surrounding slates
🛠️ Tools Required for Slate Roof Repair:>Slate ripper , the essential specialist tool; a flat steel blade with a hooked end for pulling nails beneath overlapping slates >Slate hammer , a combination hammer with a pointed end for trimming slate and a nail-pulling notch >Copper or stainless steel slate hooks(for hook method) >Copper bib flashing , minimum 8 inches × 3 inches, 16–20 oz copper sheet (for nail-and-bib method) >Copper or stainless steel ring-shank nails , never galvanized iron nails; they corrode within 20–40 years >Hand drill and bit , for pre-drilling nail holes in new slate >Replacement slate tile , matched for size, thickness, color, and ANSI grade >Fall protection , harness, rope, roof anchors; non-negotiable for all slate roof work >Rubber-soled shoes , slate is extremely slippery when wet or dry; purpose-made rubber roofing shoes reduce slip risk >Knee pads , protect both you and the surrounding tiles from pressure damage during work
Step 1: Source Your Matching Replacement Slate
Before doing anything else , before climbing the roof, before ordering tools , source your replacement slate. Correct matching requires identifying four parameters: tile dimensions (length × width in inches), thickness (typically 3/16″ to 3/8″), color and texture (photograph in natural light), and origin/grade where known.
Sources for matching replacement slate: the National Slate Association’s supplier directory, regional architectural salvage dealers (often the best source for historic color matches), and specialty suppliers including Vermont Structural Slate Company, Rising and Nelson Slate, and North Country Slate. For replacement, use a slightly thinner tile than the original when available , it eases insertion under the overlapping courses without lifting surrounding tiles.
Step 2: Remove the Damaged Slate with the Ripper
Insert the slate ripper beneath the damaged tile and work it upward until the hooked blade engages the nail shank holding the slate. Pull the ripper handle downward firmly , this drives the hook against the nail and cuts or pulls it free. Repeat for the second nail. Most slates are held by two nails positioned in the upper half of the tile.
Once both nails are removed or cut, the broken slate will typically slide downward and out. If fragments remain, use the pointed end of the slate hammer or the ripper tip to carefully clear broken pieces without disturbing adjacent tiles. Clean the nail hole area of any debris or protruding nail shanks before proceeding.
Step 3A: Install Using the Hook Method (Preferred)
The hook method is the preferred technique for slate roof repair because it requires no nail penetration through the new tile face, eliminating a potential leak point. Pre-drill a small pilot hole in the roof deck or sheathing at the point between two existing slates in the course below where the damaged tile sat. Drive a copper or stainless steel slate hook into the pilot hole so it protrudes upward and will catch the bottom edge of the new replacement slate.
Slide the replacement slate upward into the gap, ensuring its sides align perfectly with the tiles on either side and the bottom edge aligns with the course below. Pull the tile downward to engage the hook at its bottom edge. The hook holds the tile securely without any nail penetration through the tile face, allowing for thermal movement and future removal if needed.
Step 3B: Install Using the Nail-and-Bib Method (Alternative)
The nail-and-bib (also called tingle) method is an alternative when hook installation is not practical. Slide the replacement slate into position. Pre-drill a nail hole near the top edge of the replacement tile where it will be covered by the overlap of the tiles above. Drive a copper or stainless ring-shank nail through the pre-drilled hole into the roof deck , never nail through the slate without pre-drilling, as the percussive force will crack the tile.
Cut a copper bib approximately 8 inches long × 3 inches wide. Make diagonal cuts at the upper corners so the bib can bend under the overlapping slates. Slide the bib upward beneath the tiles in the course above so it covers the nail head completely, with 2–3 inches of bib extending below the overlap to shed water over the new tile surface. The bib is not nailed , it holds in position through friction against the overlapping tiles.
Step 4: Verify the Repair Before Leaving the Roof
Before descending, perform a complete verification of the repair: the replacement tile must sit flush with the surrounding slates , no proud edges that will catch wind or foot traffic. The exposure (the visible portion of the tile below the overlap) must match the exposure of neighboring tiles exactly , standard exposure is 3 inches of headlap. Give the tile a gentle tap , it should feel solid and produce a clear ring, not a hollow thud.
For the most thorough verification, have a helper spray water over the repaired area with a garden hose while you observe from inside the attic below. Water penetrating the attic during the hose test reveals any remaining gaps before the next rainfall does. This extra step adds 10 minutes and potentially saves a follow-up repair call.
Slate Roof Repair Checklist: Before, During, and After
Before Any Slate Roof Repair
>✅ Replacement slate sourced and matched , size, thickness, grade, and color confirmed
>✅ All specialist tools assembled , slate ripper, slate hammer, copper nails or hooks, copper bib
>✅ Roof surface dry , never work on wet slate, which is dangerously slippery
>✅ Attic inspection completed , water staining and structural condition assessed
>✅ Scope of damage fully assessed , count of broken, slipped, and missing tiles documented before starting
During Slate Roof Repair
>✅ Never walk directly on slate tiles , use a chicken ladder (roof ladder) or walk on a foam kneeling board spread across multiple tiles to distribute weight
>✅ Use only copper or stainless steel nails , never iron or standard galvanized nails on a slate roof
>✅ Pre-drill all nail holes , never drive nails directly through slate without pre-drilling
>✅ Check alignment and exposure on each tile before moving to the next
>✅ Clear all removed slate fragments from roof surface , broken slate is a falling hazard
>✅ Inspect surrounding tiles for hidden cracks while area is accessible , address all damage in one roof access event
After Slate Roof Repair
>✅ Water test from attic with garden hose before declaring repair complete
>✅ Ground-level visual check , repaired tiles flush and aligned with surrounding courses
>✅ Store any remaining spare tiles horizontally in a dry, temperature-stable location for future repairs
>✅ Document repair with photographs , date, tile count, location on roof
>✅ Schedule follow-up inspection in 6 months to verify repair integrity through one full weather cycle
Common Slate Roof Repair Mistakes , And How to Avoid Them
Nail sickness, the progressive corrosion of original iron fasteners used in historic slate installations, is the leading cause of slate roof failure and the reason every slate roof repair must use copper or stainless steel ring-shank nails exclusively. Iron and standard galvanized nails fail within 20–40 years, far shorter than the slate’s remaining service life
Mistake 1: Using the Wrong Nails
Iron cut nails and standard hot-dip galvanized nails were used in slate installations throughout the 19th and early 20th centuries , and their corrosion (“nail sickness”) is the number one cause of slate roof failure on historic buildings today. Any slate roof repair must use copper ring-shank or stainless steel nails exclusively. Copper is the traditional preferred material because it develops a patina that does not stain slate; stainless steel is an acceptable alternative. Galvanized nails will fail within 20–40 years , far shorter than the slate’s remaining service life.
Mistake 2: Walking Directly on the Slate Surface
Slate is stone , but it is also brittle and highly sensitive to point loading. Walking directly on slate tiles concentrates your full body weight on a small tile area, causing immediate cracking that may not be visible until the tile fails weeks later during rain. Always use a chicken ladder (roof access ladder) that hooks over the ridge, a foam kneeling board spread across at least four tiles, or purpose-made slate roof walkway boards. One careless step on the wrong tile during a “quick repair” can create three new repair jobs.
Mistake 3: Applying Roofing Cement or Caulk as a Repair
Roofing cement (tar-based sealant) applied to cracked slate tiles or around flashing is a common quick-fix that creates serious long-term problems. Roofing cement traps moisture against the stone and accelerates the delamination of soft slate grades. It prevents future inspection of the condition beneath it. And it makes proper repairs significantly more difficult when it eventually fails , which it will within 5–10 years. The correct repair for a cracked or broken slate tile is always removal and replacement , never patching in place with adhesive.
Mistake 4: Mismatching Replacement Slate
Installing replacement slate tiles that don’t match the existing installation in thickness creates a critical structural problem , not just a cosmetic one. Thicker replacement tiles lift the overlapping courses above them, creating gaps at the exposed edges that allow water and ice infiltration. Tiles that are too thin sit below the plane of the surrounding slate and create a low point where water pools. Match thickness within 1/16 inch of the existing tile for correct installation geometry.
Mistake 5: Ignoring the Underlayment Condition
Many slate roofs installed in the early-to-mid 20th century used organic felt underlayment that has a service life of 60–75 years , significantly shorter than the S1 or S2 grade slate above it. On a 100-year-old slate roof with sound tiles, the underlayment may have completely deteriorated, leaving the deck boards as the only moisture barrier. This is the scenario behind many “mystery leaks” on well-maintained historic slate roofs , the slate is fine, the underlayment is gone. An attic inspection looking for deteriorated or missing underlayment is essential before concluding that tile replacement alone will solve an ongoing leak.
Slate Roof Repair vs. Full Replacement: Making the Right Call
The most important financial decision for any slate roof owner is knowing when ongoing slate roof repair remains cost-effective versus when the system has reached the point where replacement delivers better value. The National Slate Association’s general guideline: if more than 20% of the tiles on a slate roof are broken, slipped, or missing, a full professional inspection to assess restoration versus replacement is warranted.
Factor
Favor Repair
Favor Replacement
Slate grade
S1 or S2 hard slate with decades remaining
S3 soft slate at or past expected lifespan
Damage extent
Under 20% of tiles damaged or missing
Over 20–30% tiles failed system-wide
Nail condition
Copper or stainless nails , sound condition
Iron nail sickness , widespread corrosion
Underlayment
Underlayment intact or recently replaced
Underlayment fully deteriorated
Repair cost vs. replacement
Repair under 30% of replacement cost
Repair exceeds 50% of replacement cost
Deck condition
Deck boards sound, no rot or structural damage
Widespread deck rot requiring structural repair
Matching slate availability
Matching replacement slate readily sourceable
Matching slate unavailable or prohibitively costly
Frequently Asked Questions: Slate Roof Repair
How much does slate roof repair cost in 2026?
The national average slate roof repair cost in 2026 is $2,006, with most residential projects falling between $784 and $3,253. Individual tile replacements cost $50–$300 per tile (materials and labor). Flashing replacement ranges from $600–$20,000 depending on extent. Underlayment repair or replacement costs $800–$16,000. Labor alone averages $4–$17 per square foot depending on slope, access difficulty, and regional labor rates. Natural slate repair costs approximately $2 more per square foot than synthetic slate repair.
Can I repair a slate roof myself?
Single-tile replacement on an accessible, lower-pitch roof section is DIY-feasible for a careful homeowner with the correct specialist tools , primarily the slate ripper and slate hammer. The hook method of installation is particularly well-suited to DIY because it requires no nail penetration through the tile. However, any repair involving flashing, underlayment, ridge work, steep slopes (over 6:12), or multi-story access should be performed by a specialist slate roofing contractor. Never attempt slate roof repair without a proper fall protection harness and roof anchor system , slate surfaces are dangerously slippery.
How do I find matching replacement slate?
Finding matching replacement slate requires identifying your roof’s origin (Vermont, Pennsylvania, Virginia, or imported), color, and tile dimensions. Start with the National Slate Association’s member supplier directory at slateassociation.org. Regional architectural salvage dealers are often the best source for exactly matching historic color variations. Specialty suppliers including Vermont Structural Slate, Rising and Nelson Slate, and North Country Slate maintain extensive inventories of domestic and imported slate. Bring a physical sample tile for color matching whenever possible , photographs rarely capture the full color range of natural stone.
How long does a repaired slate roof last?
A correctly executed slate roof repair using copper nails, correctly matched replacement tiles, and proper installation technique lasts as long as the surrounding slate system , potentially decades or longer on S1 hard slate. The repair itself does not create a weak point if performed correctly. The limiting factor is always the condition of the surrounding system: the nails, underlayment, and flashing. A well-maintained S1 hard slate roof with regular professional inspections and prompt individual tile repairs can realistically reach 150–200 years of total service life.
What is nail sickness in a slate roof?
Nail sickness is the progressive corrosion of the iron or galvanized iron cut nails used in historic slate installations , typically those installed before 1950. As these nails corrode, they lose their holding power and the slates they secured begin to slip downward or fall. Nail sickness is visible as slates that repeatedly slip even after re-setting, rust staining on the slate surface below nail holes, and on close inspection, visibly corroded or missing nail shanks. Widespread nail sickness typically requires a full professional re-nailing program , lifting each slate, removing corroded nails, and re-fastening with copper nails , a significant project costing $4,000–$20,000+ but one that can extend the life of a sound slate system by another 50–100 years.
A slate roof that receives competent, timely repairs is not a maintenance burden , it is a once-in-a-generation investment that will protect your home long after every asphalt shingle roof in the neighborhood has been replaced two or three times over.
The key is finding a specialist who understands the system, using the right materials every time, and never letting a minor broken tile turn into a major water damage event through delayed action.
🏠 Roofing Tips & Updates
Get free roofing advice, cost guides, and seasonal maintenance tips.
Roofing content specialist with 5+ years researching U.S. residential and commercial roofing. Has documented 200+ projects covering installation costs, material selection, contractor vetting, and DIY guides for homeowners across all climate zones.
Eco-Friendly Roofing Options: Why Your Roof Choice Matters
Your roof covers everything you love.
It keeps your family, your home, and your things safe. If you make the right choice, it can also keep something much bigger safe. The roof of the ordinary American home covers 1,500 to 3,000 square feet, absorbs decades of sunlight, and needs to be replaced every 15 to 30 years. When you multiply that by the 140 million homes in the U.S., the roofing industry’s environmental impact becomes huge: some 11 million tons of asphalt shingle debris ends up in U.S. landfills every year.
But here’s something no one tells you while you’re in the roofing aisle: the greenest choice you make isn’t simply about the material itself. It’s about the whole life cycle: how the material is made, how long it lasts before it needs to be replaced, how much energy it reflects or absorbs while it’s on your home, and what happens to it when it finally comes off. A product that lasts 15 years and is sold as “eco-friendly” is nearly never greener than a regular product that lasts 50 years.
This guide cuts through the greenwashing to offer you a full, honest picture of the greenest roofing materials available in 2026. It tells you how much they cost, how well they work, and what the research really says about how they affect the environment.
Table of Contents
Why Your Roofing Material Choice Is an Environmental Decision
Most people who own homes think of roofing as a way to keep their homes in good shape. When it leaks, get a new one. Select the least expensive choice that fits the law. Go ahead.
What that framework doesn’t take into account is the chain of environmental effects that come with every roofing choice. Standard asphalt shingles, which cover around 80% of homes in the United States, are made from oil. They are made of bitumen, a heavy crude oil derivative, fiberglass matting, and mineral granules that are put on top of them. They release a lot of carbon into the air when they are made, they create garbage when they are installed, and practically everyone throws them away when they are done with them.
The other options present a very different story.
Metal roofing constructed from recycled steel or aluminum have 25% to 95% recycled material and can be recycled 100% at the end of their life. In congested districts, cool roof coatings on any material can lower the urban heat island effect by 2 to 5 degrees Fahrenheit. In cities, living green roofs soak up runoff, store carbon, and bring back habitats. Solar shingles protect the building underneath while making electricity. Every year, millions of tires and plastic bottles are kept out of landfills by composite shingles made from recycled rubber and plastic.
There are greenest roofing solutions out there. Yes, they do. The question is which one is best for your home, your climate, your budget, and what you mean by “green.”
What Does It Mean for a Roof to Be “greenest roofing”?
It’s important to know what “green” means in the context of roofing before assessing eco-friendly roofing materials, since the marketing sector has made the word less helpful.
A really greenest roofing material works well in a number of environmental areas at the same time:
Recycled content: How much of the product is made from materials that were used by people before or after they bought it?
Manufacturing carbon footprint: How much CO₂ is made for every square foot of material that is installed?
Energy performance: How much solar heat does the roof reflect or absorb? What does that signify for the heating and cooling loads?
Longevity: How long does the roof survive before it needs to be replaced? How does a longer lifespan effect the roof’s overall environmental impact over its lifetime?
Recyclability at the end of its life: Can the material be recycled or used for something else when it is no longer useful, or does it go straight to the landfill?
Local sourcing potential: Is it possible to make the material in the area, which would cut down on transportation emissions?
Stormwater management: Does the roof aid or hurt the flow of stormwater?
There is no one substance that works properly in every way. The best roofing choice for a homeowner in Phoenix (who should search for materials that reflect solar energy and are resistant to drought) is significantly different from the best choice for a homeowner in Seattle (who should look for materials that last a long time and resist moss) or Chicago (who should look for materials that have a lot of thermal mass and resist ice dams). The talk of greenest roofing can’t be separated from the climate backdrop.
Eco friendly roofing materials in 2026 range from recycled metal (25–95% recycled content) to living roofs
The Most Eco-Friendly Roofing Materials in 2026
1. Recycled Metal Roofing: The Best of the Best
Recycled metal roofing provides the strongest overall case for being the greenest roofing material that can be used in the most situations.
Recycled Metal Roofing
Steel roofing panels made with recycled steel contain 25% to 95% recycled steel. This material has been recycled for more than a century without losing quality. Aluminum roofs are made from 50% to 90% recycled aluminum, which takes only 5% of the energy to make compared to new aluminum. When the metal panel is no longer useful, it may be recycled 100% of the time. It doesn’t go to a landfill; it goes back into the production process.
The disagreement about how long anything lasts is just as strong. A properly fitted metal roof can last anywhere from 40 to 70 years. In that same 70-year period, a conventional asphalt shingle roof would need to be replaced three to four times, which would mean three to four loads of shingle debris going to the landfill. In contrast, the metal roof that lasted the longest would not have any garbage going to the landfill.
The energy performance of metal roofing is another plus. Metal panels that are light-colored and approved for cool roofs reflect 60–70% of the sun’s rays that hit them, while typical asphalt shingles only reflect 25–35%. The U.S. Department of Energy says that ENERGY STAR-certified metal roofing cuts down on the amount of energy used for cooling by 7–15% each year in warm climates. This is a long-term advantage for the environment and your wallet.
The truth is that making metal roofs takes a lot of energy, and making new steel costs a lot of carbon up front. Recycled metal roofing is most environmentally friendly when it has a lot of recycled content (50% or more), when it is put in an area where it can reflect light well, and when it replaces a material that would need to be replaced many times during its lifetime.
Eco profile:
25% to 95% of the material is recycled.
When it’s done, it may be recycled 100%.
Life span: 40 to 70 years
Energy efficiency: Very good (there are variants with cool roofs)
Cost of installation: $5 to $14 per square foot
2. greenest roofing’s best product is metal roofing with solar integration.
When you combine the greenest roofing material with distributed renewable energy generation, the environmental math changes a lot. Standing seam metal roofing is the best base for photovoltaic solar panels.
Solar panels on standing seam metal roofs use clamp systems that don’t go through the roof. These systems attach to the elevated seams without going through the roof, which keeps the roof’s weatherproofing intact while boosting energy generation capacity above. A solar array that is the right size for a metal roof may offset 60 to 100 percent of a home’s annual electricity use. This turns the roof from a passive shelter into an active clean energy generator.
The newest types of solar shingles, such Tesla Solar Roof, GAF Energy Timberline Solar, and SunRoof integrated panels, go even further by making roofs where every tile protects the building and makes electricity. These devices cost a lot up front ($20–$45/sf installed), but they save you money on roof replacement and generate power, making them very cost-effective over 20–30 years, especially in states where electricity is expensive.
For homeowners who want to get the most environmental benefit out of every dollar spent on roofing, the best option right now is a mix of recycled metal roofing and solar panels.
Eco profile:
Recycled content: 25% to 95% (for a metal base)
Energy performance: generating more electricity than it uses
Life span: 25 to 40 years for solar parts and 40 to 70 years for metal substrate
Carbon payback time: 1 to 4 years (solar panels make up for the emissions from making them by making clean energy)
Cost to install: $10 to $45 per square foot, depending on the type of solar integration
3. Living Roofs (sometimes called Green Roofs) are the ecological powerhouse.
A living roof is the most complicated and ambitious of all eco-friendly roofing materials. It is a vegetated roofing system where plants grow directly on a multi-layer waterproofing and growing medium assembly.
Living roofs absorb 50–90% of summer rainfall, reduce urban temperatures by up to 7°F through evapotranspiration, and restore pollinator habitat in environments where green space has been eliminated
Living roofs soak up 50–90% of summer rain, which greatly lowers the amount of stormwater runoff that floods urban drainage systems. They give animals a place to live directly, which is especially important for pollinators in cities where native plant habitat has been destroyed. They help temper the urban heat island effect by letting water evaporate. They add a lot of thermal mass, which lowers the heating and cooling needs of the building. And the plant communities that grow on them use photosynthesis to store carbon.
There are two main types of living roofs. Extensive greenest roofing employ a shallow growing media (3–6 inches) planted with low-maintenance sedums, grasses, and wildflowers. They weigh 15–50 pounds per square foot when wet, need little upkeep after they are set up, and are good for most homes with a little extra support. Intensive greenest roofing employ a deeper growing media (8–24+ inches) that can hold shrubs, perennials, and even small trees. They weigh 80–150+ lbs per square foot and need a lot of structural engineering, but they make real rooftop ecosystems.
There are significant problems. Living roofs need careful structural evaluation because they are much heavier than regular roofing materials. They also need professional waterproofing installation (the waterproofing membrane under the growing medium must be perfect; a leak in a living roof is very expensive to find and fix) and ongoing horticultural care.
This is a difficult subject to understand, but this make it easier. The most environmentally friendly roofing method is living roofs, but only when they are properly designed, structurally sound, and installed by professionals on buildings in regions where plants may grow.
Eco profile:
50% to 90% of stormwater can be absorbed.
Urban heat island reduction: 3–7°F drop in local temperature
Life duration (waterproofing): 40 to 60 years when protected by a growth medium
Carbon sequestration: still going on (depends on how dense the plant community is)
Cost to install: $15 to $35 per square foot (extensive); $35 to $75 per square foot (intense)
4. Shingles made of recycled rubber and plastic composite are the landfill diverters.
The United States makes over 290 million trash tires per year. One of the most interesting tales in the building materials sector about the circular economy is how recycled rubber and plastic composite shingles turn trash into strong roofing materials.
EcoStar Inspire, Euroshield Rubber Roofing, and DaVinci Roofscapes composite shingles are made using up to 95% recycled materials, mostly old tires and plastic waste from factories. They are made to seem like slate, wood shake, or regular shingles, but they often work better than the actual materials they look like. Most of them have Class 4 impact ratings, which is the maximum possible. This makes them especially useful in areas where hail is common.
Another good thing is how long it lasts. High-quality recycled rubber shingles come with 40–50 year manufacturer guarantees. They last two to three times longer than regular asphalt shingles and cost about the same to install ($5–$10/sf). These goods are some of the most practical eco-friendly roofing materials for homeowners who want to help the environment without spending a lot of money. They have a lot of recycled content, last a long time, and are resistant to damage.
The truth is that recycled rubber roofing can’t be recycled at the end of its life in most markets right now. In most circumstances, the material that didn’t go to the dump as a tire will end up there as a shingle. There are some ways to recycle rubber that are getting better, but people recognize that this is a weak point in the product’s environmental credentials.
Eco profile:
Content that has been recycled: 75–95% (tires and plastic from people who have used them)
Energy performance: Comes in colors that are approved for cool roofs
Life span: 40 to 50 years
At the end of life, it can only be recycled a little bit (although it’s becoming better).
Cost to install: $5 to $10 per square foot
5. The Natural Choice: Reclaimed and FSC-Certified Wood Shingles
The environmental impact of wood shake and shingle roofing is very intricate and depends nearly entirely on where it comes from.
Reclaimed wood shingles are a type of roofing that has a very low impact on the environment. They come from historic buildings that were torn down, old-growth timber buildings, or thinning operations in forests that are maintained in a way that is good for the environment. The wood’s carbon was taken out of the air decades ago and will stay there for the life of the roof. No new forest is cut down, making energy is low, and the material may be completely broken down when it is no longer needed.
The next level is FSC-certified (Forest Stewardship Council) new wood shingles. This means that the forest is managed in a way that protects biodiversity, replanting, and regulates the rate of harvest, which keeps the carbon stores in the forest steady over time. Western red cedar is the most common type of cedar. It is valued for its natural oils, which make it very resistant to decay and insects without the need of chemicals.
But there are a lot of practical problems with wood shingles. Untreated wood shingles don’t do well in fires (Class C or worse), which is a big safety and insurance concern in areas where fires are common. Metal or composite alternatives are easier to care for than this one. Quality cedar lasts 20 to 30 years, which implies it needs to be replaced more often than metal or composite competitors.
Wood shake needs to be treated for moss and cleaned on a regular basis to keep it from getting damaged too soon in damp Pacific Northwest weather or humid coastal places. People who live in dry areas often care more about fire safety than the environment.
Eco profile:
Content that has been recycled or reclaimed: 100% for reclaimed and 0% for new
Carbon sequestration: Good (it stores carbon from the air for the whole time it is in use)
Cedar lasts 20 to 30 years, whereas recovered old-growth lasts longer.
At the end of its life, it can be burned for energy or fully broken down.
Cost to install: $7–$12/sf
6. Natural Slate: The Choice for Many Generations
Natural slate roofs have been keeping buildings safe for hundreds of years. When you think about how long a material really lasts (100–150 years), the cost of quarrying and the amount of carbon it releases start to appear very different.
Slate is a type of stone that is cut into thin sheets and then cemented together. There isn’t much to the manufacturing process: no chemical changes, no petroleum derivatives, and no synthetic coatings. The carbon in slate comes mostly from the energy used to quarry and transport it, not from any chemicals used in the manufacturing process.
Slate’s greenest roofing credentials are based on its long life. A slate roof put on now will probably still be sheltering the structure in 2176. During that same 150 years, an asphalt roof would need to be replaced 6 to 10 times, which would create 6 to 10 cycles of manufacturing emissions, installation waste, and landfill disposal. Even though it costs more to install one slate, it probably wins the lifecycle carbon analysis over a hundred years of comparison.
The problems are just as genuine. Natural slate is hefty (800–1,500 lbs per square), therefore you need to get structural engineering approval before you install it. There are fewer and fewer skilled slate installers, and they charge a lot more for their work. Not all slate is the same, though. Vermont and Pennsylvania slate is high quality and made in the US. Some imported slate has bad quality control and comes apart in a few decades. Source is really important.
Eco profile:
Recycled content: 0% (stone from a quarry)
Making carbon: moderate (quarrying and shipping)
Quality slate lasts for 100 to 150 years.
End of life: Can be saved and used again; completely inert
Cost to install: $15 to $30 per square foot
7. Cool Roof Coatings: The Cheap Way to Improve
Not every homeowner is ready to replace their whole roof. And for people whose roofs are still working but don’t need to be replaced yet, cool roof coatings are the easiest and most effective eco-friendly roofing upgrade you can have right away.
Cool roof coatings are elastomeric or acrylic coatings that are put directly on top of existing roofing materials, like flat roofs, low-slope membranes, and even metal roofs. They reflect 70–85% of the solar energy that hits them, while ordinary uncoated roofing only reflects 5–25%. This cuts down on the amount of heat that gets into the building below.
The effect on the environment is direct and can be measured. The Heat Island Group at the Lawrence Berkeley National Laboratory says that if a lot of U.S. cities adopted cool roofs, it could lower city temperatures by 2 to 3°F. This would be enough to significantly lower the heat island effect, which causes more air conditioning use, ozone formation, and heat-related illnesses in densely populated areas.
A white elastomeric cool roof coating on a flat-roofed home or business building costs $1–$3 per square foot. It saves energy right away, extends the life of the membrane underneath it by reflecting UV radiation, and helps reduce the urban heat island effect at the lowest possible cost for any greenest roofing intervention.
Eco profile:
Solar reflectance: 70 to 85%
Energy savings: in warm climates, cooling costs might go down by 15% to 30%.
Lifespan (coating): 10 to 20 years before it needs to be recoated
Cost of application: $1 to $3 per square foot over existing roofing
Best use: rooftops that are flat or have a modest slope in warmer places
Greenest Roofing Materials at a Glance
Material
Recycled Content
Lifespan
End-of-Life
Energy Performance
Installed Cost/sf
Recycled metal roofing
25–95%
40–70 yrs
100% recyclable
⭐⭐⭐⭐⭐
$5–$14
Metal + solar integration
25–95%
40–70 yrs
100% recyclable
⭐⭐⭐⭐⭐
$10–$45
Living / green roof
N/A
40–60 yrs
Biodegradable
⭐⭐⭐⭐⭐
$15–$75
Recycled rubber/plastic
75–95%
40–50 yrs
Limited recycle
⭐⭐⭐⭐
$5–$10
FSC certified wood
0–100%
20–30 yrs
Biodegradable
⭐⭐
$7–$12
Natural slate
0%
100–150 yrs
Fully reusable
⭐⭐⭐
$15–$30
Cool roof coating
0%
10–20 yrs
Limited
⭐⭐⭐⭐⭐
$1–$3
Standard asphalt shingles
0–5%
15–25 yrs
Landfill (mostly)
⭐
$2–$6
How to Choose the Greenest Roofing for Your Specific Home
The table above illustrates a range of values. Real choices are more complicated. Based on your situation, here are some practical ways to make a decision:
If your priority is lowest lifecycle environmental impact: choose recycled metal roofing or natural slate, depending on your budget. Both last a long time, which makes the increased initial environmental cost seem small in comparison.
If your priority is maximizing energy performance: you can get metal roofing with an ENERGY STAR cool-roof coating or solar shingles if your electricity expenses make the investment worth it.
If your priority is circular economy and waste diversion: Recycled rubber or plastic composite shingles are the best choice for a circular economy and waste diversion because they have the most recycled content of any readily available roofing material.
If you have a flat or low-slope roof and want to make a big difference right away without spending a lot of money, the first thing you should do is put a cool roof coating over the existing roof.
If you care about urban ecology and stormwater management, living/green roof systems are a good choice as long as your building is strong enough and you live in an area with enough rain to support plants.
If you want your roof to last for a long time across generations, use natural slate from a reputable high-quality local or ethical import supplier and hire a qualified slate roofer to install it.
If money is the only thing that matters, recycled rubber composite shingles for $5–$10/sf are the greatest option for homeowners who can’t afford metal or slate. They have a high recycled content, last a long time, and are affordable.
The Question Nobody Asks — But Should
The greenest roofing industry doesn’t want to talk about this, but the truth is that the best thing you can do for the greenest roofing decision is typically to wait to replace a roof that is still working.
Every time a roof is replaced, there is demolition trash, transportation emissions, and carbon emissions from making the new material, no matter how eco-friendly it is. If your asphalt roof has 8 to 10 years of useful life left, replacing it with recycled metal roofing today doesn’t help the environment until the metal roof’s lifecycle savings outweigh the cost of replacing it in terms of carbon.
Make what works last longer. Take care of what you can. When you really need to replace anything, choose the greenest roofing choice. A really ecologically literate roofing approach looks like that order, not just picking the greenest roofing material when you’re ready to buy.
Choose with the whole lifecycle in mind when it’s time to replace something. The options are better now than they have ever been.
Frequently Asked Questions
What kind of roofing material is the most eco-friendly?
Recycled metal roofing is the greenest roofing material for most homeowners. It is made of 25–95% recycled steel or aluminum, can be recycled at the end of its life, lasts 40–70 years, and has cool-roof energy performance that cuts cooling costs by 7–15% each year. Living green roofs are better for the environment in cities, and natural slate lasts the longest, at 100 to 150 years. However, recycled metal is the greatest choice for the most homeowners since it has the best mix of greenest roofing credentials, performance, and ease of use.
Are rubber shingles made from recycled materials really good for the environment?
Yes, recycled rubber shingles manufactured from used tires and plastic have 75–95% recycled content, keep a lot of trash out of landfills, come with 40–50 year guarantees, and are less likely to be damaged by impacts than most other types of roofing. The fact that most rubber composite shingles go to the garbage when they are changed is a known weakness in their greenest roofing credentials. Recycled rubber composites are a great choice for homeowners who want eco-friendly roofing materials that are easy to get and don’t cost a lot of money like metal or slate.
Do green roofs work on homes?
Yes, most homes can have extensive greenest roofing with shallow growth medium and sedum plants. The expense of engineering and reinforcing the roof is usually between $1,000 and $3,000. They work best on flat or low-slope roof sections, and they are especially useful in cities for managing rainwater and lowering heat islands. Intensive greenest roofing that hold more soil and bigger plants need a lot of structural engineering and are not as prevalent on single-family homes.
Is it worth it to get a cool roof to save energy?
For homes in warm climates (IECC zones 1–3, which covers the Southern U.S., Southwest, and coastal areas), ENERGY STAR-certified cool roofing can save you 7–15% on your cooling expenditures per year—$75–$300 per year, depending on the size of your home, the climate, and the cost of energy. In cold climes, the energy balance is better because the extra heat that is absorbed in the winter makes up for some of the savings in cooling in the summer. Cool roof coatings are the cheapest way to start, costing $1 to $3 per square foot. Cool-roof-rated metal panels do the same thing as a 40- to 70-year roofing system.
What makes natural slate better than metal as a greenest roofing material?
Natural slate and recycled metal roofing both have strong environmental arguments, but they come from different places. Slate lasts longer (100 to 150 years compared to 40 to 70 years for metal) and can be reused at the end of its life (slate can be rescued and put back in place). Metal is better than slate because it has more recycled material (25–95% versus 0%), it uses less energy (reflective coatings), and it is easier to get to (slate is heavy and needs structural engineering; installing it takes increasingly rare professional labor). Recycled metal is easier for ordinary homes to get, but for heritage buildings or homeowners who want to construct roofing that lasts for generations, high-quality slate makes a strong case for being better for the environment.
Which eco-friendly roofing materials have the most recycled content?
Recycled rubber and plastic composite shingles are the most eco-friendly roofing materials that are widely used. They are made from 75–95% post-consumer recycled tires and plastic.Recycled aluminum roofing panels come next, with 50 to 90 percent recycled aluminum content. Depending on the manufacturer and product line, recycled steel roofing panels can have 25% to 95% recycled material. Most commercial asphalt shingles have 0–5% recycled content, but there is a new type of asphalt shingle that uses reclaimed rubber crumb.
🏠 Roofing Tips & Updates
Get free roofing advice, cost guides, and seasonal maintenance tips.
Roofing content specialist with 5+ years researching U.S. residential and commercial roofing. Has documented 200+ projects covering installation costs, material selection, contractor vetting, and DIY guides for homeowners across all climate zones.
For most homes, the cost of installing a tin roof is between $5 and $14 per square foot. Corrugated panels cost between $5 and $9 per square foot, and standing seam systems cost between $10 and $14 per square foot. This means that the total cost of installing a tin roof on a 2,000-square-foot home ranges from $10,000 to $28,000, depending on the type of panel, the pitch of the roof, and the cost of labor. Modern “tin roofs” are nearly always steel or aluminum panels with protective coatings. Real tin roofing hasn’t been made commercially since the middle of the 20th century, but the moniker is still the most common one for metal panel roofing in homes. A tin roof that is put up correctly lasts 40 to 70 years, needs very little upkeep, and is more better at keeping out fire, wind, impact, and moisture than asphalt shingles at the same long-term cost.
A tin roof has a way of getting into your bones. Rain hitting corrugated metal panels makes a deep, pleasant sound that turns a thunderstorm into a lullaby. But aside from the romance, putting up a tin roof is a serious and very useful roofing choice that has real performance benefits. It is Class A fire resistant, can withstand winds of 120 to 160 mph, has energy-reflecting coatings that lower cooling costs by 10 to 25%, and will last longer than the people who put it up.
Table of Contents
This full guide for 2026 has everything you need to know to install a tin roof, including how to choose the right panels and underlayment, how to fasten them, how to add ridge and eave details, how to flash them, how to compare costs, how to avoid common mistakes, and a full FAQ for homeowners who are planning their first metal roof project.
What does a tin roof look like? (And What It Is Now)
The phrase “tin roof” has been used in American English for more than 150 years, but what it means has evolved a lot since Southern farmers started attaching corrugated iron sheets to barn roofs in the 1850s.
Real tin roofing, which is made of thin sheets of steel covered in a layer of real tin metal, was the most common type of metal roofing until the early 20th century. When galvanizing technology was still in its early stages, tin was able to resist rust. By the 1950s, hot-dip galvanizing (zinc coating) and subsequently Galvalume® (zinc-aluminum alloy coating) had taken the place of tin as the best protective coating. “Tin roofing” as a real material was no longer made.
When people say “tin roof” today, they mean one of three things:
Galvanized steel panels are steel that has been coated with zinc to protect it from rust. They are the most common and commonly accessible type of metal roofing.
Galvalume® steel panels are made of steel that has been coated with an alloy of zinc, aluminum, and silicon. They are better at resisting corrosion, especially in coastal and humid areas.
Aluminum roofing panels are light, don’t need a coating, and are inherently resistant to corrosion. They are popular in coastal areas and for residential architecture.
People usually call all three “tin roofing,” and they are all put up using the same basic methods.
Different Types of Tin Roof Panels
The classic barn roof form is made up of wave-shaped panels that are usually 26 or 29 gauge steel and 36 inches wide. The cheapest alternative for a tin roof, easy to put up, and very well-known. Used a lot on buildings for farming, industry, and homes. Needs exposed fasteners (screws through the panel surface), which are the major thing that needs to be kept up on the roof over its life.
Standing Seam Metal Roofing: A high-end residential tin roofing system with panels that interlock at raised vertical seams. The fasteners are hidden under the seam, so there are no visible screw holes and the roof surface is smooth and clean. You can get them with snap-lock or mechanical-lock profiles. It costs more to install, but it is far better at withstanding the weather, needs almost no maintenance on the fasteners, and looks a lot more sophisticated.
5-V Crimp Panels: These panels have five V-shaped ridges and are a mix between corrugated and standing seam. The flat parts between the ridges have exposed fasteners. This style of Southern farm architecture is popular in farmhouses, cottages, and historic renovations. Because of the V-ridge shape, it is more resistant to weather than regular corrugated.
Metal Shingles and Tiles: Pressed metal panels that look like asphalt shingles, slate, or tile profiles. Give metal the look of traditional roofing while keeping its performance. Fasteners that are visible at the top of each shingle and buried by the following course were used to put them in place.
Cost of Installing a Tin Roof (2026)
Cost per square foot for each type of panel
Panel Type
Material Cost (per sf)
Installed Cost (per sf)
Lifespan
Best Application
Corrugated steel (29 ga.)
$1.50–$3.00/sf
$5.00–$8.00/sf
30–45 years
Agricultural, budget residential
Corrugated steel (26 ga.)
$2.00–$4.00/sf
$5.50–$9.00/sf
40–50 years
Residential, commercial
5-V Crimp steel
$2.00–$3.50/sf
$5.50–$8.50/sf
40–50 years
Residential, farmhouse
Standing seam steel
$4.00–$7.00/sf
$9.00–$14.00/sf
50–70 years
Premium residential
Standing seam aluminum
$5.00–$9.00/sf
$10.00–$16.00/sf
50–70 years
Coastal, luxury residential
Metal shingles
$3.50–$6.00/sf
$8.00–$13.00/sf
40–60 years
Residential, historic
Total Project Cost by Home Size (Standard Corrugated Tin Roof)
Home Size
Roof Square Footage
Material Cost
Installed Cost
Small (1,000 sf home)
1,100–1,300 sf
$1,650–$3,900
$5,500–$10,400
Medium (1,500 sf home)
1,600–1,900 sf
$2,400–$5,700
$8,000–$15,200
Standard (2,000 sf home)
2,100–2,500 sf
$3,150–$7,500
$10,500–$20,000
Large (2,500 sf home)
2,600–3,100 sf
$3,900–$9,300
$13,000–$24,800
Estate (3,000+ sf home)
3,200–3,800+ sf
$4,800–$11,400
$16,000–$30,400
The Cost Comparison Over 50 Years
When you divide the cost of installing a tin roof by the number of years it will last, the math becomes clear:
Over 50 years, asphalt shingles (2 replacements and maintenance) will cost between $24,000 and $30,000.
The total cost of installing a tin roof and keeping it up for more than 50 years is $11,500 to $22,000.
Long-term savings of $2,000 to $18,000 or more with a tin roof
This figure doesn’t take into account the energy savings that come from reflective metal roofing coatings. The U.S. Department of Energy says that in warm climates, these coatings can save 7–15% on cooling costs each year, which adds up to an extra $100–$350 per year over the life of the roof. The Department of Energy says that in warm climes, the annual cooling cost can go down by 7–15%, which adds $100–$350 per year that adds up over the life of the roof.
How to Plan Your Tin Roof Installation
Check the roof’s load-bearing capacity
Before you order panels, be sure that your current roof can handle the extra weight of a tin roof:
40 to 80 pounds per square foot (100 square feet) of corrugated metal panels are similar to asphalt shingles and usually don’t need any further support.
Standing seam systems weigh between 40 to 70 pounds per square foot, which is about the same as asphalt.
Metal over existing shingles: In most places, it is okay to add metal directly over one layer of existing asphalt (check local code). If there are two layers, you must remove the previous roofing first.
Most of the time, tin roofing is lighter than asphalt, thus it may be used with existing house structure without any changes to the engineering.
Minimum Requirements for Roof Pitch
There are certain minimum pitch requirements for each type of panel when installing a tin roof:
Panel Type
Minimum Pitch
Notes
Standing seam (snap-lock)
1:12
Lowest minimum of any panel type
Standing seam (mechanical seam)
0.5:12
With proper sealant at seams
Corrugated panels
3:12
Lower pitches allow water to back up at laps
5-V Crimp
2:12
With sealed laps
Metal shingles
3:12
Same as asphalt shingle minimum
Pick the color and coating for your panel.
Most producers of modern tin roofing provide more than 40 colors and two main coating systems:
PVDF (Polyvinylidene Fluoride / Kynar 500®):
A high-quality coating technology that comes with a 40-year color fading warranty on most products. Better protection to UV rays, chemicals, and long-lasting shine. It costs 10–20% more for the panels, but it basically gets rid of the need to re-coat them for the life of the roof. This is what we suggest for all high-end residential tin roof installs.
SMP (Silicone Modified Polyester):
A standard coating technology that comes with a 30-year warranty on excellent items. Less expensive than PVDF, but still good at blocking UV rays and weather. Good enough for most home uses, especially in conditions that aren’t too harsh.
Cool Roof Colors:
You can get ENERGY STAR-rated reflecting pigment systems in darker colors that still reflect a lot of solar heat. This gives you more options for colors while still being energy efficient. For colors other than white, look for goods with Solar Reflectance Index (SRI) ratings of 29 or above.
Tools and Materials Required for Tin Roof Installation
List of Materials
System of Panels:
The number of tin roofing panels you need is the roof area divided by the panel coverage plus 10% for waste.
Ridge cap panels that are the same shape and color
Drip edge or eave trim (goes all the way around the edges of the eaves)
Rake trim goes all the way around the margins of the rake and gable.
Valley flashing, which can be either a pre-formed W-valley or open valley metal
Hip cap (for roofs with a hip shape)
Flashing on the endwall and sidewall (where the roof meets the walls)
Flashing at the transition point (when the pitch changes)
System for fastening:
Exposed fastener screws: 1½-inch or 2-inch hex-head self-drilling screws with EPDM rubber washers (for corrugated and 5-V)
Hidden clips: Standing seam clips (for systems with standing seams, made by a specific company)
sealer: Use butyl tape or a sealer that works with all lap joints and trim situations.
Closure strips: Pre-shaped foam closures for the eave and ridge that fill in the gaps in the corrugation.
Underlayment:
Synthetic roofing underlayment (non-perforated and certified for high temperatures for metal roofs)
Ice and water shield (in cold areas, eave zones and all penetrations)
Optional: Vented metal roofing underlayment (lets moisture move from the deck)
Needed Tools
Metal roofing shears or a circular saw with a blade that cuts metal (never an abrasive cutoff wheel, because sparks can produce rust patches).
Cutting tin: straight, left, and right
Hex-head bit cordless drill/driver
Chalk line and measuring tape
Square for speed
Level (4 feet)
Extension ladder and roof jacks (for steep roofs)
Fall safety harness (needed for pitches higher than 6:12)
Gloves, safety glasses, and ear protection
Magnetic roller (to pick up metal shavings after cutting, which is very important for keeping rust spots from forming)
A Guide to Installing a Tin Roof Step by Ste
Step 1: Take off the old roof or get the deck ready
Tear-off (if needed): Take off all the old shingles, felt, and broken decking. Check the decking boards or plywood for rot, delamination, or broken places. If you find any, replace them before moving on. Putting a tin roof over a deck that is falling apart makes soft places, causes fasteners to pull out, and gives the completed product a wavy look.
If your local code allows it and your existing shingles are in good shape and only one layer thick, you can re-roof over them.
Check for soft places or shingles that are significantly cupped or elevated, as these could show through metal panels.
Put up furring strips (1×3 or 1×4 with 24-inch spaces between them) to make a smooth surface for nailing and a gap for air to flow through. This stops the metal from getting too wet and stops the drumming that can happen when you install bare-deck metal.
Step 2: Put in the underlayment
Underlayment is important for keeping water out and keeping metal from touching wood, which can trap moisture and speed up corrosion on both surfaces:
Put ice and water shield on all eave edges (at least 24 inches inside the outside wall line in cold climates), all valley areas, and all places where water can get in.
Install synthetic underlayment from the eave to the ridge, with each course overlapping by 6 inches.
Put cap nails 12 inches apart at the overlaps to hold it down.
For standing seam systems, use a synthetic underlayment that doesn’t have holes in it and can handle high temperatures. Standard felt isn’t good beneath metal since it lets out gases and doesn’t handle heat well.
Before identifying the locations of the penetrations (plumbing vents, skylights, chimneys), put ice and water shield on all of them.
“The underlayment is the last line of defense if any panel seam or fastener ever lets moisture in. Choosing the right high-temperature synthetic product and putting it in the right way is just as important as any other part of the tin panel installation above it.” — Metal Roofing Alliance Installation Standards, 2025
Step 3: Put up the eave trim and eave drip edge
The first metal parts to go on are the eave and rake trim. They make the smooth, completed edges that the panels will overlap:
Draw a chalk line 1 inch below the fascia face. This is the line that shows where your drip edge should go.
Put metal drip edge along all the eaves, making sure that the joints overlap by 2 inches and that the nails are spaced 12 inches apart.
Put metal rake trim (also called gable edge trim) on all the rake and gable edges, making sure it overlaps the drip edge at the corners.
Cut and fold trim pieces at the corners (where the eave meets the rake) to make overlapping joints that won’t let water in.
Before fastening, put butyl tape sealant under all of the trim overlaps.
Step 4: Put in the valley flashing
Before putting up the panels, put up pre-formed W-valley or open valley metal flashing:
Put a 12-inch-wide ice and water shield on each side of all the valley centerlines.
Put pre-formed metal valley flashing (at least 24 inches wide) in the middle of each valley.
Only fasten at the edges; never nail through the middle of the valley flashing.
Seal the valley parts using a sealer that works with the other materials and overlaps by at least 6 inches.
At the bottom, the valley flashing should stick out at least 4 inches past the eave line.
Step 5: Put in the eave closure strips
For corrugated and 5-V panels, the corrugated profile makes open spaces at the eave edge where the panel meets the eave trim. These spaces let birds and pests in, ice dams form, and rain blown by the wind get in:
Put pre-made foam or metal eave closure strips along the whole length of the eave, on the eave trim.
Closure strips must fit the profile of your panel. Corrugated closures are not universal; they are profile-specific.
Use construction adhesive or fasteners as the manufacturer says to hold it in place.
Put the ridge closing strips in place at the ridge in the same way (Step 8)
Step 6: Put up the tin roofing panels
This is the most important part of putting up a tin roof. The three things that decide if the finished roof appears professional or displays every mistake in the panel layout are direction, alignment, and where the fasteners go.
Arrangement and alignment:
Begin at one edge of the rake and go across the roof in the direction that puts the lapped (overlapping) panel edge downwind of the direction of the wind. This is very important for keeping the roof from blowing away or getting wet.
To keep the vertical alignment steady, snap a chalk line along the rake edge that is the same width as your first panel.
Place the first panel so that its rake edge is 1 to 1.5 inches above the rake trim and its eave edge is 1 to 1.5 inches above the eave trim/drip edge.
Make sure the panel is absolutely square to the eave by using a framing square at the bottom corner before putting in any screws.
Putting corrugated panels together:
Never drive screws into the valleys (low spots where water runs); instead drive them into the panel crests (high points).
For any structural supports (purlins or decking), the screws should be 12 to 24 inches apart on center.
At the eave and ridge, the spacing is 6 inches on center (closer at important weather boundaries).
At laps, use the same spacing to fasten through both panel layers.
The screw must compress the EPDM washer enough to make a little bulge, but not enough to crush it flat (over-driving makes leak sites) or too loose (under-driving lets water in).
Laps from panel to panel:
For slopes 4:12 and higher, there must be at least 1.5 corrugations on the side; for slopes lower than 4:12, there must be at least 2 corrugations.
End laps, which are the places where panels meet horizontally, must be at least 6 inches for slopes 4:12 and above and 12 inches for slopes lower than 4:12.
Before putting on the overlapping panel, put butyl sealant tape on all of the end laps.
How to fasten standing seam panels:
Install hidden clips by putting them at the right distances (usually 12 to 24 inches) according to the manufacturer’s instructions and attaching the clip base to the roof deck or purlins.
Fold the panel seam over the clip by snapping it or using a machine. The hidden clip floats in the seam to allow for thermal expansion.
Important: Never utilize exposed screws on the faces of standing seam panels. This makes the system’s leak-free seaming benefit useless.
Cutting panels:
Always cut teeth-forward with metal shears, aviation snips, or a circular saw with a metal-cutting blade. This means that the blade spins so that the teeth cut from below the panel instead of above it.
Never use an abrasive cutoff wheel. Sparks leave microscopic iron particles on the panel covering that corrode and stain the roof.
Use a magnetic roller or sweep to pick up all the metal filings from the roof after each cutting job. This will keep them from rusting.
Step 7: Flash All Openings
Plumbing vents, skylights, chimneys, and exhaust fans are all examples of penetrations through a tin roof. Each one needs the right flashing to keep water from going under it and over it:
Flashing for pipe boots and vents:
Use pipe boots that are made for metal roofing, not regular rubber boots, because they don’t work with metal panel thermal movement.
For panels with exposed fasteners, put the boot over the panel and move the seams around the base of the boot.
Use a roofing sealant that works with the boot to seal the edges.
For standing seam, utilize the pipe penetration equipment that comes with the product.
Flashing for chimneys and skylights:
Put step flashing on the sides, weaving it in with each panel course.
Put head flashing on the side that goes up (it should go at least 4 inches under the panels above).
Put a saddle or cricket below the chimney that is broader than 30 inches to guide water around the hole.
Use a sealant that works at high temperatures to seal all of the flashing counterflashing joints. Don’t use regular silicone; instead, use polyurethane or metal roofing-specific sealant.
Conditions for the end wall and side wall: where the slope of the roof meets a vertical wall surface:
Put flashing on the side of the wall that is at least 4 inches high and goes all the way up.
Use the right sealant to seal the wall counterflashing.
Cover the flashing with metal counterflashing that is attached to the wall and lets heat move.
Step 8: Put in the closure strips and ridge cap
The ridge cap is the last big part of the installation. It goes on top of the roof where two slopes meet and needs to be completely weatherproof:
Put foam or metal ridge closure strips on both sides of the ridge, making sure they match the panel profile.
Use butyl tape sealant on either side between the closing strip and the last panel course.
Place the ridge cap in the middle of the ridge so that it overlaps each slope by at least 4 inches.
Using the right screws, attach the ridge cap to the solid framework (rafters at the ridge) every 12 inches through the closure strips.
Minimum 6 inches of overlap between ridge cap pieces, with the lap going in the direction of the wind.
At the hip ridges, put in the pre-formed hip cap in the same order, starting at the eave and working your way up to the ridge peak.
Step 9: Put on the hip cap (for hip roofs)
For hip roofs with four slopes that all meet at the hip ridges:
To make trim cut lines, snap chalk lines on both panels where they meet at each hip ridge.
Use tin snips to cut the edges of the trim panels along the chalk lines.
Put butyl tape to the edges of both trimmed panels.
Place the hip cap in the middle of the hip ridge, making sure that each panel edge overlaps by at least 3 inches.
Starting at the eave and working your way up to the ridge, fasten every 12 inches.
Use a sealant that works with the fastener heads that are exposed.
Step 10: Last Check and Cleanup
Before saying that the installation of the tin roof is finished:
Walk around on the roof and check that all the screws that are sticking out are correctly pushed in, with the EPDM washer slightly squeezed and the head flush and snug.
Make sure that all of the overlaps between the ridge cap and the hip cap are sealed.
Check all penetration flashings to make sure they are fully sealed.
Check that all trim pieces are completely attached and that there are no corners that are raised.
Use a magnetic roller on the whole roof to pick up any metal shavings that are still there.
Use mild soap and water to clean all of the panels. This will get rid of fingerprints, chalk line residue, and construction debris.
Check the panels from the ground and from a ladder at the eave level to make sure they are straight and even.
Take pictures of all the places where the penetrations are so you can refer to them later for maintenance.
Standing seam tin roofing uses concealed clips that allow panels to float within seams for thermal expansion — eliminating exposed fastener maintenance over the roof’s 50–70 year life
Tin Roof Installation vs Other Roofing Materials
Factor
Tin Roof
Asphalt Shingles
Clay Tile
Wood Shake
Flat EPDM
Installed cost per sf
$5–$14
$2–$6
$10–$20
$7–$12
$5–$12
Lifespan
40–70 years
15–30 years
50–100 years
20–30 years
20–30 years
Weight per square
40–80 lbs
200–350 lbs
600–1,000 lbs
250–350 lbs
60–100 lbs
Fire resistance
Class A
Class A (deck)
Class A
Class B/C
Class A
Wind resistance
120–160 mph
60–130 mph
80–130 mph
60–90 mph
90–110 mph
Minimum pitch
0.5:12
2:12
4:12
3:12
0.25:12
Energy efficiency
High (reflective)
Moderate
Moderate
Low
Moderate
Maintenance
Minimal
Low-moderate
Low
Moderate-high
Annual inspections
Noise (rain)
Noticeable
Low
Low
Moderate
Low
50-year total cost
$11,500–$22,000
$24,000–$30,000
$20,000–$40,000
$25,000–$35,000
$15,000–$25,000
Common Tin Roof Installation Mistakes
Professional installer fastening standing seam metal panels on residential home roof with chalk line alignment – Roof Installation
Using an abrasive cutoff wheel to cut panels is a mistake
Problem: When cutting galvanized or Galvalume steel panels, abrasive grinding wheels let forth sparks that contain iron. These sparks become stuck in the protective coating, rust nearly right away, and leave persistent rust stains on the panel surface within weeks of being put up. At first, the rust stains are just decorative, but with time, they might speed up the deterioration of the panels in the afflicted locations.
Always use metal shears, aviation snips, or a circular saw with a carbide-tipped metal cutting blade that is made just for sheet metal. After cutting, use a magnetic roller or a strong magnet to quickly sweep the whole work area to pick up all the metal dust before it rusts.
Mistake 2: Driving too hard or too little on exposed fastener screws
The EPDM rubber washer under each exposed screw head is the main water seal at every fastener penetration. Overdriven screws crush the washer flat, which ruins its capacity to seal and makes a compressed, permanently deformed gasket that lets water in. Screws that are not driven enough don’t compress the washer at all, leaving a space around the fastener shank.
To fix this, drive each screw in until the EPDM washer is slightly bulged. You should notice the washer grow about 1/16 to 1/8 inch wider than its original diameter. Change the settings on the drill clutch and keep the pressure the same. After finishing each area, do a last manual check on all the screws.
Mistake 3: Putting fasteners through the bottoms of valleys
Problem: Driving fasteners through the low areas (valleys) of corrugated panels puts screw penetrations right in the course of the water flow. Water runs through the valleys, right over the screw head, and if the washer compresses too much, it creates an immediate leak source.
Solution: Always fasten through the tops of the panels (the high corrugated peaks), not the troughs. This puts every fastener penetration at the top of the profile, where water can’t flow, which greatly lowers the likelihood of leaks during the life of the panel.
Mistake 4: Not taking thermal expansion into account when planning the layout of the panels
Problem: When the temperature changes, metal expands and contracts a lot. For example, a 10-foot steel panel can expand and contract 1/8 to 3/16 inch across a range of 100°F. In the summer heat, panels that are tightly attached against each other or trim without room for expansion can buckle, causing the surface of the panel to become permanently wavy and the fasteners to pull through.
Solution: When using exposed fastener systems, make sure to install panels with the gap required by the manufacturer at all fixed trim points. For standing seam, utilize hidden floating clips that let panels move freely in seams without putting stress on the fasteners. If your standing seam extends more than 30 feet, don’t use fixed clips without floating clips every now and then.
Mistake 5: Using the Wrong Sealant on Metal Roofing
Problem: Standard silicone sealant, which is common in construction, doesn’t work with painted metal roofing. It can’t be painted over, it breaks down faster than metal roofing coatings when exposed to UV light, and it loses its grip on many Kynar and SMP coating systems after 3–5 years.
Use only polyurethane-based roofing sealants (such Geocel, Sikaflex, or something similar) or metal roofing sealant that the manufacturer says to use at all trim conditions, penetrations, and exposed fastener heads that need touch-up. These materials stay stuck to painted metal finishes even after long periods of thermal cycling and UV exposure.
Mistake 6: Not using closure strips at the eave and ridge
Without eave and ridge closure strips, the corrugated profile of metal panels makes open channels at the eave edge and ridge. These are places where birds, bats, wasps, and rats can get into the attic and where wind-driven rain can get into the roof system at its weakest points.
Solution: Before putting up panels above, put pre-formed foam or metal closure strips (that fit the shape of your panels) at every eave and ridge. This tiny feature has big effects on how well the roof works over time and how well pests are kept under control.
Tin Roof Maintenance Schedule
One of the best things about installing a tin roof is that it doesn’t need much maintenance for 40 to 70 years.
Every six months
Check the ground level for any panels that are plainly loose, trim edges that have lifted, or color changes that show rust.
Remove leaves, branches, and pine needles from valleys, eave edges, and gutters. Debris buildup keeps moisture against metal surfaces.
Every year
Check all of the exposed fastener screws. If any of the washers are cracked, flattened, or missing, replace them.
Look for cracks or gaps in all sealant at penetrations, trim overlaps, and ridge/hip cap edges. If you find any, reapply the sealant.
Check all flashings for edges that have come up or rust where different metals touch.
Use a light detergent and a soft brush to clean the panels. This will get rid of biological growth, leaf stains, and deposits from the air that might speed up the breakdown of the coating.
Every five years
A professional will look at the whole roof, including the trim, penetrations, and margins of the underlayment that are visible at the eave.
If any exposed fasteners are loose, tighten them or replace them.
Use touch-up paint from the manufacturer to fix any scratches or chips in the paint. Bare metal that is exposed to the elements may corrode and needs to be fixed right away.
Signs That Need Immediate Attention
Rust streaks on the margins of panels below fastener heads or trim
Panel gaps that can be seen at the ridge or eave (closure strip failure)
Bubbling or flaking panel coating (unusual with good products, but it means the coating has failed)
Any visible sunshine through attic-side penetration flashings
Annual tin roof maintenance inspecting exposed fastener washers, checking trim sealant, and clearing debris from valleys, extends service life and prevents the minor issues that become major repairs
Frequently Asked Questions
How much does it cost to put up a tin roof?
In 2026, it will cost between $5 and $9 per square foot to install corrugated metal panels and between $9 and $14 per square foot to build standing seam systems. For a normal 2,000 square foot home, corrugated costs between $10,500 and $20,000, while standing seam costs between $18,900 and $35,000. The cost of a tin roof is higher up front ($4,000–$12,000), but it lasts 40 to 70 years, thus over 50 years, it costs less to have one tin roof than two asphalt roofs.
How long will a tin roof last?
If you install a tin roof correctly, it will last 40 to 70 years for steel systems with good coatings and 50 to 70 years or more for aluminum systems. Because there are no aged EPDM washers to replace, standing seam metal roofs with hidden fasteners usually survive longer than corrugated systems with visible fasteners. In coastal areas, Galvalume® steel and aluminum work far better than regular galvanized steel, which can rust in salt air in 20 to 30 years.
Is it possible to install a tin roof yourself?
If you know how to work on roofs and cut sheet metal, you can put up a corrugated tin roof yourself on a one-story house with a pitch that is easy to reach (under 6:12). Estimated savings for doing it yourself: $2,000–$6,000 in work. For appropriate seam formation, standing seam installation needs instruction from the manufacturer and certain tools. It is not a good idea to do it yourself. No matter what system you use, you must have fall protection and meet local permission requirements before you can start.
What kind of underlayment do I need for a roof made of tin?
When putting on a tin roof, you need a synthetic underlayment that doesn’t have holes and can handle high temperatures instead of regular 15 or 30-pound felt. Felt releases oils that can discolor the undersides of metal panels, and it doesn’t hold up well to temperatures under metal roofs that can reach 150–180°F in the summer sun. In cold areas, ice and water shield is needed at all eave edges, in all valley circumstances, and around all penetrations, no matter what the weather is like.
Does a tin roof make noise when it rains?
When you put tin roofs over solid plywood or OSB decking with underlayment, they are only a little bit louder than asphalt shingles. This is because the solid deck and underlayment absorb most of the sound. The sound of rain is loudest on tin roofs that are put over exposed purlins and don’t have a solid deck underneath. This is prevalent in agricultural and basic residential installations. For homeowners who are worried about the noise of rain, adding a layer of stiff insulation behind the metal panels or putting them over an existing shingle layer makes a big difference.
What is the lowest pitch that can be used to install a tin roof?
The lowest pitch depends on the type of panel. For example, standing seam snap-lock systems can be put on pitches as low as 1:12, while mechanical-lock standing seam can go as low as 0.5:12 with the right seaming. For regular end-lap circumstances, corrugated panels need at least 3:12.With sealed laps, 5-V crimp panels work up to 2:12. For any metal panel with a pitch of less than 3:12, the ends must be sealed with butyl tape, and the fastening patterns must be tightened to keep water from getting in during rainstorms that are blown by wind.
Is it possible to put a tin roof over shingles that are already there?
Most building codes allow for the installation of a tin roof over an existing coating of asphalt shingles, and this is a popular practice. Installing over existing shingles costs $1 to $1.50 less per square foot to rip off. Requirements: the shingles that are already there must be fairly level (no badly cupped, buckling, or elevated shingles), the roof deck underneath must be structurally sound, and local laws must allow re-roofing over existing shingles. Most of the time, you can’t install over two layers of shingles because the combined weight and unevenness of the surface are too much.
What makes standing seam and corrugated tin roofing different?
Wave-profile panels with exposed screws through the panel surface are used in corrugated tin roofing. This makes it faster and cheaper to install, and it can be done by a larger range of people. However, the screws and washers need to be checked and replaced on a regular basis. Standing seam uses flat panels with vertical seams that lock together and fasteners that are completely hidden. This means that there are no exposed screw penetrations, which means that there are no fastener points that need a lot of maintenance. This makes the roof much more weather-resistant and gives it a much longer effective service life, but it costs 30–50% more to install.
What hue of tin roof saves the most energy?
White and light-colored tin roofs reflect the most sunlight. A white metal roof with ENERGY STAR certification reflects 60–70% of solar heat, while a black asphalt roof only reflects 25–35%. Most big companies now sell “cool roof” pigment technology in deeper colors, though. This technology reflects 30–45% of solar heat even in charcoal, dark bronze, and old copper tones. No matter what color they are, search for ENERGY STAR-certified panels with Solar Reflectance Index (SRI) ratings above 29 for the best energy efficiency.
Does a tin roof make a house worth more?
Yes, according to Remodeling Magazine’s Cost vs. Value studies, installing a tin roof usually adds $1.09 to $1.35 to the resale value for every dollar spent. This makes metal roofing one of the best exterior improvement projects for getting a good return on investment. In most real estate markets, tin roofing is a great selling point because it lasts a long time (buyers like not having to repair the roof for decades), is energy-efficient, requires little upkeep, and looks good from the street.
🏠 Roofing Tips & Updates
Get free roofing advice, cost guides, and seasonal maintenance tips.
Roofing content specialist with 5+ years researching U.S. residential and commercial roofing. Has documented 200+ projects covering installation costs, material selection, contractor vetting, and DIY guides for homeowners across all climate zones.
Dryer Vent Installation Through Roof: Step-by-Step Guide
When the shortest, most direct duct path runs straight up and down, a 4-inch rigid metal duct, proper roof flashing, a dryer vent installation through roof, and a maximum total duct run of 25–35 feet (with each 90-degree elbow adding 5 feet of run), it is possible and code-compliant to install the dryer vent through the roof. It costs $150 to $500 to have a professional install a dryer vent through the roof, depending on how deep the attic is, how steep the roof is, and how easy it is to get there. If you do it yourself, the materials will cost $80 to $200. Using a dryer-specific roof vent cap is the most important thing to do. Standard roof box vents create dangerous back pressure that can cut airflow efficiency by up to 60% and speed up lint buildup, which is a major cause of house fires.
Most homeowners don’t worry about where their dryer vents go until the day the laundry room layout makes it hard for the dryer to go out a wall, the dryer is in the middle of the house with no outside wall nearby, or the only way to get out is straight up through the attic and out the roof. In some cases, putting the dryer vent through the roof is not only okay, it’s typically the best and cleanest way to do it.
Table of Contents
A properly installed through-roof dryer vent lets air flow quickly, collects little lint, and makes a watertight hole in the roof that lasts for decades. If you don’t do it right, it makes a lint trap that holds moisture and slowly builds up to a dryer fire, a leaking roof, or both.
This full guide for 2026 has all the information you need, including when through-roof venting makes sense, building code requirements, how to choose duct material, how to install it step by step, how to flash and seal it, how to choose a roof cap, frequent problems, maintenance, and a full FAQ section.
When Should You Install a Dryer Vent Through the Roof?
When deciding how to route the dryer vent, you should always follow this rule: the shortest, straightest path to the outside.Every extra foot of duct run and every bend adds friction, which slows down the airflow, makes lint build up, and makes your dryer work harder on every load.
Through-roof venting is a good idea in several situations:
The laundry room sits in the middle of the house, but there is no easy way to get to an outside wall that is close enough for the duct run.
Stacked washer/dryer units in a closet or corridor on the second level, where vertical routing to the roof is shorter than horizontal routing to a wall.
Laundry in a finished basement where laying duct horizontally through finished walls to reach an outside wall would need a lot of work to fix
Townhomes and condos where the HOA rules say that venting from the side or back wall is not allowed or is not possible because of shared walls
Renovation projects that need to open up finished drywall in several rooms to reroute existing ducts through walls
When you shouldn’t use through-roof venting
When it’s easy to make a shorter, more direct wall escape
In places where it snows a lot, roof cap dampers can get clogged by snow buildup.
When the length of the vertical duct run goes over the code-allowed length without a booster fan
When it’s hard or unsafe to get to the roof for yearly cleaning
Building Code Rules for Putting a Dryer Vent Through the Roof
Before you pick up a drill, make sure you know the code baseline. This will keep you from failing inspections, losing your homeowner’s insurance, and putting yourself at real risk of fire. The International Residential Code (IRC) Section M1502 and the International Mechanical Code (IMC) Section 504 are the main rules that govern the installation of dryer vents. However, some states and cities may have stricter local rules that apply.
Important Code Requirements
Material for the duct:
The duct run needs to be made of rigid metal duct, like aluminum or galvanized steel. No plastic, foil flex, or vinyl is allowed.
At least 4 inches wide on the inside
Ribbed flex duct and smooth inside wall are not allowed for dryer venting because the ribs trap lint.
Maximum Length of the Duct Run:
The maximum length is usually 25 to 35 feet, depending on municipal code.
For every 90-degree elbow, take 5 feet off the maximum run length.
For every 45-degree elbow, take away 2.5 feet from the longest run allowed.
For example, if the maximum length is 25 feet and there are two 90-degree elbows, the actual duct can only be 15 feet long.
If the vertical runs are longer than the code allows or don’t have enough airflow at the end, they need an inline booster fan. This is usually a UL-listed unit that turns on automatically when the dryer runs.
Connections for ducts:
All seams were held together with metal clamps or metal foil tape that could handle the heat of a dryer.
Don’t ever use regular duct tape. The glue breaks down when it’s hot and humid, which makes seams come apart.
Sheet metal screws are not allowed within the duct because the points of the screws trap lint.
Termination on the Outside:
Vent must end outside the building, not in an attic, crawl space, or wall cavity.
A working damper that closes while the dryer is not running must be part of the roof vent cap.
The vent entrance must have a pest screen or damper that keeps animals from getting in.
No less than three feet of space between any building opening (windows, doors, vents)
Flashing:
A weatherproof flashing assembly that is made for dryer exhaust must cover all roof penetrations. Standard plumbing pipe flashing is not enough.
Why Picking the Right Dryer Vent Roof Cap Is More Important Than You Think
Most of the time, through-roof dryer vent installations fail not in the duct run itself, but at the end point.
When utilized as dryer vent terminations, standard roof box vents (the kind used for attic ventilation) make it very hard for air to flow back. In the lab, regular box roof vents create back pressure of 0.6 WCI (Water Column Inches) or more. This level of back pressure greatly reduces the efficiency of dryer airflow, speeds up lint buildup, and raises the risk of fire.
Dryer-specific roof vent covers are made to handle the amount of air and moisture that comes out of a dryer. The DryerJack and other products like it were designed because all of the normal roof vent types examined created dangerously high back pressure when utilized to vent dryer exhaust. The DryerJack’s aerodynamic damper design and improved hood geometry only slightly reduce airflow, making it the roof termination product with the least back pressure of those tested.
How to Choose a Roof Vent Cap
When choosing a roof cap for a dryer vent that goes through the roof, think about:
Back pressure rating: Look for things that have been tested and found to have low back pressure (under 0.1 WCI is great; over 0.3 WCI starts to hurt efficiency).
Damper mechanism: A spring-loaded or gravity-operated damper that completely seals when the dryer is off. This keeps cold air, animals, and rain from getting in.
Pest screening: fine enough to keep out birds and rodents without trapping lint; may be taken off for cleaning
Flashing compatibility: a built-in or compatible flashing base that fits your roof pitch range
Material: Aluminum or galvanized steel; plastic covers break down when exposed to hot exhaust and UV light over and over again.
Pitch range: Most caps fit specified pitch ranges (3:12–6:12 or 6:12–12:12), so make sure they work with your roof pitch.
Common Roof Vent Products for Dryers (2026)
Product
Back Pressure
Pitch Range
Material
Price Range
DryerJack Premium
Lowest (lab-tested)
3:12–12:12
Aluminum
$45–$75
Fantech Dryer Boost Cap
Low
4:12–9:12
Galvanized steel
$35–$60
Master Flow Dryer Vent Cap
Moderate-low
3:12–7:12
Aluminum
$25–$45
Lambro Industries Roof Cap
Moderate
3:12–8:12
Aluminum
$20–$40
Generic box roof vent
Very high (dangerous)
N/A
Various
$8–$20
In short, don’t utilize a typical attic box vent or ridge vent as a dryer vent roof termination. The back pressure it causes makes the duct run a lint collection chamber, which greatly raises the risk of a dryer fire.
Things You Need to Install a Dryer Vent Through the Roof
List of Materials
Duct System:
60-inch lengths of 4-inch rigid aluminum or galvanized steel duct (number of sections depends on length of run)
4-inch 90-degree elbows (keep the number minimal; each costs 5 feet of permitted run)
45-degree elbows that are 4 inches long (use instead of 90-degree ones when you can)
Aluminum foil duct tape, certified for 250°F or higher, for sealing all joints
Metal duct clamps (2-inch band clamps) for all mechanical connections
Duct hanger straps hold up the duct every 4 to 6 feet in the attic.
Going through the roof:
A roof vent cover that fits your dryer and has a flashing base that fits your roof pitch
If the cap doesn’t come with a roof flashing kit, it should come with base flashing and step flashing as needed.
Nails or screws for roofing (to hold the flashing in place)
Polyurethane roofing sealant or high-quality roofing cement
Matching roofing shingles (if the old shingles need to be taken off and put back on)
Duct insulation for attic runs:
Wrap for duct insulation that can handle dryer temperatures (R-6 minimum in climate zones 4–8)
Keeps condensation from forming on chilly duct surfaces in an attic that isn’t heated
Tools You Will Need
Reciprocating saw or jigsaw (for making a hole in the roof)
Use a hole saw (4¼ inch) to drill a hole in the ceiling or subfloor.
Tin snips or aviation shears (for cutting and trimming stiff duct)
Chalk line and tape measure
Knife for utility
Flat pry bar (for carefully pulling shingles that are already there)
Gun for caulking
Ladder (an extension ladder that is safe for roofs)
Safety harness (needed for roofs with a slope of more than 6:12)
Marker and straightedge
Step by Step: How to Install a Dryer Vent Through the Roof
Step 1: Decide on the route for the duct before cutting anything.
Planning the route is the most crucial part of putting in a dryer vent through the roof, and it’s also the part that people rush the most. Before you make any cuts, take the time to physically outline the path you want the duct to go from the dryer exhaust collar to the roof outlet.
The process of planning a route:
Find the exhaust collar on the dryer. It is usually in the middle of the back bottom of the dryer and is 4 inches in diameter.
Find the best place for the roof exit. The best place is right over the dryer. If possible, try to keep the horizontal offset in the attic to a minimum.
Check the attic for things that might get in the way of the proposed route, like roof joists, cross-bracing, HVAC equipment, existing ductwork, and electrical runs.
Measure the total planned duct length, which should include all sections and elbows that have been changed to feet.
Make sure that the overall comparable length doesn’t go over the maximum set by your local code (usually 25–35 feet).
If the total equivalent length is longer than the maximum, find out if the route can be shortened or if an inline booster fan is needed.
Make sure that the roof departure point doesn’t get in the way of ridge vents, existing holes, skylight frames, or valley locations.
Important rules for planning:
Plan for as few elbows as possible. Each 90-degree elbow costs you 5 feet of permitted run and makes a place for lint to build up.
The roof exit point should be on a straight slope, away from valleys, ridges, hips, and places near flashings.
Put the roof exit point where a ladder can reach it for yearly cleaning. Don’t put it on steep slopes that are hard to get to.
Step 2: Put in the attic duct run
Finish all of the ducting inside and in the attic before going on the roof. This lets you figure out the exact spot where the roof ends by looking at where the duct naturally ends in the attic.
Put the first piece of ductwork on the dryer’s exhaust collar, use a metal clamp to hold it in place, and then tape it up with foil.
Use the right wall sleeves to run stiff duct sections through the ceiling and into the attic where the duct goes through frame members.
To connect duct pieces, crimp the smaller end (male end) into the bigger end (female end). The airflow should go from the dryer to the roof, with the male end facing toward the dryer and the female end pointing toward the roof.
Use metal band clamps AND foil tape to make sure all connections are snug and won’t leak.
Support the duct with hanger straps that are fastened to the attic structure every 4 to 6 feet. Sags trap lint and condensate.
At the proposed exit location for the roof, the last length of duct should end about 6 inches below the roof decking.
Wrap all of the duct sections that go through unconditioned attic space with insulation wrap. This is because condensation on cold duct walls causes moisture to build up and lint to stick faster.
Step 3: Mark and Cut the Hole in the Roof
This stage entails working on the roof, thus you need to follow all fall protection rules:
From the attic:
To mark the center of the hole from below, put a nail or drill bit up through the roof decking at the anticipated exit location.
Make sure the marker nail comes out of the roof in a clean spot, not on a rafter, ridge, or valley.
From the top:
Find the marking nail on the roof.
Use the vent cap flashing as a guide to draw the whole outline of the hole and flashing base on the roof.
Carefully raise the shingles in the flashing zone with a utility knife, then slip a pry bar beneath the shingles to prevent cracking them.
At the marker nail location, mark the center of the 4¼-inch hole.
Cut through the roof decking using a jigsaw or reciprocating saw, but stay inside the lines you drew.
Remove any dirt from the aperture and clean the cut edges.
Step 4: Put in the vent cap and roof flashing
Proper flashing is what makes the difference between a roof that stays waterproof for 20 years and one that leaks the first time it rains:
Put a layer of roofing cement or polyurethane sealer around the edge of the hole you cut in the roof decking.
If your roof cap has a built-in flashing base, slip the flashing base beneath the higher shingles and over the lower shingles. This is like the conventional step flashing principle: water must flow over the flashing, not under it.
For dedicated flashing kits, follow the manufacturer’s instructions exactly when putting up base flashing first and then counter flashing.
Use roofing nails to nail the flashing along the edges of the roof deck at the corners and at intervals set by the manufacturer.
Put roofing cement under all the flashing edges that touch the roof surface, and make sure there is a perfect seal around all four sides.
From above, push the vent cap through the flashing opening so that it connects to the duct below.
Put the lifted shingles back over the top of the flashing and nail them back in place.
Put roofing sealant around the top and side edges where the shingles meet the flashing to make a full weatherproof seal.
Check that the damper on the vent cap can be opened and closed by hand.
Step 5: Attach the Roof Cap to the Duct and Seal It
Back in the attic:
Connect the last part of the duct to the collar within the roof cap. From below, push the end of the duct into the collar of the cap.
Use a metal band clamp to hold it in place and tighten it well.
Use aluminum foil tape to seal the connection joint. Wrap it all the way around the junction, with at least 2 inches of overlap.
Check to see sure the duct between the last hanger strap and the roof connection doesn’t have any sags, kinks, or unsupported parts.
Step 6: Close off the connections and holes on the dryer side.
At the conclusion of the dryer, link the dryer transition hose (a short, flexible piece of aluminum) to the first rigid duct segment and the dryer collar.
Use clamps and foil tape to hold both ends in place.
If the duct goes through a rated assembly, use high-temperature fire-stop caulk or code-approved fire blocking to seal the gap.
Check all the joints along the whole run one more time. Each junction should be taped with foil and clamped.
Step 7: Check the System
Before you clean up, testing makes sure the installation is correct before you seal off access to the attic:
Set the dryer on a high-heat cycle for 10 minutes.
Check the vent cap damper on the roof to make sure it is open and that you can feel warm, moist exhaust air coming out easily.
You should be able to feel a strong, constant flow of air right away if you hold your hand 6 to 12 inches above the cap.
While the system is running, go back to the attic and put your hand near each duct junction. You shouldn’t feel any air leaking.
If the airflow at the roof cap is weak or the damper barely opens, look for: kinked duct sections, missed joint connections, or a total run length that is longer than code restrictions (a booster fan may be needed).
After the drying cycle, look at the flashing area from the roof. There shouldn’t be any signs of water getting in.
After the test run, look for condensation on the duct insulation from the attic. This means that the insulation is not thick enough or the duct is too long.
Correct dryer vent flashing orientation ,upper shingles always overlap the top flashing edge so water flows over, never under, the penetration flashing
Dryer Vent Installation Cost Breakdown (2026)
Costs of DIY materials
Item
Low Cost
High Cost
Rigid aluminum duct (per 5-ft section)
$8
$18
90-degree elbows (each)
$6
$14
Dryer-specific roof vent cap
$25
$75
Roof flashing kit
$15
$45
Metal foil duct tape + clamps
$12
$25
Duct hanger straps
$8
$15
Duct insulation wrap (per 6 ft)
$10
$22
Roofing sealant/cement
$8
$18
Roofing nails/screws
$5
$10
Total DIY Materials (typical run)
$97
$242
Professional Installation Costs
Scenario
Cost Range
Simple vertical run (under 10 ft)
$150–$280
Standard attic run (10–20 ft, 1–2 elbows)
$250–$400
Complex run (20–30 ft, multiple elbows)
$350–$600
With booster fan installation
Add $125–$250
With fascia/wall repair (attic access)
Add $100–$200
Two-story home (difficult attic access)
Add $75–$150
DIY or Professional: A Guide to Making a Choice
When to do it yourself:
Comfortable working on the roof with safety gear
One-story house with an easy-to-reach attic and a straight vertical run
Confident in basic sheet metal work, putting up flashing, and sealing roofs
Estimated savings: $150 to $400 compared to hiring a pro
When to hire a professional:
Roof with two stories or a steep pitch
Difficult attic routing with a lot of problems
No experience with roof flashing or other roofing work before
A booster fan is needed for the run length, and electrical work makes things more difficult.
The roof is ancient or has flashing problems that need to be fixed at the same time.
Common Mistakes When Installing a Dryer Vent Through the Roof
Mistake #1: Using a regular roof box vent as the end point
Problem: When utilized for dryer exhaust, standard attic ventilation box vents create severe back pressure (0.6+ WCI), which greatly slows down airflow and speeds up lint buildup, which is a direct fire hazard.
Always use a roof vent cap made just for dryers that can handle the amount and temperature of dryer exhaust. The DryerJack and other similar items are made just for this use and cost only $25 to $75 more than a regular box vent.
Mistake 2: Putting Flex Duct or Plastic Duct on Roof Runs
Problem: The code says that flexible ribbed duct and plastic duct can’t be used for dryer venting because the ribs catch lint at every corrugation, plastic breaks down when it gets hot, and flex duct sags between supports, causing pools of moisture and lint.
Use only smooth-wall rigid aluminum or galvanized steel duct for the whole route as a solution. It is okay to have a small (less than 8 inches) piece of flexible aluminum transition hose at the dryer connection. Everything else must be solid.
Mistake 3: Going over the maximum length of the duct run
Problem: A duct run longer than 25 to 35 feet (including elbow equivalents) doesn’t let enough exhaust flow through, lint builds up quickly, drying cycles take longer, and the risk of fire goes up with time.
Answer: Before installing, figure out the total comparable run length by adding 5 feet for each 90-degree elbow and 2.5 feet for each 45-degree elbow. If your route is longer than the maximum, you need to either find a shorter one or put in an inline booster fan.
Mistake 4: Using regular duct tape instead of foil tape
Problem: The glue on regular cloth duct tape breaks down in 1 to 3 years when it is exposed to heat, humidity, and temperature changes from the dryer. Separated joints let lint into the attic, which slows down ventilation and makes a fire more likely.
Solution: Only use aluminum foil tape that is rated for high-temperature duct applications (look for a UL 181A or 181B designation). This tape will stay stuck even when the dryer is running.
Mistake 5: Not insulating the attic ducts
Problem: In cold areas, an uninsulated 4-inch metal duct that runs through an unconditioned attic becomes a condensation surface. The warm, moist dryer exhaust cools quickly, causing water vapor to condense inside the duct. This creates a wet lint paste that is very hard to remove.
Solution: Use duct insulation rated for dryer temperatures (at least R-6 in cold locations) to cover all the duct sections that go through the attic that isn’t heated. This keeps the temperature and speed of the exhaust gas steady during the run.
Mistake 6: Putting the Flashing on Backwards
Problem: Roof flashing needs to guide water over the flashing and away from the hole. If the flashing is put in wrong, with the upper shingles going under the top border of the flashing instead of over it, water will run straight into the roof opening.
The solution is that the upper shingles must always cover the top border of the flashing. The bottom border of the flashing is where the lower shingles go. Think of it like a shingle: water flows downhill, over every edge, and never under an edge that goes up.
Dryer Vent Installation Through Roof: Annual Maintenance
Cleaning a dryer vent that goes through the ceiling at least once a year is the very minimum. Households that do a lot of laundry or have extensive duct lines should clean it more often. According to the U.S. Fire Administration, lint buildup in dryer vents causes over 15,000 fires in homes each year. Administration of Fire.
Checklist for Annual Maintenance
From the top:
Check the vent cap and make sure the damper can open and close easily. Remove any lint that has built up on the damper and screen.
Look for raised edges, damaged sealant, or other evidence of water getting in on the flashing.
Check the shingles around the vent cap right away to see if they are lifting or damaged.
If you have them, take off the pest screens and remove the lint from them.
From the end of the dryer:
Take out the transition hose from the dryer and put in a brush to clean the dryer vent.
Work the brush through the whole duct line, pushing brush rods through all the sections until they reach the roof.
Or, utilize a lint removal kit that runs on a drill (better for long vertical runs).
Vacuum up the lint that has come loose from the duct’s inside.
If you see any of these signs, your dryer vent installation through the roof needs to be fixed right away:
The dryer needs to run through several cycles to completely dry a load (lint buildup slows down airflow).
The dryer gets hot to the touch, or the laundry area is particularly warm while it’s running.
While the dryer is running, you can smell something burning or musty.
The vent cap damper doesn’t move while the dryer is running.
Water stains around the vent cap on the roof when the attic was checked from the inside
Annual dryer vent cleaning is non-negotiable for through-roof installations, lint accumulation in dryer ducts causes approximately 15,000 U.S. residential fires every year
Frequently Asked Questions
Can you vent a dryer via the roof?
Yes, installing a dryer vent via the roof is a code-compliant, professionally approved method when the vertical route is the fastest and most direct way to get to the outside. It needs a 4-inch rigid metal duct, a roof vent cap made just for dryers (not a regular box vent), weatherproof flashing, and a total duct run that is no more than 25 to 35 feet, which is the code limit. Cleaning once a year is important for safety.
How long can a dryer vent go through the roof at most?
Most building regulations that follow IRC Section M1502 say that the maximum length of a duct that can be used is 25 to 35 feet from the dryer exhaust collar to the outside termination. Every 90-degree elbow takes away 5 feet from the maximum, while every 45-degree elbow takes away 2.5 feet. For instance, if the maximum length is 25 feet and there are two 90-degree elbows, the duct can only be 15 feet of straight flow. If the runs are longer than the maximum, an inline booster fan is needed to keep the exhaust speed up.
What kind of duct should you use to put a dryer vent through the roof?
Use 4-inch smooth-wall rigid metal duct, which can be made of either aluminum or galvanized steel. The code says that you can’t use flexible ribbed duct for dryer venting because the ridges on the inside catch lint. Plastic duct breaks down as it becomes hot in the dryer, and it is also against the law. A brief, flexible aluminum transition hose (less than 8 inches) between the dryer and the first stiff portion is fine, but the whole run into the attic and up to the roof must be made of hard metal.
Do I need special flashing for a roof vent for my dryer?
Yes, typical plumbing pipe flashing is not good for dryer vent roof penetrations. You need a weatherproof flashing system that fits 4-inch duct and seals the roof opening while letting exhaust flow freely. Most roof vent caps that are made for dryers come with a built-in flashing base. The flashing needs to be put in place so that the higher shingles cover its top border. Water should always flow over the flashing, not under it. Use roofing cement or polyurethane sealer to seal all the edges of the flashing.
What is the finest cap for a dryer roof vent?
The DryerJack is commonly thought to be the best dryer roof vent cap since it is specifically made for dryer exhaust and has been tested in a lab to have low back pressure that keeps airflow efficiency high. Standard attic box vents are unsafe alternatives that create back pressure greater than 0.6 WCI, which slows down airflow and speeds up the buildup of lint. A roof vent cap made just for your dryer should have a working damper, keep pests out, and have roof flashing that fits your roof’s pitch range.
Do I need a fan to help my dryer vent go through the roof?
You need a booster fan if your total comparable duct run length is longer than the local code maximum (usually 25–35 feet) or if testing shows that the airflow at the roof top is not good enough. A vent cap damper that hardly opens, longer dryer cycles, and lint buildup after only a few months of use are all signs that there isn’t enough ventilation. Booster fans for dryer vents are inline units that turn on by themselves when the dryer is running. They keep the exhaust speed up for lengthy vertical runs.
How often should you clean a roof vent for a dryer?
At least once a year, but more often for homes who do five or more loads of laundry a week or have runs longer than 20 feet. Many people put off cleaning their roof dryer vents for too long because they are tougher to get to than wall-exit vents. In the U.S., lint buildup in dryer vents starts about 15,000 house fires each year. If the vent is blocked, it will take longer for clothes to dry, it will get too hot, it will smell like burning, and the vent cap damper will hardly move when the dryer is running.
Should the attic have insulation on the dryer duct?
Yes, any duct sections that go through an attic that isn’t heated or cooled should be insulated with duct wrap that is rated for dryer temperatures (at least R-6 in climatic zones 4–8). Without insulation, warm, moist exhaust air cools quickly within a cold duct. This causes condensation, which gathers water inside the duct. Lint sticks to wet surfaces, and the resulting paste is very hard to get rid of. Insulation keeps the exhaust temperature and speed the same throughout the whole run, which cuts down on condensation and lint sticking to the surface.
What kind of tape should I use to connect the dryer vent ducts?
Never use regular cloth duct tape; only use aluminum foil tape that is rated for high-temperature duct work (UL 181A or 181B specified). Under the heat and humidity of a dryer, the glue on regular duct tape stops working after 1 to 3 years. This causes joints to come apart and lint to escape into the attic. Aluminum foil tape sticks to things permanently at the temperatures that dryers work at and makes an airtight seal at every junction. For extra safety, use metal band clamps along with foil tape at any mechanical connections.
Can I put a dryer vent through the roof by myself?
If you live in a one-story house and are comfortable working on the roof, making simple sheet metal parts, and putting up flashing, you can install a dryer vent through the roof yourself. The cost of materials is between $97 and $242, while the cost of having it professionally installed is between $150 and $600. The most important things to do are to use only rigid metal duct, put in a roof vent cap that is made just for dryers (not a conventional box), layer the flashing correctly so that water runs over it and never beneath it, and seal any holes with the right roofing sealant. Professional installation is helpful for homes with two stories, steep roofs, and complicated attic routing.
🏠 Roofing Tips & Updates
Get free roofing advice, cost guides, and seasonal maintenance tips.
Roofing content specialist with 5+ years researching U.S. residential and commercial roofing. Has documented 200+ projects covering installation costs, material selection, contractor vetting, and DIY guides for homeowners across all climate zones.
How to Start a Roofing Company: Step-by-Step Guide 2026
Starting a roofing company in 2026 requires $30,000–$80,000 in startup capital, a contractor license (required in most states), general liability insurance ($3,000–$8,000/year), workers’ compensation ($7,500–$15,000/year), an LLC business structure, and basic equipment including a truck ($15,000–$45,000) and trailer ($3,000–$8,000) with new roofing companies typically generating $150,000–$500,000 in revenue during year one depending on market size, crew size, and marketing investment (ServiceTitan, 2026). The U.S. roofing industry generates over $56 billion annually and remains one of the most recession-resistant trades, as roofs require replacement regardless of economic conditions.
Table of Contents
The roofing industry offers one of the clearest paths to entrepreneurship in the skilled trades: high demand, recurring work driven by weather and aging housing stock, strong profit margins of 15–30% net on residential projects, and relatively low barriers to entry compared to other construction trades. According to the U.S. Bureau of Labor Statistics, roofing employment is projected to grow 5% through 2032, and with over 5 million residential roofs replaced annually in the U.S., new roofing companies with strong local marketing and quality workmanship can establish profitable operations within 12–18 months of launch.
This complete 2026 guide walks through every step required to start a roofing company from business planning and licensing to insurance, equipment, pricing, hiring, and digital marketing with specific cost figures, state-by-state licensing notes, and actionable strategies for landing your first contracts.
Why Start a Roofing Company in 2026?
Before diving into the how-to, understanding why roofing is one of the best trades businesses to launch establishes the strategic foundation for everything that follows.
Market Opportunity
The U.S. residential roofing market processes approximately 5–6 million roof replacements per year, driven by aging housing stock (the median U.S. home is 40+ years old), severe weather events (hailstorms alone cause $15+ billion in property damage annually), and growing demand for energy-efficient and premium roofing materials. Roofing companies that establish strong local reputations can build consistent revenue streams from insurance storm work, planned replacements, and commercial maintenance contracts.
Financial Potential
Residential roofing companies in established markets generate:
Year 1 revenue: $150,000–$500,000 (owner-operator + 1–2 crew members)
Year 3 revenue: $500,000–$2,000,000+ (multiple crews, diversified services)
Net profit margins: 15–30% on residential replacement jobs
Average job revenue: $8,000–$18,000 per residential roof replacement
Recession Resistance
Unlike discretionary home improvement projects, roof replacements are largely non-negotiable a leaking or storm-damaged roof must be addressed regardless of economic conditions. This makes roofing one of the most recession-resistant service businesses, with demand remaining stable or increasing during economic downturns when homeowners delay other renovations but cannot postpone urgent roof repairs.
Step 1: Develop Your Roofing Business Plan
Every successful roofing company starts with a written business plan that defines your market, services, financial targets, and competitive positioning before spending a single dollar on equipment or licenses.
Define Your Service Offerings
Decide which roofing services your company will provide from day one:
Core Services (recommend starting here):
Residential asphalt shingle replacement
Storm damage assessment and insurance claim assistance
Roof repair and emergency leak response
Roof inspection services
Expansion Services (add after 12–18 months of operation):
Metal roofing installation
Flat/low-slope commercial roofing
Gutter installation and replacement
Skylight installation
Roof cleaning and maintenance programs
Specializing in residential asphalt replacement at launch simplifies training, estimating, and material purchasing while allowing you to build volume and reputation before expanding to higher-complexity work.
Define Your Service Area
Identify your target geographic market:
Primary radius: 20–30 miles from your home base for initial operations
Population density: Urban/suburban markets support higher job volume and faster growth
Competition analysis: Research existing roofing companies in your target area using Google Maps, Angi, and HomeAdvisor identify gaps in coverage, response time, or specialty services
Storm corridor advantage: If your region experiences frequent hail or wind events (Texas, Oklahoma, Colorado, Midwest), storm-driven insurance work can accelerate early revenue dramatically
Financial Projections
Build a realistic 3-year financial model:
Year 1 targets (owner-operator + 2 crew members):
Jobs per month: 4–8 residential replacements
Average job revenue: $8,000–$14,000
Monthly revenue: $32,000–$112,000 (weather-dependent; peak in spring/fall)
Annual gross revenue: $200,000–$600,000
Net profit (after materials, labor, overhead): $30,000–$90,000
Year 3 targets (2 crews):
Jobs per month: 15–30
Annual gross revenue: $750,000–$2,500,000
Net profit: $112,500–$500,000
Step 2: Choose Your Roofing Company Business Structure
Business structure determines your personal liability exposure, tax treatment, and administrative requirements one of the most important early decisions for any new roofing company.
Business Structure Options
Sole Proprietorship:
Simplest structure no separate business registration required in most states
Critical disadvantage: Zero legal separation between business and personal assets; a lawsuit or major liability claim can take your home, savings, and vehicles
Not recommended for roofing given the high injury and property damage risk
LLC (Limited Liability Company) Recommended:
Protects personal assets from business liabilities
Flexible tax treatment (taxed as sole proprietor, partnership, or S-Corp)
Formation cost: $50–$500 depending on state (most average $100–$200)
Requires operating agreement and annual report filings
Best choice for most new roofing companies
S-Corporation:
Preferred structure once revenue exceeds $80,000–$100,000/year
Allows owner to split income between salary and distributions, reducing self-employment tax
More administrative complexity than LLC
Best for established roofing companies generating $500,000+ annually
Still exposes partners to personal liability without LLC protection
“An LLC is non-negotiable for roofing contractors. One uninsured incident a worker injury, a damaged vehicle, a botched installation can result in a judgment exceeding your business assets. An LLC keeps that judgment away from your personal finances.” – License to Build Contractor Guide, 2026
Registration Steps for LLC
Choose a business name (verify availability in your state’s Secretary of State database)
File Articles of Organization with your state ($50–$500 fee)
Obtain an EIN (Employer Identification Number) from IRS.gov free, takes 5 minutes
Open a dedicated business bank account (keep personal and business finances completely separate)
Create an Operating Agreement defining ownership and management structure
Register for state and local business licenses as required
Step 3: Get Licensed and Meet Legal Requirements
Licensing requirements for roofing companies vary significantly by state some require passing trade exams and proving years of experience; others have no state license at all.
State Licensing Overview
Category
States
Requirements
Full license required
Florida, California, Arizona, Illinois, Alabama, North Carolina
Pass trade + business law exams; prove 2–4 years experience; post surety bond; provide insurance proof
Registration required (not full license)
South Carolina, Pennsylvania, Ohio, Massachusetts
Register with state board; show insurance; may require HIC registration
No state license (check local)
Texas, Colorado, Kansas, Georgia, Indiana, New York
Register business with Secretary of State; city/county licenses may apply
Key licensing requirements in major states:
California: C-39 Roofing Contractor license required; pass law and trade exams; 4 years journey-level experience
Texas: No state license; some municipalities require local registration
Colorado: No state license; check county and city requirements
Federal Requirements
Regardless of state:
EIN: Required for hiring employees and opening business accounts (free at IRS.gov)
OSHA Compliance: Fall protection standards (29 CFR 1926.502) are the most critical; OSHA 10 or 30 certification is strongly recommended for all crew leaders
EPA Lead-Safe Certification: Required when disturbing paint on pre-1978 homes during roofing work RRP (Renovation, Repair, and Painting) Rule compliance is federally mandated
Surety Bond Requirements
Most states requiring licensing also require surety bonds:
Bond amount: Typically $10,000–$25,000
Annual cost: $200–$500 for $10,000–$25,000 bond (1–3% of face value)
Purpose: Protects customers if contractor defaults on a project or violates license terms
Step 4: Secure Roofing Business Insurance
Roofing carries higher liability exposure than almost any other construction trade, making comprehensive insurance coverage non-negotiable before starting any work.
Required and Recommended Coverage
Insurance Type
Coverage
Annual Cost
Required?
General Liability
$1–$2 million per occurrence
$3,000–$8,000
Yes (most clients/states)
Workers’ Compensation
Medical + lost wages for injured workers
$7,500–$15,000
Yes (most states when hiring)
Commercial Auto
Work vehicles accident/damage/theft
$1,500–$4,000
Yes (for company vehicles)
Tools & Equipment
Replacement of stolen/damaged tools
$500–$1,500
Recommended
Professional Liability
Errors, omissions, faulty workmanship
$800–$2,000
Recommended
Umbrella Policy
Additional coverage beyond other policy limits
$500–$1,500
Strongly recommended
Total annual insurance budget: $8,000–$23,000 for a small roofing company with 2–4 employees.
Workers’ Compensation Rate Note
Workers’ compensation rates for roofing are among the highest of any trade due to fall injury risk:
Rate: $15–$30 per $100 of payroll (versus $2–$5 for many other trades)
On a $50,000 annual payroll: $7,500–$15,000 in workers’ comp premiums alone
Proper OSHA fall protection training and documented safety programs can reduce rates by 10–25% through experience modification rating improvements over time
“Workers’ compensation insurance for roofing contractors typically costs 3–6× more than equivalent coverage for general carpenters or painters. New roofing business owners should budget conservatively for this expense as it’s often the largest single insurance line item.” – ServiceTitan Roofing Business Guide, 2026
Step 5: Calculate Startup Costs
Understanding the full capital requirement prevents the most common failure mode for new roofing companies running out of cash before generating consistent revenue.
Complete Startup Cost Breakdown
Category
Low Estimate
High Estimate
Notes
Business registration + legal
$500
$2,000
LLC formation, contracts, attorney fees
Contractor license + bonds
$2,000
$10,000
Varies significantly by state
General liability insurance
$3,000
$8,000
Annual premium upfront
Workers’ compensation
$5,000
$15,000
Required when hiring crew
Commercial vehicle (truck)
$15,000
$45,000
Used F-250/350 or similar
Trailer
$3,000
$8,000
Materials and debris hauling
Tools and equipment
$3,000
$8,000
Nail guns, ladders, safety gear
Safety equipment
$1,500
$4,000
Harnesses, helmets, fall protection
Initial material inventory
$2,000
$5,000
First 2–3 jobs stock
Website + digital marketing
$1,500
$5,000
Website build + initial ads
Business software
$500
$2,000
Estimating, CRM, accounting
Working capital reserve
$5,000
$15,000
2–3 months operating expenses
Total Startup Investment
$42,000
$127,000
Most start at $50,000–$80,000
Startup Financing Options
Personal savings: Most common; avoids debt but requires capital accumulation
SBA 7(a) loans: Government-backed loans up to $500,000 at competitive rates for qualified businesses
Equipment financing: Finance truck and trailer separately (20–30% down, 3–5 year term)
Business credit cards: For tools and initial marketing (pay monthly to build credit)
Manufacturer credit programs: GAF, Owens Corning, and CertainTeed offer material financing to certified contractors
Angel investors or business partners: Bring in equity partner with capital in exchange for ownership percentage
85% of homeowners begin contractor searches online — Google Business Profile optimization and yard signs at every job site are the two highest-ROI marketing investments for new roofing companies
Step 6: Purchase Equipment and Set Up Operations
Essential Equipment List
Vehicles and Transport:
1-ton pickup truck (F-250, F-350, Ram 2500/3500): Primary for crew transport and towing
16–18 ft equipment trailer: Materials delivery and debris haul-off
Budget: $18,000–$53,000 combined
Roofing Tools (per crew):
Pneumatic roofing nail guns (2–3): $150–$350 each
Air compressor (6-gallon minimum): $200–$500
Extension ladders (24 ft and 32 ft): $300–$600 each
Roof jacks and planks: $200–$400
Hook blades and utility knives: $40–$80
Pry bars and shingle shovels: $80–$150
Chalk line and tape measures: $30–$60
Caulking guns and sealant tools: $30–$60
Safety Equipment (non-negotiable per OSHA 1926.502):
Full-body harnesses: $80–$150 per worker
Roof anchors and rope systems: $200–$500
Hard hats: $25–$60 each
Safety glasses and gloves: $20–$40 per worker
Non-slip work boots: $80–$180 per worker
Business Operations:
Laptop or tablet for estimates: $500–$1,200
Measuring wheel or drone (optional but recommended): $100–$3,000
Printer for contracts and permits: $150–$300
Phone plan with data for field communication: $50–$100/month
Roofing Software for New Companies
Estimating: EagleView or iRoofing (satellite measurement, $150–$300/month)
CRM and job management: JobNimbus, AccuLynx, or Roofr ($100–$300/month)
Accounting: QuickBooks Online ($30–$90/month)
Proposal software: Roofr or JobNimbus integrated proposals
Step 7: Set Your Pricing Strategy
Pricing roofing jobs correctly from day one is critical underpricing wins jobs but destroys cash flow, while overpricing loses bids in competitive markets.
Per-square pricing: Most common price per 100 sf of roof area. Simplest for estimating and customer comparison.
Itemized line-item pricing: Detailed breakdown of each cost component. Builds customer confidence and reduces price objections by demonstrating value.
Flat-rate pricing: Fixed price for standard job types (e.g., $7,500 for any 20-square 3-tab replacement). Simplifies sales but requires accurate cost modeling.
Step 8: Build Your Roofing Company Brand and Online Presence
In 2026, 85% of homeowners begin their contractor search online before making first contact your digital presence directly determines how many leads your roofing company receives.
Essential Digital Marketing Assets
Professional Website (Priority #1): Your roofing company website must include:
Clear service description with service area
Photo gallery of completed projects (real photos – not stock)
Customer testimonials and Google review integration
Clear call-to-action (phone number prominent on every page)
Contact form for estimate requests
Mobile-optimized design (60%+ of searches are mobile)
Google Business Profile (Priority #2):
Claim and fully optimize your Google Business listing
Add all services, hours, photos, and complete contact information
Respond to every review – positive and negative
Add weekly posts showing completed projects
This is the single highest-ROI marketing action for a new roofing company
Effective for new companies without organic rankings
Budget: $500–$2,000/month minimum for meaningful results
Facebook and Instagram Ads:
Effective for retargeting website visitors and targeting homeowners by age/income/location
Before/after photos and project showcases perform well
Budget: $300–$800/month
Offline Marketing Strategies
Yard signs: Place signs at every active job site; neighbors observe and inquire
Door hangers: Distribute in neighborhoods where you’re actively working (“We just roofed your neighbor’s home at 123 Main St…”)
Vehicle branding: Wrap truck and trailer with company name, phone, and services -estimated 30,000–70,000 impressions daily in urban areas
Referral program: Offer $200–$500 referral fee to past customers for every new job referred
Realtor and insurance agent partnerships: Realtors need pre-listing roof inspections; insurance agents connect adjusters with quality contractors for storm claims
Step 9: Hire and Manage Your First Roofing Crew
When to Hire
Most roofing company owners start as owner-operators, doing physical roofing work alongside 1–2 helpers for the first 6–12 months. Hire your first dedicated crew when:
You have consistent weekly job flow (at least 2–3 jobs per week)
Administrative work is consuming time that should be spent selling
Physical roofing alongside crew is limiting your business development activities
Revenue supports crew payroll without cash flow risk
Hiring Options: W-2 Employees vs Subcontractors
W-2 Employees:
You withhold payroll taxes, provide workers’ comp and benefits
Greater control over quality, schedule, and procedures
Higher administrative burden and fixed costs
Best for core crew you want to retain long-term
Subcontractors (1099):
They provide their own tools, insurance, and tax compliance
More flexible use more capacity in busy periods, less in slow periods
Risk: IRS scrutiny of contractor classification must pass the “ABC test” in many states
Subcontractor crews must carry their own workers’ compensation to avoid your liability
Best for occasional overflow work while building permanent crew
Crew Composition for a 1-Crew Operation
Minimum viable crew:
1 crew leader (experienced roofer hire this person first)
2 laborers/helpers
Owner managing, selling, and often working on-site
Attic insulation: Often upsold during roof inspection
85% of homeowners begin contractor searches online — Google Business Profile optimization and yard signs at every job site are the two highest-ROI marketing investments for new roofing companies
Roofing Company Profitability and Financial Management
Key Performance Metrics to Track
Metric
Healthy Benchmark
Warning Signal
Gross profit margin
35–50%
Below 30%
Net profit margin
15–30%
Below 10%
Material cost as % of revenue
35–45%
Above 50%
Labor cost as % of revenue
20–30%
Above 35%
Marketing cost as % of revenue
8–15%
Above 20%
Close rate on estimates
35–55%
Below 25%
Average job revenue
$8,000–$16,000
Below $6,000
Revenue per crew per day
$2,000–$4,000
Below $1,500
Cash Flow Management
Roofing companies face seasonal cash flow volatility peak revenue in spring and fall, slower winters in northern markets:
Require deposits: Standard practice is 30–40% deposit at contract signing, balance upon completion
Invoice immediately: Submit final invoice same day as job completion
Establish a business line of credit: $25,000–$100,000 line available before you need it not after
Retain 3 months operating expenses in reserve: Cover payroll and overhead during slow periods
Negotiate material terms: Most distributors offer net-30 terms for established contractors use to improve cash position
A properly equipped 3-person roofing crew with OSHA fall protection can complete a 20-square residential replacement in one day, generating $6,000–$10,000 in revenue per crew day
Frequently Asked Questions
How much does it cost to start a roofing company?
Starting a roofing company costs $42,000–$127,000 in total startup capital, with most new roofing companies launching on $50,000–$80,000. The largest expenses are vehicle and trailer ($18,000–$53,000), insurance ($8,000–$23,000 annually), licensing and bonding ($2,000–$10,000), and working capital reserves ($5,000–$15,000). Owner-operators who start small with minimal crew and used equipment can launch for as little as $30,000.
Do I need a license to start a roofing company?
License requirements vary by state. States like Florida, California, and Arizona require full roofing contractor licenses involving trade exams, experience verification, and surety bonds. States like Texas, Colorado, and Kansas have no state license requirement, though local permits may apply. Always verify requirements with your state licensing board before operating working without required licenses exposes you to fines, inability to pull permits, voided insurance claims, and personal lawsuit liability.
How profitable is a roofing company?
Roofing companies generate net profit margins of 15–30% on residential replacement jobs. A single-crew roofing company completing 4–6 jobs per month at $10,000 average generates $480,000–$720,000 in annual revenue, with $72,000–$216,000 in net profit. Two-crew operations can generate $1,000,000–$2,500,000 in revenue with $150,000–$500,000+ net profit. Storm damage markets and insurance claim work typically generate the highest margins.
Can I start a roofing company with no experience?
Starting a roofing company with no field experience is legally possible in some states but practically very risky poor installation quality generates warranty callbacks, insurance claims, and reputation damage that destroys new companies quickly. Most successful roofing company owners have 2–5 years of field experience before launching independently. If you lack experience, consider spending 1–2 years working for an established roofing company first, or partner with an experienced crew leader who handles field operations while you manage sales and business development.
What insurance does a roofing company need?
Every roofing company needs at minimum: general liability insurance ($1–$2 million coverage, $3,000–$8,000/year), workers’ compensation ($7,500–$15,000/year for a small crew), and commercial auto insurance ($1,500–$4,000/year). Strongly recommended additions include tools and equipment coverage ($500–$1,500/year), professional liability/errors and omissions ($800–$2,000/year), and an umbrella policy ($500–$1,500/year). Total annual insurance budget for a 2–4 person roofing company runs $8,000–$23,000.
How do I get my first roofing customers?
The fastest paths to first roofing customers are: Google Business Profile optimization (free, high-intent local searches), yard signs at every job site ($5–$15 per sign), HomeAdvisor or Angi lead services ($30–$80 per lead), door hangers in neighborhoods where you’re working, and referrals from friends and family. Most new roofing companies land their first 10–20 jobs through personal networks, then transition to digital marketing for scale. Offering a competitive price and exceptional cleanup and communication on early jobs generates the 5-star reviews that fuel organic growth.
What is the best business structure for a roofing company?
An LLC (Limited Liability Company) is the best structure for most new roofing companies it protects personal assets from business liabilities, offers flexible tax treatment, costs only $50–$500 to form, and is recognized and respected by customers, insurance companies, and material suppliers. Sole proprietorships should be avoided in roofing due to the high injury and property damage liability exposure. S-Corporation election (through the LLC) becomes advantageous once annual net income exceeds $80,000–$100,000.
How long does it take to start making money with a roofing company?
Most new roofing companies generate their first paying jobs within 30–60 days of launch if marketing is started immediately. Breaking even on startup costs typically takes 6–12 months. Building a consistently profitable operation with reliable crew, repeat customer base, and strong online reviews generally takes 12–24 months. Companies that invest in digital marketing from day one, obtain manufacturer certifications within year one, and focus relentlessly on quality and customer service reach profitability faster than those who rely solely on word of mouth.
What equipment do I need to start a roofing company?
Essential startup equipment includes: 1-ton truck ($15,000–$45,000), equipment trailer ($3,000–$8,000), pneumatic nail guns (2–3 units at $150–$350 each), air compressor ($200–$500), extension ladders (24 ft and 32 ft, $300–$600 each), roof jacks and planks ($200–$400), OSHA-compliant fall protection per worker ($280–$650 each), and estimating software ($150–$300/month). Total tool and equipment investment for a complete 3-person crew runs $8,000–$20,000 excluding vehicle and trailer.
How do roofing companies find work in slow seasons?
Roofing companies maintain revenue in slow seasons (winter in northern markets) through several strategies: commercial flat roofing and maintenance contracts (year-round work regardless of weather); storm damage repairs (emergency response work available any season); interior work like attic insulation (weather-independent service); marketing budget shifts toward spring aggressive advertising in January–February generates leads ahead of the spring rush; and customer maintenance programs (annual inspection agreements that keep your name in front of existing customers year-round).
🏠 Roofing Tips & Updates
Get free roofing advice, cost guides, and seasonal maintenance tips.
Roofing content specialist with 5+ years researching U.S. residential and commercial roofing. Has documented 200+ projects covering installation costs, material selection, contractor vetting, and DIY guides for homeowners across all climate zones.