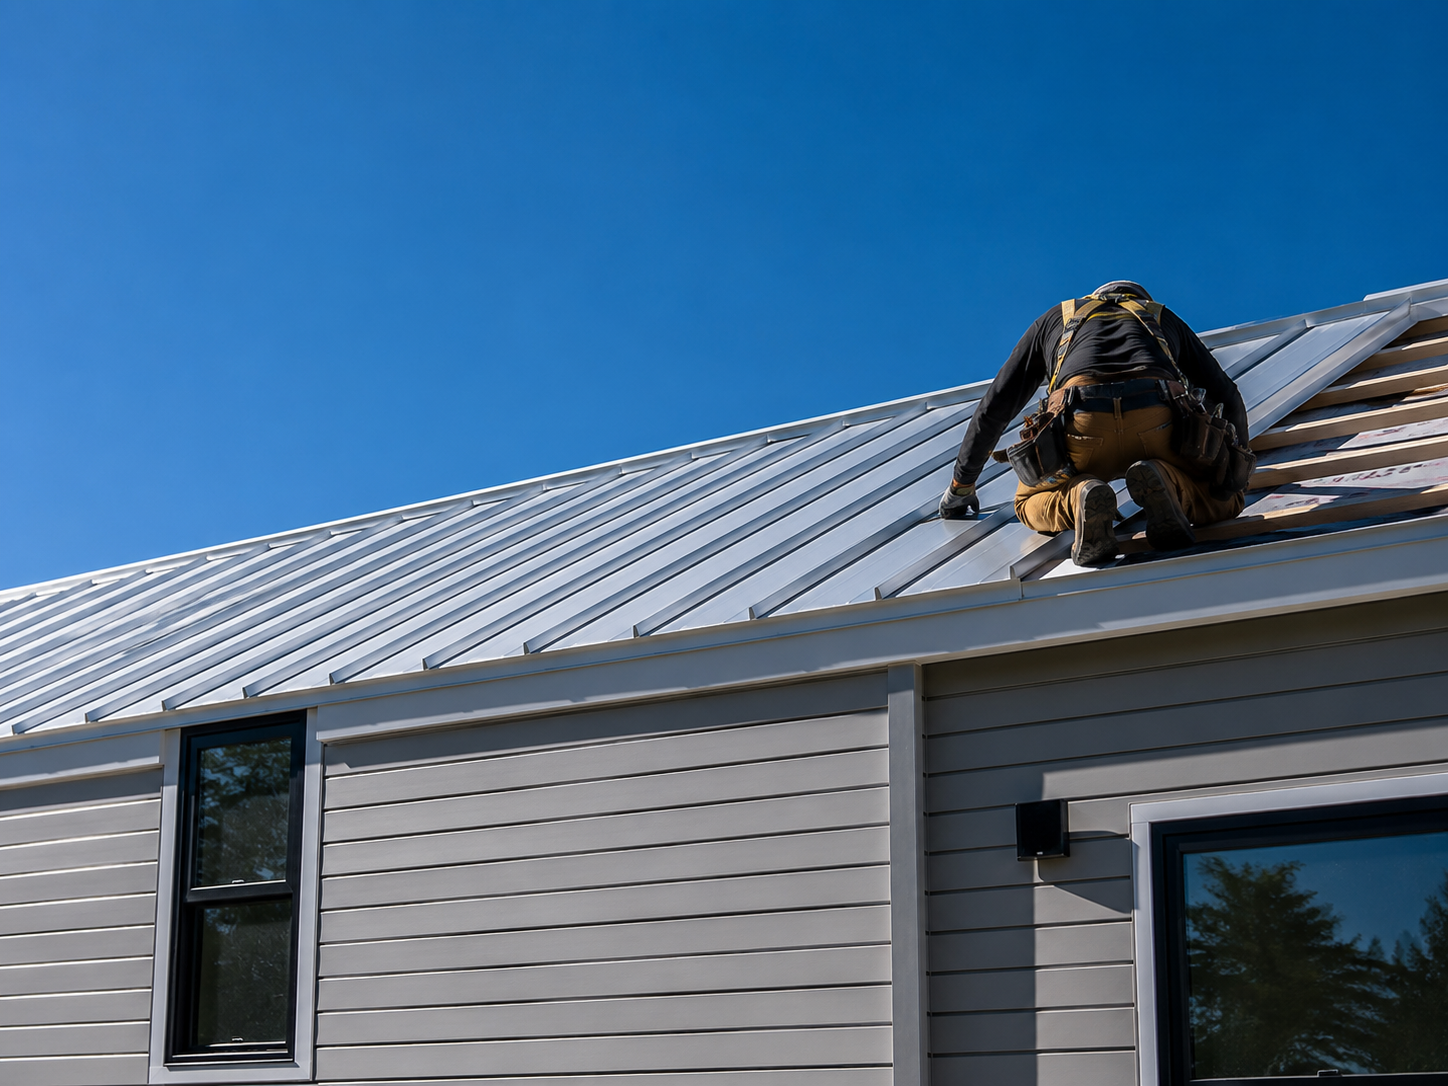
Your Roof Is Trying to Tell You Something. Listen Up.
Look up. Right now. When did you last actually look at your roof?
If your answer involves a vague memory and a lot of uncertainty, you’re not alone. Most homeowners treat their roof the way they treat their car’s spare tire, they know it exists, they know it’s important, and they’d really rather not think about it until something goes wrong.
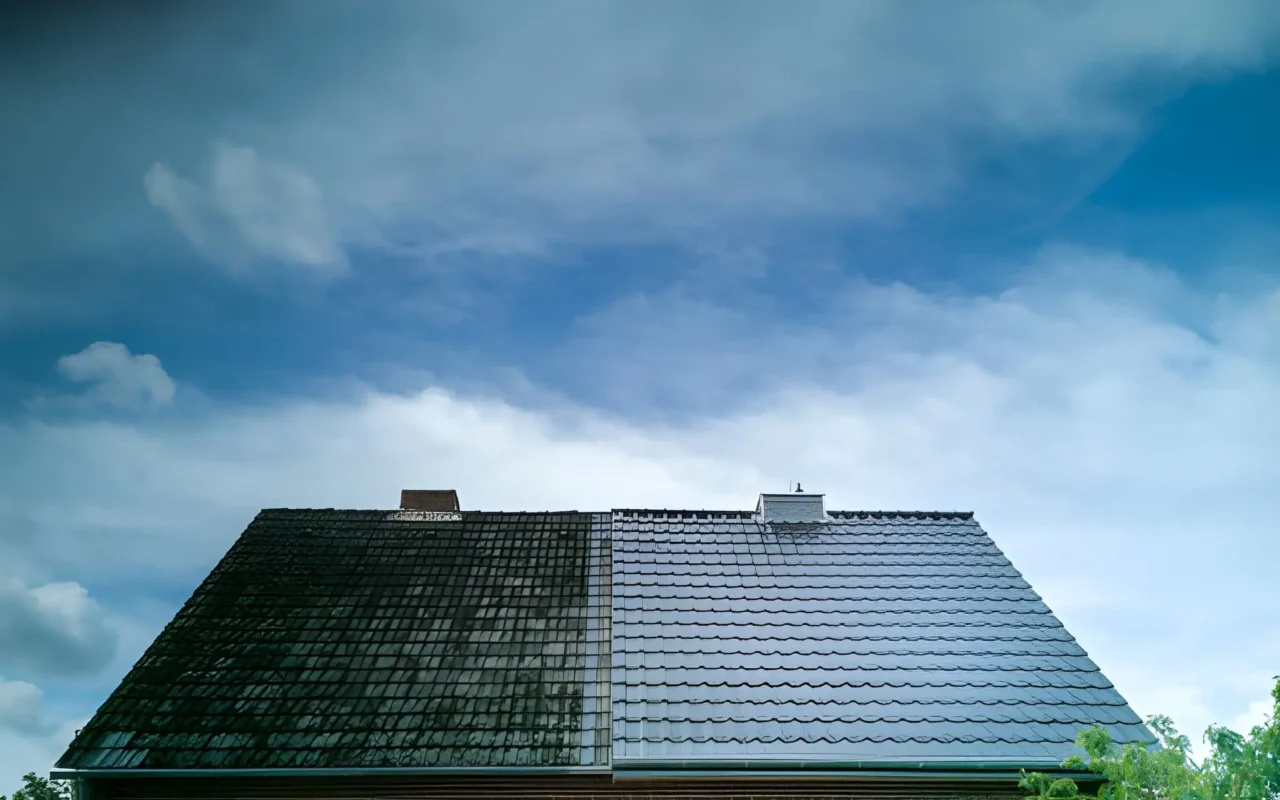
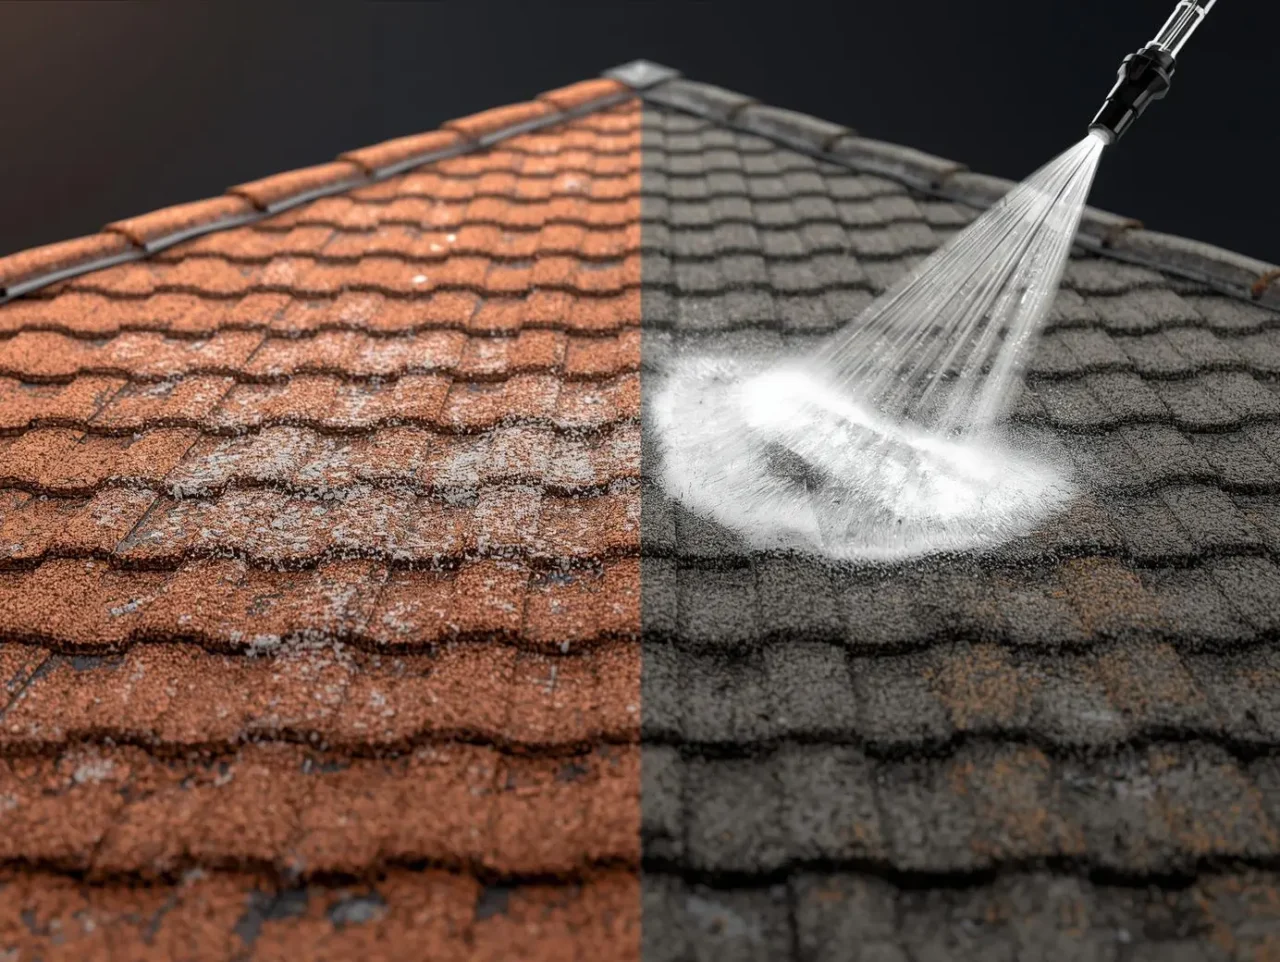
But here’s the thing: your roof is talking to you. Those dark streaks running down the shingles? That fuzzy green carpet of moss creeping across the north-facing slope? The patches of grey-black staining that have been growing quietly since last spring? That’s your roof telling you it needs help and the longer you wait, the more expensive the conversation becomes.
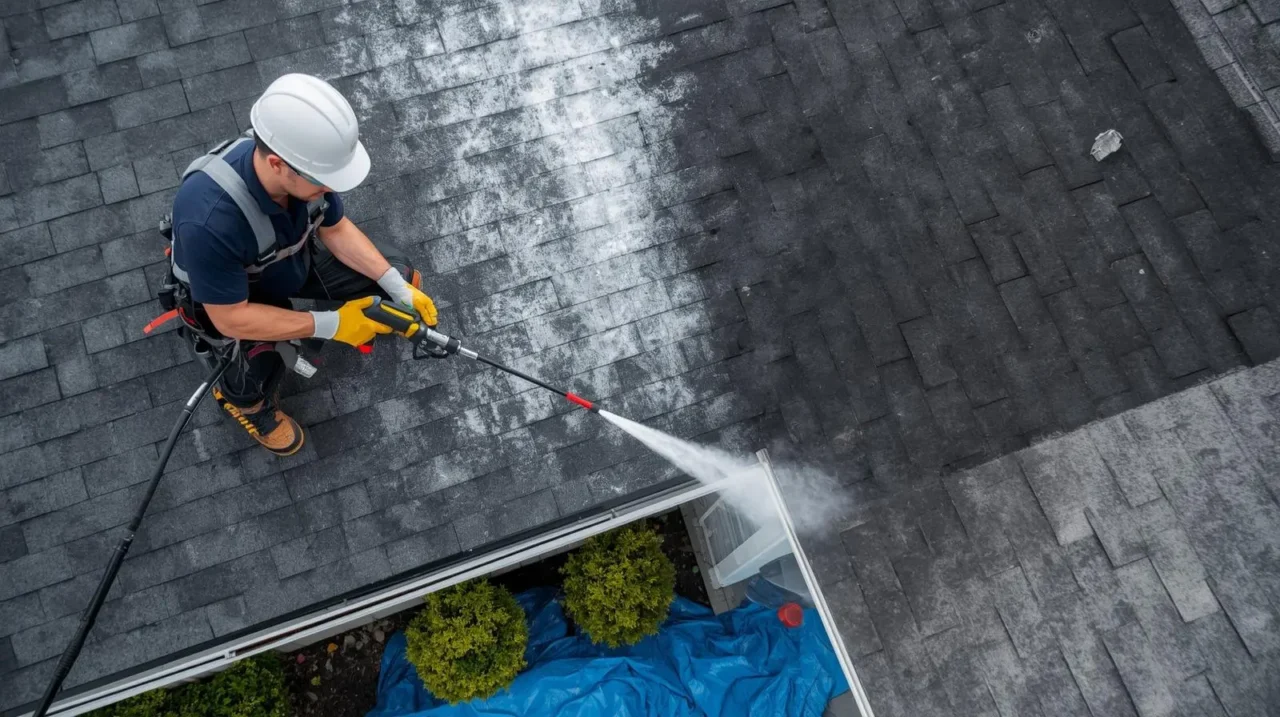
Roof pressure cleaning is one of the simplest, most cost-effective ways to protect the biggest investment above your head. Done correctly, a single cleaning session can add 5–15 years to your roof’s lifespan, remove organisms actively degrading your shingles right now, and restore the kind of curb appeal that reminds you why you loved your home in the first place. Done incorrectly, it can strip your shingles bare and void your manufacturer warranty in a single afternoon.
This guide gives you everything you need to do it right.
Table of Contents
What’s Actually Living on Your Roof (And Why You Should Care)
Before we talk about pressure washers and PSI settings, let’s talk about what you’re actually dealing with, because understanding the enemy changes how you fight it.
That black streaking you’ve been blaming on pollution or tree sap? It’s alive. Gloeocapsa magma is a cyanobacterium, essentially a photosynthetic algae, that feeds on the calcium carbonate limestone filler in your asphalt shingles. It spreads through airborne spores, thrives in humidity, and steadily degrades the granule adhesion that protects your shingles from UV damage. Once it’s established, it doesn’t leave on its own.
Moss is worse. Those green cushions that look almost charming in a cottage-aesthetic kind of way are actually moisture traps, they press damp organic matter directly against your roofing material 24 hours a day. Moss retains water. Water deteriorates shingles. And in advanced cases, moss rhizoids (root structures) actually lift shingle edges, creating pathways for water to infiltrate your roof deck.
Lichen is the final boss of roof contamination. Part algae, part fungi, lichen embeds anchor structures directly into your roofing material. It doesn’t sit on the surface, it grows into it. Removing lichen requires patience, the right chemistry, and the understanding that no amount of pressure washing alone will kill it at the root.
All of this is manageable. None of it is a death sentence for your roof. But ignoring it definitely is.
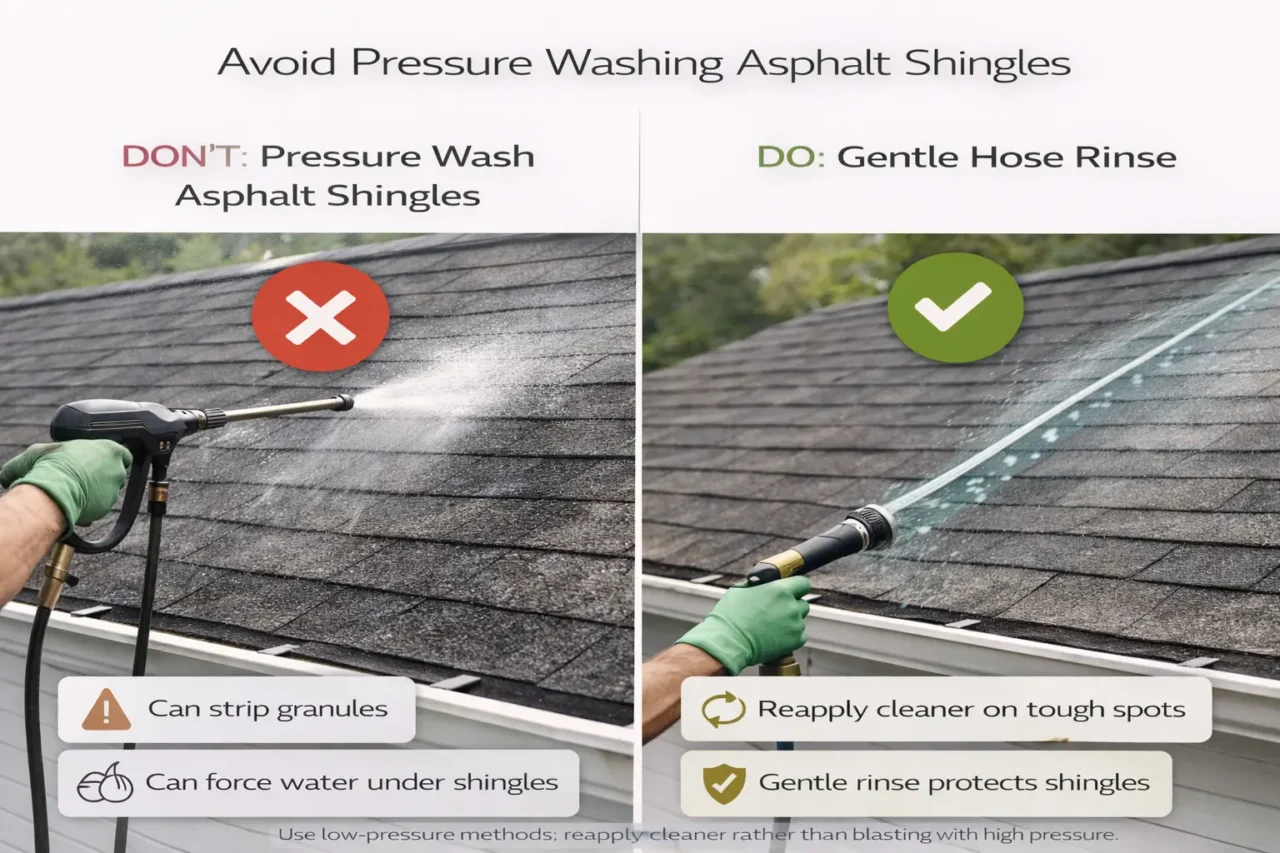
The Big Decision: Pressure Wash or Soft Wash?
Here’s where most homeowners make their first mistake, and it’s usually an expensive one.
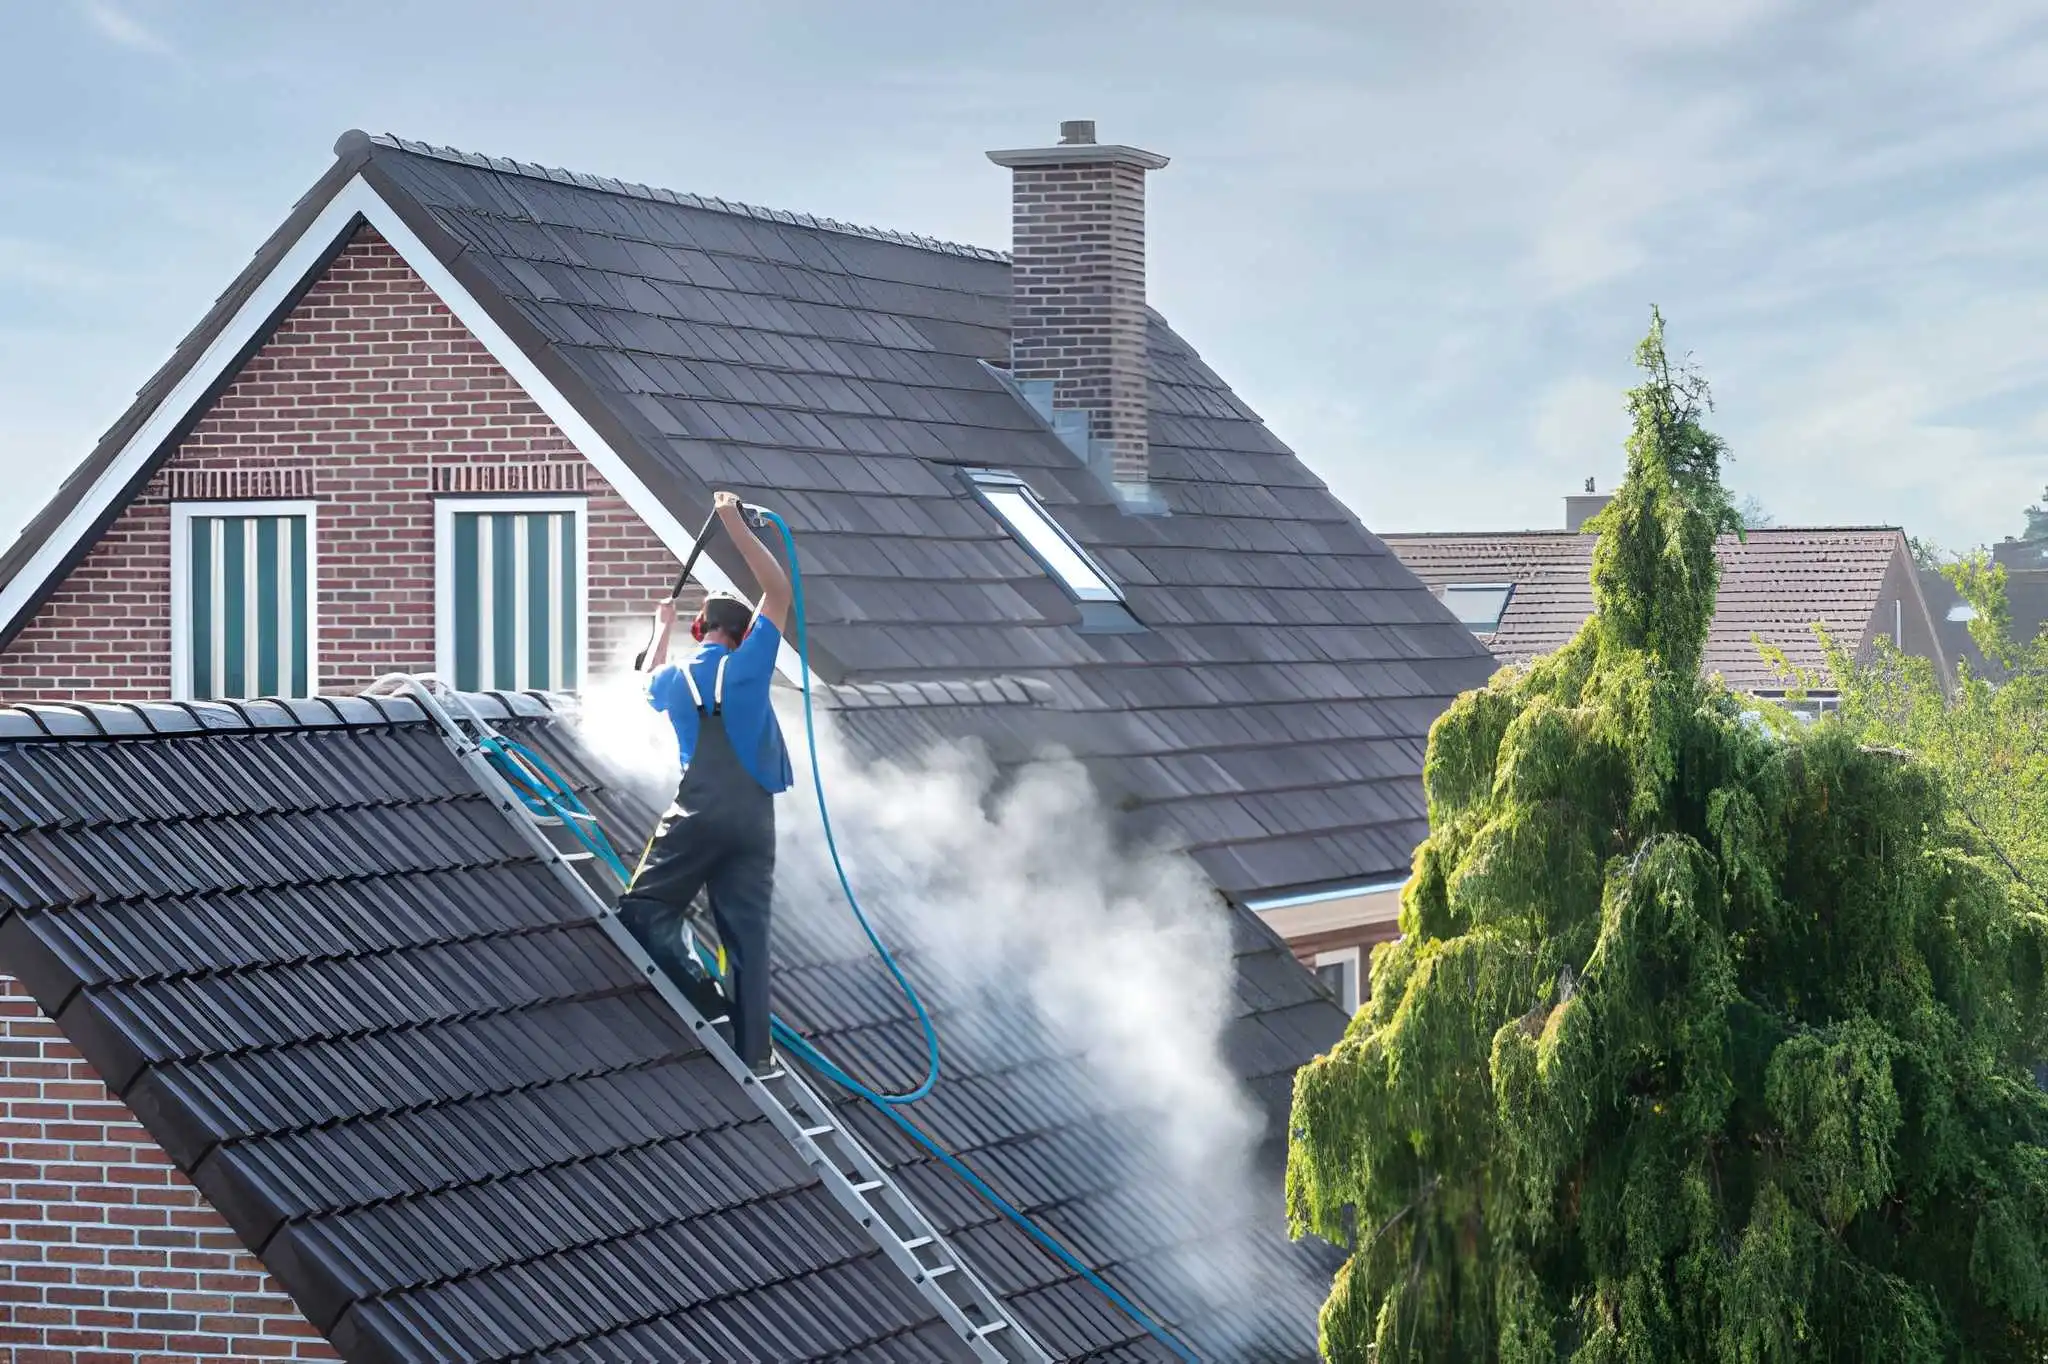
The instinct when you see a dirty roof is to blast it. More pressure equals more clean, right? That logic works great on concrete driveways. On asphalt shingles, it’s the roofing equivalent of scrubbing a non-stick pan with steel wool.
Soft washing uses chemistry instead of force. You apply a diluted sodium hypochlorite solution (think carefully managed pool-grade bleach) at extremely low pressure, 50 to 150 PSI, barely more than a garden hose, and let it dwell on the surface for 15 to 30 minutes. The chemistry kills every biological organism on your roof at the cellular level. You’re not scraping off the moss and hoping for the best; you’re killing it at the root. The low-pressure rinse simply removes the dead matter.
Results from a proper soft wash last 2 to 5 years. The Asphalt Roofing Manufacturers Association (ARMA) endorses this as the correct cleaning method for asphalt shingles, not because the industry is being cautious, but because it genuinely works better.
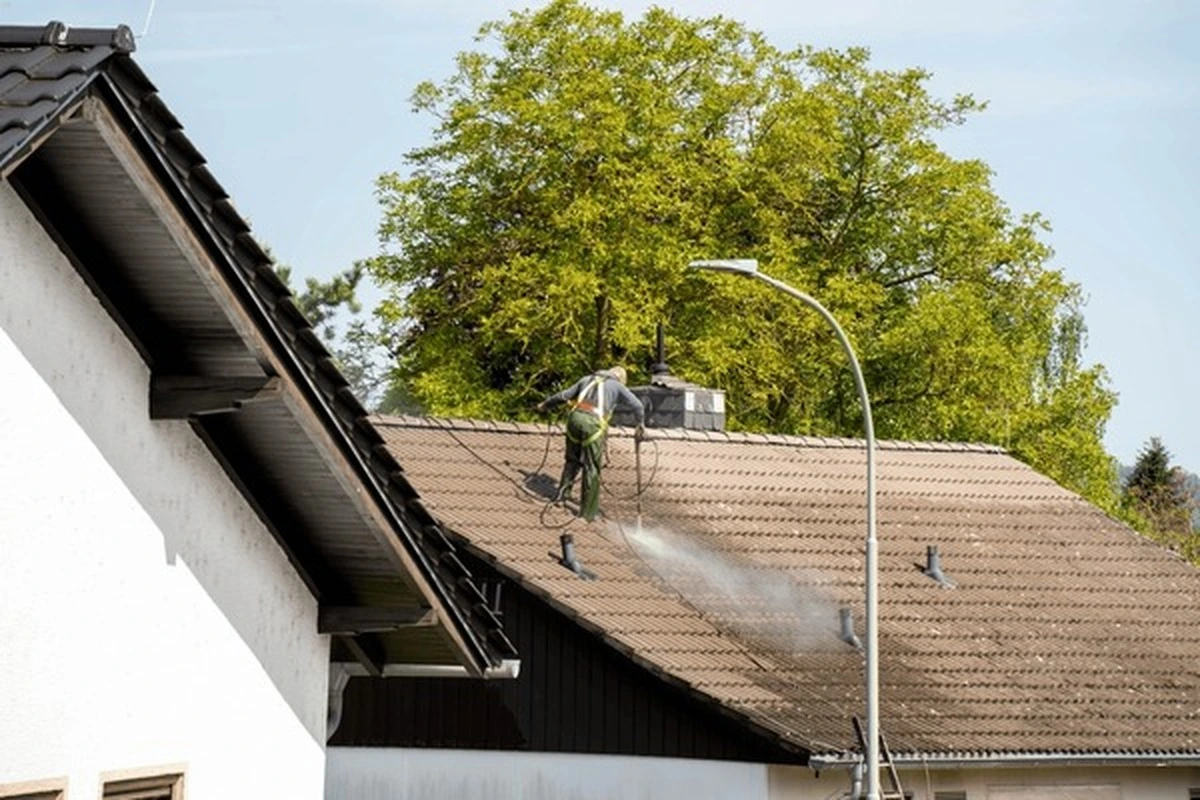
Pressure washing uses mechanical water force,1,000 to 2,000 PSI,to physically blast contamination off the surface. It works well on durable materials like concrete tile and metal roofing. On asphalt shingles, however, anything above 1,500 PSI risks stripping the granules that protect your shingles from the sun. And here’s the kicker: pressure washing doesn’t kill the biology. It removes the visible growth but leaves spores and root structures behind. Expect regrowth within 6 to 18 months.
The choice isn’t really complicated. For asphalt shingles, which cover roughly 80% of American homes, soft wash wins every time. For tile and metal, moderate pressure washing is acceptable with the right nozzle and technique.
Know Your Roof: The PSI Guide That Could Save Your Shingles
Not all roofs are created equal, and the wrong pressure setting doesn’t just clean poorly, it causes the kind of damage that only shows up months later, when your next heavy rain turns into a leak you can’t explain.
Here’s what every homeowner doing roof pressure cleaning needs to know:
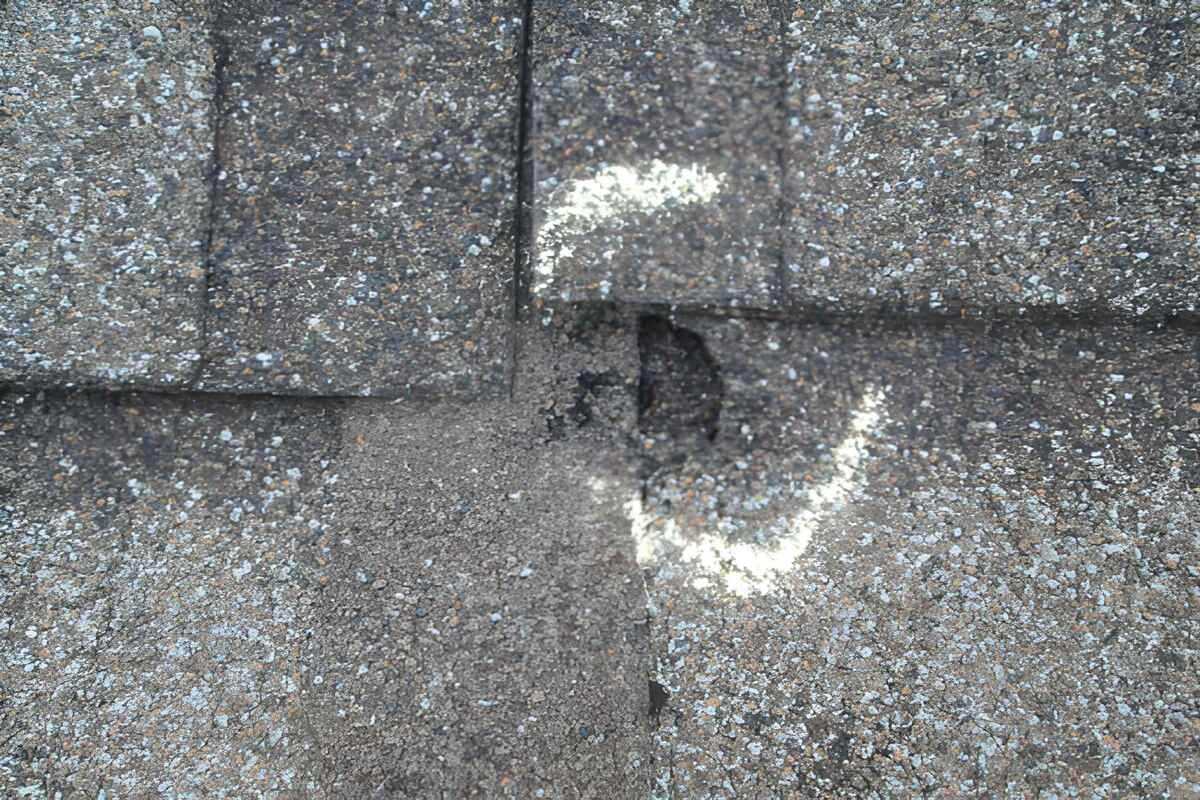
Asphalt shingles are the most sensitive material you’ll encounter. New shingles (under 10 years old) can tolerate up to 1,200 PSI with a wide 40-degree nozzle. Mid-age shingles (10 to 20 years) should stay under 800 PSI. Anything older than 20 years? Soft wash only, no exceptions. The granule adhesion on older shingles is too compromised to risk any mechanical pressure.
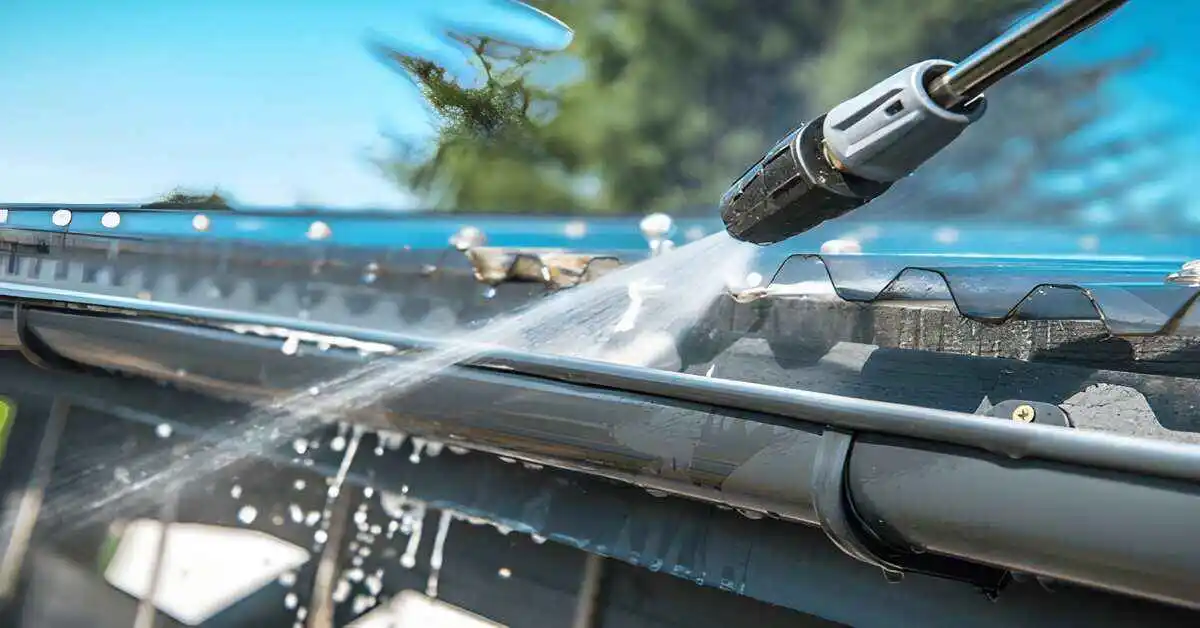
Concrete and clay tiles are significantly more forgiving, you can safely use 1,200 to 2,000 PSI. The critical rule here is direction: always wash downward from ridge to eave. Angle the nozzle upward under tile edges even once and you’ve driven water beneath the tile, exactly where you don’t want it.
Metal roofing handles 1,200 to 1,500 PSI comfortably. Use a wide fan nozzle, avoid direct pressure at seams and fastener points, and reduce to 800 to 1,000 PSI if you’re working on copper or painted finishes you want to preserve.
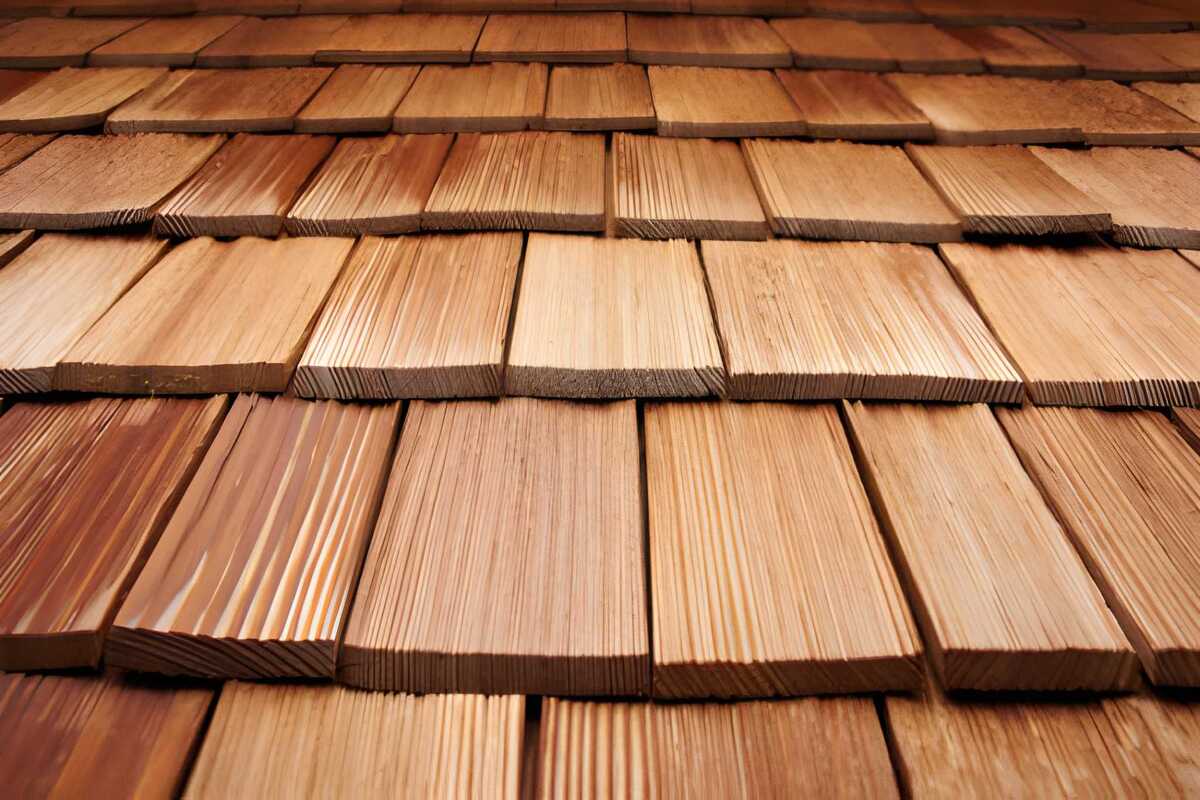
Cedar shake and wood shingles are nearly as sensitive as old asphalt, maximum 500 to 800 PSI, and soft washing is strongly preferred. High pressure splits grain, raises fibers, and strips the natural oils that give cedar its weather resistance.
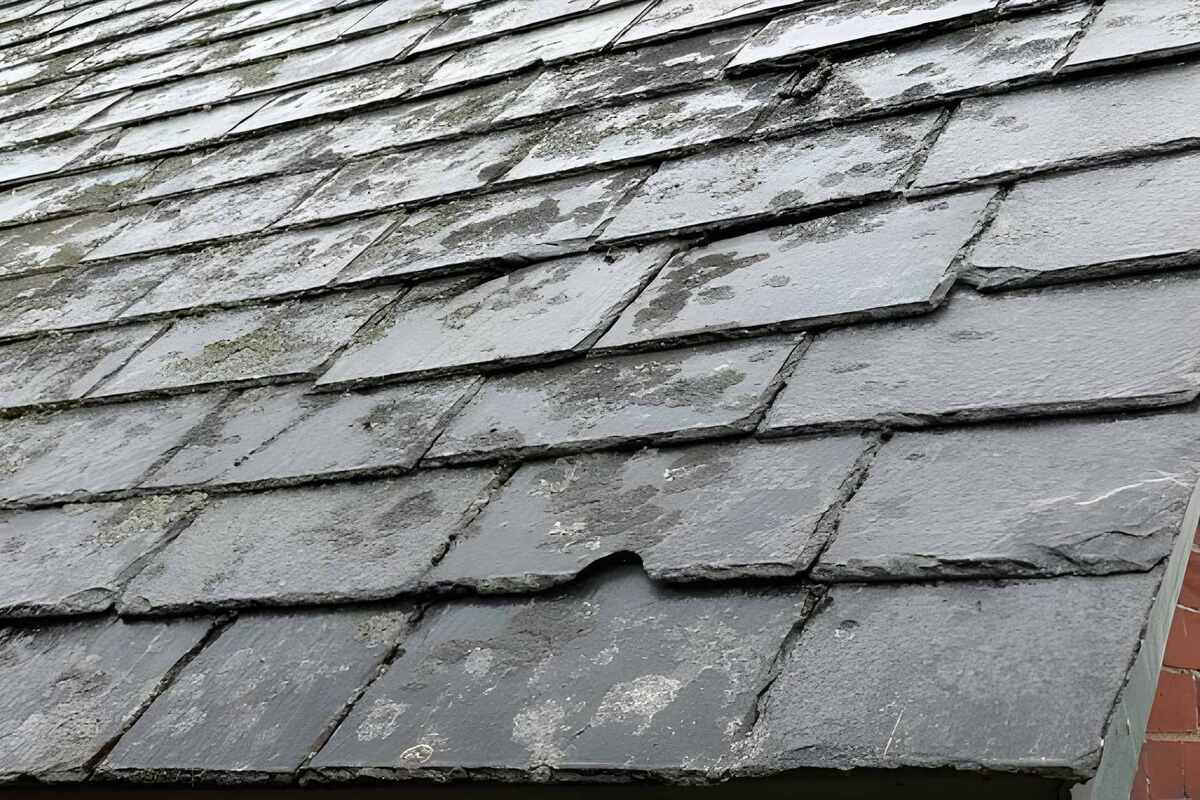
Natural slate is durable but brittle at the edges, 800 to 1,200 PSI maximum, and honestly, professional-only territory if you value your roof’s integrity.
Choosing Your Pressure Washer Roof Cleaner: What Actually Matters
The market is flooded with pressure washer options, and the specs can feel overwhelming. Here’s what actually matters for roof pressure cleaning specifically.
For most homeowners, an electric pressure washer rated between 1,800 and 2,200 watts is the sweet spot, enough power to clean effectively, easy enough to control that you won’t accidentally destroy your shingles. The Nilfisk Core 140 with its dedicated roof cleaner accessory was specifically designed for this application, delivering controlled pressure at safe roof-cleaning levels. The Kärcher K5 with an adjustable vario lance is another excellent option.
Gas pressure washers generate more raw power, 2,000 to 4,000 PSI , which makes them better for commercial work and large concrete tile roofs. The problem for DIYers is that extra power combined with less experience creates more opportunities for costly mistakes.
Whatever machine you choose, the nozzle matters more than the machine. A simple rule: never put a red (0-degree) nozzle anywhere near a roof. The concentrated jet that makes it satisfying to blast grime off concrete will destroy roofing material. For most roof applications, start with the white 40-degree nozzle and only step up to the green 25-degree for concrete tile and metal if needed.
One accessory that genuinely changes the safety equation: a telescopic extension wand extending 20 to 38 feet. It lets you clean from ground level or a stable ladder position rather than walking on a wet, sloped roof with a machine creating unpredictable force. For single-story homes especially, it eliminates most of the fall risk that makes DIY roof cleaning genuinely dangerous.
The Chemistry of Clean: What to Put in Your Pressure Washer Roof Cleaner
Here’s something the hardware store won’t always tell you: the chemical you use matters as much as the equipment.
Sodium hypochlorite diluted to 3 to 6% for most residential applications is the gold standard for biological roof contamination. It’s what professional soft wash contractors use, it’s what ARMA recommends, and it’s what genuinely works on the algae, moss, mold, and mildew that accumulate on residential roofs. Mix it with a non-ionic surfactant (about 1 to 2 ounces per gallon) and you have a solution that adheres to the roof surface long enough to do its work before you rinse.
A few things to keep in mind: sodium hypochlorite will damage your plants if it runs off unchecked. Pre-wet your landscaping with plain water before you start, and run a garden hose continuously on surrounding plants during the chemical application phase. It’s not complicated it just requires awareness.
For homeowners who want the lowest-effort option, Wet & Forget Outdoor is a no-rinse formula you apply with a pump sprayer and then let rain do the work over subsequent weeks. Results come slower, but the product is genuinely safe, easy to apply, and effective for light to moderate algae and moss.
What to avoid entirely: muriatic acid (it etches concrete tile and damages metal finishes), undiluted bleach (too concentrated for roof materials), and any product formulated specifically for concrete or decking (the pH and chemical composition are wrong for roofing materials).
Step-by-Step: How to Actually Clean Your Roof Without Ruining It
Before You Touch the Pressure Washer
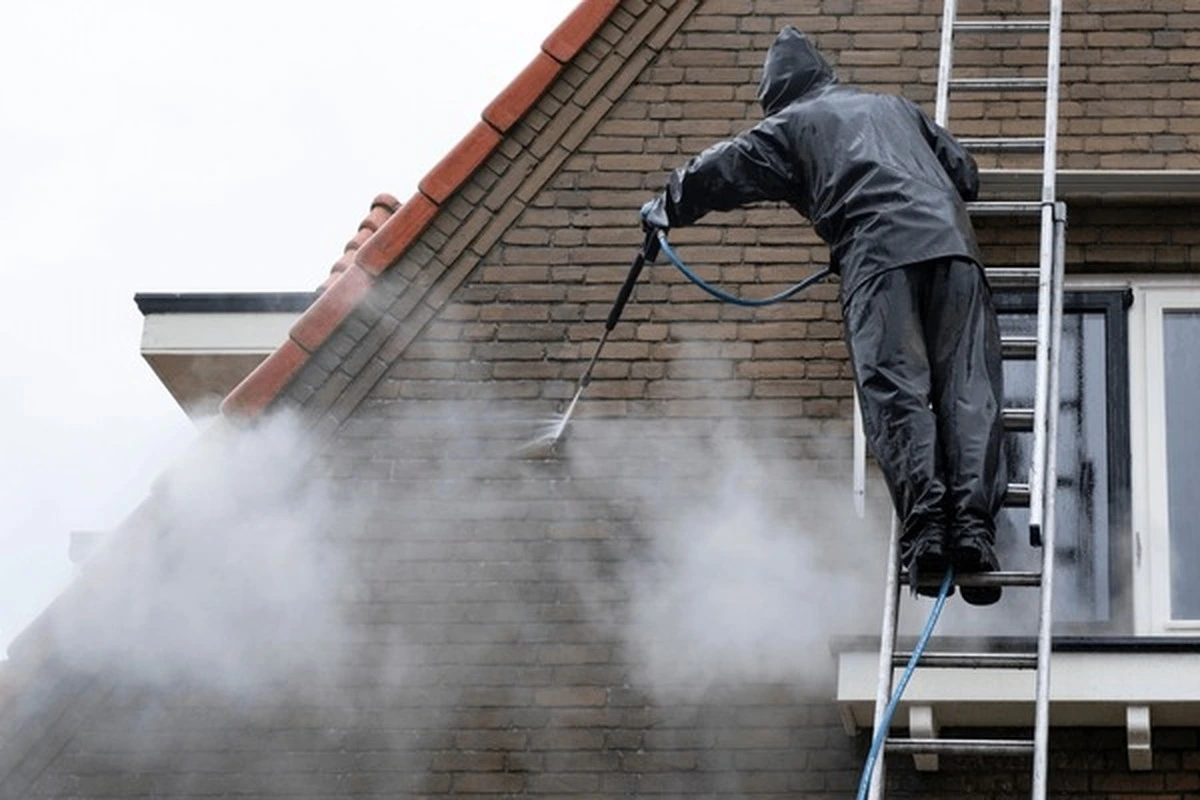
Safety first and this isn’t boilerplate. Roof pressure cleaning combines working at height with operating pressurized equipment. That’s a combination that demands respect.
Inspect your roof from the ground before climbing anything. Identify damaged shingles, loose tiles, or soft spots that might give way under your weight. Check your ladder it needs to extend at least 3 feet above the roofline, sit on level ground, and be secured at top and bottom. Wear non-slip rubber-soled footwear. Have someone on the ground with you. And if the roof pitch is steeper than 6:12, wear a properly anchored fall protection harness no arguments.
Prepare the Surface
Clear loose debris first leaves, branches, pine needles using a leaf blower or soft brush. If there’s substantial moss buildup, scrape off as much bulk as possible with a plastic scraper before you apply any water or chemical. This reduces the load on your cleaning solution and gets you better results with less product.
Pre-wet all plants, shrubs, and grass below the roofline with plain water. Cover anything particularly sensitive with plastic sheeting during the chemical dwell period.
Apply the Chemical Solution
Switch to your low-pressure soap nozzle (the black one) or your foam cannon attachment. Apply your sodium hypochlorite solution starting at the ridge and working downward never spray upward. Achieve even coverage across all contaminated areas, then step back and wait. Give it 15 to 30 minutes of dwell time. This is the part where the actual cleaning happens. Let the chemistry work.
If it starts drying in hot sun before the dwell time is up, lightly mist with plain water to keep it wet.
Rinse from Top to Bottom
Switch to your appropriate cleaning nozzle 40-degree white for asphalt, 25-degree green for tile and metal. Set your pressure to the correct PSI for your material. Hold the nozzle 12 to 18 inches from the surface closer than that multiplies effective pressure dramatically.
Work systematically from ridge to eave, overlapping each pass slightly, always spraying in the direction the shingles lie. Never angle water upward under shingles or tile edges. This one rule, consistently applied, prevents the majority of water damage caused by amateur roof pressure cleaning.
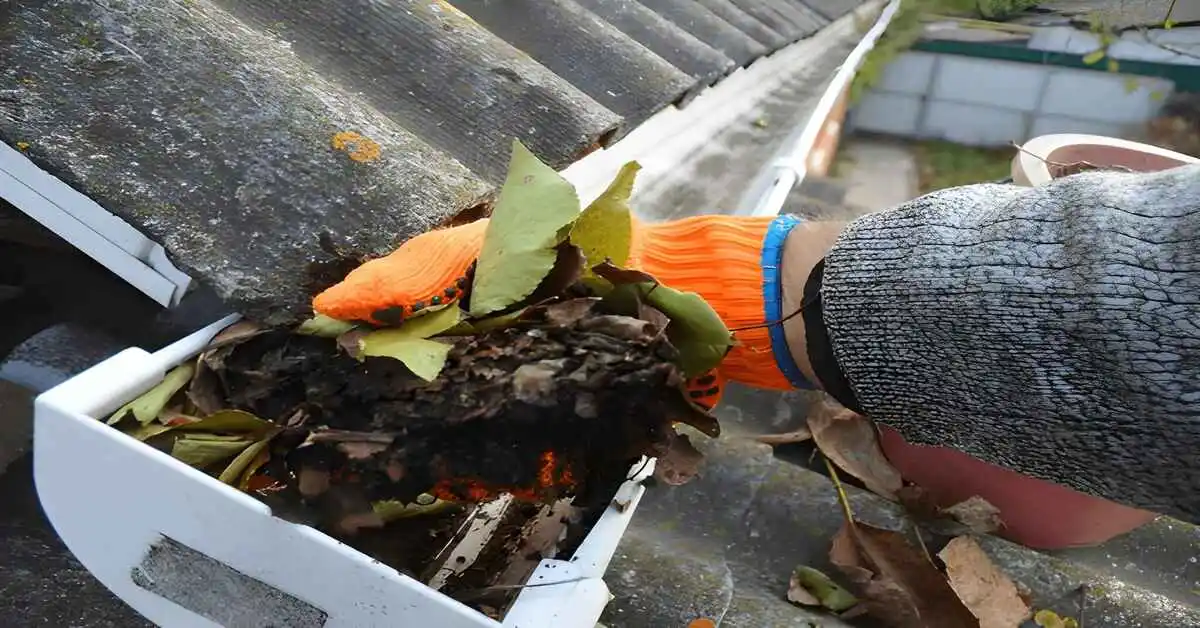
Treat Valleys and Gutters
Flush valleys from top to bottom to clear anything the cleaning dislodged. Run your pressure washer down each downspout to verify clear flow. Clean your gutters manually to remove the debris that’s accumulated during the washing process.
Apply a Preventive Biocide
This step is optional but genuinely extends the life of your clean by one to two years. Apply a no-rinse biocide treatment Wet & Forget or a professional equivalent using your downstream injector or a separate pump sprayer. Let it dry naturally. Rain will distribute it across the roof surface in subsequent weeks.
Alternatively, install zinc or copper strips along the ridge. Metal ions released by rainfall create a continuous anti-biological treatment across every slope below a passive, maintenance-free solution that works quietly every time it rains.
What It Costs: DIY vs Calling a Pro
Let’s talk numbers honestly.
DIY roof pressure cleaning on a standard 2,000 square foot home costs between $255 and $570 for a one-time clean including rental or purchase of a pressure washer, cleaning chemicals, nozzles, and basic safety equipment. If you’re buying equipment to use repeatedly, budget $375 to $900 for the full setup. The savings versus professional service are real: typically $200 to $500 per cleaning event.
Professional roof pressure cleaning on the same 2,000 square foot home runs $350 to $600 for soft wash or $300 to $500 for standard pressure washing. Steep pitches add 25 to 40% to professional pricing. Heavy moss or lichen adds $100 to $300. Multi-story access adds $50 to $150.
The honest guidance: DIY is genuinely appropriate for single-story homes with accessible roof pitch and moderate contamination, provided you’re comfortable at height and willing to follow the PSI and chemical guidelines carefully. For two-story homes, steep roofs, significant lichen contamination, or shingles over 15 years old, the $300 to $600 professional service cost is excellent insurance against the $200 to $500 per granule-stripping mistake that experienced technicians simply don’t make.
The Mistakes That Cost Homeowners Every Year
Most roof pressure cleaning damage isn’t malicious it’s uninformed. These are the errors that show up most consistently:
Using too much pressure on asphalt. The granule loss from a single high-pressure session isn’t immediately obvious. It shows up three years later when your roof starts aging faster than it should. Set PSI conservatively and test in an inconspicuous area before cleaning your entire roof.
Spraying upward under shingles. Every instruction in this guide has said it because it bears repeating: the angle of your spray relative to shingle overlap direction is non-negotiable. Downward only.
Skipping the chemical pre-treatment. Mechanical removal of moss without biocide treatment is like mowing a weed it comes back faster because the roots survived. The chemistry is what makes the results last.
Forgetting about the landscaping. Sodium hypochlorite runoff is genuinely harmful to plants. Pre-wet everything, dilute continuously, and cover sensitive plants. It takes ten minutes and prevents a genuinely unpleasant outcome.
Working on a wet or windy day. Wet roofs and shifting pressure wand forces are a dangerous combination. If conditions aren’t right, reschedule. No clean roof is worth a fall.
How Long Will Your Clean Last?
This is the question that drives the whole maintenance conversation.
A proper soft wash with sodium hypochlorite and a post-clean biocide treatment typically keeps your roof clean for 2 to 4 years in moderate climates longer in drier regions, shorter in humid environments with heavy tree canopy. A pressure-wash-only clean without biocide typically needs retreatment within 12 to 18 months because the underlying biology wasn’t fully addressed.
The most cost-effective long-term strategy combines a professional or well-executed DIY soft wash every 2 to 3 years with zinc or copper ridge strips providing passive biological inhibition between treatments. Over a 10-year period, this approach costs roughly $800 to $2,000 in total roof cleaning investment fraction of the $8,000 to $20,000+ cost of premature roof replacement that unmanaged biological growth can necessitate.
Your Roof Doesn’t Ask for Much
Here’s the takeaway, stated simply: your roof works every hour of every day, in every weather condition, protecting everything and everyone inside your home. It asks for almost nothing in return a visual inspection twice a year, a cleaning every 2 to 3 years, and the occasional attention to gutters and flashings.
Roof pressure cleaning, done correctly with the right PSI settings, the right pressure washer roof cleaner chemicals, and basic technique discipline, is one of the most straightforward and high-value maintenance tasks available to any homeowner. It doesn’t require specialist skills. It doesn’t require expensive equipment. It requires knowing what you’re doing and respecting the material you’re working on.
Look up at your roof again. If what you see looks like it’s been a while, it probably has been. And now you know exactly what to do about it.
Frequently Asked Questions
Is roof pressure cleaning safe for asphalt shingles?
Yes, when done correctly. The key qualifiers are pressure (stay under 1,200 PSI, use a 40-degree nozzle) and direction (always spray downward along shingle direction, never upward). ARMA recommends soft washing at 50 to 150 PSI with diluted sodium hypochlorite as the preferred approach. High-pressure washing above 1,500 PSI strips granules, accelerates aging, and voids many manufacturer warranties.
What PSI should I use for roof pressure cleaning?
Match PSI to material: 500–1,200 PSI for asphalt shingles, 1,200–2,000 PSI for concrete and clay tile, 1,200–1,500 PSI for metal, and 500–800 PSI for cedar shake. When in doubt, start lower. A 40-degree nozzle at 12 to 18 inches of standoff distance provides gentler effective pressure than the machine’s rated output suggests.
How much does professional roof pressure cleaning cost?
Most residential homes run $250 to $600 professionally, depending on size, pitch, contamination level, and region. A standard 2,000 square foot home averages $350 to $600 for soft wash or $300 to $500 for straight pressure washing. Steep pitches, multi-story access, and heavy lichen add to the base price.
How often should I clean my roof?
Every 2 to 4 years for soft-washed roofs; every 12 to 18 months for pressure-only cleaning without biocide treatment. Humid climates, shaded roofs, and homes under heavy tree canopy may need annual attention. Zinc or copper ridge strips significantly extend the interval between required treatments.
What is the best chemical for roof pressure cleaning?
Sodium hypochlorite at 3 to 6% dilution mixed with a non-ionic surfactant is the professional and ARMA-recommended standard for removing algae, moss, and mold from residential roofs. For a no-rinse consumer option, Wet & Forget Outdoor is safe, effective, and simple to apply. Avoid muriatic acid, undiluted bleach, and cleaners formulated for concrete or decking.
Can I pressure clean my roof myself?
Yes, for single-story homes with accessible pitch and moderate contamination, DIY is fully feasible and saves $200 to $500 per clean. Two-story homes, steep pitches, heavy lichen, or shingles over 15 years old are best left to professionals. The primary DIY risks are falls, granule damage from excessive PSI, and landscape damage from chemical runoff, all manageable with preparation and correct technique.
Does roof pressure cleaning extend roof lifespan?
Significantly. Regular roof pressure cleaning extends shingle lifespan by 5 to 15 years by removing moss, algae, and lichen before they cause irreversible granule loss, moisture retention, and physical shingle lifting. Spending $300 to $600 every 2 to 3 years is a straightforward investment against the $8,000 to $20,000+ cost of a premature full replacement.
Get free roofing advice, cost guides, and seasonal maintenance tips.

Roofing content specialist with 5+ years researching U.S. residential and commercial roofing. Has documented 200+ projects covering installation costs, material selection, contractor vetting, and DIY guides for homeowners across all climate zones.
Seamless Gutter Installation | 2026 Easy Step‑by‑Step Guide
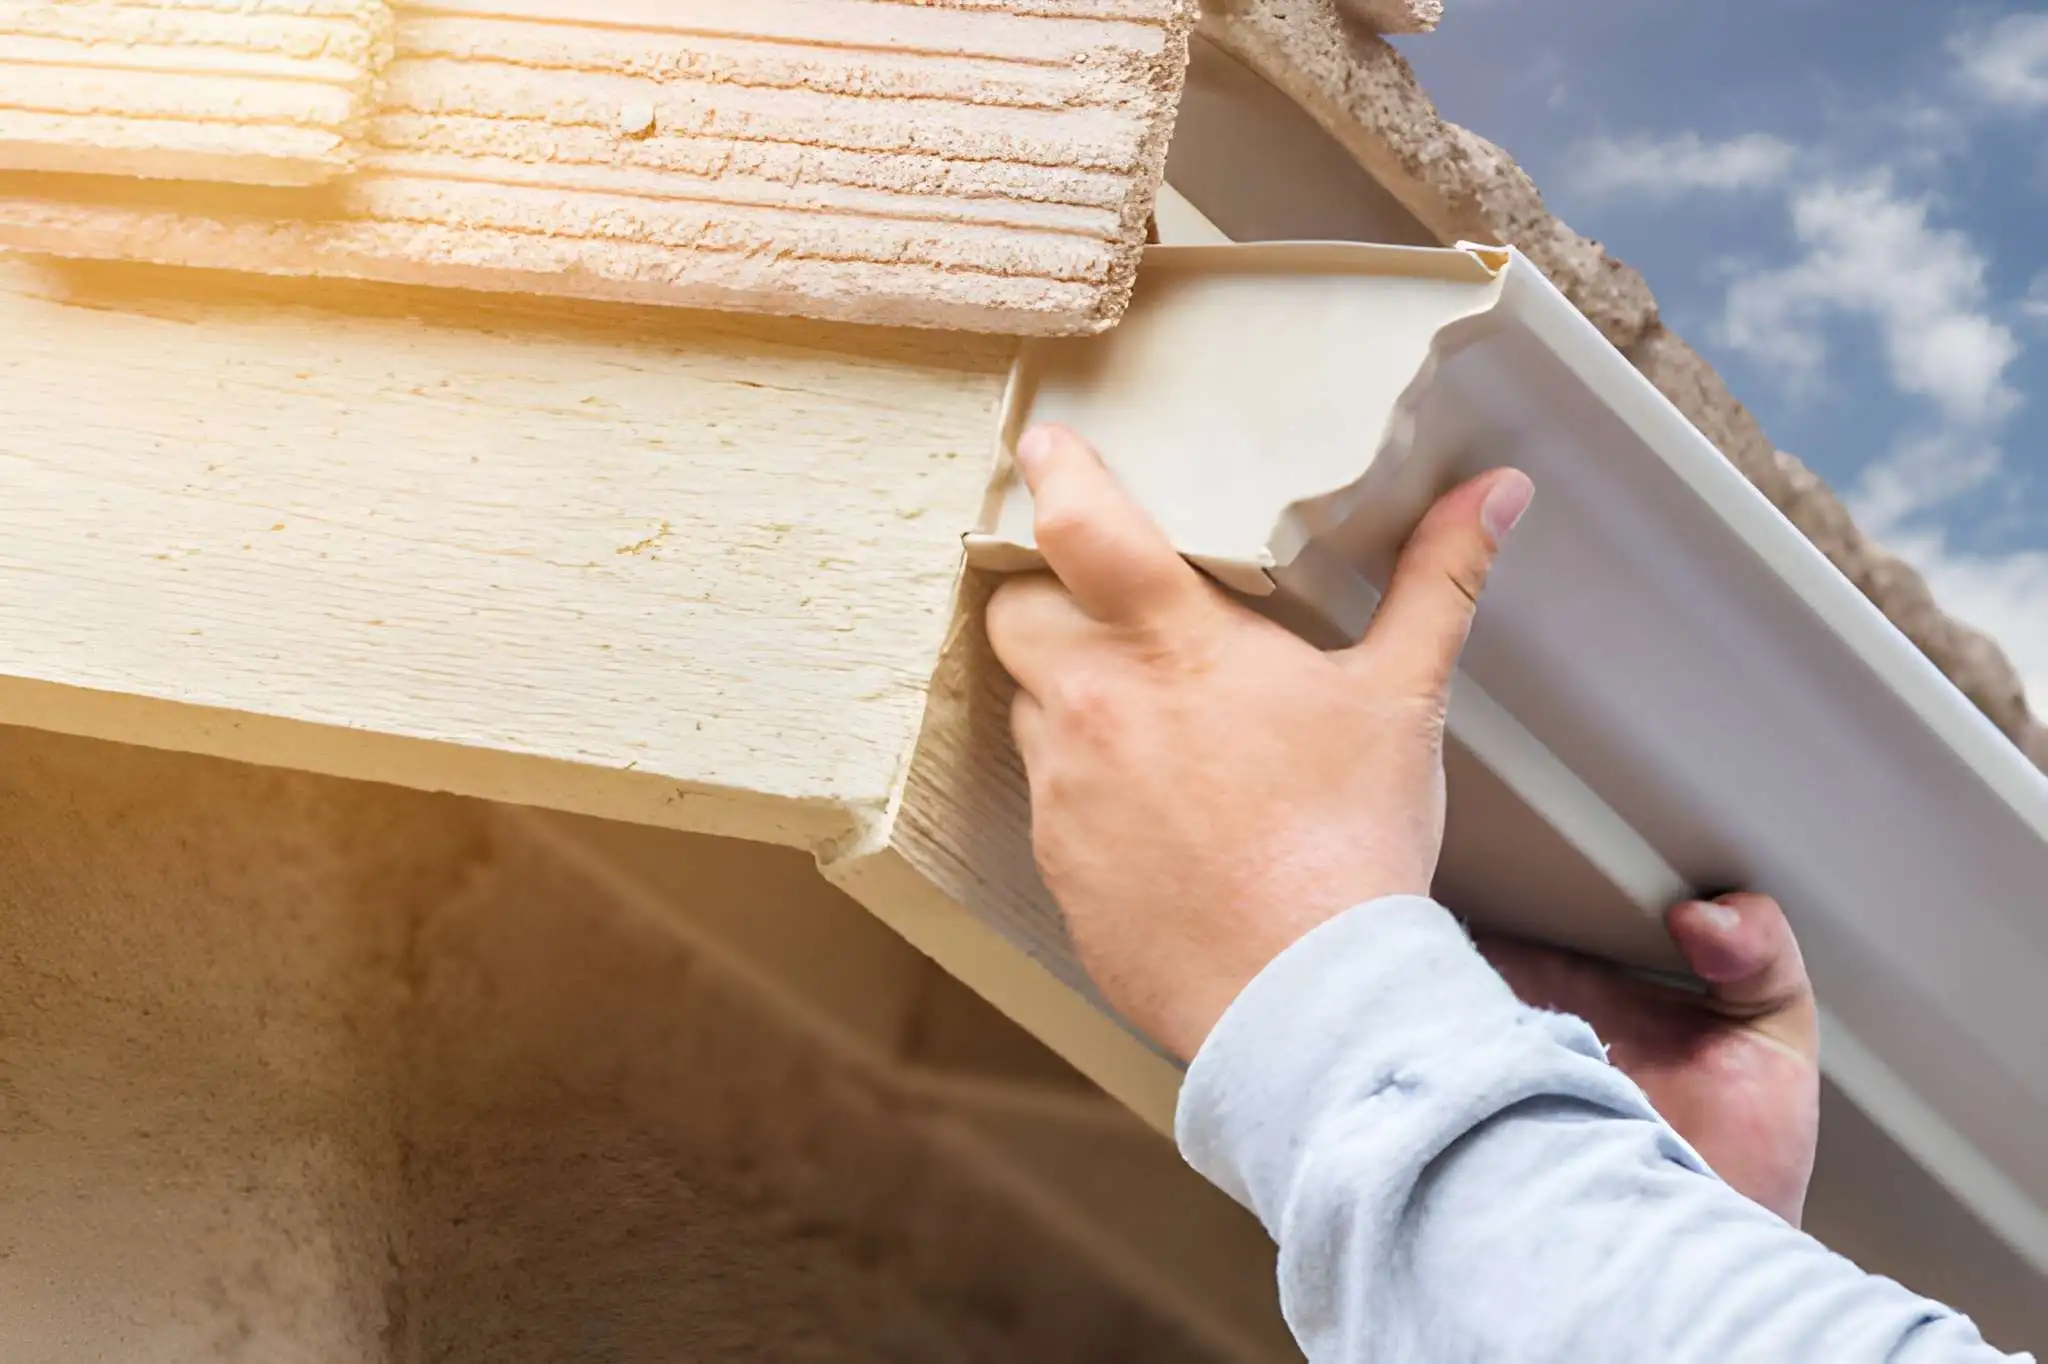
Seamless gutter installation costs $6–$14 per linear foot installed, with most homes spending $1,200–$2,800 for a complete aluminum system — roughly 50% less prone to leaking than sectional gutters because continuous runs eliminate mid-span seams that split, clog, and corrode over time (NRCA, 2026). Professional installation on a standard 1,500–2,000 sq ft home takes 1–2 days, requires hangers spaced every 16–24 inches, and must slope ¼–½ inch per 10 feet toward downspouts to prevent standing water and roof-edge moisture that accelerates moss and algae growth.
Table of Contents
Seamless gutter installation is the single most effective roofline upgrade for protecting your roof, fascia, siding, and foundation from water damage and it directly supports a clean, long-lasting roof by channeling water and debris away efficiently rather than letting it pool at roof edges where organic growth thrives. The U.S. seamless gutter market has grown steadily as homeowners recognize that sectional gutters require constant resealing, sag at joints, and trap debris at every seam connection problems seamless systems solve from day one.
This complete 2026 guide covers seamless gutter installation costs, planning, slope requirements, hanger spacing, step-by-step installation, integration with roof cleaning maintenance, common mistakes, DIY vs. professional considerations, and a full FAQ section for homeowners researching gutter replacement or new installation.
What Are Seamless Gutters?
Seamless gutters are continuous lengths of metal typically aluminum, steel, or copper formed on-site using a portable roll-forming machine that pulls metal coil through shaped rollers, creating gutters custom-cut to your exact roofline dimensions. Unlike sectional gutters sold in 10–20 foot pieces at hardware stores, seamless systems have zero joints along each straight run, with connections only at corners, downspout outlets, and end caps.
This fundamental difference eliminates the most common failure points in traditional gutter systems. According to the National Roofing Contractors Association, approximately 80% of gutter leaks originate at seam joints, not along the gutter body making seamless design the most direct solution to chronic leaking problems.
Key Components of a Seamless Gutter System
Understanding each component helps ensure proper installation from start to finish:
- Gutter runs: Custom-formed continuous lengths matched to each wall section
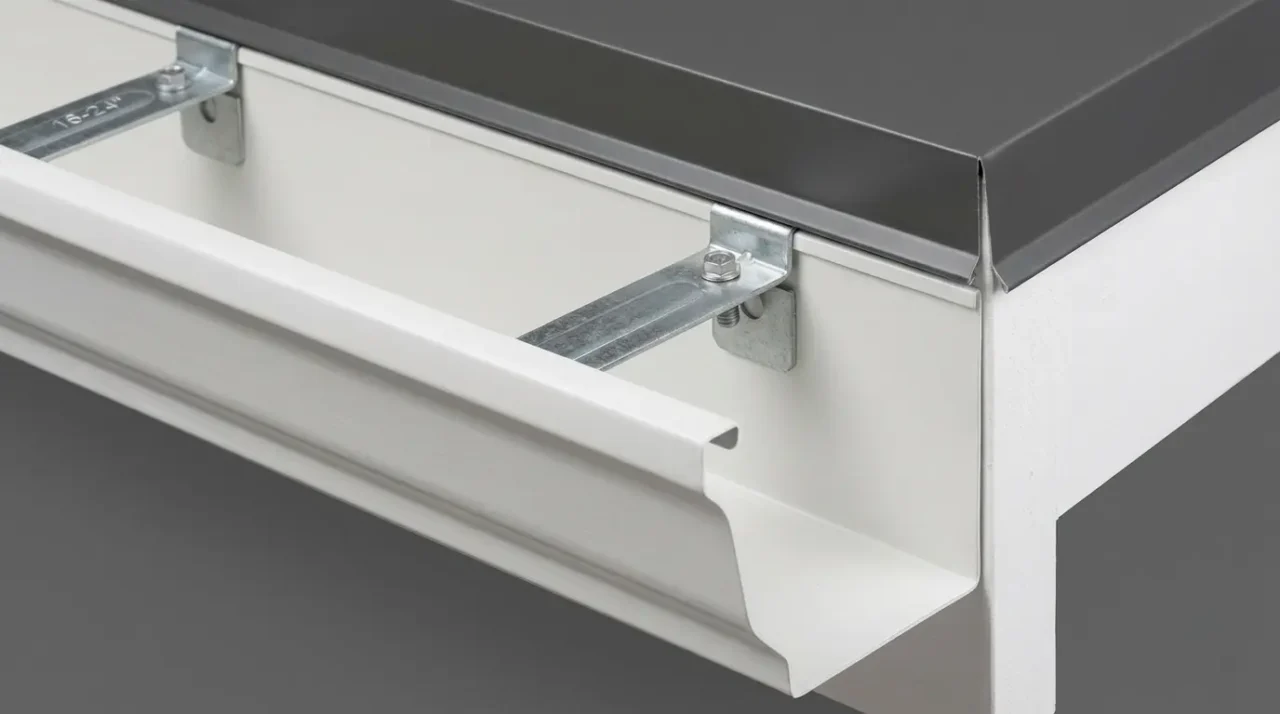
- Hidden hangers: Concealed clips that attach gutter to fascia and support weight
- End caps: Sealed closures at each run terminus left and right orientation
- Drop outlets: Pre-cut openings connecting gutter to downspout
- Miters: Corner connectors (inside and outside) joining runs at roof angles
- Downspouts: Vertical pipes (2×3 inch or 3×4 inch) carrying water from gutter to ground
- Elbows: Directional connectors routing downspout from gutter outlet to wall
- Straps/bands: Wall fasteners securing downspout every 6–8 feet
- Splash blocks/extensions: Ground-level discharge directing water away from foundation
Seamless Gutter Profiles and Sizes
K-Style (Ogee Profile):
The most popular residential profile, with flat back and decorative front mimicking crown molding. Available in 5-inch (standard) and 6-inch (premium/high-rainfall) widths. K-style gutters handle approximately 40% more water volume than round gutters of equivalent width, making them the dominant choice for residential installations.
Half-Round Profile:
Traditional semicircular design common on historic and craftsman homes. Less water capacity than K-style but preferred for architectural authenticity. Available in 4-inch, 5-inch, and 6-inch diameters.
Box Gutter:
Large-capacity commercial or oversized residential profile, typically 4–7 inches wide. Used on low-slope roofs or large commercial buildings where volume is a priority over aesthetics.
Seamless Gutter Installation Cost Breakdown (2026)
Cost Per Linear Foot by Material
| Material | Cost Per Linear Foot (Installed) | Lifespan | Best Application |
|---|---|---|---|
| Aluminum (standard) | $6–$10/lf | 20–30 years | Most residential homes |
| Aluminum (heavy gauge) | $8–$14/lf | 25–35 years | High-snow, high-rainfall areas |
| Galvanized Steel | $9–$18/lf | 20–25 years | Commercial, heavy-use |
| Stainless Steel | $15–$25/lf | 40–50 years | Coastal, premium residential |
| Copper | $25–$40+/lf | 50–100 years | Luxury, historic homes |
Total Project Cost by Home Size
| Home Size | Gutter Linear Footage | Aluminum System Cost | Professional Install Total |
|---|---|---|---|
| 1,000 sq ft (small) | 100–130 lf | $600–$1,300 | $800–$1,700 |
| 1,500 sq ft (medium) | 130–170 lf | $780–$1,700 | $1,200–$2,400 |
| 2,000 sq ft (standard) | 150–200 lf | $900–$2,000 | $1,500–$2,800 |
| 2,500 sq ft (large) | 175–240 lf | $1,050–$2,400 | $1,800–$3,500 |
| 3,000+ sq ft (estate) | 200–300+ lf | $1,200–$3,000 | $2,500–$5,000 |
Cost Factors That Increase Price
Several variables push seamless gutter installation costs above baseline:
- Home stories: Two-story homes add 20–35% to labor costs due to extended ladder time and safety requirements
- Roof complexity: Multiple valleys, dormers, bay windows, and irregular angles increase cutting, joining, and sealing time
- Downspout count: Each additional downspout adds $75–$150 in materials and labor
- Gutter guards: Add $1–$3/lf for basic foam/brush guards; $4–$10/lf for premium micro-mesh systems
- 6-inch upgrade: Upgrading from 5-inch to 6-inch gutters adds $1–$2/lf but handles significantly higher water volume
- Fascia repair: Damaged or rotten fascia boards must be repaired first budget $200–$600 for typical repairs
- Removal of old gutters: Expect $50–$100 per 50 linear feet for old gutter removal
30% Cost Breakdown for a Typical $2,000 Project
| Cost Component | Percentage | Dollar Amount |
|---|---|---|
| Materials (gutters, hangers, downspouts) | 45% | $900 |
| Labor (installation) | 40% | $800 |
| Disposal of old system | 8% | $160 |
| Miscellaneous (sealant, fasteners) | 7% | $140 |
Planning Your Seamless Gutter Installation
Thorough planning prevents the most common installation failures standing water, sagging runs, and improper downspout placement.
Step 1: Inspect Roof and Fascia Before Installation
Seamless gutter installation always begins with a complete roof and fascia inspection. Installing new gutters over rotten fascia or under damaged shingles is the most costly mistake homeowners make the gutters will fail prematurely and require removal to address the underlying problem.
Fascia inspection checklist:
- Press firmly along all fascia boards soft spots indicate moisture damage or rot
- Check for paint peeling, swelling, or discoloration indicating past water infiltration
- Verify all fascia is plumb and properly nailed to rafter tails
- Replace any sections with visible rot, cracks exceeding 1/4 inch, or structural compromise
Roof edge inspection checklist:
- Confirm drip edge is present and properly installed along eaves
- Check for missing, curled, or cracked shingles within 18 inches of roof edge
- Verify no shingles are pulling away from fascia or hanging loose
- Look for moss, algae staining, or debris accumulation at roof edges
“Fascia condition is the most overlooked factor in seamless gutter installation longevity. Even perfectly installed gutters fail within 3–5 years when fastened into compromised wood.”
Prime American Roofing Installation Standards, 2025
Combine with roof cleaning: If your roof shows moss, algae, or significant debris buildup at edges, schedule a professional soft-wash roof cleaning before gutter installation. Clean shingles shed debris more efficiently into new gutters, and treating organic growth now prevents accelerated debris loading after installation.
Step 2: Measure the Roofline
Accurate measurement prevents costly material waste and ensures seamless runs fit precisely:
- Measure each straight gutter run from corner to corner
- Record inside and outside corner locations
- Note locations of fascia interruptions (garage doors, exterior lights, HVAC equipment)
- Sketch the home perimeter and label all dimensions
- Calculate total linear footage, adding 10% for waste on complex rooflines
Downspout placement planning:
- Place downspouts every 30–40 feet of continuous gutter run
- Never exceed 40 feet between downspouts longer unsupported runs sag and overflow
- Position downspouts away from entry doors, walkways, driveways, and HVAC equipment
- Plan discharge locations at least 3–4 feet from foundation walls
Step 3: Select Gutter Size, Material, and Profile
Use this selection guide:
5-inch K-style gutters: Suitable for roofs under 1,000 sq ft of drainage area per downspout, with roof pitch under 6:12, and annual rainfall under 40 inches
6-inch K-style gutters: Required for roofs over 1,000 sq ft of drainage area per downspout, roof pitch steeper than 6:12, or regions with annual rainfall above 40–50 inches
Material selection:
- Aluminum: Best value for 95% of residential applications lightweight, rust-proof, paintable, and available in 30+ colors
- Copper: Best for luxury homes, historic renovations, and homeowners who want maximum lifespan (50–100 years) and a natural patina aesthetic; no painting required
- Steel: Heavier and stronger than aluminum but susceptible to rust if coating is scratched best for commercial applications or regions with extreme physical loads (heavy snow, falling branches)
Tools and Materials Required
Professional Tools
- Roll-forming gutter machine: Rented or owned; pulls coil stock and forms continuous gutter profile on-site (cost to rent: $75–$150/day)
- Laser level or water level: Essential for accurate slope marking along full run length
- Cordless drill/driver: For hanger installation and downspout straps
- Aviation snips: Left-cut, right-cut, and straight for trimming gutter ends and outlets
- Rivet gun: For securing end caps, outlets, and miter joints
- Caulking gun: For applying gutter sealant at all joints
- Extension ladders (2): One at each end for long runs; ladder stabilizers prevent fascia damage
- Chalk line: For marking slope reference points on fascia
Materials Checklist
- Aluminum coil stock (or pre-formed seamless lengths from supplier)
- Hidden hangers (quantity: run length ÷ 16–24 inches spacing + 20% buffer)
- End caps (left and right for each run terminus)
- Drop outlets (one per downspout location)
- Inside and outside miters for all corners
- Downspout material (2×3 inch standard; 3×4 inch for 6-inch gutters or heavy flow)
- Downspout elbows (A-style and B-style as needed by wall configuration)
- Downspout straps/bands (one per 6–8 vertical feet)
- Sheet metal screws or pop rivets
- High-quality polyurethane gutter sealant (not standard silicone caulk)
- Splash blocks or downspout extensions (minimum 4 feet per downspout)
Step-by-Step Seamless Gutter Installation Guide
Step 1: Prepare the Work Area and Roof Edge
Begin by removing old gutters, spikes, and mounting hardware:
- Remove old gutters carefully to avoid damaging fascia
- Pull all old spikes and fill holes with exterior wood filler
- Sand and prime any bare wood sections
- Verify drip edge is installed correctly metal flashing at eave edge should overlap inside the gutter position, directing water into the gutter and not behind it
If no drip edge is present, install before gutters. Drip edge costs $1–$2 per linear foot and prevents water from running behind fascia one of the leading causes of soffit and fascia rot that ultimately destabilizes the entire gutter system.
Step 2: Establish and Mark Slope Reference Line
Correct slope is the single most critical technical requirement in seamless gutter installation:
Slope calculation:
- Standard slope: ¼ inch drop per 10 feet of horizontal run (minimum acceptable)
- Optimal slope: ½ inch drop per 10 feet (preferred for better flow and debris clearing)
- Maximum practical slope: ¾ inch per 10 feet (beyond this, gutters look visibly tilted)
Marking process:
- Mark the high point on the fascia at the end furthest from the downspout, positioned 1 inch below the roof’s drip edge
- Calculate total drop: (run length ÷ 10) × slope per 10 ft
- Example: 40-foot run at ½ inch/10 ft = 2-inch total drop
- Mark the low point at the downspout end, the calculated amount below the high point
- Snap a chalk line between high and low points this is your installation reference line
- Verify with a level: the chalk line should show consistent downward slope toward downspout
“Maintaining consistent slope is more important than exact measurement. A gutter that slopes ⅜ inch per 10 feet consistently outperforms one that averages ½ inch but has high and low spots.” GutterFX Professional Installation Standards, 2025
Step 3: Form the Seamless Gutter
Using a roll-forming machine:
- Load aluminum coil stock into the machine feed
- Run a test length (2–3 feet) to verify the machine is forming the correct profile
- Feed the full run length, supporting exiting gutter on run-out stands or a helper
- Cut to length with the machine’s guillotine cutter allow ¼ inch extra for end cap overlap
- Label each run immediately to avoid confusion during installation
If using supplier-formed gutters:
- Provide exact measurements to supplier, including length plus end cap allowances
- Verify each run immediately on delivery before the truck leaves
- Store lengths flat or on edge never bend seamless sections mid-span
Step 4: Fabricate Joints and Outlets on the Ground
Assemble all end caps and outlets before lifting the gutter onto the fascia:
End cap installation:
- Slide end cap over the open gutter end
- Secure with 3–4 rivets through cap into gutter sides
- Apply continuous bead of polyurethane sealant inside the joint
- Allow sealant to skin (15–20 minutes) before handling
Drop outlet installation:
- Mark outlet location 2–4 inches from the low end of the gutter run (near downspout side)
- Drill starter hole and cut opening with aviation snips to match outlet dimensions
- Insert drop outlet from below, ensuring outlet collar seats fully
- Secure with rivets and apply gutter sealant completely around the joint interior
- Test the seal by pouring water directly into the outlet no drips acceptable
Miter installation (corners):
- Pre-form or purchase miters for all inside and outside corners
- Test fit before sealing
- Apply sealant, join, rivet, and allow to cure
Step 5: Install Hidden Hangers on Fascia
Hidden hangers are the structural attachment system for your gutters. Poor hanger installation causes sagging, pulling away from fascia, and gutter failure.
Hanger placement standards:
| Climate/Condition | Hanger Spacing |
|---|---|
| Mild climate, moderate rainfall | 24 inches OC |
| Heavy rainfall regions | 20 inches OC |
| Snow load regions (50+ lbs/sf) | 16–18 inches OC |
| Within 12 inches of corners/outlets | Always add hanger |
| Over valleys or high-flow areas | 12–16 inches OC |
Installation technique:
- Hold hanger clip on fascia aligned with chalk slope line
- Ensure the front lip of the hanger aligns to receive the gutter at correct height
- Drive exterior-grade screws (minimum 1½ inch) through hanger into fascia and ideally into rafter tail behind
- Never use nails screw withdrawal strength is 3–4× greater, critical for winter ice and snow loads
- Verify each hanger follows the chalk slope line precisely before proceeding
Step 6: Hang the Seamless Gutter Run
With at least one helper for runs over 15 feet:
- Lift the fabricated gutter run into position along the fascia
- Hook the front gutter lip over the front of each hanger
- Press the back of the gutter against the fascia and snap the hanger clip closed over the back gutter wall
- Work from one end to the other, clipping each hanger
- Verify the gutter follows the chalk slope line — it should be consistent from high end to low end
- Check that the back of the gutter is fully seated against fascia — gaps behind the gutter allow wasps and moisture to enter
Drip edge clearance:
Confirm the drip edge overhangs the front of the gutter by at least ½ inch and sits inside the gutter opening. Water running off the roof should drip directly into the gutter, not behind it.
At corners:
Install miter connectors where two runs meet at inside or outside corners:
- Apply sealant to both gutter ends before connecting
- Rivet the connection through both gutter walls
- Test for leaks before proceeding
Step 7: Install Downspouts
Properly installed downspouts are equally critical as the gutters themselves:
Elbow and offset installation:
- Attach an A-style elbow to the drop outlet, angled toward the wall
- Measure the horizontal distance from outlet to wall
- Cut an offset section or use elbows to route the downspout to run flush with the wall
- Test fit all pieces before securing
Downspout run installation:
- Connect first downspout section to upper elbow assembly
- Add sections working downward, overlapping upper sections inside lower sections (crimped end faces down)
- Secure to wall with straps every 6–8 feet — use lag screws into solid wood or masonry anchors
- Terminate with a B-style elbow pointing away from foundation at 45–90 degrees
Discharge and drainage:
- Add splash block or plastic extension directing water 3–6 feet from foundation
- For heavy rainfall areas or close foundations, use underground drainage pipe directing water to daylight or storm drain connection
- Never discharge toward neighbor’s property or in areas that will ice in winter
Step 8: Final Sealing and System Test
Before cleaning up:
- Apply a final bead of polyurethane sealant at any joint showing insufficient coverage
- Allow 1–2 hours of cure time before testing
- Run a garden hose at maximum pressure at the high point of each run
- Watch for:
- Water flowing steadily toward downspout (correct slope confirmed)
- No standing water mid-run (no sags or reverse pitch)
- No drips at end caps, outlets, or miters (sealant integrity)
- Water exiting cleanly at downspout discharge (no blockages)
- Document any slow-draining sections and adjust hanger height if needed
Seamless Gutter Installation and Roof Cleaning
Seamless gutter installation and regular roof cleaning form a complementary maintenance system that protects your entire roof structure.
How Gutters Protect Your Roof from Organic Growth
Standing water at roof edges creates the moisture environment that moss, algae, and lichen need to establish. When gutters overflow or back-pitch, water pools against fascia and under shingles — exactly where moss spores germinate. Well-installed seamless gutters that drain quickly and completely remove the moisture source, reducing roof cleaning frequency by an estimated 30–40% compared to homes with clogged or leaking sectional gutters.
Recommended Roof and Gutter Cleaning Schedule
| Task | Frequency | Method |
|---|---|---|
| Gutter debris removal | 2× per year (spring/fall) | Hand-scoop + hose flush |
| Downspout cleaning | 2× per year | Hose pressure from top |
| Roof soft-wash cleaning | Every 1–3 years | Low-pressure chemical treatment |
| Roof debris clearing | After every major storm | Blower or roof rake |
| Full gutter inspection | Annually | Visual + water test |
| Gutter sealant check | Every 3–5 years | Inspect all joints during cleaning |
Best Practices for Combined Roof and Gutter Maintenance
- Clean roof first, gutters second: Roof cleaning dislodges moss, algae, and shingle granules that fall into gutters. Always flush gutters after completing roof work.
- Soft-wash roof cleaning is gutter-friendly: High-pressure washing forces granules and debris into gutters aggressively. Low-pressure soft-wash with biodegradable treatments is safer for both shingles and gutter systems.
- Inspect gutters during every roof cleaning visit: The elevated position allows easy visual inspection of hanger tightness, gutter slope, and sealant condition.
- Trim overhanging branches: Overhanging limbs deposit 60–70% of debris that enters gutters. Trimming branches to 3 feet clear of roofline reduces cleaning frequency significantly.
- Gutter guards complement seamless systems: Micro-mesh gutter guards ($4–$10/lf) virtually eliminate debris entry, making them ideal when combined with seamless installation — you get maximum flow with minimum maintenance.
“The combination of seamless gutters, properly maintained roof drip edge, and annual soft-wash roof cleaning represents the most cost-effective long-term roof protection strategy available to homeowners.” — Thompson Creek Home Improvement Guide, 2025
Common Seamless Gutter Installation Mistakes
Mistake 1: Insufficient Slope
Problem: Gutters installed level or with less than ¼ inch per 10 feet slope trap water and debris, creating standing water that promotes mosquito breeding, accelerates corrosion, and adds ice load in winter.
Solution: Always establish and verify slope with a chalk line and level before hanging any hangers. Test with water after installation — water should flow visibly toward the downspout within 30 seconds.
Cost of error: $300–$800 to remove and re-hang sections with incorrect slope.
Mistake 2: Hanger Spacing Too Wide
Problem: Hangers spaced beyond 24 inches allow gutters to sag between attachment points, especially when loaded with water, ice, or wet leaves. Sagging gutters hold debris and eventually pull away from fascia.
Solution: Never exceed 24 inches between hangers in mild climates; use 16–18 inches in snow regions. Add extra hangers at every corner, outlet, and valley location regardless of spacing.
Cost of error: $200–$500 to reinstall hangers at correct spacing after sagging is observed.
Mistake 3: Fastening Only into Sheathing
Problem: Screws driven into roof sheathing only (rather than through sheathing into rafter tails) have inadequate withdrawal strength. Under ice, snow, or heavy rainfall loads, gutters rip away from fascia.
Solution: Locate rafter tails before drilling hanger locations; align screws to penetrate both fascia and rafter tail. Use 2½–3 inch screws for maximum holding power.
Cost of error: Gutter run detachment, potential fascia damage, complete re-installation.
Mistake 4: Installing Over Rotten Fascia
Problem: Soft, rotten, or deteriorated fascia cannot hold hanger screws under load. Even if installation appears solid initially, the first heavy rain or ice event causes failure.
Solution: Replace all rotten fascia sections before installation. Budget $3–$8 per linear foot for fascia replacement. Combined with gutter installation, this is the best time to address fascia condition.
Mistake 5: Downspouts Discharging Too Close to Foundation
Problem: Downspouts dumping water within 1–2 feet of the foundation saturate soil, create hydrostatic pressure against foundation walls, and increase basement leak risk significantly.
Solution: Install splash blocks or flexible extensions directing water minimum 3–4 feet from foundation. Use underground drainage pipe for tight sites or crawl space foundations.
Mistake 6: Using Standard Silicone Caulk at Joints
Problem: Standard silicone caulk is designed for interior use and breaks down rapidly under UV exposure and temperature cycling. Joints sealed with silicone typically fail within 1–3 years.
Solution: Use only polyurethane-based gutter sealant (Geocel, GE Max Flex, or equivalent) formulated specifically for metal gutter systems. Apply inside the gutter where UV exposure is minimized.
Seamless Gutters vs Sectional Gutters: Full Comparison
| Factor | Seamless Gutters | Sectional Gutters |
|---|---|---|
| Leak frequency | Low (joints only at ends) | High (every 10–20 ft section) |
| Installation cost | $6–$14/lf professional | $3–$8/lf DIY possible |
| Material waste | Minimal (custom length) | Higher (cut from standard lengths) |
| Clog tendency | Low (smooth, no seam snags) | Higher (debris catches at joints) |
| Appearance | Clean, continuous lines | Visible joints and seams |
| DIY feasibility | Requires rented machine | Standard hardware store purchase |
| Maintenance | Minimal | Regular resealing needed |
| Lifespan | 20–30 years | 10–20 years |
| Custom length | Yes (on-site formed) | No (pre-cut sections) |
| Best for | Long-term investment homes | Budget repairs, rental properties |
DIY vs Professional Seamless Gutter Installation
When DIY Makes Sense
Seamless gutter installation can be a viable DIY project under the right conditions:
- Single-story home with accessible, safe ladder work
- Simple rectangular roofline with few corners or obstacles
- Access to roll-forming machine rental ($75–$150/day) or supplier-formed sections
- Comfort with measuring, cutting, and sealing metal
- Adequate help: At least one assistant for lifting long runs
Estimated DIY savings: $400–$1,200 on a typical single-story home (labor cost eliminated)
DIY supply cost example (150 lf home):
- Aluminum coil stock: $200–$300
- Hangers, outlets, elbows, straps: $80–$120
- Downspouts: $60–$100
- End caps, miters, sealant: $40–$70
- Machine rental (1 day): $100–$150
- Total DIY material cost: $480–$740
When to Hire a Professional
Hire professional installers when:
- Two or three stories: Height and safety requirements exceed typical DIY comfort
- Complex roofline: Multiple dormers, valleys, or irregular angles require precise cuts
- Fascia replacement needed: Combining repairs with installation requires carpentry skill
- Bundling with roof cleaning or replacement: Professionals coordinate all roofline work efficiently
- Warranty requirements: Some gutter manufacturers require professional installation for warranty validity
How to hire a qualified contractor:
- Request 3 detailed quotes specifying material gauge, hanger spacing, and sealant type
- Verify licensing and liability insurance
- Ask for local references and before/after photos
- Confirm warranty on both materials and labor (minimum 1-year labor warranty standard)
- Ask specifically whether they use hidden hangers and polyurethane sealant
Frequently Asked Questions
What is the average cost of seamless gutter installation?
Seamless gutter installation costs $6–$14 per linear foot for aluminum systems professionally installed in 2026, with most homes spending $1,200–$2,800 for a complete system. Copper seamless gutters cost $25–$40+ per linear foot, while steel runs $9–$18 per linear foot. Two-story homes and complex rooflines add 20–35% to baseline labor costs.
How long do seamless gutters last?
Properly installed aluminum seamless gutters last 20–30 years with regular maintenance. Copper seamless gutters last 50–100 years with virtually no corrosion. Steel systems last 20–25 years if protective coatings remain intact. The main factors affecting lifespan are climate, maintenance frequency, hanger quality, and whether the system was installed with proper slope and sealed joints.
How far apart should seamless gutter hangers be?
Hidden hangers for seamless gutters should be spaced every 24 inches in mild climates, every 18–20 inches in high-rainfall areas, and every 16 inches in heavy-snow regions. Add extra hangers within 12 inches of every corner, outlet, and valley regardless of standard spacing. Using 2½–3 inch exterior screws driven into rafter tails provides maximum holding strength.
What slope is required for seamless gutter installation?
Seamless gutters require ¼ to ½ inch of slope per 10 feet of horizontal run toward the downspout. A 40-foot run needs a total drop of 1–2 inches from the high point to the downspout. Inadequate slope causes standing water, debris accumulation, and corrosion; excessive slope (over ¾ inch per 10 feet) looks visually obvious and can cause water to overshoot the downspout in heavy rain.
Can seamless gutters be installed as a DIY project?
Yes, seamless gutter installation is feasible as a DIY project on single-story homes with simple rooflines when you rent a roll-forming machine ($75–$150/day) and have an assistant. DIY saves $400–$1,200 in labor compared to professional installation. However, two-story homes, complex rooflines, rotten fascia requiring replacement, and any situation requiring rooftop access beyond comfortable ladder work should be handled by professionals.
When is the best time of year for seamless gutter installation?
Spring and fall are the optimal seasons for seamless gutter installation because moderate temperatures (40–80°F) allow sealant to cure properly and metal to be worked without cold brittleness or heat expansion issues. Summer works well in most regions. Avoid installing in freezing temperatures when sealant won’t cure and metal is more brittle, and avoid installation immediately before forecast heavy rain that prevents sealant curing.
How do seamless gutters help with roof cleaning and maintenance?
Seamless gutters protect roofs by efficiently directing water away from roof edges, preventing the pooling moisture that accelerates moss, algae, and lichen growth. Well-installed seamless gutters operating at proper slope complement roof cleaning by providing a clear, smooth path for debris and cleaning solution runoff. After any roof cleaning treatment, flushing gutters removes all dislodged organic matter and prevents re-growth from trapped debris.
Do I need to clean seamless gutters?
Yes — even seamless gutters require cleaning at least twice per year (spring and fall), though less frequently than sectional gutters because there are no seam snags to trap debris. Homes with overhanging trees may need quarterly cleaning. Gutter guards ($4–$10 per linear foot installed) significantly reduce cleaning frequency when combined with seamless systems and are a worthwhile long-term investment.
What size seamless gutters do I need?
Choose 5-inch K-style seamless gutters for most homes with moderate roof pitch (under 6:12) and annual rainfall under 40 inches. Upgrade to 6-inch K-style for steep roofs (over 6:12 pitch), large drainage areas over 1,000 square feet per downspout, or regions receiving 40+ inches of annual rainfall. Pair 6-inch gutters with 3×4-inch downspouts rather than standard 2×3-inch for proportionate flow capacity.
How can I tell if my seamless gutters need replacement vs repair?
Replace seamless gutters when sections have pulled away from fascia more than once, when corrosion holes appear anywhere along the gutter body, when hangers are failing in multiple locations, or when the gutter is 20+ years old and showing widespread sealant failure. Repair is appropriate for isolated joint leaks, single damaged sections, or sagging caused by loose hangers that can be re-secured. Combined gutter replacement and roof cleaning performed simultaneously maximizes the efficiency of roofline maintenance visits.
Get free roofing advice, cost guides, and seasonal maintenance tips.
Roofing content specialist with 5+ years researching U.S. residential and commercial roofing. Has documented 200+ projects covering installation costs, material selection, contractor vetting, and DIY guides for homeowners across all climate zones.
Asphalt Roof Cleaning: How to Clean Without Damage
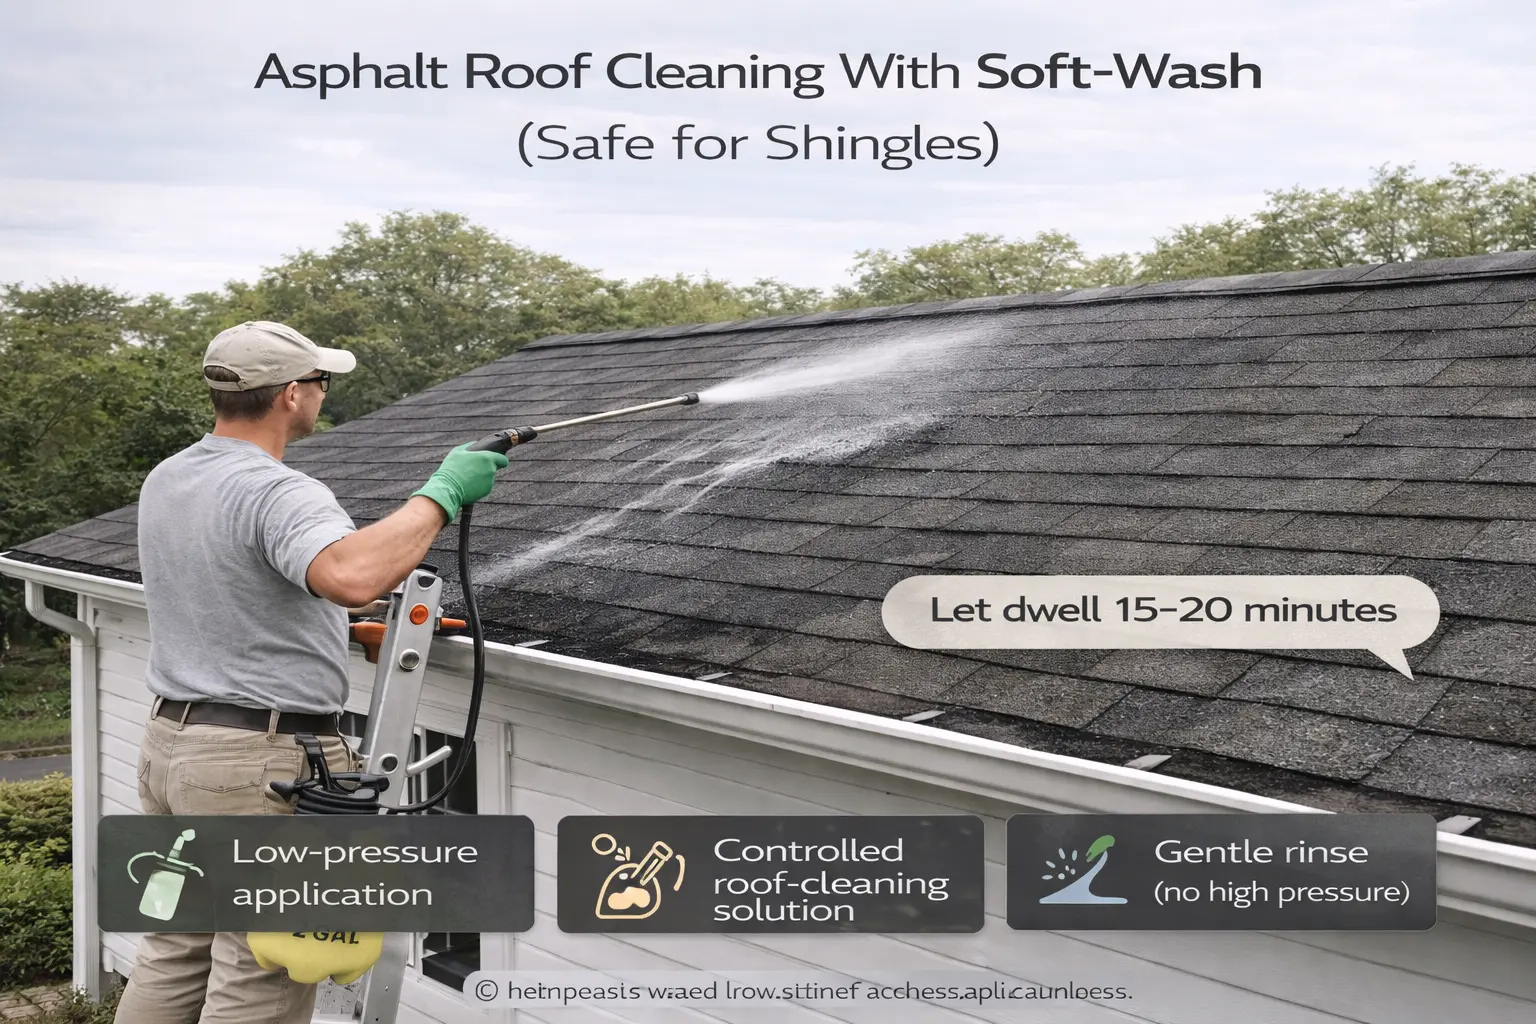
Asphalt roof cleaning is the safest way to restore curb appeal and slow premature shingle aging when you remove algae streaks, moss, and debris using a low-pressure “soft wash” approach instead of high-pressure blasting. When homeowners ask for how to clean roof without damaging shingles, the key is to use gentle tools, the right cleaning solution, and a top-to-bottom rinse that avoids lifting shingle tabs or stripping protective granules.
This full guide walks through asphalt roof cleaning step-by-step, explains what causes stains on asphalt shingles, outlines the safest tools and solutions (including vinegar-and-water and bleach-based options used sparingly), clarifies exactly what not to do (especially pressure washing), and shares prevention tactics to reduce future algae/moss growth. You’ll also get a practical cost/timing overview, maintenance schedule, and internal-linking-ready notes for roofing materials and shingle types content.
Table of Contents
Safety first (don’t skip this)
Asphalt roof cleaning is inherently risky because roofs become slippery when wet and many cleaning solutions are irritating to skin and eyes, so safety protocols are part of doing the job “without damaging shingles” and without hurting yourself. Lowe’s recommends cleaning roof shingles only in calm, mild weather because heat can dry cleaning solution too fast and wind makes roof work unsafe.
Choose the right day
For asphalt roof cleaning, pick a mild, calm day so your solution has time to work and you’re not dealing with wind gusts or rapid evaporation. Avoid extreme temperatures, storms, and conditions that would make the roof slick or unpredictable.
Secure the area below
Lowe’s advises using drop cloths to cover anything you don’t want cleaner to drip onto, including patios, furniture, and especially plants and gardens around the house. If you’re practicing how to clean roof without damaging shingles, protecting landscaping is part of the plan because runoff and overspray are common.
Wear proper protective gear
Lowe’s recommends a safety harness, hard hat, non-slip shoes, plus a mask, gloves, and protective eyewear when using harsh or strong cleaners. This is particularly important during asphalt roof cleaning because even “household” solutions can irritate skin and eyes.
Consider working from a ladder
Lowe’s notes the roof surface can get slippery when wet and suggests working from a step ladder instead of walking over the roof when possible. This reduces foot traffic on shingles, which also supports how to clean roof without damaging shingles by minimizing scuffing and granule disturbance.
What stains asphalt shingles (and why it matters)
Good asphalt roof cleaning starts by identifying what you’re seeing on the roof because the wrong approach can damage shingles or simply waste time.
Algae (black streaks)
One of the most common reasons people search for asphalt roof cleaning is black streaking that runs down roof slopes, often mistaken for dirt or soot. Many cleaning approaches aim to treat algae and rinse it off rather than physically scrubbing it away.
Moss and green growth
Moss tends to grow in shaded, damp roof zones and can hold moisture against shingles, which is why homeowners look for how to clean roof without damaging shingles when moss appears. Moss removal usually requires dwell time with a cleaner and gentle rinse rather than brute force.
Debris and grime
Leaves, twigs, and roof “dust” collect especially around valleys, behind chimneys, and near tree cover, and removing them is a core step in asphalt roof cleaning. Clearing debris also improves drainage and reduces water retention.
Rust, chimney stains, and unknown marks
Not every stain is algae—some marks come from metal runoff (rust), chimney flashing issues, or localized leaks, which can change how you approach asphalt roof cleaning. If you’re unsure, test a small area first and avoid harsh methods.
Asphalt roof cleaning: tools and materials checklist
Using the right tools is central to how to clean roof without damaging shingles because the wrong equipment (especially pressure washers) can compromise shingle integrity.
Cleaning and application tools
For a safe asphalt roof cleaning setup, gather:
- Spray bottle or pump sprayer for applying the solution from the top down.
- Garden hose for gentle rinsing until solution and grime are removed.
- Soft bristle brush for light agitation only where necessary.
- A broom to gently sweep loose debris (not aggressive scraping).
Safety and protection materials
For asphalt roof cleaning and overspray control:
- Drop cloths to protect patios, decks, and nearby surfaces.
- Plant covers (or plastic sheeting) and a plan to rinse plants afterward.
- Gloves, eye protection, mask, and non-slip footwear.
- Safety harness and ladder safety equipment for roof-edge work.
Optional but helpful
If you’re serious about how to clean roof without damaging shingles, consider:
- Gutter guards or temporary gutter covers (to manage debris during cleaning).
- A hose-end sprayer that applies cleaner at low pressure (still avoid strong blasting).
How to clean roof without damaging shingles (step-by-step method)
This section is the core “how-to” for asphalt roof cleaning, designed to minimize shingle wear.
Step 1: Inspect before you clean
Before asphalt roof cleaning, inspect shingles for cracks, missing tabs, lifted edges, or exposed nail heads, because water and solution can enter vulnerable areas. If shingles are already failing, cleaning won’t fix the underlying issue and could worsen leaks.
Step 2: Check gutters and downspouts
Lowe’s recommends checking gutters and downspouts before applying solution so rinse water and runoff can flow through easily. This is part of how to clean roof without damaging shingles because backups can cause water to pool and push under edges.
Step 3: Gently remove loose debris
Start asphalt roof cleaning by gently sweeping away leaves and dry debris so your cleaner hits the roof surface instead of sitting on organic material. This also reduces the chance of streaky rinsing and clogged gutters.
Step 4: Choose your cleaning solution (safe options)
Lowe’s suggests mixing vinegar with equal parts water to deal with moss and algae, and notes bleach can also treat buildup but should be used sparingly because it can damage shingles. For asphalt roof cleaning, this gives you two common pathways: a milder vinegar mix for lighter growth or carefully-used bleach-based products for heavier staining.
Option A: Vinegar + water (milder approach)
Vinegar-and-water is often used for asphalt roof cleaning when you want a gentler cleaner and you’re dealing with lighter moss or algae. It’s also a practical entry point for homeowners learning how to clean roof without damaging shingles because it reduces the risk of chemical overkill.
Option B: Bleach-based cleaning (use sparingly)
Lowe’s acknowledges bleach is effective for buildup but advises using it sparingly because it can damage shingles. If you choose bleach for asphalt roof cleaning, take extra care to protect plants and avoid over-concentration and over-dwell.
Option C: Commercial roof cleaners
Lowe’s says commercial cleaners that specifically treat algae and moss are a good option and you should follow manufacturer instructions for proper application. This is often the best route for how to clean roof without damaging shingles because the product is formulated for roofs and the dwell/rinse guidance is clearer.
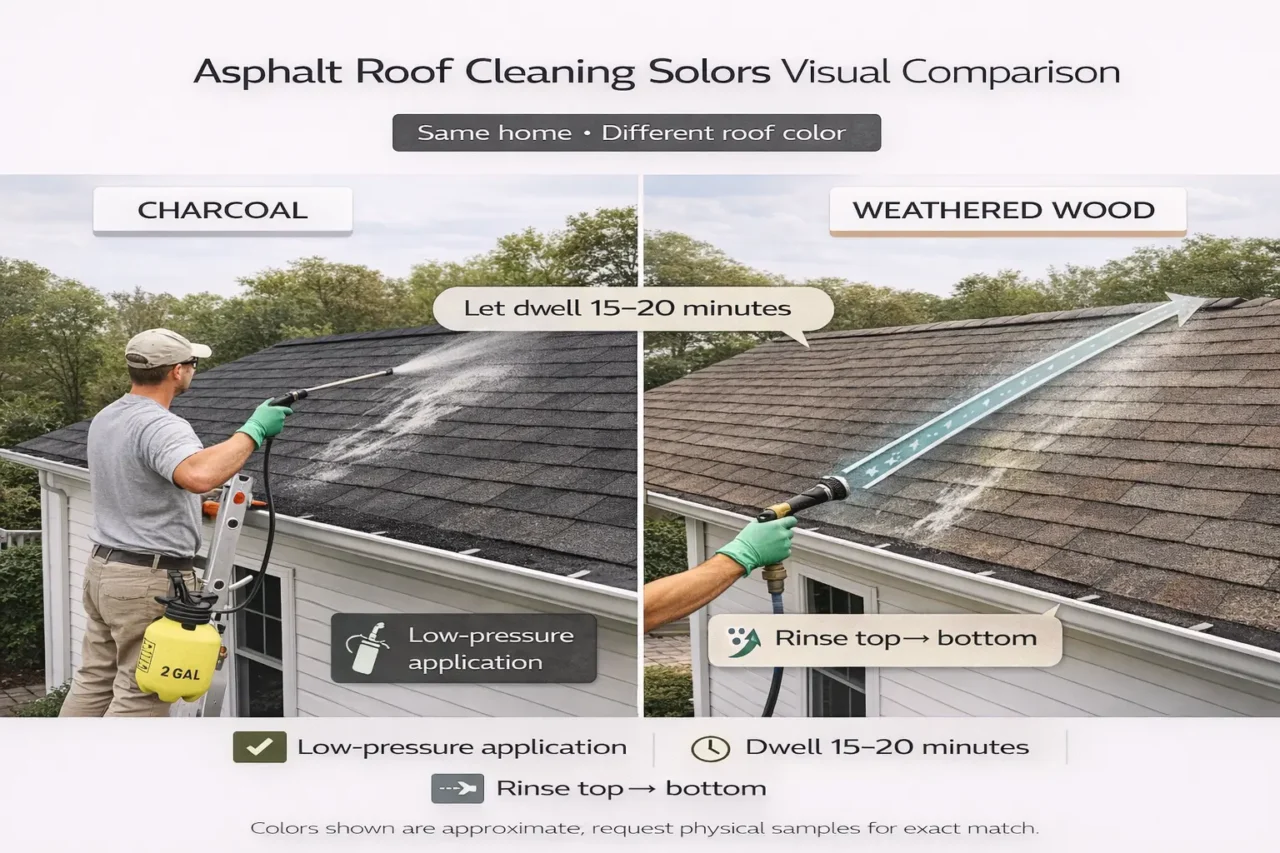
Step 5: Apply solution top-to-bottom (even coverage)
Add your solution to a spray bottle or sprayer and apply it starting at the top and working downwards, concentrating on areas with heavier grime or algae and moss buildup. For asphalt roof cleaning, this top-down approach aligns with how water naturally runs and reduces the chance of forcing liquid under shingles.
Step 6: Let it dwell (don’t rush it)
Lowe’s advises leaving the cleaning solution on for at least 15–20 minutes for an effective clean, though you should always follow the instructions for the specific cleaning agent you use. Dwell time is crucial for how to clean roof without damaging shingles because it reduces the need for scrubbing.
Step 7: Light agitation only if needed
If some areas still look stubborn, Lowe’s recommends using a soft bristle brush to gently scrub those areas. Keep agitation minimal during asphalt roof cleaning to avoid granule loss.
Step 8: Rinse thoroughly and gently
Fill your spray bottle with water or use a garden hose and keep rinsing the roof until you are sure no cleaning solution or grime is left behind. For asphalt roof cleaning, gentle rinsing is a major part of how to clean roof without damaging shingles because it avoids shingle lift and granule stripping.
Step 9: Reapply instead of increasing force
Lowe’s notes that if the initial clean hasn’t removed grime, dirt, and moss, you should reapply solution on tough spots. Reapplication is the safe alternative to “trying harder,” and it supports how to clean roof without damaging shingles by keeping pressure low.
Step 10: Rinse plants and cleanup
Lowe’s recommends rinsing plants that may have accidentally come in contact with the cleaning solution after you’re done. Clean up drop cloths, flush gutters, and verify runoff paths are clear to finish asphalt roof cleaning properly.
The pressure washer question (and why the answer is “avoid it”)
Many homeowners assume a pressure washer is the best way to do asphalt roof cleaning, but that’s a common mistake. Lowe’s explicitly says to avoid using a pressure washer on roof shingles because it will damage your shingles.
What pressure washing can do to asphalt shingles
During asphalt roof cleaning, a pressure washer can:
- Remove protective granules (reducing shingle life).
- Lift shingle edges and force water where it shouldn’t go.
- Turn a cosmetic problem into a performance problem.
If a contractor suggests pressure washing
If a contractor proposes high-pressure cleaning as the main method, ask about their shingle-safe process and what pressure range they use, because safe how to clean roof without damaging shingles guidance emphasizes low pressure and chemistry-driven cleaning. You can also ask for written confirmation that their method won’t void any warranty (if applicable).
Asphalt roof cleaning solutions: what to use and what to avoid
Choosing chemicals is a major part of asphalt roof cleaning because certain products can harm shingles or surrounding property.
Safer choices (common homeowner options)
- Vinegar mixed with equal parts water for moss and algae.
- Commercial algae/moss cleaners that specify shingle compatibility, used per instructions.
- Bleach-based options used sparingly (with strong precautions and careful dilution).
Avoid abrasive cleaners and aggressive methods
Lowe’s says never use abrasive cleaners or methods and recommends testing a cleaner on a hidden area first if you’re unsure. This guidance is central to how to clean roof without damaging shingles because abrasives can accelerate wear.
Avoid “mystery mixes”
If a DIY forum suggests strong acids or caustic degreasers for asphalt roof cleaning, skip them unless a manufacturer explicitly states compatibility, because unknown chemical reactions can weaken shingles or strip granules. When in doubt, stick to known approaches and follow label directions.
Cleaning moss on asphalt shingles (without tearing them up)
Moss often requires a slightly different mindset for asphalt roof cleaning because it can form thick mats.
Use products meant for mold/mildew stains
Lowe’s recommends purchasing a mold and mildew stain remover meant for outdoor use and ensuring it’s compatible with your shingles. This is one of the safest paths for how to clean roof without damaging shingles when moss is heavy.
Let dwell time do the work
For asphalt roof cleaning of moss, dwell time is crucial, and Lowe’s suggests leaving solution on for at least 15–20 minutes (or per the label). This reduces the need to scrape, which is where shingle damage often happens.
Gentle rinse and repeat
Rinse gently and repeat applications if needed instead of trying to pry moss off in one go. Repeating is slower but aligns with how to clean roof without damaging shingles guidance.
Asphalt roof cleaning for algae streaks (black lines)
Algae streaks are often cosmetic, but they’re the number-one reason people consider asphalt roof cleaning.
Treat, dwell, rinse
The safest approach is still chemical treatment plus gentle rinse rather than mechanical scrubbing. Apply the solution top-to-bottom, allow it to work, then rinse until residue is gone.
Don’t chase perfection with force
If stains linger after the first pass, reapply cleaner instead of escalating to high pressure. That’s the practical version of how to clean roof without damaging shingles.
Special situations (steep roofs, old shingles, and repairs)
Not every roof is a good DIY candidate for asphalt roof cleaning.
Steep pitch roofs
Steep roofs increase fall risk, and Lowe’s emphasizes that roof cleaning “should only be undertaken by those experienced with the essential safety protocols for roof work.” If you have a steep roof, hiring a pro is often the safest way to follow how to clean roof without damaging shingles.
Older or brittle shingles
Older asphalt shingles can become brittle and more prone to granule loss, so asphalt roof cleaning should be extra gentle. If your roof is near the end of its life, consider whether cleaning is worth it versus replacement.
Existing leaks or flashing issues
If you suspect leaks, address repair first; cleaning won’t solve water entry. During asphalt roof cleaning, water exposure can make pre-existing problems worse.
DIY vs professional asphalt roof cleaning
Choosing between DIY and hiring out affects cost, risk, and results for asphalt roof cleaning.
DIY makes sense when
DIY asphalt roof cleaning is most reasonable when:
- The roof is low and easy to reach from a ladder.
- Staining is light-to-moderate moss/algae.
- You can protect landscaping and control runoff.
Hire a pro when
Hiring a professional is often best when:
- The roof is steep/high or you can’t work safely from a ladder.
- Growth is heavy and widespread, requiring multiple treatments.
- You want insured work and standardized processes aligned with shingle-safe cleaning.
Cost of asphalt roof cleaning (what homeowners should expect)
Costs vary by roof size, pitch, and the severity of staining, but asphalt roof cleaning is usually far cheaper than premature roof replacement if done safely. DIY costs are mainly sprayers, cleaners, protective gear, and plant protection materials, while professional costs include labor, insurance, and specialized equipment used at safe pressures.
A practical way to budget is by roof size: a larger roof surface requires more solution, more dwell time, and more rinsing. If you’re comparing quotes, ask whether their approach avoids pressure washing and relies on a soft-wash method consistent with how to clean roof without damaging shingles guidance.
Prevention: keep the roof cleaner longer
Preventive steps reduce how often you need asphalt roof cleaning and help preserve shingle appearance.
Routine inspections
Lowe’s recommends routine inspections at least twice a year to make repairs and to take to cleaning at least once a year. Inspections help you catch algae and moss early, which reduces the intensity needed for asphalt roof cleaning.
Trim overhanging trees
Lowe’s suggests trimming trees that are too close to your roof to prevent moisture from affecting shingles. Less shade and less debris can slow algae and moss growth, reducing the need for frequent asphalt roof cleaning.
Clean gutters frequently
Lowe’s says cleaning gutters frequently prevents stagnant water and debris from accumulating over your roof. Better drainage supports roof longevity and reduces the recurrence of conditions that lead to asphalt roof cleaning.
Consider algae/moss treatment
Lowe’s suggests applying moss or algae treatment to deal with these build-ups. Preventive treatments can help extend the time between major asphalt roof cleaning sessions.
Seasonal asphalt roof cleaning schedule (practical)
A simple schedule makes asphalt roof cleaning more manageable and less risky.
Spring
Spring is a common time for asphalt roof cleaning because winter moisture can trigger moss and algae growth; mild weather also helps solutions work properly. Inspect, clear debris, and spot-treat early growth.
Summer
If you do asphalt roof cleaning in summer, avoid extreme heat because Lowe’s notes high heat can dry your cleaning solution before it works effectively. Early morning or mild days are better.
Fall
Fall cleaning focuses on debris removal and gutter clearing to prevent winter moisture traps. A light asphalt roof cleaning pass can reduce organic buildup before rainy months.
Winter
Winter is typically not ideal for DIY asphalt roof cleaning due to slippery surfaces and cold conditions, and safety should dominate decisions. Use winter mainly for inspections from the ground and planning.
Shingle roof details that matter during cleaning
Understanding basic “shingle roof details” helps you execute how to clean roof without damaging shingles with fewer mistakes.
Shingle tabs and overlaps
Asphalt shingles are layered so water runs over overlaps; spraying upward or forcing water under tabs undermines that system. That’s why asphalt roof cleaning guidance emphasizes top-to-bottom application and rinse.
Granules (the protective surface)
Granules protect shingles from UV and weathering, so preserving them is a main objective in how to clean roof without damaging shingles. Abrasive methods and pressure washing threaten granules, which is why they’re discouraged.
Flashing and penetrations
Around chimneys, vents, and skylights, be extra cautious during asphalt roof cleaning because these are leak-prone details. Avoid aggressive brushing near flashing edges.
Mistakes that shorten shingle life (avoid these)
If you want asphalt roof cleaning to extend roof life instead of shortening it, avoid these errors.
Mistake 1: Pressure washing
Lowe’s says a pressure washer will damage your shingles, making this the most important “don’t” in how to clean roof without damaging shingles. Even moderate pressure can be too aggressive.
Mistake 2: Using abrasive cleaners
Lowe’s says never use abrasive cleaners or methods and to test in a hidden area first if uncertain. Abrasives can scuff shingles and strip granules, creating premature wear.
Mistake 3: Overusing bleach
Lowe’s notes bleach can be effective but should be used sparingly because it can damage shingles. Overuse can also increase risk to plants and finishes around your home.
Mistake 4: Cleaning in bad weather
Lowe’s warns that wind and extreme heat are unsafe and reduce effectiveness. Weather timing is part of doing asphalt roof cleaning correctly.
Read More
- Roofing materials (asphalt shingles vs metal vs tile; when cleaning is appropriate).
- Shingle types (3-tab vs architectural; why surface texture affects staining).
FAQ (asphalt roof cleaning)
Can I pressure wash an asphalt shingle roof?
No—Lowe’s says to avoid pressure washing because a pressure washer will damage your shingles.
What’s the safest “how to clean roof without damaging shingles” method?
Use a sprayer to apply a roof-safe cleaner from top to bottom, allow at least 15–20 minutes dwell time (or follow the product label), then rinse gently with a garden hose and reapply on stubborn areas rather than increasing force.
Is vinegar safe for asphalt roof cleaning?
Lowe’s recommends mixing vinegar with equal parts water to deal with moss and algae, making it a common gentler option for asphalt roof cleaning.
Should I scrub roof shingles?
Lowe’s says shingles are delicate and warns against abrasive methods; if needed, use a soft bristle brush and scrub gently only on heavy buildup areas.
How often should I clean my roof shingles?
Lowe’s suggests inspections at least twice a year and cleaning at least once a year, plus considering algae/moss treatments and trimming trees near the roof.
Get free roofing advice, cost guides, and seasonal maintenance tips.
Roofing content specialist with 5+ years researching U.S. residential and commercial roofing. Has documented 200+ projects covering installation costs, material selection, contractor vetting, and DIY guides for homeowners across all climate zones.
Roof Cleaning Houston: Complete Guide for Homeowners
Roof cleaning Houston homes is essential for protecting curb appeal, preventing roof damage, and extending shingle life in one of the most demanding climates in the country. High humidity, intense sun, and frequent storms create perfect conditions for black streaks, algae, mold, and moss to thrive on asphalt and tile roofs.
Ignoring regular roof cleaning in Houston leads to dark stains, granule loss on shingles, premature aging, and even higher energy bills as reflective surfaces become darker and hotter over time.
Table of Contents
Why roof cleaning matters more in Houston
Houston’s subtropical climate means long, hot summers and moisture-rich air that feeds algae like Gloeocapsa magma, the dark streaks often mistaken for dirt. These organisms hold moisture against the roof surface and gradually break down protective granules on asphalt shingles.

Roofs in the Houston area are also exposed to pollen, air pollution, salt in coastal zones, and debris from frequent storms. Without occasional roof cleaning, these contaminants build up, creating ideal conditions for mold and mildew, especially on north-facing or shaded roof slopes.
Soft washing vs. pressure washing
For roof cleaning Houston homeowners should understand the difference between soft washing and traditional pressure washing. Soft washing uses low-pressure water combined with specialized cleaning solutions designed to kill algae, mold, and mildew without damaging roofing materials.
High-pressure washing can strip granules from shingles, force water under flashing, and void manufacturer warranties. On asphalt shingle roofs, professional contractors almost always recommend soft washing methods, while pressure washing may be reserved for some concrete tile or metal roofs at carefully controlled settings.
Key points:
- Soft wash = low pressure + cleaners, safer for shingles
- High pressure = higher damage risk, used only when appropriate and by experienced pros
- Always confirm the method a contractor will use before hiring for roof cleaning in Houston
Common contaminants on Houston roofs
When booking roof cleaning Houston services, it helps to recognize the typical growth and staining patterns on local roofs:
- Black streaks and patches
Often caused by blue‑green algae that thrive on moist, shaded surfaces. These streaks spread gradually down the slope following water runoff paths. - Green moss and lichens
More common on heavily shaded roofs or where trees overhang the home. Moss holds moisture and can lift shingles over time. - Mold and mildew
Appear as dark or greenish staining, especially in valleys, under trees, and near gutters where moisture lingers. - Pollen, dirt, and pollution
Fine dust and airborne contaminants settle and bake onto the roof, dulling the color and making it harder to reflect heat.
Regular roof cleaning in Houston keeps these contaminants under control, protecting both appearance and performance.
Benefits of professional roof cleaning in Houston
Hiring a professional for roof cleaning Houston projects offers more than just cosmetic improvement. Done correctly, it provides:
- Extended roof lifespan
Removing algae, moss, and mold reduces moisture retention and surface breakdown, helping shingles and tiles last closer to their intended service life. - Improved energy efficiency
Clean, lighter‑colored roofs reflect more sunlight and absorb less heat, which can slightly reduce cooling loads during Houston’s long hot season. - Maintained curb appeal and property value
Clean roofs make homes look well‑maintained, which benefits resale value and neighborhood appearance. - Prevention of damage
Professional cleaners can spot early signs of issues such as loose shingles, failing flashing, clogged gutters, or soft spots that need repair. - Safety
Climbing ladders and walking on roofs is risky, especially on steep slopes or in high humidity. Professional crews are trained and properly equipped.
How often to schedule roof cleaning in Houston
The right schedule for roof cleaning Houston homes depends on roof type, shade, tree coverage, and local conditions, but a general guideline is:
- Every 2–3 years for most asphalt shingle roofs with moderate tree cover.
- Every 1–2 years for roofs under heavy shade or with frequent algae growth.
- After major storm seasons if debris, leaves, and branches accumulate heavily.
If you see dark streaks expanding, moss patches thickening, or noticeable color change on visible slopes, it is time to consider a professional cleaning rather than waiting for a set date.
Typical roof cleaning methods used in Houston
Professional roof cleaning Houston companies commonly use:
- Soft wash chemical application
A low‑pressure pump applies an EPA‑approved, manufacturer‑recommended cleaning solution (often a bleach‑based mix) that kills algae, mold, and mildew. After appropriate dwell time, the roof is gently rinsed, and stains gradually fade over hours or days. - Detergents and surfactants
Added to help cleaners cling to surfaces and break down oily dirt and pollution. - Gutter and downspout flushing
To make sure runoff and loosened debris do not clog the drainage system after cleaning. - Targeted brushing (where safe)
For stubborn moss or lichen, light brushing on certain roof types, done carefully to avoid damaging shingles.
Reputable companies tailor the process to your exact roof material—an important reason not to use generic high‑pressure DIY approaches.
Cost of roof cleaning in Houston
Prices for roof cleaning Houston services vary with roof size, pitch, complexity, and contamination level, but homeowners can expect ballpark ranges such as:
| Roof Size / Condition | Approximate Price Range (USD) |
|---|---|
| Small, single‑story, light staining | $250–$400 |
| Average 1,800–2,400 sq ft home | $350–$650 |
| Large or complex multi‑story roof | $600–$1,000+ |
| Heavy moss or severe staining | Additional $100–$300 for extra dwell time and labor |
These are general estimates, not quotes. Extremely steep roofs, difficult access, or tile and metal roofs may cost more due to safety and time requirements. Bundling roof cleaning Houston services with gutter cleaning or minor roof tune‑ups can sometimes reduce overall per‑service cost.
How to choose a roof cleaning Houston company
Not all contractors follow safe and manufacturer‑approved methods, so choosing a reputable provider matters.
Checklist when evaluating companies:
- Local experience
Look for companies specifically advertising roof cleaning Houston or surrounding areas so they understand local climate and roof types. - Insurance and licensing
Verify general liability and workers’ compensation coverage, and any required local licenses. - Method used
Ask if they use soft washing for asphalt shingles and what cleaning agents they apply. Avoid anyone insisting on high‑pressure washing on shingles. - References and reviews
Check recent reviews, ask for before‑and‑after photos, and request references in your neighborhood. - Written estimate
Get a clear written scope: areas to be cleaned, method, chemicals used, estimated time on site, and total price. - Guarantees
Some roof cleaning Houston providers offer limited warranties on how long streaks and stains will stay away, which can help with peace of mind.
DIY vs. professional roof cleaning in Houston
While some homeowners consider DIY roof cleaning to save money, there are important tradeoffs to understand.
DIY roof cleaning considerations:
- Requires safe ladder use, harnesses, and non‑slip footwear.
- Handling concentrated cleaners incorrectly can damage landscaping and surfaces.
- Using too much pressure can void roof warranties or cause leaks.
- It’s easy to underestimate how slippery a wet, algae‑covered roof can be.
By contrast, professional roof cleaning Houston crews bring:
- Specialized pumps and low‑pressure equipment.
- Calibrated chemical mixes appropriate for roof surfaces.
- Safety training, harnesses, and roof‑walking experience.
- Knowledge of local building practices and manufacturer guidelines.
For most homeowners, the combination of height, chemical handling, and potential roof damage makes professional service the safer long‑term choice.
Protecting landscaping and property during cleaning
A good roof cleaning Houston company will take steps to protect your home exterior and yard while working.
Typical precautions include:
- Pre‑wetting plants and grass before applying cleaning agents.
- Using catchment or diversion systems on downspouts to dilute or redirect runoff.
- Covering sensitive shrubs or decorative plants near the drip line.
- Rinsing exterior siding, windows, and walkways after cleaning to remove residue.
As a homeowner, you can help by removing patio furniture, covering grills, and moving vehicles away from the cleaning area on the scheduled day.
Preventive maintenance after roof cleaning
Once you’ve invested in professional roof cleaning Houston services, simple preventive measures can help keep the roof cleaner for longer:
- Trim tree branches back from the roof to reduce shade, leaf buildup, and constant moisture.
- Clean gutters regularly so water doesn’t back up and overflow onto fascia and roof edges.
- Install zinc or copper strips near the ridge on some roofs; as rainwater washes over, trace metals can help inhibit algae growth.
- Schedule periodic visual checks from the ground or with binoculars to catch early signs of new streaks or moss.
Combined with a reasonable cleaning cycle, these steps can add years of service life to your roofing system.
When Houston weather demands roof cleaning
Houston’s unique weather patterns create specific times when roof cleaning becomes more urgent. After heavy spring rains, roofs stay damp for extended periods, accelerating algae growth on north-facing slopes and shaded areas. Summer’s intense UV exposure then bakes contaminants onto the surface, making them harder to remove if left untreated.
Hurricane season brings another challenge for roof cleaning Houston homeowners face: branches, leaves, and debris accumulation that traps moisture and provides ideal conditions for mold. Post-storm inspections often reveal areas where organic material has built up in valleys and along roof-to-wall transitions, requiring professional attention before permanent staining sets in.
Winter, though milder in Houston, offers an excellent window for roof cleaning since cooler temperatures mean cleaning solutions work more effectively and crews can work more comfortably on dark-colored roofs that would be dangerously hot in summer months.
How roof cleaning affects insurance and home inspections
Many Houston homeowners don’t realize that visible roof neglect can complicate insurance renewals or home sales. Insurance companies increasingly use aerial imagery to assess property conditions, and roofs covered in dark streaks or heavy moss growth may trigger re-inspection requirements or even coverage questions.
When scheduling roof cleaning Houston services before listing your home for sale, you give potential buyers confidence that the roof has been properly maintained. Home inspectors specifically note algae staining and moss growth in their reports, and buyers often request credits or repairs based on these findings. A professionally cleaned roof removes this negotiating point and can help justify asking price.
Additionally, some insurance policies include maintenance requirements in their fine print. Neglecting obvious roof cleaning needs could theoretically provide grounds for claim disputes if water damage occurs in areas where moss or debris retention contributed to the problem.
Special considerations for tile and metal roofs
While asphalt shingles dominate Houston residential construction, many homes feature concrete tile or metal roofing that requires adapted roof cleaning Houston approaches.
Tile roof cleaning:
Concrete and clay tiles are more durable than asphalt but collect algae, mold, and dirt in their textured surfaces. Professional roof cleaning on tile involves careful pressure control—too much force can crack or shift tiles, while too little leaves stains embedded in the porous surface. The best contractors use medium-pressure systems with rotating surface cleaners that provide even coverage without damaging the tile or underlayment.
Metal roof cleaning:
Standing seam metal roofs and corrugated metal panels develop chalking, oxidation, and sometimes rust streaks that detract from their appearance. Roof cleaning Houston services for metal roofs often use pH-balanced cleaners that won’t corrode protective coatings or painted finishes. The process is typically faster than shingle cleaning since metal doesn’t harbor organic growth as readily, but careful technique prevents scratching the finish or forcing water under seams.
Both roof types benefit from periodic cleaning that preserves their longer service life—often 40-50 years for tile and metal compared to 20-25 for asphalt shingles.
Environmental impact of roof cleaning in Houston
Responsible roof cleaning Houston companies prioritize environmentally conscious practices that protect local waterways, landscaping, and air quality.
Biodegradable cleaning agents:
Many modern roof cleaners use biodegradable surfactants and controlled concentrations of cleaning solutions that break down quickly rather than persisting in soil or stormwater systems. When properly diluted and applied, these products effectively kill algae and mold without creating long-term environmental concerns.
Runoff management:
Professional crews may use collection systems, strategic tarping, or runoff diversion techniques to minimize the amount of cleaning solution entering lawns, gardens, or storm drains. In areas near Buffalo Bayou or other waterways, extra precautions ensure that concentrated runoff doesn’t reach sensitive aquatic habitats.
Alternative methods:
Some eco-focused companies offer oxygen-based cleaning systems or enzyme treatments that work more slowly but with less environmental impact. While these methods may require longer dwell times or repeated applications, they appeal to homeowners who prioritize sustainability alongside roof maintenance.
Houston’s growing awareness of environmental stewardship means more roof cleaning providers now market their green credentials—ask specifically about products used and runoff management when comparing quotes.
Roof cleaning vs. roof replacement: making the right choice
Sometimes homeowners considering roof cleaning Houston services wonder whether cleaning makes sense or if replacement is the better investment. Understanding the difference helps you make financially smart decisions.
When cleaning is the right choice:
- Roof is less than 15 years old with good structural integrity
- Dark streaks and stains are primarily cosmetic algae growth
- Shingles remain flat, intact, and properly sealed
- No significant granule loss or bare spots visible
- Recent inspection confirmed adequate remaining service life
When replacement makes more sense:
- Roof is 20+ years old approaching end of typical lifespan
- Multiple shingles are cracked, curled, or missing
- Widespread granule loss exposes asphalt backing
- Previous leak repairs or documented moisture problems
- Sagging areas or visible structural concerns
A professional roof cleaning Houston contractor can often assess whether cleaning will meaningfully extend your roof’s life or if you’re better served by budgeting for replacement. In borderline cases, cleaning can buy you 2-3 additional years to save for replacement while maintaining curb appeal in the meantime.
Neighborhood HOA requirements and roof cleaning
Many Houston-area neighborhoods and homeowner associations maintain appearance standards that include roof maintenance. If you live in a master-planned community, your HOA may require periodic roof cleaning Houston homeowners must complete to stay in compliance with covenant standards.
Common HOA provisions:
- Prohibitions against visible algae staining or moss growth exceeding certain coverage percentages
- Requirements for homeowners to address roof appearance issues within 30-90 days of notification
- Architectural review committee oversight of roof color and cleanliness standards
- Fines or liens for properties that fall out of compliance
Review your HOA documents to understand specific requirements, and keep documentation of professional roof cleaning services in case questions arise. Some HOAs maintain preferred vendor lists or negotiate group rates for roof cleaning Houston residents can access, potentially saving money while ensuring all homes meet community standards.
Even without formal requirements, maintaining a clean roof shows respect for neighbors and contributes to overall property values throughout the subdivision.
FAQ about roof cleaning Houston
Is roof cleaning safe for asphalt shingles?
Yes, when roof cleaning Houston companies use soft wash techniques with manufacturer‑recommended cleaners and low pressure, it is considered safe and can actually help shingles last longer by removing damaging growth.
How long do results from roof cleaning last?
On many Houston roofs, professional cleaning can keep algae and streaking away for 2–3 years, sometimes longer if you have good sun exposure and minimal overhanging trees. Shady, heavily treed lots may see regrowth sooner.
Will roof cleaning damage my plants?
Responsible contractors pre‑wet plants, dilute runoff, and rinse landscaping afterward to minimize risk. You can ask in advance how they protect yards and what products they use.
Can roof cleaning fix leaks?
Roof cleaning Houston services improve appearance and remove growth but do not repair leaks by themselves. However, cleaners often spot loose shingles, cracked flashing, or other issues that need separate repair work.
Is roof cleaning required for my roof warranty?
Some manufacturer warranties require reasonable maintenance, which can include keeping the roof free of moss and heavy organic growth. Check your specific warranty language, and keep records of professional roof cleaning visits.
Regular roof cleaning Houston services are a smart investment in the health, appearance, and longevity of your roof. By choosing soft wash methods, hiring qualified local professionals, and following basic preventive maintenance, Houston homeowners can keep their roofs cleaner, cooler, and better protected against this region’s challenging climate.
Get free roofing advice, cost guides, and seasonal maintenance tips.
Roofing content specialist with 5+ years researching U.S. residential and commercial roofing. Has documented 200+ projects covering installation costs, material selection, contractor vetting, and DIY guides for homeowners across all climate zones.

Gutter Cleaning: DIY Methods, Costs & Gutter Guards Guide
Table of Contents
Gutter cleaning is one of the most neglected yet critical home maintenance tasks. Clogged gutters cause water damage to roofs, fascia, foundations, and landscaping—problems that cost thousands to repair. This guide covers when and how to clean gutters, professional service costs, DIY methods and safety, and whether gutter guards are worth the investment to reduce maintenance.
Regular gutter cleaning protects your home’s structural integrity and prevents costly water damage. Whether you tackle the job yourself or hire professionals, understanding proper techniques and maintenance schedules ensures your gutters perform as designed.
Why Gutter Cleaning Matters
Primary Functions of Gutters:
- Channel rainwater away from roof edges and fascia boards
- Direct water away from foundations (prevents basement flooding and settling)
- Protect siding and exterior walls from water staining and rot
- Prevent soil erosion around landscaping
What Happens When Gutters Clog:
- Water overflows, rotting fascia boards and soffit
- Roof edge water backup causes shingle deterioration and leaks
- Foundation water accumulation leads to cracks and basement flooding
- Ice dams form in winter (trapped water freezes and expands)
- Mosquitoes breed in standing water
- Excess weight pulls gutters away from house
Cost of Neglect: Foundation repairs cost $5,000–$15,000. Fascia board replacement runs $1,500–$3,000. Regular gutter cleaning costs $100–$250.
How Often to Clean Gutters
Standard Schedule:
- Twice yearly minimum: Spring (after pollen/seeds) and fall (after leaves drop)
- Add cleanings if you have: Heavy tree coverage (+2 times/year), pine trees (+3 times/year, needles clog easily)
Signs You Need Immediate Cleaning:
- Water overflowing during rain
- Sagging gutters (debris weight)
- Plants growing in gutters
- Water stains on siding below gutters
- Dripping or pooling near foundation
Pro Tip: Clean gutters before winter to prevent ice dam formation. Frozen, clogged gutters can pull away from the house.
DIY Gutter Cleaning Methods
Safety First (Non-Negotiable)
Ladder Safety:
- Use stable extension ladder rated for your weight plus gear
- Set at 4:1 angle (4 feet high = 1 foot from wall)
- Use ladder stabilizers to prevent gutter damage
- Never lean beyond arm’s reach; reposition ladder frequently
- Have helper spot ladder on soft ground
- Avoid power lines
Personal Safety:
- Wear work gloves (debris contains sharp objects, bacteria)
- Safety glasses (debris falls toward face)
- Non-slip shoes
- Never work on roof edge when wet
When to Hire Pros: Multi-story homes, steep roofs, physical limitations, uncomfortable with heights.
Method 1: Hand Scooping (Most Common)
Tools Needed:
- Ladder with stabilizers
- 5-gallon bucket with hook (hang on ladder or gutter)
- Gutter scoop or garden trowel
- Work gloves
- Garden hose with spray nozzle
Steps:
- Position ladder at downspout
- Scoop debris into bucket (work away from downspout)
- Work in 3–4 foot sections before moving ladder
- Collect debris in bucket, dispose in compost or trash
- Flush gutters with hose toward downspouts
- Clear downspout clogs (see below)
Time: 1–3 hours for typical single-story home
Pro Tip: Start at downspout to avoid pushing debris into drain opening.
Method 2: Gutter Cleaning Tools
Tool Options:
| Tool | Type | Price | Best For |
|---|---|---|---|
| Gutter Scoop | Hand tool, plastic | $8–$15 | Efficient debris removal |
| Telescoping Wand | Hose attachment, extends 6–12 ft | $30–$60 | Ground-level cleaning, light debris |
| Gutter Cleaning Robot | Battery-powered auger | $100–$200 | Tech solution, works on some gutters |
| Leaf Blower Attachment | Extends blower nozzle | $25–$50 | Fast, messy, dry debris only |
| Wet/Dry Vac Attachment | Shop vac hose extension | $30–$60 | Wet/dry debris, powerful |
Our Pick for DIY: Gutter scoop + telescoping wand combo ($40 total) balances efficiency and cost.
Method 3: Pressure Washing
When to Use: Heavy compacted debris, algae/mold buildup
Caution: High pressure can damage gutters, loosen fasteners, or spray debris onto roof/siding.
Technique:
- Use low-pressure setting (≤1,500 PSI)
- Spray away from house
- Work from downspout toward ends
- Protect landscaping and windows
Not Recommended for: Older gutters, seamless gutters with weak joints.
Clearing Downspout Clogs
Signs of Clog: Water backs up in gutter during flush, slow drainage, gurgling sounds
Clearing Methods:
- From Top: Insert garden hose into downspout opening, turn on full blast, work up and down
- From Bottom: Remove downspout elbow at base, insert hose upward, blast clog
- Plumber’s Snake: Feed snake from top or bottom, break up clog, flush
- Leaf Blower: Seal downspout opening around nozzle with rag, blast from bottom (messy)
Stubborn Clogs: May require disassembling downspout section.
Professional Gutter Cleaning Costs
National Averages (2025):
- Single-story home: $100–$150
- Two-story home: $150–$250
- Three-story home: $250–$400+
- Per linear foot: $0.75–$1.50
Factors Affecting Cost:
- Number of stories (height = higher labor)
- Gutter length and accessibility
- Debris volume (years of neglect costs more)
- Downspout count and clog complexity
- Regional labor rates
- Additional services (gutter repairs, guard installation)
What’s Included:
- Debris removal from gutters
- Downspout clearing
- Basic gutter flushing
- Debris disposal
What Costs Extra:
- Repairs (seams, fasteners, leaks): $50–$200
- Gutter guard installation: $500–$2,500
- Roof cleaning: $200–$500
How to Hire: Get 3 quotes, verify insurance (liability + workers’ comp), check reviews, confirm what’s included.
Find Local Gutter Cleaning Services
Gutter Guards: Are They Worth It?
Gutter guards reduce cleaning frequency but don’t eliminate maintenance. Evaluate cost vs. effort savings.
Types of Gutter Guards
| Type | Material | Cost/Linear Ft (Installed) | Pros | Cons |
|---|---|---|---|---|
| Screen Guards | Metal or plastic mesh | $1–$3 | Affordable, DIY-friendly, blocks large debris | Small debris passes through, requires cleaning |
| Micro-Mesh | Surgical-grade stainless steel | $3–$6 | Best debris blocking, durable | Higher cost, pro install recommended |
| Foam Inserts | Porous foam | $2–$4 | Easy DIY install, low cost | Debris sits on top, degrades in sun, needs frequent replacement |
| Reverse Curve | Aluminum/vinyl surface tension | $4–$8 | Sheds debris via water flow | Expensive, can overshoot in heavy rain, tricky install |
| Brush Guards | Nylon bristles | $3–$5 | Easy install, flexible | Debris tangles in bristles, frequent maintenance |
Our Recommendation: Micro-mesh guards (e.g., LeafFilter, Raptor) offer best long-term performance if budget allows. Screen guards (e.g., Amerimax Snap-In) provide good value for DIYers.
Do Gutter Guards Eliminate Cleaning?
No. Guards reduce frequency from 2–4 times/year to once every 1–3 years, but maintenance is still needed:
- Remove debris buildup on top of guards
- Clear fine sediment that passes through (especially pine needles, shingle granules)
- Inspect and adjust fasteners
- Clean downspouts (guards don’t protect these)
Best Case: Cut cleaning from 2×/year to 1× every 2 years = 75% reduction.
Cost vs. Value Analysis
Scenario: 150 linear feet of gutters
Without Guards:
- Professional cleaning 2×/year @ $125 = $250/year
- 10-year cost: $2,500
With Micro-Mesh Guards ($900 installed):
- Cleaning 1× every 2 years @ $125 = $63/year average
- 10-year cost: $900 (guards) + $630 (cleaning) = $1,530
- Savings: $970 over 10 years
Additional Benefits:
- Reduced risk of water damage
- No ladder work (safer)
- Less time spent on maintenance
When Guards Make Sense:
- Heavy tree coverage
- Multi-story homes (safety)
- Physical limitations
- Dislike of ladder work
When to Skip:
- Minimal debris (e.g., desert climates, no trees)
- Tight budget
- DIY-comfortable homeowner
Gutter Maintenance Tips
Beyond Cleaning:
- Inspect fasteners: Tighten loose hangers/spikes annually
- Check pitch: Gutters should slope ¼” per 10 feet toward downspouts
- Seal leaks: Apply gutter sealant to seams and joints
- Extend downspouts: Direct water 4–6 feet from foundation
- Trim trees: Keep branches 6–10 feet from roof edge
- Install splash blocks: Prevent erosion at downspout outlets
Seasonal Checklist:
- Spring: Clean after pollen/seeds, inspect for winter damage
- Fall: Clean after leaves drop, prepare for winter
- Summer: Check for wasp nests, ensure proper drainage during storms
- Winter: Remove ice dams promptly, check for sagging from snow/ice
Download Maintenance Schedule PDF
FAQ
How often should I clean my gutters?
Twice a year minimum (spring and fall). Add cleanings if you have heavy tree coverage, especially pine trees. Clean immediately if you notice overflow or sagging.
Can I clean gutters myself?
Yes, if you’re comfortable on ladders, have proper safety equipment, and own a single-story home. Hire professionals for multi-story homes or if you’re uncomfortable with heights.
How much does professional gutter cleaning cost?
$100–$150 for single-story homes, $150–$250 for two-story homes. Prices vary by region, gutter length, and debris volume.
Are gutter guards worth the cost?
If you have heavy tree coverage, a multi-story home, or dislike ladder work, micro-mesh guards pay for themselves in 4–6 years through reduced cleaning frequency and safety benefits.
What happens if I don’t clean my gutters?
Clogged gutters cause water overflow, rotting fascia boards, roof damage, foundation problems, basement flooding, and ice dams. Repairs cost thousands; cleaning costs $100–$250.
How do I unclog a downspout?
Insert a garden hose from the top or bottom and blast water at full pressure. For stubborn clogs, use a plumber’s snake or disassemble the downspout section.
Do gutter guards work in winter?
Yes, but ice can still form on guards in freezing conditions. Micro-mesh guards handle snow/ice better than foam or brush types. No guard prevents all ice dam formation.
Can I install gutter guards myself?
Screen and foam guards are DIY-friendly. Micro-mesh and reverse-curve guards require professional installation for proper fit and performance.
Conclusion
Gutter cleaning is essential preventive maintenance that protects your roof, foundation, and landscaping from costly water damage. Clean gutters twice yearly at minimum, or invest in quality gutter guards to reduce maintenance by 70–80%. Whether you DIY with proper safety equipment or hire professionals, consistent gutter care saves thousands in potential repairs and extends your home’s lifespan.
Get free roofing advice, cost guides, and seasonal maintenance tips.
Roofing content specialist with 5+ years researching U.S. residential and commercial roofing. Has documented 200+ projects covering installation costs, material selection, contractor vetting, and DIY guides for homeowners across all climate zones.
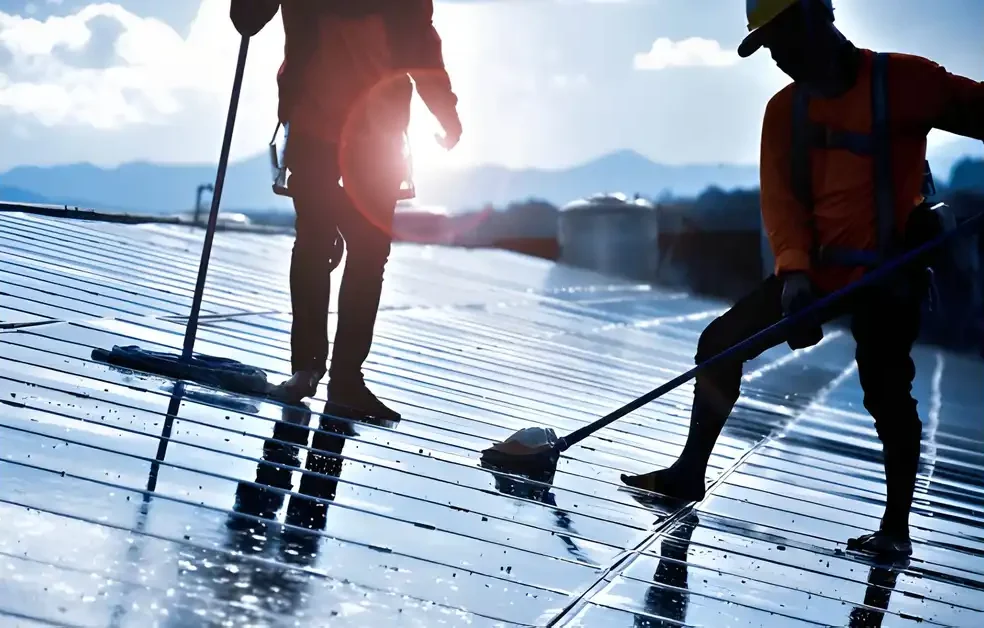
What Is Soft-Wash Roof Cleaning and How Does it Work?
Table of Contents
Soft-wash roof cleaning is a specialized, gentle cleaning technique that effectively removes algae, moss, lichen, dirt, and other organic stains from roofing materials without damaging delicate surfaces. This method combines low-pressure water spray with powerful, eco-friendly cleaning solutions, ensuring a thorough clean while preserving the integrity and lifespan of your roof. Here’s a comprehensive explanation of what soft-wash roof cleaning is, why it works, and how it’s performed safely and efficiently.
What Is Soft-Wash Roof Cleaning?
The U.S. Environmental Protection Agency (EPA) recommends using low-phosphate cleaning agents for roof washing near waterways, and advises against pressure washing that can drive moisture under shingles.
Soft washing is a low-pressure cleaning process that relies on specialized chemical solutions—not high-pressure water—to eliminate biological growth on roofs. Unlike pressure washing which uses intense water force that can erode shingles and tiles, soft washing uses a diluted cleaning agent, typically containing sodium hypochlorite (bleach), surfactants, and water. This solution kills mold, mildew, algae, moss, and bacteria at their root, preventing regrowth for a longer-lasting clean. The roof is sprayed gently with the chemical mixture at low pressure to avoid physical damage, and then rinsed with water after the chemicals have had time to work.
How Does Soft Washing Work?
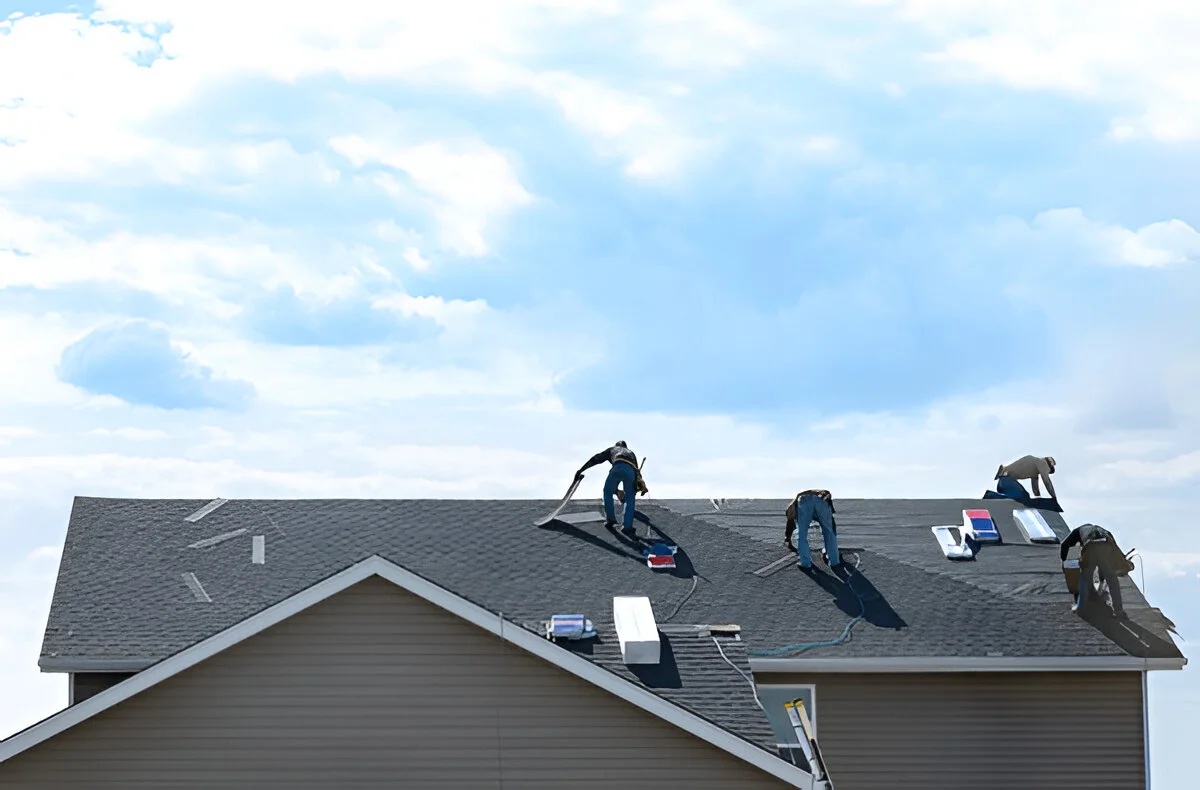
The key to soft washing’s effectiveness and safety lies in its chemical action combined with controlled application pressure. After an initial roof inspection to check for sensitive areas or damage, the soft wash solution is carefully mixed and applied using specialized equipment that ensures even coverage while maintaining low pressure, typically around 150 to 400 PSI. The cleaning agents disrupt and kill the biological contaminants responsible for discoloration and decay without stripping away protective granules or damaging roofing materials. After allowing the chemicals to dwell for 10-20 minutes, the roof surface is rinsed gently with low-pressure water to wash away residues and debris.
Benefits of Soft-Wash Roof Cleaning
Soft washing is recognized as the safest and most effective method for roof cleaning by industry professionals. It prevents physical damage and removes roots of algae and moss rather than merely washing away surface dirt. This reduces the frequency of cleaning needed and prevents accelerated roof aging. Using eco-friendly, biodegradable chemicals also minimizes harm to surrounding landscaping, pets, and people. By maintaining proper roof ventilation and moisture control through soft washing, homeowners can extend their roof’s lifespan by several years, reducing costly premature replacements.
Step-by-Step Soft Wash Roof Cleaning Process
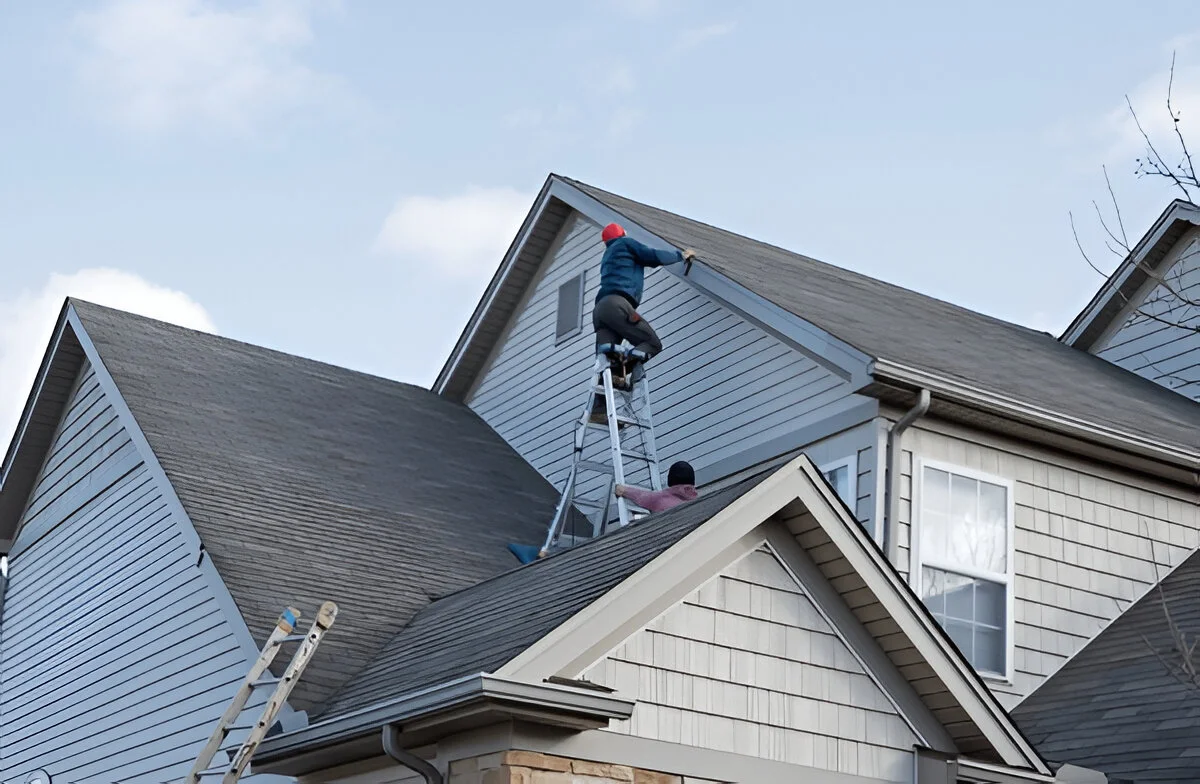
- Inspection and Preparation:
Start by inspecting the roof surface for loose shingles or any damage that requires repair before washing. Protect plants and outdoor furniture near the building with water, tarps, or barriers to prevent chemical exposure. - Mixing Cleaning Solution:
A typical soft wash cleaning solution includes sodium hypochlorite (household bleach), water, and a biodegradable surfactant that helps the solution cling to the roof surface. Concentrations vary depending on the severity of biological growth—stronger mixes for moss-heavy roofs and milder for light algae. - Application:
Using a low-pressure sprayer, the solution is applied evenly from the roof ridge down to the eaves. Special attention is given to problem spots such as shaded areas, valleys, and gutters. The solution is left to dwell, allowing it to chemically break down organic matter. - Rinsing:
The roof is then rinsed thoroughly with water at low pressure to wash away dead growth and residue safely. Care is taken to rinse clean gutters and landscaping afterwards. - Post-Treatment and Maintenance:
After cleaning, roofs are inspected to ensure thorough cleaning and absence of damage. Regular maintenance schedules help keep roofs algae and moss free.
Safety Precautions for Soft Washing
Soft washing requires following strict safety protocols to protect the home, environment, and applicator. Using personal protective equipment such as gloves, goggles, and respirators is mandatory. The chemicals used must be handled according to manufacturers’ guidelines. Plants and delicate landscaping must be shielded, and runoff water managed responsibly to prevent contamination. Applicators should only work in good weather and follow fall protection procedures when working on pitched roofs. DIY homeowners are advised to consult or hire professionals due to these safety concerns.
Suitable Roofing Materials for Soft Washing
Soft washing is safe for virtually all common roofing materials: asphalt shingles, clay tiles, concrete tiles, slate, metal sheets, and wood shakes. Unlike traditional high-pressure methods, soft washing preserves the protective coatings and granules essential to roof performance. However, always consult material manufacturers for warranty considerations and specific recommendations.
Common Misconceptions and FAQs
- Is soft washing just low-pressure power washing? No—soft washing primarily uses chemical action rather than water pressure to clean, avoiding surface damage common in power washing.
- How often should I soft wash my roof? Usually every 3-5 years depending on climate and debris exposure.
- Will soft washing void my roof warranty? No, if done according to manufacturer guidelines.
- Can I DIY my roof soft wash? It’s recommended to hire professionals due to chemical hazards and safety risks.
Visual and Learning Resources
- The SAFEST Way to SOFT WASH a Roof — Detailed tutorial video
- How To Soft Wash A Roof: A Complete Guide — Extensive written step-by-step guide
- Roof Cleaning Before & After Photos — Professional imagery demonstrating results
- Soft Wash Time-Lapse Video — Visual of cleaning process
Soft-wash roof cleaning is the ideal choice for homeowners wanting a thorough, gentle, and environmentally responsible way to maintain their roof’s longevity and aesthetics. Understanding the chemistry, process, safety, and best practices ensures a successful outcome that traditional power washing simply cannot match.
Get free roofing advice, cost guides, and seasonal maintenance tips.
Roofing content specialist with 5+ years researching U.S. residential and commercial roofing. Has documented 200+ projects covering installation costs, material selection, contractor vetting, and DIY guides for homeowners across all climate zones.