Seamless Gutter Installation | 2026 Easy Step‑by‑Step Guide
Seamless gutter installation costs $6–$14 per linear foot installed, with most homes spending $1,200–$2,800 for a complete aluminum system — roughly 50% less prone to leaking than sectional gutters because continuous runs eliminate mid-span seams that split, clog, and corrode over time (NRCA, 2026). Professional installation on a standard 1,500–2,000 sq ft home takes 1–2 days, requires hangers spaced every 16–24 inches, and must slope ¼–½ inch per 10 feet toward downspouts to prevent standing water and roof-edge moisture that accelerates moss and algae growth.
Table of Contents
Seamless gutter installation is the single most effective roofline upgrade for protecting your roof, fascia, siding, and foundation from water damage and it directly supports a clean, long-lasting roof by channeling water and debris away efficiently rather than letting it pool at roof edges where organic growth thrives. The U.S. seamless gutter market has grown steadily as homeowners recognize that sectional gutters require constant resealing, sag at joints, and trap debris at every seam connection problems seamless systems solve from day one.
This complete 2026 guide covers seamless gutter installation costs, planning, slope requirements, hanger spacing, step-by-step installation, integration with roof cleaning maintenance, common mistakes, DIY vs. professional considerations, and a full FAQ section for homeowners researching gutter replacement or new installation.
What Are Seamless Gutters?
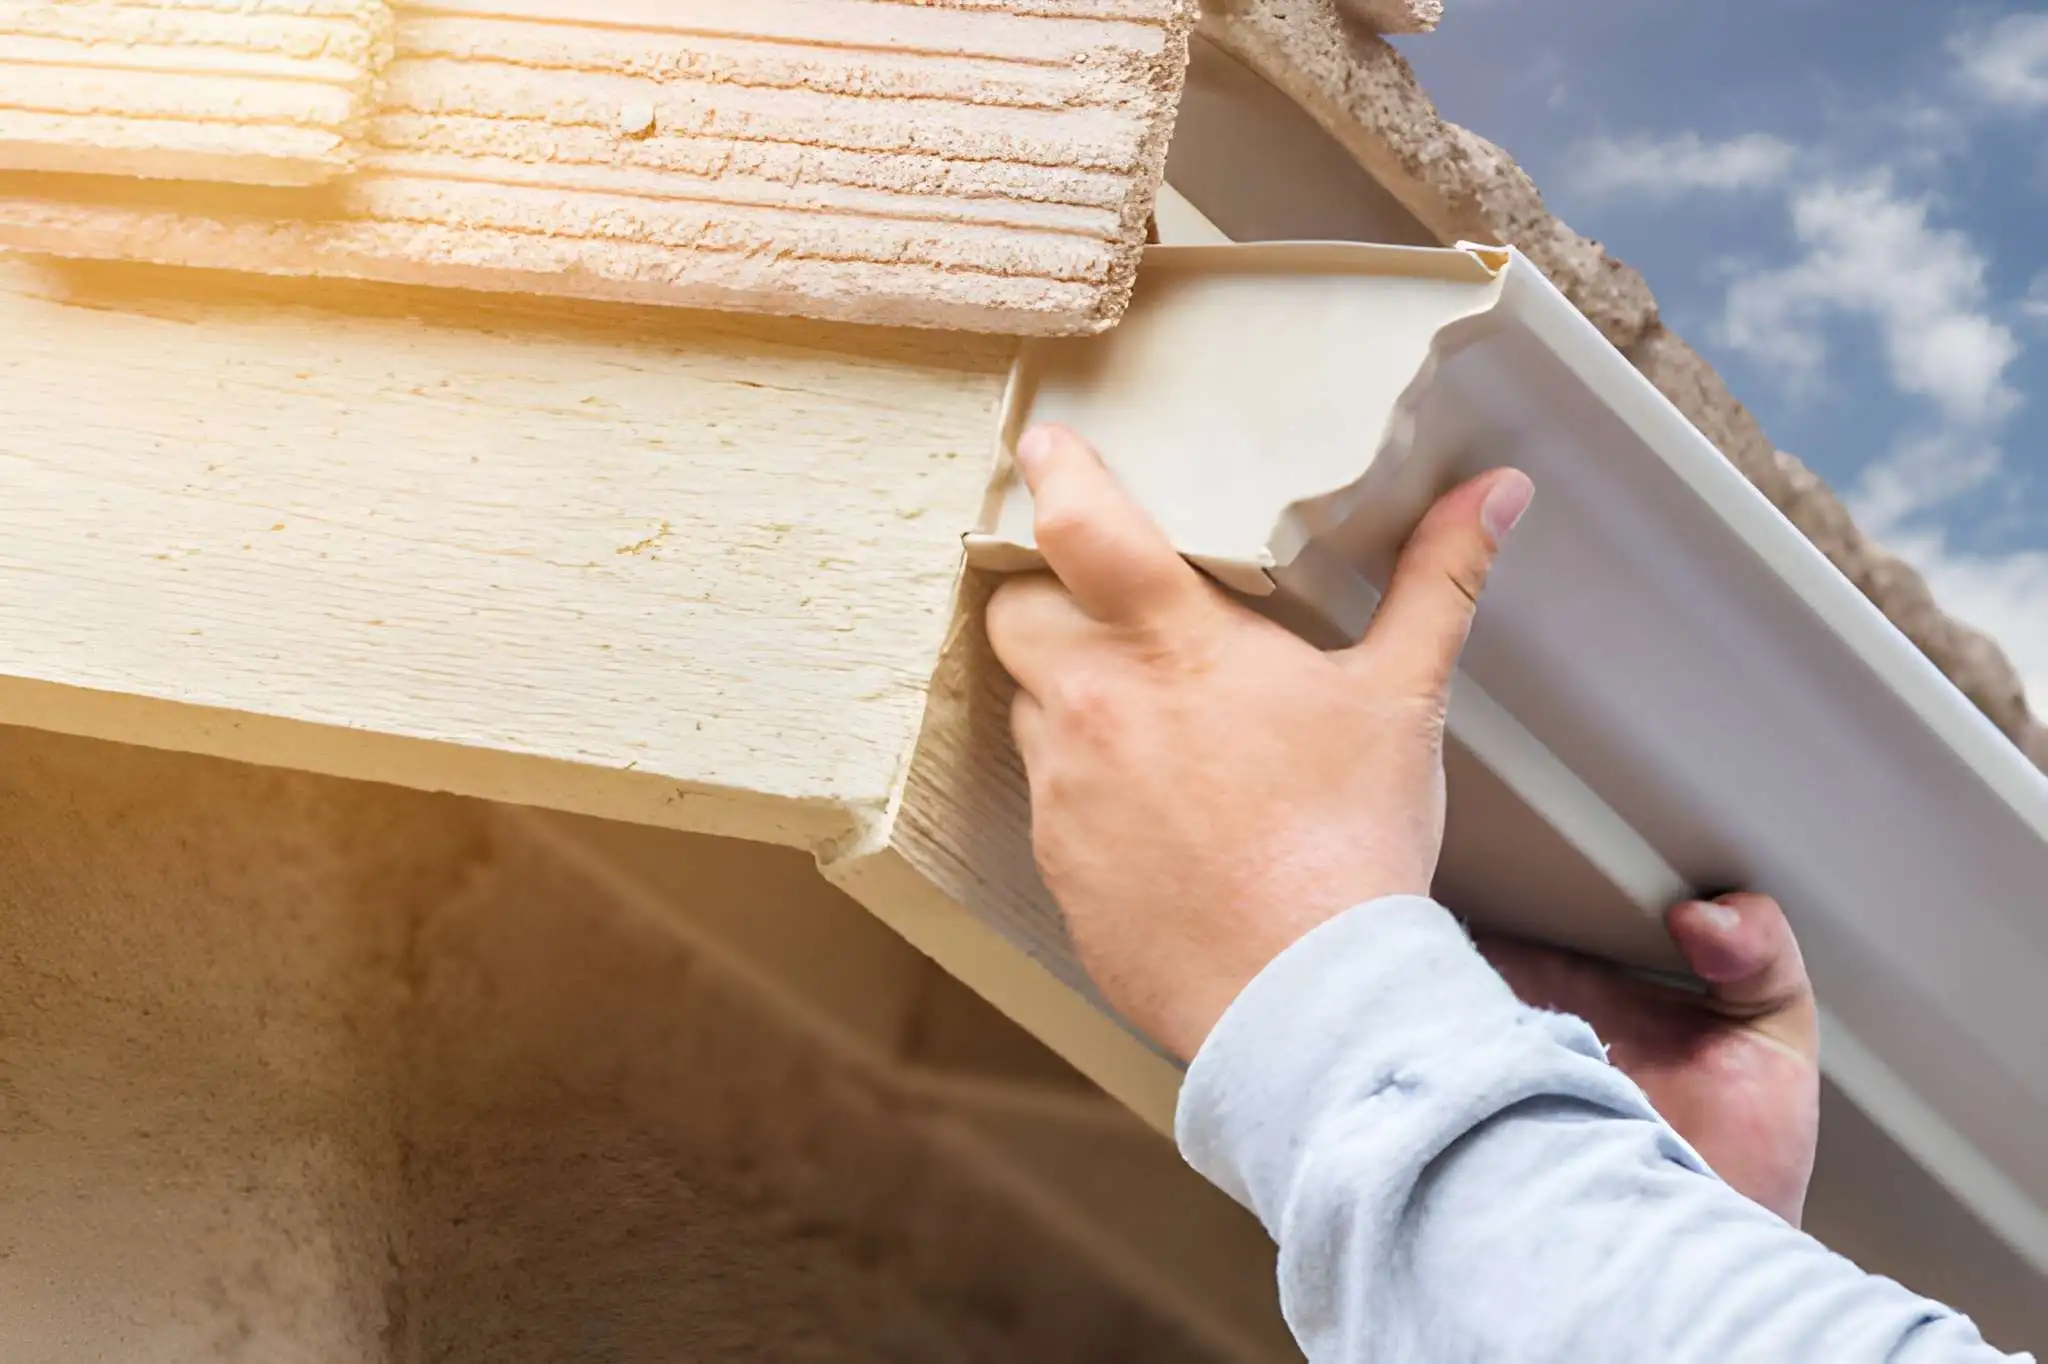
Seamless gutters are continuous lengths of metal typically aluminum, steel, or copper formed on-site using a portable roll-forming machine that pulls metal coil through shaped rollers, creating gutters custom-cut to your exact roofline dimensions. Unlike sectional gutters sold in 10–20 foot pieces at hardware stores, seamless systems have zero joints along each straight run, with connections only at corners, downspout outlets, and end caps.
This fundamental difference eliminates the most common failure points in traditional gutter systems. According to the National Roofing Contractors Association, approximately 80% of gutter leaks originate at seam joints, not along the gutter body making seamless design the most direct solution to chronic leaking problems.
Key Components of a Seamless Gutter System
Understanding each component helps ensure proper installation from start to finish:
- Gutter runs: Custom-formed continuous lengths matched to each wall section
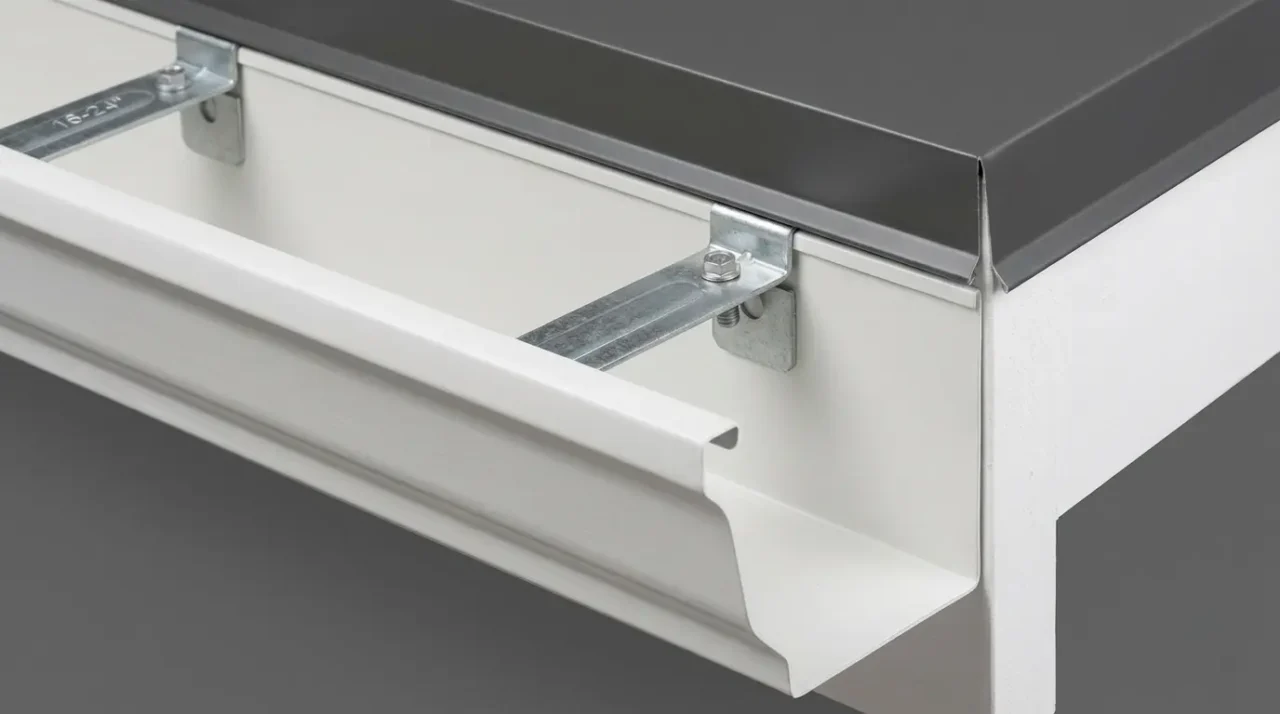
- Hidden hangers: Concealed clips that attach gutter to fascia and support weight
- End caps: Sealed closures at each run terminus left and right orientation
- Drop outlets: Pre-cut openings connecting gutter to downspout
- Miters: Corner connectors (inside and outside) joining runs at roof angles
- Downspouts: Vertical pipes (2×3 inch or 3×4 inch) carrying water from gutter to ground
- Elbows: Directional connectors routing downspout from gutter outlet to wall
- Straps/bands: Wall fasteners securing downspout every 6–8 feet
- Splash blocks/extensions: Ground-level discharge directing water away from foundation
Seamless Gutter Profiles and Sizes
K-Style (Ogee Profile):
The most popular residential profile, with flat back and decorative front mimicking crown molding. Available in 5-inch (standard) and 6-inch (premium/high-rainfall) widths. K-style gutters handle approximately 40% more water volume than round gutters of equivalent width, making them the dominant choice for residential installations.
Half-Round Profile:
Traditional semicircular design common on historic and craftsman homes. Less water capacity than K-style but preferred for architectural authenticity. Available in 4-inch, 5-inch, and 6-inch diameters.
Box Gutter:
Large-capacity commercial or oversized residential profile, typically 4–7 inches wide. Used on low-slope roofs or large commercial buildings where volume is a priority over aesthetics.
Seamless Gutter Installation Cost Breakdown (2026)
Cost Per Linear Foot by Material
| Material | Cost Per Linear Foot (Installed) | Lifespan | Best Application |
|---|---|---|---|
| Aluminum (standard) | $6–$10/lf | 20–30 years | Most residential homes |
| Aluminum (heavy gauge) | $8–$14/lf | 25–35 years | High-snow, high-rainfall areas |
| Galvanized Steel | $9–$18/lf | 20–25 years | Commercial, heavy-use |
| Stainless Steel | $15–$25/lf | 40–50 years | Coastal, premium residential |
| Copper | $25–$40+/lf | 50–100 years | Luxury, historic homes |
Total Project Cost by Home Size
| Home Size | Gutter Linear Footage | Aluminum System Cost | Professional Install Total |
|---|---|---|---|
| 1,000 sq ft (small) | 100–130 lf | $600–$1,300 | $800–$1,700 |
| 1,500 sq ft (medium) | 130–170 lf | $780–$1,700 | $1,200–$2,400 |
| 2,000 sq ft (standard) | 150–200 lf | $900–$2,000 | $1,500–$2,800 |
| 2,500 sq ft (large) | 175–240 lf | $1,050–$2,400 | $1,800–$3,500 |
| 3,000+ sq ft (estate) | 200–300+ lf | $1,200–$3,000 | $2,500–$5,000 |
Cost Factors That Increase Price
Several variables push seamless gutter installation costs above baseline:
- Home stories: Two-story homes add 20–35% to labor costs due to extended ladder time and safety requirements
- Roof complexity: Multiple valleys, dormers, bay windows, and irregular angles increase cutting, joining, and sealing time
- Downspout count: Each additional downspout adds $75–$150 in materials and labor
- Gutter guards: Add $1–$3/lf for basic foam/brush guards; $4–$10/lf for premium micro-mesh systems
- 6-inch upgrade: Upgrading from 5-inch to 6-inch gutters adds $1–$2/lf but handles significantly higher water volume
- Fascia repair: Damaged or rotten fascia boards must be repaired first budget $200–$600 for typical repairs
- Removal of old gutters: Expect $50–$100 per 50 linear feet for old gutter removal
30% Cost Breakdown for a Typical $2,000 Project
| Cost Component | Percentage | Dollar Amount |
|---|---|---|
| Materials (gutters, hangers, downspouts) | 45% | $900 |
| Labor (installation) | 40% | $800 |
| Disposal of old system | 8% | $160 |
| Miscellaneous (sealant, fasteners) | 7% | $140 |
Planning Your Seamless Gutter Installation
Thorough planning prevents the most common installation failures standing water, sagging runs, and improper downspout placement.
Step 1: Inspect Roof and Fascia Before Installation
Seamless gutter installation always begins with a complete roof and fascia inspection. Installing new gutters over rotten fascia or under damaged shingles is the most costly mistake homeowners make the gutters will fail prematurely and require removal to address the underlying problem.
Fascia inspection checklist:
- Press firmly along all fascia boards soft spots indicate moisture damage or rot
- Check for paint peeling, swelling, or discoloration indicating past water infiltration
- Verify all fascia is plumb and properly nailed to rafter tails
- Replace any sections with visible rot, cracks exceeding 1/4 inch, or structural compromise
Roof edge inspection checklist:
- Confirm drip edge is present and properly installed along eaves
- Check for missing, curled, or cracked shingles within 18 inches of roof edge
- Verify no shingles are pulling away from fascia or hanging loose
- Look for moss, algae staining, or debris accumulation at roof edges
“Fascia condition is the most overlooked factor in seamless gutter installation longevity. Even perfectly installed gutters fail within 3–5 years when fastened into compromised wood.”
Prime American Roofing Installation Standards, 2025
Combine with roof cleaning: If your roof shows moss, algae, or significant debris buildup at edges, schedule a professional soft-wash roof cleaning before gutter installation. Clean shingles shed debris more efficiently into new gutters, and treating organic growth now prevents accelerated debris loading after installation.
Step 2: Measure the Roofline
Accurate measurement prevents costly material waste and ensures seamless runs fit precisely:
- Measure each straight gutter run from corner to corner
- Record inside and outside corner locations
- Note locations of fascia interruptions (garage doors, exterior lights, HVAC equipment)
- Sketch the home perimeter and label all dimensions
- Calculate total linear footage, adding 10% for waste on complex rooflines
Downspout placement planning:
- Place downspouts every 30–40 feet of continuous gutter run
- Never exceed 40 feet between downspouts longer unsupported runs sag and overflow
- Position downspouts away from entry doors, walkways, driveways, and HVAC equipment
- Plan discharge locations at least 3–4 feet from foundation walls
Step 3: Select Gutter Size, Material, and Profile
Use this selection guide:
5-inch K-style gutters: Suitable for roofs under 1,000 sq ft of drainage area per downspout, with roof pitch under 6:12, and annual rainfall under 40 inches
6-inch K-style gutters: Required for roofs over 1,000 sq ft of drainage area per downspout, roof pitch steeper than 6:12, or regions with annual rainfall above 40–50 inches
Material selection:
- Aluminum: Best value for 95% of residential applications lightweight, rust-proof, paintable, and available in 30+ colors
- Copper: Best for luxury homes, historic renovations, and homeowners who want maximum lifespan (50–100 years) and a natural patina aesthetic; no painting required
- Steel: Heavier and stronger than aluminum but susceptible to rust if coating is scratched best for commercial applications or regions with extreme physical loads (heavy snow, falling branches)
Tools and Materials Required
Professional Tools
- Roll-forming gutter machine: Rented or owned; pulls coil stock and forms continuous gutter profile on-site (cost to rent: $75–$150/day)
- Laser level or water level: Essential for accurate slope marking along full run length
- Cordless drill/driver: For hanger installation and downspout straps
- Aviation snips: Left-cut, right-cut, and straight for trimming gutter ends and outlets
- Rivet gun: For securing end caps, outlets, and miter joints
- Caulking gun: For applying gutter sealant at all joints
- Extension ladders (2): One at each end for long runs; ladder stabilizers prevent fascia damage
- Chalk line: For marking slope reference points on fascia
Materials Checklist
- Aluminum coil stock (or pre-formed seamless lengths from supplier)
- Hidden hangers (quantity: run length ÷ 16–24 inches spacing + 20% buffer)
- End caps (left and right for each run terminus)
- Drop outlets (one per downspout location)
- Inside and outside miters for all corners
- Downspout material (2×3 inch standard; 3×4 inch for 6-inch gutters or heavy flow)
- Downspout elbows (A-style and B-style as needed by wall configuration)
- Downspout straps/bands (one per 6–8 vertical feet)
- Sheet metal screws or pop rivets
- High-quality polyurethane gutter sealant (not standard silicone caulk)
- Splash blocks or downspout extensions (minimum 4 feet per downspout)
Step-by-Step Seamless Gutter Installation Guide
Step 1: Prepare the Work Area and Roof Edge
Begin by removing old gutters, spikes, and mounting hardware:
- Remove old gutters carefully to avoid damaging fascia
- Pull all old spikes and fill holes with exterior wood filler
- Sand and prime any bare wood sections
- Verify drip edge is installed correctly metal flashing at eave edge should overlap inside the gutter position, directing water into the gutter and not behind it
If no drip edge is present, install before gutters. Drip edge costs $1–$2 per linear foot and prevents water from running behind fascia one of the leading causes of soffit and fascia rot that ultimately destabilizes the entire gutter system.
Step 2: Establish and Mark Slope Reference Line
Correct slope is the single most critical technical requirement in seamless gutter installation:
Slope calculation:
- Standard slope: ¼ inch drop per 10 feet of horizontal run (minimum acceptable)
- Optimal slope: ½ inch drop per 10 feet (preferred for better flow and debris clearing)
- Maximum practical slope: ¾ inch per 10 feet (beyond this, gutters look visibly tilted)
Marking process:
- Mark the high point on the fascia at the end furthest from the downspout, positioned 1 inch below the roof’s drip edge
- Calculate total drop: (run length ÷ 10) × slope per 10 ft
- Example: 40-foot run at ½ inch/10 ft = 2-inch total drop
- Mark the low point at the downspout end, the calculated amount below the high point
- Snap a chalk line between high and low points this is your installation reference line
- Verify with a level: the chalk line should show consistent downward slope toward downspout
“Maintaining consistent slope is more important than exact measurement. A gutter that slopes ⅜ inch per 10 feet consistently outperforms one that averages ½ inch but has high and low spots.” GutterFX Professional Installation Standards, 2025
Step 3: Form the Seamless Gutter
Using a roll-forming machine:
- Load aluminum coil stock into the machine feed
- Run a test length (2–3 feet) to verify the machine is forming the correct profile
- Feed the full run length, supporting exiting gutter on run-out stands or a helper
- Cut to length with the machine’s guillotine cutter allow ¼ inch extra for end cap overlap
- Label each run immediately to avoid confusion during installation
If using supplier-formed gutters:
- Provide exact measurements to supplier, including length plus end cap allowances
- Verify each run immediately on delivery before the truck leaves
- Store lengths flat or on edge never bend seamless sections mid-span
Step 4: Fabricate Joints and Outlets on the Ground
Assemble all end caps and outlets before lifting the gutter onto the fascia:
End cap installation:
- Slide end cap over the open gutter end
- Secure with 3–4 rivets through cap into gutter sides
- Apply continuous bead of polyurethane sealant inside the joint
- Allow sealant to skin (15–20 minutes) before handling
Drop outlet installation:
- Mark outlet location 2–4 inches from the low end of the gutter run (near downspout side)
- Drill starter hole and cut opening with aviation snips to match outlet dimensions
- Insert drop outlet from below, ensuring outlet collar seats fully
- Secure with rivets and apply gutter sealant completely around the joint interior
- Test the seal by pouring water directly into the outlet no drips acceptable
Miter installation (corners):
- Pre-form or purchase miters for all inside and outside corners
- Test fit before sealing
- Apply sealant, join, rivet, and allow to cure
Step 5: Install Hidden Hangers on Fascia
Hidden hangers are the structural attachment system for your gutters. Poor hanger installation causes sagging, pulling away from fascia, and gutter failure.
Hanger placement standards:
| Climate/Condition | Hanger Spacing |
|---|---|
| Mild climate, moderate rainfall | 24 inches OC |
| Heavy rainfall regions | 20 inches OC |
| Snow load regions (50+ lbs/sf) | 16–18 inches OC |
| Within 12 inches of corners/outlets | Always add hanger |
| Over valleys or high-flow areas | 12–16 inches OC |
Installation technique:
- Hold hanger clip on fascia aligned with chalk slope line
- Ensure the front lip of the hanger aligns to receive the gutter at correct height
- Drive exterior-grade screws (minimum 1½ inch) through hanger into fascia and ideally into rafter tail behind
- Never use nails screw withdrawal strength is 3–4× greater, critical for winter ice and snow loads
- Verify each hanger follows the chalk slope line precisely before proceeding
Step 6: Hang the Seamless Gutter Run
With at least one helper for runs over 15 feet:
- Lift the fabricated gutter run into position along the fascia
- Hook the front gutter lip over the front of each hanger
- Press the back of the gutter against the fascia and snap the hanger clip closed over the back gutter wall
- Work from one end to the other, clipping each hanger
- Verify the gutter follows the chalk slope line — it should be consistent from high end to low end
- Check that the back of the gutter is fully seated against fascia — gaps behind the gutter allow wasps and moisture to enter
Drip edge clearance:
Confirm the drip edge overhangs the front of the gutter by at least ½ inch and sits inside the gutter opening. Water running off the roof should drip directly into the gutter, not behind it.
At corners:
Install miter connectors where two runs meet at inside or outside corners:
- Apply sealant to both gutter ends before connecting
- Rivet the connection through both gutter walls
- Test for leaks before proceeding
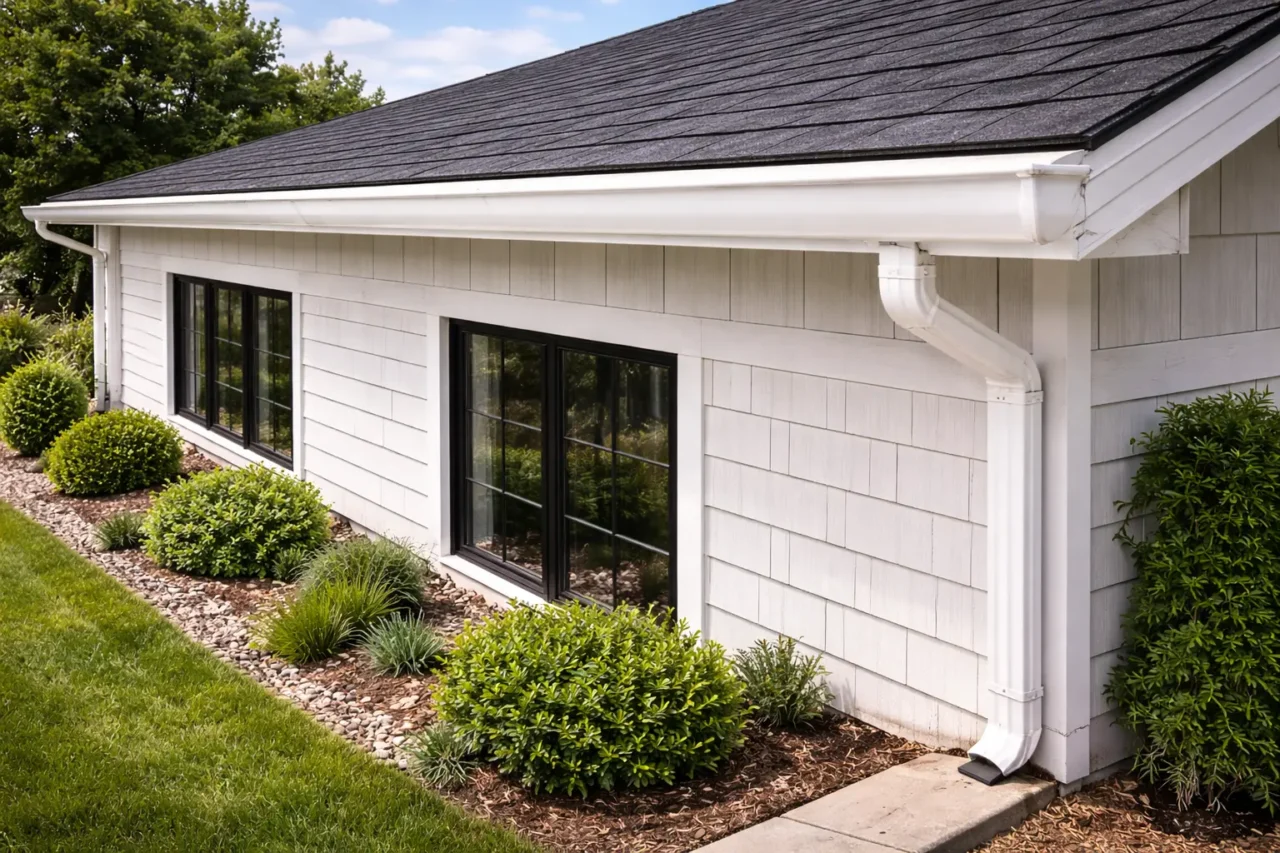
Step 7: Install Downspouts
Properly installed downspouts are equally critical as the gutters themselves:
Elbow and offset installation:
- Attach an A-style elbow to the drop outlet, angled toward the wall
- Measure the horizontal distance from outlet to wall
- Cut an offset section or use elbows to route the downspout to run flush with the wall
- Test fit all pieces before securing
Downspout run installation:
- Connect first downspout section to upper elbow assembly
- Add sections working downward, overlapping upper sections inside lower sections (crimped end faces down)
- Secure to wall with straps every 6–8 feet — use lag screws into solid wood or masonry anchors
- Terminate with a B-style elbow pointing away from foundation at 45–90 degrees
Discharge and drainage:
- Add splash block or plastic extension directing water 3–6 feet from foundation
- For heavy rainfall areas or close foundations, use underground drainage pipe directing water to daylight or storm drain connection
- Never discharge toward neighbor’s property or in areas that will ice in winter
Step 8: Final Sealing and System Test
Before cleaning up:
- Apply a final bead of polyurethane sealant at any joint showing insufficient coverage
- Allow 1–2 hours of cure time before testing
- Run a garden hose at maximum pressure at the high point of each run
- Watch for:
- Water flowing steadily toward downspout (correct slope confirmed)
- No standing water mid-run (no sags or reverse pitch)
- No drips at end caps, outlets, or miters (sealant integrity)
- Water exiting cleanly at downspout discharge (no blockages)
- Document any slow-draining sections and adjust hanger height if needed
Seamless Gutter Installation and Roof Cleaning
Seamless gutter installation and regular roof cleaning form a complementary maintenance system that protects your entire roof structure.
How Gutters Protect Your Roof from Organic Growth
Standing water at roof edges creates the moisture environment that moss, algae, and lichen need to establish. When gutters overflow or back-pitch, water pools against fascia and under shingles — exactly where moss spores germinate. Well-installed seamless gutters that drain quickly and completely remove the moisture source, reducing roof cleaning frequency by an estimated 30–40% compared to homes with clogged or leaking sectional gutters.
Recommended Roof and Gutter Cleaning Schedule
| Task | Frequency | Method |
|---|---|---|
| Gutter debris removal | 2× per year (spring/fall) | Hand-scoop + hose flush |
| Downspout cleaning | 2× per year | Hose pressure from top |
| Roof soft-wash cleaning | Every 1–3 years | Low-pressure chemical treatment |
| Roof debris clearing | After every major storm | Blower or roof rake |
| Full gutter inspection | Annually | Visual + water test |
| Gutter sealant check | Every 3–5 years | Inspect all joints during cleaning |
Best Practices for Combined Roof and Gutter Maintenance
- Clean roof first, gutters second: Roof cleaning dislodges moss, algae, and shingle granules that fall into gutters. Always flush gutters after completing roof work.
- Soft-wash roof cleaning is gutter-friendly: High-pressure washing forces granules and debris into gutters aggressively. Low-pressure soft-wash with biodegradable treatments is safer for both shingles and gutter systems.
- Inspect gutters during every roof cleaning visit: The elevated position allows easy visual inspection of hanger tightness, gutter slope, and sealant condition.
- Trim overhanging branches: Overhanging limbs deposit 60–70% of debris that enters gutters. Trimming branches to 3 feet clear of roofline reduces cleaning frequency significantly.
- Gutter guards complement seamless systems: Micro-mesh gutter guards ($4–$10/lf) virtually eliminate debris entry, making them ideal when combined with seamless installation — you get maximum flow with minimum maintenance.
“The combination of seamless gutters, properly maintained roof drip edge, and annual soft-wash roof cleaning represents the most cost-effective long-term roof protection strategy available to homeowners.” — Thompson Creek Home Improvement Guide, 2025
Common Seamless Gutter Installation Mistakes
Mistake 1: Insufficient Slope
Problem: Gutters installed level or with less than ¼ inch per 10 feet slope trap water and debris, creating standing water that promotes mosquito breeding, accelerates corrosion, and adds ice load in winter.
Solution: Always establish and verify slope with a chalk line and level before hanging any hangers. Test with water after installation — water should flow visibly toward the downspout within 30 seconds.
Cost of error: $300–$800 to remove and re-hang sections with incorrect slope.
Mistake 2: Hanger Spacing Too Wide
Problem: Hangers spaced beyond 24 inches allow gutters to sag between attachment points, especially when loaded with water, ice, or wet leaves. Sagging gutters hold debris and eventually pull away from fascia.
Solution: Never exceed 24 inches between hangers in mild climates; use 16–18 inches in snow regions. Add extra hangers at every corner, outlet, and valley location regardless of spacing.
Cost of error: $200–$500 to reinstall hangers at correct spacing after sagging is observed.
Mistake 3: Fastening Only into Sheathing
Problem: Screws driven into roof sheathing only (rather than through sheathing into rafter tails) have inadequate withdrawal strength. Under ice, snow, or heavy rainfall loads, gutters rip away from fascia.
Solution: Locate rafter tails before drilling hanger locations; align screws to penetrate both fascia and rafter tail. Use 2½–3 inch screws for maximum holding power.
Cost of error: Gutter run detachment, potential fascia damage, complete re-installation.
Mistake 4: Installing Over Rotten Fascia
Problem: Soft, rotten, or deteriorated fascia cannot hold hanger screws under load. Even if installation appears solid initially, the first heavy rain or ice event causes failure.
Solution: Replace all rotten fascia sections before installation. Budget $3–$8 per linear foot for fascia replacement. Combined with gutter installation, this is the best time to address fascia condition.
Mistake 5: Downspouts Discharging Too Close to Foundation
Problem: Downspouts dumping water within 1–2 feet of the foundation saturate soil, create hydrostatic pressure against foundation walls, and increase basement leak risk significantly.
Solution: Install splash blocks or flexible extensions directing water minimum 3–4 feet from foundation. Use underground drainage pipe for tight sites or crawl space foundations.
Mistake 6: Using Standard Silicone Caulk at Joints
Problem: Standard silicone caulk is designed for interior use and breaks down rapidly under UV exposure and temperature cycling. Joints sealed with silicone typically fail within 1–3 years.
Solution: Use only polyurethane-based gutter sealant (Geocel, GE Max Flex, or equivalent) formulated specifically for metal gutter systems. Apply inside the gutter where UV exposure is minimized.
Seamless Gutters vs Sectional Gutters: Full Comparison
| Factor | Seamless Gutters | Sectional Gutters |
|---|---|---|
| Leak frequency | Low (joints only at ends) | High (every 10–20 ft section) |
| Installation cost | $6–$14/lf professional | $3–$8/lf DIY possible |
| Material waste | Minimal (custom length) | Higher (cut from standard lengths) |
| Clog tendency | Low (smooth, no seam snags) | Higher (debris catches at joints) |
| Appearance | Clean, continuous lines | Visible joints and seams |
| DIY feasibility | Requires rented machine | Standard hardware store purchase |
| Maintenance | Minimal | Regular resealing needed |
| Lifespan | 20–30 years | 10–20 years |
| Custom length | Yes (on-site formed) | No (pre-cut sections) |
| Best for | Long-term investment homes | Budget repairs, rental properties |
DIY vs Professional Seamless Gutter Installation
When DIY Makes Sense
Seamless gutter installation can be a viable DIY project under the right conditions:
- Single-story home with accessible, safe ladder work
- Simple rectangular roofline with few corners or obstacles
- Access to roll-forming machine rental ($75–$150/day) or supplier-formed sections
- Comfort with measuring, cutting, and sealing metal
- Adequate help: At least one assistant for lifting long runs
Estimated DIY savings: $400–$1,200 on a typical single-story home (labor cost eliminated)
DIY supply cost example (150 lf home):
- Aluminum coil stock: $200–$300
- Hangers, outlets, elbows, straps: $80–$120
- Downspouts: $60–$100
- End caps, miters, sealant: $40–$70
- Machine rental (1 day): $100–$150
- Total DIY material cost: $480–$740
When to Hire a Professional
Hire professional installers when:
- Two or three stories: Height and safety requirements exceed typical DIY comfort
- Complex roofline: Multiple dormers, valleys, or irregular angles require precise cuts
- Fascia replacement needed: Combining repairs with installation requires carpentry skill
- Bundling with roof cleaning or replacement: Professionals coordinate all roofline work efficiently
- Warranty requirements: Some gutter manufacturers require professional installation for warranty validity
How to hire a qualified contractor:
- Request 3 detailed quotes specifying material gauge, hanger spacing, and sealant type
- Verify licensing and liability insurance
- Ask for local references and before/after photos
- Confirm warranty on both materials and labor (minimum 1-year labor warranty standard)
- Ask specifically whether they use hidden hangers and polyurethane sealant
Frequently Asked Questions
What is the average cost of seamless gutter installation?
Seamless gutter installation costs $6–$14 per linear foot for aluminum systems professionally installed in 2026, with most homes spending $1,200–$2,800 for a complete system. Copper seamless gutters cost $25–$40+ per linear foot, while steel runs $9–$18 per linear foot. Two-story homes and complex rooflines add 20–35% to baseline labor costs.
How long do seamless gutters last?
Properly installed aluminum seamless gutters last 20–30 years with regular maintenance. Copper seamless gutters last 50–100 years with virtually no corrosion. Steel systems last 20–25 years if protective coatings remain intact. The main factors affecting lifespan are climate, maintenance frequency, hanger quality, and whether the system was installed with proper slope and sealed joints.
How far apart should seamless gutter hangers be?
Hidden hangers for seamless gutters should be spaced every 24 inches in mild climates, every 18–20 inches in high-rainfall areas, and every 16 inches in heavy-snow regions. Add extra hangers within 12 inches of every corner, outlet, and valley regardless of standard spacing. Using 2½–3 inch exterior screws driven into rafter tails provides maximum holding strength.
What slope is required for seamless gutter installation?
Seamless gutters require ¼ to ½ inch of slope per 10 feet of horizontal run toward the downspout. A 40-foot run needs a total drop of 1–2 inches from the high point to the downspout. Inadequate slope causes standing water, debris accumulation, and corrosion; excessive slope (over ¾ inch per 10 feet) looks visually obvious and can cause water to overshoot the downspout in heavy rain.
Can seamless gutters be installed as a DIY project?
Yes, seamless gutter installation is feasible as a DIY project on single-story homes with simple rooflines when you rent a roll-forming machine ($75–$150/day) and have an assistant. DIY saves $400–$1,200 in labor compared to professional installation. However, two-story homes, complex rooflines, rotten fascia requiring replacement, and any situation requiring rooftop access beyond comfortable ladder work should be handled by professionals.
When is the best time of year for seamless gutter installation?
Spring and fall are the optimal seasons for seamless gutter installation because moderate temperatures (40–80°F) allow sealant to cure properly and metal to be worked without cold brittleness or heat expansion issues. Summer works well in most regions. Avoid installing in freezing temperatures when sealant won’t cure and metal is more brittle, and avoid installation immediately before forecast heavy rain that prevents sealant curing.
How do seamless gutters help with roof cleaning and maintenance?
Seamless gutters protect roofs by efficiently directing water away from roof edges, preventing the pooling moisture that accelerates moss, algae, and lichen growth. Well-installed seamless gutters operating at proper slope complement roof cleaning by providing a clear, smooth path for debris and cleaning solution runoff. After any roof cleaning treatment, flushing gutters removes all dislodged organic matter and prevents re-growth from trapped debris.
Do I need to clean seamless gutters?
Yes — even seamless gutters require cleaning at least twice per year (spring and fall), though less frequently than sectional gutters because there are no seam snags to trap debris. Homes with overhanging trees may need quarterly cleaning. Gutter guards ($4–$10 per linear foot installed) significantly reduce cleaning frequency when combined with seamless systems and are a worthwhile long-term investment.
What size seamless gutters do I need?
Choose 5-inch K-style seamless gutters for most homes with moderate roof pitch (under 6:12) and annual rainfall under 40 inches. Upgrade to 6-inch K-style for steep roofs (over 6:12 pitch), large drainage areas over 1,000 square feet per downspout, or regions receiving 40+ inches of annual rainfall. Pair 6-inch gutters with 3×4-inch downspouts rather than standard 2×3-inch for proportionate flow capacity.
How can I tell if my seamless gutters need replacement vs repair?
Replace seamless gutters when sections have pulled away from fascia more than once, when corrosion holes appear anywhere along the gutter body, when hangers are failing in multiple locations, or when the gutter is 20+ years old and showing widespread sealant failure. Repair is appropriate for isolated joint leaks, single damaged sections, or sagging caused by loose hangers that can be re-secured. Combined gutter replacement and roof cleaning performed simultaneously maximizes the efficiency of roofline maintenance visits.
Get free roofing advice, cost guides, and seasonal maintenance tips.

Roofing content specialist with 5+ years researching U.S. residential and commercial roofing. Has documented 200+ projects covering installation costs, material selection, contractor vetting, and DIY guides for homeowners across all climate zones.
Leave A Comment