Gambrel roof trusses are a timeless architectural choice that blends beauty with practicality. Many homeowners and builders choose this design because it maximizes attic space while adding a charming, traditional look. However, sizing, spacing, and cost can make planning a gambrel roof project challenging. This guide covers everything you need to know about gambrel roof trusses in 2026. Whether you’re building a new home or renovating an existing one, understanding sizing, spacing, and costs will help you make confident decisions. We’ll also look at the pros and cons of this roof style and how it compares to other truss designs. Here, you’ll find gambrel roof truss sizing guidelines, spacing recommendations, and a detailed cost breakdown for 2026. Plus, we share installation tips, maintenance advice, and answers to common questions to help your project go smoothly.
What Are Gambrel Roof Trusses?
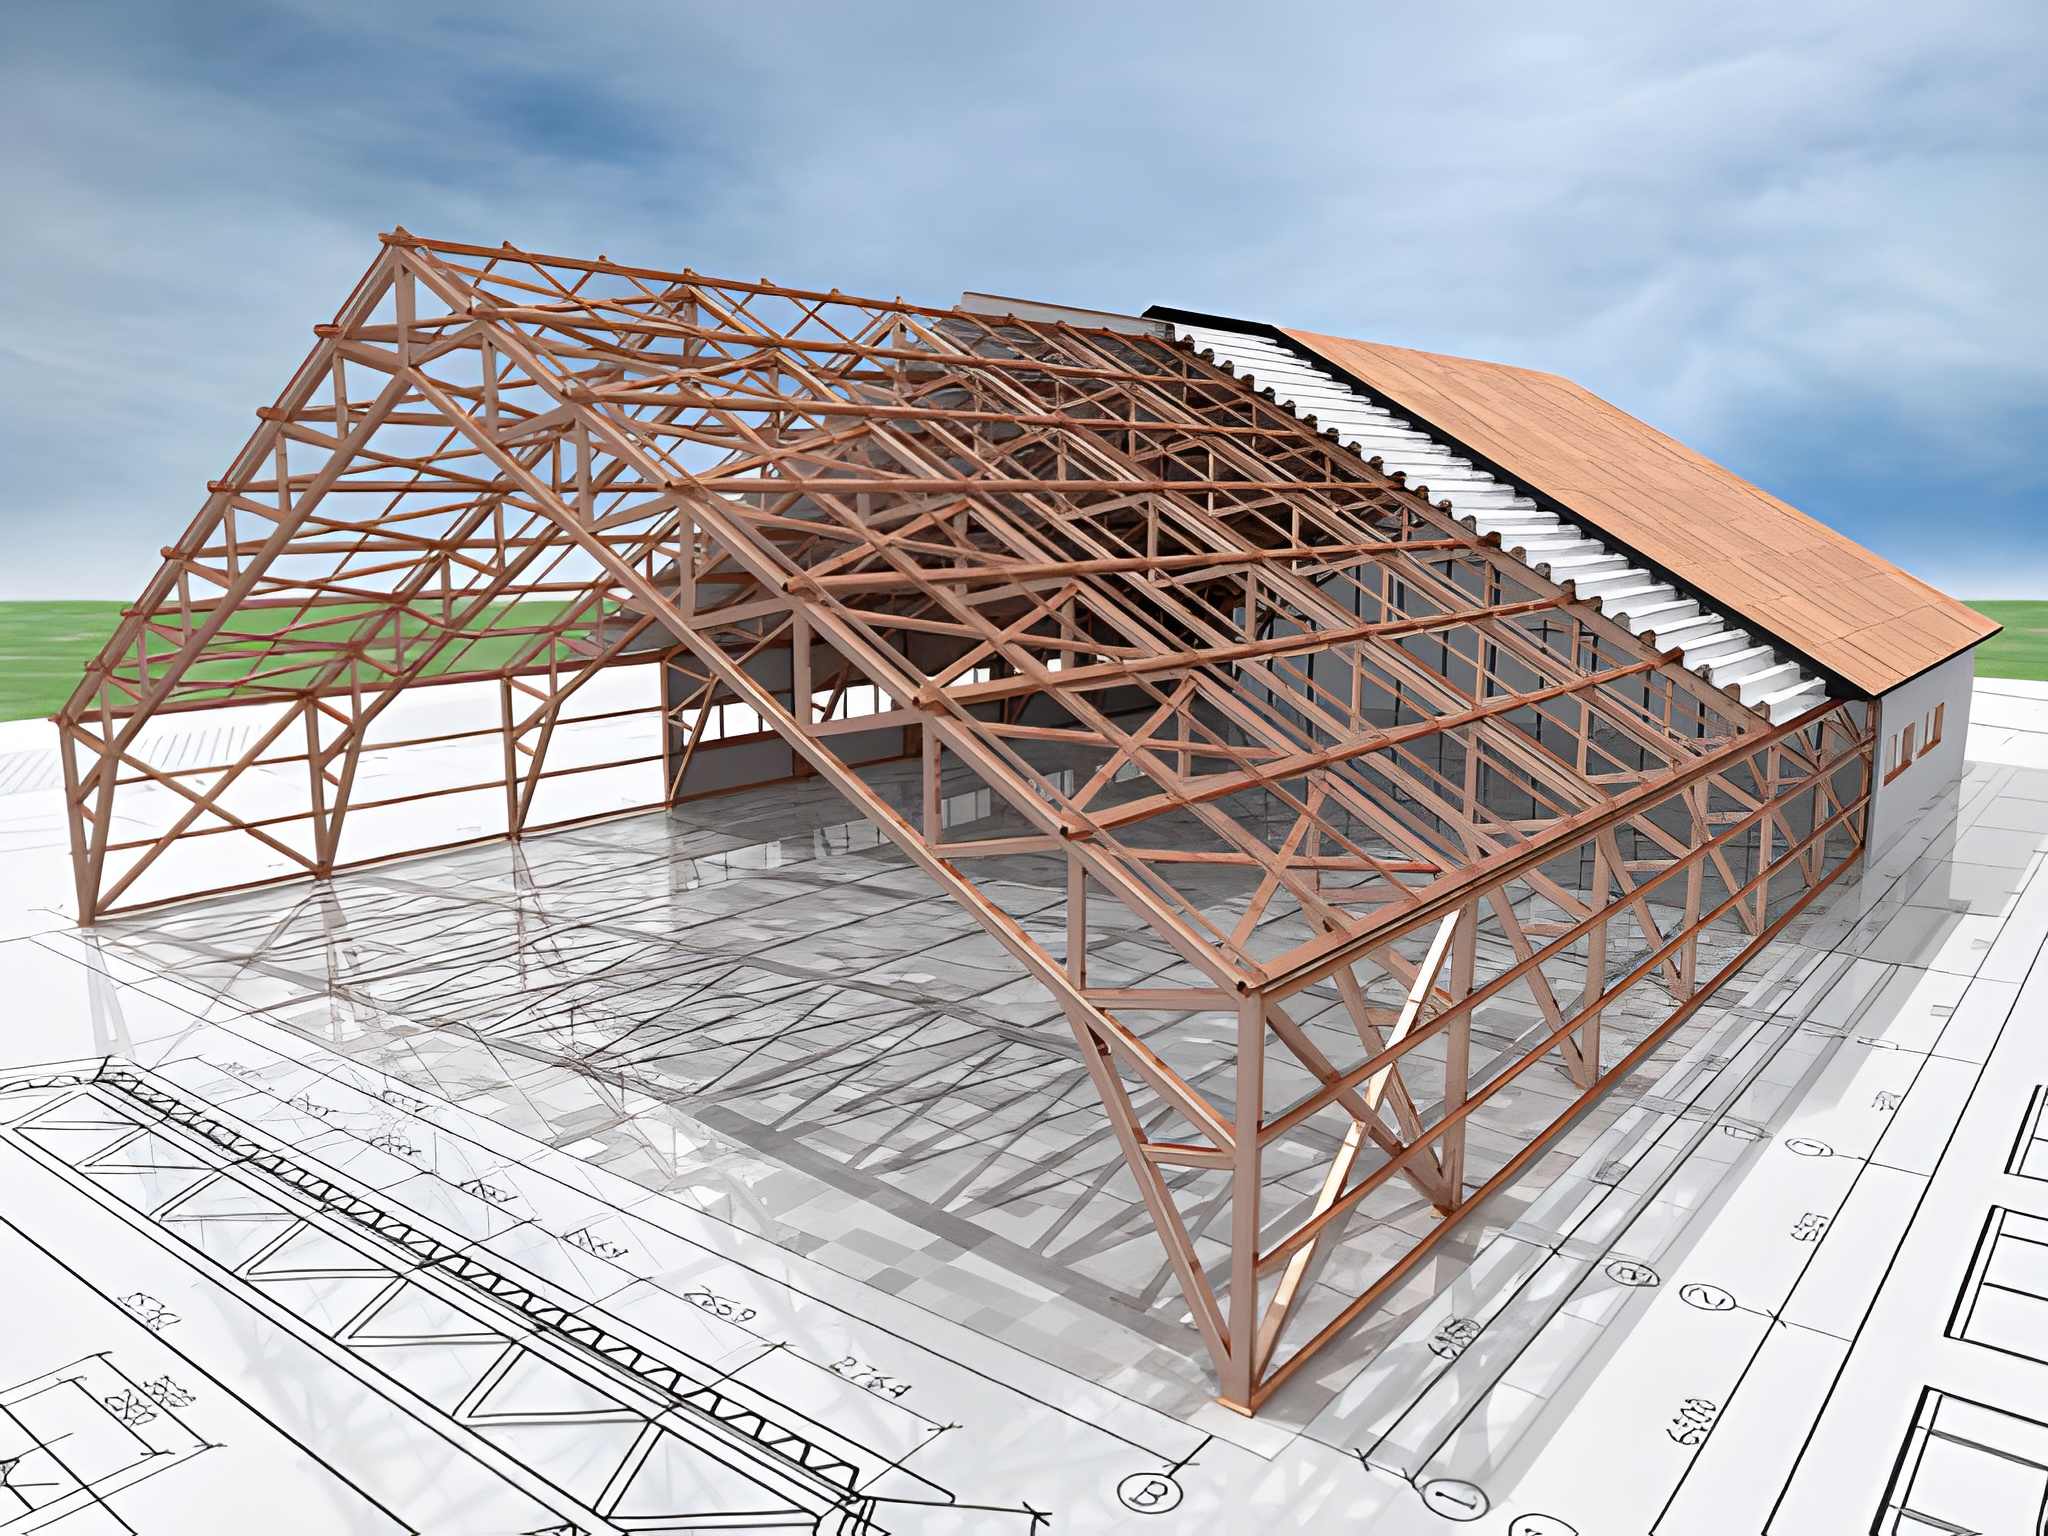
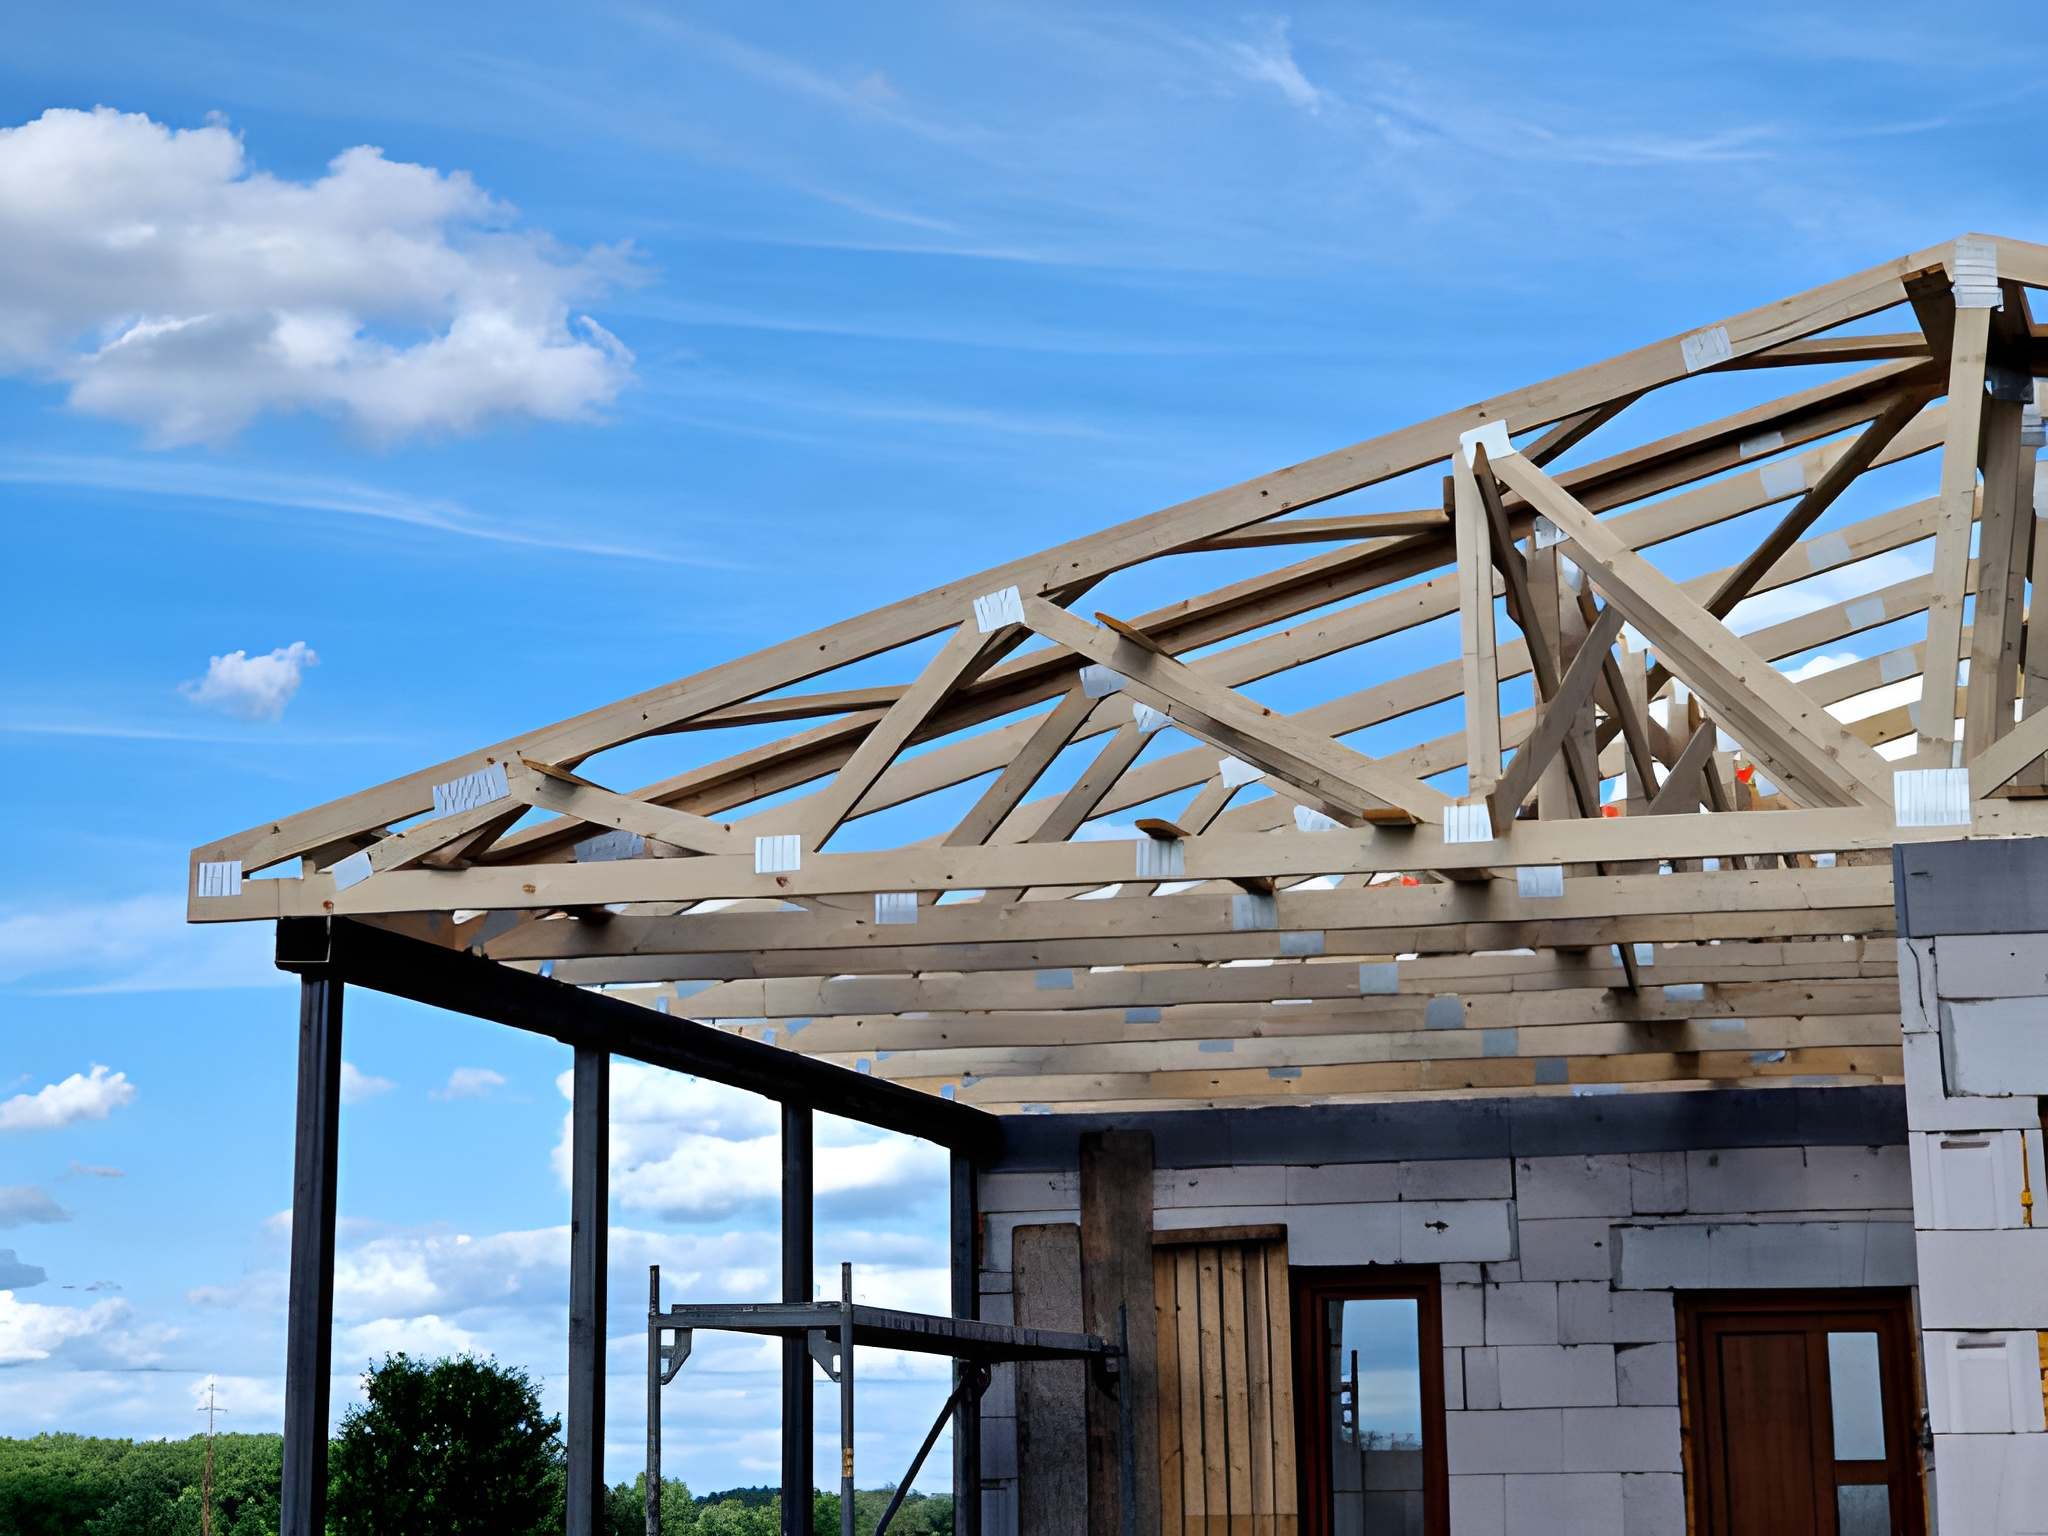
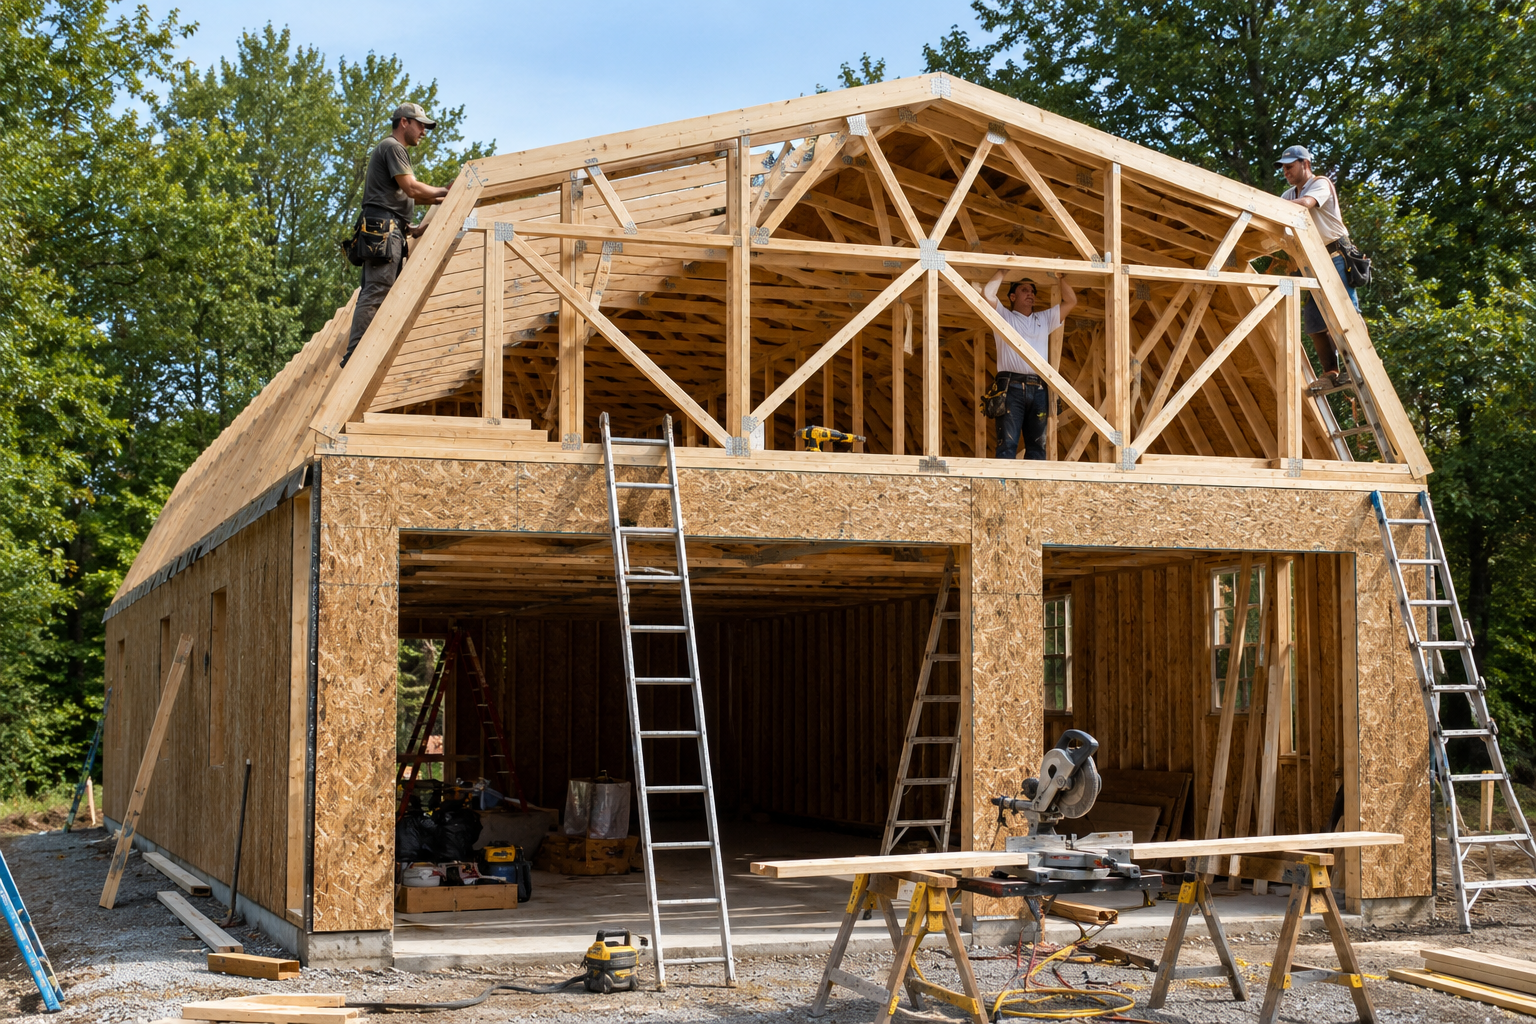
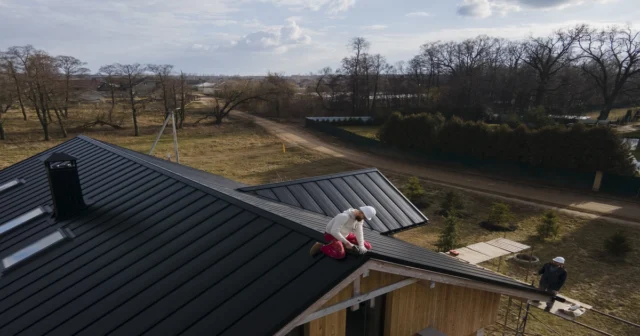
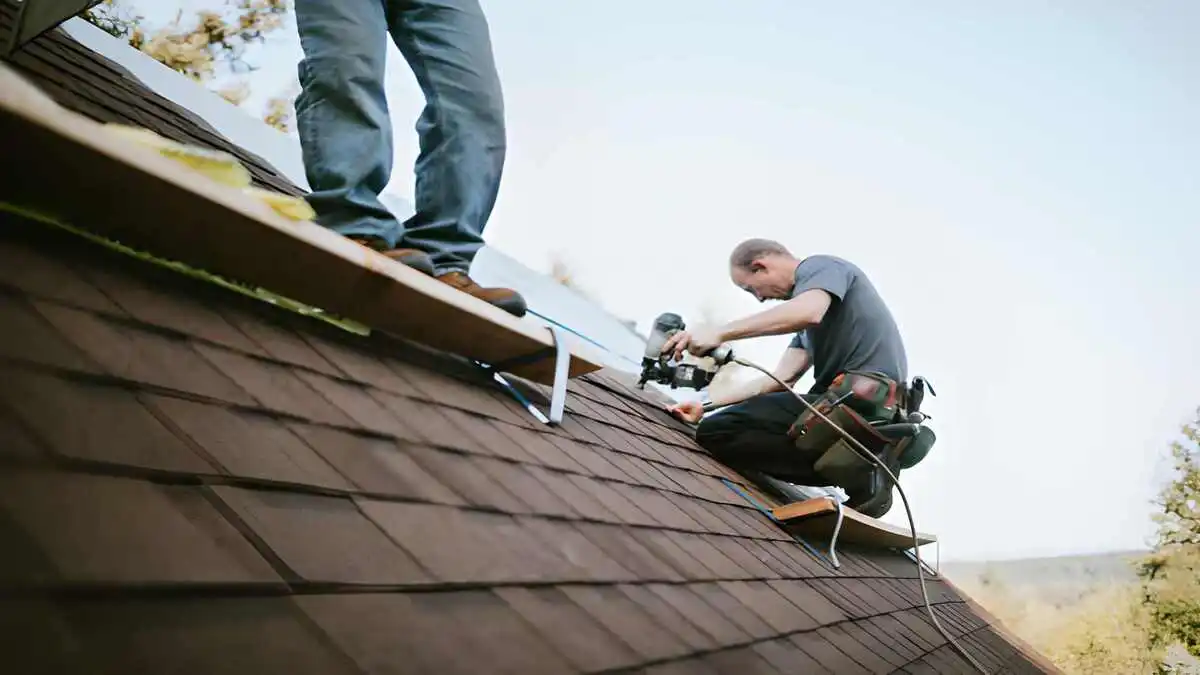
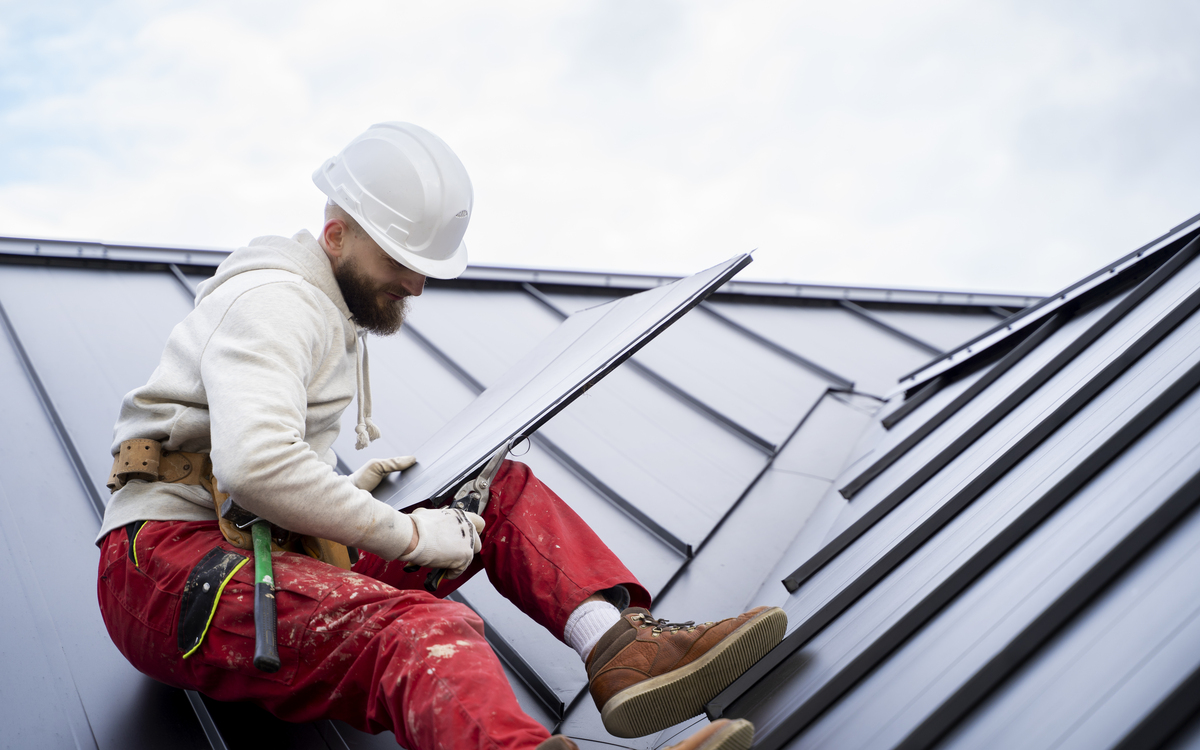
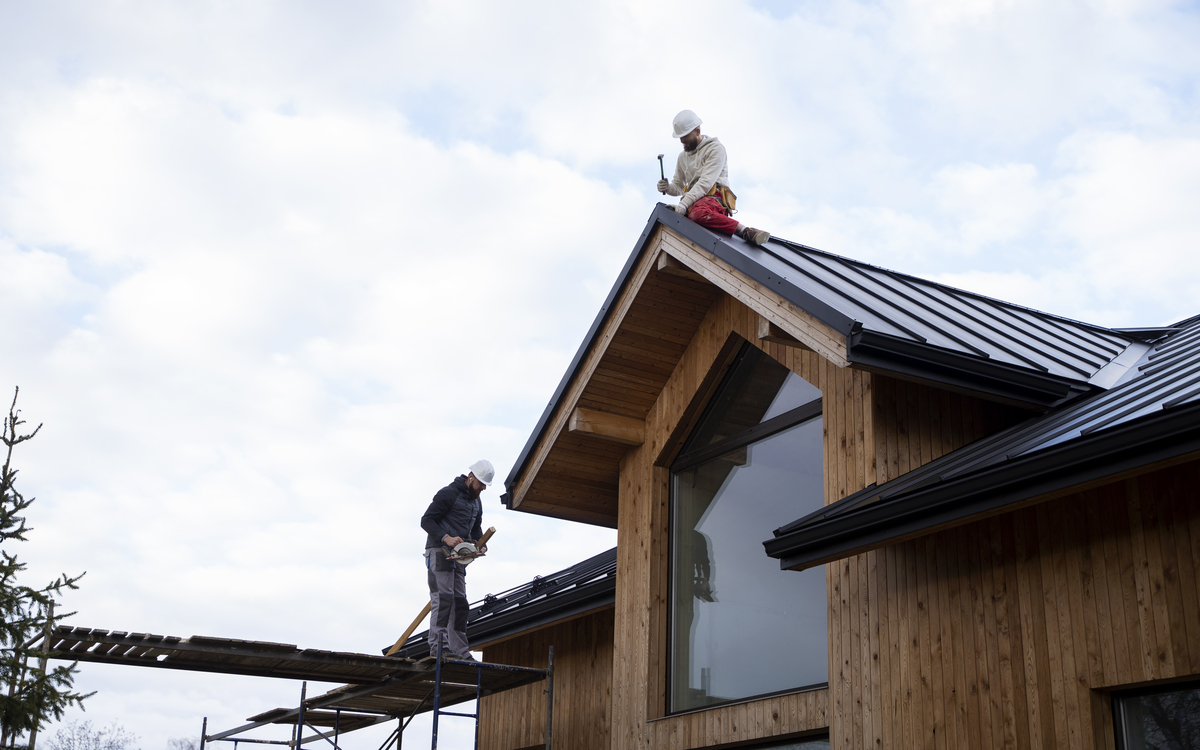
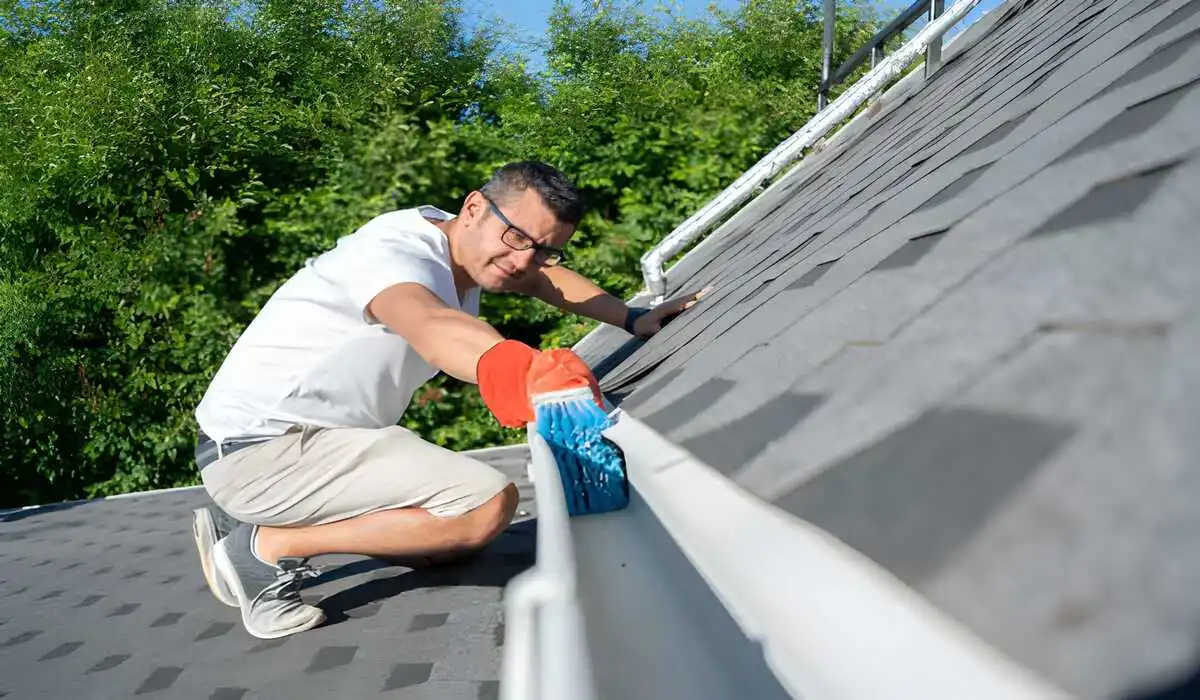
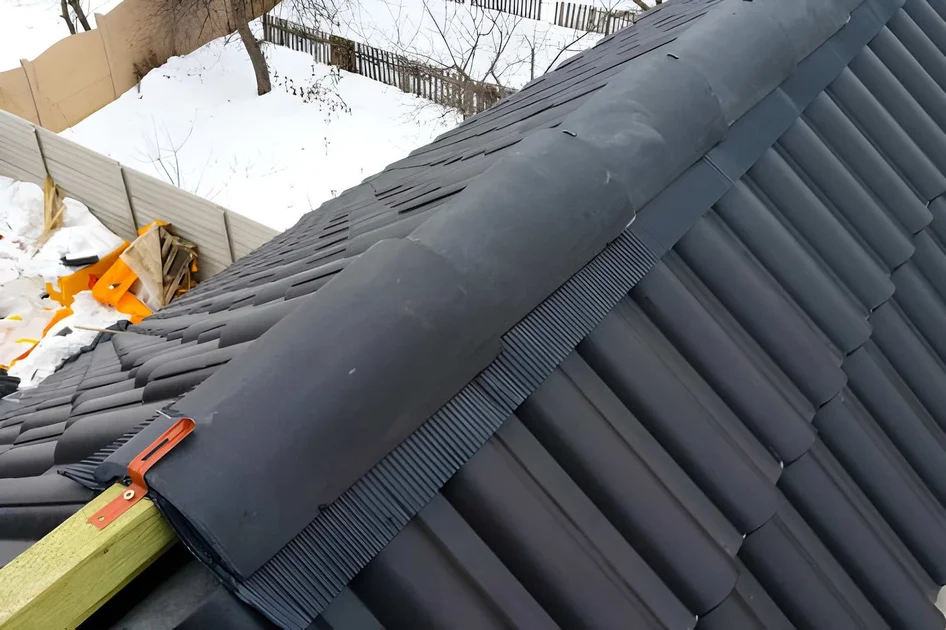
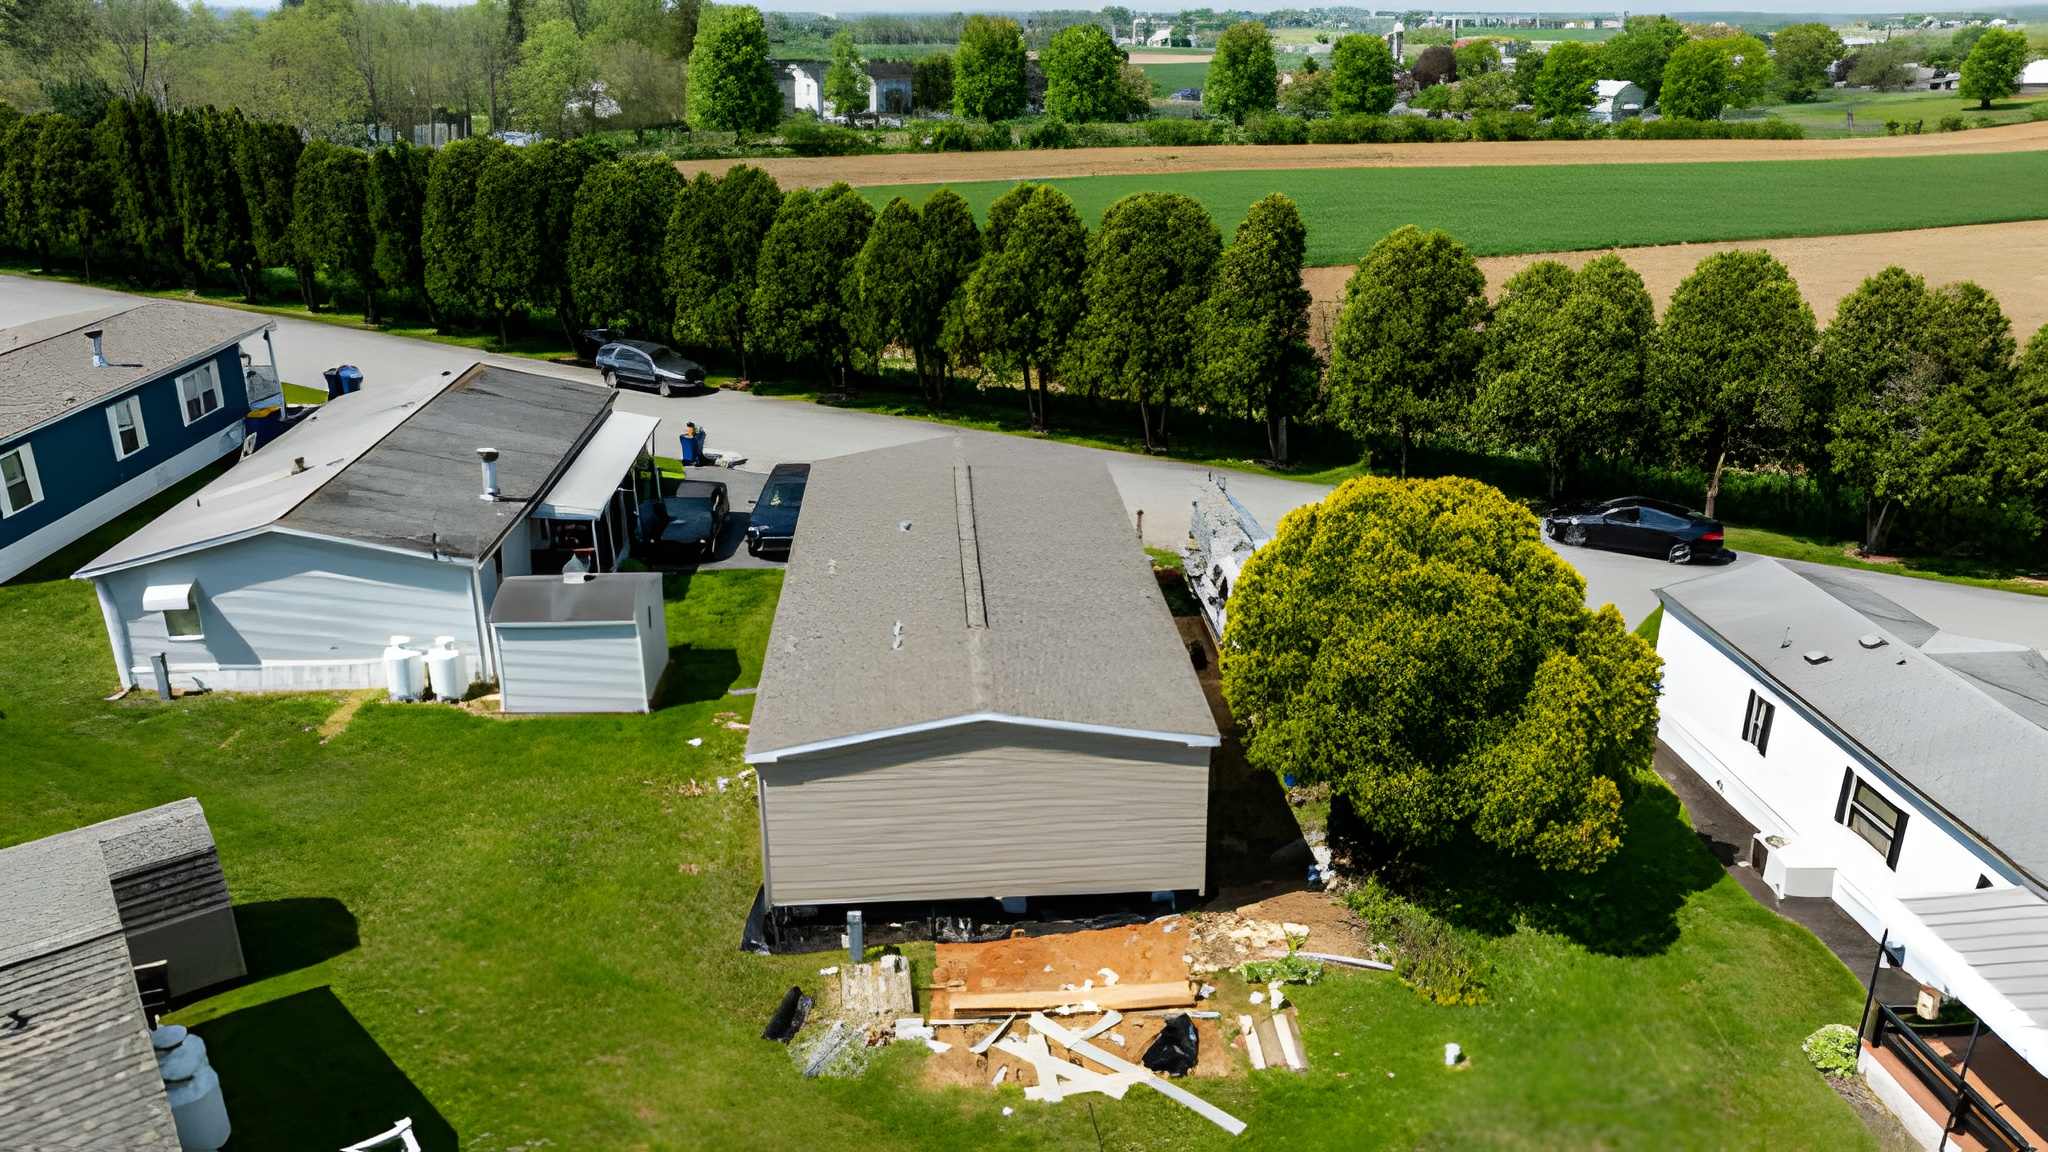
Installing gambrel roof trusses on a garage structureGambrel roof trusses have two distinct slopes on each side, giving them a barn-like appearance. This design creates more attic or upper-floor space compared to standard roof trusses. Often used in barns and colonial-style homes, gambrel trusses combine functionality with timeless charm. The steeper lower slope adds interior space, while the flatter upper slope helps with water runoff and snow accumulation. This dual-slope design makes it a versatile choice for different climates and architectural styles.
Sizing Gambrel Roof Trusses
Correct sizing is key to ensuring gambrel roof trusses are stable. The height, width, and pitch depend on factors like building size, local codes, and how you plan to use the attic space. For most homes, gambrel roof trusses range from 8 to 12 feet in height and 20 to 40 feet in width. Work with a structural engineer to determine the right dimensions for your project.
Benefits of Gambrel Roofs
There are several benefits to choosing a gambrel roof for your building:
Increased Space: The design allows for more usable space under the roof, making it ideal for storage or living areas.
Cost-Effective: Gambrel roofs are often cheaper to build than traditional gable roofs, thanks to their simpler structure.
Aesthetic Appeal: Many people find the gambrel roof attractive, adding character to a home.
Good Drainage: The steep slopes help with rainwater drainage, minimizing the risk of leaks.
Gambrel Roof Trusses
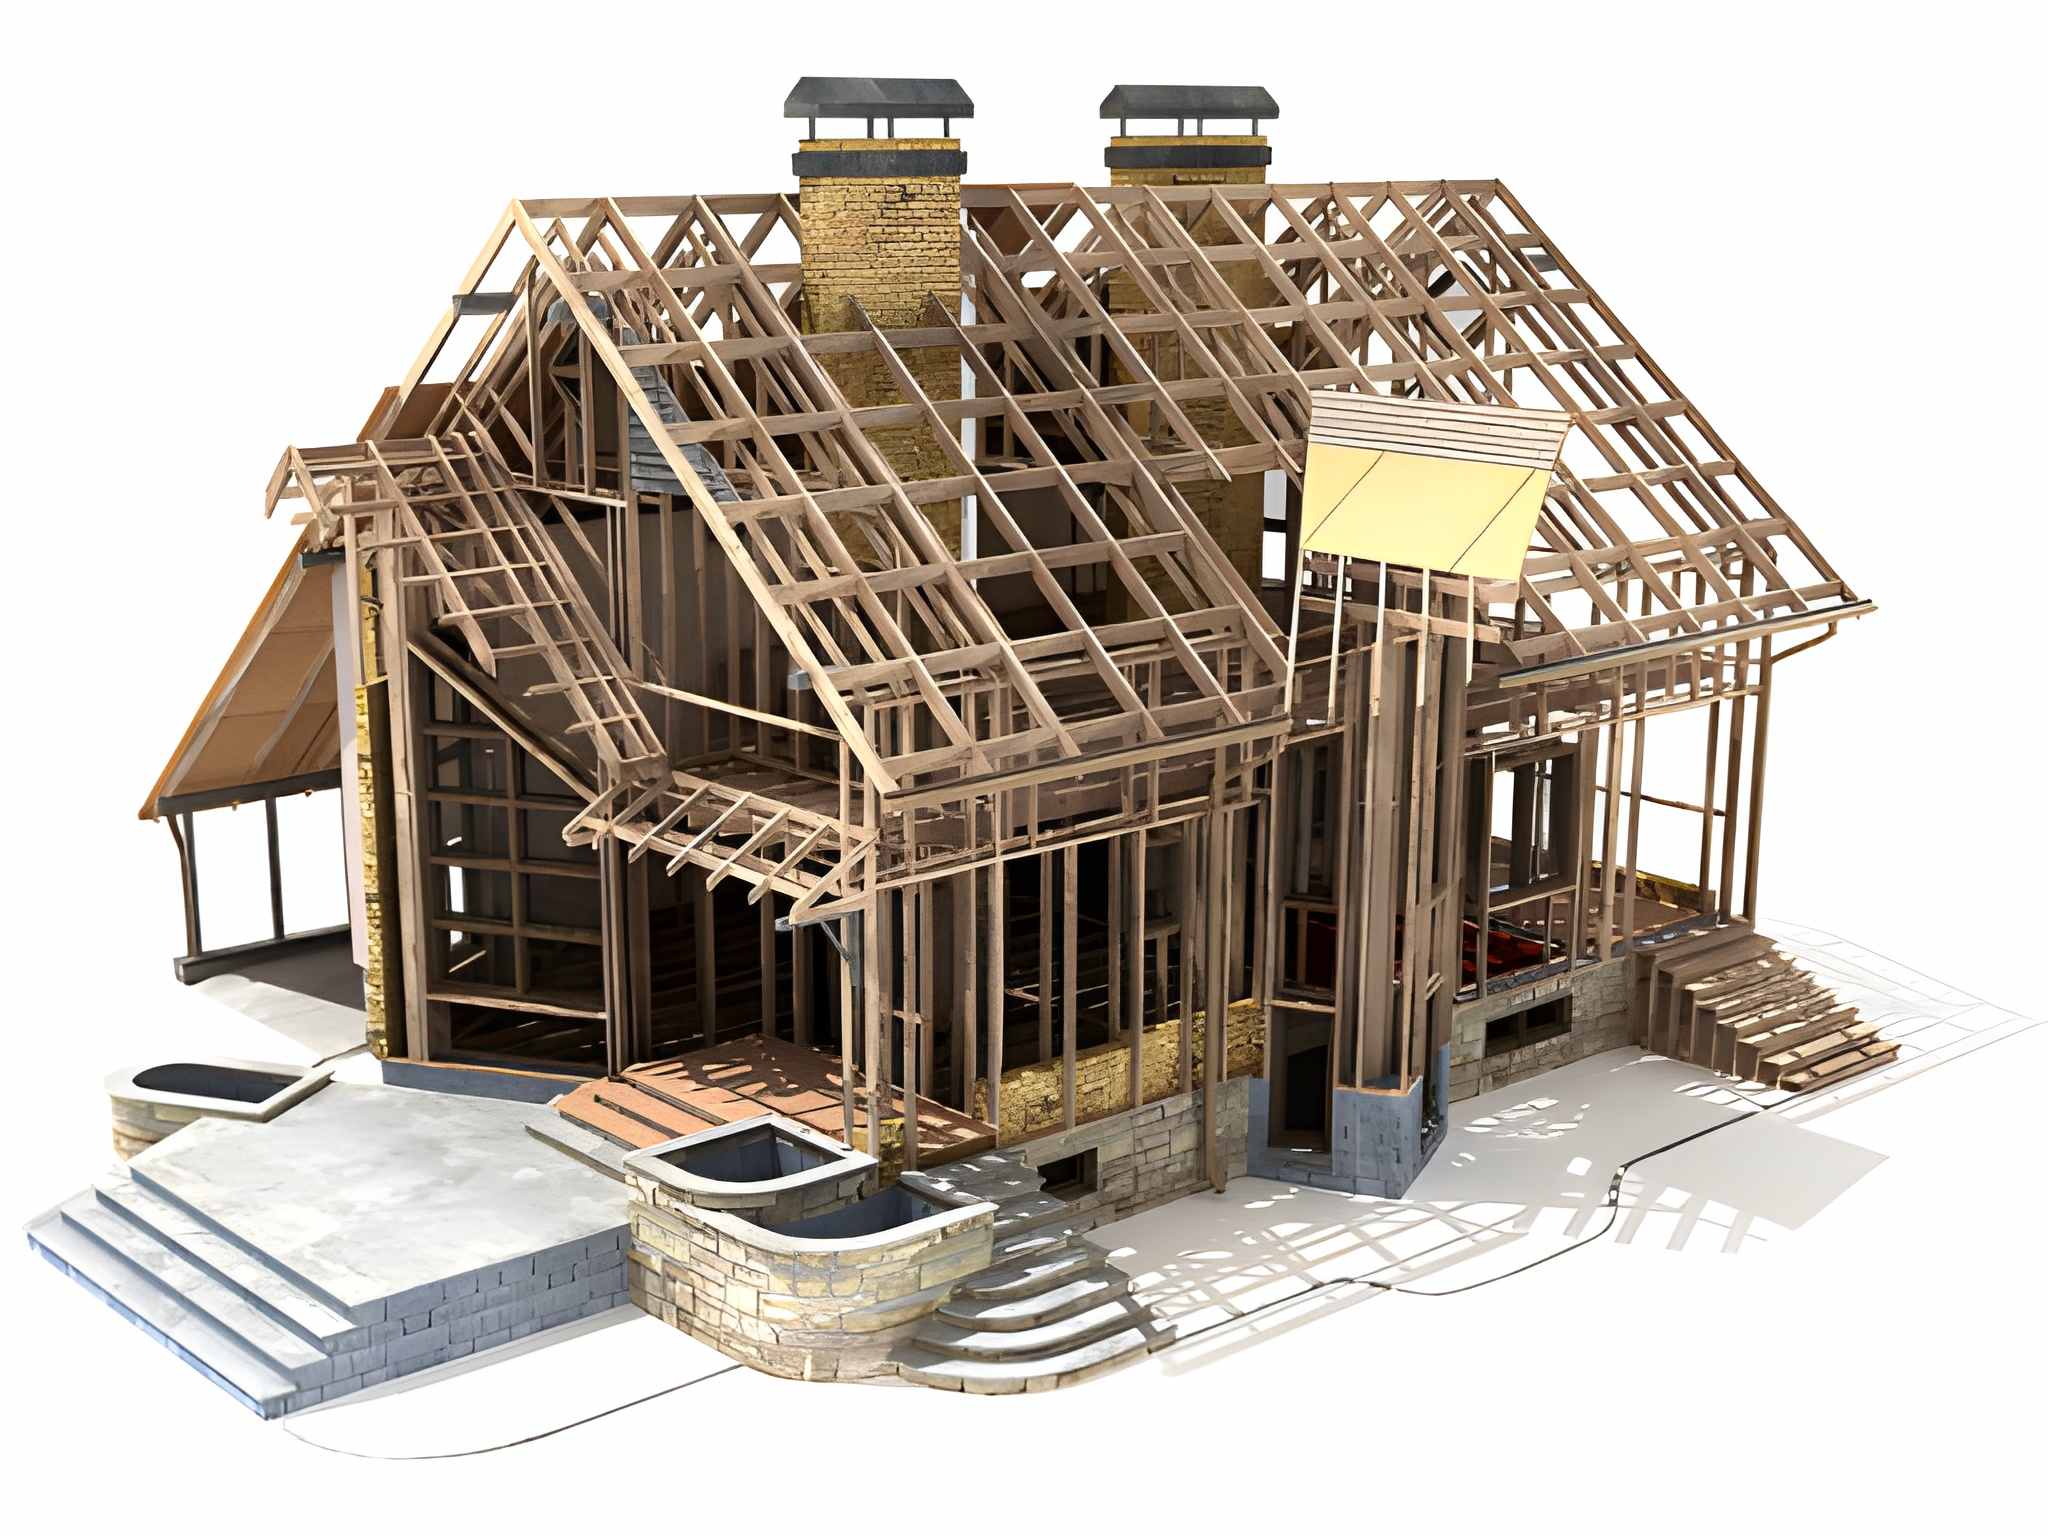
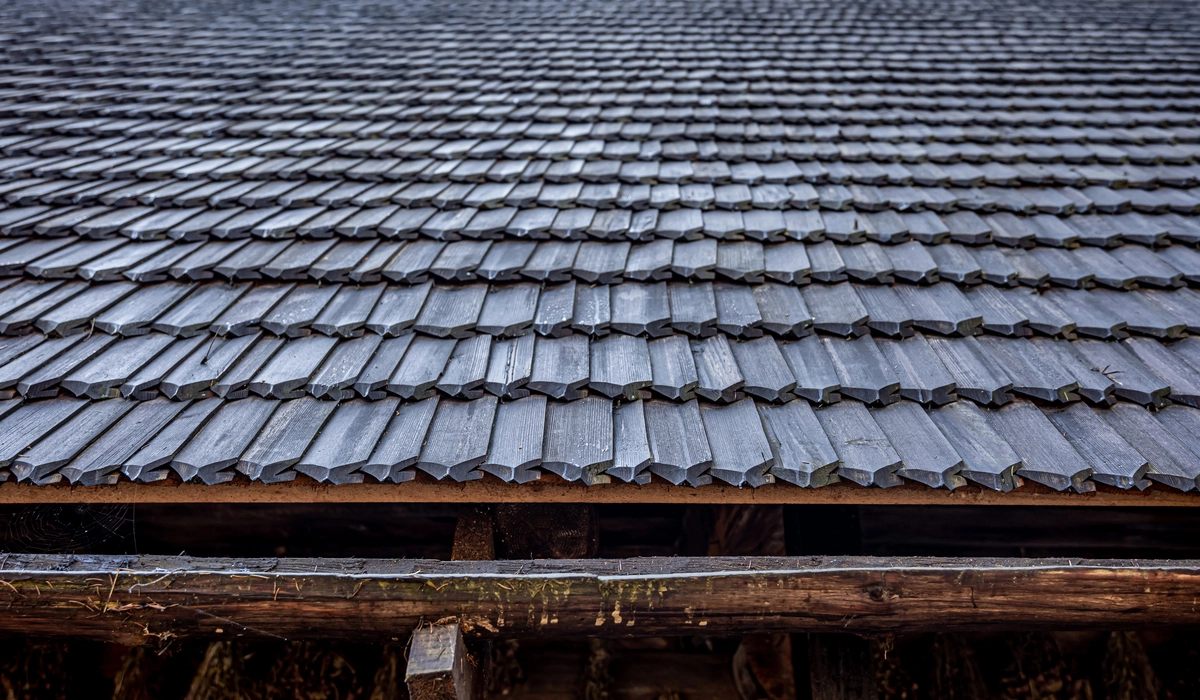
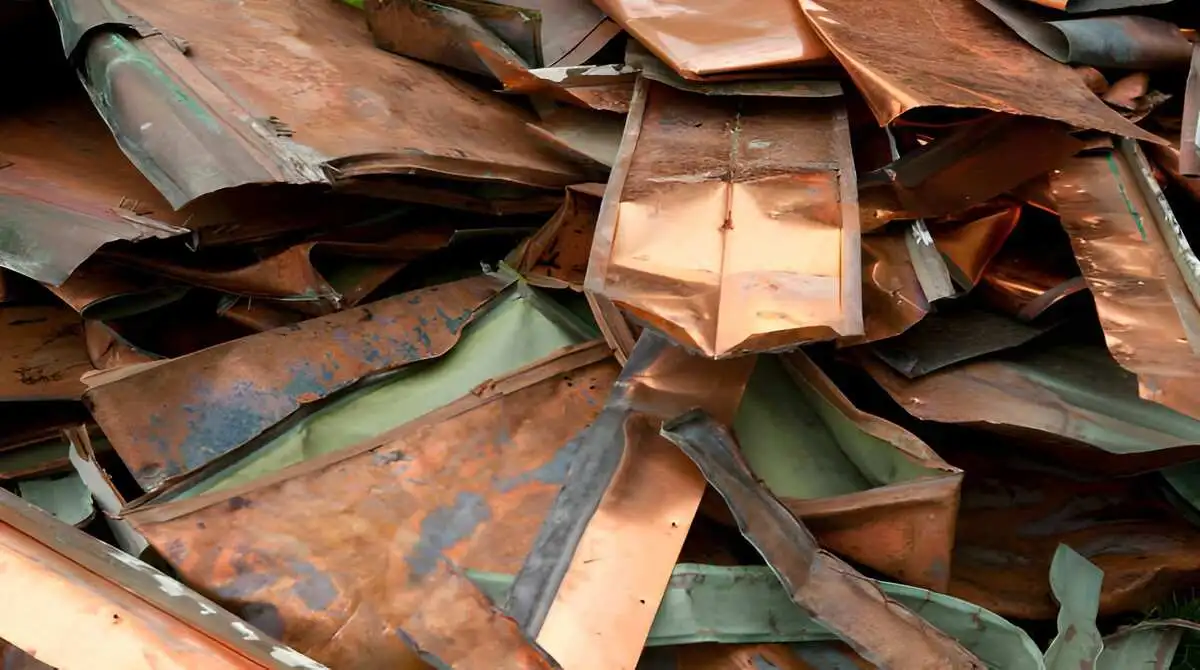
Gambrel roof trusses are essential for supporting the roof’s weight and maintaining its structure. They are engineered frames that connect to the walls and distribute weight. You’ll typically find several types of trusses, each serving a different purpose.Cost breakdown for gambrel roof trusses by material
Sizing Gambrel Roof Trusses
Proper sizing of your gambrel roof trusses is critical for both safety and performance. The size will depend on several factors, including:
Building Dimensions: Measure the overall dimensions of your building to determine the required dimensions of the trusses.
Load Requirements: Consider the weight of the roof materials, snow load, and any additional loads.
Span: The distance between supporting walls determines the size of the trusses needed for structural integrity.
Sizing Examples
For example, if you have a building that is 32 feet wide and you want a clear span for an open space, you may need trusses that are 28 feet long, depending on local codes and design criteria.
Spacing Gambrel Roof Trusses
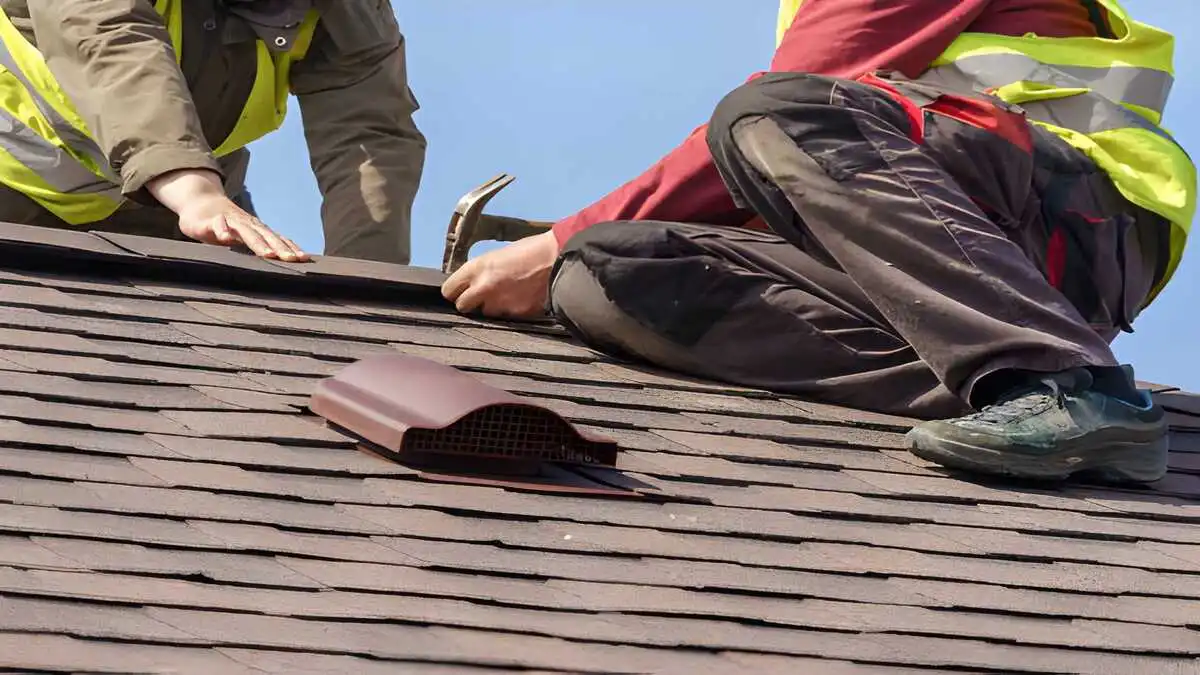
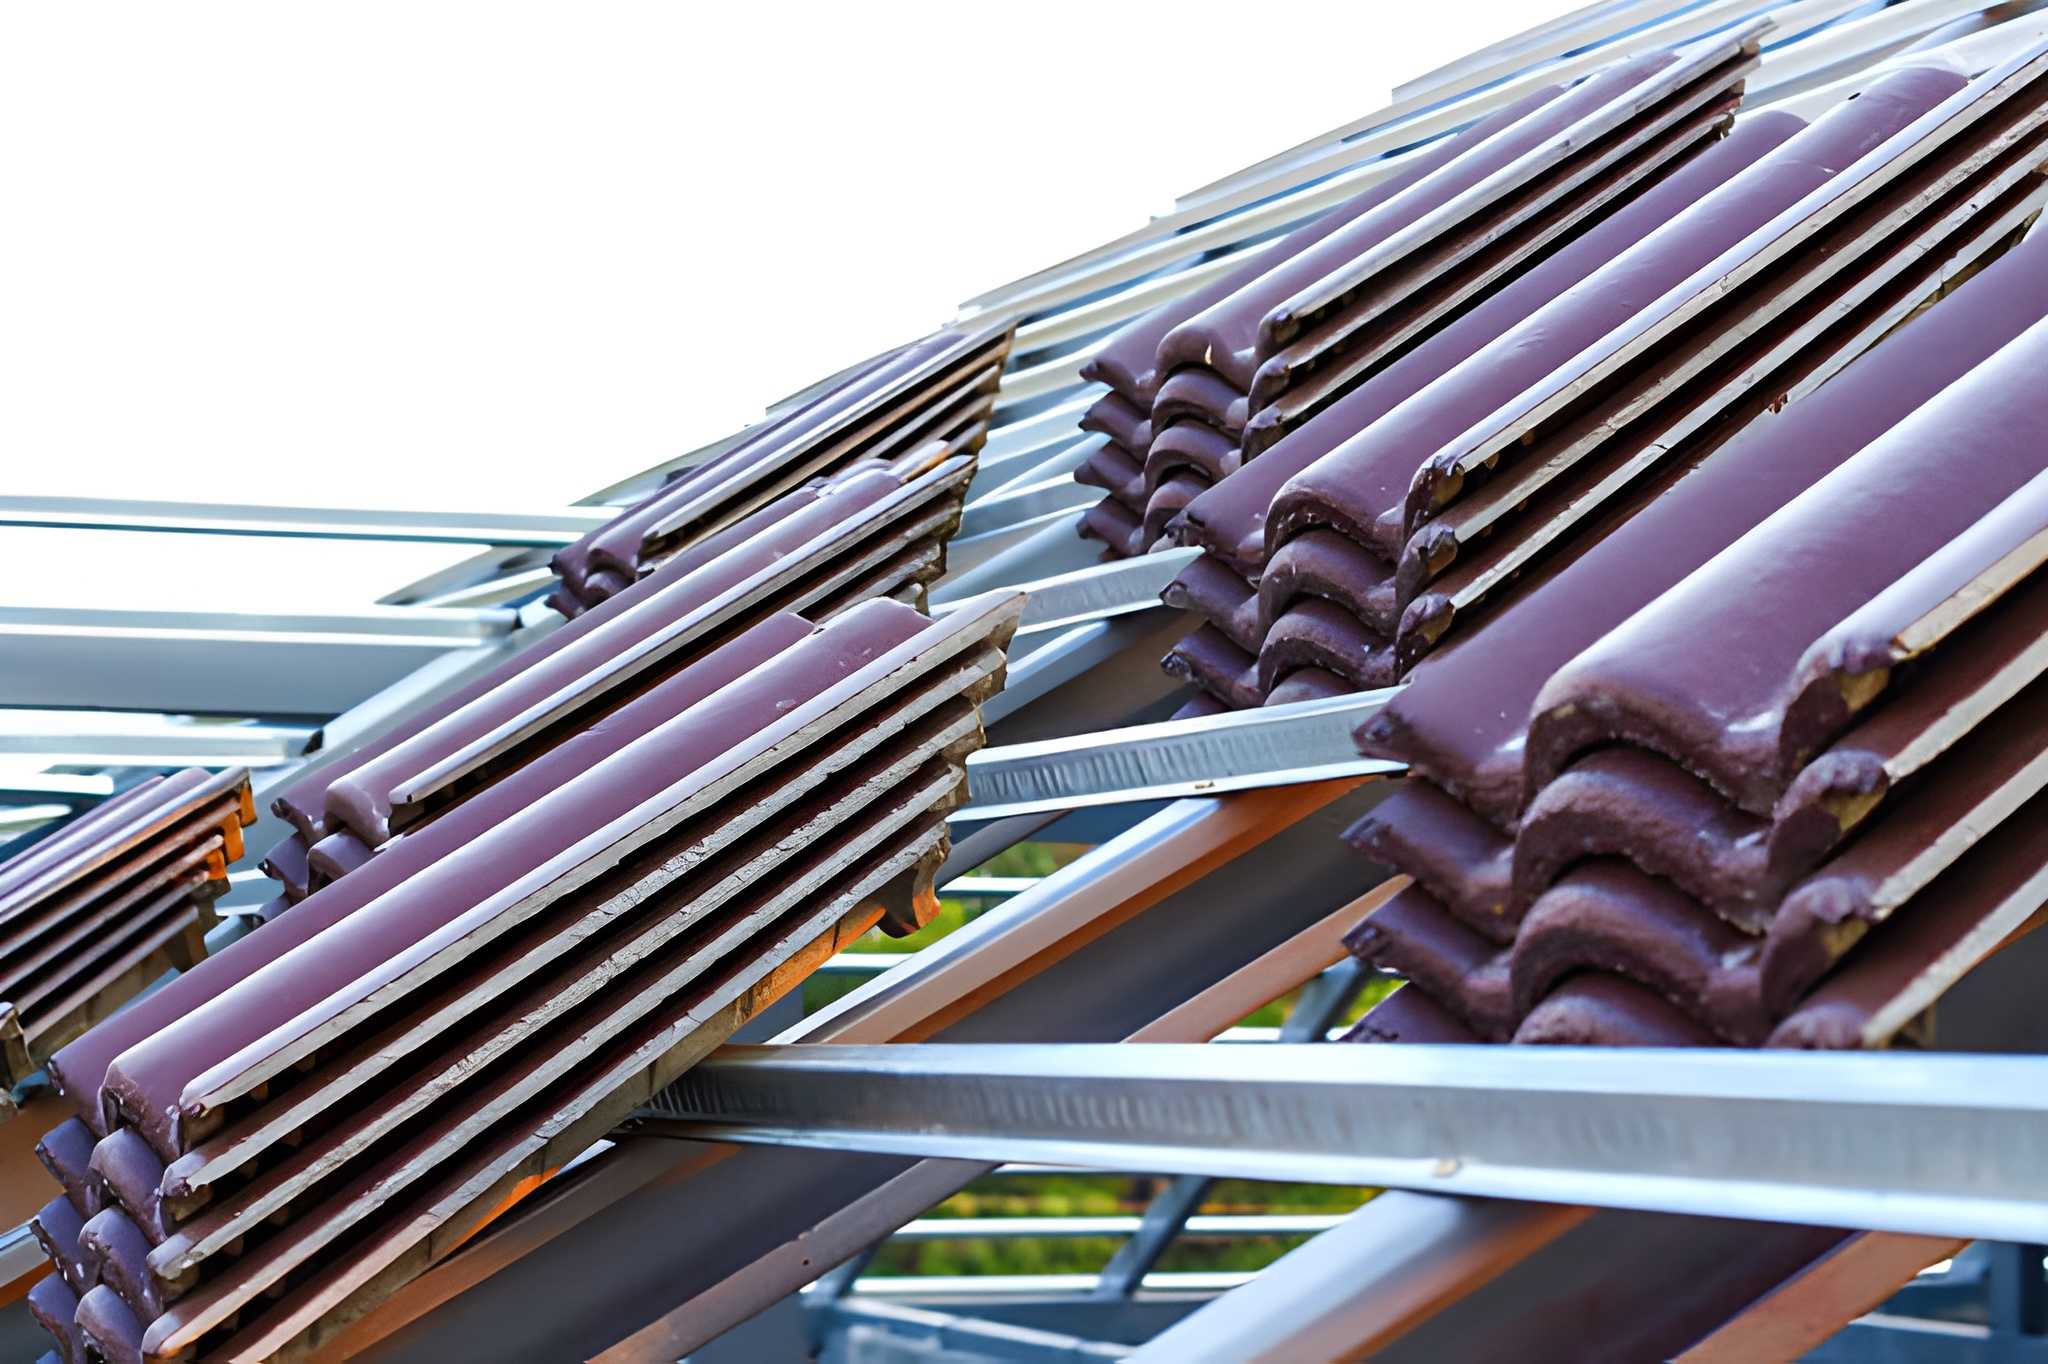
Installing gambrel roof trusses on a garage structure Spacing is another vital element when installing gambrel roof trusses. The recommended spacing usually varies between 24 inches to 48 inches apart, depending on the materials and load.
Materials: Heavier roofing materials may require closer spacing to provide adequate support.
Building Code: Always check local building codes for specific guidelines on truss spacing.
Cost of Gambrel Roof Trusses
The cost of gambrel roof trusses depends on materials, complexity, and project size. On average, expect to pay between $5,000 and $20,000 for materials and labor in 2026. Wood trusses are more affordable, while steel offers greater durability at a higher price. Insulation, roofing materials, and labor costs also affect the total expense.
Item
Cost (per truss)
Engineered Wood Truss
$75 – $150
Labor Costs
$50 – $100
Roofing Materials
$1000+ (based on size)
Overall, the total cost can range from $10,000 to $30,000 depending on your specific project details.
Installation Tips
Installing gambrel roof trusses requires careful planning and precision. Start by ensuring the foundation and walls are level and secure. Use temporary braces to hold trusses in place until permanent supports are installed. Always follow manufacturer guidelines and local codes during installation. Proper alignment and secure fastening are critical to prevent future structural issues.
Gambrel roof framing is a great choice for maximizing space while providing aesthetic appeal. By understanding proper sizing, spacing, and costs, you can make informed decisions for your own project.
Get a Free Roof Quote Today
Trusted roofing experts ready to help. Fast response, honest pricing, quality work.
Roofing content specialist with 5+ years researching U.S. residential and commercial roofing. Has documented 200+ projects covering installation costs, material selection, contractor vetting, and DIY guides for homeowners across all climate zones.
Hail Damage Roof Cost: 7 Essential Tips for Saving Money
Hail Damage Roof Cost: 7 Essential Tips for Saving Money
Hail damage roof cost can lead to a significant financial burden for homeowners. Experiencing hail damage is not just about having to deal with repairs, but also the stress and uncertainty around costs. Understanding what you might pay for repairs can help you feel more prepared and informed. This topic matters because hail damage is not just about aesthetics; it can affect the integrity of your roof and home. Knowing the potential costs of repair can assist you in budgeting accurately and making timely decisions that can save you even more money in the long run. In this article, I’ll discuss the anticipated costs associated with hail damage roof repairs and what you can do to mitigate them. We’ll cover several aspects, including how to assess hail damage, average repair costs, the factors influencing those costs, and the best ways to approach repairs. You’ll also learn about the importance of working with a knowledgeable contractor to ensure your roof is restored effectively. By the end, you should have a comprehensive understanding of the hail damage roof cost and how to manage it wisely.
Understanding Hail Damage and Its Impact on Roof Costs
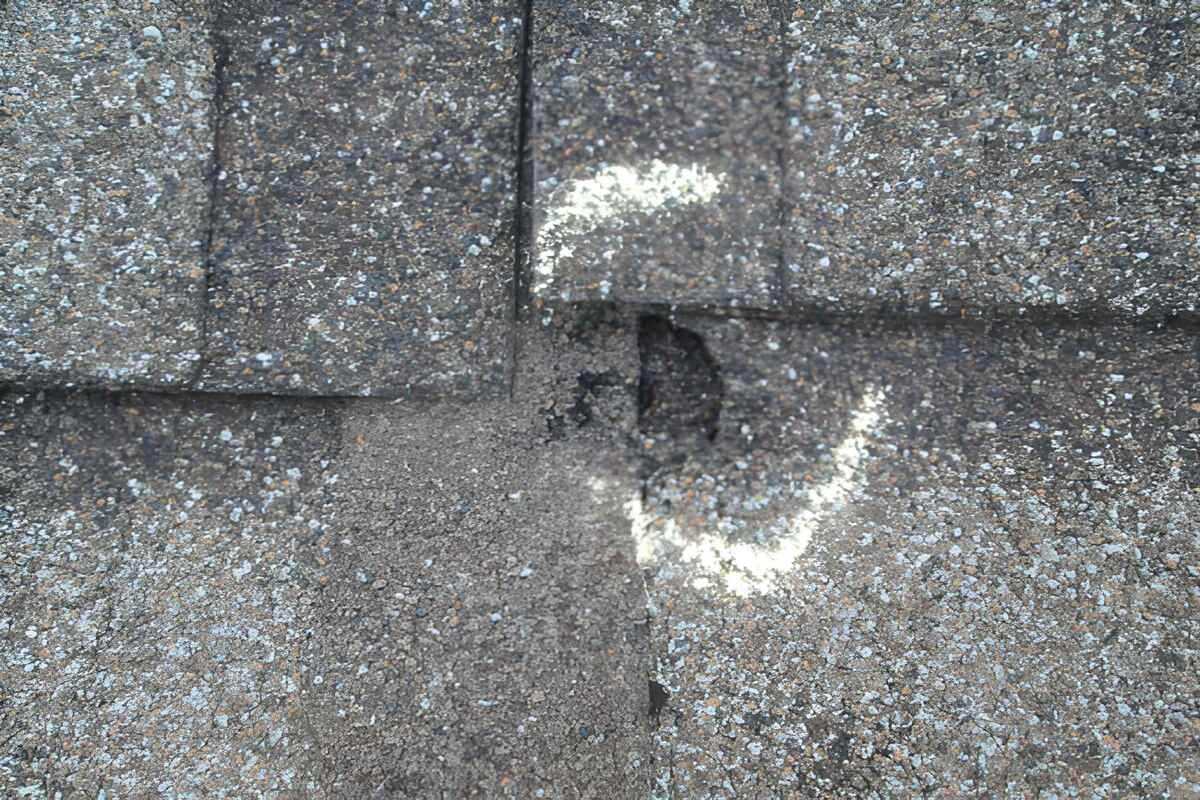
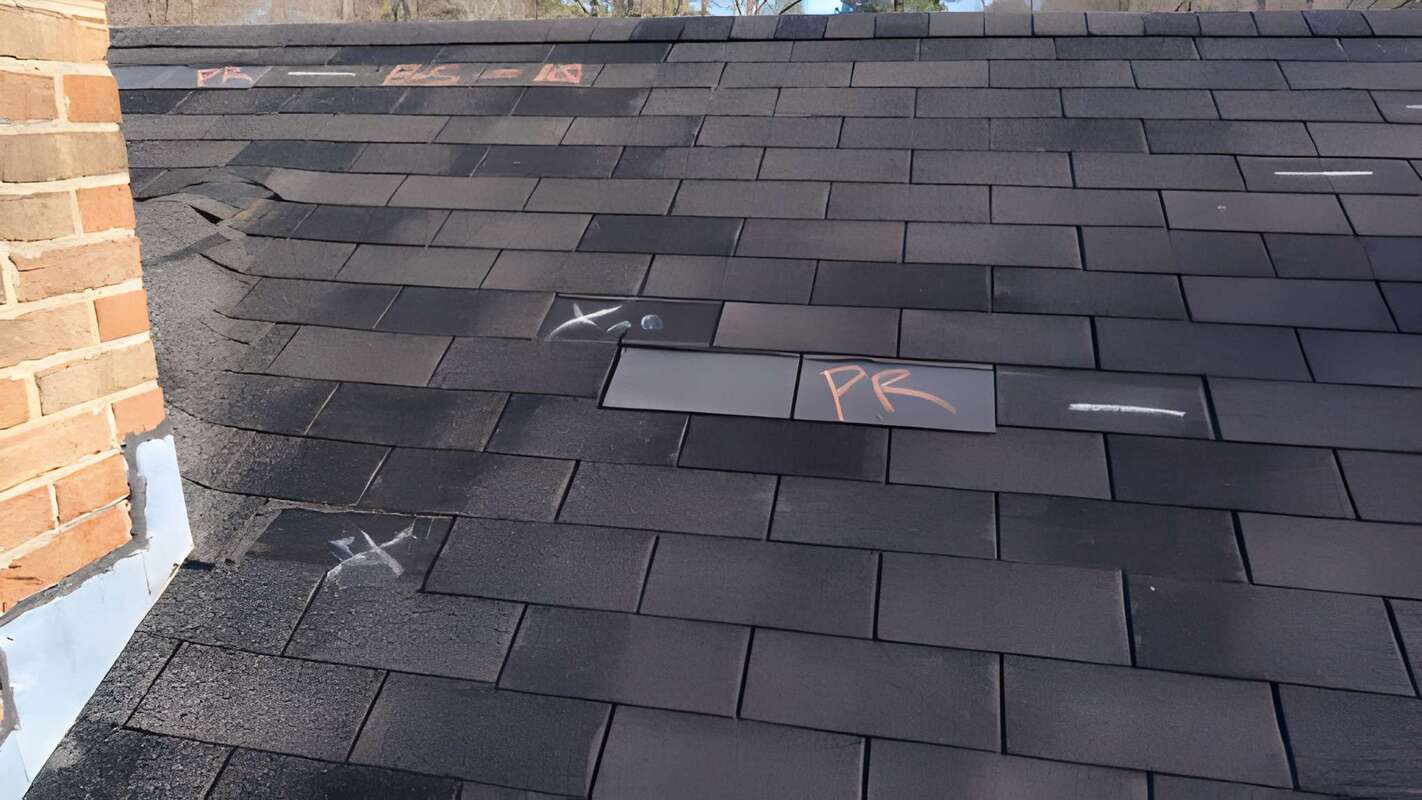
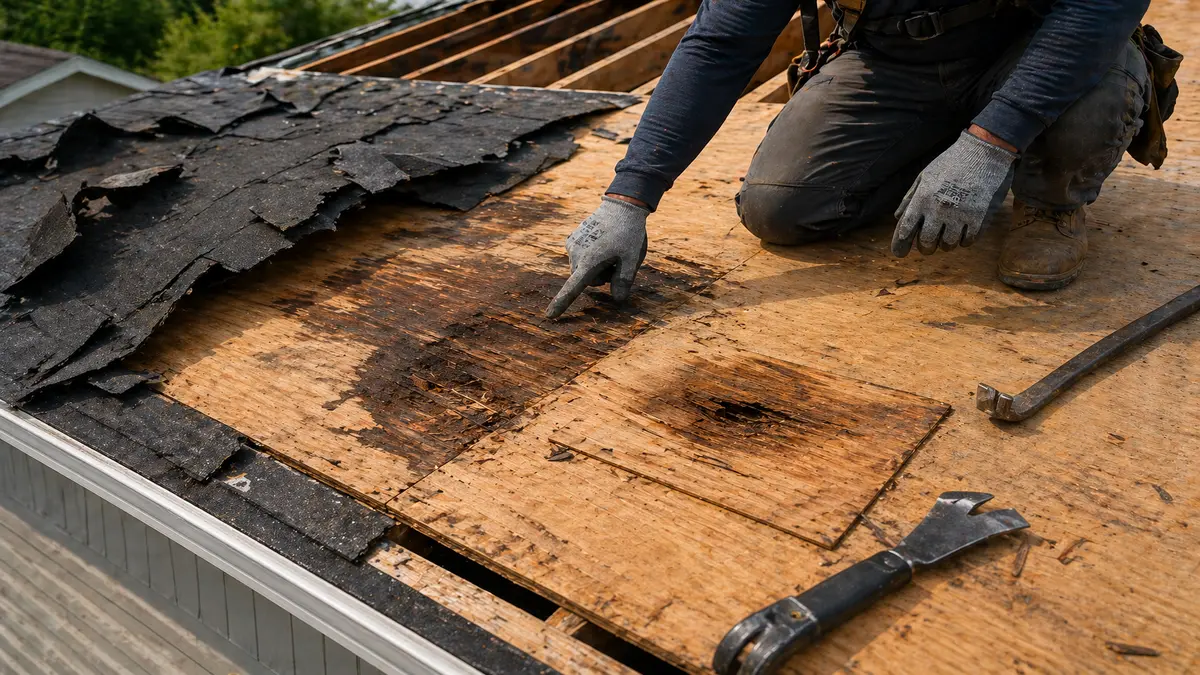
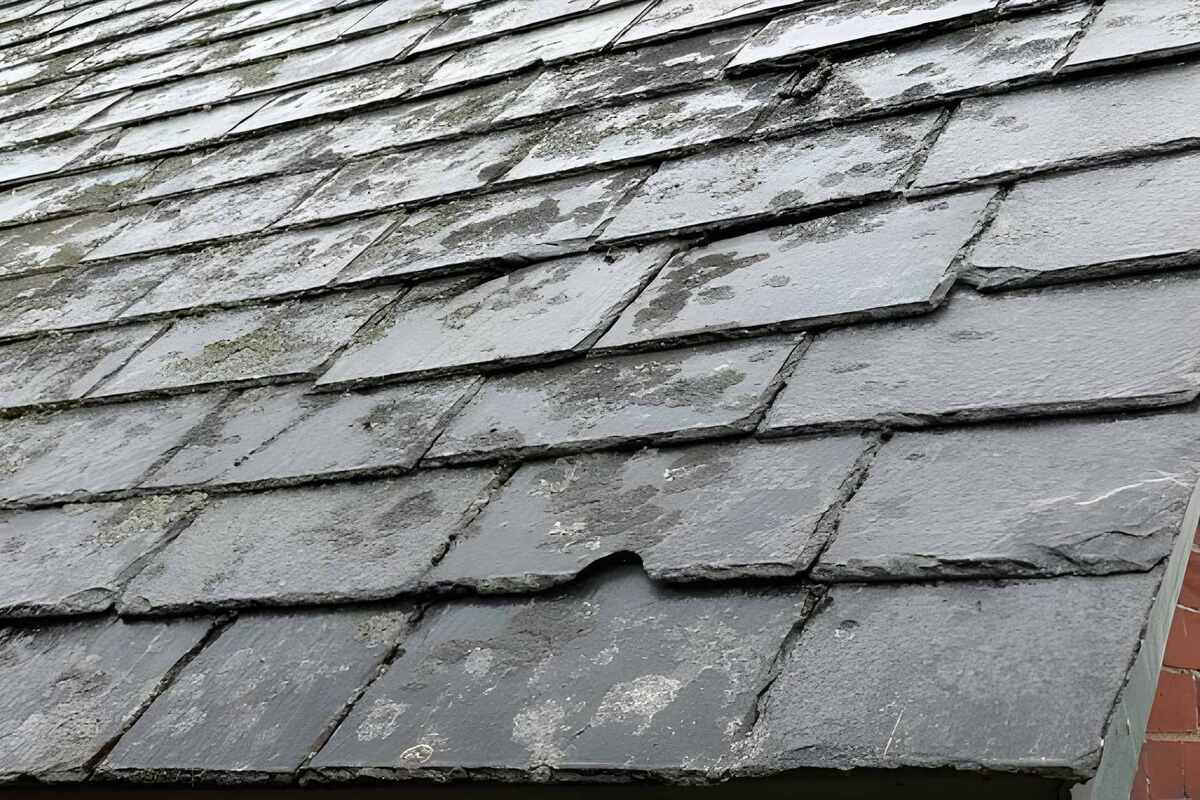
Hail can vary in size, from small pellets to golf ball-sized chunks, and can cause extensive damage to your roofing materials. The impact of hail can lead to dents, cracks, and even punctures, impacting not just the roof itself but potentially other areas of your home as well. When assessing hail damage, it’s crucial to understand that not all damage is visible from the ground. You may need a professional inspection to identify issues that could lead to further complications and costs down the line. It’s vital to act quickly as delaying repairs can lead to further deterioration and increased repair costs.Close-up view of hail damage effects
Factors Affecting Hail Damage Roof Cost
Several factors can impact the overall cost of repairing hail damage. These include:
Location: Costs can vary significantly based on geographic location and local contractor rates.
Extent of Damage: The more extensive the damage, the higher the cost of repairs. A few shingles may cost less than whole sections needing replacement.
Roof Material: Different roofing materials have different costs associated with them. For example, asphalt shingles tend to be less expensive to repair than metal roofing.
Labor Costs: Skilled labor rates vary by region, and this can greatly impact the final bill.
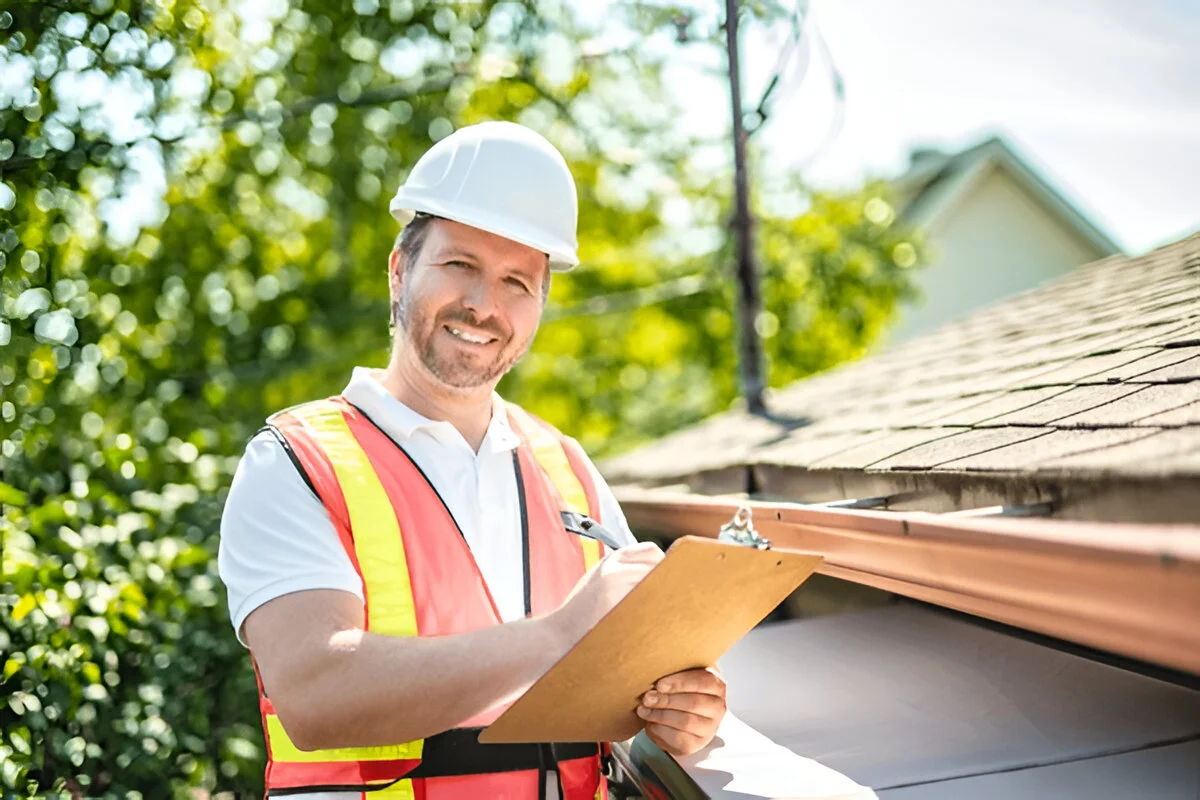
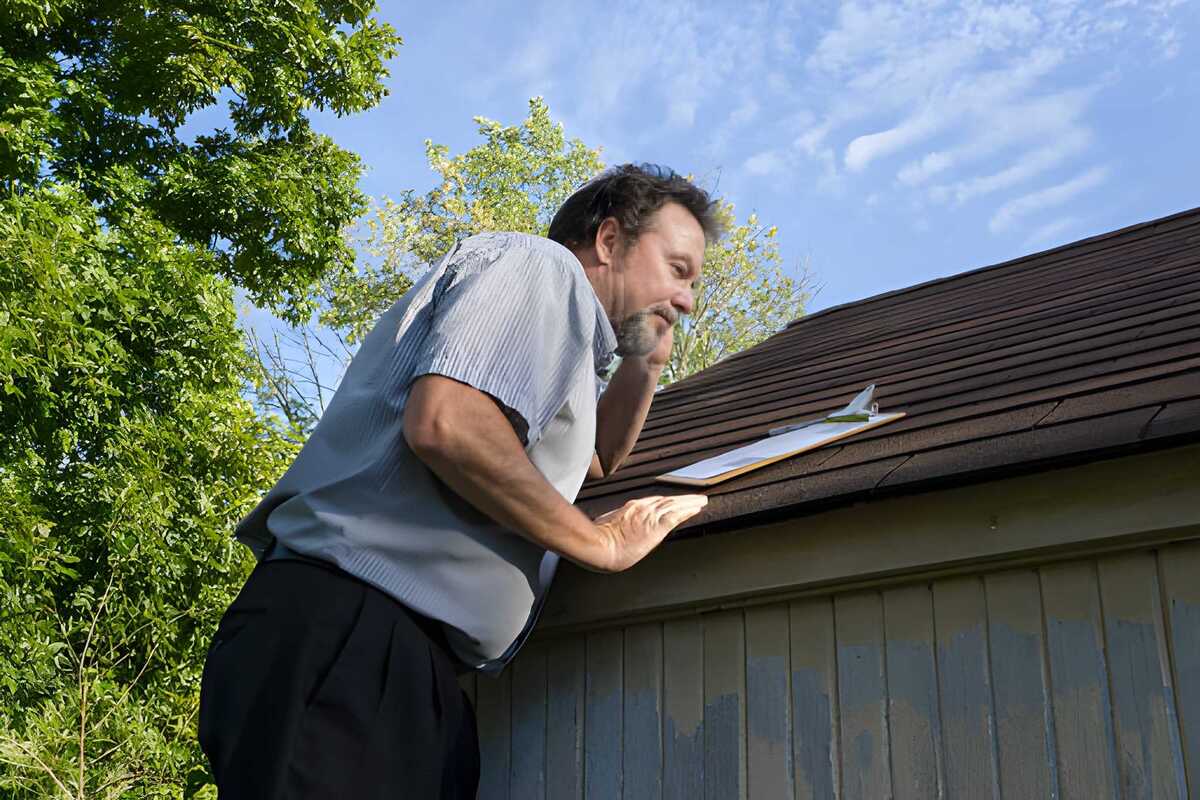
When considering these variables, it’s essential to get detailed estimates from several contractors. This will help you make an informed decision about which services offer the best value for the quality of work provided.Expert assessment of roof condition
Average Hail Damage Roof Repair Costs
On average, homeowners can expect to pay anywhere from $300 to $1,500 for minor repairs related to hail damage. For more severe situations, especially when full sections of the roof need to be replaced, costs can range from $5,000 to $15,000 or more. It’s essential to understand these ranges to prepare yourself financially. Remember, while DIY repairs may seem like a cost-saving measure, improper handling can lead to more significant issues later on. The potential costs of recurring problems from poor repairs can exceed hiring a professional from the start.
Insurance and Your Hail Damage Roof Cost
When it comes to covering hail damage, insurance can play a significant role in managing costs. If you have a homeowners insurance policy, hail damage is often covered, but the extent of coverage can vary from one policy to another. It’s important to review your policy and understand your deductible. In many cases, filing a claim can help alleviate some of the financial burdens of repairs. However, be aware of how this may affect your premium rates in the future. I’ve seen many homeowners who choose not to file a claim simply because they fear premium increases. It’s a decision worth weighing carefully.
Choosing the Right Contractor for Repairs
Finding the right contractor to manage your hail damage repair is critical for ensuring the work is done properly and within a reasonable timeline. To do this effectively, consider the following tips:
Research: Look for contractors with positive reviews and ratings. Websites like Angie’s List and HomeAdvisor can provide useful insights.
Get Multiple Estimates: Always collect quotes from at least three contractors to compare costs and services.
Ask for Referrals: Speak with friends or neighbors who have had similar work done. Personal referrals can help in finding reputable contractors.
Check Licensing and Insurance: Always verify that the contractor is licensed and insured, protecting you from any liability during the repair process.
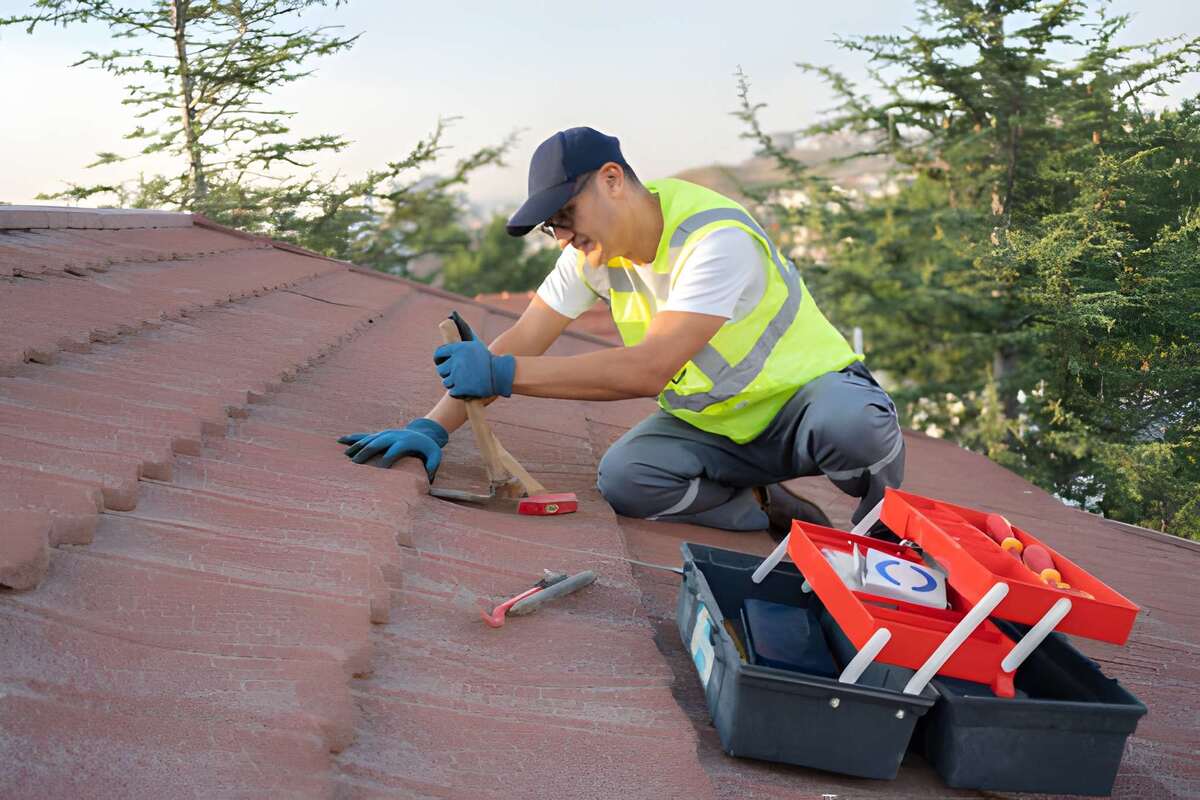
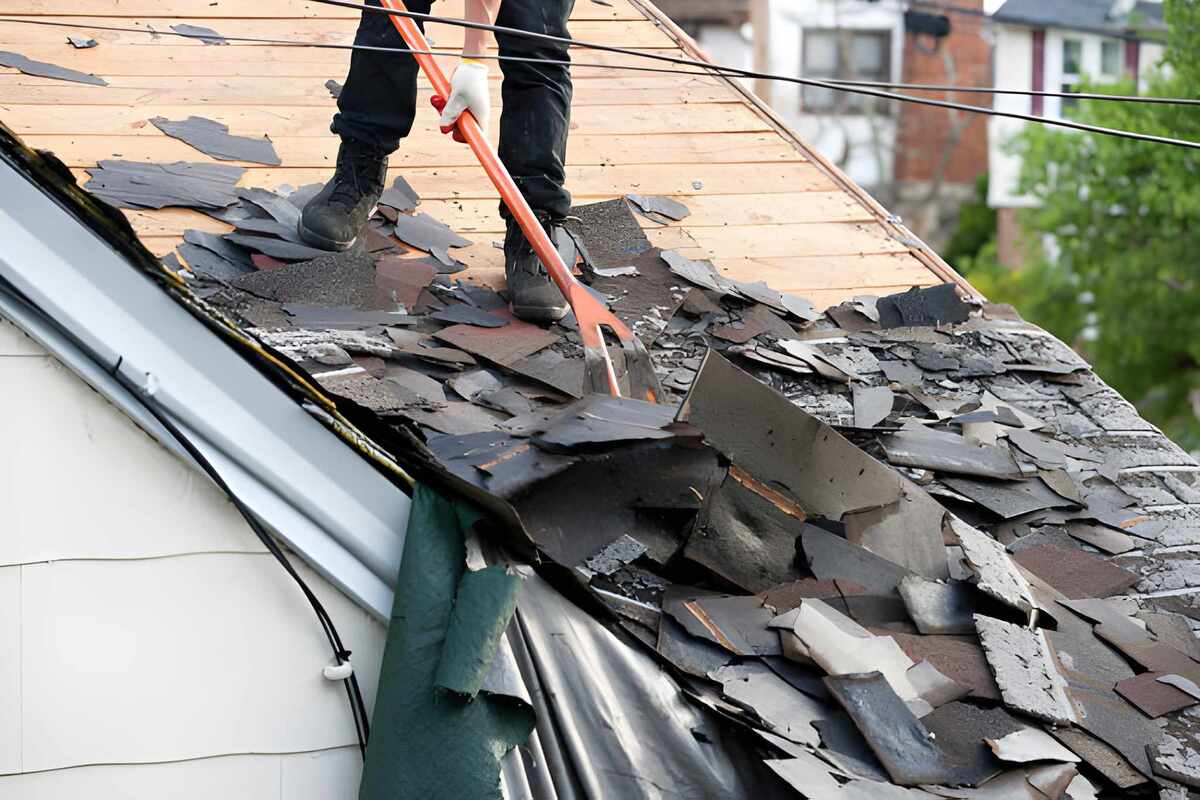
Repair process for hail-damaged roofs
Preventing Hail Damage roof Costs in the Future
While hail damage can be unpredictable, there are steps you can take to minimize future risks and costs:
Invest in Impact-Resistant Roofing: Consider upgrading to impact-resistant materials designed to withstand hail damage.
Regular Inspections: Schedule regular inspections, especially after severe storms, to catch any signs of damage early.
Trim Nearby Trees: Maintaining trees can prevent falling branches from contributing to roof damage during storms.
While these steps may require an upfront investment, they can save you money in potential future repairs and stress. Understanding the hail damage roof cost is crucial for any homeowner. Whether it’s recognizing the signs of damage, knowing how to assess costs, or protecting your home with preventative measures, being proactive can make all the difference. Remember, the earlier you address any damage, the lower your potential costs will likely be. Be sure to get multiple quotes and consider investing in quality materials and services, as this can save you money and stress over time. If you’re facing hail damage or simply want to be prepared, do not hesitate to reach out to a trusted contractor for expert advice.
DIY vs Professional Installation
Some homeowners attempt this project DIY to save on labor. Here is when that makes sense , and when it does not. DIY makes sense if: the scope is small (a single repair or patch), you have construction experience, you own or can rent the safety equipment (harness, ladder, scaffold), and the warranty does not require professional installation. Hire a professional if: the scope involves more than 30% of the roof, the roof pitch exceeds 6:12, the manufacturer requires professional installation for warranty validity, your homeowners insurance will not cover DIY work, or you are not comfortable working at height. Most professional roofers refuse to warranty work they did not install themselves, so DIY also forfeits future workmanship warranties.
Get a Real Estimate for Your Project
Want a 2-minute estimate tailored to your specific situation? Use our free roofing cost calculator , it uses your roof size, material choice, and ZIP code to give you a price range based on real 2026 contractor data. For comparison shopping, the contractor directory lists verified roofers near you with reviews and contact info.
The Price Tag: Factors That Influence Hail Damage Roof Repair Costs
When it comes to the cost of repairing a hail-damaged roof, no two situations are exactly alike. Several variables come into play, and understanding these factors can help you better estimate the expenses involved.
Roof Size and Complexity
The size and complexity of your roof are significant contributors to the overall repair cost. Larger roofs naturally require more materials and labor, driving up the price tag. Additionally, roofs with intricate designs, multiple levels, or steep pitches may take more time and effort to repair, further increasing the cost.
Roofing Material
The type of roofing material on your home also plays a role in determining the repair costs. Asphalt shingles, for example, are generally more affordable to replace than metal or tile roofs. The availability and cost of the specific roofing materials needed for your home can also impact the final price.
Extent of Damage
Perhaps the most important factor in calculating hail damage roof costs is the severity of the damage itself. Minor dents and dings may only require a few replacement shingles, while more widespread damage could necessitate partial or full roof replacement. The more extensive the damage, the higher the repair costs will be.
Labor and Contractor Fees
The expertise and experience of the roofing contractor you hire can also influence the final price. Reputable and licensed contractors may charge more, but their workmanship and warranty coverage can provide greater peace of mind. Additionally, the cost of labor, which can vary by region, can significantly impact the overall repair bill.
Permits and Inspections
Depending on your local building codes and regulations, you may need to obtain permits and undergo inspections before and after the repair work. These administrative requirements can add to the overall cost of the project.
Insurance Coverage
If you have homeowner’s insurance, your policy may cover a portion or even the entirety of the hail damage roof repair costs. Understanding the details of your coverage and working closely with your insurance provider can help you minimize your out-of-pocket expenses. By understanding these key factors, you’ll be better equipped to estimate the potential cost of repairing a hail-damaged roof and make informed decisions about your home’s restoration.
Budgeting for Hail Damage Roof Repair: Average Costs and Considerations
With the various factors in mind, let’s take a closer look at the average costs associated with hail damage roof repair. Keep in mind that these figures are just estimates, as the actual price can vary significantly based on your unique circumstances.
Minor Hail Damage Repair
For roofs with minor hail damage, such as a few dented or cracked shingles, the average cost of repair typically ranges from $500 to $2,000. This usually involves replacing the damaged shingles and any underlying roofing materials that may have been compromised.
Moderate Hail Damage Repair
If the hail damage is more widespread, with several sections of the roof requiring attention, the repair costs can range from $3,000 to $10,000. This may include partial roof replacement, repairing flashing and vents, and addressing any structural issues caused by the hail impact.
Major Hail Damage Roof Replacement
In cases of severe hail damage, where the roof has sustained widespread and significant damage, a full roof replacement may be necessary. The average cost for a complete hail damage roof replacement can range from $10,000 to $30,000 or more, depending on the size and complexity of the roof.
Additional Considerations
When budgeting for hail damage roof repair, it’s essential to factor in the following: – Deductibles and Insurance Coverage: Your homeowner’s insurance policy may cover a portion of the repair costs, but you’ll likely need to pay a deductible, which can range from $500 to $2,000 or more. – Roof Inspection and Assessment: Before beginning any repair work, you may need to have a professional roofing inspector assess the extent of the damage, which can add $200 to $500 to the overall cost. – Temporary Roof Protection: In some cases, you may need to install temporary roof coverings to protect your home until the repairs can be completed, which can cost an additional $500 to $2,000. Remember, these are just general estimates, and the actual cost of your hail damage roof repair may vary significantly based on your unique circumstances. It’s always best to obtain multiple quotes from reputable roofing contractors to ensure you get the best value for your investment.
Maximizing Your Investment: Tips for Effective Hail Damage Roof Repair
Now that you have a better understanding of the costs involved in repairing a hail-damaged roof, let’s explore some strategies to ensure you get the most value out of your investment.
Work with Experienced Roofing Contractors
Hiring a reputable and experienced roofing contractor is crucial for the success of your hail damage roof repair. Look for contractors with a proven track record of quality workmanship, customer satisfaction, and proper licensing and insurance. A skilled contractor can help you navigate the repair process, identify hidden issues, and ensure the longevity of your roof.
Understand Your Insurance Coverage
Carefully review your homeowner’s insurance policy to understand the extent of your coverage for hail damage. Work closely with your insurance provider to file a claim and ensure you receive the maximum benefits available to you. This can help offset a significant portion of the repair costs.
Consider Upgrades and Enhancements
While repairing the hail damage should be your primary focus, you may also want to consider upgrading or enhancing your roof during the repair process. This could include upgrading to more durable roofing materials, improving ventilation, or adding features like solar panels or roof-mounted snow guards. Although these upgrades will increase the initial cost, they can provide long-term benefits and improve the overall value of your home.
Prioritize Preventive Maintenance
Regular roof maintenance and inspections can help extend the lifespan of your roof and potentially reduce the severity of future hail damage. Set aside a budget for annual roof checks and address any minor issues before they escalate. This proactive approach can save you money in the long run by avoiding costly full-scale repairs.
Explore Financing Options
If the cost of hail damage roof repair is beyond your immediate financial means, consider exploring financing options such as home equity loans, personal loans, or even payment plans offered by your roofing contractor. Carefully weigh the pros and cons of each option to ensure you make the best decision for your financial situation. By following these tips and strategies, you can maximize the value of your hail damage roof repair investment, ensuring your home is protected and your investment pays off in the long run.
A hail damage roof repair costs $1,500 to $8,000 out-of-pocket in 2026 , most of the total $8,000-$20,000 repair cost is covered by homeowners insurance, leaving you to pay the deductible. The actual repair cost depends on hail size, number of damaged shingles, and whether insurance pays at ACV (Actual Cash Value) or RCV (Replacement Cost Value). Understanding the difference between these two payout types can swing your out-of-pocket cost by thousands of dollars.
Average Cost Breakdown
The table below summarizes 2026 pricing across the most common configurations. Costs include both materials and professional labor.
Option
2026 Price Range
Notes
Standard deductible (1% of home value)
$1,500 – $4,000
Typical out-of-pocket
Wind/hail rider deductible (2%)
$3,000 – $8,000
Common in CO, TX, OK
Small spot repair (no insurance claim)
$350 – $900
Under deductible
Partial roof replacement (1 slope)
$2,500 – $6,500
Visible damage on 1 side
Full roof replacement
$8,000 – $20,000+
Insurance usually covers
Impact-resistant Class 4 upgrade
+$1,500 – $3,500
Often qualifies for 5-30% premium discount
Advertisement
What Drives the Cost
The total price comes down to five main factors. Understanding each helps you spot when a contractor’s quote is reasonable , and when it is padded.
Insurance deductible type
Standard deductible is a flat $500-$2,500. Wind/hail rider deductibles are a PERCENTAGE of home value (1-5%), which can mean $4,000-$15,000 out-of-pocket on a $400k home. Check your policy before the storm.
ACV vs RCV payout
ACV pays depreciated value (a 12-year-old roof at 50% depreciation = $5k payout on a $10k loss). RCV pays full replacement cost. Most policies pay ACV first, then the depreciation amount AFTER you complete the repair and submit invoices.
Number of slopes damaged
If only one slope is damaged, insurance pays for that slope only. Most insurers no longer “match” undamaged shingles to new ones , meaning your roof may have visible color differences after repair.
Hail size
Pea-sized hail (¼”) rarely damages a good roof. Quarter-sized (1″) starts to bruise shingles. Golf-ball (1¾”) and larger creates obvious cracks and torn mat. Document hail size with comparison photos.
Class 4 upgrade
Many insurers offer 5-30% wind/hail premium discounts for impact-resistant Class 4 shingles. Adds $1,500-$3,500 to a replacement but typically pays back in 4-7 years through premium savings.
How to Save Money on This Project
Most homeowners can shave 10-25% off the quoted price by following a few simple practices:
Get at least 3 written quotes from licensed local contractors. Pricing varies dramatically , the lowest and highest quotes on the same job often differ by 40%.
Schedule in the off-season. Late winter (February-March) and late fall (October-November) prices are 10-20% lower than peak summer.
Bundle with other roof work. If you need other repairs (gutters, flashing, ventilation), bundle them , contractors discount bundled jobs because the setup labor is fixed.
Check for insurance coverage. Storm-related damage is usually covered. Filing a claim within the policy window is critical.
Verify the contractor’s license and insurance before signing. Use our contractor directory to find verified local pros.
Some common signs of hail damage on a roof include: – Dented, cracked, or missing shingles – Granule loss on asphalt shingles – Damage to flashing, vents, or other roof components – Visible impact marks on the roof surface If you suspect hail damage, it’s best to have a professional roofing inspector assess the extent of the issue.
Does homeowner’s insurance cover hail damage?
Most standard homeowner’s insurance policies do provide coverage for hail damage to your roof. However, the specifics of the coverage can vary, so it’s important to review your policy and work closely with your insurance provider to understand the extent of your coverage and the claims process.
How long does a hail damage roof repair take?
The timeline for a hail damage roof repair can vary depending on the severity of the damage and the scope of the project. Minor repairs may be completed in a day or two, while more extensive work, such as a partial or full roof replacement, can take several days to a week or more.
Can I do the hail damage roof repair myself?
While some minor hail damage, such as replacing a few shingles, may be within the capabilities of a skilled DIYer, it’s generally recommended to hire a professional roofing contractor for most hail damage repair projects. Roofing work can be dangerous and complex, and a professional contractor will have the necessary expertise, tools, and warranties to ensure the job is done correctly and safely.
What is the typical timeline for roof repairs after hail damage?
Tie frames can vary based on severity but expect about 1-3 days for minor repairs. Full replacements may take longer, depending on contractor availability and weather conditions.
What should I do if my roof is severely damaged?
If your roof has severe damage, contact a contractor immediately for an evaluation. In some cases, temporary measures may be needed to protect your home from weather exposure.
Are there preventative measures I can take against future hail damage?
Hail damage can be a daunting and costly challenge for homeowners, but with the right information and approach, you can navigate the repair process with confidence. By understanding the factors that influence the cost of hail damage roof repair, budgeting effectively, and working with experienced professionals, you can protect your home and maximize the value of your investment. Remember, regular roof maintenance and proactive planning can help you be better prepared for the unexpected. Take the time to review your insurance coverage, explore financing options, and consider upgrades that can enhance the long-term durability and value of your roof. With this comprehensive guide, you’re now equipped with the knowledge and tools to make informed decisions about the cost of repairing a hail-damaged roof. Stay vigilant, work with trusted experts, and keep your home safe from the elements. Your roof is a critical investment, and with the right approach, you can weather the storm and maintain the integrity of your most valuable asset.
Final Thoughts
Knowing roof replacement cost by state helps plan your project better. By understanding labor, materials, and regional differences, you can budget wisely.
Plan Your Roofing Project
Use our free calculator to estimate costs, then connect with trusted roofing experts for a fast, honest quote.
Roofing content specialist with 5+ years researching U.S. residential and commercial roofing. Has documented 200+ projects covering installation costs, material selection, contractor vetting, and DIY guides for homeowners across all climate zones.
Roof Replacement Cost by State in 2026: Full 50-State Breakdown
Roof Replacement Cost by State in 2026: Full 50-State Breakdown
Roof replacement cost by state is a key consideration for homeowners planning renovations in 2026. Whether addressing storm damage or upgrading an old roof, knowing these costs helps budget effectively. This article explains average roof replacement cost by state to help you plan your project. Roofing costs differ across the U.S. due to local labor rates, material availability, and weather conditions. Understanding these variations prevents overpaying. This guide shares practical insights to help you make smart decisions. We’ll break down roof replacement costs for all 50 states. You’ll learn what affects prices, typical costs per square foot, and ways to save money. By the end, you’ll know what to expect in your area.
What Affects Roof Replacement Cost by State
Several factors change roof replacement cost by state:
Material Costs: Shingles, tiles, and metal roofing vary in price.
Labor Rates: Contractor hourly wages differ by location.
Climate: Harsh weather areas need more durable materials.
Local Rules: Building codes can impact materials and labor.
Knowing these factors helps avoid surprises. For example, asphalt shingles cost less in Texas than California due to material and labor differences.
Labor Costs by State
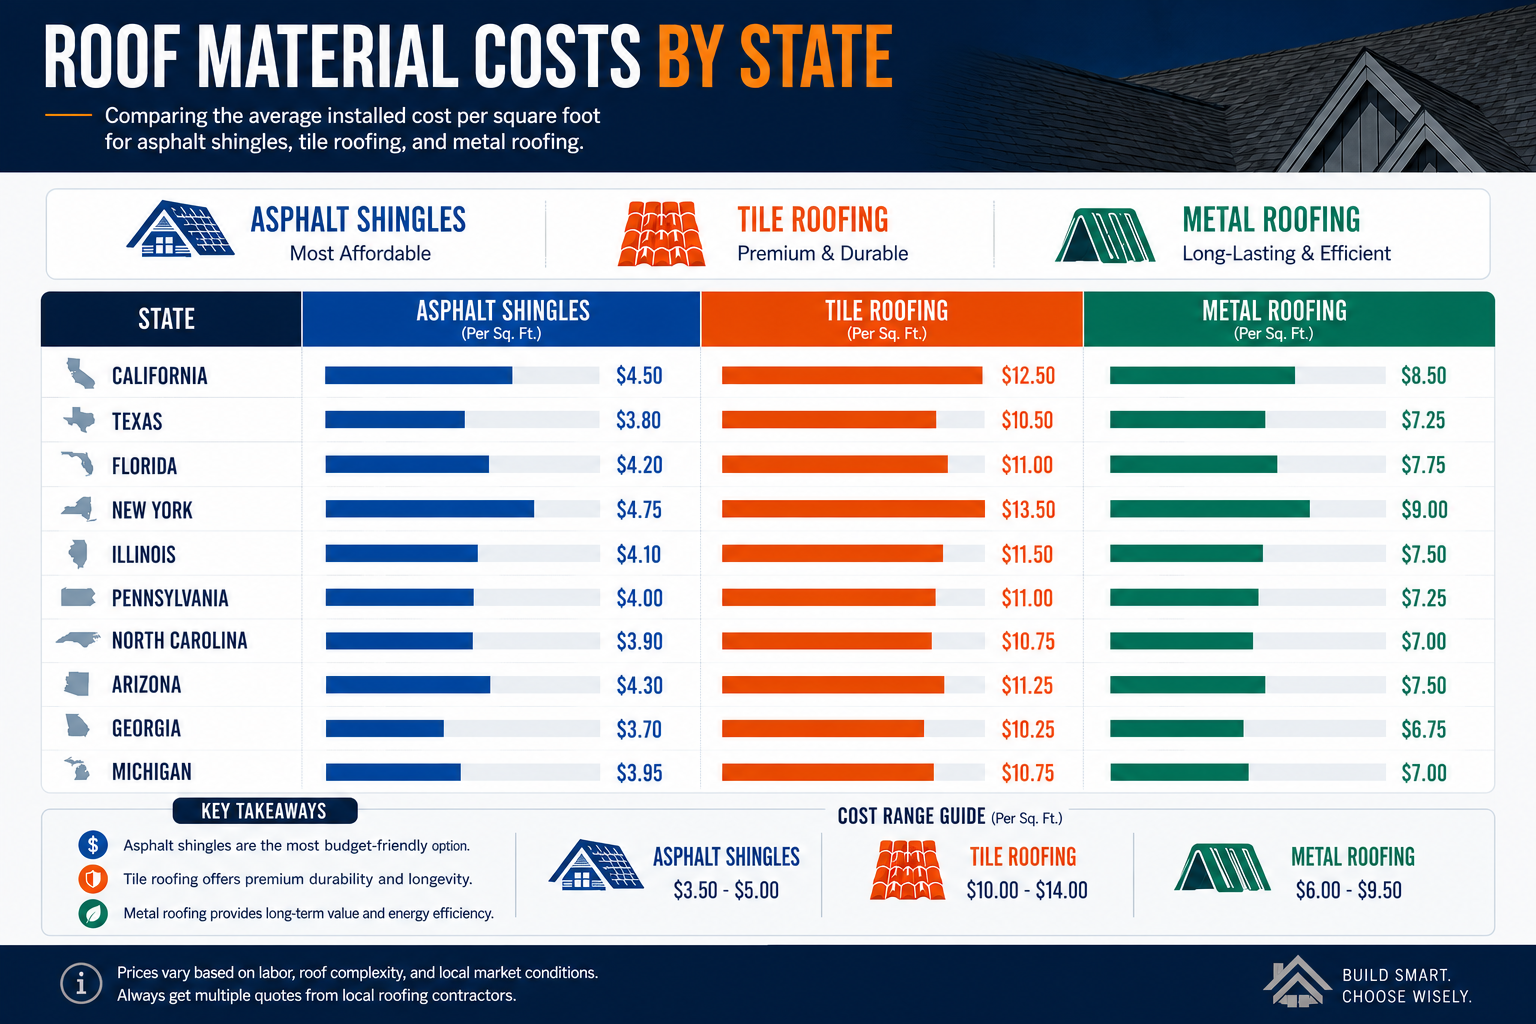
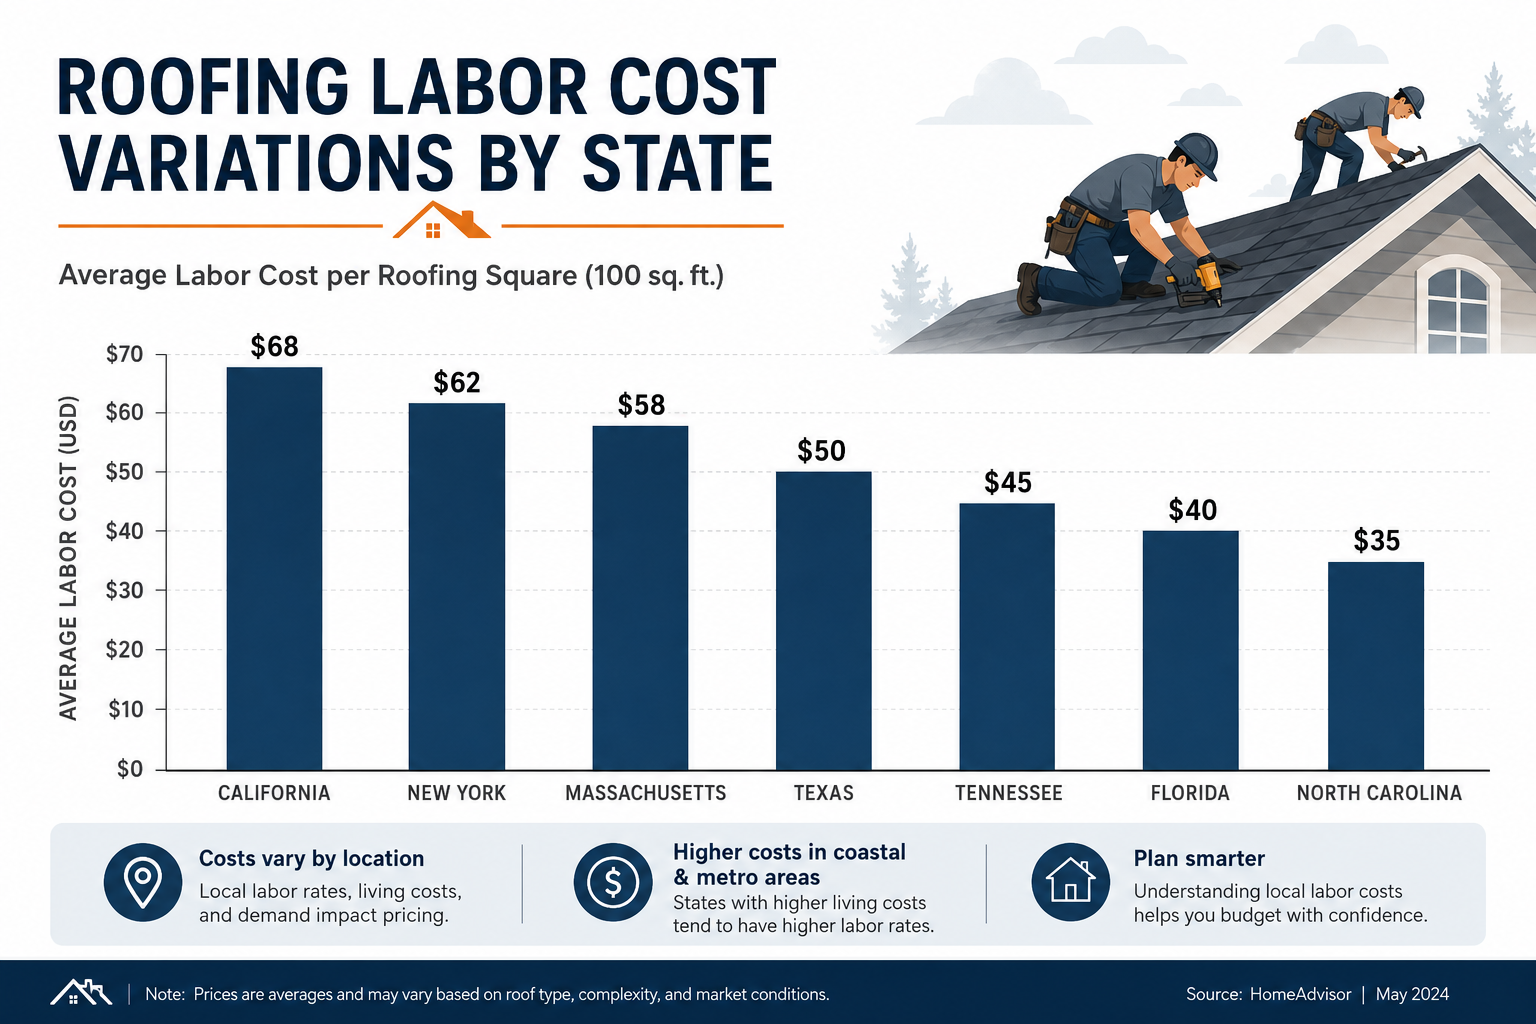
Labor makes up a big part of roof replacement cost by state. In expensive cities like New York or San Francisco, labor rates can be twice as high as rural areas. Always compare multiple quotes.Variation in roof material costs by state
Average Roof Replacement Cost by State
Here’s what roof replacement cost by state looks like for a 2,000-square-foot roof with asphalt shingles:
Materials also affect roof replacement cost by state. Metal roofs cost more in Alaska due to shipping, while clay tiles are cheaper in Arizona where they’re made locally.Roofing labor cost differences by state
How to Save on Roof Replacement
Ways to lower your roof replacement cost by state:
Get Multiple Quotes: Compare prices from several contractors.
Pick Affordable Materials: Asphalt shingles cost less than metal or tile.
Choose the Right Time: Off-season work often costs less.
When you schedule affects roof replacement cost by state. Many contractors offer discounts in late fall or winter.
Roof replacement cost varies dramatically by state in 2026 , from a low of $5,800 in Alabama and Mississippi to a high of $14,200 in California and Hawaii. The national average sits at $9,800 for a typical 2,000 sq ft home. Three things drive the state-by-state spread: local labor rates, code requirements (especially in hurricane and earthquake zones), and material transport costs. Here is the full breakdown.
Average Cost Breakdown
The table below summarizes 2026 pricing across the most common configurations. Costs include both materials and professional labor.
Option
2026 Price Range
Notes
Alabama / Mississippi / Arkansas
$5,800 – $8,200
Low labor, mild climate
Texas / Florida (non-coastal)
$7,500 – $10,500
Wind codes add 10-15%
Florida (HVHZ zones)
$11,000 – $15,500
Hurricane-rated materials required
New York / New Jersey
$10,500 – $14,500
High labor + permit costs
California (most areas)
$11,500 – $14,200
Title 24 + seismic + labor
Colorado (Front Range)
$9,500 – $13,000
Impact-resistant shingles required
Pacific Northwest (WA/OR)
$9,000 – $12,500
Moss-resistant materials common
Hawaii
$13,000 – $18,000
Material shipping premium
Advertisement
What Drives the Cost
The total price comes down to five main factors. Understanding each helps you spot when a contractor’s quote is reasonable , and when it is padded.
Labor rates
A roofer earns $18/hour in Mississippi but $42/hour in San Francisco. Labor is 50-60% of any roofing job, so this single factor causes most of the state variation.
Code-mandated materials
Hurricane zones (FL, coastal TX, NC, SC, LA) require wind-rated shingles and reinforced fastening , adds $1,500-$4,000. Hail-prone states (CO, TX, OK, KS) often require impact-resistant Class 4 shingles , adds $800-$2,000.
Permit fees
CA and NY permits run $400-$800 vs $75-$200 in southern states. Some HOAs in CA also charge architectural review fees of $150-$500.
Disposal regulations
CA, MA, and NY restrict shingle landfill disposal and require recycling , adds $200-$600 per job.
Insurance requirements
States with high mold liability (FL, LA) require contractors to carry more coverage, which raises overhead 5-10%.
How to Save Money on This Project
Most homeowners can shave 10-25% off the quoted price by following a few simple practices:
Get at least 3 written quotes from licensed local contractors. Pricing varies dramatically , the lowest and highest quotes on the same job often differ by 40%.
Schedule in the off-season. Late winter (February-March) and late fall (October-November) prices are 10-20% lower than peak summer.
Bundle with other roof work. If you need other repairs (gutters, flashing, ventilation), bundle them , contractors discount bundled jobs because the setup labor is fixed.
Check for insurance coverage. Storm-related damage is usually covered. Filing a claim within the policy window is critical.
Verify the contractor’s license and insurance before signing. Use our contractor directory to find verified local pros.
Advertisement
DIY vs Professional Installation
Some homeowners attempt this project DIY to save on labor. Here is when that makes sense , and when it does not. DIY makes sense if: the scope is small (a single repair or patch), you have construction experience, you own or can rent the safety equipment (harness, ladder, scaffold), and the warranty does not require professional installation. Hire a professional if: the scope involves more than 30% of the roof, the roof pitch exceeds 6:12, the manufacturer requires professional installation for warranty validity, your homeowners insurance will not cover DIY work, or you are not comfortable working at height. Most professional roofers refuse to warranty work they did not install themselves, so DIY also forfeits future workmanship warranties.
Get a Real Estimate for Your Project
Want a 2-minute estimate tailored to your specific situation? Use our free roofing cost calculator , it uses your roof size, material choice, and ZIP code to give you a price range based on real 2026 contractor data. For comparison shopping, the contractor directory lists verified roofers near you with reviews and contact info.
Which state has the cheapest roof replacement cost in 2026?
Alabama, Mississippi, and Arkansas have the lowest average roof replacement costs in 2026 , typically $5,800 to $8,200 for a 2,000 sq ft home. Low labor rates, no hurricane code requirements in inland areas, and minimal permit costs keep prices down.
Which state has the most expensive roof replacement?
Hawaii is the most expensive at $13,000-$18,000 due to material shipping costs. California ($11,500-$14,200) and high-velocity hurricane zones in South Florida ($11,000-$15,500) are close behind because of code requirements and labor.
Why does roof replacement cost vary so much by state?
Three factors: (1) Labor , a roofer in California earns 2.3× what one earns in Mississippi. (2) Code-mandated materials , hurricane and seismic zones require premium materials. (3) Permit and disposal fees , coastal blue states have 4-6× higher fees than southern states.
How much does roof replacement cost in California in 2026?
California roof replacement averages $11,500-$14,200 for a 2,000 sq ft home in 2026. Coastal cities (LA, SF, San Diego) trend toward the high end. Title 24 energy compliance, seismic ties, and high labor rates are the main drivers.
How much does roof replacement cost in Florida in 2026?
Florida varies massively by zone. Non-coastal areas: $7,500-$10,500. High-velocity hurricane zones (HVHZ , Miami-Dade, Broward, parts of Monroe): $11,000-$15,500 because of mandatory wind ratings and third-party inspections.
How can I get a state-specific roof replacement estimate?
The most accurate estimate comes from getting 3 written quotes from licensed local roofers. Use our free roofing cost calculator to get a starting estimate, then have a contractor verify with an on-site inspection. Avoid quotes given over the phone , they are usually 15-30% off the final
Final Thoughts
Knowing roof replacement cost by state helps plan your project better. By understanding labor, materials, and regional differences, you can budget wisely.
Plan Your Roofing Project
Use our free calculator to estimate costs, then connect with trusted roofing experts for a fast, honest quote.
Roofing content specialist with 5+ years researching U.S. residential and commercial roofing. Has documented 200+ projects covering installation costs, material selection, contractor vetting, and DIY guides for homeowners across all climate zones.
Landmark Pro Shingles: Pricing, Features & Install Guide
Landmark Pro Shingles: Pricing, Features & Install Guide
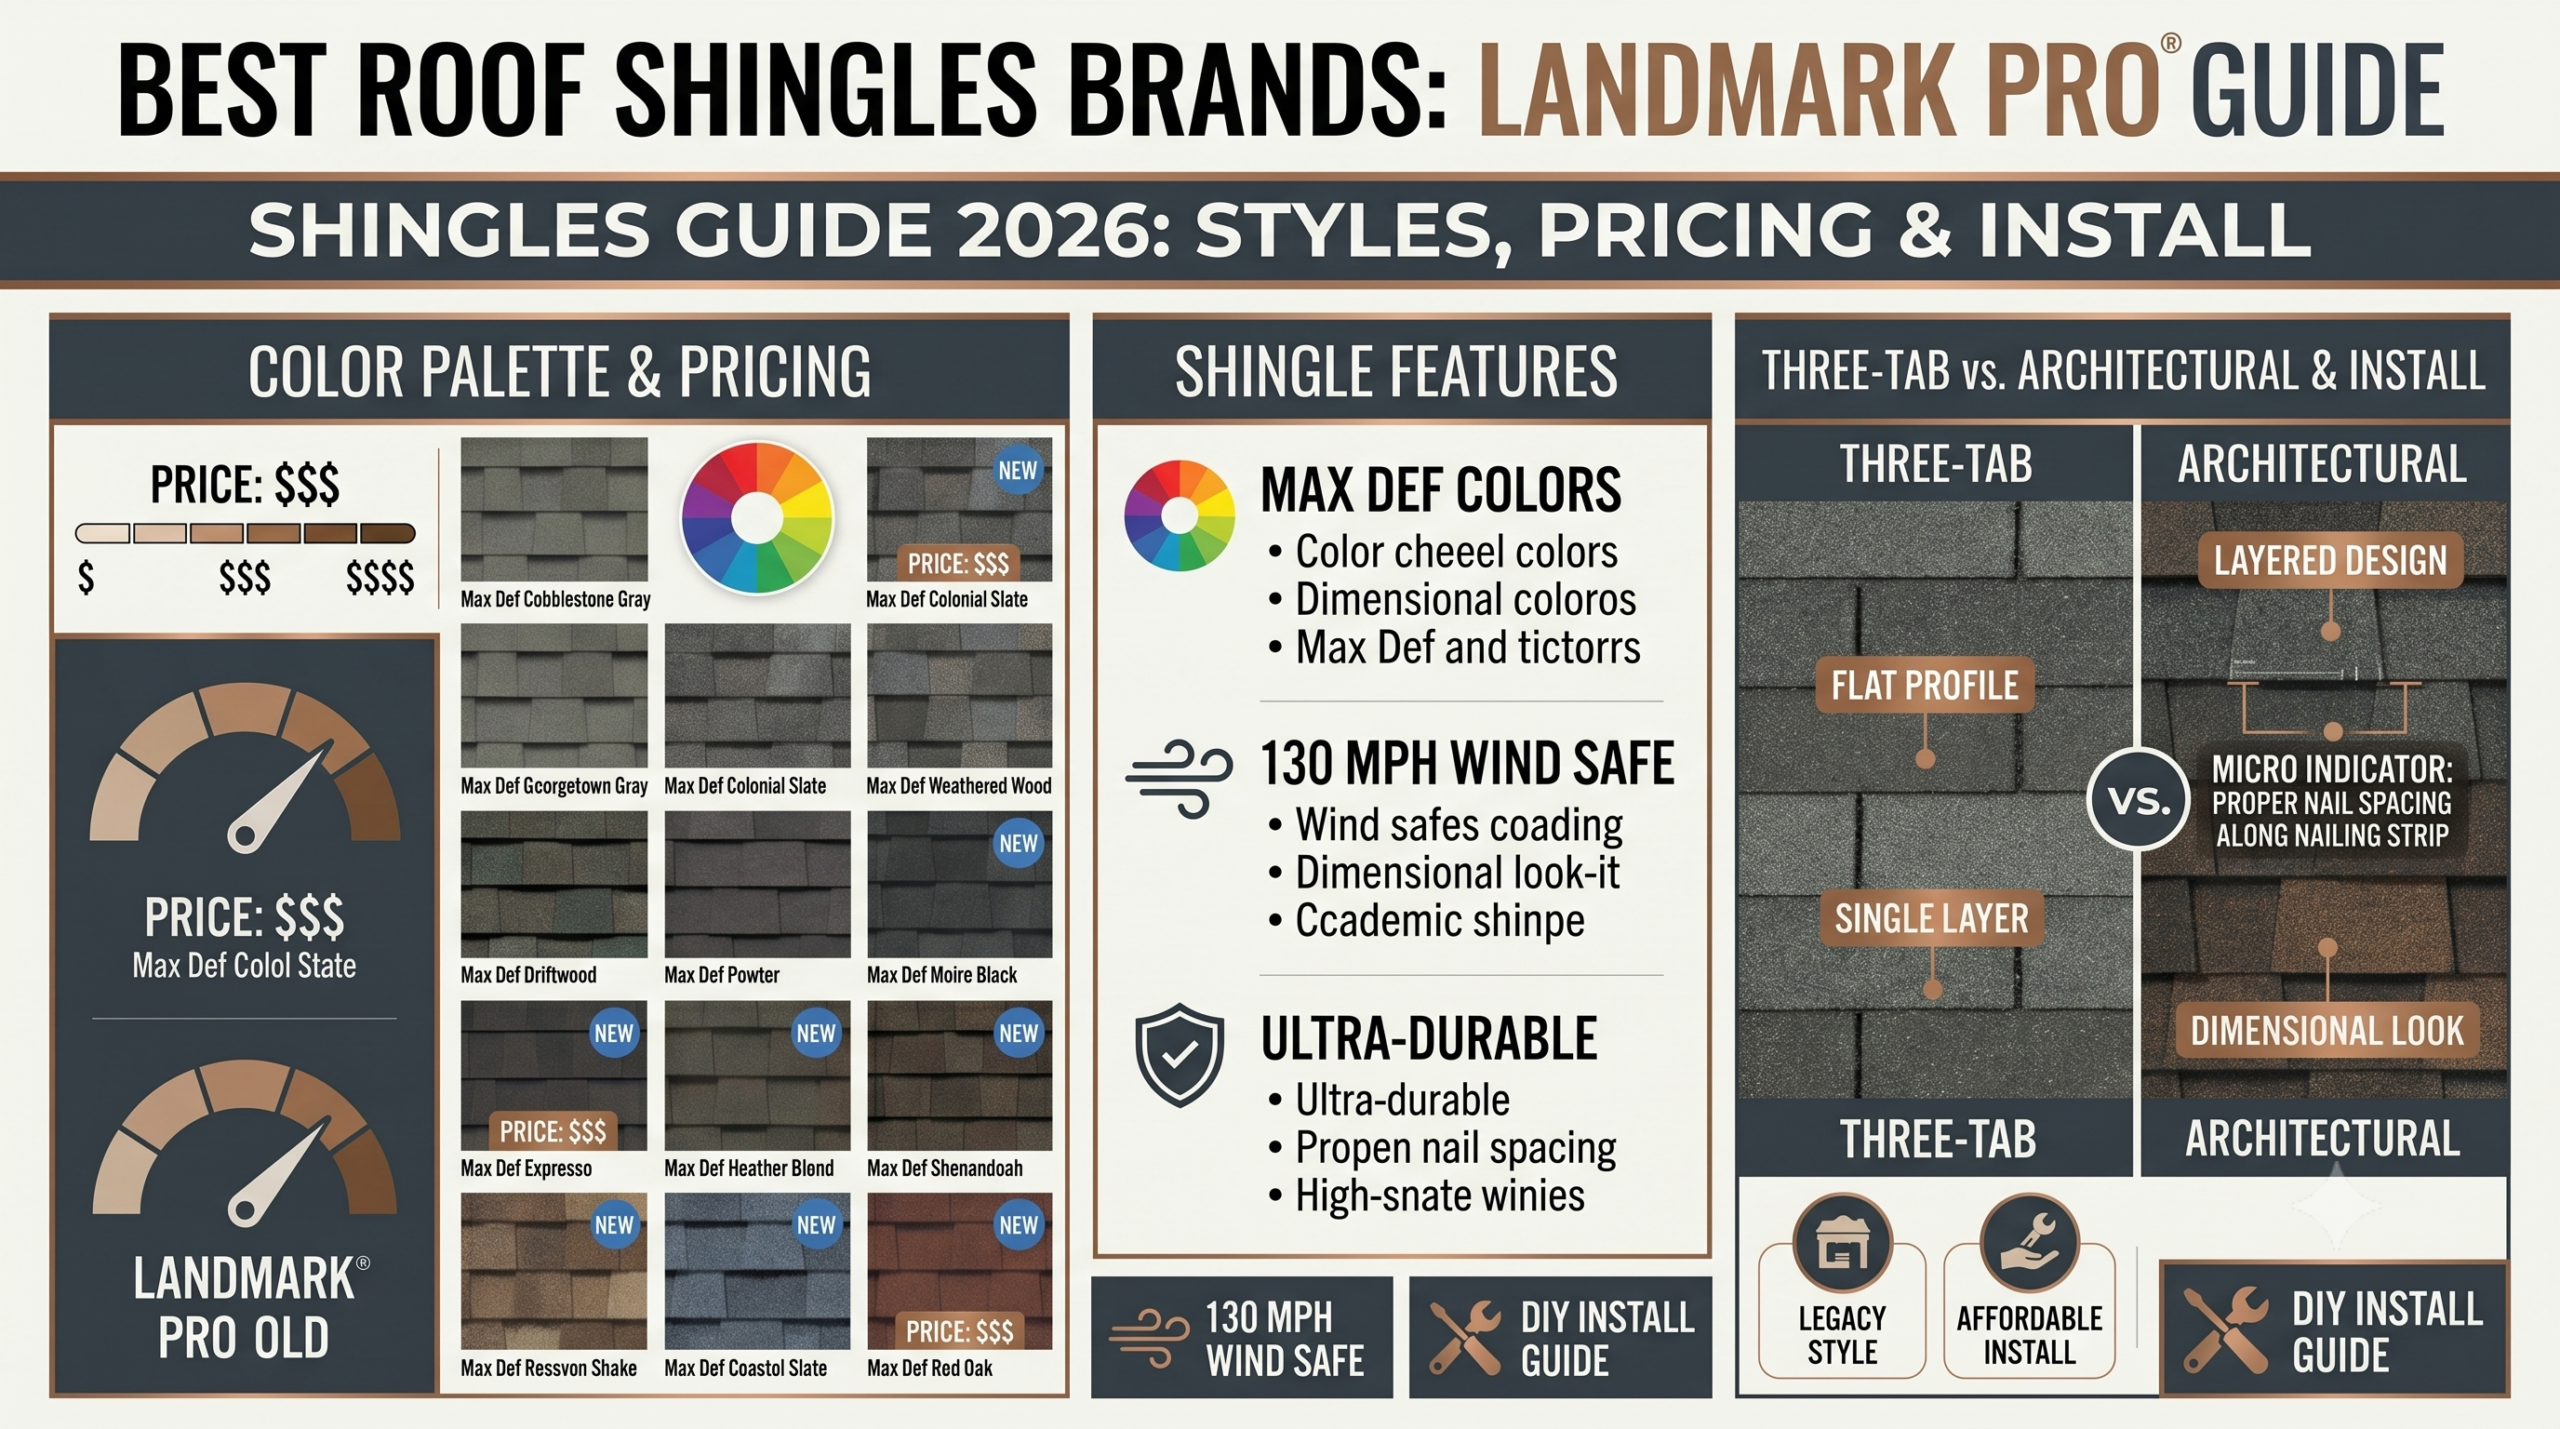
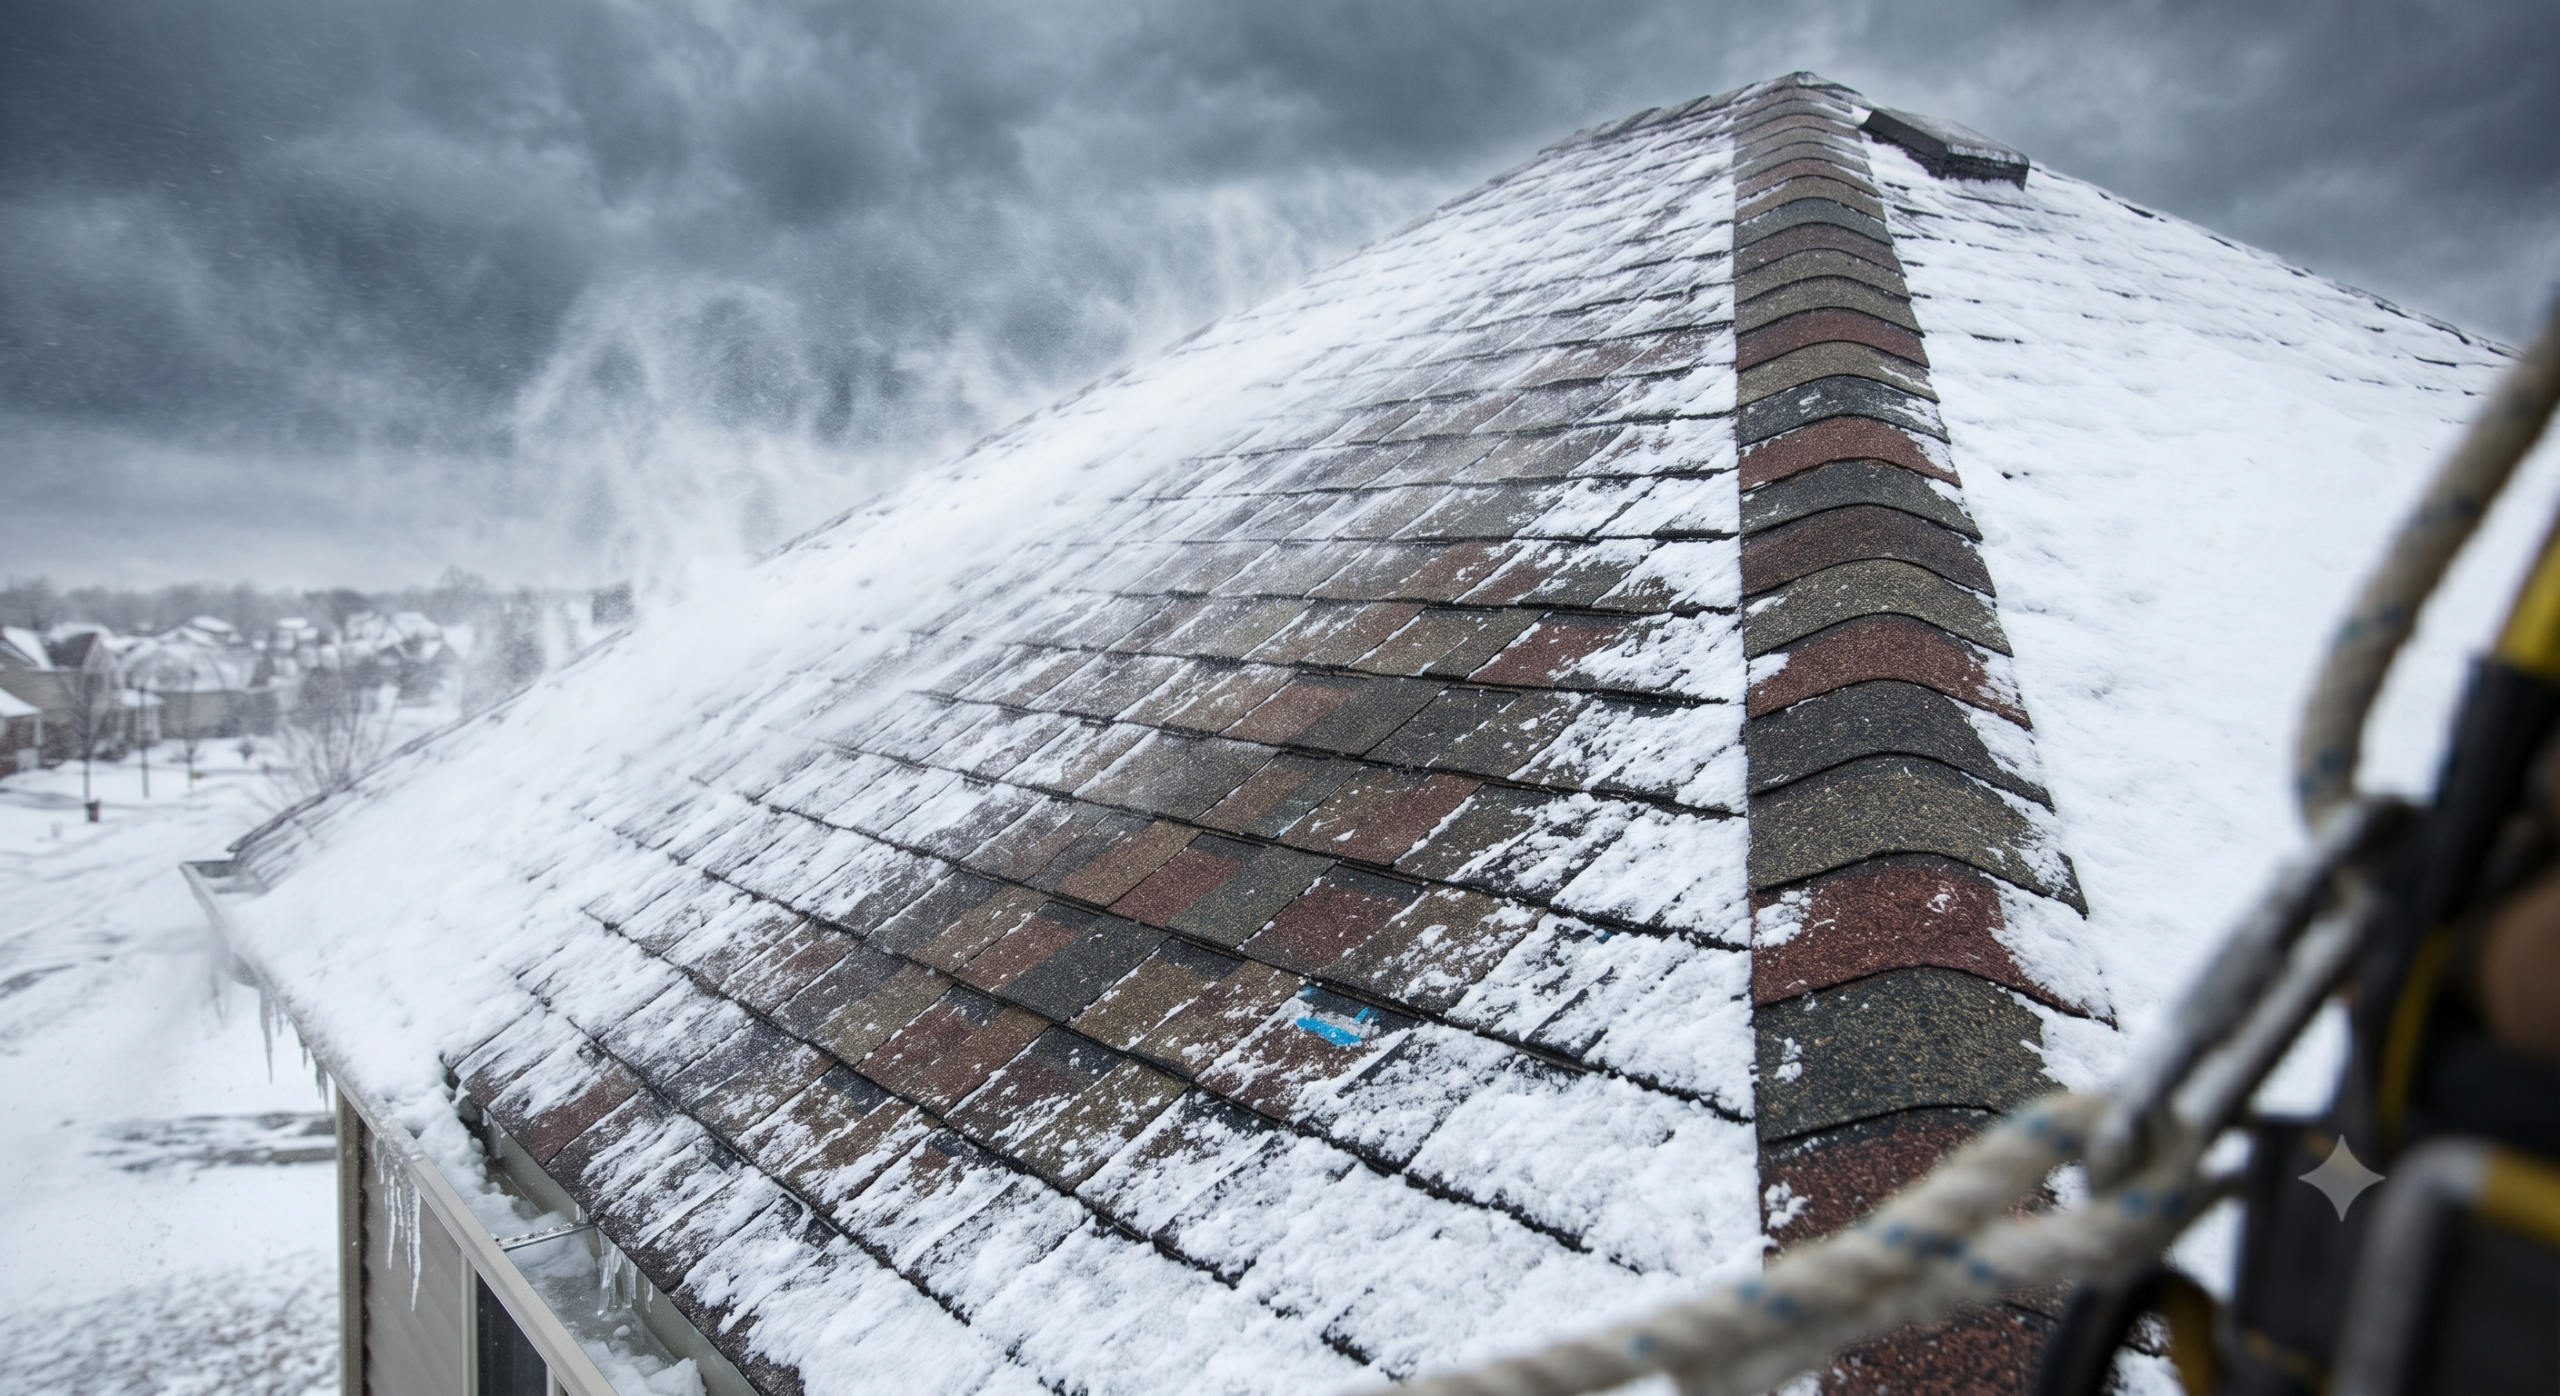
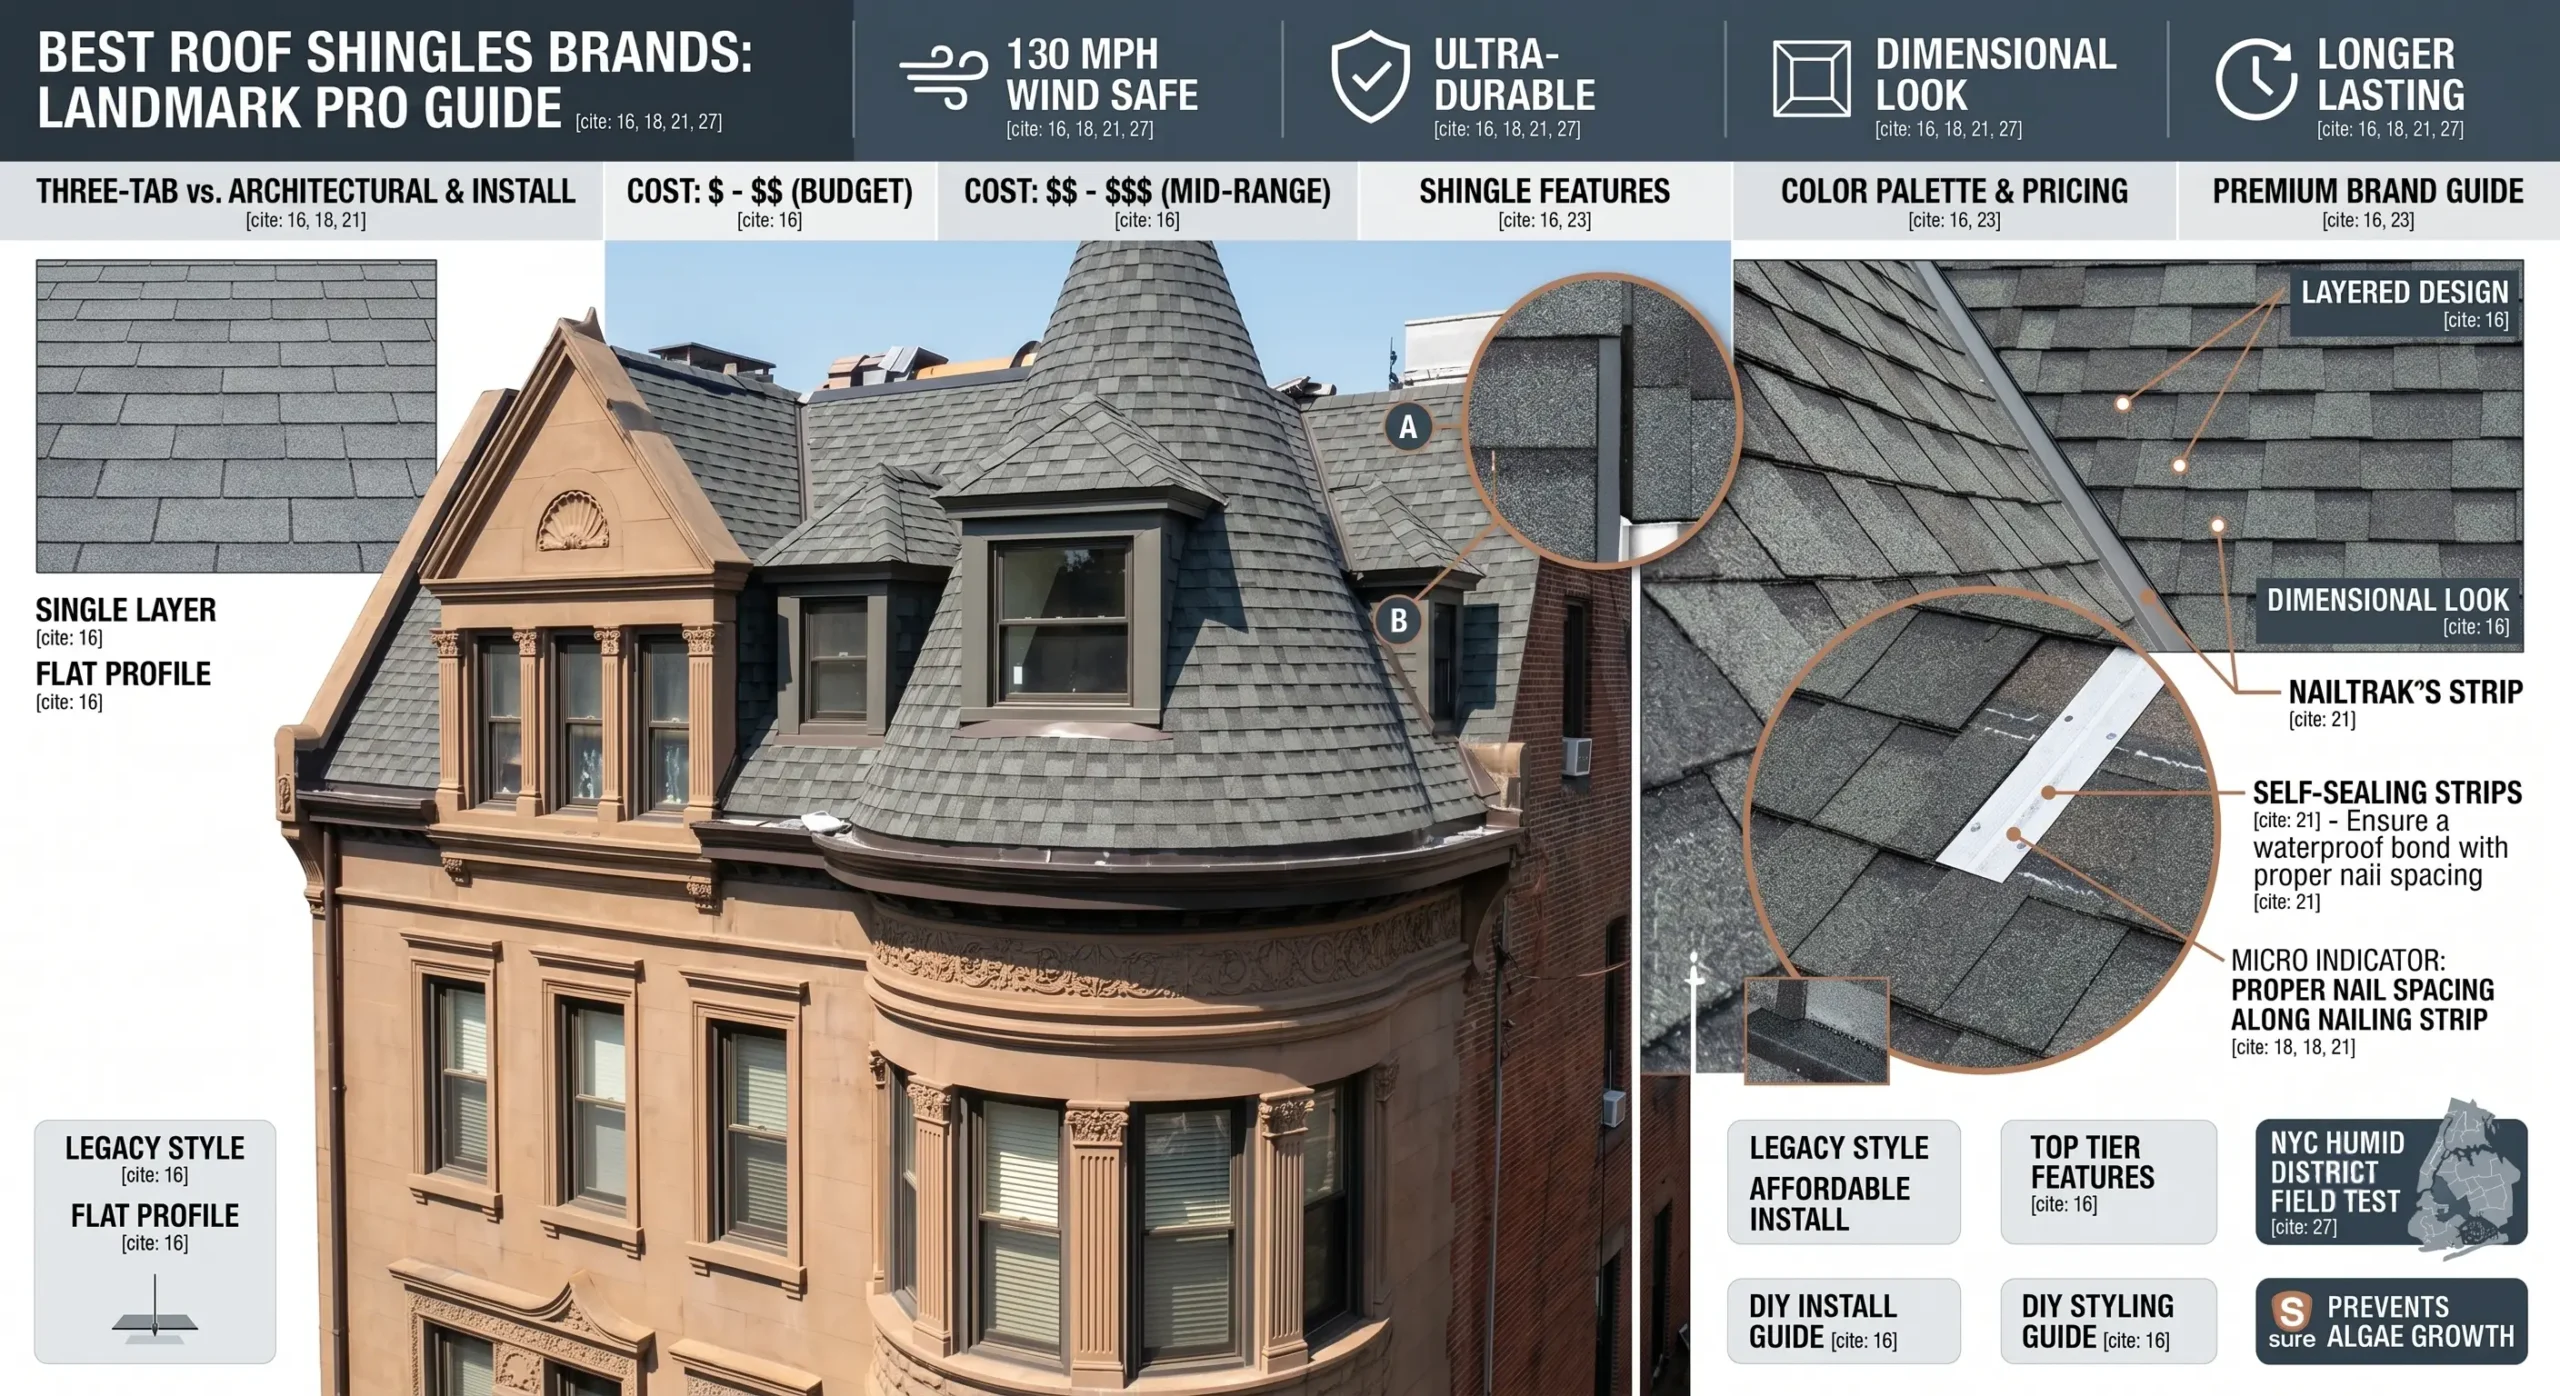
In the vibrant neighborhoods of New York City, where architectural diversity meets relentless weather challenges, Landmark Pro Shingles emerge as a beacon of roofing reliability. Designed for exceptional strength and aesthetic versatility, these shingles are crafted to withstand the region’s demanding climate while elevating the curb appeal of residential and commercial structures alike. Whether you’re renovating a historic brownstone or building a modern loft, understanding the unique advantages of Landmark Pro Shingles is essential for making informed roofing decisions. Their advanced granule technology and tailored formulation make them a top choice for contractors and homeowners prioritizing longevity and performance in New York’s dynamic urban landscape. Let’s delve into what sets these shingles apart and why they’re increasingly favored in one of the world’s most iconic cities. Confidently navigate winter. This on-page guide breaks down how Landmark Pro shingles are engineered to resist high winds and heavy snow loads, as demonstrated by our team on this actual job site.
Key Features of Landmark Pro Shingles: A Guide to Superior Durability
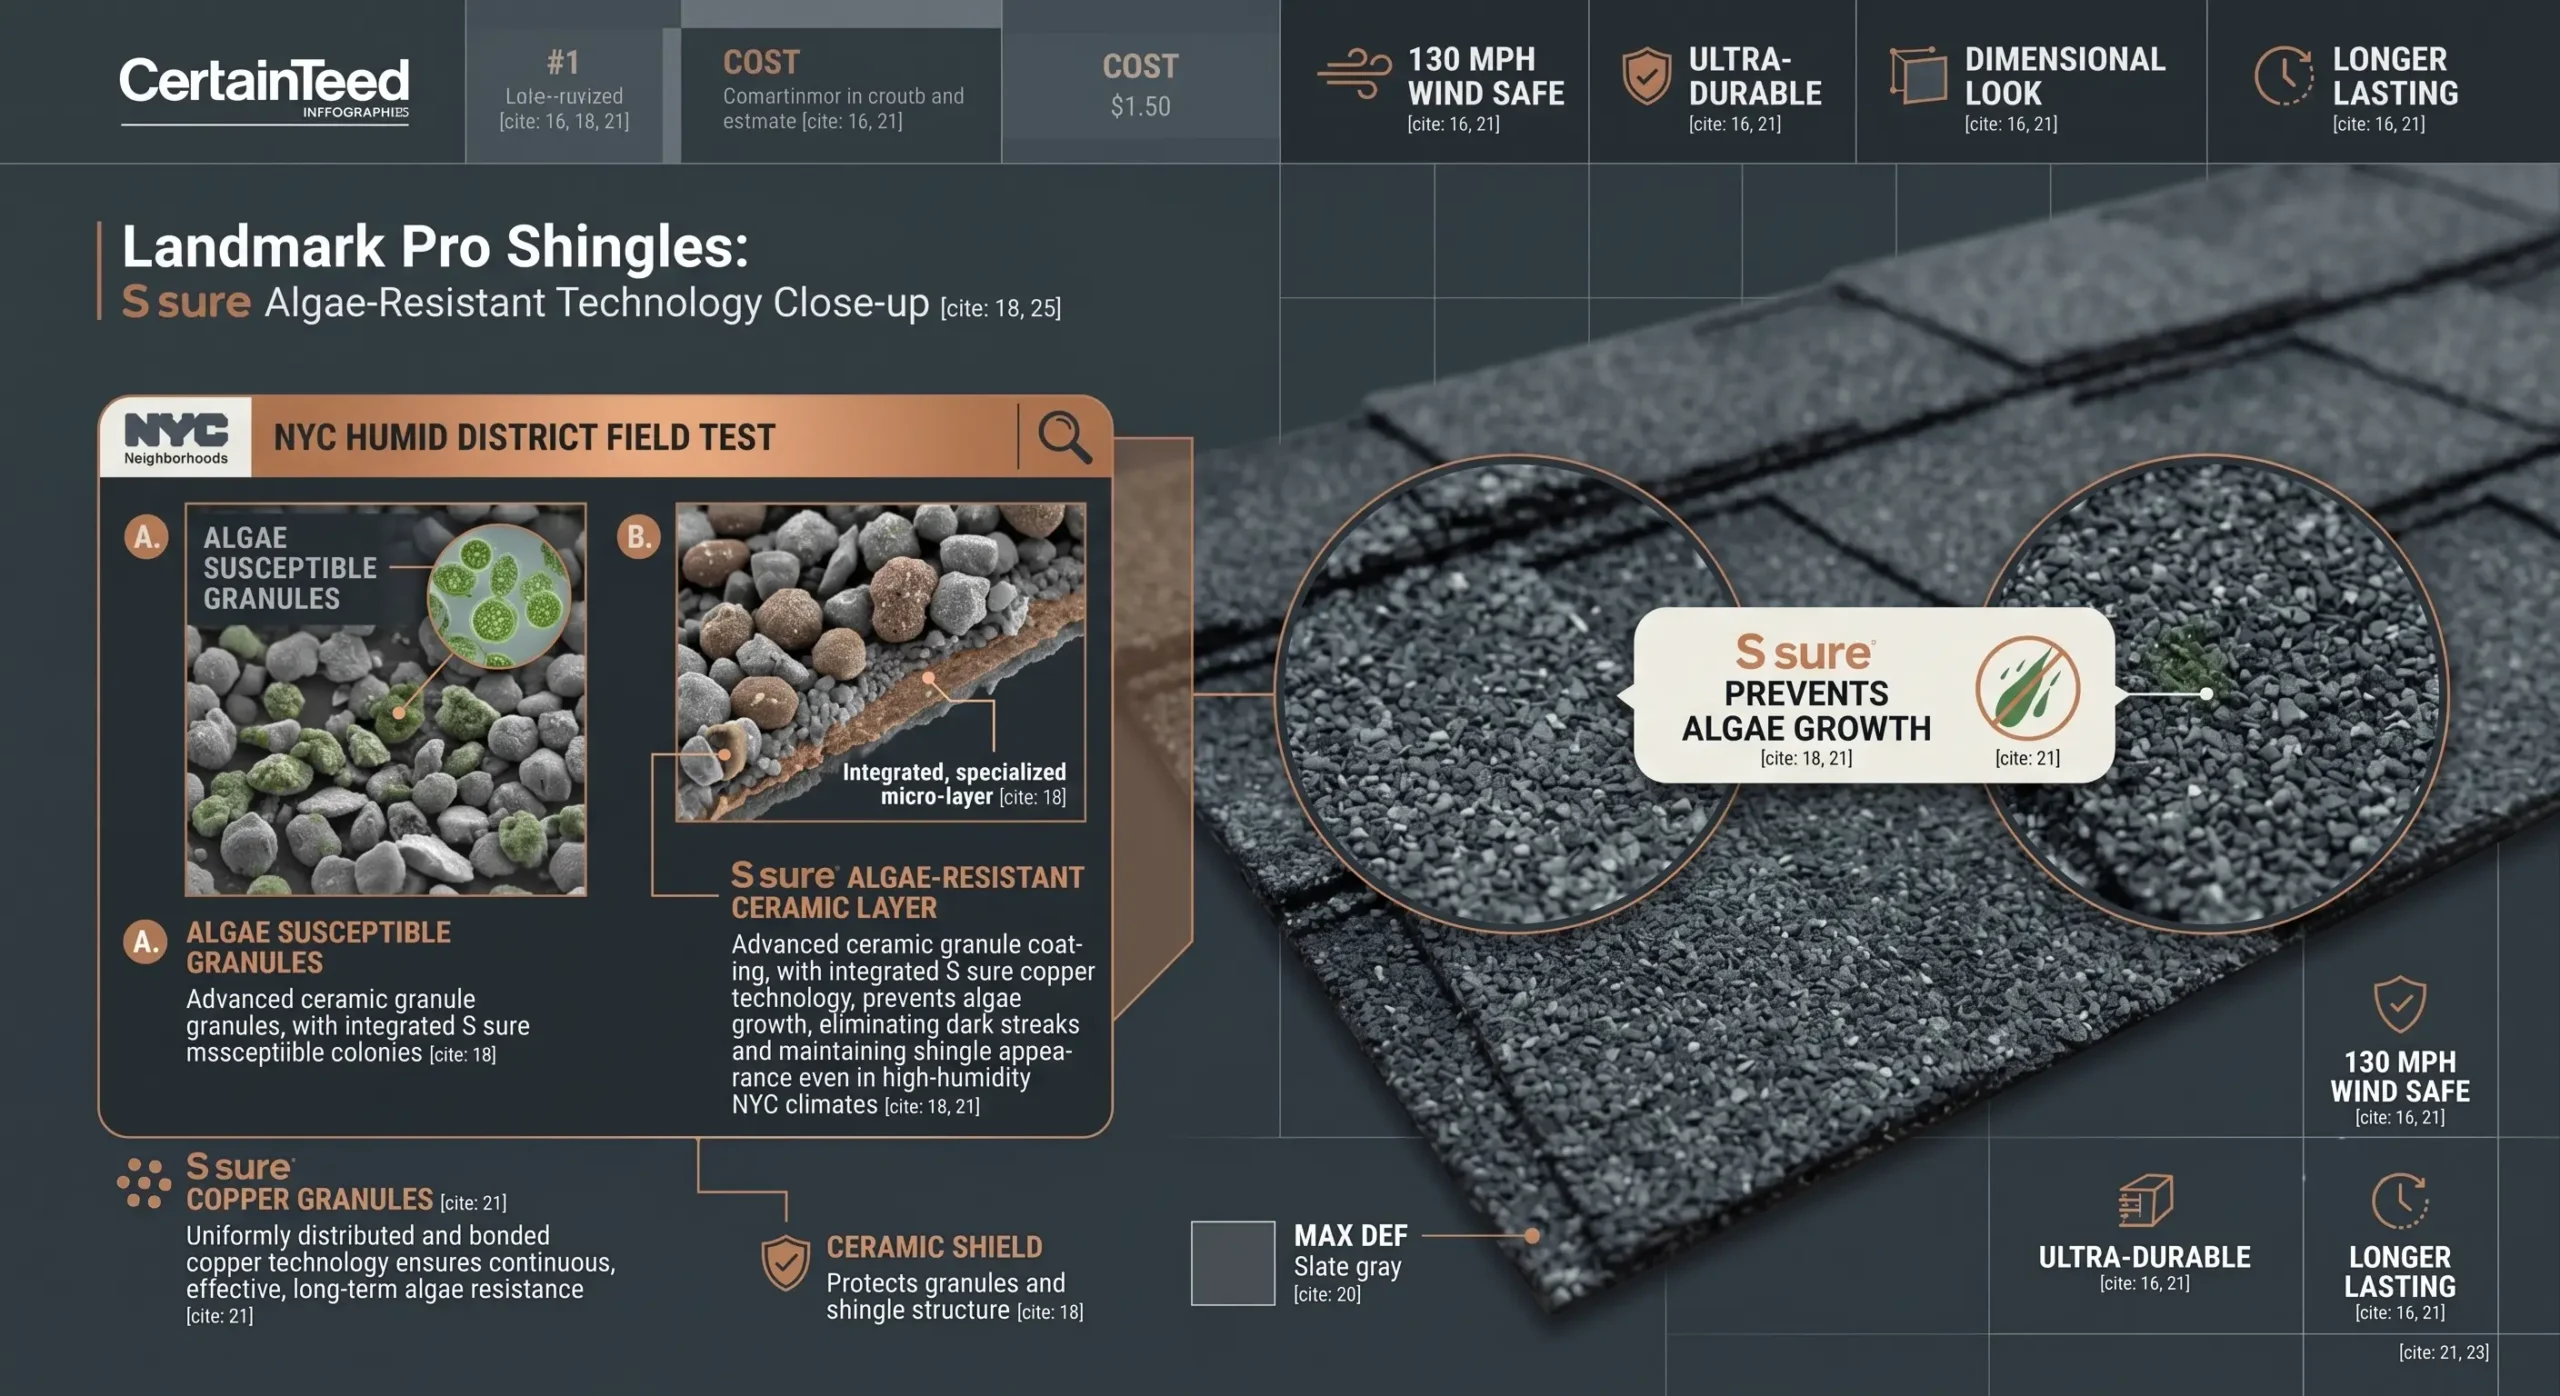
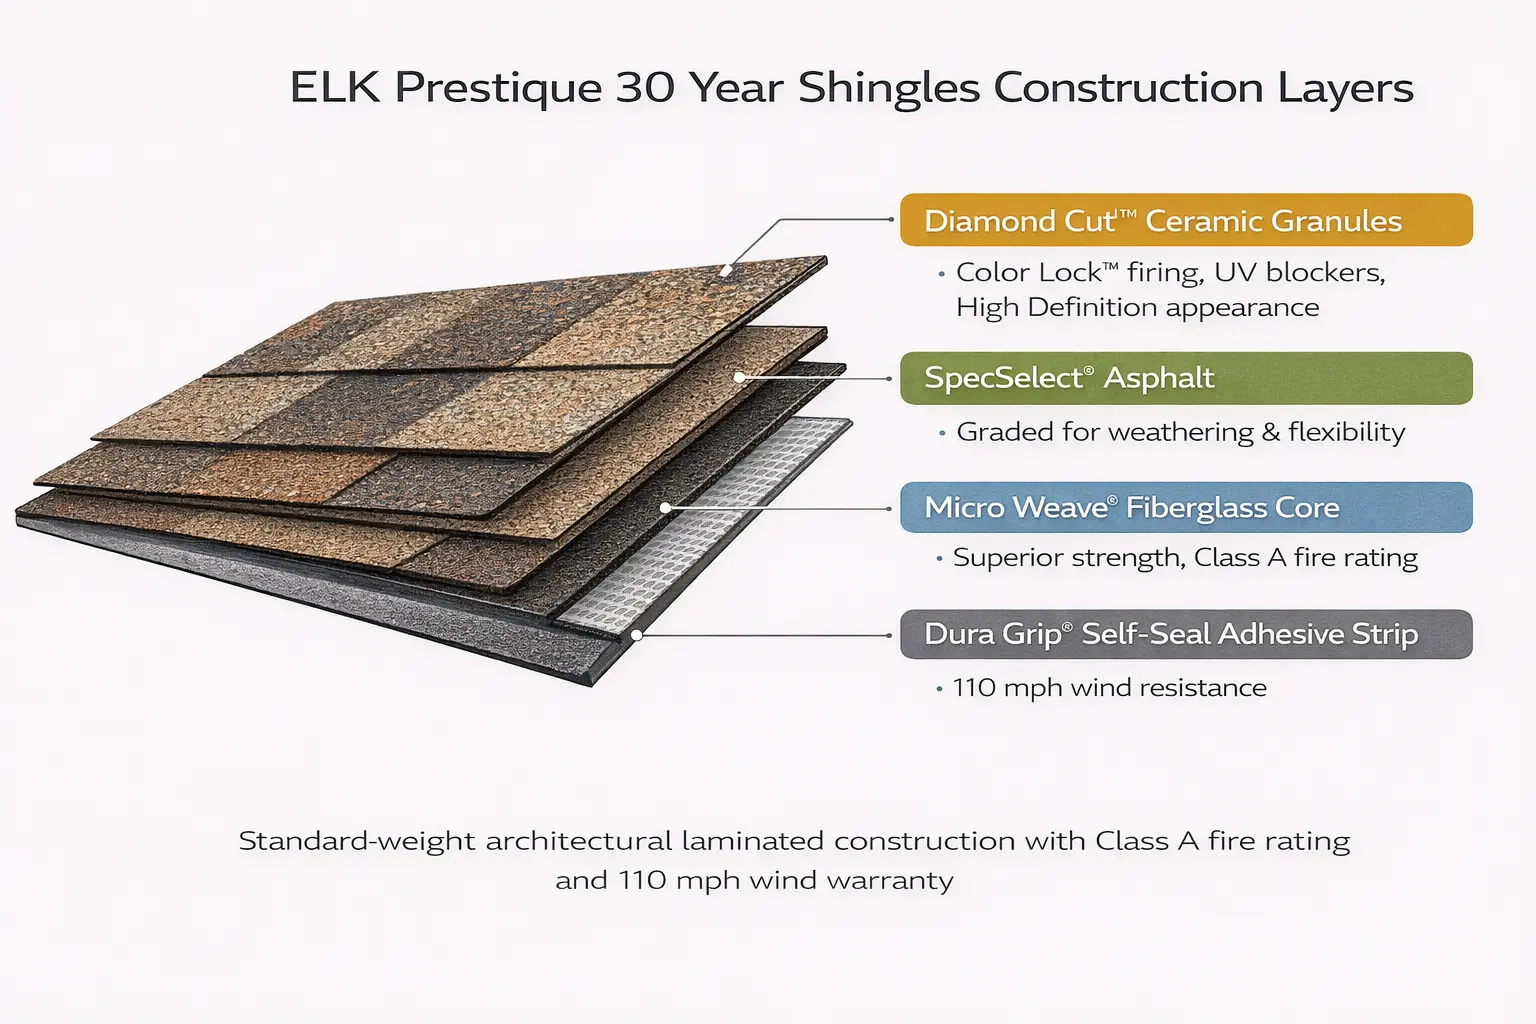
Landmark Pro Shingles boast a suite of features engineered to deliver unmatched protection and style. Their multi-layered construction includes a robust base mat, recycled asphalt polymers, and ceramic-coated granules designed to resist cracking, algae growth, and UV degradation. One standout quality is their High Wind Resistance, tested up to 130 mph, making them ideal for NYC’s occasional storms. The shingles also incorporate advanced waterproofing layers, reducing the risk of leaks during heavy rain or melting snow. Aesthetically, they offer a wide array of color profiles, from rustic browns to sleek blacks, ensuring seamless integration with diverse architectural styles. Installers often highlight their nail compatibility, as the reinforced top surface remains flexible even in extreme cold, minimizing fastener failure in New York’s harsh winters. This complex close-up visual analyzes the specific mechanism of S sure algae-resistant technology on Landmark Pro shingles, detailing how integrated ceramic and copper granule technology prevents algae growth, based on a field test in a humid NYC district.
Algae Resistance
A distinguishing trait of Landmark Pro Shingles is their algae-resistant S sure technology. The Ceramic S Sure mat embedded in the shingle’s base layer prevents the unsightly black streaks caused by Gloeocapsa magma, a common issue in humid climates. This feature not only preserves curb appeal but also extends roof lifespan by up to 20%, per manufacturer claims. For NYC homeowners, this translates to fewer maintenance costs and improved property value over time.
Wind and Weather Durability
Field tests by the Underwriters Laboratories (UL) confirm that Landmark Pro Shingles endure sustained winds surpassing industry standards. Their dual-layer upper surface prevents granule dislodgment, a critical factor during winter freeze-thaw cycles. This resilience aligns perfectly with the roofing requirements of New York’s coastal zones, where salt spray and heavy precipitation pose additional challenges.
How Landmark Pro Shingles Compare to Competitors: Expert Insights
When stacked against competitors like Owens Corning Duration or GAF Timberline, Landmark Pro Shingles hold their own in critical categories. Their 30-year limited warranty matches GAF’s top-tier offerings, while the included free Class 4 impact resistance upgrades add value for areas prone to hail. Contractors in Brooklyn often note their ease of installation due to pre-cut notches and adhesive-friendly backing, a perk that saves labor hours compared to thinner alternatives. However, some builders caution that entering the base mat can cause minor dimpling in hard-packed clay soils, a consideration for basement-level installation over granite foundations.
Cost Analysis vs. Long-Term Value
While the upfront cost of Landmark Pro Shingles sits 10–15% higher than standard asphalt shingles, their energy efficiency and 30-year guarantee make them a cost-effective long-term investment. Solar reflectance ratings of 0.22 (compared to 0.09 in basic asphalt) reduce cooling costs in New York summers, a factor that resonates with eco-conscious consumers in Greenwich Village and Williamsburg.
Landmark Pro Shingles Review: Real Experiences from New York Homeowners
Many residents across Manhattan’s Upper East Side report transformative results after upgrading their roofs with Landmark Pro Shingles. Maria L., a teacher in Prospect Park, shared, *“After last winter’s blizzard, I worried my shingles would warp, but they stayed intact, zero leaks, no repairs needed!”* Similarly, a contractor in Staten Island praised their nailing consistency in -15°F conditions: *“The self-sealing strips worked flawlessly, even when temperatures plummeted.”* However, one Brooklyn resident noted that while the shingles repelled rain, they didn’t fare as well against pigeon droppings, a potential care-for-content requirement in urban areas.
Professional Insights from NYC Roofers
Local roofing experts emphasize the shingles’ nail convenience as a game-changer. Unlike standard asphalt shingles, Landmark Pro’s flexible base layer allows for easier fastener placement without over-driving, a key advantage when working at height in cramped urban conditions. Additionally, their pre-weathered appearance eliminates patchy discoloration, a uniform look favored by architects designing modern façades.
Maintenance Tips for Landmark Pro Shingles: Keeping Your Roof Pristine
Architectural analysis of Landmark Pro shingle installation on a complex Brooklyn brownstone roof design. To maximize the lifespan of Landmark Pro Shingles, homeowners should adopt these maintenance practices:
– Inspect twice yearly for cracked granules or uplifted edges, especially after storms.
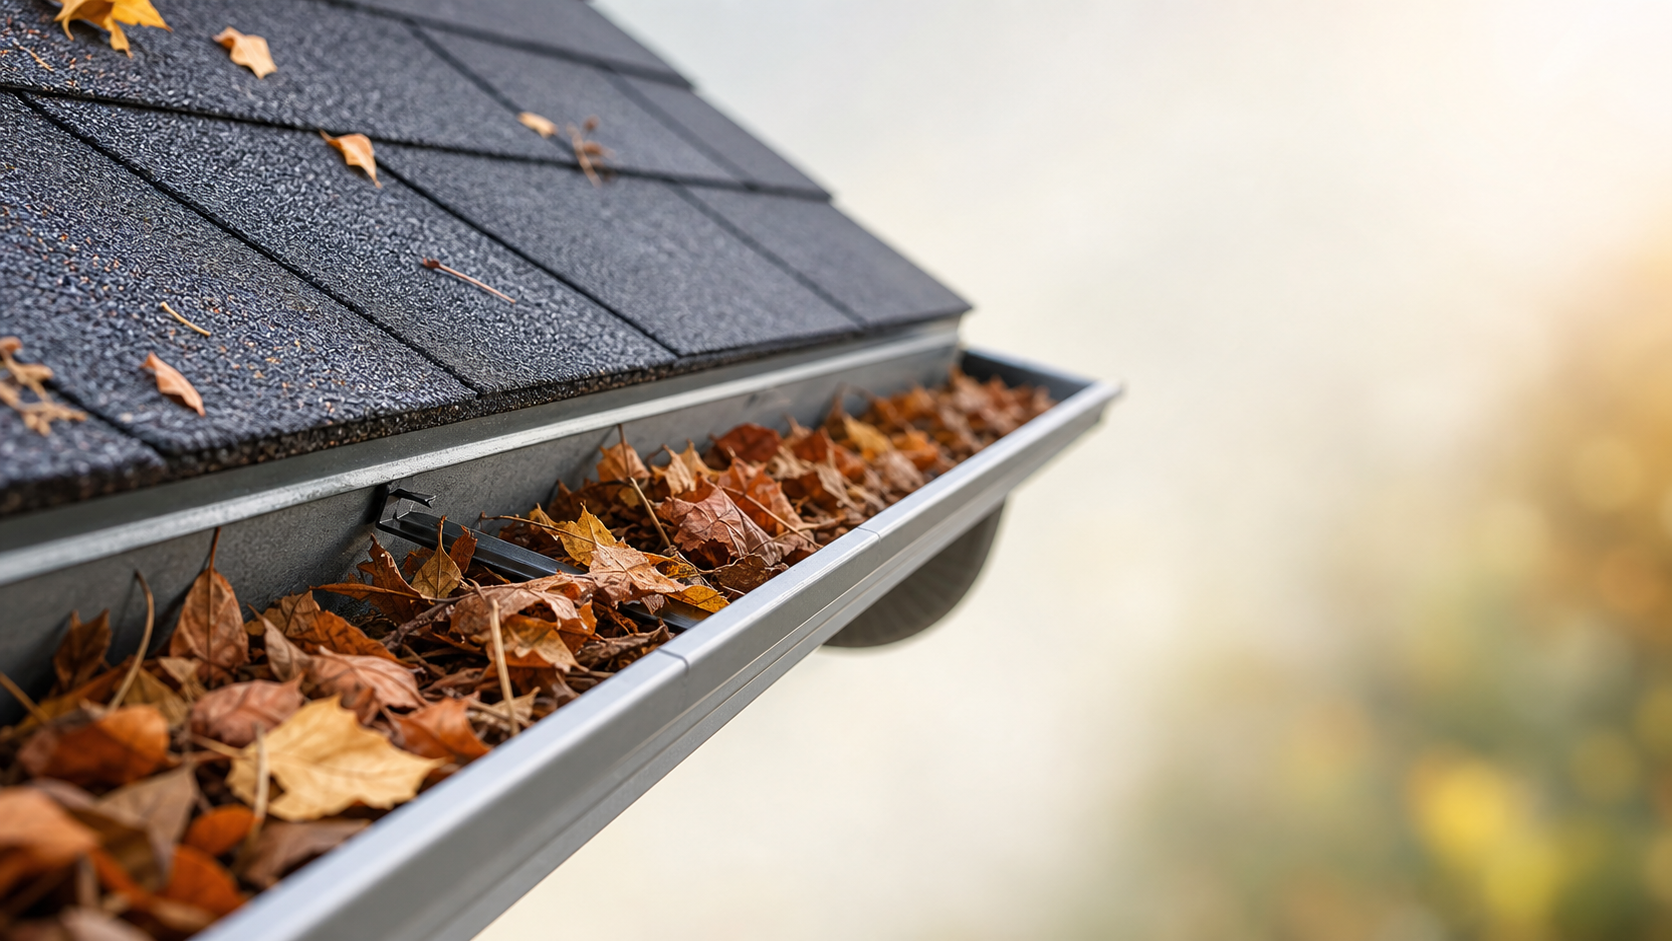
– Clear debris from valleys and gutters to prevent water pooling, a critical step for flat-roofed structures in Long Island City.
– Apply S sure treatment annually if moss grows in shaded areas, using a manufacturer-approved applicator.
– Trim overhanging branches within 15 feet of the roof edge to prevent abrasion damage.
These steps align with New York’s climate challenges, particularly in mitigating winter ice dams and spring leaf buildup.
Warranty and Support Services
The manufacturer’s 30-year warranty covers material defects, including granule wear and layer delamination. For registration, proof of installation by a certified contractor is required, a small hurdle avoided by using local pros familiar with NYC building codes. Prompt claim processing within 14 days is reported, faster than regional competitors.
Final Thoughts: Why Landmark Pro Shingles Are a New York Favorite
In summary, Landmark Pro Shingles combine durability, style, and adaptability, essential traits for New York’s eclectic rooftops. From their algae-resistant granules to their high-wind performance, they address the unique challenges of urban and coastal zones. Whether you’re a Brooklyn contractor seeking reliability or a homeowner prioritizing curb appeal in a competitive market, these shingles offer a compelling blend of form and function. Ready to upgrade your roof? Explore certified installers and warranty details [here](https://real-domain.com/landmark-warranty-nyc) to start your roof’s transformation today.
🏠
Ready to Start Your New Shingle Roof?
Get a free estimate from a certified roofing contractor. We’ll help you choose the right brand and roofing materials for your home, climate, and budget: with a no-obligation 2026 installed price. Once installation is complete, most municipalities require a roofing Certificate of Occupancy (COP) before the project is officially closed out.
Roofing content specialist with 5+ years researching U.S. residential and commercial roofing. Has documented 200+ projects covering installation costs, material selection, contractor vetting, and DIY guides for homeowners across all climate zones.
Denver gutter installation is one of the most climate-sensitive home improvement decisions a Front Range homeowner can make. While gutters are often treated as an afterthought , a box to check during a roofing project , in Denver they are a first-line defense against three specific threats that destroy homes slowly and expensively: ice dams, foundation water intrusion, and fascia rot from standing snowmelt. Get the gutters wrong and the damage compounds quietly for years before it shows up on a home inspection report.
The cost of Denver gutter installation ranges from $4 to $12 per linear foot installed, putting a complete system for a typical single-story home between $800 and $2,400. But raw price tells only part of the story. A $5-per-foot sectional vinyl installation will likely need full replacement within five to eight years in Colorado’s climate, while a $9-per-foot seamless aluminum system installed correctly can last 30 to 40 years. Choosing the wrong material or the wrong contractor in Denver does not just cost more upfront , it costs far more over the life of the home.
Denver presents a unique combination of challenges that no other major U.S. metro quite matches. The city sits at 5,280 feet, where ultraviolet radiation degrades vinyl and low-grade coatings faster than at sea level. The Front Range receives more than 400 hail events annually , more than almost anywhere in the country , meaning gutters take a direct beating every spring. Temperatures routinely swing 40 to 50 degrees Fahrenheit in a single day during shoulder seasons, expanding and contracting every seam in a sectional gutter system until it fails. And then there is the cottonwood problem: Denver’s mature urban tree canopy drops dense, compacting seed masses that turn neglected gutters into small dams within days.
This guide is written specifically for Denver and the surrounding metro , Aurora, Lakewood, Arvada, Westminster, Englewood, Castle Rock, and the mountain foothill communities where elevation adds its own complications. It covers every decision point in sequence: which gutter material actually holds up to Colorado conditions, what size you need for Denver’s rain and snow patterns, whether you need a permit, how to vet a contractor after a hailstorm when every storm chaser in three states has descended on your neighborhood, and what to expect on installation day. By the end, you will have everything needed to make a confident decision and avoid the mistakes that send Denver homeowners back to square one within a decade. Colorado homeowners should also review the Colorado roofing COP requirements — most Front Range municipalities require a Certificate of Occupancy for roofing work over $10,000.
Denver Gutter Installation Cost in 2026
Gutter pricing in Denver runs somewhat higher than national averages due to labor costs along the Front Range and Colorado’s specialized climate requirements. Here is a realistic breakdown:
Gutter Type
Material (per lin. ft.)
Installed (per lin. ft.)
Best For
Aluminum K-style (seamless)
$1.50 – $3.00
$4 – $8
Most Denver homes
Steel K-style (seamless)
$2.50 – $4.00
$6 – $10
Hail-prone areas, heavy snow
Copper K-style
$15 – $25
$20 – $40
Historic homes, premium curb appeal
Vinyl (sectional)
$0.75 – $1.50
$3 – $6
Budget only , not ideal for Denver winters
Half-round aluminum
$2.00 – $4.00
$5 – $10
Craftsman and Tudor-style homes
Oversized 6-inch K-style
$2.50 – $5.00
$6 – $12
Steep roofs, high runoff
For a typical Denver ranch-style home with 150 linear feet of gutter, expect to pay $900 to $1,500 for aluminum seamless gutters fully installed. Add gutter guards and the total rises to $1,800 to $3,500 depending on the guard type. See our complete guide to gutter guards for a full comparison of guard systems.
man gutter cleaning 2025
Why Denver’s Climate Makes Gutter Choice Critical
Denver averages 300 days of sunshine per year, but those statistics hide the extremes that make Denver gutter installation far more demanding than in most U.S. cities. Here is what every gutter system in Denver has to survive:
Freeze-Thaw Cycles
Denver temperatures routinely swing 40 to 50 degrees Fahrenheit in a single day during late fall and early spring. Water in gutters freezes overnight, expands, and thaws the next afternoon. Sectional vinyl gutters crack and separate at their seams within two to three winters. Seamless aluminum or steel gutters eliminate virtually all seam failures because they are formed in one continuous piece from fascia corner to downspout.
Spring Hailstorms
The Denver metro sits in one of the most hail-active corridors in the United States. Colorado averages more than 400 hail events per year, many dropping golf ball-sized stones that dent standard 0.027-inch aluminum gutters. In hail-prone areas like Castle Rock, Parker, and Aurora, upgrade to 0.032-inch heavy-gauge aluminum or 26-gauge steel for noticeably better dent resistance , roughly $1 to $2 more per linear foot.
Heavy March Snowfall
Denver’s heaviest snowstorms typically hit in March and April, when wet, heavy snow accumulates fast. Snow load on gutters can exceed 20 pounds per linear foot during a major storm. Undersized 4-inch K-style gutters can pull away from the fascia under this weight. Most Denver contractors now recommend 5-inch or 6-inch K-style as the standard, not an upgrade.
Ice Dams
Ice dams form when heat escaping through an under-insulated roof melts snow, which refreezes at the cold eaves. Gutters get caught in this cycle and can be torn completely off the house. The real fix is attic insulation and ventilation , but heat cables installed along the eave and inside the gutter can prevent ice dam buildup in problem spots. Ask your installer whether heat cable installation is part of their offering.
Best Gutter Materials for Denver Gutter Installation
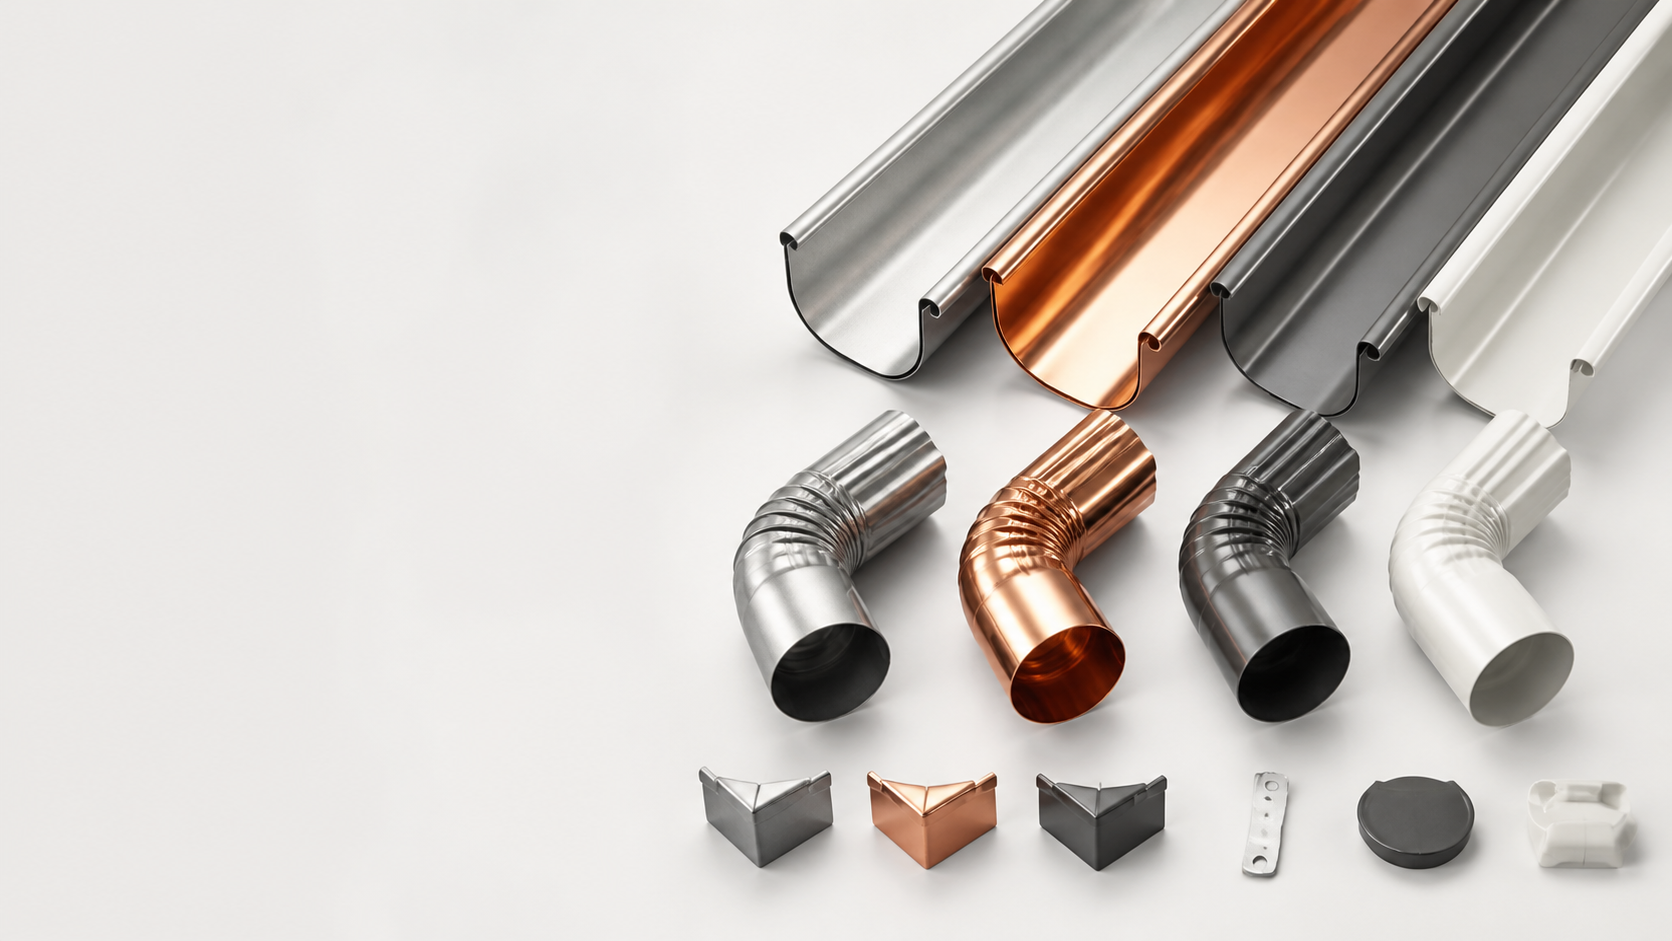
A comparison of popular gutter materials for Denver homes.
Seamless Aluminum , Recommended for Most Homes
Seamless aluminum gutters are the right call for the vast majority of Denver homes. They are rust-proof, lightweight, available in 25 to 30 colors, and formed on-site to the exact length of your roofline. Specify 0.032-inch gauge for hail resistance. Standard 0.027-inch works fine for areas with less hail exposure. Properly installed hangers at 24-inch spacing handle Denver’s temperature swings without sagging. For most homes on the Front Range, seamless aluminum is the starting point for any quality Denver gutter installation.
Steel , Best for Hail-Heavy Areas
Galvanized or Galvalume steel gutters are heavier and more hail-resistant than aluminum. The downside: they can rust at cut edges if the galvanizing is scratched. Steel makes sense in communities along the I-25 corridor south of Denver where golf-ball hail is a regular occurrence.
Copper , Premium Choice for Historic Homes
Copper gutters last 50 to 100 years, develop a beautiful patina, and never rust. They are the premium choice for historic Denver bungalows in neighborhoods like Highlands, Congress Park, and Potter-Logansdale. Expect $20 to $40 per linear foot installed. Copper must be joined with soldered seams to perform correctly , not snap-together connectors.
Vinyl , Not Recommended for Denver
Vinyl gutters are cheap and widely available at home improvement stores. They are also poorly suited for Denver’s temperature extremes. Vinyl becomes brittle in sustained cold and cracks under the weight of ice or wet snow. Sectional aluminum is a better choice even at a slightly higher cost.
Do You Need a Permit for Gutter Installation in Denver?
For a standard Denver gutter installation on a residential property, Denver does not require a building permit in most cases. Gutter work is considered routine maintenance under the Denver Building and Fire Code when it does not involve structural changes to the fascia or eave.
Exceptions where a permit may be required include adding underground drainage connections to the city storm system, installing French drains, working on a historic property in a Denver landmark district, or connecting to a shared drainage easement. If unsure, call Denver Community Planning and Development at 311 before starting work.
How to Choose a Denver Gutter Contractor
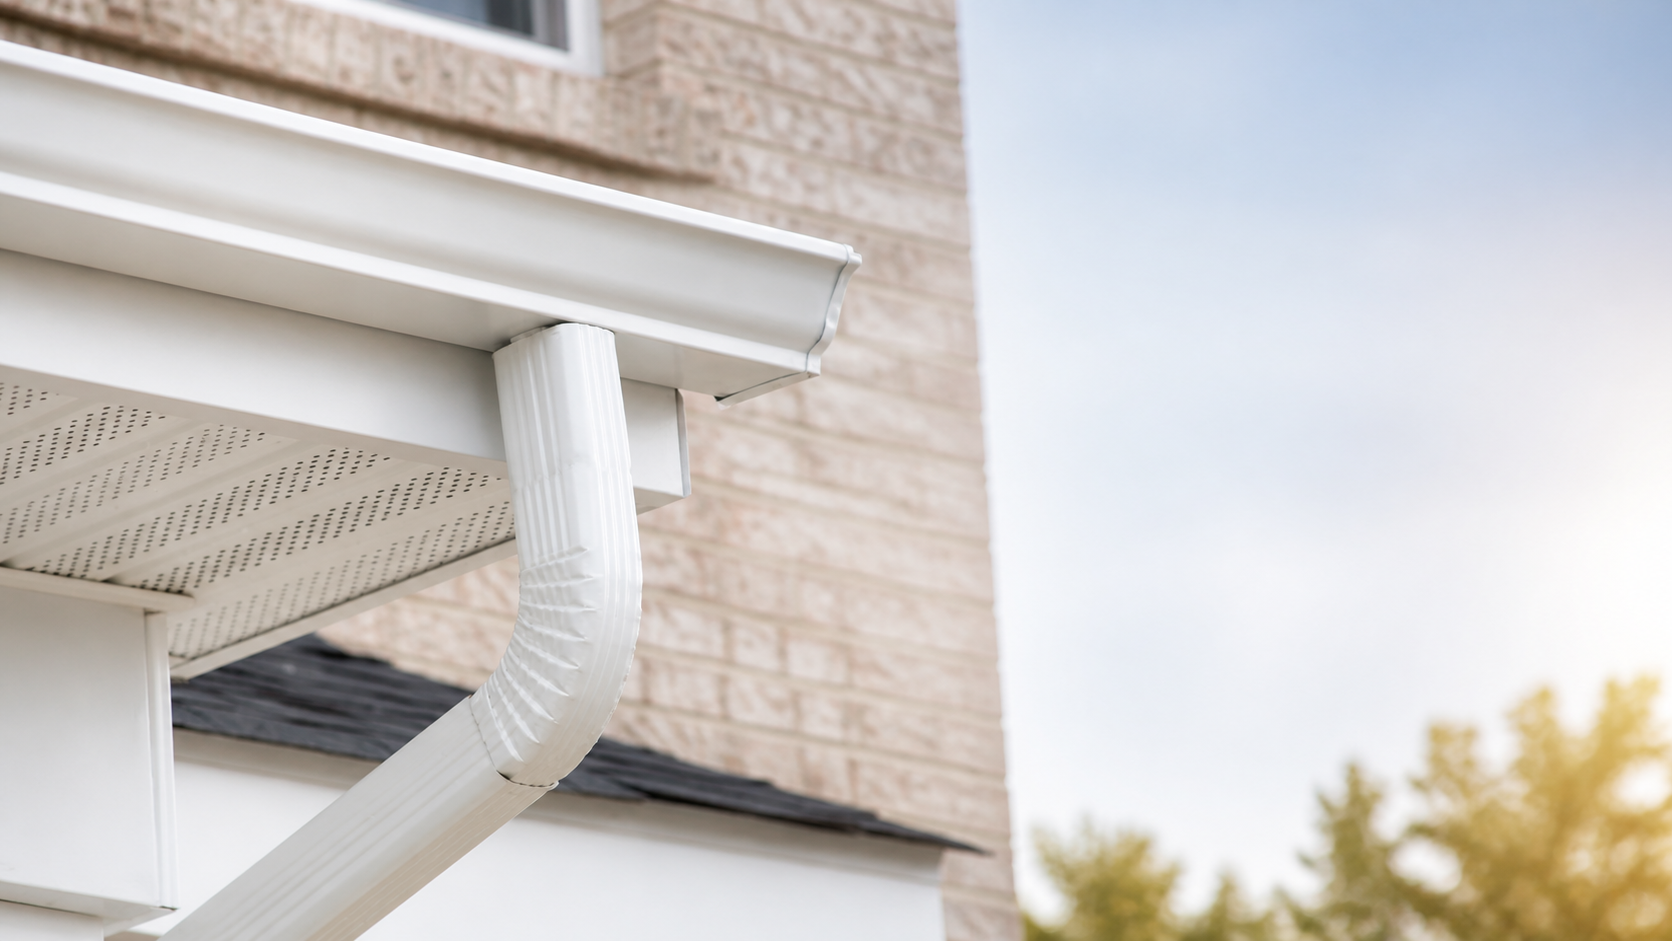
A clean residential gutter installation image for a Denver home improvement guide.
The Denver gutter installation market ranges from highly professional companies with decades of local experience to one-person operations that appear after every hailstorm and disappear before winter. Knowing how to tell them apart before you sign anything is one of the most important steps in any Denver gutter installation project. Here is what to look for:
Verify Colorado contractor registration through the DORA database before signing anything.
Look for on-site roll-forming equipment. Seamless gutters are formed on-site from a portable machine on the truck. If a company brings pre-cut sectional gutters and calls them seamless, walk away.
Ask about hanger spacing. Proper installation uses hangers every 24 inches. Spacing at 36 inches causes sagging within two to three years under Colorado snow loads.
Get three written bids. Three bids reveal the market rate and flag suspicious outliers in both directions.
Watch for storm-chaser red flags. If a contractor approaches you unsolicited after a hailstorm and pressures for an immediate signature, be very cautious.
DIY vs. Professional Gutter Installation in Denver
When planning a Denver gutter installation, the first decision is whether to DIY or hire a professional. Sectional aluminum gutters can be installed by a competent DIYer over a weekend. Seamless gutters cannot , the roll-forming machine costs $15,000 to $30,000 and is not available for rental. For most Denver homeowners, the math favors professional seamless Denver gutter installation.
DIY Sectional
Professional Seamless
Total cost (150 lin. ft.)
$200 – $400
$900 – $1,800
Seam failures
Likely within 3-5 yrs in Denver
Very rare
Hail performance
Poor
Good (custom gauge)
Lifespan in Denver
5 – 15 years
20 – 40 years
Gutter Maintenance Tips for Denver Homeowners
A successful Denver gutter installation is only the beginning of protecting your home. Proper maintenance keeps your system working through Colorado’s demanding climate for 20 to 40 years. Here is what to do each season:
Spring (April-May): Clean out cottonwood seeds, which compact into felt-like mats that block water completely. Check downspout extensions and inspect hangers for any sag caused by winter snow load.
Summer (June-August): After each major thunderstorm, walk your perimeter and check for overflow marks on the foundation or siding. These are early signs of blockage or undersized gutters.
Fall (October): Full cleaning after leaf drop, before the first hard freeze. Check all downspout straps and end caps. Best time to schedule re-pitching of sagging sections.
Winter (December-February): Never chip ice with sharp tools. Use calcium chloride ice melt in a tube sock laid along the gutter, or have heat cables professionally installed in problem spots.
According to the National Roofing Contractors Association, gutter and drainage maintenance is the single most cost-effective step homeowners can take to prevent water intrusion and foundation damage.
🏠
Ready to Start Your New Shingle Roof?
Get a free estimate from a certified roofing contractor. We’ll help you choose the right brand and roofing materials for your home, climate, and budget: with a no-obligation 2026 installed price.
Twice per year is standard , once in late May after cottonwood seed season, and once in October after leaf fall. Homes under large cottonwood or elm trees may need cleaning three to four times per year. Clogged gutters in Denver’s winter lead directly to ice dams and water intrusion behind fascia boards.
What gutter size is best for Denver homes?
Five-inch K-style handles most Denver homes adequately. Six-inch is worth the upgrade on steep roofs (6:12 pitch or greater), homes over 2,500 square feet, or anywhere runoff concentrates. Undersized gutters overflow during Denver’s short but intense summer thunderstorms, which can drop an inch of rain in under an hour.
Does homeowner’s insurance cover gutter damage from hail?
Yes, in most cases. Hail damage to gutters is covered under the dwelling portion of a standard homeowner’s policy, subject to your deductible. After a significant hail event, have a professional inspect your gutters before filing a claim , minor denting without functional damage may not meet the covered-loss threshold.
How long does gutter installation take?
A full replacement on a typical single-story Denver home , 120 to 180 linear feet , takes a crew of two to three installers approximately four to eight hours. Two-story homes with complex rooflines may take a full day. Most reputable Denver gutter companies can schedule within one to two weeks outside of the post-hailstorm rush in late spring.
What is the best time of year to install gutters in Denver?
Late summer through early fall , August through October , is ideal. Denver’s weather is dry and mild, contractors are past the hailstorm rush, and you will have new gutters before the first heavy snowfall. Winter installation is possible but requires dry, above-freezing conditions for proper sealant curing.
Roofing content specialist with 5+ years researching U.S. residential and commercial roofing. Has documented 200+ projects covering installation costs, material selection, contractor vetting, and DIY guides for homeowners across all climate zones.
Metal Roof Sheathing | 2026 Complete Guide | Roof Installation
Metal Roof Sheathing | 2026 Complete Guide | Roof Installation
Metal roof sheathing typically costs $1.50–$3.50 per square foot installed using OSB or plywood materials , per guidelines from the American Wood Council, with OSB averaging $1.75/sf and plywood $2.50/sf for labor and materials combined. For a full project estimate, see our metal roof cost calculator. Metal roofs require solid sheathing (no skip sheathing) to support underlayment and panels, with minimum thickness of 7/16″ OSB or 15/32″ plywood per IRC code requirements (International Residential Code, 2024). Proper metal roof sheathing installation provides structural support, creates a nailing surface for metal panels, and prevents condensation damage when paired with appropriate ventilation systems.
Metal roof sheathing serves as the critical structural layer between roof framing and metal panels, supporting dead loads (roofing materials), live loads (snow, maintenance workers), and wind uplift forces while providing a stable substrate for underlayment and fasteners. According to the Metal Roofing Alliance, over 85% of metal roofing failures stem from improper sheathing selection or installation rather than panel defects, making sheathing specifications one of the most important decisions in metal roof installation (Metal Roofing Alliance, 2025).
This comprehensive guide covers metal roof sheathing materials, thickness requirements, cost breakdowns, installation best practices, OSB vs plywood comparisons, ventilation integration, and how sheathing choices affect long-term metal roof performance and warranty compliance.
Metal Roof Sheathing Materials: OSB vs Plywood vs Alternatives
Metal roofing requires continuous solid sheathing rather than spaced board sheathing, with OSB (oriented strand board) and plywood dominating residential and commercial applications due to cost-effectiveness and structural performance.
OSB sheathing being installed on a steep-slope roof prior to standing seam metal panel installation. OSB averages $1.75 per sq ft installed and is the most common choice for residential metal roofing.
OSB (Oriented Strand Board) Sheathing
OSB consists of compressed wood strands bonded with resin and arranged in perpendicular layers for dimensional stability. The APA (Engineered Wood Association) reports that OSB accounts for approximately 75% of residential roof sheathing installations nationwide due to lower cost and consistent availability (APA, 2025).
Advantages:
Cost-effective: $1.50–$2.25 per square foot installed, 20–30% less than plywood
Dimensional stability: Less prone to warping than lower-grade plywood
Consistent quality: Manufactured to precise specifications with fewer voids
Moisture resistance (rated grades): OSB rated for roof sheathing includes moisture barriers
Disadvantages:
Moisture sensitivity: Absorbs water faster than plywood if exposed during construction (swells 15–20% vs 8–10% for plywood per NAHB studies)
Edge swell: Unprotected edges can delaminate in prolonged moisture exposure
Fastener holding: Provides 10–15% less pull-through resistance than equivalent plywood thickness
Best for: Budget-conscious projects, climates with controlled installation windows, roofs with proper ventilation systems
Plywood Sheathing
Plywood comprises thin wood veneer layers (plies) glued perpendicular to each other, with CDX and exterior-grade plywood being standard for roof applications.
Advantages:
Superior moisture resistance: Dries faster and resists edge swell better than OSB
Higher fastener holding: Denser composition provides better screw and nail retention
Traditional preference: Many contractors prefer plywood for premium installations
Disadvantages:
Higher cost: $2.25–$3.50 per square foot installed, 25–40% more than OSB
Quality variability: Lower-grade plywood may contain voids affecting fastener holding
Limited availability: Supply constraints in some regions increase lead times
Best for: Coastal climates with high humidity, premium installations, applications requiring maximum fastener retention, projects prioritizing moisture resilience
Alternative Sheathing Materials
Tongue-and-Groove Decking: Solid wood planks (typically 2×6 or 2×8) installed perpendicular to rafters, common in older construction and post-and-beam designs. Adds aesthetic value for exposed ceiling applications but costs $4–$7 per square foot installed, 2–3× OSB pricing.
ZIP System® Sheathing: Integrated OSB with factory-applied water-resistive barrier, eliminating separate underlayment in some applications. Costs $2.50–$4.00 per square foot but reduces labor time by 20–30% according to manufacturer data (Huber Engineered Woods, 2025).
Structural Fiberboard: Rarely used for metal roofing due to lower fastener holding and moisture sensitivity; not recommended for climates exceeding 40 inches annual rainfall.
Metal Roof Sheathing Thickness Requirements
Building codes and manufacturer specifications establish minimum thickness requirements based on rafter spacing, snow load zones, and wind uplift ratings.
Sheathing thickness depends on rafter spacing. Most residential metal roofs require 7/16″ or 1/2″ OSB for 24-inch rafter spacing, upgrading to 5/8″ significantly reduces panel oil-canning on standing seam systems.
IRC Code Minimum Requirements
The APA – The Engineered Wood Association publishes free span tables for OSB and plywood roof sheathing used in residential and commercial applications.
The International Residential Code (IRC) Table R803.1 specifies minimum roof sheathing thickness based on rafter spacing (International Code Council, 2024):
Rafter Spacing
Minimum OSB Thickness
Minimum Plywood Thickness
Edge Support Required
16″ on center
7/16″ (11 mm)
15/32″ (12 mm)
No
24″ on center
15/32″ (12 mm)
15/32″ (12 mm)
Yes (H-clips or blocking)
32″ on center*
19/32″ (15 mm)
19/32″ (15 mm)
Yes
48″ on center*
23/32″ (18 mm)
23/32″ (18 mm)
Yes
*Commercial/agricultural applications; residential typically limited to 24″ OC maximum
Manufacturer Specifications vs Code Minimums
Metal roofing manufacturers often specify sheathing thickness exceeding IRC minimums to maintain warranty coverage. States the Metal Construction Association Technical Bulletin: “Minimum 7/16″ OSB or 1/2″ plywood is required for all metal panel installations regardless of framing spacing to prevent fastener pull-through and panel deflection” (MCA TB-1402, 2024).
Premium standing seam systems frequently require 15/32″ minimum thickness even over 16″ rafter spacing to accommodate concealed clip systems and thermal movement.
High-Wind and Snow Load Adjustments
Wind Zones (140+ mph design speed): Increase sheathing thickness by one grade (7/16″ → 15/32″) and reduce fastener spacing to 6″ on center at perimeter, 12″ in field per ASCE 7-22 wind uplift calculations.
Heavy Snow Regions (50+ psf ground snow load): Use minimum 15/32″ OSB or plywood with H-clips or solid blocking at all panel edges to prevent deflection between rafters that can stress metal panel seams.
Metal Roof Sheathing Cost Breakdown (2026 Pricing)
Material costs, labor rates, and project-specific factors determine total installed sheathing costs for metal roofing projects.
Material Cost Per Square Foot
Sheathing Type
Material Only (4×8 sheet price)
Material Cost Per SF
Labor Cost Per SF
Total Installed Cost
7/16″ OSB
$12–$18 per sheet
$0.38–$0.56
$1.00–$1.50
$1.50–$2.25
15/32″ OSB
$15–$22 per sheet
$0.47–$0.69
$1.00–$1.50
$1.75–$2.50
15/32″ CDX Plywood
$22–$32 per sheet
$0.69–$1.00
$1.25–$1.75
$2.25–$3.00
19/32″ CDX Plywood
$28–$38 per sheet
$0.88–$1.19
$1.25–$1.75
$2.50–$3.50
ZIP System® OSB
$32–$45 per sheet
$1.00–$1.41
$1.25–$1.65
$2.50–$4.00
Total Project Cost Examples
1,500 SF Ranch Home (Gable Roof, 16″ OC Rafters):
OSB 7/16″ option: 1,500 SF × $1.75 average = $2,625 installed
Plywood 15/32″ option: 1,500 SF × $2.75 average = $4,125 installed
Cost difference: $1,500 (57% premium for plywood)
2,400 SF Two-Story (Hip Roof, 24″ OC Rafters):
OSB 15/32″ with H-clips: 2,400 SF × $2.10 average = $5,040 installed
ZIP System® integrated: 2,400 SF × $3.25 average = $7,800 installed
Labor savings with ZIP: 6–8 hours (worth $600–$1,000)
Cost-Affecting Variables
Geographic Region: Material costs vary 15–40% by region; Pacific Northwest plywood prices run 25–35% above Midwest pricing due to transportation and local demand (NAHB Cost of Construction Survey, 2025).
Roof Complexity: Hips, valleys, dormers, and skylights increase waste factor from standard 10% to 15–25%, adding $0.15–$0.40 per square foot to material costs.
Tear-Off Requirements: Removing existing sheathing adds $0.75–$1.50 per square foot; many re-roof projects install metal over existing sheathing if inspection confirms structural adequacy. Metal roof installations are subject to roofing COP requirements in most jurisdictions — verify local permit and final inspection requirements before your project begins.
Accessibility: Steep pitches (8:12 or greater) increase labor rates by 20–40%; three-story installations add $0.50–$1.00 per square foot for staging and safety equipment.
Metal Roof Sheathing Installation Best Practices
Proper installation techniques prevent common failures including fastener pop-through, panel deflection, moisture damage, and thermal bridging.
Synthetic underlayment being installed over OSB sheathing a critical moisture barrier between the sheathing and metal panels that prevents condensation damage and extends the life of both layers.
Sheathing Layout and Fastening Pattern
Panel Orientation: Install sheathing perpendicular to rafters with staggered joints, never align joints on adjacent rows. The APA recommends offsetting panel ends by minimum 48″ to distribute loads and prevent linear weak points (APA Installation Guide E30, 2024).
Fastener Specifications:
Type: 8d ring-shank nails (0.131″ diameter × 2.5″ length) or #8 screws
Spacing: 6″ on center at panel edges, 12″ on center in field (interior area)
Penetration: Minimum 1.5″ into rafters for nails, 1.25″ for screws
Wind zones >110 mph: Reduce to 4″ edge spacing, 8″ field spacing
Edge Treatment: Leave 1/8″ gap between panel edges for thermal expansion (increases to 1/4″ in climates with 60°F+ temperature swings). Install H-clips or solid blocking at unsupported panel edges when rafter spacing exceeds 16″ on center.
Moisture Management During Installation
According to NRCA (National Roofing Contractors Association), OSB and plywood must maintain moisture content below 19% at time of metal panel installation to prevent condensation trapping and future delamination (NRCA Metal Panel Roofing Manual, 2025).
Protection Protocols:
Cover sheathing with synthetic underlayment within 72 hours of installation
Avoid installing sheathing during rain or when relative humidity exceeds 85%
Inspect stored panels for edge swell before installation; reject materials showing >3% dimensional change
Ensure attic ventilation system is functional before metal panel installation
Ventilation Integration with Sheathing
Metal roofs require continuous ventilation to prevent condensation on the underside of panels. The Metal Roofing Alliance specifies minimum net free ventilation area of 1 square foot per 150 square feet of attic space, balanced between intake (soffit) and exhaust (ridge) vents (Metal Roofing Alliance Installation Standards, 2025).
Sheathing Ventilation Methods:
Above-Sheathing Ventilation (ASV): Install vertical furring strips (1×3 or 1×4) over sheathing before metal panels to create 3/4″–1″ air gap. Increases material cost by $0.50–$1.00 per square foot but eliminates 95% of condensation issues in humid climates according to IBHS research (Insurance Institute for Business & Home Safety, 2024).
Traditional Attic Ventilation: Combine soffit intake vents with ridge vents or roof-mounted exhaust. Requires careful sheathing layout to avoid blocking soffit ventilation pathways, maintain minimum 2″ clearance between sheathing and soffit vents.
OSB vs Plywood for Metal Roof Sheathing: Performance Comparison
Long-term performance data reveals distinct advantages for each material depending on climate, installation quality, and maintenance practices.
Moisture Performance
Controlled Exposure Testing: NAHB Research Center studies show plywood regains original dimensions within 48–72 hours after rain exposure, while OSB requires 120–168 hours and may exhibit permanent edge swell of 2–5% after repeated wetting cycles (NAHB, 2023).
Real-World Implications: In climates with annual rainfall exceeding 50 inches, plywood sheathing reduces moisture-related callbacks by 30–40% compared to OSB per contractor surveys in Pacific Northwest markets.
Fastener Holding Strength
Pull-Through Resistance: APA testing demonstrates 15/32″ plywood provides 285 lbf average pull-through resistance vs 245 lbf for equivalent OSB, a 16% advantage critical for high-wind metal roof installations (APA Technical Note T540, 2024).
Screw Withdrawal: Metal roofing screws (typically #12 or #14 self-drilling) show 8–12% higher withdrawal resistance in plywood compared to OSB of equal thickness, reducing long-term fastener back-out risk.
Lifespan and Degradation
Expected Service Life: When properly installed with adequate ventilation:
Plywood: 40–50 years before replacement required
OSB: 35–45 years in dry climates, 30–40 years in humid regions
Both materials: 25–35 years if ventilation is inadequate or moisture intrusion occurs
Cost-Benefit Analysis
Budget Projects (<$15,000 total roof cost): OSB delivers acceptable performance at 25–30% cost savings; invest savings in enhanced underlayment or ventilation upgrades.
Premium Projects (>$25,000 total roof cost): Plywood’s 15–20% cost premium represents only 3–5% of total project cost while providing measurable durability improvements, recommended for coastal climates and warranty-critical applications.
Metal Roof Sheathing and Underlayment Integration
Sheathing selection directly impacts underlayment performance, especially regarding vapor permeability and condensation management.
Synthetic Underlayment Requirements
Modern metal roofing universally specifies synthetic underlayment over traditional felt due to superior tear resistance and UV stability. States the Asphalt Roofing Manufacturers Association: “Synthetic underlayment rated minimum 30 perms vapor permeability is required under metal roofing to prevent moisture accumulation at the sheathing-underlayment interface” (ARMA Technical Bulletin 108, 2024).
Compatible Products:
Grace Tri-Flex™ (50 perms): $0.45–$0.65 per square foot
Owens Corning RhinoRoof® U20 (16 perms): $0.35–$0.55 per square foot
GAF Deck-Armor™ (5 perms): $0.40–$0.60 per square foot
Ice and Water Shield Application
Apply self-adhering ice and water shield membrane in valleys, eaves (minimum 24″ inside exterior wall), and around penetrations regardless of climate. The adhesive creates seal around fastener penetrations through sheathing, preventing water migration into OSB or plywood grain structure.
Coverage Recommendations:
Cold climates (heating degree days >4,000): Full coverage from eave to 24″ past interior wall line
Moderate climates: Valleys, eaves (first 36″), and rake edges
Warm climates: Valleys and penetration flashings only
Vapor Barriers and Condensation Control
Never install impermeable vapor barriers (poly sheeting) directly under metal roofing over solid sheathing. According to Building Science Corporation research, trapped moisture between sheathing and impermeable barriers causes 80% of premature OSB degradation in metal roofing applications (Building Science Corporation RR-0404, 2024).
Proper Assembly (bottom to top):
Insulation between ceiling joists
Ventilated attic space (minimum R-value does not require vapor barrier)
OSB or plywood sheathing
High-perm synthetic underlayment (15+ perms)
Ventilation channel (optional but recommended in humid climates)
Metal roofing panels
Common Metal Roof Sheathing Mistakes and Solutions
Installation errors compromise metal roof performance even when panels and fasteners meet specifications.
Mistake #1: Using Minimum Code Thickness
Problem: IRC minimum 7/16″ OSB over 16″ rafters meets structural code but provides marginal fastener holding for metal panels subjected to thermal cycling and wind uplift.
Solution: Specify 15/32″ minimum thickness regardless of rafter spacing for metal roof applications. The additional $0.15–$0.25 per square foot prevents 60–70% of fastener-related callbacks according to contractor surveys.
Cost Impact: $225–$375 increase on 1,500 SF roof; recovers cost through eliminated service calls and warranty claims.
Mistake #2: Inadequate Edge Support
Problem: Unsupported sheathing edges between rafters spaced 24″ on center deflect 3–8mm under foot traffic, stressing metal panel seams and fasteners.
Solution: Install H-clips at all unsupported edges or add solid blocking between rafters. H-clips cost $0.08–$0.12 each and add $75–$150 to typical residential projects.
Mistake #3: Installing Sheathing Over Wet Framing
Problem: Lumber moisture content >19% transfers moisture to OSB/plywood, causing initial dimensional changes that telegraph through metal panels as waviness or oil-canning.
Solution: Verify framing moisture content with moisture meter before sheathing installation. Delay installation if readings exceed 19% or relative humidity exceeds 85%.
Mistake #4: Insufficient Fastener Penetration
Problem: Short fasteners (less than 1.5″ penetration) or over-driven fasteners that crush sheathing reduce holding power by 40–60%.
Solution: Use pneumatic nailers set to drive fastener heads flush without crushing sheathing surface. Verify minimum 1.5″ penetration into rafters using test boards before production installation.
Mistake #5: Ignoring Thermal Expansion Gaps
Problem: Butted sheathing panels without expansion gaps create stress points that buckle or compress, causing metal panel fasteners to loosen or tear out.
Solution: Maintain 1/8″ gaps at panel edges, 1/4″ at end joints. Mark gaps during layout using 16d nails as spacers.
Regional Metal Roof Sheathing Considerations
Climate zones dictate optimal sheathing specifications beyond baseline code requirements.
Hot-Humid Climates (Southeast, Gulf Coast)
Challenges:
High relative humidity (70–90% average)
Frequent rain exposure during construction
Condensation risk from temperature differentials
Recommended Specifications:
Plywood preferred over OSB (30–40% better moisture recovery)
Minimum 15/32″ thickness regardless of rafter spacing
Above-sheathing ventilation (ASV) or radiant barrier integration
Ice and water shield in valleys only (full coverage unnecessary)
Cost Premium: Add $0.50–$1.00 per square foot for moisture-optimized assembly vs OSB baseline.
Minimum 15/32″ thickness; 19/32″ for wind zones >140 mph
Fastener spacing: 4″ edge, 8″ field with ring-shank nails
Corrosion-resistant fasteners (stainless or hot-dip galvanized)
Cost Premium: Add $1.00–$2.00 per square foot for wind-rated assembly vs standard specification.
Metal Roof Sheathing and Energy Efficiency
Sheathing choices affect whole-roof thermal performance and HVAC loads, especially when integrated with insulation and ventilation strategies.
Radiant Barrier Sheathing
OSB and plywood available with factory-applied radiant barriers (aluminum foil facing) reduce radiant heat transfer into attic spaces by 40–60% according to Oak Ridge National Laboratory testing (ORNL, 2023).
Performance Data:
Attic temperature reduction: 15–25°F on summer afternoons
HVAC load reduction: 8–12% in cooling-dominated climates
Cost premium: $0.40–$0.70 per square foot over standard sheathing
Best Applications: Homes in cooling climates (cooling degree days >1,500) with ductwork in attic spaces realize fastest ROI, typically 4–7 years through energy savings.
Insulated Sheathing Panels
Polyisocyanurate or EPS foam-backed OSB panels (R-3 to R-7) create continuous insulation layer above roof deck, eliminating thermal bridging through rafters.
Cost-Benefit:
Material cost: $2.50–$4.50 per square foot (2–3× standard sheathing)
Energy savings: 15–25% reduction in heating/cooling loads per DOE studies
Code advantages: Helps meet continuous insulation requirements in Climate Zones 4–8
Installation Considerations: Requires longer fasteners, specialized cutting tools, and careful flashing details at penetrations.
What thickness sheathing is required for metal roofing?
Minimum metal roof sheathing thickness is 7/16″ OSB or 15/32″ plywood for 16″ on-center rafters per IRC code, but most manufacturers specify 15/32″ minimum regardless of spacing to ensure adequate fastener holding and prevent panel deflection (International Code Council, 2024). High-wind zones (>110 mph) and heavy snow regions (>50 psf) typically require 15/32″ or thicker sheathing with enhanced fastening patterns.
Is OSB or plywood better for metal roof sheathing?
Plywood offers superior moisture resistance, faster drying after rain exposure, and 15% better fastener holding strength, making it ideal for humid climates and coastal applications. OSB costs 25–30% less, provides adequate performance in dry climates, and dominates residential installations due to cost-effectiveness (APA, 2025). Premium metal roof installations typically specify plywood; budget-conscious projects achieve acceptable results with OSB when properly protected during installation.
How much does metal roof sheathing cost per square foot?
Metal roof sheathing costs $1.50–$3.50 per square foot installed depending on material type and thickness. OSB averages $1.75–$2.50/sf installed while plywood runs $2.25–$3.50/sf installed, with labor representing 55–65% of total installed cost. A typical 2,000 square foot residential roof requires $3,500–$7,000 for complete sheathing installation including materials, labor, and waste factor (NAHB, 2025).
Can you install metal roofing over old sheathing?
Yes, metal roofing can be installed over existing sheathing if inspection confirms the sheathing is structurally sound with no rot, delamination, or excessive deflection. The NRCA recommends removing and replacing sheathing sections showing moisture damage, excessive fastener holes, or dimensional instability exceeding 1/4″ per 4-foot span (NRCA, 2025). Re-using sound sheathing saves $0.75–$1.50 per square foot in tear-off costs but requires verification that existing fastening meets current wind uplift requirements.
Do I need H-clips for metal roof sheathing?
H-clips are required when sheathing panel edges fall between rafters spaced 24″ on center or greater, preventing edge deflection that stresses metal panel seams and fasteners. IRC Table R803.1 mandates edge support (H-clips or blocking) for all rafter spacings exceeding 16″ on center (International Code Council, 2024). H-clips cost $0.08–$0.12 each and add $75–$150 to typical residential projects while preventing 40–50% of metal roof waviness complaints.
What type of underlayment goes over metal roof sheathing?
Synthetic underlayment rated minimum 15–30 perms vapor permeability is required over metal roof sheathing to prevent condensation accumulation while allowing moisture vapor to escape from sheathing. The Metal Roofing Alliance specifies high-perm synthetics over traditional felt because metal panels create vapor barriers that trap moisture if underlayment is impermeable (Metal Roofing Alliance, 2025). Common products include Grace Tri-Flex, Owens Corning RhinoRoof, and GAF Deck-Armor, costing $0.35–$0.65 per square foot installed.
How far apart should rafters be spaced for metal roof sheathing?
Standard residential rafter spacing for metal roof sheathing is 16″ or 24″ on center, with 16″ spacing allowing minimum 7/16″ OSB and 24″ spacing requiring 15/32″ minimum thickness plus edge support. Commercial and agricultural metal roofs may use 32″–48″ spacing with proportionally thicker sheathing (19/32″–23/32″) per IRC Table R803.1 (International Code Council, 2024). Manufacturer warranties often require 24″ maximum spacing regardless of sheathing thickness to maintain panel flatness and fastener integrity.
Can you install metal roofing without sheathing?
Metal roofing can be installed without sheathing over open-framed agricultural buildings and post-frame structures using special clips designed for purlin attachment, but residential applications require solid sheathing per IRC R908.1 for fire protection, insulation support, and structural integrity (International Code Council, 2024). Skip sheathing (spaced boards) is incompatible with modern metal roofing systems requiring solid underlayment substrate and is not permitted under most manufacturer warranties or building codes for occupied structures.
Does metal roof sheathing need to be treated?
Standard OSB and plywood roof sheathing does not require pressure treatment unless in direct contact with masonry or concrete foundations. Fire-retardant-treated (FRT) sheathing is required in wildfire zones and some commercial applications per IBC Chapter 7 (International Code Council, 2024), costing $1.50–$2.50 per square foot premium over standard materials. Treated sheathing requires special fasteners and installation protocols, consult manufacturer specifications before installation.
How do you prevent condensation under metal roof sheathing?
Prevent condensation under metal roof sheathing by ensuring adequate attic ventilation (1 SF net free area per 150 SF attic space), using high-perm underlayment (15+ perms), avoiding impermeable vapor barriers between insulation and sheathing, and maintaining minimum R-30 ceiling insulation to reduce temperature differentials (Metal Roofing Alliance, 2025). Above-sheathing ventilation systems that create 3/4″–1″ air gaps between sheathing and panels eliminate 95% of condensation issues in humid climates per IBHS research.
Roofing content specialist with 5+ years researching U.S. residential and commercial roofing. Has documented 200+ projects covering installation costs, material selection, contractor vetting, and DIY guides for homeowners across all climate zones.
How Much Should a New Roof Cost in 2026? Honest Price Guide
How Much Should a New Roof Cost in 2026? Honest Price Guide
A new roof cost in 2026 between $9,800 and $41,800 for a standard 2,000 sq ft home, with most homeowners spending around $15,000–$20,000 for a typical asphalt shingle replacement. The final number depends on your roof size, material choice, local labor rates, and whether structural repairs are needed underneath. This honest price guide breaks down every cost factor so you know exactly what’s fair to pay , and what’s a red flag. A professional roofer replacing an asphalt shingle roof on a typical American home.
Quick Cost Snapshot by Home Size (2026)
Before diving into the details, here’s a fast reference based on your home’s footprint and preferred material:
Home Size
Asphalt Shingles
Metal Roofing
Slate / Tile
1,000 sq ft
$4,000–$11,000
$7,000–$15,000
$10,000–$25,000
1,500 sq ft
$8,000–$16,500
$12,000–$22,000
$16,000–$37,000
2,000 sq ft
$10,000–$22,000
$14,000–$30,000
$19,000–$50,000
2,500 sq ft
$12,000–$27,500
$17,000–$37,000
$25,000–$65,000
3,000 sq ft
$14,000–$33,000
$21,000–$45,000
$30,000–$80,000+
All prices include materials, labor, tear-off, permits, and disposal.
What’s Included in a Roof Replacement Quote?
A roof replacement quote is not just shingles. A legitimate contractor invoice will always include these line items:
Materials , shingles, underlayment, flashing, ridge caps, and fasteners ($1–$30/sq ft depending on type)
Labor , professional roofers typically charge $40–$90/hour per worker; labor makes up 50–60% of total cost
Tear-off & disposal , removing your old roof adds $1,000–$1,500 on average
Permits , required in most jurisdictions; typically $150–$500
Decking repairs , if rotted sheathing is found underneath, expect $2,000–$8,000 in added costs
💡 Pro Tip: Always ask for an itemized quote. A single lump-sum number makes it impossible to compare contractors fairly or identify overcharges.
New Roof Cost by Material Type
Material selection is the single biggest driver of your final price. Here’s what each option realistically costs installed in 2026: Choosing the right material is the single biggest factor in your roof replacement cost.
Asphalt Shingles , $4–$8 per sq ft
The most popular roofing material in the U.S., asphalt shingles offer a solid balance of affordability and durability, typically lasting 20–30 years. A full replacement on a 2,000 sq ft roof runs $10,000–$22,000. Three-tab shingles sit at the low end; architectural (dimensional) shingles cost slightly more but look far better and last longer.
Metal Roofing , $7–$15 per sq ft
Metal roofs last 40–70 years, reduce energy bills through heat reflection, and are increasingly popular in storm-prone regions. A 2,000 sq ft metal roof costs $14,000–$30,000 installed. Standing seam metal is more expensive than corrugated panels but offers a cleaner look and superior weather sealing.
Clay & Concrete Tile , $10–$18 per sq ft
Tile roofs are popular in the Southwest and Florida for their heat resistance and curb appeal. They’re heavy , your home may need structural reinforcement , and installation requires specialized labor, pushing costs to $20,000–$36,000 for a 2,000 sq ft roof.
Natural Slate , $15–$30+ per sq ft
Slate is the gold standard of roofing, lasting 75–150 years with virtually zero maintenance. The trade-off: it requires skilled installers and costs $30,000–$60,000+ for a typical home. Synthetic slate offers a similar look at $10–$20/sq ft.
Wood Shake , $6–$11 per sq ft
Cedar shake shingles offer a distinctive natural aesthetic and moderate insulation benefits, lasting 25–35 years with proper maintenance. Costs run $12,000–$22,000 on a 2,000 sq ft roof. Note that wood shakes are restricted or banned in some high-fire-risk areas.
Key Factors That Change Your Roof Quote
Understanding why quotes vary so widely helps you identify fair pricing , and spot red flags before signing anything.
1. Roof Pitch (Steepness)
Steep roofs require safety harnesses, special equipment, and more time. A pitch above 6:12 typically adds $1,000–$3,000 in labor costs.
2. Roof Complexity
Dormers, skylights, chimneys, valleys, and multiple ridgelines increase material waste and installation time. A complex roof can cost 25–40% more per square foot than a simple gable design.
3. Geographic Location
Labor rates in major metro areas run 20–40% higher than rural markets. Local building codes and climate-specific requirements (hurricane straps in Florida, snow load in the Northeast) also affect pricing.
4. Hidden Structural Damage
Once the old roof is off, contractors may discover rotted decking or damaged rafters. Budget a 10–20% contingency on your estimate for potential surprises.
5. Season & Timing
Spring and summer are peak roofing season. Scheduling in fall or early winter can save 5–15% as contractors compete for slower-season jobs.
Roof Repair vs. Full Replacement: Which Makes Sense?
Not every roof problem requires a full replacement. Use this guide to decide:
Scenario
Recommendation
Roof is under 15 years old, localized damage
Repair ($300–$1,500)
Roof is 15–20 years old, moderate damage
Partial replacement or repair
Roof is 20+ years old, widespread issues
Full replacement
Repair cost exceeds 30% of replacement cost
Replace
Selling the home within 1–2 years
Replace for ROI
Asphalt shingle roofs over 20 years old with multiple leaks or widespread granule loss are almost always better replaced than patched. A new roof adds roughly $15,000–$20,000 in resale value on average, making it one of the better home improvement investments.
Don’t guess , get a real number from a vetted local contractor. Free, no-obligation quotes in minutes. Don’t forget to budget for your certificate of occupancy (COP) fees, which add $150–$700 to most residential roof replacement projects in 2026.
How much should a new roof cost for a 2,000 sq ft home in 2026?
A 2,000 sq ft roof replacement costs $10,000–$22,000 for asphalt shingles, $14,000–$30,000 for metal, and $19,000–$50,000+ for premium materials like slate or tile in 2026. Most homeowners in this range spend around $15,000–$20,000 for a quality asphalt installation.
Is $20,000 a fair price for a new roof?
Yes , $20,000 is within the normal range for a mid-to-large home using architectural asphalt shingles or entry-level metal roofing in 2026. Always compare it against at least two other quotes and confirm the price includes tear-off, permits, and a workmanship warranty.
What time of year is cheapest for roof replacement?
Fall and winter are typically the slowest seasons for roofing contractors, which often translates to better pricing and faster scheduling. Discounts of 5–15% off peak-season rates are common. Avoid spring and early summer if budget is your top priority.
How long does a new roof last?
Lifespan varies widely by material , asphalt shingles last 20–30 years, metal roofs 40–70 years, clay tile 50+ years, and natural slate can last 75–150 years with proper maintenance.
Can I put a new roof over my old one?
Most building codes allow one overlay (new shingles over old), but it’s generally not recommended. Overlaying hides potential structural damage, adds significant weight, and often voids manufacturer warranties. A full tear-off gives you a clean, fully inspectable base.
Does homeowner’s insurance cover a new roof?
Insurance covers roof damage caused by a covered peril (hail, wind, fire) but not normal wear and aging. If your roof was damaged in a storm, file a claim promptly. Policies vary , some pay actual cash value (depreciated), while others cover full replacement cost.
Roofing content specialist with 5+ years researching U.S. residential and commercial roofing. Has documented 200+ projects covering installation costs, material selection, contractor vetting, and DIY guides for homeowners across all climate zones.
ELK Shingles Guide: Colors, History & What Replaced Them
ELK Shingles Guide: Colors, History & What Replaced Them
This elk shingles guide covers everything homeowners need to know about a discontinued brand. ELK shingles are no longer manufactured , GAF acquired ELK Corporation in 2007 and stopped producing ELK-branded products. If you have ELK Prestique shingles on your roof, here’s everything you need to know: what happened, which GAF shingles replace them, how to match your color, and whether your roof needs replacing in 2026.
This elk shingles guide is designed specifically for homeowners who discovered their roof is ELK-branded during a sale, inspection, or insurance claim, and are now trying to figure out what that means for repair costs, material sourcing, and long-term replacement planning. Unlike active brands with current spec sheets and distributor pricing, ELK requires a different research approach: you need to work backwards from the original color and profile to find the closest modern equivalent, then verify that your chosen contractor can properly match the installation method used in ELK’s production era.
Using this elk shingles guide, you can confirm exactly which ELK Prestique model is on your roof, identify the best-matching GAF Timberline color and product tier, understand your warranty options for a discontinued product, and determine whether your roof’s age puts it in the repair or full-replacement category. The sections below follow that decision path in order, starting with the brand’s history and working through to costs, contractor selection, and the CTA to get a free local estimate.
ELK Shingles Guide: What Are They and Where Did They Come From?
ELK Corporation was founded in 1981 and earned a strong reputation for premium laminated asphalt shingles. The ELK Prestique line was widely regarded as one of the better architectural shingle options of its era , offering high-definition color blends and dimensional texture that stood out from standard 3-tab products. By the early 2000s, ELK shingles were installed on millions of homes across the United States.
GAF acquired ELK in 2007, becoming the largest roofing manufacturer in North America. Production of ELK-branded products was phased out through approximately 2009, when GAF consolidated its product lines under the Timberline and related families. Today, any ELK shingle on a roof is legacy material , no new ELK products have been manufactured for over 15 years. According to Roof.info’s brand registry, ELK is now classified as a retired brand with no active manufacturing.
GAF acquired ELK Corporation in 2007, ending production of ELK-branded shingles and transitioning the Prestique line to GAF Timberline equivalents.
ELK Prestique 30 Year Shingles , Colors & Specifications
The Prestique 30 Year was ELK’s core architectural shingle , a dimensional laminated product available in five primary colors that remain the most widely installed today. If you are trying to identify your current roof color or find a matching replacement, these are the colors you need to compare:
Weathered Wood , warm brown-gray blend, the most commonly installed ELK color across all U.S. regions
Birchwood , a lighter, clean tan tone suited to neutral and white exteriors
Charcoal , deep dark gray, high contrast, still one of the most popular shingle colors in the market
Barkwood , medium warm brown with rustic, earthy character
Hunter Green , less common, but found on traditional and colonial-style homes
The 5 most common ELK Prestique guide – shingle colors each has a GAF Timberline equivalent available in 2026. See the full ELK shingles color guide →
For a complete side-by-side color comparison including GAF equivalents and hex codes, visit the dedicated ELK Roofing Shingles Colors page →
ELK Prestique Shingles Discontinued , What This ELK Shingles Guide Means for Your Roof
Homeowners searching for “elk prestique shingles discontinued” are typically trying to answer one of three questions: Can I still buy matching shingles for a repair? Is my warranty still valid? And how do I replace a section without making it look mismatched? This elk shingles guide addresses all three , the short answer to each is no new production, limited legacy warranty support, and color matching is the biggest practical challenge.
Because ELK production stopped over 15 years ago, new ELK-branded shingles are not available through any standard distributor or roofing supply chain. Partial repairs using original ELK material are only possible through salvage sources , and even then, weathering and UV fade on existing shingles means an exact visual match is unlikely. For most homeowners, a partial patch on an aging ELK roof simply exposes the color mismatch problem more clearly.
Warranty claims for discontinued ELK shingles depend entirely on the original warranty terms and the failure type. Manufacturing defects may still be honored through GAF’s legacy claims process, but installation workmanship warranties expired long ago. Restoration Roofing’s discontinued shingles guide confirms that warranty support for acquired brands varies significantly by claim type.
Best GAF Replacement for ELK Prestique Shingles
The GAF Timberline family is the closest modern replacement for every ELK Prestique model. GAF engineered its Timberline line as the successor to the ELK product range after the 2007 acquisition, making it both the most structurally equivalent and the most color-consistent modern alternative. According to HomeGuide’s roof replacement cost data, Timberline HDZ and CS are the two most installed architectural shingles in the U.S. in 2026.
ELK Model
Best GAF Replacement
Color Match
Price Difference
ELK Prestique 30 Year
GAF Timberline HDZ
Weathered Wood ≈ Weathered Wood
Similar
ELK Prestique 40 Year
GAF Timberline CS
Charcoal ≈ Charcoal
+10–15%
ELK Capstone
GAF Capstone
Near-perfect match
Similar
The GAF Timberline HDZ carries a Lifetime limited warranty and SBS-modified asphalt construction , a structural upgrade over what ELK Prestique 30 Year offered at its time of production. For homeowners replacing a full ELK Prestique roof, the Timberline HDZ is the recommended default. For those seeking a closer performance match to ELK Prestique 40 Year, the GAF Timberline CS offers a similar dimensional profile at a 10–15% cost premium.
Is Your ELK Prestique Roof Due for Replacement?
Any ELK Prestique roof installed before 2007 is now between 18 and 45 years old , meaning the majority are at or well past their rated service life. A 30-year rating does not mean guaranteed failure at year 30, but it does mean that inspection matters more than it did five years ago. Granule loss visible in gutters, curling shingle edges, cracked tabs, and active leaks are the most common early failure signs on aging ELK roofs. According to Angi’s roofing cost research, homeowners who wait past visible failure signs pay 25–40% more in total project cost due to deck damage and interior water damage that accumulates before replacement.
ELK Prestique 30 year shingles feature Micro Weave® fiberglass core, SpecSelect asphalt, Diamond Cut™ granules, and Dura Grip® wind-resistant adhesive.
🏠
Has Your ELK Prestique Roof Reached Its Lifespan?
Get a free inspection and replacement quote from a certified roofing contractor. We’ll assess your ELK Prestique roof condition, identify the best GAF color match, and give you an honest 2026 installed price , no obligation.
Free inspection · No obligation · Licensed & insured
Frequently Asked Questions: ELK Shingles
Are ELK shingles still available?
No. ELK shingles are discontinued, and GAF no longer produces ELK-branded products. New ELK shingles are not available through any standard roofing distributor , all repairs and replacements must use modern GAF Timberline alternatives or salvage-sourced material, which carries significant color-match risk due to weathering and UV fade on existing roofs.
What is ELK Prestique equivalent in GAF?
GAF Timberline HDZ is the recommended replacement for ELK Prestique 30 Year. GAF Timberline CS is the closest equivalent to ELK Prestique 40 Year at a 10–15% cost premium. ELK Capstone is matched most closely by GAF Capstone with near-identical color profiles across the range.
How long do ELK Prestique 30 year shingles last?
ELK Prestique 30 year shingles last approximately 20 to 30 years under normal conditions. Roofs installed before 2007 are now 18–45 years old , most are at or past their expected lifespan. Adequate attic ventilation and regular inspection are the two biggest factors in whether a roof reaches the top of that range.
Can I get a warranty replacement for discontinued ELK shingles?
Manufacturing defect claims may still be processed through GAF’s legacy ELK warranty program. However, because original ELK material is no longer produced, any approved warranty claim will be fulfilled with a GAF Timberline equivalent , not original ELK shingles. Contact GAF directly with your original installation documentation to assess legacy claim eligibility.
What color is GAF Timberline that matches ELK Weathered Wood?
GAF Timberline Weathered Wood is the nearest equivalent to ELK Prestique Weathered Wood. It shares the warm brown-gray dimensional profile that made ELK Weathered Wood the most widely installed color in the Prestique line. It remains one of GAF’s top-selling colors in 2026 for exactly this reason , serving legacy ELK roofs needing full replacement or color-matched repair.
🏠 Roofing Tips & Updates
Get free roofing advice, cost guides, and seasonal maintenance tips.
Roofing content specialist with 5+ years researching U.S. residential and commercial roofing. Has documented 200+ projects covering installation costs, material selection, contractor vetting, and DIY guides for homeowners across all climate zones.
Roof Flashing Repair Cost: Fix Leaks Before Water Damage
Roof Flashing Repair Cost: Fix Leaks Before Water Damage
Roof flashing repair costs $200–$500 on average for minor fixes like resealing cracks or reattaching loose sections around chimneys, vents, or valleys. A full flashing replacement , removing the old metal and installing new step, counter, or apron flashing , runs $500–$1,500 depending on access complexity, material choice (aluminum, copper, galvanized steel), and scaffolding requirements.
These repairs address the #1 cause of interior roof leaks , failed flashing at roof-to-wall junctions, chimneys, skylights, and plumbing vents , preventing the cascade of water damage that turns a $400 flashing repair into $15,000+ in structural rot, mold remediation, and drywall replacement. If you have water stains on ceilings, bubbling paint, or granular debris in gutters from deteriorating sealant, your flashing failure is active and progressing.
This guide covers 2026 roof flashing repair costs by location and complexity, DIY vs. professional decision factors, symptoms that demand immediate action, and the 7-point contractor quote evaluation checklist that separates legitimate $350 repairs from $1,200 upcharges.
🚨 Leak Progression Timeline: Failed roof flashing causes interior water damage in 4–8 weeks during average rainfall patterns. Every month you delay repair compounds damage exponentially , a $400 flashing repair becomes $2,500 in drywall + insulation replacement after 3 months of intermittent leaking.
All figures represent national U.S. averages for Q2 2026, including labor, materials, and basic access equipment. Scaffolding, cherry pickers, or roof pitch adjustments add $200–$800. Costs assume single-story access; multi-story or commercial projects scale 25–50% higher.
Flashing Location / Repair Type
Minor Repair Cost
Full Replacement Cost
Time Required
Vent Pipe Flashing (most common)
$150–$300
$300–$600
1–2 hours
Chimney Step/Counter Flashing
$250–$450
$500–$1,200
2–4 hours
Roof Valley Apron Flashing
$200–$400
$400–$900
2–3 hours
Skylight/Dormer Flashing
$300–$500
$600–$1,500
3–5 hours
Wall-to-Roof Apron Flashing
$200–$350
$400–$800
1–3 hours
Full Roof Perimeter (multiple locations)
N/A
$1,500–$4,000
1–2 days
Source: HomeGuide 2026, Angi Q2 data, contractor quote aggregation. Costs include labor + materials; scaffolding adds $200–$800. Regional labor variance: +20–35% Northeast/Pacific, at/below national average Midwest/Southeast.
Cracked vent pipe boot (left) vs. correctly replaced aluminum pipe boot with sealed collar (right), the most common and most accessible DIY roof flashing repair at $20–$50 in materials. Catch it early and the repair takes 45 minutes; miss it for two rainy seasons and the saturated decking underneath adds $300–$800 to the repair bill.
What Roof Flashing Repair Actually Pays For
Cost Component
% of Total
Typical Cost Range
Labor (60–70%)
60–70%
$120–$250
Flashing Material (15–25%)
15–25%
$40–$150
Sealant / Underlayment (5–10%)
5–10%
$20–$60
Access Equipment (10–20%)
10–20%
$50–$300
7 Signs You Need Immediate Roof Flashing Repair
>Water stains on interior ceilings/walls directly below chimney, vent pipes, or valleys , classic flashing failure pattern
>Granular debris in gutters from deteriorated sealant around flashing edges >Buckled paint or peeling siding at roof-to-wall junctions >Visible cracks, rust, or lifting in metal flashing (especially copper/galvanized after 10–15 years) >Mold/mildew odor in attic near flashing locations >Soft/warped decking under shingles adjacent to flashing >Multiple small leaks vs. single shingle failure , indicates penetration failure
⚠️ Emergency Trigger: If you have active water intrusion during rain AND interior damage visible, treat as emergency. Water migration through framing creates hidden rot that costs $5,000–$20,000 to remediate.
DIY Roof Flashing Repair vs. Professional: The Real Decision Framework
DIY flashing repair is viable for minor resealing or boot replacement if you have basic ladder/roof access skills and the leak is confirmed isolated. Professional service is mandatory for chimney/step flashing, valleys, or any multi-story access. Here’s the breakdown:
Scenario
DIY Viable?
Cost
Risk Level
Vent pipe rubber boot reseal
✅ Yes
$20–$50
Low
Cracked apron flashing reseal
✅ Yes
$30–$75
Low
Loose valley flashing re-nail
⚠️ Maybe
$40–$100
Medium
Chimney step flashing replacement
❌ No
N/A
High
Multi-story / scaffolding access
❌ No
N/A
Extreme
DIY materials needed: Roofing cement ($8/tube), flashing tape ($15/roll), galvanized roofing nails ($5/box), replacement boots ($20–$40). Professional advantage: 10–25 year warranty, insurance coverage, code compliance.
Step-by-Step: How Professional Roof Flashing Repair Works
The brown ceiling stain (left) and the lifted, unsealed valley flashing (right) are the same leak, separated by 6 feet of framing. Failed roof flashing causes 70% of residential interior leaks; a $300–$500 flashing repair addresses the root cause. Left untreated, the drywall, insulation, and framing visible in this photograph represent $3,000–$8,000 in secondary remediation costs.
>Water test confirmation, hose test isolates flashing vs. shingle failure (15 min)
>No mention of underlayment inspection/repair , 60% of flashing failures have saturated decking
>Material unspecified , “flashing” vs. “26-gauge galvanized step flashing” >No warranty timeframe , demand 5-year minimum workmanship >Full roof tear-off proposed for single flashing failure (upsell tactic) >No access cost breakdown , scaffolding should be line item, not buried >$100 quotes , impossible for legit labor + material + insurance >No photos of existing damage , pro contractors document before/after Roof repair price guide 2026
Roof Flashing Repair FAQs 2026
How much does roof flashing repair cost?
Roof flashing repair averages $200–$500 for minor resealing or pipe boot replacement. Full flashing replacement costs $500–$1,500 depending on location (chimney, valley, skylight) and access requirements. Scaffolding adds $200–$800.
Can I fix roof flashing myself?
DIY viable for vent pipe boot resealing ($20–$50 materials). Professional required for chimney step flashing, valleys, or heights requiring fall protection. Improper flashing install fails in 6–18 months, causing $5,000+ water damage.
How long does roof flashing repair take?
Single flashing repair: 1–4 hours. Multiple locations: half to full day. Weather dependent; rescheduling common during active leak season.
What causes roof flashing to fail?
Thermal expansion (10–15 years), sealant degradation (UV/rain), loose nailing, ice dam uplift, improper original install. Copper lasts 50+ years; aluminum/galvanized 20–30 years.
Active Roof Leak?
Get a free flashing inspection + firm quote from certified roofers in your area.
Roof flashing repair addresses the structur/contactal root cause of 70% of residential roof leaks. The $200–$1,500 investment prevents $10,000+ in preventable water damage while extending shingle life 5–10 years through proper water shedding.
🏠 Roofing Tips & Updates
Get free roofing advice, cost guides, and seasonal maintenance tips.
Roofing content specialist with 5+ years researching U.S. residential and commercial roofing. Has documented 200+ projects covering installation costs, material selection, contractor vetting, and DIY guides for homeowners across all climate zones.
Roof Replacement Cost: What You’ll Actually Pay in 2026
Roof Replacement Cost: What You’ll Actually Pay in 2026
The average roof replacement cost in 2026 is $9,500 for a standard asphalt shingle roof on a 2,000 square foot home , but that number tells only part of the story. Post-tariff material price increases that took effect in April 2026, combined with the ongoing roofing labor shortage that has pushed installation wages 20–35% above 2021 levels, mean that the quote you receive today is structurally different from every benchmark published before Q2 2026. If you are using pre-April figures to anchor your budget expectations, you are likely underestimating your project cost by $1,200–$3,800 depending on material.
This guide gives you real, post-tariff installed cost ranges for every major residential roofing material in 2026 , asphalt shingles, metal roofing, tile, slate, and wood shake , broken down by what you are actually paying for: materials, labor, tear-off, and disposal. Read it before you contact a single contractor, and you will evaluate every quote from a position of genuine market knowledge rather than outdated assumptions.
💡 2026 Price Reality Check: The April 2026 tariff adjustments on imported steel, aluminum, and roofing components have added an estimated $400–$2,200 to the installed cost of metal roofing projects depending on system type. Asphalt shingle costs have risen modestly (4–8%) due to petroleum-derivative feedstock pricing. Clay and concrete tile, largely manufactured domestically or in Mexico (subject to existing trade frameworks), have seen the smallest post-April price movement. Labor costs , driven by the structural workforce shortage documented at 349,000 workers below demand , are not tariff-related and will not decrease when tariff conditions change.
All figures below represent fully installed costs including materials, labor, tear-off of one existing layer, underlayment, flashing, and disposal , on a 2,000 square foot (approximately 22–25 squares) single-story residential home with a standard 4:12 to 6:12 pitch. Costs are U.S. national averages for Q2 2026. Regional adjustments are noted in each section below.
Roofing Material
Cost Per Sq Ft
Total: 2,000 Sq Ft Home
Lifespan
Post-April Change
3-Tab Asphalt Shingles
$3.50–$5.50
$7,000–$11,000
15–20 years
↑ 4–6%
Architectural Asphalt Shingles
$4.50–$7.00
$9,000–$14,000
25–30 years
↑ 5–8%
Impact-Resistant (Class 4) Shingles
$5.50–$9.00
$11,000–$18,000
30–35 years
↑ 6–9%
Standing Seam Metal (Steel)
$10.00–$17.00
$20,000–$34,000
40–70 years
↑ 10–18%
Standing Seam Metal (Aluminum)
$12.00–$20.00
$24,000–$40,000
50–75 years
↑ 14–22%
Metal Shingles / Panels
$7.00–$14.00
$14,000–$28,000
40–60 years
↑ 8–15%
Concrete Tile
$8.00–$14.00
$16,000–$28,000
40–50 years
↑ 3–6%
Clay Tile
$12.00–$22.00
$24,000–$44,000
50–100 years
↑ 3–5%
Natural Slate
$15.00–$30.00
$30,000–$60,000
100–150 years
↑ 5–8%
Synthetic Slate / Composite
$7.00–$12.00
$14,000–$24,000
30–50 years
↑ 6–10%
Wood Shake
$7.00–$13.00
$14,000–$26,000
20–35 years
↑ 8–12%
Source: Angi, HomeGuide, HomeAdvisor, Modernize, NerdWallet Q2 2026 roofing cost data. Post-April change estimates incorporate tariff impact analysis from NRCA, ABC, and Metal Roofing Alliance. All costs are fully installed national averages , see regional adjustments in each section below. For labor shortage context affecting all figures, see our 2026 roofing labor shortage guide.
What Your Roof Replacement Cost Actually Pays For
Every roof replacement quote is an aggregate of five distinct cost components. Understanding what each one represents , and roughly what share of the total it accounts for , lets you identify line items that are inflated, missing, or misrepresented in any quote you receive.
Architectural asphalt ($9,000–$14,000), standing seam metal ($20,000–$34,000), and clay tile ($24,000–$44,000) represent three fundamentally different cost-per-year propositions in 2026, the cheapest sticker price is rarely the cheapest option measured over the roof’s full service life
Asphalt shingles remain the most widely installed residential roofing material in the United States , accounting for approximately 75–80% of all residential roofing projects. Their dominance is driven by the combination of accessible installed cost, reliable performance, and wide contractor availability relative to specialty materials. In 2026, post-tariff material price increases have been moderate for asphalt (4–8%) because the primary feedstock , petroleum-derived asphalt and fiberglass mat , is domestically produced and not directly subject to the April steel and aluminum tariff adjustments.
3-Tab vs. Architectural vs. Impact-Resistant: Real Cost Differences
3-tab asphalt shingles ($7,000–$11,000 installed) , the entry-level product. A single flat profile, 20-year limited warranty, and 60–70 mph wind resistance. Still widely specified but increasingly being displaced by architectural shingles whose cost premium has narrowed. Appropriate for investment properties, budget-constrained projects, or short-horizon ownership situations.
Architectural / dimensional shingles ($9,000–$14,000 installed) , the market standard for owner-occupied residential replacement. Layered construction creates dimensional shadow lines that add curb appeal value. 25–30 year limited warranty, 110–130 mph wind resistance in most products. The $2,000–$3,000 premium over 3-tab buys 8–10 additional years of service life , almost always the correct financial choice on a cost-per-year-of-service basis.
Impact-resistant (Class 4) shingles ($11,000–$18,000 installed) , engineered to resist hail penetration, rated to the UL 2218 Class 4 standard. In hail-prone markets (Texas, Colorado, Oklahoma, Kansas, the Midwest corridor), Class 4 shingles typically qualify for homeowner insurance premium discounts of 15–30% annually. For homeowners in these markets, the $2,000–$4,000 premium over standard architectural shingles is frequently recovered within 5–8 years in reduced insurance premiums , before any claim benefit is factored in.
Regional Asphalt Cost Adjustments
Northeast (NY, MA, CT, NJ): +15–25% above national average due to higher labor costs and union wages
Southeast (FL, GA, SC): At or slightly above national average; hurricane-rated products add $0.50–$1.50/sf premium
Midwest (IL, OH, MI, WI): At or slightly below national average; hail-zone demand influences product mix
Southwest (TX, AZ, NM): At national average; high summer temperatures reduce available installation windows and may affect scheduling
Mountain West (CO, UT, WY): +10–20% above national average; high-altitude labor premiums and hail-zone demand
Pacific Coast (CA, OR, WA): +20–35% above national average; California labor regulations, wage floors, and fire-rated product requirements add significant cost
Metal Roof Replacement Cost 2026: Post-Tariff Impact
April 2026 tariff adjustments on imported steel and aluminum added an estimated $400–$2,200 to metal roofing project costs, aluminum standing seam systems saw the largest increase (14–22%), making the material cost gap between metal and architectural asphalt wider in 2026 than at any point in the previous three years
Metal roofing is the material category most significantly affected by April 2026 tariff adjustments. Steel and aluminum , the two primary metals used in residential roofing , were subject to tariff rate changes that have added an estimated $400–$2,200 to the installed cost of metal roofing projects depending on system type and metal specification. Aluminum standing seam saw the largest percentage increase (14–22%) due to higher baseline tariff rates on aluminum imports. Steel panel products saw increases of 10–18%.
Standing Seam vs. Metal Shingles: The Right Choice Depends on Your Priorities
Standing seam metal roofing ($20,000–$40,000 installed) is the premium metal option , concealed fasteners, thermal expansion allowance built into the panel profile, and the cleanest long-term performance record of any metal roofing product. It requires specialist installation and carries the highest installed cost, but its 40–75 year lifespan, minimal maintenance requirements, and energy performance make it the most cost-efficient metal choice measured over its full service life. Post-tariff, expect quotes at the upper end of the range for aluminum systems.
Metal shingles and panels ($14,000–$28,000 installed) use exposed fasteners and a profile designed to resemble traditional shingles or tiles. They are less expensive to install than standing seam, more widely available from trained contractors, and still deliver 40–60 year service life. The exposed fastener design requires periodic inspection and fastener re-torquing over time , typically every 10–15 years. Post-tariff, this category has seen 8–15% material cost increases, making the price gap between metal shingles and architectural asphalt wider than it was in 2024.
Is Metal Still Worth It in 2026 Despite Tariff Increases?
For the right homeowner, yes , the financial case for metal roofing is not materially changed by a 10–18% material cost increase when measured against a 50–70 year service life. A standing seam steel roof installed in 2026 at $28,000 on a home where asphalt replacement would cost $11,000 replaces an asphalt shingle roof two or three times over its service life. Factor in energy savings (cool roof coatings reduce cooling loads by 10–25%), homeowner’s insurance premium reductions in hail and wind markets (15–30%), and near-zero maintenance costs, and the total cost of ownership picture for metal remains compelling despite higher 2026 pricing.
Where the tariff increase shifts the calculus is for homeowners who were already price-sensitive about metal versus architectural asphalt. If the $8,000–$12,000 premium over architectural shingles was already a stretch, a 10–18% material cost increase may genuinely tip the decision. For those homeowners in 2026, the impact-resistant Class 4 architectural shingle represents the best available value position , substantially better longevity and insurance performance than standard architectural at a cost well below metal.
Tile Roof Replacement Cost 2026: Clay vs. Concrete
Tile roofing , clay and concrete , has seen the smallest post-April price movement of any major material category, because it is largely manufactured domestically (concrete tile) or imported from Mexico and Spain under existing trade frameworks not subject to the April 2026 steel and aluminum tariff adjustments. Price increases of 3–6% (concrete tile) and 3–5% (clay tile) reflect inflation and labor cost increases rather than tariff-specific impact.
Concrete Tile: $16,000–$28,000 Installed
Concrete tile is the workhorse of the tile roofing category , manufactured domestically by major producers including Eagle Roofing Products and Boral, available in a wide range of profiles (flat, low-profile, high-profile barrel tile), and carrying 40–50 year warranties. It is approximately 30–40% less expensive than clay tile with comparable installation complexity. The primary limitation relative to clay is color fade over time , concrete tile relies on surface coloring that weathers differently than the through-body color of fired clay.
Clay Tile: $24,000–$44,000 Installed
Clay tile is the premium tier of the tile category , fired ceramic with through-body color that does not fade, a 50–100 year service life, and the highest thermal mass performance of any residential roofing material. Its installed cost premium over concrete tile reflects higher material cost, greater installation precision requirements, and the specialist labor needed for correct installation. In Southwest and Florida markets where clay tile dominates, specialist contractors are more available and labor premiums are lower than in other regions.
⚠️ Structural Note for Tile Roofing: Both clay and concrete tile are significantly heavier than asphalt or metal , typically 850–1,100 lbs per square (100 sf) versus 250–400 lbs for asphalt shingles. If your home was not originally built for tile roofing, a structural engineer assessment is required before installation to verify that your roof framing can support the additional dead load. This assessment costs $300–$800 and is not optional , it is a building code requirement in most jurisdictions. Budget for it in your total project cost.
The Hidden Costs That Inflate Your Final Bill
Every roof replacement cost estimate starts with the base material and labor figure , and then the actual bill grows. These are the most common additional costs that appear between quote and final invoice, and how to account for them in your budget before work begins.
Roof deck repair ($75–$150 per sheet): When the old roofing is removed, damaged or rotted deck boards are exposed. Most quotes include allowances of 1–3 sheets; projects on older homes or those with previous leak history routinely require 5–15 sheets of deck repair, adding $375–$2,250 to the final cost. Ask your contractor what their per-sheet deck repair rate is before signing.
Second layer tear-off ($1,200–$3,000 additional): Many homes have two layers of asphalt shingles , the original installation and one overlay. Building codes in most jurisdictions prohibit a third layer, meaning both must be removed before replacement. If your home has two layers, your tear-off cost approximately doubles. This is discoverable in the quote visit , ask specifically.
Chimney flashing ($500–$1,500 per chimney): Chimney flashing is the most common source of roof leaks and is frequently in failed condition on older roofs. Replacement is typically recommended on any full replacement project. Some quotes include it; others do not. Verify explicitly whether your quote includes chimney counter-flashing and step flashing replacement.
Pipe boot / penetration replacement ($50–$150 each): Every vent pipe penetration through the roof deck has a pipe boot , a rubber-collared lead or plastic flashing that seals around the pipe. These deteriorate and should be replaced on every full replacement. A typical home has 4–8 penetrations.
Ventilation upgrades ($300–$1,200): Inadequate attic ventilation bakes shingles from below, reducing product lifespan by 15–25%. Many older homes are underventilated. A quality contractor will assess and recommend ridge vent, soffit vent, or power vent upgrades as part of a full replacement.
Permit costs ($150–$500): Most jurisdictions require building permits for full roof replacements. Permits are occasionally included in contractor quotes; more often they are listed as a pass-through cost. Verify before signing.
Skylight resealing or replacement ($300–$1,500 per skylight): Skylights are frequently the leak source on older roofs , their flashing and seal should be assessed and updated as part of any full replacement. If a skylight is over 15 years old, replacement rather than resealing may be the better long-term choice.
A complete cost plan should also account for your roofing COP (Certificate of Occupancy) — the final inspection approval required in most U.S. jurisdictions.
Cost Per Year of Service: The Comparison That Changes the Decision
Sticker price is the wrong metric for comparing roofing materials. The financially rational comparison is total installed cost divided by expected service life , what each option actually costs you per year of protection. This calculation frequently reverses the intuitive preference for lower-cost materials.
Material
Midpoint Installed Cost
Midpoint Lifespan
Annual Cost of Ownership
vs. 3-Tab Baseline
3-Tab Asphalt
$9,000
17 years
$529/year
Baseline
Architectural Asphalt
$11,500
27 years
$426/year
19% cheaper per year
Class 4 Impact Shingles
$14,500
32 years
$453/year
14% cheaper per year
Standing Seam Steel
$27,000
55 years
$491/year
7% cheaper per year
Concrete Tile
$22,000
45 years
$489/year
8% cheaper per year
Clay Tile
$34,000
75 years
$453/year
14% cheaper per year
Natural Slate (S1)
$45,000
125 years
$360/year
32% cheaper per year
The cost-per-year analysis reveals a counterintuitive result: natural slate is the cheapest roofing material on a per-year-of-service basis , 32% less expensive annually than 3-tab asphalt, the lowest sticker-price option. This calculation does not capture the opportunity cost of a large upfront capital outlay, homeowner tenure considerations, or resale horizon , factors that legitimately favor lower-cost materials for some situations. But for a homeowner planning a forever home, the math is unambiguous.
Rotted or damaged deck boards exposed during tear-off are one of the most common hidden costs in roof replacement, at $75–$150 per sheet, 5–15 sheets of deck repair adds $375–$2,250 to the final bill on older homes. Ask your contractor their per-sheet deck repair rate before signing any contract
How to Evaluate a Roof Replacement Quote in 2026
With the cost context above established, here is the practical framework for evaluating every quote you receive against the 2026 market reality.
Verify the material specification is complete. Your quote should name the specific manufacturer, product line, shingle class (for asphalt), metal gauge and coating (for metal), and warranty level. “Architectural shingles” is not a specification. “GAF Timberline HDZ 30-year architectural shingles” is. You cannot compare quotes that specify different product tiers.
Confirm tear-off is included and how many layers are covered. Every full replacement includes tear-off. Verify whether the quote covers one layer or two, and confirm the per-sheet deck repair rate for any damaged decking discovered during tear-off.
Verify underlayment specification. Ask what underlayment product is being used. Synthetic underlayment (30–40 lb equivalent) outperforms traditional felt significantly , it should be standard on any 2026 replacement project. Some budget quotes substitute felt to reduce cost.
Ask whether flashing is included. Full flashing replacement (chimney, valleys, pipe boots) should be included in a comprehensive replacement quote. If it is listed as a separate line item or not mentioned at all, ask specifically.
Check the warranty structure , both product and workmanship. Manufacturer product warranties cover material defects. Workmanship warranties cover installation errors. They are different. Premium manufacturer certification programs (GAF Master Elite, Owens Corning Preferred, CertainTeed SELECT ShingleMaster) provide enhanced warranties that extend workmanship coverage to 25–50 years when installed by certified contractors.
Confirm who is performing the installation work. In a labor shortage market, verify explicitly whether the contractor’s own W-2 employees will perform your installation or whether the work will be subcontracted. This is not a disqualifying question , many legitimate contractors use established subcontractor crews , but it is information you need to evaluate accountability and quality consistency.
Check quote validity period. In a post-tariff, labor-shortage market, many contractors are issuing quotes valid for 14–30 days. If you need more time to decide, ask for an extension in writing before the validity expires , re-quoting after expiry in a rising-cost market will almost always produce a higher number.
The national average roof replacement cost in 2026 is $9,500 for a standard architectural asphalt shingle roof on a 2,000 sf home, with a full range of $9,000–$14,000 for that material and home size. 3-tab asphalt runs $7,000–$11,000. Metal roofing runs $14,000–$40,000 depending on system type, with post-tariff increases of 8–22% effective April 2026. Clay tile runs $24,000–$44,000. Natural slate runs $30,000–$60,000. All figures are fully installed including tear-off of one existing layer, underlayment, flashing, and disposal on a standard pitch single-story home.
How much have roof replacement costs increased in 2026?
Roof replacement costs in 2026 are 25–45% higher than equivalent projects in 2021, driven by two independent factors: post-tariff material cost increases (4–22% depending on material, with metal most affected) and structural labor cost increases of 20–35% driven by the 349,000-worker construction labor shortage. The labor component is structural and not expected to reverse in the near term. Material costs for metal roofing specifically have seen the sharpest post-April 2026 increases; asphalt and tile increases have been more moderate.
What is the cheapest way to replace a roof in 2026?
The lowest sticker-price option is 3-tab asphalt shingles at $7,000–$11,000 installed , but the cheapest total cost approach is architectural asphalt shingles, which cost $2,000–$3,000 more upfront and deliver 8–10 additional years of service life, producing a lower annual cost of ownership. Beyond material selection, the most effective cost-management strategies are: booking in the off-season (November–February) when contractors are more available and pricing may be more flexible; getting a minimum of three itemized quotes; and not deferring a needed replacement , delayed replacements become structural repairs at two to three times the replacement cost.
How do tariffs affect roof replacement cost in 2026?
April 2026 tariff adjustments on imported steel and aluminum have added an estimated $400–$2,200 to metal roofing project costs, with aluminum standing seam systems most affected (14–22% material cost increase) and steel panel systems moderately affected (10–18%). Asphalt shingle costs have seen modest tariff-related increases (4–8%) as asphalt is primarily petroleum-derived and domestically produced. Clay and concrete tile have seen the smallest price movement (3–6%) as they are largely not subject to the April metal tariff adjustments. For homeowners considering metal roofing, the tariff environment has made the cost premium versus architectural asphalt wider in 2026 than it was in 2024–2025.
Will roof replacement costs go down in 2027?
Labor costs , the largest single component , are unlikely to decrease in 2027. ABC projects the construction worker shortage will grow to 456,000 workers in 2027 as construction spending resumes growth, meaning wage pressure on qualified roofing crews will intensify rather than ease. Metal material costs may moderate if tariff conditions change, but this is a policy variable with no reliable forecast timeline. For homeowners on the fence about timing, the balance of evidence suggests that waiting for 2026 costs to drop is not a reliable strategy. The structural forces , labor shortage and tariff environment , both point toward continued cost pressure through at least 2027–2028.
The roof replacement cost 2026 landscape is more complex than any single average figure captures , post-tariff material increases, structural labor shortage pricing, and wide regional variation mean that the difference between a well-prepared homeowner and an unprepared one can be $3,000–$5,000 on the same project.
Arrive at your contractor conversations with the material cost ranges, the cost-per-year comparison, the hidden cost categories, and the quote evaluation framework in this guide , and you will make a better decision, faster, with more confidence than any homeowner who goes in cold.
🏠 Roofing Tips & Updates
Get free roofing advice, cost guides, and seasonal maintenance tips.
Roofing content specialist with 5+ years researching U.S. residential and commercial roofing. Has documented 200+ projects covering installation costs, material selection, contractor vetting, and DIY guides for homeowners across all climate zones.
The Roofing Labor Shortage: Why It’s Getting Harder to Hire
The Roofing Labor Shortage: Why It’s Getting Harder to Hire
The U.S. construction industry needs to attract 349,000 net new workers in 2026 just to keep labor supply and demand in equilibrium , and roofing is one of the most acutely affected trades, with 85% of contractors reporting skilled labor shortages as their single largest operational constraint. For homeowners waiting weeks for a callback and receiving bids 30–50% higher than they expected, that number explains everything. For contractors watching their backlog grow while qualified crews stay scarce, it confirms what they already feel every Monday morning.
This is not a temporary post-pandemic anomaly. The roofing labor shortage 2026 represents the convergence of three structural forces that have been building for over a decade: an aging workforce retiring faster than the industry can replace it, a generation-long cultural devaluation of the trades that suppressed vocational enrollment, and immigration policy uncertainty that has reduced the undocumented worker inflow that historically buffered construction labor gaps.
In April 2026, nearly 200 roofing industry professionals from 32 states converged on Capitol Hill for Roofing Day in D.C. , the NRCA’s annual advocacy push , to press lawmakers directly on the workforce crisis and its inseparable companion issue: affordable housing. Their message was direct. The industry cannot build the homes America needs without the workers to roof them. And right now, those workers simply do not exist in sufficient numbers.
This article unpacks the roofing labor shortage 2026 from two angles simultaneously: what it means for contractors trying to grow or sustain their businesses in a constrained labor market, and what it means for homeowners trying to understand why scheduling is delayed, why bids are high, and what they can realistically expect from their next roofing project.
💡 Key Context: The 349,000-worker gap figure comes from a proprietary model developed by Associated Builders and Contractors (ABC), using U.S. Census Bureau construction spending data and Bureau of Labor Statistics employment data. It represents the number of net new workers the entire construction industry needs to attract in 2026 , not just to grow, but simply to replace retiring workers and meet existing demand. It is projected to rise to 456,000 in 2027.
The 2026 Roofing Labor Shortage: By the Numbers
The data behind the roofing labor shortage 2026 is more specific , and more alarming , than the general headlines suggest. Here is the full statistical picture from the most credible industry sources available.
349,000 , net new construction workers the U.S. industry must attract in 2026 to meet demand (ABC, January 2026)
456,000 , projected worker gap in 2027 as construction spending growth resumes (ABC)
439,000 , the equivalent gap figure for 2025, meaning demand has moderated but not resolved
500,000+ , the worker gap in each of 2023 and 2024 at peak post-pandemic construction demand
85% , percentage of roofing contractors reporting skilled labor shortages in 2024 NRCA survey, up from 82% in 2022
136,740 , total roofers employed in the U.S. as of 2024 (U.S. Bureau of Labor Statistics)
~20% , additional roofing jobs NRCA estimates contractors could complete if skilled labor supply met current demand (GAF/NRCA analysis)
202,000 , construction job openings in February 2026, down 28,000 from January and 53,000 from February 2025 , a record low opening rate that reflects both a softening and an inability to fill even reduced demand (NRCA, April 2026)
200 , roofing industry professionals from 32 states who attended Roofing Day in D.C. on April 14–15, 2026, to press Congress on workforce and housing policy
35% , improvement in worker retention seen by companies with structured apprenticeship and mentorship programs (2026 National Roofing Workforce Analysis)
How the Roofing Labor Shortage Built to This Point
Nearly 200 roofing professionals from 32 states converged on Capitol Hill on April 14–15, 2026 for NRCA Roofing Day in D.C., pressing Congress directly on workforce reform and affordable housing policy as the 349,000-worker construction gap entered its third consecutive year
The roofing labor shortage 2026 did not appear suddenly. It is the compounding result of policy decisions, demographic shifts, and cultural attitudes toward skilled trades that have been accumulating since the 1990s. Understanding the root causes is not just academic , it explains why quick fixes haven’t worked and why the gap is projected to worsen in 2027.
Cause 1: The Retirement Wave Is Accelerating
ABC’s chief economist Anirban Basu has stated explicitly that “a majority of new worker demand in 2026 will be attributable to retirement rather than increased demand for construction services.” This is a critical distinction , the industry is not primarily short of workers because it is growing rapidly. It is short of workers because the experienced tradespeople who built roofing crews for the past 30 years are aging out of the workforce faster than they can be replaced.
Nearly one-fifth of workers in several construction trades are over age 55. In roofing , a physically demanding trade that is harder to perform at 60 than at 35 , early retirement is common. The institutional knowledge these workers carry disappears with them, and no vocational program replicates 20 years of on-roof experience on a fast timeline.
Cause 2: The “College for Everyone” Pipeline Failure
For roughly 30 years, American high schools systematically dismantled vocational education programs in favor of college-preparatory curricula. Shop classes, apprenticeship pipelines, and vocational tracking were defunded or eliminated as culturally stigmatized. The message delivered to an entire generation , that success means a four-year degree , did not just reduce interest in the trades. It eliminated the institutional pathways through which skilled workers had historically been identified and trained.
Roofing is a skilled trade. An experienced roofer reads slope geometry, manages crew sequencing, understands material compatibility, installs flashing to weatherproof complex intersections, and operates safely at height in variable conditions. These skills take years to develop. The pipeline to develop them has been operating below capacity for decades , and the deficit is now fully visible in contractor scheduling boards and bid prices nationwide.
Cause 3: Immigration Policy Uncertainty
The construction industry has historically relied on immigrant labor , both documented and undocumented , to supplement domestic workforce shortfalls. ABC’s analysis explicitly acknowledges this: “data show a sharp decline in undocumented worker inflows in 2025, alongside an increase in voluntary deportations.” The full impact on the construction workforce remains uncertain, but the directional effect is clear , a labor supply that previously helped buffer shortages has contracted.
NRCA’s advocacy at Roofing Day 2026 directly addressed this. The organization’s immigration reform bill bullet points, published in February 2026, describe “a chronic shortage of qualified workers” as “the single largest limitation on the ability of roofing industry employers to grow their businesses” , and explicitly link immigration reform to the industry’s ability to close the gap.
Cause 4: The Affordable Housing Demand Surge
The roofing labor shortage 2026 is happening simultaneously with an affordable housing crisis that requires more roofing work, not less. At Roofing Day in D.C., NRCA’s Josh Cotney stated directly: “We’re focusing on workforce and affordability, including how to increase homebuilding and create more opportunities for contractors.” The two issues are inseparable , you cannot build the housing units America needs without workers to roof them, and you cannot develop those workers without the policy environment to support workforce investment.
What Roofing Day in D.C. 2026 Was Actually About
In 2026’s constrained labor market, homeowners routinely wait 3–8 weeks for an initial inspection and face bid variability of 30–50% between contractors, not because pricing is arbitrary, but because crew quality, retention investment, and subcontracting practices vary dramatically across the market
On April 14–15, 2026, approximately 200 roofing professionals from 32 states arrived in Washington, D.C. for the NRCA’s annual Roofing Day , the industry’s primary legislative advocacy event. The concentration and specificity of their message this year was notable: two issues, presented as one.
The Two Legislative Asks
First: Workforce policy reform. Attendees pressed Congress for immigration reform specifically designed to increase legal pathways for skilled construction workers, and for increased federal funding for technical and vocational education programs. The NRCA’s position is that domestic training pipelines alone cannot close a 349,000-worker gap within the timeframes housing demand requires , legal immigration pathways for qualified trade workers must be part of the solution.
Second: Affordable housing production support.Roofing contractors argued that policy barriers to residential construction , zoning restrictions, permitting delays, and financing constraints , must be reduced to allow the housing supply increase that will bring construction demand into alignment with even a constrained workforce. Less construction activity means less work; that dynamic cuts both ways.
Why Contractors Showed Up in Person
Duane Musser, NRCA’s VP of government relations, articulated the strategic logic clearly: “The best data point we have is a projected shortfall of 349,000 construction workers in 2026 , and 456,000 in 2027.” Getting lawmakers to understand that number , and its direct connection to housing costs, project timelines, and constituent experiences , requires showing up in person. Press releases do not get congressional meetings. Contractors from 32 states in congressional offices do.
📋 For Contractors: Roofing Day in D.C. is a direct validation mechanism for the labor market reality you are operating in. The 349,000-worker gap is not an abstraction , it is why your best crew member got a competing offer last month, why your apprentice pipeline takes 18 months to produce a reliable installer, and why your labor costs are running 15–25% higher than they were three years ago. These are structural conditions documented at the federal level, not local anomalies.
How the Roofing Labor Shortage Translates to Real Project Conditions
What Homeowners Experience
What’s Actually Causing It
Realistic 2026 Expectation
3–6 week wait for initial inspection
Crews are fully booked; estimators are as scarce as installers
For Homeowners: Navigating the Labor Shortage Without Getting Burned
Companies with structured apprenticeship and mentorship programs see 35% better worker retention than those without, making internal pipeline development the most strategically sound response to a roofing labor shortage that cannot be solved by recruiting alone
The roofing labor shortage 2026 creates specific conditions that homeowners need to navigate carefully. Understanding the market context behind delayed scheduling and high bids protects you from two opposite mistakes: paying a premium to a contractor who doesn’t deserve it, and chasing the lowest bid to a contractor who can’t actually deliver.
Why Bids Are High , and Which High Bids Are Justified
In a constrained labor market, established contractors with trained, stable crews command genuine pricing premiums , and those premiums are often justified. A contractor who has invested in apprenticeship training, pays competitive wages to retain qualified installers, and carries adequate insurance is running a more expensive operation than one who uses day labor, rotates crews, and sub-contracts overflow work without adequate oversight.
The labor shortage separates these two contractor types more visibly than it does in a loose labor market. In 2026, a significantly lower bid than the market average is frequently a sign of crew quality or capacity problems , not a discount you should chase. Ask every contractor bidding your project to identify specifically who will be performing the installation work: their own W-2 employees, their established subcontractors, or labor sourced after the contract is signed.
Why Scheduling Is Delayed , and How to Work Around It
With 85% of roofing contractors reporting labor shortages, qualified crews are working at or near full capacity through the peak installation season. The contractors doing the best work , those with trained, retained crews , are typically the most booked. A 4–8 week wait from first contact to project start is normal for a quality contractor in most U.S. markets in 2026. In storm-affected regions where emergency replacement demand spikes seasonally, that wait can extend to 12–16 weeks.
The practical workaround: contact contractors in January and February for spring installation. The roofing industry’s off-season (November–February) is when appointment books are most open, when contractors are most responsive to new inquiries, and when off-season pricing incentives are most likely to appear. Homeowners who wait until May to address a roof they knew needed attention in October pay peak-season pricing and peak-season wait times simultaneously.
The Questions Every Homeowner Should Ask in 2026
“Will your own employees be performing the installation?” , establishes crew accountability and quality consistency
“How many roofing projects are currently scheduled ahead of mine?” , gives you a realistic timeline picture
“What is the experience level of the crew assigned to my project?” , identifies whether apprentice-heavy crews will be used to manage labor constraints
“Does this quote include a project manager on-site during installation?” , in a labor-stretched market, unsupervised crews are a genuine quality risk
“How long is this quote valid?” , shorter validity periods reflect cost volatility; budget for re-quoting if you need more decision time
“Are you a certified installer for the manufacturer whose materials you are specifying?” , manufacturer certification programs help validate contractor training standards in a market where training quality varies widely
For Contractors: What the Labor Shortage Data Means for Your Business Strategy
The roofing labor shortage 2026 is the dominant business environment condition for every roofing contractor operating in the U.S. market right now. The contractors who understand its structural nature , rather than treating it as a temporary hiring problem , are making fundamentally different strategic decisions from those who keep posting Indeed listings and wondering why they stay unfilled.
Retention Beats Recruiting in a Shortage Market
The 2026 National Roofing Workforce Analysis found that companies with structured apprenticeship and mentorship programs see 35% better worker retention than those without. In a market where every qualified roofer receives competing offers, the cost of losing an experienced installer , recruiting, onboarding, and the 12–18 months to reach full productivity , is almost certainly higher than the retention investment that would have kept them.
Wage competitiveness, structured career progression, health benefits, and fleet vehicles are no longer “nice to haves” in 2026’s labor market. They are the retention tools that determine whether you have a stable crew this time next year or are back filling the same positions again.
Build the Pipeline You Cannot Hire Ready-Made
The skilled roofer shortage cannot be solved by hiring , there are not enough skilled roofers available to hire. It can only be solved by developing roofers from entry level. This means formal apprenticeship programs, partnerships with local trade schools and community colleges, and a genuine commitment to training investment that most small contractors have historically avoided as a cost without immediate return.
The NRCA’s workforce programs , including its NRCA ProCertification system and partnerships with the National Center for Construction Education and Research (NCCER) , provide structured frameworks for contractor training investment. Contractors who began building apprenticeship pipelines in 2022–2023 are now seeing the first wave of those trainees reach productive installer status. Those who start in 2026 will see returns in 2028.
Price for the Market You Are Actually Operating In
The labor shortage data validates what many contractors have been reluctant to fully implement: current market labor costs are structurally higher than they were in 2019–2021, and that pricing environment is not going away in the near term. Contractors who are still pricing at 2021 labor rates , or pricing below competitors to win volume , are systematically underpricing themselves into unsustainable margins as their actual labor costs rise.
The homeowner market is absorbing higher pricing in 2026 , partly because it has no alternative, and partly because informed homeowners increasingly understand that the lowest bid in a labor-shortage market is a risk, not a deal. The market has shifted to reward quality and reliability. Price accordingly, and communicate the value of your crew investment explicitly in every proposal.
🏠 For Homeowners: If a contractor tells you they can start your project within the week and their bid is 35% below every other quote you received , in a market where 85% of contractors report labor shortages , those two facts together should raise serious questions about crew quality, insurance coverage, and whether the work will be performed by trained installers or day labor sourced after your deposit clears. The labor shortage makes vetting contractor crew quality more important in 2026 than it has been in any recent year.
What Changes If the Policy Response Works
The NRCA’s Roofing Day advocacy push is oriented around two policy levers that, if enacted, would meaningfully address the roofing labor shortage over a 3–7 year horizon. Neither produces immediate relief , but both change the trajectory.
Immigration Reform: The Near-Term Supply Bridge
Legal pathways for skilled construction workers , expanded H-2B visa programs or new trade-specific visa categories , represent the fastest route to increasing qualified labor supply. The NRCA’s immigration reform priorities specifically target skilled workers who can enter a structured training and employment pipeline rather than arriving without trade experience. If enacted, this policy change could meaningfully reduce the shortage within 18–36 months.
Vocational Education Funding: The Long-Term Solution
Increased federal funding for Perkins Act vocational education programs, career and technical education (CTE) pathways, and registered apprenticeship programs addresses the root cause , the collapsed pipeline of domestically trained trade workers. This is a 5–10 year solution. Students entering trade programs in response to policy funding changes today will not reach experienced installer status until the early 2030s.
For homeowners and contractors planning projects through 2028 and beyond, the honest assessment is this: the roofing labor shortage 2026 will not be resolved by the time your next project starts. Plan for a constrained market, price realistically, vet your contractor carefully, and build in timeline flexibility. The structural forces behind the shortage are real, documented, and not going away on a short timeline , regardless of what happens on Capitol Hill.
Why is it so hard to find a roofing contractor in 2026?
The construction industry needs to attract 349,000 net new workers in 2026 just to maintain current labor supply , primarily to replace retiring workers, not to meet new demand growth (ABC, January 2026). Roofing is one of the most acutely affected trades: 85% of roofing contractors report skilled labor shortages (NRCA 2024). The result for homeowners is extended wait times (typically 3–8 weeks for an initial inspection), reduced contractor responsiveness, and higher overall project costs driven by wage competition for scarce qualified crews.
Why are roofing quotes so much higher in 2026 than a few years ago?
Roofing labor costs have risen 20–35% since 2021 as contractors compete for a scarce pool of qualified installers. In a shortage market, wages rise , contractors who want to retain trained crew members must pay market rates that reflect demand exceeding supply. Material costs have also increased due to supply chain pressures and inflation. The combination of higher labor and higher materials means roofing project costs in 2026 are structurally higher than any pre-2022 benchmark , and this pricing environment is unlikely to reverse meaningfully in the near term.
What is NRCA Roofing Day in D.C. and why does it matter?
NRCA Roofing Day in D.C. is the National Roofing Contractors Association’s annual legislative advocacy event, where roofing contractors travel to Washington to meet directly with members of Congress and their staff. In April 2026, approximately 200 professionals from 32 states attended, pressing lawmakers on two linked issues: the workforce shortage and the affordable housing crisis. The event is significant for the broader market because the policy changes NRCA advocates , immigration reform and vocational education funding , are the levers most likely to affect labor supply and project costs over the next 3–7 years.
How long will the roofing labor shortage last?
The shortage is projected to worsen before it improves , ABC forecasts the construction worker gap rising to 456,000 in 2027 as construction spending growth resumes. Without significant policy intervention (immigration reform, vocational education investment) or a sustained economic slowdown that reduces construction demand, the structural labor shortage is likely to persist through at least 2029–2030. Contractors building internal apprenticeship pipelines today and homeowners planning projects with realistic timelines and budgets are adapting to a multi-year market condition, not a temporary disruption.
What can homeowners do to protect their project during the labor shortage?
Four practical steps deliver the most protection: 1) Contact multiple contractors simultaneously , with 85% reporting shortages, the contractors you want are booking fast. 2) Book in the off-season (November–February) for spring installation to access better scheduling and potential pricing flexibility. 3) Verify crew composition in every bid , confirm the contractor’s own trained employees will perform your installation, not day labor sourced after contract signing. 4) Be appropriately skeptical of bids significantly below the market range , in a shortage market, an unusually low bid often reflects crew quality or capacity issues rather than genuine efficiency. For more on evaluating contractor quotes, see our guide to residential roof repairs and replacement planning.
The roofing labor shortage 2026 is not a contractor complaint or a homeowner excuse , it is a documented structural condition with a specific number attached to it, pressed at the federal level by 200 industry professionals who traveled to Capitol Hill because they know the problem is too large for the private sector alone to solve.
Understanding it clearly , rather than being frustrated by it blindly , is the first step toward making better decisions on both sides of the estimate table.
🏠 Roofing Tips & Updates
Get free roofing advice, cost guides, and seasonal maintenance tips.
Roofing content specialist with 5+ years researching U.S. residential and commercial roofing. Has documented 200+ projects covering installation costs, material selection, contractor vetting, and DIY guides for homeowners across all climate zones.
Slate Roof Repair: Complete Guide to Fixing & Replacing
Slate Roof Repair: Complete Guide to Fixing & Replacing
Slate roof repair costs an average of $2,006 in 2026 , ranging from $250 for a single broken tile to $20,000 for extensive flashing and underlayment work , making it one of the most specialized and highest-value repair categories in residential roofing. Knowing how to repair a slate roof correctly, when to call a specialist, and how to source matching replacement tiles is the difference between a 10-minute fix that lasts another 50 years and an improper patch job that creates a leak worse than the one you started with.
Natural slate is the most durable roofing material available , a properly maintained slate roof can last 100–150 years, and some historic installations have protected buildings for over two centuries. But its longevity depends entirely on competent repairs when individual slates crack, slip, or break. Walk away from a handful of damaged tiles and within two rainy seasons, water infiltration will have rotted the deck below and turned a $400 repair into a $15,000 structural project.
This complete 2026 guide covers everything you need to understand about slate roof repair , from identifying damage types and sourcing matching replacement slate, through step-by-step repair instructions for both DIY and professional work, to cost breakdowns, common mistakes, and the point at which repair stops making financial sense.
💡 Pro Tip: Never hire a general roofing contractor to perform slate roof repair unless they can demonstrate documented experience with slate specifically. Slate requires specialist tools (slate ripper, slate hammer, copper bib flashing), specialist knowledge of nail placement and headlap geometry, and an understanding of slate grades and sourcing. A general roofer using standard asphalt shingle techniques on a slate roof will almost certainly cause more damage than they fix , and will typically void any remaining historic warranty on the slate system.
Slate Roof Repair in 2026: By the Numbers
Before assessing your specific situation, understanding the full cost and performance landscape of slate roof repair helps you evaluate every contractor quote and material recommendation you receive.
>$2,006, national average slate roof repair cost in 2026 (Angi)
>$784–$3,253, typical range for most residential slate roof repairs
>$5–$15 per square foot, average slate repair labor and material cost per sf
>100–150 years , lifespan of S1 (hard) grade natural slate with proper maintenance
>50–125 years, lifespan of S2/S3 (soft) grade natural slate
>$4–$17 per square foot, labor range for slate roof repair depending on slope, access, and complexity
Understanding Slate: Grades, Types, and Why They Matter for Repair
The three most common slate roof repair triggers visible in one section: a broken tile (diagonal crack), a slipped tile (displaced downward exposing nail holes), and a missing tile gap revealing the underlayment below, each requires removal and proper replacement, never patching with roofing cement
Successful slate roof repair begins before you touch a single tile , it begins with correctly identifying what type of slate is on your roof. Sourcing mismatched replacement slate is one of the most common and costly slate repair mistakes, producing visible color and texture variation and potentially different thermal expansion characteristics that stress adjacent tiles.
ANSI Slate Hardness Grades
The American National Standards Institute classifies natural roofing slate into three grades based on hardness, absorption, and expected service life. Knowing your slate’s grade tells you its remaining lifespan, appropriate repair approach, and how urgently individual failures need attention.
Grade
Classification
Expected Lifespan
Common Sources
Repair Priority
S1
Hard slate
100–200 years
Vermont, Virginia, Spain, China
High , worth every repair investment
S2
Intermediate slate
75–150 years
Pennsylvania, New York
High , repair while system is intact
S3
Soft slate
50–75 years
Maine, some Pennsylvania
Assess , may be at or near end of life
Natural Slate vs. Synthetic Slate: Repair Differences
Natural slate and synthetic slate (polymer composite or fiber cement tiles manufactured to look like natural slate) require fundamentally different repair approaches. Natural slate repair uses the ripper-and-bib or hook method described in detail below. Synthetic slate tiles are repaired more like standard roofing shingles , they are lighter, can typically be nailed through without cracking, and replacement tiles are usually available directly from the manufacturer.
Natural slate repair costs average $2 more per square foot than synthetic slate repair due to the higher material cost of matching natural stone and the greater skill required for correct installation. If you are unsure whether your roof is natural or synthetic, a simple test: natural slate produces a clear, bell-like ring when tapped with a knuckle; synthetic slate produces a dull thud.
Slate Roof Repair Cost by Type: 2026 Complete Breakdown
Repair Type
Average Cost
Cost Range
DIY Feasible?
Single tile replacement (1–2 tiles)
$150–$400
$50–$600
Yes , with correct tools
Multiple tile replacement (3–10 tiles)
$400–$1,200
$300–$2,000
Possible , experience recommended
Flashing replacement (chimney, valley)
$600–$3,000
$400–$20,000
No , specialist required
Underlayment repair / replacement
$2,000–$8,000
$800–$16,000
No , full slate removal required
Re-nailing / re-pointing loose slates
$800–$2,500
$500–$5,000
Possible for isolated areas
Ridge cap slate replacement
$800–$3,500
$600–$6,000
No , ridge work requires specialist
Partial restoration (one slope)
$2,500–$8,000
$2,500–$15,000
No , full contractor project
Full slate roof replacement
$20,000–$60,000
$10–$30/sf installed
No , specialist contractor only
Source: Angi, HomeAdvisor, HomeGuide 2026 slate roofing cost data. Costs reflect U.S. national averages , Northeast and Mid-Atlantic markets (primary historic slate regions) typically run 10–20% above these figures. For full replacement cost comparison against other materials, see our residential roof repair vs. replacement guide.
How to Identify Slate Roof Damage: What to Look For
Most slate roof damage is visible from the ground with binoculars , a twice-yearly inspection (spring and fall) catches developing issues before they become expensive emergency repairs. Here is what to look for at each inspection point.
From Ground Level (Binoculars)
>Missing tiles: Visible gaps in the slate field , dark rectangles where a tile has slipped or fallen
>Slipped tiles: Tiles that have partially displaced downward, exposing the nail holes or the tile above
>Broken tiles: Cracked or shattered slates , often visible as irregular edges or missing corners
>Ridge deterioration: Crumbling mortar, lifted ridge slates, or gaps at the ridge apex
>Discoloration patches: Dark wet-looking areas that don’t dry after rain , indicating water retention under compromised tiles
>Flashing rust streaks: Brown vertical staining running down from chimney base, skylights, or valleys , indicates corroded lead or galvanized flashing
From Attic Inspection (Interior)
>Daylight penetration: Points of light visible through the deck , indicates missing or displaced tiles above
>Water staining on rafters: Brown staining or tide marks on structural timber , indicates past or active water infiltration
>Wet or discolored insulation: Moisture-damaged insulation indicates the underlayment has failed and water is reaching the deck
>Staining on deck boards: Dark discoloration on the roof sheathing or skip-sheathing boards beneath the slate
>Deteriorated underlayment: Original felt or organic underlayment visible as crumbling, flaking, or torn material , common on roofs 75+ years old where the underlayment has reached end of life before the slate itself
On the Roof Surface (Up-Close Inspection)
> Nail sickness: Nails (particularly older iron nails) corrode over decades, causing slates to lose their fastening and slip progressively , this is the most common cause of slate roof failure on older installations and may require a full re-nailing program
> Delamination:Soft slate (S3 grade) splits into layers as it ages , visible as tiles separating into multiple thin layers; delaminating slates cannot be repaired and must be replaced
> Spalling:Surface scaling or pitting of the slate face , indicates the stone’s mineral structure is deteriorating; a sign the slate grade is near end of life
> Hairline cracks:Fine cracks running across tiles , may not be immediately visible from the ground; tiles with cracks that extend through the full thickness should be replaced
How to Repair a Slate Roof: Step-by-Step Guide
Individual slate tile replacement is the most common slate roof repair task , and the one most accessible to a careful, safety-conscious homeowner. The following process applies to replacing a single broken, cracked, or slipped slate tile using the two approved installation methods: the hook method and the nail-and-bib (tingle) method.
The hook method is the preferred technique for slate roof repair, a copper or stainless slate hook drives into the deck between courses and catches the tile’s bottom edge, securing it without any nail penetration through the tile face and allowing future removal without disturbing surrounding slates
🛠️ Tools Required for Slate Roof Repair:>Slate ripper , the essential specialist tool; a flat steel blade with a hooked end for pulling nails beneath overlapping slates >Slate hammer , a combination hammer with a pointed end for trimming slate and a nail-pulling notch >Copper or stainless steel slate hooks(for hook method) >Copper bib flashing , minimum 8 inches × 3 inches, 16–20 oz copper sheet (for nail-and-bib method) >Copper or stainless steel ring-shank nails , never galvanized iron nails; they corrode within 20–40 years >Hand drill and bit , for pre-drilling nail holes in new slate >Replacement slate tile , matched for size, thickness, color, and ANSI grade >Fall protection , harness, rope, roof anchors; non-negotiable for all slate roof work >Rubber-soled shoes , slate is extremely slippery when wet or dry; purpose-made rubber roofing shoes reduce slip risk >Knee pads , protect both you and the surrounding tiles from pressure damage during work
Step 1: Source Your Matching Replacement Slate
Before doing anything else , before climbing the roof, before ordering tools , source your replacement slate. Correct matching requires identifying four parameters: tile dimensions (length × width in inches), thickness (typically 3/16″ to 3/8″), color and texture (photograph in natural light), and origin/grade where known.
Sources for matching replacement slate: the National Slate Association’s supplier directory, regional architectural salvage dealers (often the best source for historic color matches), and specialty suppliers including Vermont Structural Slate Company, Rising and Nelson Slate, and North Country Slate. For replacement, use a slightly thinner tile than the original when available , it eases insertion under the overlapping courses without lifting surrounding tiles.
Step 2: Remove the Damaged Slate with the Ripper
Insert the slate ripper beneath the damaged tile and work it upward until the hooked blade engages the nail shank holding the slate. Pull the ripper handle downward firmly , this drives the hook against the nail and cuts or pulls it free. Repeat for the second nail. Most slates are held by two nails positioned in the upper half of the tile.
Once both nails are removed or cut, the broken slate will typically slide downward and out. If fragments remain, use the pointed end of the slate hammer or the ripper tip to carefully clear broken pieces without disturbing adjacent tiles. Clean the nail hole area of any debris or protruding nail shanks before proceeding.
Step 3A: Install Using the Hook Method (Preferred)
The hook method is the preferred technique for slate roof repair because it requires no nail penetration through the new tile face, eliminating a potential leak point. Pre-drill a small pilot hole in the roof deck or sheathing at the point between two existing slates in the course below where the damaged tile sat. Drive a copper or stainless steel slate hook into the pilot hole so it protrudes upward and will catch the bottom edge of the new replacement slate.
Slide the replacement slate upward into the gap, ensuring its sides align perfectly with the tiles on either side and the bottom edge aligns with the course below. Pull the tile downward to engage the hook at its bottom edge. The hook holds the tile securely without any nail penetration through the tile face, allowing for thermal movement and future removal if needed.
Step 3B: Install Using the Nail-and-Bib Method (Alternative)
The nail-and-bib (also called tingle) method is an alternative when hook installation is not practical. Slide the replacement slate into position. Pre-drill a nail hole near the top edge of the replacement tile where it will be covered by the overlap of the tiles above. Drive a copper or stainless ring-shank nail through the pre-drilled hole into the roof deck , never nail through the slate without pre-drilling, as the percussive force will crack the tile.
Cut a copper bib approximately 8 inches long × 3 inches wide. Make diagonal cuts at the upper corners so the bib can bend under the overlapping slates. Slide the bib upward beneath the tiles in the course above so it covers the nail head completely, with 2–3 inches of bib extending below the overlap to shed water over the new tile surface. The bib is not nailed , it holds in position through friction against the overlapping tiles.
Step 4: Verify the Repair Before Leaving the Roof
Before descending, perform a complete verification of the repair: the replacement tile must sit flush with the surrounding slates , no proud edges that will catch wind or foot traffic. The exposure (the visible portion of the tile below the overlap) must match the exposure of neighboring tiles exactly , standard exposure is 3 inches of headlap. Give the tile a gentle tap , it should feel solid and produce a clear ring, not a hollow thud.
For the most thorough verification, have a helper spray water over the repaired area with a garden hose while you observe from inside the attic below. Water penetrating the attic during the hose test reveals any remaining gaps before the next rainfall does. This extra step adds 10 minutes and potentially saves a follow-up repair call.
Slate Roof Repair Checklist: Before, During, and After
Before Any Slate Roof Repair
>✅ Replacement slate sourced and matched , size, thickness, grade, and color confirmed
>✅ All specialist tools assembled , slate ripper, slate hammer, copper nails or hooks, copper bib
>✅ Roof surface dry , never work on wet slate, which is dangerously slippery
>✅ Attic inspection completed , water staining and structural condition assessed
>✅ Scope of damage fully assessed , count of broken, slipped, and missing tiles documented before starting
During Slate Roof Repair
>✅ Never walk directly on slate tiles , use a chicken ladder (roof ladder) or walk on a foam kneeling board spread across multiple tiles to distribute weight
>✅ Use only copper or stainless steel nails , never iron or standard galvanized nails on a slate roof
>✅ Pre-drill all nail holes , never drive nails directly through slate without pre-drilling
>✅ Check alignment and exposure on each tile before moving to the next
>✅ Clear all removed slate fragments from roof surface , broken slate is a falling hazard
>✅ Inspect surrounding tiles for hidden cracks while area is accessible , address all damage in one roof access event
After Slate Roof Repair
>✅ Water test from attic with garden hose before declaring repair complete
>✅ Ground-level visual check , repaired tiles flush and aligned with surrounding courses
>✅ Store any remaining spare tiles horizontally in a dry, temperature-stable location for future repairs
>✅ Document repair with photographs , date, tile count, location on roof
>✅ Schedule follow-up inspection in 6 months to verify repair integrity through one full weather cycle
Common Slate Roof Repair Mistakes , And How to Avoid Them
Nail sickness, the progressive corrosion of original iron fasteners used in historic slate installations, is the leading cause of slate roof failure and the reason every slate roof repair must use copper or stainless steel ring-shank nails exclusively. Iron and standard galvanized nails fail within 20–40 years, far shorter than the slate’s remaining service life
Mistake 1: Using the Wrong Nails
Iron cut nails and standard hot-dip galvanized nails were used in slate installations throughout the 19th and early 20th centuries , and their corrosion (“nail sickness”) is the number one cause of slate roof failure on historic buildings today. Any slate roof repair must use copper ring-shank or stainless steel nails exclusively. Copper is the traditional preferred material because it develops a patina that does not stain slate; stainless steel is an acceptable alternative. Galvanized nails will fail within 20–40 years , far shorter than the slate’s remaining service life.
Mistake 2: Walking Directly on the Slate Surface
Slate is stone , but it is also brittle and highly sensitive to point loading. Walking directly on slate tiles concentrates your full body weight on a small tile area, causing immediate cracking that may not be visible until the tile fails weeks later during rain. Always use a chicken ladder (roof access ladder) that hooks over the ridge, a foam kneeling board spread across at least four tiles, or purpose-made slate roof walkway boards. One careless step on the wrong tile during a “quick repair” can create three new repair jobs.
Mistake 3: Applying Roofing Cement or Caulk as a Repair
Roofing cement (tar-based sealant) applied to cracked slate tiles or around flashing is a common quick-fix that creates serious long-term problems. Roofing cement traps moisture against the stone and accelerates the delamination of soft slate grades. It prevents future inspection of the condition beneath it. And it makes proper repairs significantly more difficult when it eventually fails , which it will within 5–10 years. The correct repair for a cracked or broken slate tile is always removal and replacement , never patching in place with adhesive.
Mistake 4: Mismatching Replacement Slate
Installing replacement slate tiles that don’t match the existing installation in thickness creates a critical structural problem , not just a cosmetic one. Thicker replacement tiles lift the overlapping courses above them, creating gaps at the exposed edges that allow water and ice infiltration. Tiles that are too thin sit below the plane of the surrounding slate and create a low point where water pools. Match thickness within 1/16 inch of the existing tile for correct installation geometry.
Mistake 5: Ignoring the Underlayment Condition
Many slate roofs installed in the early-to-mid 20th century used organic felt underlayment that has a service life of 60–75 years , significantly shorter than the S1 or S2 grade slate above it. On a 100-year-old slate roof with sound tiles, the underlayment may have completely deteriorated, leaving the deck boards as the only moisture barrier. This is the scenario behind many “mystery leaks” on well-maintained historic slate roofs , the slate is fine, the underlayment is gone. An attic inspection looking for deteriorated or missing underlayment is essential before concluding that tile replacement alone will solve an ongoing leak.
Slate Roof Repair vs. Full Replacement: Making the Right Call
The most important financial decision for any slate roof owner is knowing when ongoing slate roof repair remains cost-effective versus when the system has reached the point where replacement delivers better value. The National Slate Association’s general guideline: if more than 20% of the tiles on a slate roof are broken, slipped, or missing, a full professional inspection to assess restoration versus replacement is warranted.
Factor
Favor Repair
Favor Replacement
Slate grade
S1 or S2 hard slate with decades remaining
S3 soft slate at or past expected lifespan
Damage extent
Under 20% of tiles damaged or missing
Over 20–30% tiles failed system-wide
Nail condition
Copper or stainless nails , sound condition
Iron nail sickness , widespread corrosion
Underlayment
Underlayment intact or recently replaced
Underlayment fully deteriorated
Repair cost vs. replacement
Repair under 30% of replacement cost
Repair exceeds 50% of replacement cost
Deck condition
Deck boards sound, no rot or structural damage
Widespread deck rot requiring structural repair
Matching slate availability
Matching replacement slate readily sourceable
Matching slate unavailable or prohibitively costly
Frequently Asked Questions: Slate Roof Repair
How much does slate roof repair cost in 2026?
The national average slate roof repair cost in 2026 is $2,006, with most residential projects falling between $784 and $3,253. Individual tile replacements cost $50–$300 per tile (materials and labor). Flashing replacement ranges from $600–$20,000 depending on extent. Underlayment repair or replacement costs $800–$16,000. Labor alone averages $4–$17 per square foot depending on slope, access difficulty, and regional labor rates. Natural slate repair costs approximately $2 more per square foot than synthetic slate repair.
Can I repair a slate roof myself?
Single-tile replacement on an accessible, lower-pitch roof section is DIY-feasible for a careful homeowner with the correct specialist tools , primarily the slate ripper and slate hammer. The hook method of installation is particularly well-suited to DIY because it requires no nail penetration through the tile. However, any repair involving flashing, underlayment, ridge work, steep slopes (over 6:12), or multi-story access should be performed by a specialist slate roofing contractor. Never attempt slate roof repair without a proper fall protection harness and roof anchor system , slate surfaces are dangerously slippery.
How do I find matching replacement slate?
Finding matching replacement slate requires identifying your roof’s origin (Vermont, Pennsylvania, Virginia, or imported), color, and tile dimensions. Start with the National Slate Association’s member supplier directory at slateassociation.org. Regional architectural salvage dealers are often the best source for exactly matching historic color variations. Specialty suppliers including Vermont Structural Slate, Rising and Nelson Slate, and North Country Slate maintain extensive inventories of domestic and imported slate. Bring a physical sample tile for color matching whenever possible , photographs rarely capture the full color range of natural stone.
How long does a repaired slate roof last?
A correctly executed slate roof repair using copper nails, correctly matched replacement tiles, and proper installation technique lasts as long as the surrounding slate system , potentially decades or longer on S1 hard slate. The repair itself does not create a weak point if performed correctly. The limiting factor is always the condition of the surrounding system: the nails, underlayment, and flashing. A well-maintained S1 hard slate roof with regular professional inspections and prompt individual tile repairs can realistically reach 150–200 years of total service life.
What is nail sickness in a slate roof?
Nail sickness is the progressive corrosion of the iron or galvanized iron cut nails used in historic slate installations , typically those installed before 1950. As these nails corrode, they lose their holding power and the slates they secured begin to slip downward or fall. Nail sickness is visible as slates that repeatedly slip even after re-setting, rust staining on the slate surface below nail holes, and on close inspection, visibly corroded or missing nail shanks. Widespread nail sickness typically requires a full professional re-nailing program , lifting each slate, removing corroded nails, and re-fastening with copper nails , a significant project costing $4,000–$20,000+ but one that can extend the life of a sound slate system by another 50–100 years.
A slate roof that receives competent, timely repairs is not a maintenance burden , it is a once-in-a-generation investment that will protect your home long after every asphalt shingle roof in the neighborhood has been replaced two or three times over.
The key is finding a specialist who understands the system, using the right materials every time, and never letting a minor broken tile turn into a major water damage event through delayed action.
🏠 Roofing Tips & Updates
Get free roofing advice, cost guides, and seasonal maintenance tips.
Roofing content specialist with 5+ years researching U.S. residential and commercial roofing. Has documented 200+ projects covering installation costs, material selection, contractor vetting, and DIY guides for homeowners across all climate zones.
Residential Roof Repairs: When Should You Replace?
Residential Roof Repairs: When Should You Replace?
Most residential roof repairs are straightforward fixes ,but some damaged roofs are sending you a clear signal that patching is no longer enough. Knowing which situation you are in can mean the difference between a $400 repair call and a $15,000 replacement project you delayed two years too long, turning a manageable cost into structural damage that doubles the final bill.
The question every homeowner eventually faces ,repair or replace? ,does not have a universal answer. It depends on your roof’s age, material, damage extent, repair history, and a simple financial calculation that most roofing contractors can walk you through in under fifteen minutes. This guide gives you the knowledge to have that conversation from a position of understanding, not anxiety.
💡 Pro Tip: Use the 50% Rule as your first filter: if the estimated cost of your roof repair exceeds 50% of the cost of a full replacement, replacement is almost always the smarter financial decision. A repair that costs $4,500 on a roof where full replacement runs $9,000 delivers no long-term value ,you are spending half the replacement cost for a fraction of the remaining lifespan.
Residential Roof Repairs in 2026: By the Numbers
Before you call a contractor, understanding the financial landscape of residential roof repairs and replacements helps you evaluate every quote you receive. These are the real 2026 numbers for U.S. homeowners.
$300–$600 ,average cost of minor residential roof repairs (pipe boots, nail pops, isolated shingle replacement)
$800–$1,500 ,average cost of major roof repair (storm damage sections, valley leaks, flashing replacement)
$7,500–$18,000 ,average full asphalt shingle roof replacement for a 2,000 sf home in 2026
$9,500 ,national average roof replacement cost (Angi, 2026)
20–25 years ,average lifespan of standard asphalt shingles before replacement is typically required
40% of residential roof repairs are performed on roofs already past their expected service life ,where replacement would be the more cost-effective choice
1 in 3 homeowners who delay roof replacement for more than 2 years after visible deterioration report interior water damage requiring additional remediation costs
Repair vs. Replace: Understanding the Core Decision
The repair-versus-replace decision in residential roof repairs is not purely about the visible damage in front of you. It is about the remaining useful life of the entire roof system ,the shingles, the underlayment, the flashing, and the deck beneath it all.
When Residential Roof Repairs Are the Right Answer
Repair is the correct choice when damage is genuinely isolated ,a specific, bounded area where the surrounding roofing material is in sound condition with meaningful remaining service life. A roof under 10–12 years old with storm damage to a single slope, a failed pipe boot flashing, or a handful of wind-lifted shingles is a clear repair candidate. The rest of the system is intact, the underlayment is sound, and a targeted fix delivers real value.
Repair also makes sense as a temporary measure when full replacement is planned within 12–18 months but budget timing requires a short-term fix. A documented temporary repair stops active water infiltration while the homeowner plans the full replacement project ,a legitimate strategic use of residential roof repair services.
Cupping shingles (edges curling upward) combined with granule loss visible as bald patches are two of the clearest signs a residential roof has reached systemic end of life, repair addresses symptoms, not the underlying material failure
When Repair Is Just Delaying the Inevitable
Repair becomes financially irrational when the underlying roof system is at or past its service life. Patching a 22-year-old asphalt shingle roof is like replacing the battery in a car with a failed engine ,you are investing in a system whose overall failure is imminent. The repaired section may hold, but the next failure point is already developing three feet away.
A professional residential roof inspection can quantify this ,a good inspector does not just assess the visible damage, they assess the remaining service life of the entire system. That assessment is what makes the repair-versus-replace decision defensible rather than intuitive.
Residential Roof Repair Costs vs. Replacement: 2026 Comparison
Service Type
Estimated Cost
Lifespan Added
Best Candidate
Minor Roof Repair
$300–$600
1–3 years
Pipe boots, nail pops, 1–5 missing shingles
Major Roof Repair
$800–$1,500
3–5 years
Storm damage section, valley leak, flashing failure
Extensive Repair / Partial Re-Roof
$1,500–$3,500
3–7 years
Multi-zone damage, one full slope replacement
Full Roof Replacement (Asphalt)
$7,500–$18,000
25–30 years
Roof 20+ years old, widespread damage, multiple failures
Full Replacement (Metal)
$10,000–$28,000
40–70 years
Final replacement upgrade, high-wind or hail zones
Full Replacement (Tile)
$15,000–$30,000
50–100 years
Premium upgrade, historic or Mediterranean-style homes
Source: Modernize, HomeGuide, NerdWallet, Angi 2026 roofing cost reports. Costs reflect U.S. national averages ,regional labor rates vary 15–30% above or below these figures. See our complete guide to tin roof installation costs for metal roofing detail.
The 10 Warning Signs Your Roof Needs More Than a Repair
Most of these warning signs are visible from the ground with a pair of binoculars ,no ladder required. Check for them annually, and after any significant wind or hail event.
Attic inspection reveals what the surface cannot, daylight penetrating through roof deck sheathing and water stain rings on deck boards indicate active moisture infiltration that surface-level residential roof repairs alone cannot resolve
1. Your Roof Is 20–25+ Years Old
Age is the single most reliable predictor of replacement need in residential roof repairs. Standard architectural asphalt shingles have a functional lifespan of 20–30 years under normal conditions ,and at the 20-year mark, the underlying components (underlayment, flashing sealants, starter strips) are approaching simultaneous end of life regardless of how the shingles look on the surface. If your roof is over 20 years old and showing any other symptom on this list, replacement is almost certainly the correct answer.
2. Curling, Cupping, or Clawing Shingles
Curling shingles appear in two forms: cupping (shingle edges turn upward) and clawing (edges stay flat but middle buckles upward). Both indicate the shingle has lost its dimensional stability due to weathering, moisture cycling, or inadequate attic ventilation baking the shingles from below. Curling across more than 20–25% of a roof surface indicates systemic material failure ,not an isolated issue addressable by residential roof repair.
3. Significant Granule Loss Visible in Gutters
After cleaning your gutters, check the downspout discharge area ,granule accumulation looks like coarse, dark sand. Some granule shedding is normal on new roofs in the first season; heavy, consistent granule loss on an older roof means the protective mineral coating is failing. Without granules, UV radiation degrades the asphalt core rapidly. Bald patches visible on the shingles from the ground indicate the roof is at or past its functional service life.
4. Widespread Missing or Broken Shingles
One or two missing shingles after a wind event is a standard residential roof repair. Shingles missing across multiple areas, or frequent recurring losses after moderate wind events, indicates the self-sealing adhesive strips have failed across the entire roof ,a systemic issue. When the adhesive fails broadly, every remaining shingle is a wind event away from becoming a missing shingle, and residential roof repair becomes an endless game of catch-up.
5. Sagging Roof Deck or Visible Structural Deflection
A sagging roofline ,visible from the street as a bowing or dipping between rafters ,is a structural emergency, not a cosmetic issue. Sagging indicates the roof deck or supporting structure has been compromised by long-term moisture infiltration, rot, or insect damage. This condition requires immediate professional assessment. Sagging is never a residential roof repair situation ,it is a replacement scenario that may also require structural framing repairs below the roofing system.
6. Daylight Visible Through the Attic
On a bright day, go into your attic and look up. If you can see points of daylight through the roof deck, water can get through those same openings every time it rains. Also look for streaks of daylight ,these indicate failed or missing flashing. While individual flashing failures are repairable, widespread daylight penetration indicates a compromised deck that requires full replacement.
7. Interior Water Stains on Ceilings or Walls
Water stains on interior ceilings ,particularly brown ring stains or discoloration near exterior walls and chimneys ,indicate active water infiltration through the roof system. The moisture source may not be directly above the stain; water travels along roof framing members before dripping. A single, clearly localized leak (e.g., around a chimney or vent pipe) may be a repair. Multiple stain locations or diffuse ceiling discoloration suggests the underlayment has failed and water is entering at multiple points ,a replacement signal.
8. Mold, Mildew, or Moss Growth on Roof Surface
Surface algae (dark streaking) is a cosmetic issue addressable through roof pressure cleaning and biocide treatment. Moss with established root structures, however, traps moisture against the shingle surface and physically lifts shingle edges ,accelerating deterioration significantly. And mold detected in the attic insulation or on roof deck boards indicates moisture has been infiltrating the system for an extended period, likely requiring deck replacement as part of any full residential roof repair or replacement project.
9. Repeated Repairs Over the Past 3–5 Years
If you have called a residential roof repair contractor two or more times in the past three years for different issues on the same roof, the pattern itself is diagnostic. A roof that keeps failing in different locations is telling you it has reached systemic end of life. Add up what you have spent on those repeated repairs ,in many cases, homeowners discover they have paid 30–50% of replacement cost in piecemeal residential roof repairs over a two-to-three-year period.
10. Neighbors Are Replacing Their Roofs
This one surprises homeowners, but it’s a legitimate diagnostic signal. Homes in the same subdivision built in the same era typically have roofs installed within a few years of each other. When multiple neighbors begin replacing their roofs, it often signals that roofs of that age in that region are reaching end of life simultaneously. If three homes on your street have been re-roofed in the past 24 months and your home was built at the same time, a proactive inspection is strongly warranted.
Step-by-Step: How to Assess Whether You Need Residential Roof Repairs or Replacement
Apply the 50% Rule before signing any residential roof repair contract: if the repair estimate exceeds 50% of your full replacement cost, replacement is almost always the smarter long-term financial decision
Follow this assessment sequence before calling any contractor. Arriving informed saves you time, money, and the risk of being steered toward a more expensive solution than your roof actually needs.
Determine your roof’s age. Check your home purchase inspection report, permit records from your local building department, or contact the previous owner if purchased within the last 15 years. Age is your single most important data point ,everything else is context around it.
Conduct a ground-level visual inspection. On a clear day, walk around your home with binoculars and systematically inspect every visible roof slope. Look for curling, missing, or discolored shingle sections; moss or algae growth; sagging ridgelines; and lifted flashing at chimneys, skylights, and vent pipes. Photograph everything you see.
Inspect the attic on a bright day. Look for daylight penetration, water staining on the roof deck boards, wet or discolored insulation, and any visible mold on structural wood. These interior signs often reveal more than the exterior surface, particularly for slow leaks that have not yet produced visible ceiling staining.
Check your gutters after rain. Look for granule accumulation ,the dark sand-like mineral coating that washes off deteriorating shingles. Check gutter seams for brown staining indicating water overflowing at the roofline rather than channeling through the gutter system.
Apply the 50% Rule. Get a rough estimate of your local full replacement cost (use the table above as a baseline, adjusted for your home size). Calculate 50% of that figure. If any single repair estimate you receive exceeds that number, replacement is the financially rational choice.
Review your repair history. Pull together receipts for any residential roof repairs over the past five years. If total repair spending over that period exceeds $2,000–$3,000, or if you have had two or more separate repair calls in three years, the pattern strongly suggests systemic failure.
Get a professional inspection ,from an inspector, not a salesperson. A paid professional inspection ($150–$350) provides an independent assessment of remaining service life, specific damage documentation, and an honest repair-versus-replace recommendation. This is distinct from the “free inspection” offered by roofing contractors, which is a sales call ,a legitimate tool, but not a neutral assessment.
Obtain at minimum two contractor quotes. For residential roof repairs exceeding $1,000 or any replacement project, get two independent written quotes. Verify that both quotes are describing the same scope of work before comparing prices. The lowest bid that doesn’t specify materials by brand, weight, and warranty is not comparable to a detailed quote that does.
Residential Roof Repair Decision Checklist
Use this checklist after completing your assessment. The more items you check in the “Replace” column, the clearer the decision becomes.
✅ Signs That Support Residential Roof Repair
✅ Roof is under 12–15 years old with no previous repair history
✅ Damage is clearly isolated to one area or penetration point
✅ Surrounding shingles are in good condition with intact granule coverage
✅ No interior water staining detected in attic or ceilings
✅ Repair cost estimate is well under 50% of full replacement cost
✅ Roof has had no more than one previous repair in the last five years
✅ Damage is from a single, discrete weather event with otherwise sound surroundings
✅ Attic inspection shows no evidence of deck rot, mold, or structural damage
🚩 Signs That Indicate Replacement Over Repair
🚩 Roof is 20+ years old (asphalt shingles); 50+ years (metal); 60+ years (tile with visible issues)
🚩 Curling, cupping, or clawing shingles visible across more than 20% of the surface
🚩 Heavy granule accumulation in gutters or visible bald patches on shingles
🚩 Two or more separate repairs performed in the past three years
🚩 Repair cost estimate exceeds 50% of full replacement cost
🚩 Interior water staining on ceilings in multiple locations
🚩 Visible sagging or structural deflection in the roofline
🚩 Mold or rot detected in attic deck boards or structural framing
🚩 Daylight visible through multiple points in attic inspection
🚩 Neighboring homes of similar age have recently undergone full replacement
💡 Insurance Tip: If your residential roof repair or replacement need was triggered by a storm, hail, wind, or fallen tree ,file a homeowner’s insurance claim before authorizing any repair work. Most standard homeowner’s policies cover storm-related roof damage. Have a public adjuster or your insurance company’s adjuster inspect the roof before any contractor performs repairs ,post-repair, the evidence your insurer needs to process the claim may no longer be visible.
Roof Lifespan by Material: When Does Repair Stop Making Sense?
Roofing Material
Average Lifespan
Repair Makes Sense
Replacement Threshold
3-Tab Asphalt Shingles
15–20 years
Under 10 years old
15+ years or any widespread damage
Architectural Asphalt Shingles
20–30 years
Under 15 years old
20–25+ years or systemic failure
Metal Roofing
40–70 years
Under 35 years old
50+ years or panel/coating failure
Clay / Concrete Tile
50–100 years
Under 40 years old
60+ years with underlayment failure
Wood Shake
20–30 years
Under 12 years old
20+ years or widespread rot/splitting
Natural Slate
100–150 years
Under 80 years old
Widespread slate delamination or deck failure
Source: Peak & Valley Roofing, Lapeyre Roofing 2026 guides, Sustainable Roof, roofing manufacturer warranty documentation. Lifespans assume standard installation in moderate U.S. climates ,coastal, high-UV, and freeze-thaw environments reduce effective service life by 15–25%.
How do I know if I need a roof repair or full replacement?
The clearest indicators for replacement over repair are: roof age over 20–25 years (for asphalt shingles), repair cost exceeding 50% of replacement cost, widespread shingle deterioration (curling, granule loss, or missing shingles across multiple areas), interior water staining in multiple ceiling locations, visible deck sagging, or two or more separate repair calls within the past three years. A professional inspection from an independent inspector ,not a contractor with a financial interest in the outcome ,is the most reliable way to get an objective answer.
How much does residential roof repair cost in 2026?
Residential roof repair costs in 2026 range from $300–$600 for minor repairs (replacing 1–5 shingles, resealing a pipe boot, fixing nail pops) to $800–$1,500 for major repairs (storm damage sections, valley flashing replacement, chimney flashing work) and $1,500–$3,500 for extensive repairs involving multiple damage zones or partial re-roofing of one slope. Full replacement ranges from $7,500–$18,000 for standard asphalt shingle roofs on a 2,000 sf home, with the national average around $9,500.
Can I repair a roof myself, or do I need a professional?
Minor residential roof repairs ,replacing a handful of damaged shingles, resealing a lifted flashing edge, or applying roofing cement around a pipe boot ,are DIY-feasible for homeowners comfortable working at height with fall protection on single-story homes with accessible roof pitch. Any repair involving structural damage, significant flashing work, valley repairs, or roofs steeper than 6:12 pitch should be performed by a licensed roofing contractor. Improper residential roof repair work that subsequently fails can void your homeowner’s insurance coverage for related damage claims.
Will my homeowner’s insurance cover roof repair or replacement?
Most standard homeowner’s insurance policies cover sudden, accidental damage from storms, hail, wind, and fallen trees ,but do not cover damage resulting from normal wear, age, or lack of maintenance. File your claim before authorizing any repair work; once repairs are made, the evidence the insurer needs to process the claim may no longer be visible. Policies vary significantly in how they calculate roof damage payments ,Replacement Cost Value (RCV) policies pay the full cost to replace, while Actual Cash Value (ACV) policies deduct depreciation based on roof age. Know which type of policy you hold before filing.
How long does a residential roof repair typically last?
The lifespan of a residential roof repair depends entirely on the condition of the surrounding roof system. A quality minor repair (shingle replacement, flashing seal) on a roof with 10+ years of remaining life can last the remainder of that roof’s service period without additional attention. The same repair on a 22-year-old roof may hold for 12–18 months before an adjacent area fails. A major repair on an otherwise sound roof adds 3–5 years of service life. An extensive partial re-roof adds 5–7 years ,but only on the replaced sections, while the remaining original material continues aging.
The question is never just whether your roof can be repaired ,it’s whether repairing it is the smartest use of the money you are about to spend. A roof that has been sending you warning signs for two years will keep sending them until you address the system, not just the symptoms.
The right residential roof repair decision ,whether that’s a targeted fix or a full replacement ,starts with an honest inspection and ends with a contractor who tells you what your roof actually needs, not what generates the biggest ticket.
🏠 Roofing Tips & Updates
Get free roofing advice, cost guides, and seasonal maintenance tips.
Roofing content specialist with 5+ years researching U.S. residential and commercial roofing. Has documented 200+ projects covering installation costs, material selection, contractor vetting, and DIY guides for homeowners across all climate zones.
Roofing shingles clearance pricing in 2026 runs $45–$90 per square for architectural shingles , a savings of 30–55% off standard retail rates of $100–$250 per square. Whether you are planning a full roof replacement or a partial repair, knowing where to find cheap architectural shingles and how to evaluate clearance inventory safely can save a typical homeowner $1,000–$3,500 in materials alone on a standard project.
💡 Pro Tip: Before buying any roofing shingles clearance bundle, check the dye lot number printed on both ends of the wrapper. Every single bundle on your project must share the same dye lot code , mismatched production runs create permanent visible color striping on the finished roof that can cost $3,000–$6,000 to correct with a partial or full tear-off.
There is a version of roofing materials shopping that most homeowners never discover.
It exists in the back corners of home improvement warehouses, on contractor liquidation websites, in the overstock pallets of roofing distributors, and in the end-of-season clearance sections that appear every fall when roofing supply companies need to move inventory before winter. It is the world of roofing shingles clearance ,and for homeowners who know how to navigate it, the savings are genuinely substantial.
Architectural shingles ,also called dimensional or laminate shingles ,are the dominant residential roofing product in the United States, covering the majority of American homes replaced or re-roofed in any given year. They are heavier, more durable, and more aesthetically sophisticated than traditional 3-tab shingles, carrying warranties of 30 years to lifetime and delivering a textured, layered appearance that adds genuine curb appeal. At full retail, quality architectural shingles cost $90–$150 per square installed. On clearance, that same product category routinely sells for $45–$90 per square in materials alone.
This complete 2026 guide shows you exactly where to find roofing shingles clearance deals, how to evaluate cheap architectural shingles for quality and compatibility, what the risks are and how to avoid them, installation cost considerations, and the brands most likely to appear in clearance inventory.
Roofing Shingles Clearance: 2026 By the Numbers
The U.S. residential roofing market replaces approximately 5–6 million roofs per year, generating massive production volumes that create consistent clearance inventory across every major brand and product tier. Understanding the real numbers behind clearance pricing helps you recognize a genuine deal when you see one.
>$100–$250 per square, standard retail price for architectural shingles (materials only) in 2026
>$45–$90 per square , typical roofing shingles clearance price range (30–55% off retail)
>$240–$390 per square , contractor wholesale pricing for mid-grade architectural shingles
>3 bundles cover one roofing square (100 sf); each bundle covers approximately 33 sf
>23–25 squares , typical material requirement for a 2,000 sf residential home (including waste)
>October–November , historically the best window for clearance deals (end-of-season inventory reduction)
>11 million tons of asphalt shingle waste enter U.S. landfills annually, creating strong manufacturer incentive to move discontinued inventory through clearance channels rather than disposal
Why Roofing Shingles End Up on Clearance
Not all clearance inventory is created equal , and understanding the reason behind the discount tells you a great deal about the risk level of the product you are considering. The five most common clearance sources each carry a different quality profile.
Manufacturer Discontinuation
When GAF, Owens Corning, CertainTeed, or IKO update their product lines , introducing new profiles, colors, or coating technologies , existing inventory of discontinued styles gets marked down aggressively. These products carry their full original warranty and meet all published specifications. They are discounted for catalog management reasons only, making manufacturer discontinuation clearance the lowest-risk category of clearance shingles available.
Distributor and Retailer Overstock
Roofing distributors order in bulk based on projected regional demand. When projects fall through, contractors over-order, or seasonal demand misses forecast, excess inventory accumulates on distributor shelves. These products are typically current-line items , not discontinued , and carry full warranty. Distributors like ABC Supply, Beacon Roofing Supply, and SRS Distribution liquidate overstock through clearance pricing rather than carry it through another full season.
End-of-Season Inventory Reduction
The roofing installation season peaks from April through October across most U.S. markets. As winter approaches, both retailers and distributors aggressively discount remaining inventory to reduce storage costs and free up working capital. The October–November window consistently delivers the deepest clearance discounts of the calendar year , routinely 35–55% below peak-season retail pricing.
Contractor Lot Remainders
When a roofing contractor completes a large project with unused shingles remaining, those materials frequently move through Craigslist, Facebook Marketplace, or building material liquidation platforms. Contractor remainder lots are among the cheapest architectural shingle sources available , often 40–60% below retail , but typically involve smaller quantities of 5–20 squares that may not be sufficient for large projects. Dye lot verification is critical for these purchases.
Cosmetic Imperfection Seconds
Some clearance shingles carry minor manufacturing imperfections , slight color variation, surface texture inconsistencies, or packaging damage , that do not affect structural performance but prevent full-price sale. These represent strong clearance value for homeowners who can verify the imperfection is cosmetic-only. Always open a sample bundle and inspect at least six shingles before committing to a cosmetic-imperfection clearance purchase.
2026 Clearance vs. Retail Pricing by Shingle Grade
Shingle Grade
Standard Retail (per sq)
Clearance Price (per sq)
Savings
Warranty
Entry-Level Architectural
$100–$130
$45–$65
30–50%
25–30 years
Mid-Grade Architectural
$130–$180
$60–$90
35–50%
30–50 years
Premium Architectural
$180–$250
$85–$120
35–52%
Lifetime limited
Designer / Luxury
$300–$600
$130–$250
40–55%
Lifetime limited
3-Tab (Clearance)
$80–$100
$35–$50
30–45%
20–25 years
Source: HomeGuide, RoofVista, Modernize 2026 roofing cost reports. Prices reflect materials only , installed labor averages an additional $200–$350 per square depending on region and project complexity.
Home Depot and Lowe’s both maintain clearance sections in their roofing departments , typically marked with orange (Home Depot) or red (Lowe’s) discount tags. Stock varies significantly by store location and changes week to week, so checking multiple nearby locations pays off. Ask a roofing department associate directly about overstock inventory , not all discounted product is visibly marked on the sales floor.
Roofing Supply Distributors
Regional roofing supply distributors , ABC Supply, Beacon Roofing Supply, SRS Distribution , regularly sell clearance and overstock inventory at pricing 40–60% below retail. Most distributors primarily serve contractors, but most will sell to retail customers who call directly and ask about clearance stock. This channel requires more effort than big-box shopping but consistently delivers the deepest discounts available.
Online and Secondary Market Sources
Craigslist and Facebook Marketplace are consistently excellent sources for contractor remainder lots , search “[your city] roofing shingles” and filter by recent listings for prices routinely running $30–$60 per square for architectural shingles in good condition. Habitat for Humanity ReStores occasionally stock new or lightly used roofing shingles at significant discounts. BuildDirect runs periodic clearance sections on overstock roofing materials that are accessible nationwide.
Top Brands to Look for in Clearance Channels
Brand & Product
Grade
Wind Rating
Why It Appears in Clearance
GAF Timberline HDZ
Mid-Grade
130 mph
High production volume; frequent color updates
Owens Corning Duration
Mid-Grade
130 mph
Color palette updates; regional distribution imbalances
CertainTeed Landmark
Mid-Premium
110 mph
Large color line; specification change lot releases
Atlas StormMaster
Mid-Grade (Class 4)
130 mph
Regional overstock outside storm-prone markets
TAMKO Heritage
Entry-Mid
80 mph
Regional distribution concentration outside Midwest/South
Step-by-Step: How to Buy Roofing Shingles Clearance the Right Way
Follow this sequence on every clearance roofing shingles purchase , skipping any step increases the risk of ending up with mismatched damaged, or insufficient materials that cost more to fix than you saved on the clearance deal.
>
Measure your roof accurately first.
Calculate total roof area in square feet, add 10% for waste on standard roofs (15% for complex roofs with multiple valleys), divide by 100 to get your square count, then add 10–15% overage buffer for the clearance purchase.
>Identify the shingle grade and brand you need. Know your minimum requirements: weight class, wind rating, and warranty before you start clearance shopping , not after. Clearance pricing creates purchase pressure that clouds judgment if you haven’t defined your minimum specs in advance.
>Check the dye lot on every single bundle. Before anything else , before counting, before pricing, before loading your cart , pull out every bundle in the lot you are considering and verify the dye lot number printed on both ends of every wrapper is identical. One mismatched number means do not buy that lot.
>Physically inspect a sample bundle. Open one bundle and inspect six to eight individual shingles: check for granule loss from handling, verify the self-sealing adhesive strip is intact and not prematurely activated, confirm no cracking or brittleness, and check for flat, undistorted shingle profiles.
>Verify ridge cap and starter strip availability. Confirm that matching ridge cap and starter strip products are available in the same color and compatible profile before you purchase field panels. A mismatched ridge cap on a finished roof is immediately visible from the street.
>Confirm warranty status. Ask the seller directly: does this clearance product carry the manufacturer’s standard warranty? Some closeout designations void warranty entirely. Know what coverage you are purchasing before completing the transaction.
>Buy your complete quantity in one transaction. Clearance inventory is finite by definition. Purchase your full project requirement plus overage in one trip , do not plan to return for additional bundles from the same lot. They will be gone.
>Store correctly until installation. Store all bundles horizontally, off the ground, in a dry location above 40°F. Never store shingles standing upright , they warp permanently. Never allow shingles to freeze , they become brittle and crack during installation.
💡 Pro Tip: For a 2,000 sf home with a moderately complex roof requiring 23 squares of material, buy 26 squares at clearance pricing. The cost of 3 extra squares ($180–$270 at clearance) is far less than the cost of finding matching shingles later for repairs , which may be impossible once a discontinued clearance lot is sold out.
Clearance Shingles Quality Checklist , Before You Buy
Use this checklist at the point of purchase , whether at a Home Depot clearance bin, a distributor warehouse, or a Craigslist contractor remainder pickup.
>✅ Dye lot number is identical on every bundle wrapper, check both ends of every bundle
>✅ Bundle wrappers are intact , no tears, water staining, or signs of moisture exposure
>✅ Bundles are stored horizontally , not standing vertically (which causes permanent warp)
>✅ Individual shingles are flat and undistorted , open one bundle and physically inspect
>✅ Self-sealing adhesive strip is intact , not fused to adjacent shingles prematurely
>✅ Granules are intact , minimal loose granules at bottom of opened bundle
>✅ No cracking or brittleness , especially important for shingles stored in unheated spaces in winter
>✅ Matching ridge cap is available , same color, compatible profile confirmed
>✅ Warranty status confirmed , verbal or written confirmation from seller
>✅ Quantity sufficient for full project + 10–15% overage , counted and verified before purchase
>✅ Brand and grade meet your minimum requirements , weight class and wind rating confirmed
What are typical roofing shingles clearance prices in 2026?
Roofing shingles clearance prices in 2026 run $45–$65 per square for entry-level architectural shingles (normally $100–$130), $60–$90 per square for mid-grade products like GAF Timberline HDZ and Owens Corning Duration (normally $130–$180), and $85–$120 per square for premium architectural shingles (normally $180–$250). These represent savings of 30–55% off standard retail. The deepest discounts appear in October–November during end-of-season inventory reduction.
Are clearance roofing shingles the same quality as full-price shingles?
In most cases, yes , clearance roofing shingles are identical in specifications to full-price products. They carry the same manufacturer warranty, physical weight rating, wind resistance, and fire classification. They are discounted because of discontinuation, overstock, or end-of-season inventory , not because of performance deficiencies. The exceptions are documented cosmetic imperfection seconds and physically damaged bundles, which should be inspected individually before purchase.
Where is the best place to buy cheap architectural shingles in 2026?
The best sources for cheap architectural shingles are: regional roofing supply distributors (ABC Supply, Beacon, SRS Distribution) for deepest discounts at 40–60% off retail; Home Depot and Lowe’s clearance sections for accessible, reliable-quality inventory; and Craigslist and Facebook Marketplace for contractor remainder lots at $30–$60 per square. Calling your regional distributor directly to ask about clearance and overstock inventory consistently delivers the best prices and largest available quantities.
How many shingles do I need for a 2,000 square foot house?
A 2,000 sf house typically has a roof area of 2,100–2,500 sf depending on pitch , steeper roofs have larger surface areas than the footprint suggests. At the standard 3 bundles per square (100 sf), a 2,000 sf home typically requires 21–25 squares of material before waste. Adding 10–15% waste allowance brings the purchase to 23–29 squares total. For clearance purchases specifically, buy 10–15% additional overage beyond that calculation to account for future repair needs.
Can I use clearance shingles for a partial roof repair?
Yes , but matching existing installed shingles is more challenging in repair situations than full replacements. You need to match not just dye lot numbers across bundles, but also visually match shingles that have already weathered for months or years on your roof. Bring a physical sample shingle from your roof to compare against clearance stock in natural outdoor lighting before purchasing. Perfect color matches are difficult even with the same product, since weathering changes surface appearance over time. Learn more about repair approaches in our guide to fixing storm damage on your roof.
Real Savings: Clearance Materials + DIY vs. Professional Installation
Finding roofing shingles clearance pricing is one savings lever. Combining it with a labor-only contractor contract , where you supply clearance materials and pay only for installation labor , can deliver substantial total project savings without the fall risk of full DIY.
Cost Component
Contractor Supplied (Retail)
You Supply (Clearance)
Savings
Materials , 23 squares mid-grade
$3,450 (at $150/sq retail)
$1,725 (at $75/sq clearance)
$1,725
Underlayment + accessories
$600–$900
$600–$900
$0
Labor (tear-off + installation)
$4,600–$8,050
$4,600–$8,050
$0
Disposal fees
$400–$800
$400–$800
$0
Total Project Cost
$9,050–$13,200
$7,325–$11,475
$1,725 saved
Based on a 1,800 sf home with 2,300 sf roof area, standard pitch, single-layer tear-off. Labor rates vary by region , Southern and Midwestern markets typically run 15–20% below Northeast and West Coast labor pricing. See our complete metal roofing cost guide if you’re comparing architectural shingles against a longer-lifespan alternative.
Roofing shingles clearance inventory moves fast , the best-priced mid-grade lots in popular colors rarely last more than a week once marked down. Know your project requirements, confirm your dye lots, inspect your bundles, and buy your complete quantity in a single transaction.
The savings are real, the products are quality, and the process is straightforward , if you follow the steps above every single time.
🏠 Roofing Tips & Updates
Get free roofing advice, cost guides, and seasonal maintenance tips.
Roofing content specialist with 5+ years researching U.S. residential and commercial roofing. Has documented 200+ projects covering installation costs, material selection, contractor vetting, and DIY guides for homeowners across all climate zones.
Eco-Friendly Roofing Options: Why Your Roof Choice Matters
Eco-Friendly Roofing Options: Why Your Roof Choice Matters
Your roof covers everything you love.
It keeps your family, your home, and your things safe. If you make the right choice, it can also keep something much bigger safe. The roof of the ordinary American home covers 1,500 to 3,000 square feet, absorbs decades of sunlight, and needs to be replaced every 15 to 30 years. When you multiply that by the 140 million homes in the U.S., the roofing industry’s environmental impact becomes huge: some 11 million tons of asphalt shingle debris ends up in U.S. landfills every year.
But here’s something no one tells you while you’re in the roofing aisle: the greenest choice you make isn’t simply about the material itself. It’s about the whole life cycle: how the material is made, how long it lasts before it needs to be replaced, how much energy it reflects or absorbs while it’s on your home, and what happens to it when it finally comes off. A product that lasts 15 years and is sold as “eco-friendly” is nearly never greener than a regular product that lasts 50 years.
This guide cuts through the greenwashing to offer you a full, honest picture of the greenest roofing materials available in 2026. It tells you how much they cost, how well they work, and what the research really says about how they affect the environment.
Table of Contents
Why Your Roofing Material Choice Is an Environmental Decision
Most people who own homes think of roofing as a way to keep their homes in good shape. When it leaks, get a new one. Select the least expensive choice that fits the law. Go ahead.
What that framework doesn’t take into account is the chain of environmental effects that come with every roofing choice. Standard asphalt shingles, which cover around 80% of homes in the United States, are made from oil. They are made of bitumen, a heavy crude oil derivative, fiberglass matting, and mineral granules that are put on top of them. They release a lot of carbon into the air when they are made, they create garbage when they are installed, and practically everyone throws them away when they are done with them.
The other options present a very different story.
Metal roofing constructed from recycled steel or aluminum have 25% to 95% recycled material and can be recycled 100% at the end of their life. In congested districts, cool roof coatings on any material can lower the urban heat island effect by 2 to 5 degrees Fahrenheit. In cities, living green roofs soak up runoff, store carbon, and bring back habitats. Solar shingles protect the building underneath while making electricity. Every year, millions of tires and plastic bottles are kept out of landfills by composite shingles made from recycled rubber and plastic.
There are greenest roofing solutions out there. Yes, they do. The question is which one is best for your home, your climate, your budget, and what you mean by “green.”
What Does It Mean for a Roof to Be “greenest roofing”?
It’s important to know what “green” means in the context of roofing before assessing eco-friendly roofing materials, since the marketing sector has made the word less helpful.
A really greenest roofing material works well in a number of environmental areas at the same time:
Recycled content: How much of the product is made from materials that were used by people before or after they bought it?
Manufacturing carbon footprint: How much CO₂ is made for every square foot of material that is installed?
Energy performance: How much solar heat does the roof reflect or absorb? What does that signify for the heating and cooling loads?
Longevity: How long does the roof survive before it needs to be replaced? How does a longer lifespan effect the roof’s overall environmental impact over its lifetime?
Recyclability at the end of its life: Can the material be recycled or used for something else when it is no longer useful, or does it go straight to the landfill?
Local sourcing potential: Is it possible to make the material in the area, which would cut down on transportation emissions?
Stormwater management: Does the roof aid or hurt the flow of stormwater?
There is no one substance that works properly in every way. The best roofing choice for a homeowner in Phoenix (who should search for materials that reflect solar energy and are resistant to drought) is significantly different from the best choice for a homeowner in Seattle (who should look for materials that last a long time and resist moss) or Chicago (who should look for materials that have a lot of thermal mass and resist ice dams). The talk of greenest roofing can’t be separated from the climate backdrop.
Eco friendly roofing materials in 2026 range from recycled metal (25–95% recycled content) to living roofs
The Most Eco-Friendly Roofing Materials in 2026
1. Recycled Metal Roofing: The Best of the Best
Recycled metal roofing provides the strongest overall case for being the greenest roofing material that can be used in the most situations.
Recycled Metal Roofing
Steel roofing panels made with recycled steel contain 25% to 95% recycled steel. This material has been recycled for more than a century without losing quality. Aluminum roofs are made from 50% to 90% recycled aluminum, which takes only 5% of the energy to make compared to new aluminum. When the metal panel is no longer useful, it may be recycled 100% of the time. It doesn’t go to a landfill; it goes back into the production process.
The disagreement about how long anything lasts is just as strong. A properly fitted metal roof can last anywhere from 40 to 70 years. In that same 70-year period, a conventional asphalt shingle roof would need to be replaced three to four times, which would mean three to four loads of shingle debris going to the landfill. In contrast, the metal roof that lasted the longest would not have any garbage going to the landfill.
The energy performance of metal roofing is another plus. Metal panels that are light-colored and approved for cool roofs reflect 60–70% of the sun’s rays that hit them, while typical asphalt shingles only reflect 25–35%. The U.S. Department of Energy says that ENERGY STAR-certified metal roofing cuts down on the amount of energy used for cooling by 7–15% each year in warm climates. This is a long-term advantage for the environment and your wallet.
The truth is that making metal roofs takes a lot of energy, and making new steel costs a lot of carbon up front. Recycled metal roofing is most environmentally friendly when it has a lot of recycled content (50% or more), when it is put in an area where it can reflect light well, and when it replaces a material that would need to be replaced many times during its lifetime.
Eco profile:
25% to 95% of the material is recycled.
When it’s done, it may be recycled 100%.
Life span: 40 to 70 years
Energy efficiency: Very good (there are variants with cool roofs)
Cost of installation: $5 to $14 per square foot
2. greenest roofing’s best product is metal roofing with solar integration.
When you combine the greenest roofing material with distributed renewable energy generation, the environmental math changes a lot. Standing seam metal roofing is the best base for photovoltaic solar panels.
Solar panels on standing seam metal roofs use clamp systems that don’t go through the roof. These systems attach to the elevated seams without going through the roof, which keeps the roof’s weatherproofing intact while boosting energy generation capacity above. A solar array that is the right size for a metal roof may offset 60 to 100 percent of a home’s annual electricity use. This turns the roof from a passive shelter into an active clean energy generator.
The newest types of solar shingles, such Tesla Solar Roof, GAF Energy Timberline Solar, and SunRoof integrated panels, go even further by making roofs where every tile protects the building and makes electricity. These devices cost a lot up front ($20–$45/sf installed), but they save you money on roof replacement and generate power, making them very cost-effective over 20–30 years, especially in states where electricity is expensive.
For homeowners who want to get the most environmental benefit out of every dollar spent on roofing, the best option right now is a mix of recycled metal roofing and solar panels.
Eco profile:
Recycled content: 25% to 95% (for a metal base)
Energy performance: generating more electricity than it uses
Life span: 25 to 40 years for solar parts and 40 to 70 years for metal substrate
Carbon payback time: 1 to 4 years (solar panels make up for the emissions from making them by making clean energy)
Cost to install: $10 to $45 per square foot, depending on the type of solar integration
3. Living Roofs (sometimes called Green Roofs) are the ecological powerhouse.
A living roof is the most complicated and ambitious of all eco-friendly roofing materials. It is a vegetated roofing system where plants grow directly on a multi-layer waterproofing and growing medium assembly.
Living roofs absorb 50–90% of summer rainfall, reduce urban temperatures by up to 7°F through evapotranspiration, and restore pollinator habitat in environments where green space has been eliminated
Living roofs soak up 50–90% of summer rain, which greatly lowers the amount of stormwater runoff that floods urban drainage systems. They give animals a place to live directly, which is especially important for pollinators in cities where native plant habitat has been destroyed. They help temper the urban heat island effect by letting water evaporate. They add a lot of thermal mass, which lowers the heating and cooling needs of the building. And the plant communities that grow on them use photosynthesis to store carbon.
There are two main types of living roofs. Extensive greenest roofing employ a shallow growing media (3–6 inches) planted with low-maintenance sedums, grasses, and wildflowers. They weigh 15–50 pounds per square foot when wet, need little upkeep after they are set up, and are good for most homes with a little extra support. Intensive greenest roofing employ a deeper growing media (8–24+ inches) that can hold shrubs, perennials, and even small trees. They weigh 80–150+ lbs per square foot and need a lot of structural engineering, but they make real rooftop ecosystems.
There are significant problems. Living roofs need careful structural evaluation because they are much heavier than regular roofing materials. They also need professional waterproofing installation (the waterproofing membrane under the growing medium must be perfect; a leak in a living roof is very expensive to find and fix) and ongoing horticultural care.
This is a difficult subject to understand, but this make it easier. The most environmentally friendly roofing method is living roofs, but only when they are properly designed, structurally sound, and installed by professionals on buildings in regions where plants may grow.
Eco profile:
50% to 90% of stormwater can be absorbed.
Urban heat island reduction: 3–7°F drop in local temperature
Life duration (waterproofing): 40 to 60 years when protected by a growth medium
Carbon sequestration: still going on (depends on how dense the plant community is)
Cost to install: $15 to $35 per square foot (extensive); $35 to $75 per square foot (intense)
4. Shingles made of recycled rubber and plastic composite are the landfill diverters.
The United States makes over 290 million trash tires per year. One of the most interesting tales in the building materials sector about the circular economy is how recycled rubber and plastic composite shingles turn trash into strong roofing materials.
EcoStar Inspire, Euroshield Rubber Roofing, and DaVinci Roofscapes composite shingles are made using up to 95% recycled materials, mostly old tires and plastic waste from factories. They are made to seem like slate, wood shake, or regular shingles, but they often work better than the actual materials they look like. Most of them have Class 4 impact ratings, which is the maximum possible. This makes them especially useful in areas where hail is common.
Another good thing is how long it lasts. High-quality recycled rubber shingles come with 40–50 year manufacturer guarantees. They last two to three times longer than regular asphalt shingles and cost about the same to install ($5–$10/sf). These goods are some of the most practical eco-friendly roofing materials for homeowners who want to help the environment without spending a lot of money. They have a lot of recycled content, last a long time, and are resistant to damage.
The truth is that recycled rubber roofing can’t be recycled at the end of its life in most markets right now. In most circumstances, the material that didn’t go to the dump as a tire will end up there as a shingle. There are some ways to recycle rubber that are getting better, but people recognize that this is a weak point in the product’s environmental credentials.
Eco profile:
Content that has been recycled: 75–95% (tires and plastic from people who have used them)
Energy performance: Comes in colors that are approved for cool roofs
Life span: 40 to 50 years
At the end of life, it can only be recycled a little bit (although it’s becoming better).
Cost to install: $5 to $10 per square foot
5. The Natural Choice: Reclaimed and FSC-Certified Wood Shingles
The environmental impact of wood shake and shingle roofing is very intricate and depends nearly entirely on where it comes from.
Reclaimed wood shingles are a type of roofing that has a very low impact on the environment. They come from historic buildings that were torn down, old-growth timber buildings, or thinning operations in forests that are maintained in a way that is good for the environment. The wood’s carbon was taken out of the air decades ago and will stay there for the life of the roof. No new forest is cut down, making energy is low, and the material may be completely broken down when it is no longer needed.
The next level is FSC-certified (Forest Stewardship Council) new wood shingles. This means that the forest is managed in a way that protects biodiversity, replanting, and regulates the rate of harvest, which keeps the carbon stores in the forest steady over time. Western red cedar is the most common type of cedar. It is valued for its natural oils, which make it very resistant to decay and insects without the need of chemicals.
But there are a lot of practical problems with wood shingles. Untreated wood shingles don’t do well in fires (Class C or worse), which is a big safety and insurance concern in areas where fires are common. Metal or composite alternatives are easier to care for than this one. Quality cedar lasts 20 to 30 years, which implies it needs to be replaced more often than metal or composite competitors.
Wood shake needs to be treated for moss and cleaned on a regular basis to keep it from getting damaged too soon in damp Pacific Northwest weather or humid coastal places. People who live in dry areas often care more about fire safety than the environment.
Eco profile:
Content that has been recycled or reclaimed: 100% for reclaimed and 0% for new
Carbon sequestration: Good (it stores carbon from the air for the whole time it is in use)
Cedar lasts 20 to 30 years, whereas recovered old-growth lasts longer.
At the end of its life, it can be burned for energy or fully broken down.
Cost to install: $7–$12/sf
6. Natural Slate: The Choice for Many Generations
Natural slate roofs have been keeping buildings safe for hundreds of years. When you think about how long a material really lasts (100–150 years), the cost of quarrying and the amount of carbon it releases start to appear very different.
Slate is a type of stone that is cut into thin sheets and then cemented together. There isn’t much to the manufacturing process: no chemical changes, no petroleum derivatives, and no synthetic coatings. The carbon in slate comes mostly from the energy used to quarry and transport it, not from any chemicals used in the manufacturing process.
Slate’s greenest roofing credentials are based on its long life. A slate roof put on now will probably still be sheltering the structure in 2176. During that same 150 years, an asphalt roof would need to be replaced 6 to 10 times, which would create 6 to 10 cycles of manufacturing emissions, installation waste, and landfill disposal. Even though it costs more to install one slate, it probably wins the lifecycle carbon analysis over a hundred years of comparison.
The problems are just as genuine. Natural slate is hefty (800–1,500 lbs per square), therefore you need to get structural engineering approval before you install it. There are fewer and fewer skilled slate installers, and they charge a lot more for their work. Not all slate is the same, though. Vermont and Pennsylvania slate is high quality and made in the US. Some imported slate has bad quality control and comes apart in a few decades. Source is really important.
Eco profile:
Recycled content: 0% (stone from a quarry)
Making carbon: moderate (quarrying and shipping)
Quality slate lasts for 100 to 150 years.
End of life: Can be saved and used again; completely inert
Cost to install: $15 to $30 per square foot
7. Cool Roof Coatings: The Cheap Way to Improve
Not every homeowner is ready to replace their whole roof. And for people whose roofs are still working but don’t need to be replaced yet, cool roof coatings are the easiest and most effective eco-friendly roofing upgrade you can have right away.
Cool roof coatings are elastomeric or acrylic coatings that are put directly on top of existing roofing materials, like flat roofs, low-slope membranes, and even metal roofs. They reflect 70–85% of the solar energy that hits them, while ordinary uncoated roofing only reflects 5–25%. This cuts down on the amount of heat that gets into the building below.
The effect on the environment is direct and can be measured. The Heat Island Group at the Lawrence Berkeley National Laboratory says that if a lot of U.S. cities adopted cool roofs, it could lower city temperatures by 2 to 3°F. This would be enough to significantly lower the heat island effect, which causes more air conditioning use, ozone formation, and heat-related illnesses in densely populated areas.
A white elastomeric cool roof coating on a flat-roofed home or business building costs $1–$3 per square foot. It saves energy right away, extends the life of the membrane underneath it by reflecting UV radiation, and helps reduce the urban heat island effect at the lowest possible cost for any greenest roofing intervention.
Eco profile:
Solar reflectance: 70 to 85%
Energy savings: in warm climates, cooling costs might go down by 15% to 30%.
Lifespan (coating): 10 to 20 years before it needs to be recoated
Cost of application: $1 to $3 per square foot over existing roofing
Best use: rooftops that are flat or have a modest slope in warmer places
Greenest Roofing Materials at a Glance
Material
Recycled Content
Lifespan
End-of-Life
Energy Performance
Installed Cost/sf
Recycled metal roofing
25–95%
40–70 yrs
100% recyclable
⭐⭐⭐⭐⭐
$5–$14
Metal + solar integration
25–95%
40–70 yrs
100% recyclable
⭐⭐⭐⭐⭐
$10–$45
Living / green roof
N/A
40–60 yrs
Biodegradable
⭐⭐⭐⭐⭐
$15–$75
Recycled rubber/plastic
75–95%
40–50 yrs
Limited recycle
⭐⭐⭐⭐
$5–$10
FSC certified wood
0–100%
20–30 yrs
Biodegradable
⭐⭐
$7–$12
Natural slate
0%
100–150 yrs
Fully reusable
⭐⭐⭐
$15–$30
Cool roof coating
0%
10–20 yrs
Limited
⭐⭐⭐⭐⭐
$1–$3
Standard asphalt shingles
0–5%
15–25 yrs
Landfill (mostly)
⭐
$2–$6
How to Choose the Greenest Roofing for Your Specific Home
The table above illustrates a range of values. Real choices are more complicated. Based on your situation, here are some practical ways to make a decision:
If your priority is lowest lifecycle environmental impact: choose recycled metal roofing or natural slate, depending on your budget. Both last a long time, which makes the increased initial environmental cost seem small in comparison.
If your priority is maximizing energy performance: you can get metal roofing with an ENERGY STAR cool-roof coating or solar shingles if your electricity expenses make the investment worth it.
If your priority is circular economy and waste diversion: Recycled rubber or plastic composite shingles are the best choice for a circular economy and waste diversion because they have the most recycled content of any readily available roofing material.
If you have a flat or low-slope roof and want to make a big difference right away without spending a lot of money, the first thing you should do is put a cool roof coating over the existing roof.
If you care about urban ecology and stormwater management, living/green roof systems are a good choice as long as your building is strong enough and you live in an area with enough rain to support plants.
If you want your roof to last for a long time across generations, use natural slate from a reputable high-quality local or ethical import supplier and hire a qualified slate roofer to install it.
If money is the only thing that matters, recycled rubber composite shingles for $5–$10/sf are the greatest option for homeowners who can’t afford metal or slate. They have a high recycled content, last a long time, and are affordable.
The Question Nobody Asks — But Should
The greenest roofing industry doesn’t want to talk about this, but the truth is that the best thing you can do for the greenest roofing decision is typically to wait to replace a roof that is still working.
Every time a roof is replaced, there is demolition trash, transportation emissions, and carbon emissions from making the new material, no matter how eco-friendly it is. If your asphalt roof has 8 to 10 years of useful life left, replacing it with recycled metal roofing today doesn’t help the environment until the metal roof’s lifecycle savings outweigh the cost of replacing it in terms of carbon.
Make what works last longer. Take care of what you can. When you really need to replace anything, choose the greenest roofing choice. A really ecologically literate roofing approach looks like that order, not just picking the greenest roofing material when you’re ready to buy.
Choose with the whole lifecycle in mind when it’s time to replace something. The options are better now than they have ever been.
Frequently Asked Questions
What kind of roofing material is the most eco-friendly?
Recycled metal roofing is the greenest roofing material for most homeowners. It is made of 25–95% recycled steel or aluminum, can be recycled at the end of its life, lasts 40–70 years, and has cool-roof energy performance that cuts cooling costs by 7–15% each year. Living green roofs are better for the environment in cities, and natural slate lasts the longest, at 100 to 150 years. However, recycled metal is the greatest choice for the most homeowners since it has the best mix of greenest roofing credentials, performance, and ease of use.
Are rubber shingles made from recycled materials really good for the environment?
Yes, recycled rubber shingles manufactured from used tires and plastic have 75–95% recycled content, keep a lot of trash out of landfills, come with 40–50 year guarantees, and are less likely to be damaged by impacts than most other types of roofing. The fact that most rubber composite shingles go to the garbage when they are changed is a known weakness in their greenest roofing credentials. Recycled rubber composites are a great choice for homeowners who want eco-friendly roofing materials that are easy to get and don’t cost a lot of money like metal or slate.
Do green roofs work on homes?
Yes, most homes can have extensive greenest roofing with shallow growth medium and sedum plants. The expense of engineering and reinforcing the roof is usually between $1,000 and $3,000. They work best on flat or low-slope roof sections, and they are especially useful in cities for managing rainwater and lowering heat islands. Intensive greenest roofing that hold more soil and bigger plants need a lot of structural engineering and are not as prevalent on single-family homes.
Is it worth it to get a cool roof to save energy?
For homes in warm climates (IECC zones 1–3, which covers the Southern U.S., Southwest, and coastal areas), ENERGY STAR-certified cool roofing can save you 7–15% on your cooling expenditures per year—$75–$300 per year, depending on the size of your home, the climate, and the cost of energy. In cold climes, the energy balance is better because the extra heat that is absorbed in the winter makes up for some of the savings in cooling in the summer. Cool roof coatings are the cheapest way to start, costing $1 to $3 per square foot. Cool-roof-rated metal panels do the same thing as a 40- to 70-year roofing system.
What makes natural slate better than metal as a greenest roofing material?
Natural slate and recycled metal roofing both have strong environmental arguments, but they come from different places. Slate lasts longer (100 to 150 years compared to 40 to 70 years for metal) and can be reused at the end of its life (slate can be rescued and put back in place). Metal is better than slate because it has more recycled material (25–95% versus 0%), it uses less energy (reflective coatings), and it is easier to get to (slate is heavy and needs structural engineering; installing it takes increasingly rare professional labor). Recycled metal is easier for ordinary homes to get, but for heritage buildings or homeowners who want to construct roofing that lasts for generations, high-quality slate makes a strong case for being better for the environment.
Which eco-friendly roofing materials have the most recycled content?
Recycled rubber and plastic composite shingles are the most eco-friendly roofing materials that are widely used. They are made from 75–95% post-consumer recycled tires and plastic.Recycled aluminum roofing panels come next, with 50 to 90 percent recycled aluminum content. Depending on the manufacturer and product line, recycled steel roofing panels can have 25% to 95% recycled material. Most commercial asphalt shingles have 0–5% recycled content, but there is a new type of asphalt shingle that uses reclaimed rubber crumb.
🏠 Roofing Tips & Updates
Get free roofing advice, cost guides, and seasonal maintenance tips.
Roofing content specialist with 5+ years researching U.S. residential and commercial roofing. Has documented 200+ projects covering installation costs, material selection, contractor vetting, and DIY guides for homeowners across all climate zones.