Best Way to Remove Roof Shingles: DIY Tear-Off Guide
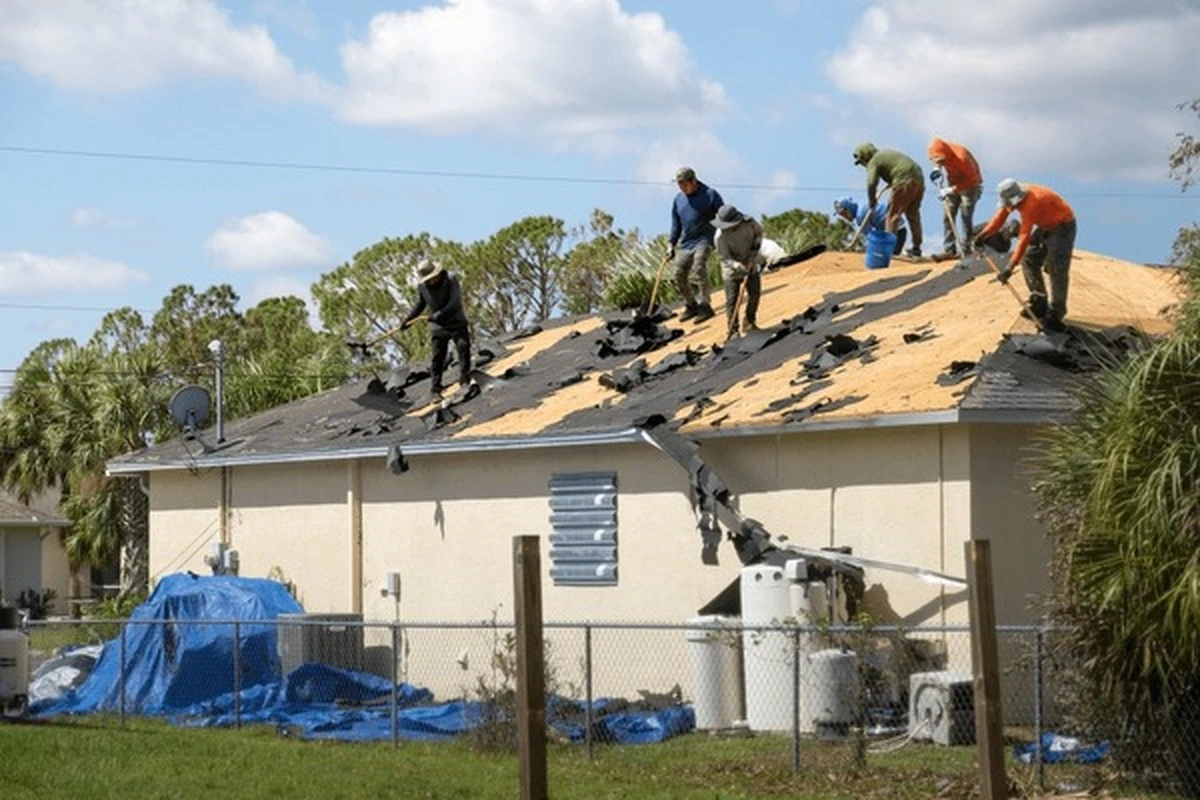
The best way to remove roof shingles (3‑tab) is to set up a safe work zone, remove ridge caps, then systematically tear off shingles in top‑down sections using a roofing tear‑off shovel—slowing down around flashing and valleys to avoid damage that could lead to leaks. Once the roof is stripped, the safest way to change roof shingles is to rebuild the roof layers in the correct order: inspect and repair the deck, install drip edge and underlayment, add starter strips, lay field shingles with proper nailing and alignment, and finish with ridge caps.
This guide is written for your exact project: 3‑tab shingles, a moderate pitch, and a full tear‑off (not a roof-over). The goal is a clean tear‑off that protects the deck, a solid inspection phase, and a straight, professional-looking 3‑tab install that performs correctly.
Table of Contents
Why the best way to remove roof shingles matters
Learning the best way to remove roof shingles isn’t just about speed—it’s about protecting the roof deck, preserving reusable flashing, and creating a clean foundation for the new roof. A rushed or careless tear‑off can gouge decking, bend valley metals, or leave hundreds of nails behind that telegraph through underlayment and create leak points. Understanding the correct technique helps DIYers avoid these problems and sets up a successful installation when you change roof shingles.
Tools and safety essentials (moderate pitch)
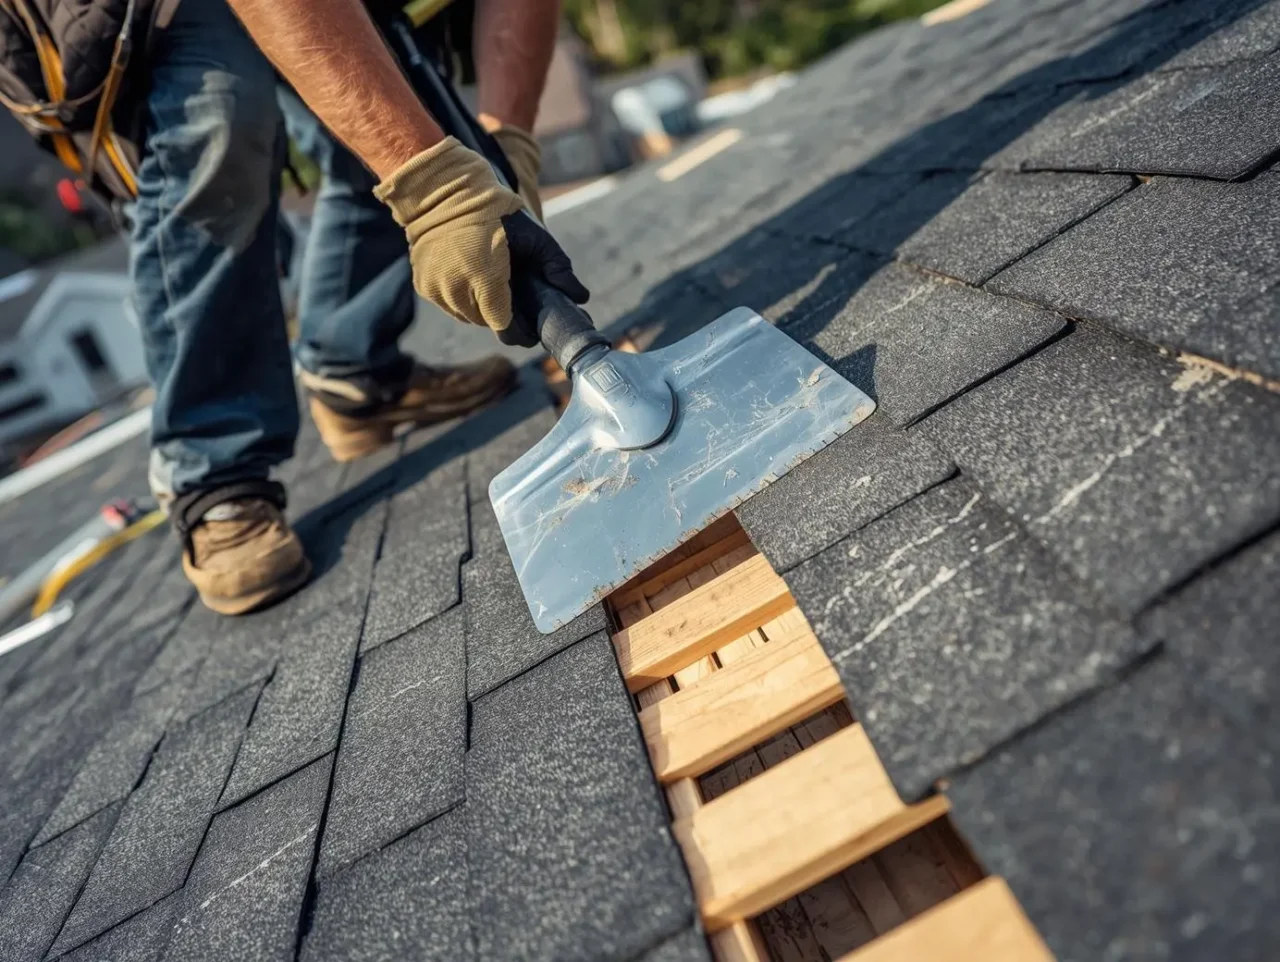
A roofing tear‑off shovel (roofing spade) is commonly recommended for shingle removal because it’s designed to slide under shingles and pop nails efficiently, which is why it’s central to the best way to remove roof shingles. A flat pry bar is still required around edges and flashing because those areas can be damaged if you force a shovel under them.
Core tear‑off tools
- Roofing tear‑off shovel (primary removal tool).
- Flat pry bar (flashing, tight corners, valley edges).
- Hammer or nail puller (cleanup nails, stubborn fasteners).
- Utility knife with hook blades (cutting underlayment cleanly).
- Push broom (keeping the deck walkable as you go).
- Magnetic nail sweeper (ground cleanup after tear‑off).
On a moderate slope, you still need fall protection appropriate for sloped roofs because loose granules and shingle fragments can reduce traction during tear‑off. Avoid working in rain, frost, or high winds because stability and control drop quickly in those conditions.
Site setup that improves safety
- Create a drop zone below the eaves so nobody walks under falling debris.
- Stage disposal (dumpster/trailer) close enough that you can toss debris with minimal carrying.
- Keep your “walking lane” clear—don’t let broken shingles stack where you step.

Best way to remove roof shingles: step-by-step tear-off
Step 1: Protect the ground and plan debris flow
Lay tarps or plywood where debris will land, and choose where shingles will slide or be tossed so cleanup is predictable. If disposal is far away, tear‑off becomes slower and messier, which increases fatigue and can increase risk.
Step 2: Remove ridge caps first
The best way to remove roof shingles starts at the ridge. Remove ridge caps first because they overlap the top edges of the field shingles. Use the tear‑off shovel or pry bar to pop nails, then move ridge pieces off the walking path immediately so you’re not stepping on loose caps.
Step 3: Start a few courses below the ridge
Starting a few rows down makes it easier to get the shovel under multiple tabs and pop nails in batches. Work left‑to‑right (or right‑to‑left) in a strip so you’re not creating random “holes” across the roof that are harder to navigate.
Step 4: Tear off in top‑down sections
Continue stripping shingles in manageable strips from top to bottom, removing overlaps in the direction they were installed. This systematic approach is part of the best way to remove roof shingles because keeping sections controlled helps you maintain footing and limits accidental deck damage from aggressive prying.
Step 5: Adjust technique for steep or slippery areas
If your moderate-pitch roof has sections that feel slippery due to granule buildup or morning dew, slow down and consider repositioning your safety anchor points. The best way to remove roof shingles safely is to work at a pace that maintains control rather than rushing and risking a fall.
Detail zones: valleys, vents, chimneys, and walls

Around flashing, walls, and valleys, switch to a pry bar and lift shingles carefully because these areas are easy to bend or tear. Flashing issues are a common leak source, so if flashing is corroded, loose, or damaged, replacement during re-roofing is often the safer move than trying to reuse questionable metal.
Best practices for tear‑off near details
- Use the shovel to get close, then switch to a pry bar for the last inches.
- Lift fasteners rather than ripping shingles sideways around metal edges.
- Plan to replace old flashing if it shows obvious deterioration because re-roofing is the easiest time to do it correctly.
- If you’re unsure whether your roof decking needs replacement, inspect carefully during tear-off for soft spots and staining.
Nail and underlayment removal (full tear‑off)
After shingles are removed, pull protruding nails so the deck is smooth for underlayment and shingles. Leaving nails behind creates bumps under the underlayment and can cause tears that compromise water protection.
In a full tear‑off, removing old underlayment helps expose the deck for inspection and can reveal moisture problems that might remain hidden under a new roof-over. This step also helps you see whether any areas need decking replacement before you move on to the installation phase where you change roof shingles.
Deck inspection and repairs (what to look for)
A major advantage of learning the best way to remove roof shingles through a full tear‑off is that it allows deck inspection and replacement of compromised sheathing before you change roof shingles. Signs associated with roof deck rot include soft spots, staining, and moisture-related indicators, and those conditions should be addressed before installing new roofing layers.
Deck inspection checklist
- Walk the deck carefully and identify any soft or spongy areas.
- Look for dark staining patterns that suggest past leak paths.
- Inspect plywood/OSB edges for swelling, delamination, or crumbling.
- Watch for sagging or uneven planes that may indicate broader structural concerns.
If rot is found, replace the affected decking sections before proceeding so the new roof isn’t installed over a weak base. If deterioration appears widespread or suggests framing issues, consider professional assessment before continuing. For guidance on minimum roof pitch requirements when replacing damaged sections, consult local building codes.
How to change roof shingles (3‑tab installation steps)
Once the deck is solid, dry, and clean, you’re ready to change roof shingles by rebuilding the roof layers in the correct order. While local codes and exact manufacturer instructions vary, the workflow below reflects commonly referenced sequencing and manufacturer guidance examples.
Step 1: Install drip edge and underlayment in proper sequence
A commonly referenced guideline is drip edge under underlayment at the eaves and drip edge over underlayment at the rakes. IKO also describes the sequence as eaves drip edge → underlayment → rake drip edge. This order supports proper water shedding at edges and helps protect the deck.
Step 2: Lay underlayment smoothly and straight
Install underlayment flat and straight, with proper overlaps, because wrinkles can telegraph through shingles and create weak points. Follow your product guidance for extra protection at vulnerable areas like valleys and eaves where leaks are more likely.
Step 3: Snap chalk lines for straight courses
Chalk lines are commonly recommended to keep courses straight and consistent, especially across long roof runs. Snap reference lines for the starter strip and the first course, then add additional guide lines as needed so rows don’t drift. This precision is an important part of how to change roof shingles correctly.
Step 4: Install the starter strip
Starter strips help seal the eave edge and improve wind resistance at the first course. Depending on the system, you can use manufactured starter strips or cut tabs off 3‑tab shingles.
Step 5: Lay 3‑tab shingles (layout and nailing)
Begin at the bottom and work upward course by course, aligning to chalk lines. Stagger vertical seams so joints do not line up in a straight pathway. Follow manufacturer guidance for nail type, nail length, and placement; for example, an IKO bulletin outlines nail requirements and penetration guidance for 3‑tab shingles.
Step 6: Handle valleys and penetrations carefully
Manufacturer training emphasizes careful valley handling, including keeping nails away from the valley line and using adhesive in that area to reduce intrusion risk. Avoid improvising on details—follow the instructions for your chosen shingle and flashing system.
Step 7: Install ridge caps last
Install ridge caps last to cover the top joints, keeping consistent exposure and nailing per manufacturer guidance. This completes the process of how to change roof shingles properly.
Final checks and cleanup
Before leaving the roof, do a quality pass: confirm rows are straight, details are properly integrated, and edge sequencing is correct. Cleanup matters because nails and sharp debris can cause injuries and property damage, so keep debris controlled during work and do a final ground sweep at the end.
For future maintenance tips and guidance on when your roof needs fixing versus full replacement, bookmark relevant resources.
Common mistakes to avoid when you remove and change roof shingles
Even when following the best way to remove roof shingles, DIY roofers can make costly errors that compromise the new roof’s performance or create safety hazards during the project. One of the most frequent mistakes is starting the tear-off without adequate disposal planning, which leads to debris piles that block walking paths and increase fall risk while making cleanup significantly harder. Another common error is working too aggressively around valleys and flashing transitions, where rushed prying can bend or tear metal that should be preserved for reuse or proper replacement.
Failing to pull all remaining nails after shingle removal creates bumps and puncture points under the new underlayment, while skipping the deck inspection phase means hidden rot gets sealed under new materials where it continues to spread. Many DIYers also underestimate how quickly weather can damage an exposed deck, starting tear-off projects without confirming they have enough dry time to complete underlayment installation before the next rain. Additionally, improper drip edge sequencing or skipping chalk lines during installation results in wavy courses and edge vulnerabilities that reduce the roof’s water-shedding effectiveness and professional appearance.
When to call a professional instead of DIY
While learning the best way to remove roof shingles empowers homeowners to tackle straightforward re-roofing projects, certain situations require professional expertise and equipment for safety and code compliance. If your roof pitch exceeds moderate slopes and approaches steep territory, or if the roof has multiple levels, dormers, or complex valley configurations, professional roofers have the experience and fall-protection systems to work safely in conditions that pose serious risk to DIYers. Similarly, if the tear-off reveals widespread structural damage, sagging sections, or rot that extends beyond isolated spots, the project has shifted from a shingle replacement to a structural repair that typically requires engineering assessment and professional framing work.
You should also consider professional help when local building codes require permits and inspections for re-roofing, when the project timeline is tight and weather windows are unpredictable, or when physical limitations or lack of comfortable roof experience make the safety risks outweigh the cost savings. Professional roofers can complete tear-off and installation in days rather than weekends, carry comprehensive liability insurance that protects homeowners from jobsite injury claims, and provide workmanship warranties that give long-term protection DIY projects cannot match. For emergency situations where your roof needs fixing immediately due to storm damage or active leaks, professional response and temporary stabilization may be necessary before any tear-off or installation work begins.
FAQ
Is a roofing tear‑off shovel really necessary for the best way to remove roof shingles?
A roofing tear‑off shovel is commonly recommended because it’s designed to slide under shingles and pop nails efficiently, making it the primary tool for the best way to remove roof shingles.
Should ridge caps always come off first?
Yes—ridge caps overlap field shingles, so removing them first is part of the best way to remove roof shingles systematically.
Why do a full tear‑off instead of a roof-over?
A full tear‑off allows deck inspection and replacement of compromised sheathing before you change roof shingles, which prevents installing a new roof over a weak base.
What’s the correct drip edge and underlayment order?
A commonly referenced guideline is drip edge under underlayment at eaves and drip edge over underlayment at rakes.
Can I reuse old flashing when I change roof shingles?
If flashing is straight, rust-free, and in good condition you may reuse it, but damaged or corroded flashing should be replaced during re-roofing.
Get free roofing advice, cost guides, and seasonal maintenance tips.

Roofing content specialist with 5+ years researching U.S. residential and commercial roofing. Has documented 200+ projects covering installation costs, material selection, contractor vetting, and DIY guides for homeowners across all climate zones.
Leave A Comment