Slate Roof Repair: Complete Guide to Fixing & Replacing
Slate roof repair costs an average of $2,006 in 2026 , ranging from $250 for a single broken tile to $20,000 for extensive flashing and underlayment work , making it one of the most specialized and highest-value repair categories in residential roofing. Knowing how to repair a slate roof correctly, when to call a specialist, and how to source matching replacement tiles is the difference between a 10-minute fix that lasts another 50 years and an improper patch job that creates a leak worse than the one you started with.
Natural slate is the most durable roofing material available , a properly maintained slate roof can last 100–150 years, and some historic installations have protected buildings for over two centuries. But its longevity depends entirely on competent repairs when individual slates crack, slip, or break. Walk away from a handful of damaged tiles and within two rainy seasons, water infiltration will have rotted the deck below and turned a $400 repair into a $15,000 structural project.
This complete 2026 guide covers everything you need to understand about slate roof repair , from identifying damage types and sourcing matching replacement slate, through step-by-step repair instructions for both DIY and professional work, to cost breakdowns, common mistakes, and the point at which repair stops making financial sense.
Slate Roof Repair in 2026: By the Numbers
Before assessing your specific situation, understanding the full cost and performance landscape of slate roof repair helps you evaluate every contractor quote and material recommendation you receive.
>$2,006, national average slate roof repair cost in 2026 (Angi)
>$784–$3,253 , typical range for most residential slate roof repairs
>$5–$15 per square foot , average slate repair labor and material cost per sf
>$50–$300 per tile , individual slate tile replacement cost (material + labor)
>$400–$3,000 , flashing and fastener replacement on a slate roof
>$800–$16,000 , underlayment repair or replacement beneath slate
>$10–$30+ per square foot , full slate roof replacement cost (natural slate)
>100–150 years , lifespan of S1 (hard) grade natural slate with proper maintenance
>50–125 years , lifespan of S2/S3 (soft) grade natural slate
>$4–$17 per square foot , labor range for slate roof repair depending on slope, access, and complexity
Understanding Slate: Grades, Types, and Why They Matter for Repair
Successful slate roof repair begins before you touch a single tile , it begins with correctly identifying what type of slate is on your roof. Sourcing mismatched replacement slate is one of the most common and costly slate repair mistakes, producing visible color and texture variation and potentially different thermal expansion characteristics that stress adjacent tiles.
ANSI Slate Hardness Grades
The American National Standards Institute classifies natural roofing slate into three grades based on hardness, absorption, and expected service life. Knowing your slate’s grade tells you its remaining lifespan, appropriate repair approach, and how urgently individual failures need attention.
| Grade | Classification | Expected Lifespan | Common Sources | Repair Priority |
|---|---|---|---|---|
| S1 | Hard slate | 100–200 years | Vermont, Virginia, Spain, China | High , worth every repair investment |
| S2 | Intermediate slate | 75–150 years | Pennsylvania, New York | High , repair while system is intact |
| S3 | Soft slate | 50–75 years | Maine, some Pennsylvania | Assess , may be at or near end of life |
Natural Slate vs. Synthetic Slate: Repair Differences
Natural slate and synthetic slate (polymer composite or fiber cement tiles manufactured to look like natural slate) require fundamentally different repair approaches. Natural slate repair uses the ripper-and-bib or hook method described in detail below. Synthetic slate tiles are repaired more like standard roofing shingles , they are lighter, can typically be nailed through without cracking, and replacement tiles are usually available directly from the manufacturer.
Natural slate repair costs average $2 more per square foot than synthetic slate repair due to the higher material cost of matching natural stone and the greater skill required for correct installation. If you are unsure whether your roof is natural or synthetic, a simple test: natural slate produces a clear, bell-like ring when tapped with a knuckle; synthetic slate produces a dull thud.
Slate Roof Repair Cost by Type: 2026 Complete Breakdown
| Repair Type | Average Cost | Cost Range | DIY Feasible? |
|---|---|---|---|
| Single tile replacement (1–2 tiles) | $150–$400 | $50–$600 | Yes , with correct tools |
| Multiple tile replacement (3–10 tiles) | $400–$1,200 | $300–$2,000 | Possible , experience recommended |
| Flashing replacement (chimney, valley) | $600–$3,000 | $400–$20,000 | No , specialist required |
| Underlayment repair / replacement | $2,000–$8,000 | $800–$16,000 | No , full slate removal required |
| Re-nailing / re-pointing loose slates | $800–$2,500 | $500–$5,000 | Possible for isolated areas |
| Ridge cap slate replacement | $800–$3,500 | $600–$6,000 | No , ridge work requires specialist |
| Partial restoration (one slope) | $2,500–$8,000 | $2,500–$15,000 | No , full contractor project |
| Full slate roof replacement | $20,000–$60,000 | $10–$30/sf installed | No , specialist contractor only |
Source: Angi, HomeAdvisor, HomeGuide 2026 slate roofing cost data. Costs reflect U.S. national averages , Northeast and Mid-Atlantic markets (primary historic slate regions) typically run 10–20% above these figures. For full replacement cost comparison against other materials, see our residential roof repair vs. replacement guide.
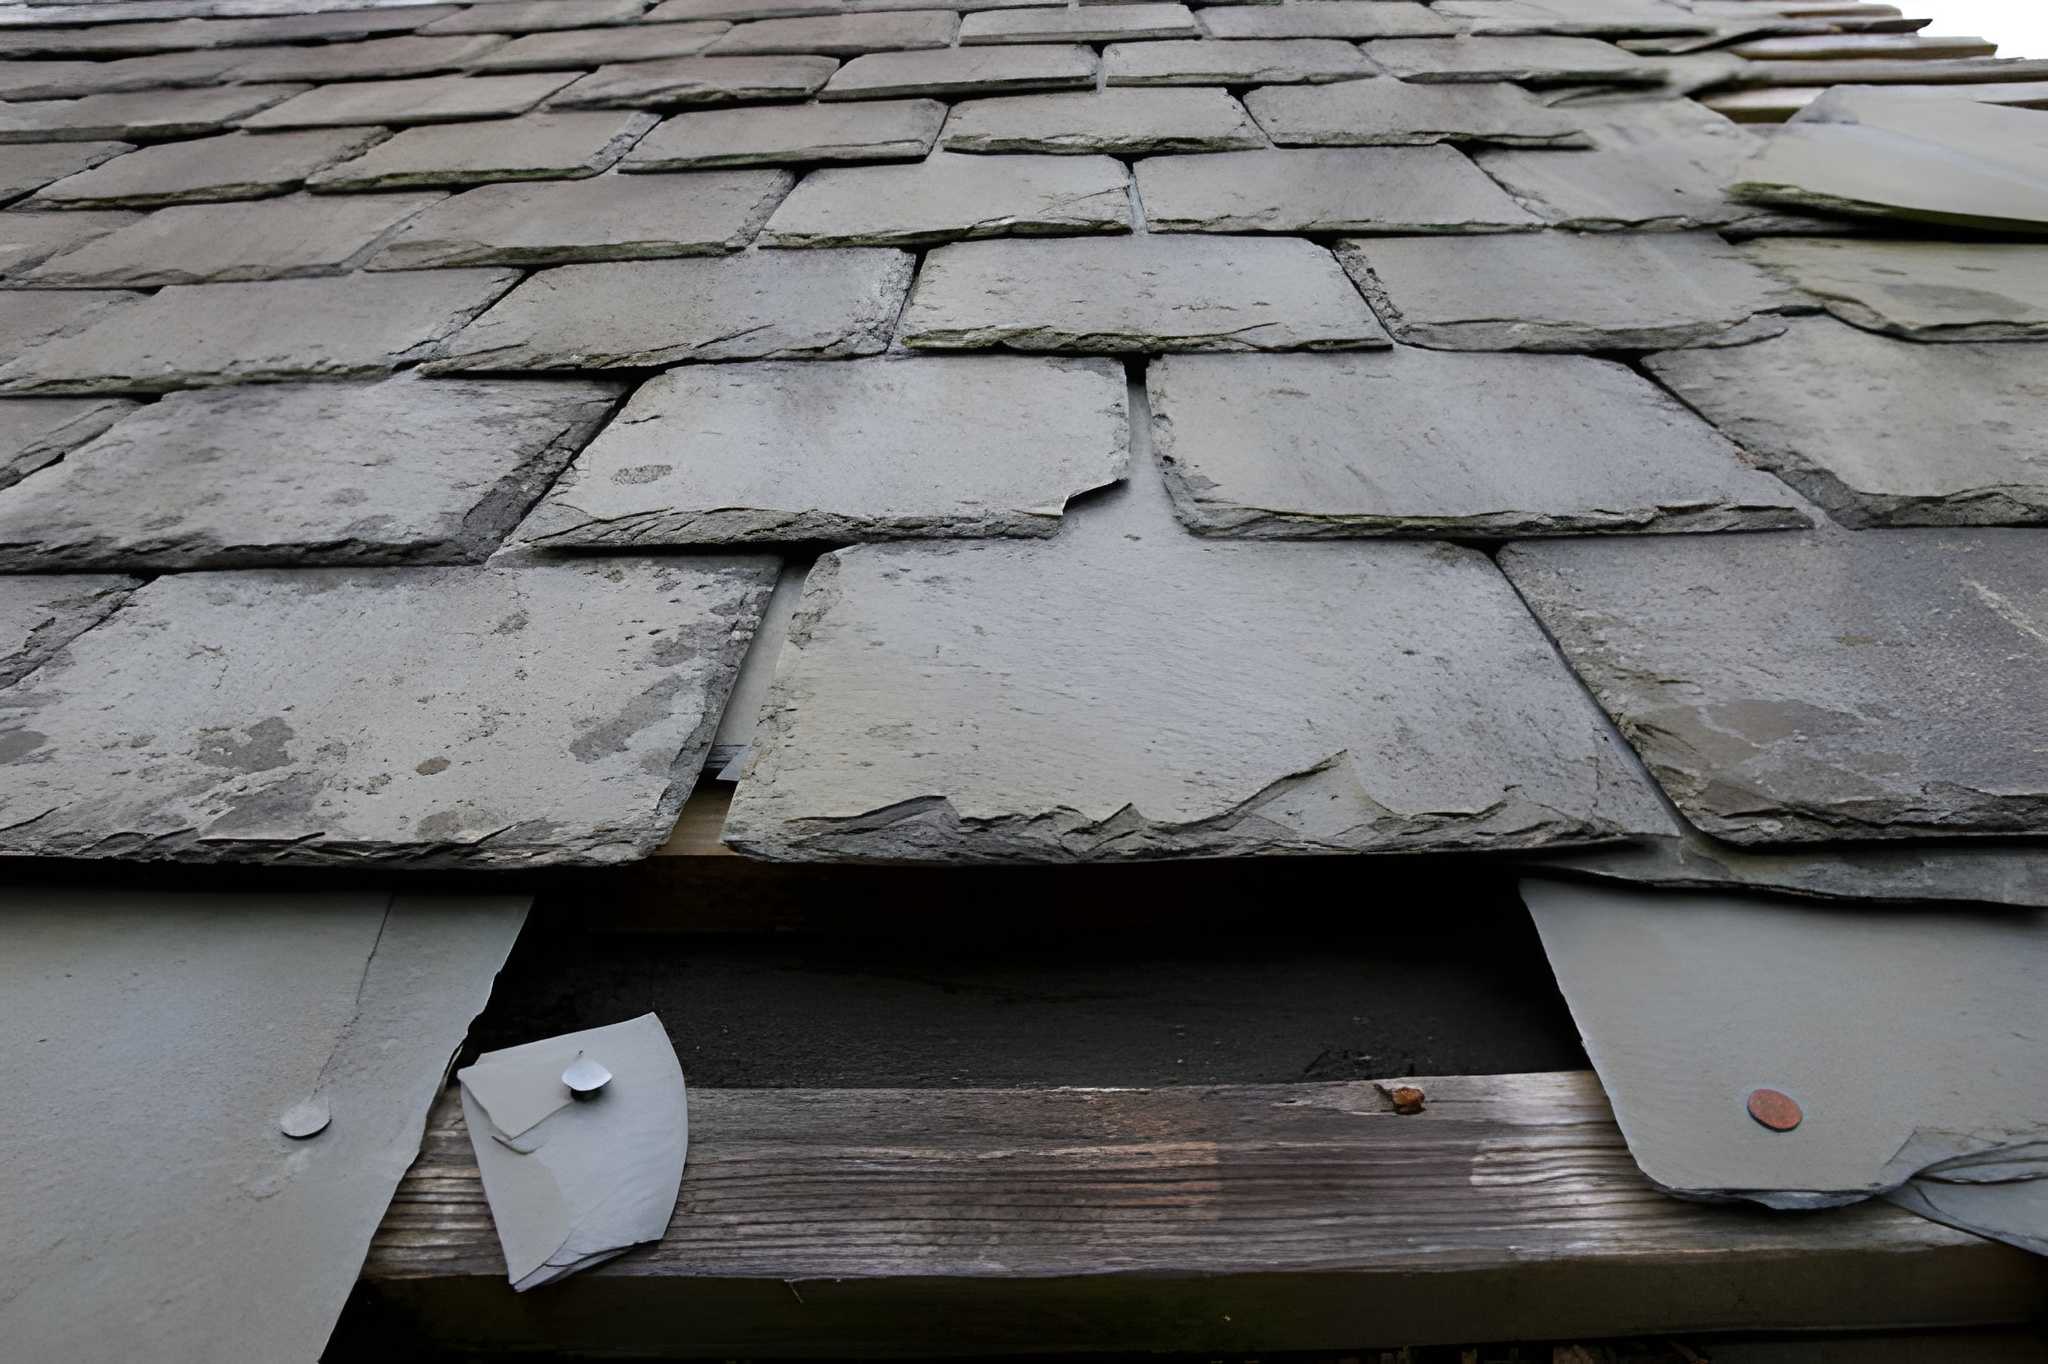
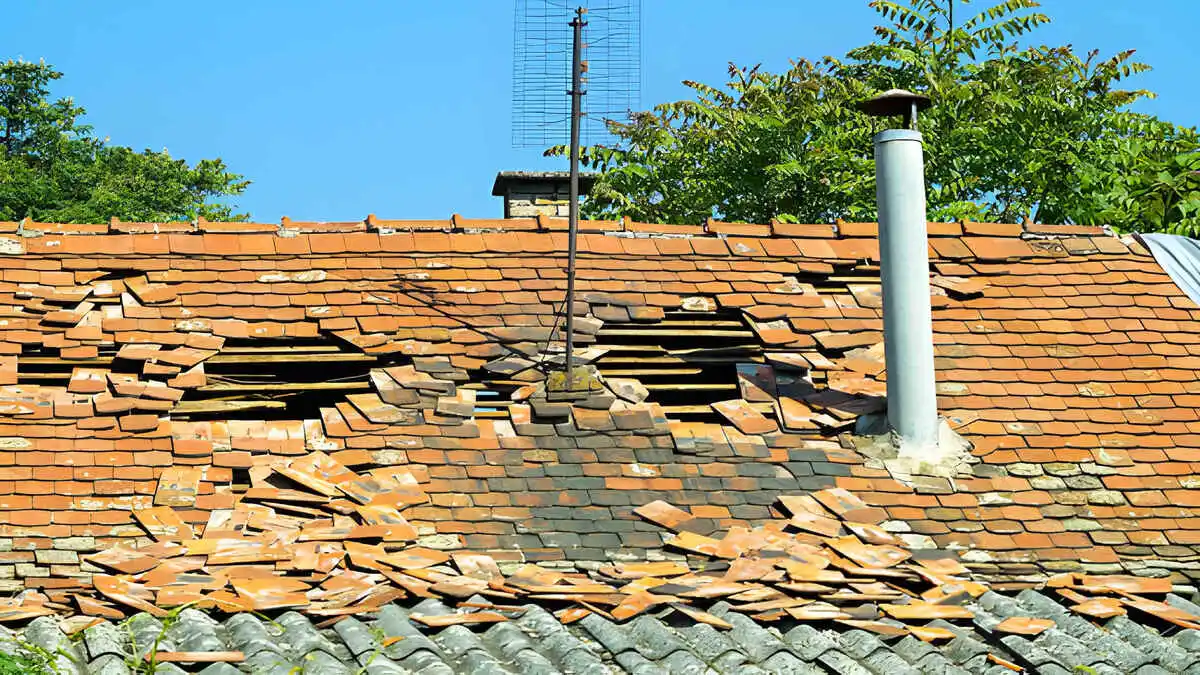
How to Identify Slate Roof Damage: What to Look For
Most slate roof damage is visible from the ground with binoculars , a twice-yearly inspection (spring and fall) catches developing issues before they become expensive emergency repairs. Here is what to look for at each inspection point.
From Ground Level (Binoculars)
>Missing tiles: Visible gaps in the slate field , dark rectangles where a tile has slipped or fallen
>Slipped tiles: Tiles that have partially displaced downward, exposing the nail holes or the tile above
>Broken tiles: Cracked or shattered slates , often visible as irregular edges or missing corners
>Ridge deterioration: Crumbling mortar, lifted ridge slates, or gaps at the ridge apex
>Discoloration patches: Dark wet-looking areas that don’t dry after rain , indicating water retention under compromised tiles
>Flashing rust streaks: Brown vertical staining running down from chimney base, skylights, or valleys , indicates corroded lead or galvanized flashing
From Attic Inspection (Interior)
>Daylight penetration: Points of light visible through the deck , indicates missing or displaced tiles above
>Water staining on rafters: Brown staining or tide marks on structural timber , indicates past or active water infiltration
>Wet or discolored insulation: Moisture-damaged insulation indicates the underlayment has failed and water is reaching the deck
>Staining on deck boards: Dark discoloration on the roof sheathing or skip-sheathing boards beneath the slate
>Deteriorated underlayment: Original felt or organic underlayment visible as crumbling, flaking, or torn material , common on roofs 75+ years old where the underlayment has reached end of life before the slate itself
On the Roof Surface (Up-Close Inspection)
> Nail sickness: Nails (particularly older iron nails) corrode over decades, causing slates to lose their fastening and slip progressively , this is the most common cause of slate roof failure on older installations and may require a full re-nailing program
> Delamination: Soft slate (S3 grade) splits into layers as it ages , visible as tiles separating into multiple thin layers; delaminating slates cannot be repaired and must be replaced
> Spalling: Surface scaling or pitting of the slate face , indicates the stone’s mineral structure is deteriorating; a sign the slate grade is near end of life
> Hairline cracks: Fine cracks running across tiles , may not be immediately visible from the ground; tiles with cracks that extend through the full thickness should be replaced
How to Repair a Slate Roof: Step-by-Step Guide
Individual slate tile replacement is the most common slate roof repair task , and the one most accessible to a careful, safety-conscious homeowner. The following process applies to replacing a single broken, cracked, or slipped slate tile using the two approved installation methods: the hook method and the nail-and-bib (tingle) method.
Step 1: Source Your Matching Replacement Slate
Before doing anything else , before climbing the roof, before ordering tools , source your replacement slate. Correct matching requires identifying four parameters: tile dimensions (length × width in inches), thickness (typically 3/16″ to 3/8″), color and texture (photograph in natural light), and origin/grade where known.
Sources for matching replacement slate: the National Slate Association’s supplier directory, regional architectural salvage dealers (often the best source for historic color matches), and specialty suppliers including Vermont Structural Slate Company, Rising and Nelson Slate, and North Country Slate. For replacement, use a slightly thinner tile than the original when available , it eases insertion under the overlapping courses without lifting surrounding tiles.
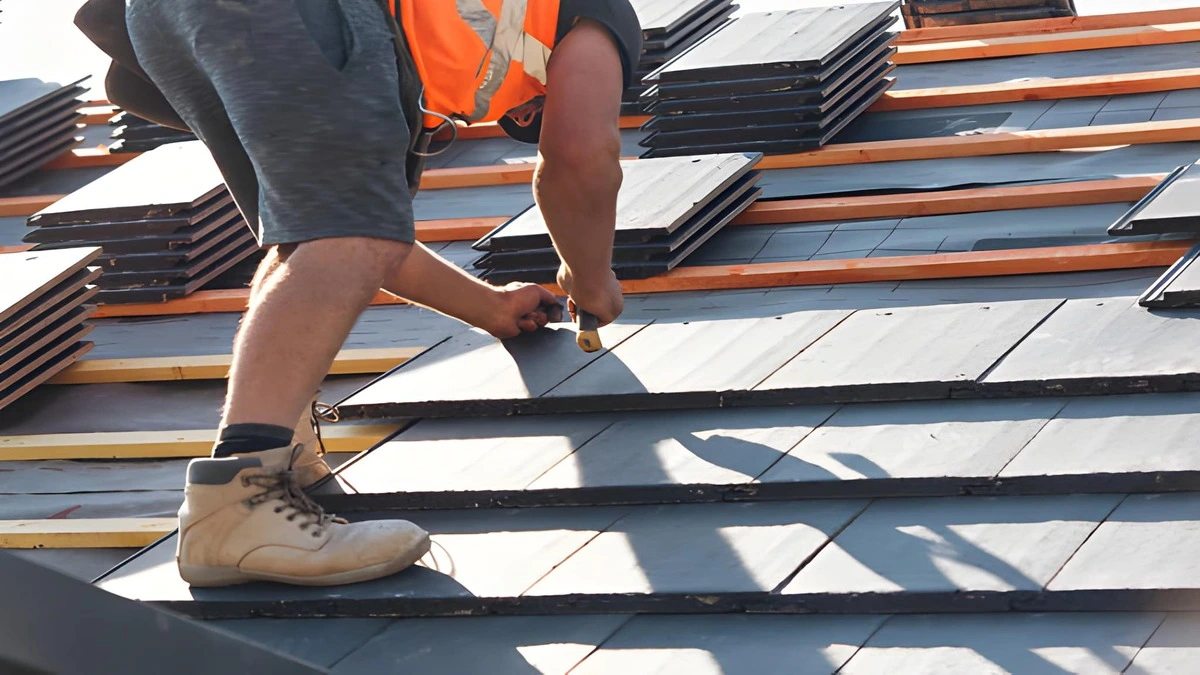
Step 2: Remove the Damaged Slate with the Ripper
Insert the slate ripper beneath the damaged tile and work it upward until the hooked blade engages the nail shank holding the slate. Pull the ripper handle downward firmly , this drives the hook against the nail and cuts or pulls it free. Repeat for the second nail. Most slates are held by two nails positioned in the upper half of the tile.
Once both nails are removed or cut, the broken slate will typically slide downward and out. If fragments remain, use the pointed end of the slate hammer or the ripper tip to carefully clear broken pieces without disturbing adjacent tiles. Clean the nail hole area of any debris or protruding nail shanks before proceeding.
Step 3A: Install Using the Hook Method (Preferred)
The hook method is the preferred technique for slate roof repair because it requires no nail penetration through the new tile face, eliminating a potential leak point. Pre-drill a small pilot hole in the roof deck or sheathing at the point between two existing slates in the course below where the damaged tile sat. Drive a copper or stainless steel slate hook into the pilot hole so it protrudes upward and will catch the bottom edge of the new replacement slate.
Slide the replacement slate upward into the gap, ensuring its sides align perfectly with the tiles on either side and the bottom edge aligns with the course below. Pull the tile downward to engage the hook at its bottom edge. The hook holds the tile securely without any nail penetration through the tile face, allowing for thermal movement and future removal if needed.
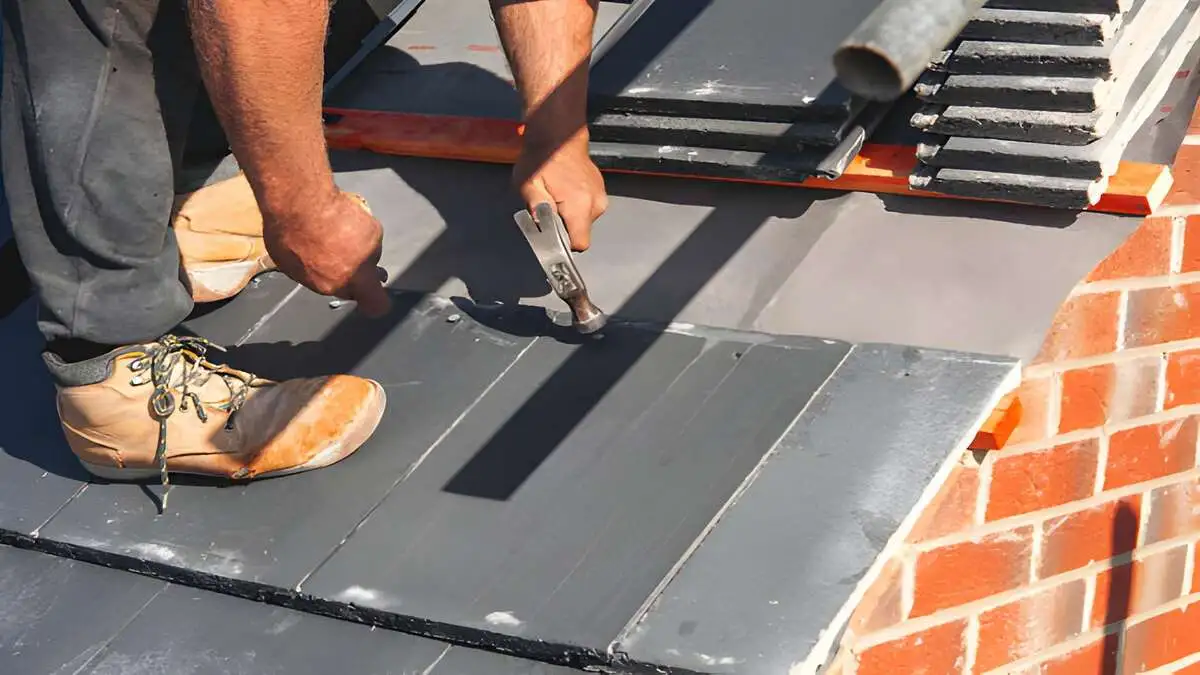
Step 3B: Install Using the Nail-and-Bib Method (Alternative)
The nail-and-bib (also called tingle) method is an alternative when hook installation is not practical. Slide the replacement slate into position. Pre-drill a nail hole near the top edge of the replacement tile where it will be covered by the overlap of the tiles above. Drive a copper or stainless ring-shank nail through the pre-drilled hole into the roof deck , never nail through the slate without pre-drilling, as the percussive force will crack the tile.
Cut a copper bib approximately 8 inches long × 3 inches wide. Make diagonal cuts at the upper corners so the bib can bend under the overlapping slates. Slide the bib upward beneath the tiles in the course above so it covers the nail head completely, with 2–3 inches of bib extending below the overlap to shed water over the new tile surface. The bib is not nailed , it holds in position through friction against the overlapping tiles.
Step 4: Verify the Repair Before Leaving the Roof
Before descending, perform a complete verification of the repair: the replacement tile must sit flush with the surrounding slates , no proud edges that will catch wind or foot traffic. The exposure (the visible portion of the tile below the overlap) must match the exposure of neighboring tiles exactly , standard exposure is 3 inches of headlap. Give the tile a gentle tap , it should feel solid and produce a clear ring, not a hollow thud.
For the most thorough verification, have a helper spray water over the repaired area with a garden hose while you observe from inside the attic below. Water penetrating the attic during the hose test reveals any remaining gaps before the next rainfall does. This extra step adds 10 minutes and potentially saves a follow-up repair call.
Slate Roof Repair Checklist: Before, During, and After
Before Any Slate Roof Repair
>✅ Replacement slate sourced and matched , size, thickness, grade, and color confirmed
>✅ All specialist tools assembled , slate ripper, slate hammer, copper nails or hooks, copper bib
>✅ Fall protection equipment fitted , harness, rope, roof anchors installed
>✅ Roof surface dry , never work on wet slate, which is dangerously slippery
>✅ Attic inspection completed , water staining and structural condition assessed
>✅ Scope of damage fully assessed , count of broken, slipped, and missing tiles documented before starting
During Slate Roof Repair
>✅ Never walk directly on slate tiles , use a chicken ladder (roof ladder) or walk on a foam kneeling board spread across multiple tiles to distribute weight
>✅ Use only copper or stainless steel nails , never iron or standard galvanized nails on a slate roof
>✅ Pre-drill all nail holes , never drive nails directly through slate without pre-drilling
>✅ Check alignment and exposure on each tile before moving to the next
>✅ Clear all removed slate fragments from roof surface , broken slate is a falling hazard
>✅ Inspect surrounding tiles for hidden cracks while area is accessible , address all damage in one roof access event
After Slate Roof Repair
>✅ Water test from attic with garden hose before declaring repair complete
>✅ Ground-level visual check , repaired tiles flush and aligned with surrounding courses
>✅ Store any remaining spare tiles horizontally in a dry, temperature-stable location for future repairs
>✅ Document repair with photographs , date, tile count, location on roof
>✅ Schedule follow-up inspection in 6 months to verify repair integrity through one full weather cycle
Common Slate Roof Repair Mistakes , And How to Avoid Them
Mistake 1: Using the Wrong Nails
Iron cut nails and standard hot-dip galvanized nails were used in slate installations throughout the 19th and early 20th centuries , and their corrosion (“nail sickness”) is the number one cause of slate roof failure on historic buildings today. Any slate roof repair must use copper ring-shank or stainless steel nails exclusively. Copper is the traditional preferred material because it develops a patina that does not stain slate; stainless steel is an acceptable alternative. Galvanized nails will fail within 20–40 years , far shorter than the slate’s remaining service life.
Mistake 2: Walking Directly on the Slate Surface
Slate is stone , but it is also brittle and highly sensitive to point loading. Walking directly on slate tiles concentrates your full body weight on a small tile area, causing immediate cracking that may not be visible until the tile fails weeks later during rain. Always use a chicken ladder (roof access ladder) that hooks over the ridge, a foam kneeling board spread across at least four tiles, or purpose-made slate roof walkway boards. One careless step on the wrong tile during a “quick repair” can create three new repair jobs.
Mistake 3: Applying Roofing Cement or Caulk as a Repair
Roofing cement (tar-based sealant) applied to cracked slate tiles or around flashing is a common quick-fix that creates serious long-term problems. Roofing cement traps moisture against the stone and accelerates the delamination of soft slate grades. It prevents future inspection of the condition beneath it. And it makes proper repairs significantly more difficult when it eventually fails , which it will within 5–10 years. The correct repair for a cracked or broken slate tile is always removal and replacement , never patching in place with adhesive.
Mistake 4: Mismatching Replacement Slate
Installing replacement slate tiles that don’t match the existing installation in thickness creates a critical structural problem , not just a cosmetic one. Thicker replacement tiles lift the overlapping courses above them, creating gaps at the exposed edges that allow water and ice infiltration. Tiles that are too thin sit below the plane of the surrounding slate and create a low point where water pools. Match thickness within 1/16 inch of the existing tile for correct installation geometry.
Mistake 5: Ignoring the Underlayment Condition
Many slate roofs installed in the early-to-mid 20th century used organic felt underlayment that has a service life of 60–75 years , significantly shorter than the S1 or S2 grade slate above it. On a 100-year-old slate roof with sound tiles, the underlayment may have completely deteriorated, leaving the deck boards as the only moisture barrier. This is the scenario behind many “mystery leaks” on well-maintained historic slate roofs , the slate is fine, the underlayment is gone. An attic inspection looking for deteriorated or missing underlayment is essential before concluding that tile replacement alone will solve an ongoing leak.
Slate Roof Repair vs. Full Replacement: Making the Right Call
The most important financial decision for any slate roof owner is knowing when ongoing slate roof repair remains cost-effective versus when the system has reached the point where replacement delivers better value. The National Slate Association’s general guideline: if more than 20% of the tiles on a slate roof are broken, slipped, or missing, a full professional inspection to assess restoration versus replacement is warranted.
| Factor | Favor Repair | Favor Replacement |
|---|---|---|
| Slate grade | S1 or S2 hard slate with decades remaining | S3 soft slate at or past expected lifespan |
| Damage extent | Under 20% of tiles damaged or missing | Over 20–30% tiles failed system-wide |
| Nail condition | Copper or stainless nails , sound condition | Iron nail sickness , widespread corrosion |
| Underlayment | Underlayment intact or recently replaced | Underlayment fully deteriorated |
| Repair cost vs. replacement | Repair under 30% of replacement cost | Repair exceeds 50% of replacement cost |
| Deck condition | Deck boards sound, no rot or structural damage | Widespread deck rot requiring structural repair |
| Matching slate availability | Matching replacement slate readily sourceable | Matching slate unavailable or prohibitively costly |
Frequently Asked Questions: Slate Roof Repair
How much does slate roof repair cost in 2026?
The national average slate roof repair cost in 2026 is $2,006, with most residential projects falling between $784 and $3,253. Individual tile replacements cost $50–$300 per tile (materials and labor). Flashing replacement ranges from $600–$20,000 depending on extent. Underlayment repair or replacement costs $800–$16,000. Labor alone averages $4–$17 per square foot depending on slope, access difficulty, and regional labor rates. Natural slate repair costs approximately $2 more per square foot than synthetic slate repair.
Can I repair a slate roof myself?
Single-tile replacement on an accessible, lower-pitch roof section is DIY-feasible for a careful homeowner with the correct specialist tools , primarily the slate ripper and slate hammer. The hook method of installation is particularly well-suited to DIY because it requires no nail penetration through the tile. However, any repair involving flashing, underlayment, ridge work, steep slopes (over 6:12), or multi-story access should be performed by a specialist slate roofing contractor. Never attempt slate roof repair without a proper fall protection harness and roof anchor system , slate surfaces are dangerously slippery.
How do I find matching replacement slate?
Finding matching replacement slate requires identifying your roof’s origin (Vermont, Pennsylvania, Virginia, or imported), color, and tile dimensions. Start with the National Slate Association’s member supplier directory at slateassociation.org. Regional architectural salvage dealers are often the best source for exactly matching historic color variations. Specialty suppliers including Vermont Structural Slate, Rising and Nelson Slate, and North Country Slate maintain extensive inventories of domestic and imported slate. Bring a physical sample tile for color matching whenever possible , photographs rarely capture the full color range of natural stone.
How long does a repaired slate roof last?
A correctly executed slate roof repair using copper nails, correctly matched replacement tiles, and proper installation technique lasts as long as the surrounding slate system , potentially decades or longer on S1 hard slate. The repair itself does not create a weak point if performed correctly. The limiting factor is always the condition of the surrounding system: the nails, underlayment, and flashing. A well-maintained S1 hard slate roof with regular professional inspections and prompt individual tile repairs can realistically reach 150–200 years of total service life.
What is nail sickness in a slate roof?
Nail sickness is the progressive corrosion of the iron or galvanized iron cut nails used in historic slate installations , typically those installed before 1950. As these nails corrode, they lose their holding power and the slates they secured begin to slip downward or fall. Nail sickness is visible as slates that repeatedly slip even after re-setting, rust staining on the slate surface below nail holes, and on close inspection, visibly corroded or missing nail shanks. Widespread nail sickness typically requires a full professional re-nailing program , lifting each slate, removing corroded nails, and re-fastening with copper nails , a significant project costing $4,000–$20,000+ but one that can extend the life of a sound slate system by another 50–100 years.
A slate roof that receives competent, timely repairs is not a maintenance burden , it is a once-in-a-generation investment that will protect your home long after every asphalt shingle roof in the neighborhood has been replaced two or three times over.
The key is finding a specialist who understands the system, using the right materials every time, and never letting a minor broken tile turn into a major water damage event through delayed action.
Get free roofing advice, cost guides, and seasonal maintenance tips.

Roofing content specialist with 5+ years researching U.S. residential and commercial roofing. Has documented 200+ projects covering installation costs, material selection, contractor vetting, and DIY guides for homeowners across all climate zones.
Leave A Comment