Preloader Close

Installing Snow Guards on Metal Roof: 7 Essential Steps

Installing snow guards on metal roof surfaces is critical for preventing dangerous snow avalanches that can damage property, injure people, and destroy landscaping. Metal roofs shed snow rapidly due to their smooth surfaces, creating hazardous conditions below. This comprehensive guide walks you through professional installation techniques that ensure maximum snow retention while protecting your investment.​

Snow retention systems have evolved significantly, offering multiple mounting options for every roof type. Whether you choose clamp-on systems for standing seam roofs or mechanical attachments for through-fastened panels, proper installation prevents costly damage and liability issues.

Snow Guards on Metal Roof guide

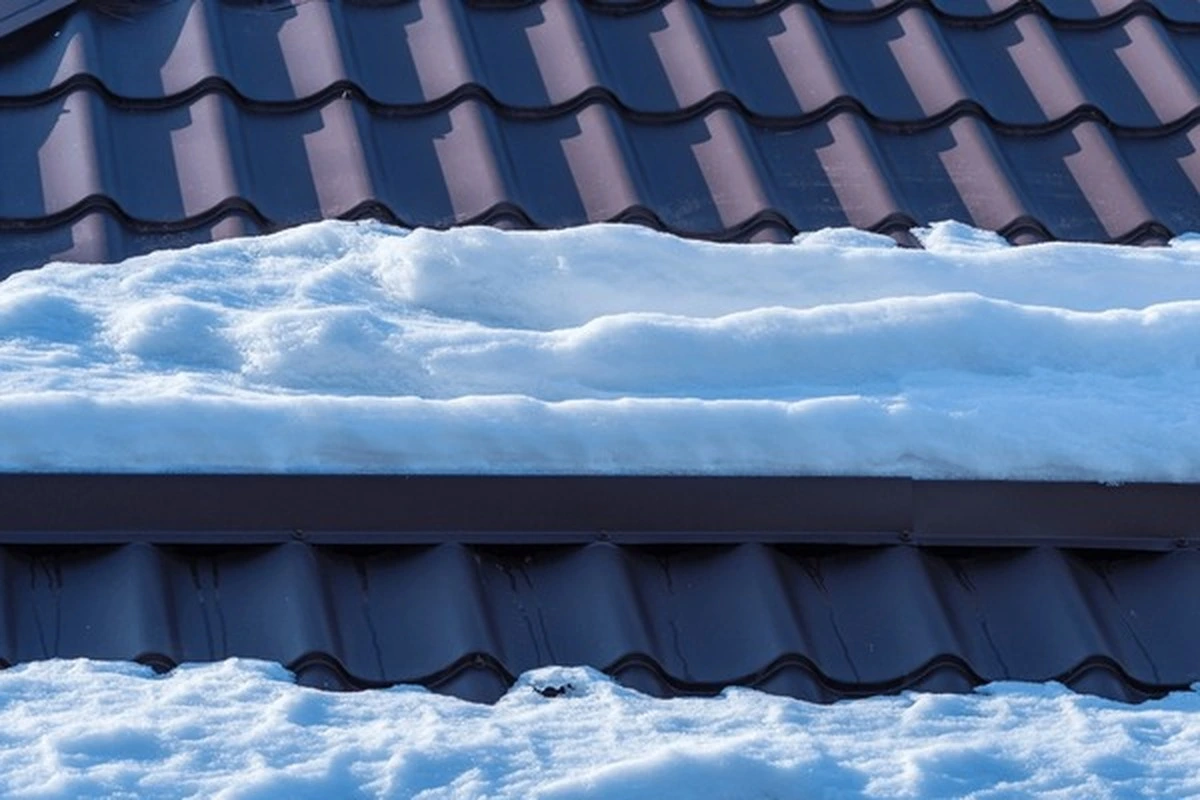
Before installing snow guards on metal roof panels, it’s essential to understand how these systems work. Snow retention doesn’t stop snow from sliding—it controls the release rate, allowing gradual melting instead of dangerous avalanches.​

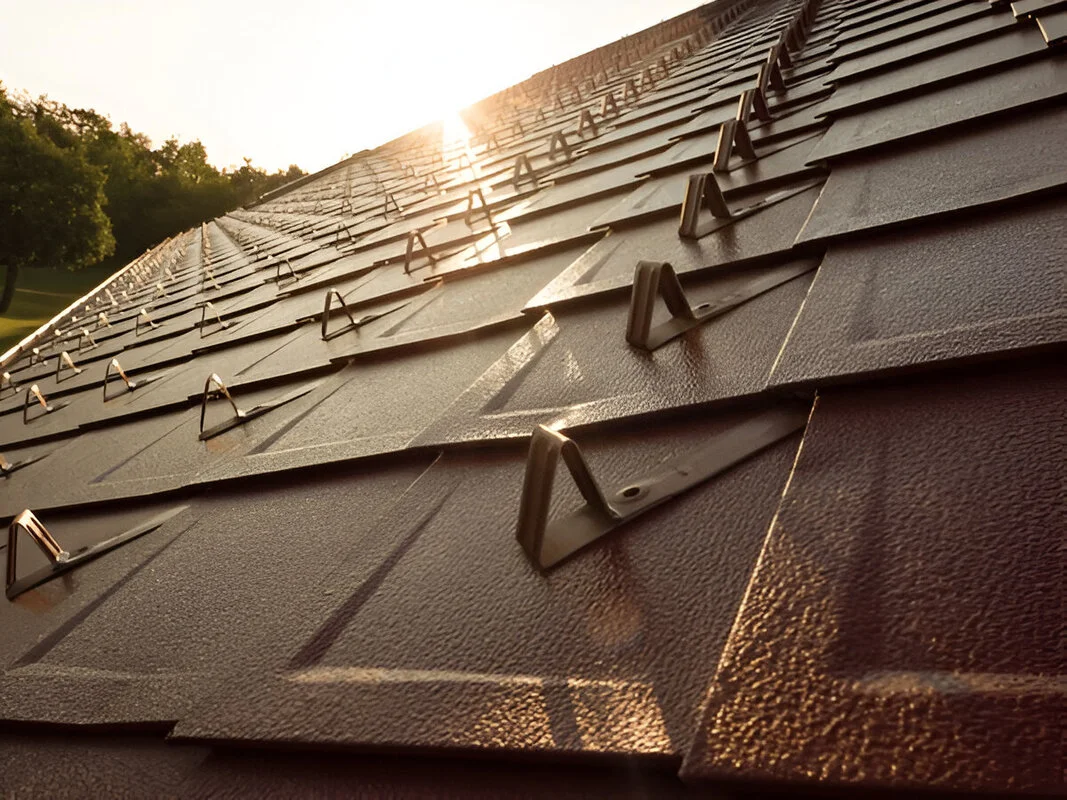
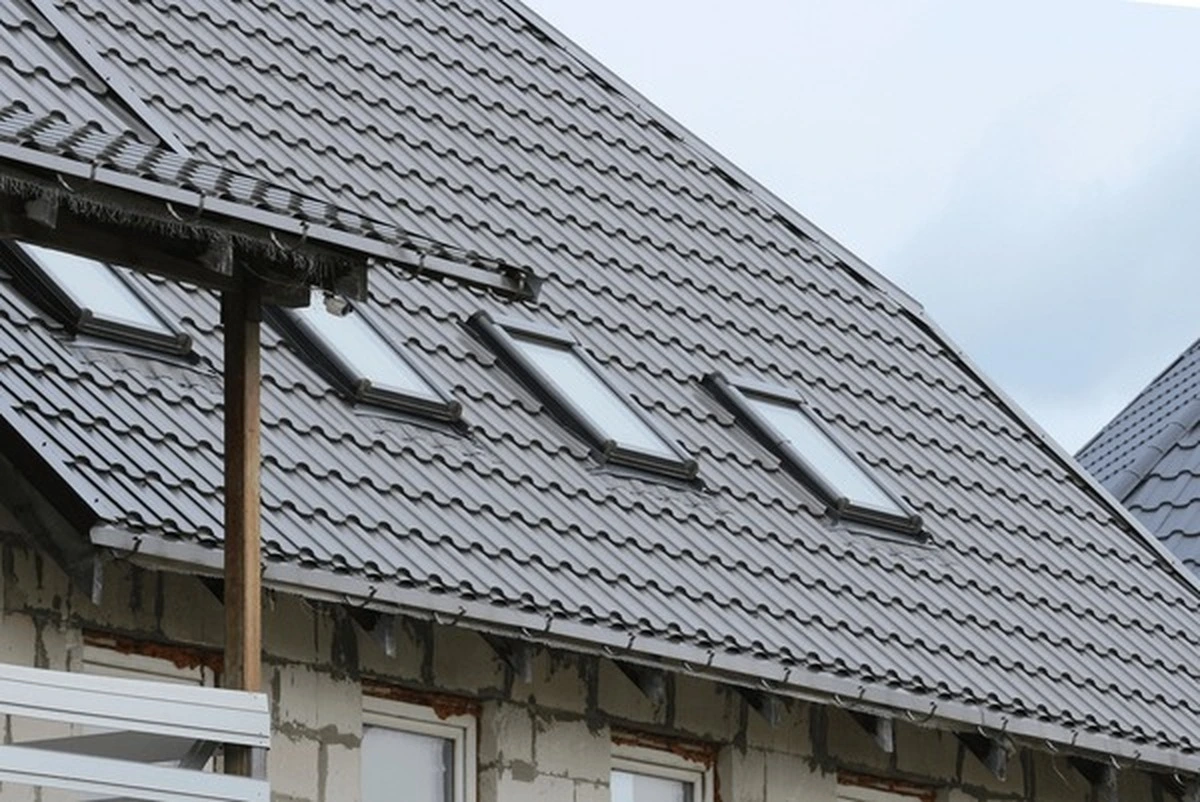
Three main types dominate the market: pad-style guards, continuous rail systems, and fence-style bars. Each serves specific applications based on roof pitch, snow load requirements, and architectural preferences.

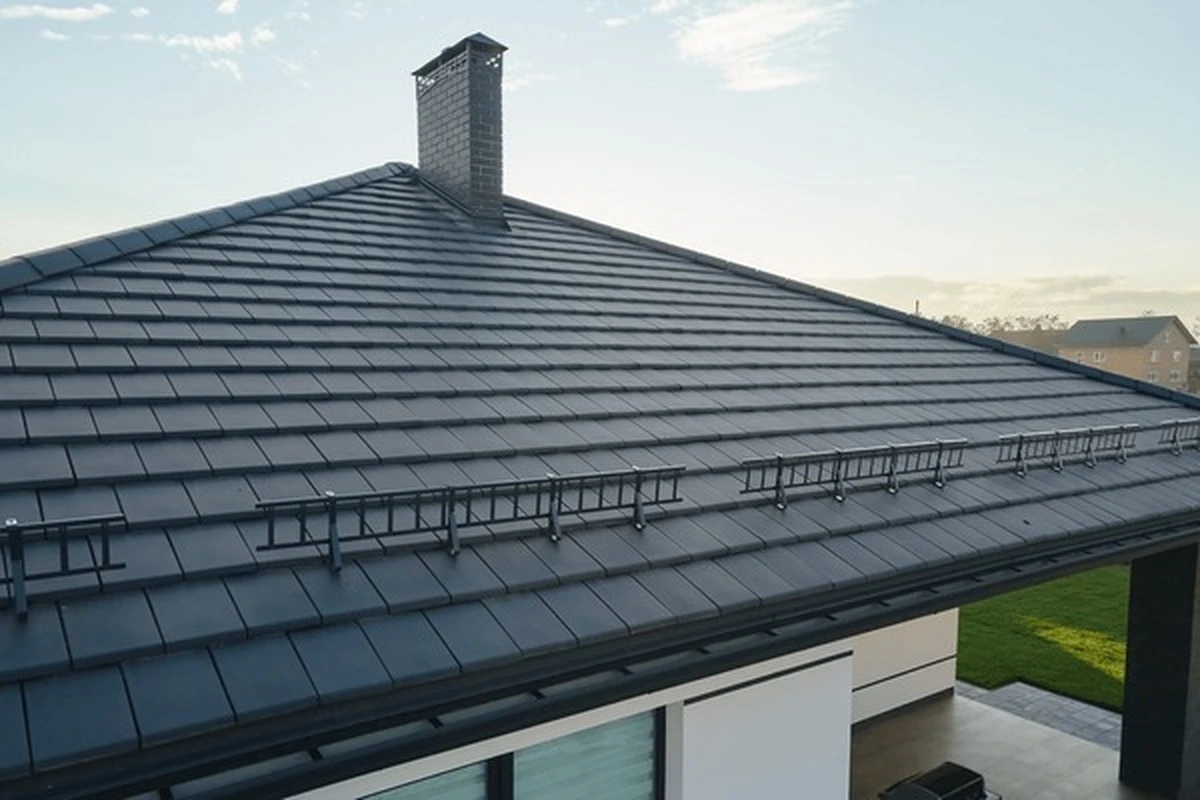
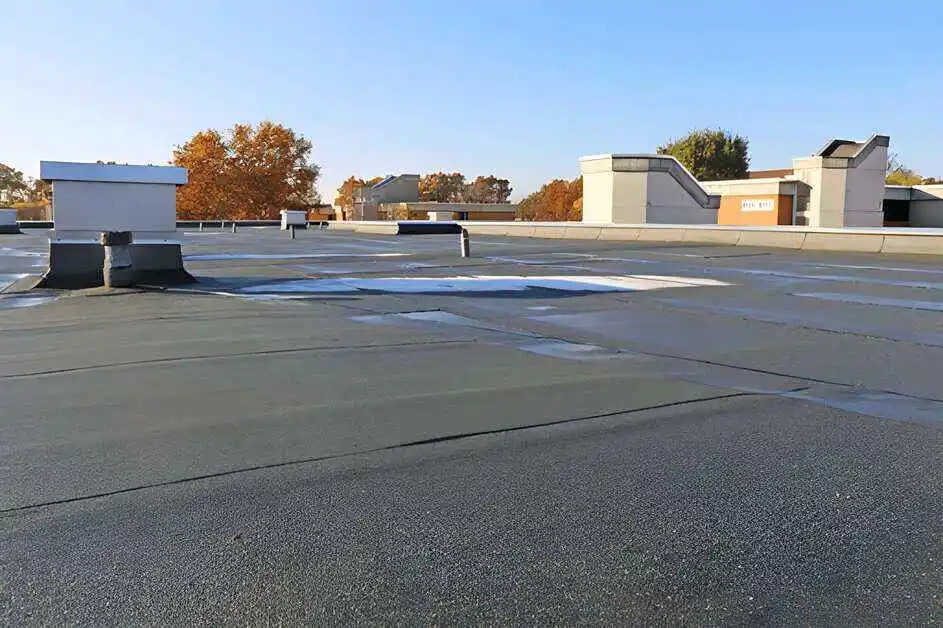
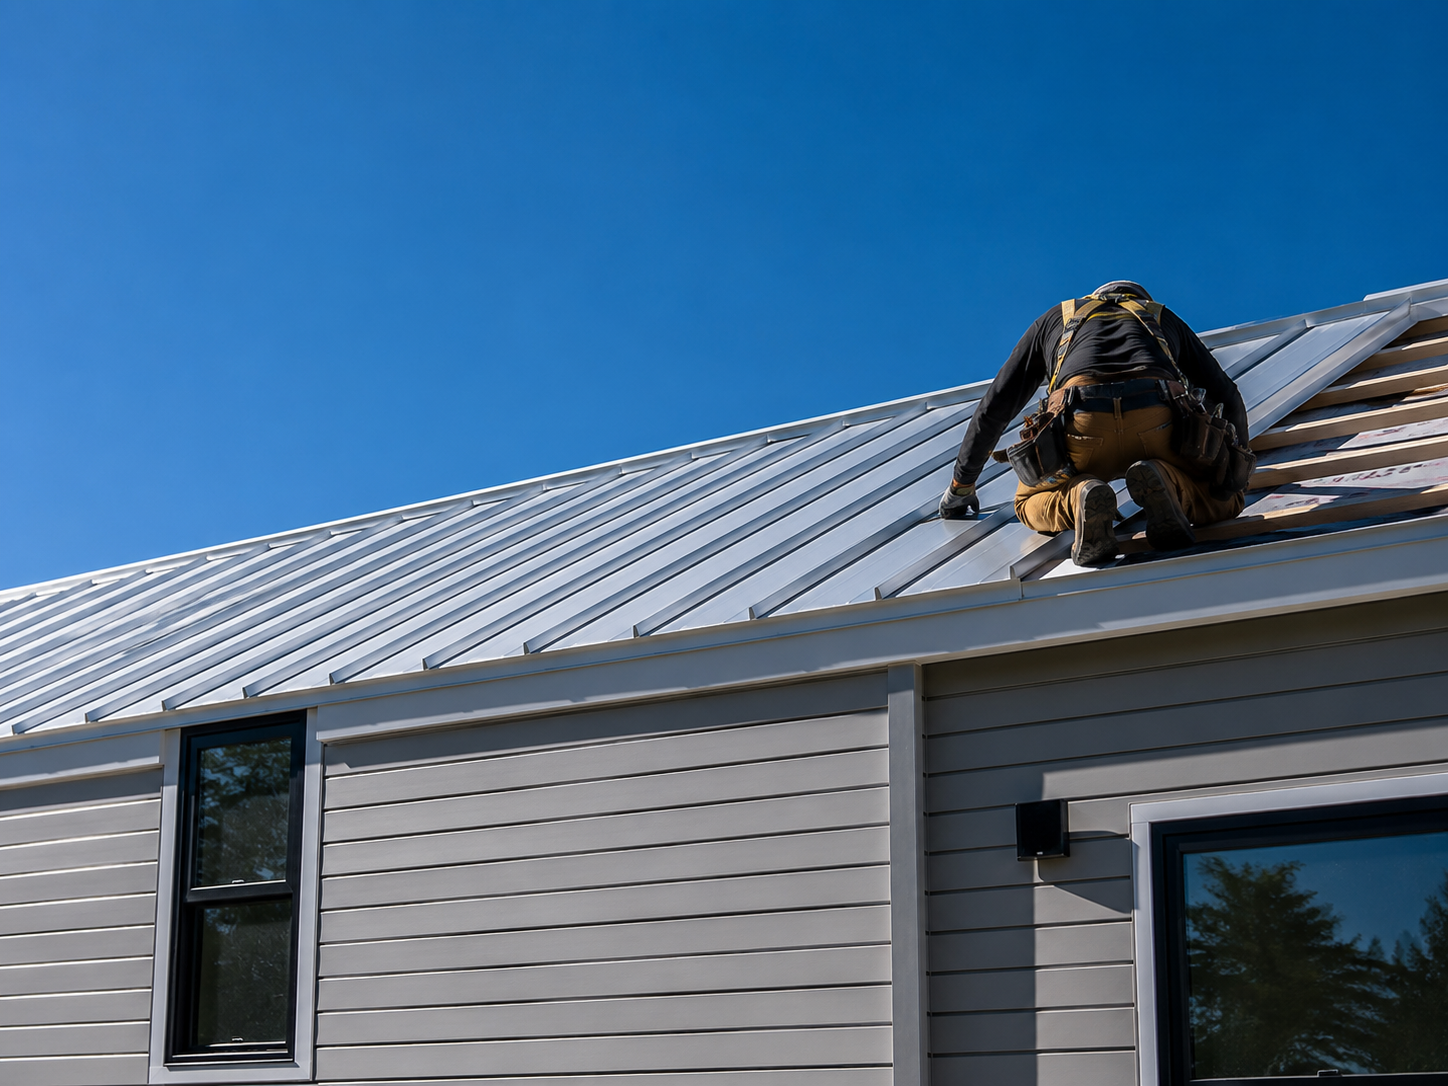
Standing seam roofs typically use non-penetrating clamp systems, while through-fastened panels require mechanical attachment. Understanding your roof type determines which installation method you’ll use.

For related information about metal roofing types, visit our complete metal roofing systems guide.

Step 1: Calculate Proper Spacing and Layout

The most critical aspect of installing snow guards on metal roof surfaces is determining correct placement. Poor spacing creates concentration points where snow accumulates, overloading the system and defeating its purpose.​

Key calculation factors:

  • Roof pitch (measured in degrees or ratio)
  • Expected snow load for your region
  • Roof length from ridge to eave
  • Panel width and seam spacing

Professional installers use manufacturer-provided charts that correlate these variables. For example, steeper pitches require guards closer to the eaves (6-12 inches), while lower slopes can place them 16-24 inches up.

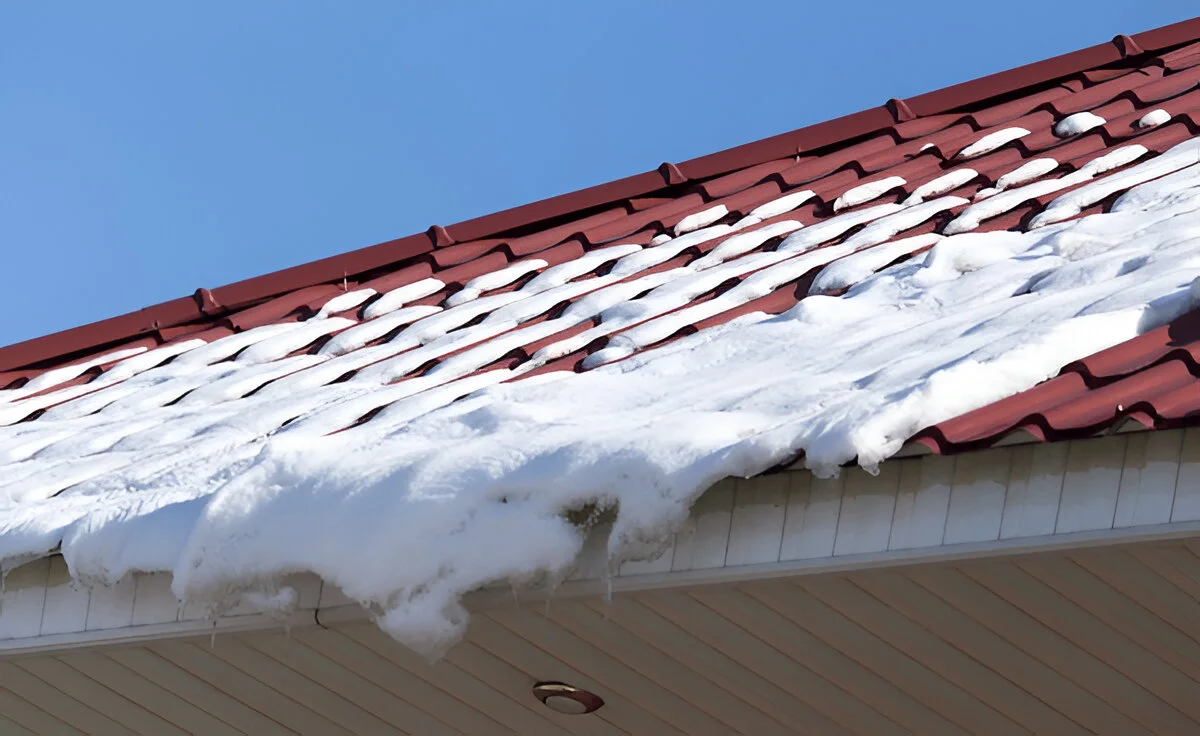
Never install guards only above doorways or specific areas. This creates a V-pattern where snow concentrates, potentially holding 3-4 times the intended load and causing system failure. Guards must span the entire roof plane for balanced distribution.​

Step 2: Gather Required Tools and Materials

Installing snow guards on metal roof panels requires specific tools and materials. Having everything prepared prevents mid-project delays and ensures proper installation.​

Essential tools:

  • Torque wrench (for clamp systems)
  • Drill with 3/16″ cobalt bits
  • Scratch awl or center punch
  • String line and water-soluble marker
  • Socket set or adjustable wrench
  • Aviation snips (for cutting bars)

Materials needed:

  • Snow guard clamps or mechanical brackets
  • ColorGard bars or rail components
  • VersaClips and SnoClips (for bar systems)
  • Self-tapping screws (1″ length, #14 head)
  • Rubber washers (for through-fastened applications)
  • Splice connectors and color strips

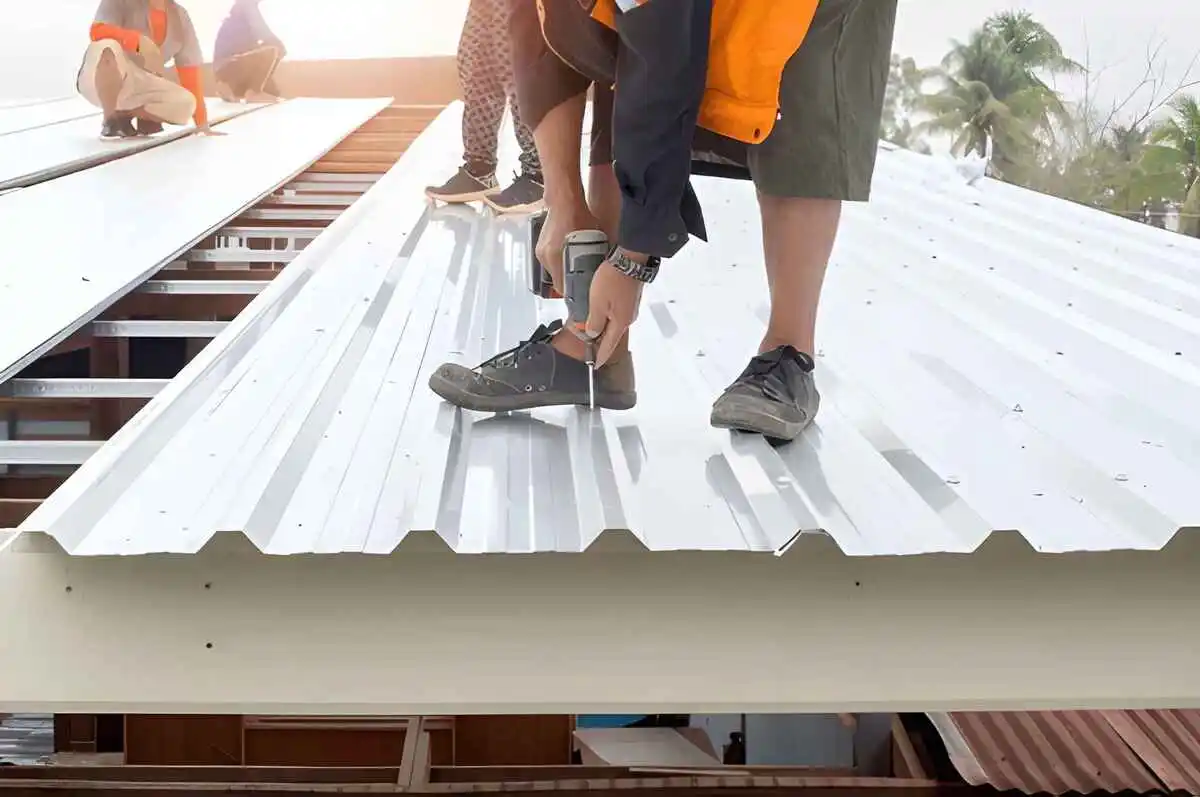
Professional contractors recommend wearing a tool belt to keep fasteners and small components accessible during installation, which typically takes 10 minutes per 10-foot section.​

![metal roof snow guard installation tools and materials layout

Step 3: Install Standing Seam Clamp Systems

For standing seam profiles, clamp-based systems offer non-penetrating attachment that preserves roof integrity. This method is preferred because it eliminates leak potential while providing adjustability.

Installation process:

Start by assembling set screws into clamps before ascending the roof. Measure from the eaves to your calculated attachment points and mark with water-soluble pen.

Position clamps on both end seams first, using a torque wrench to verify proper tightness. Manufacturers typically specify 100-120 inch-pounds of torque—rotate the screw past the initial resistance (galling point) for accurate readings.

Run a string line between end clamps to maintain alignment. Metal roofs often have slight waves, and the string ensures straight installation. Add intermediate clamps if the span exceeds 20 feet to prevent sagging.

Preload ColorGard bars with one VersaClip per clamp location and one SnoClip per panel. The SnoClips slow snow travel beneath the bar, improving retention effectiveness.

Set bars into position, loose-fit bolts, insert splice connectors between sections, and slide in color strips. Crimp the top lip to prevent movement, then tighten all connections. Cut the final section 4-6 inches from the last seam—longer overhangs can bend and compromise the system.

Learn more about standing seam metal roofing maintenance.

DIY installation Snow guards metal roof
DIY installation Snow guards metal roof 2025

Step 4: Install Through-Fastened Panel Guards

Through-fastened roofs require mechanical attachment using screws. While this penetrates the roof surface, proper technique with quality fasteners creates weathertight installations.​

Installation technique:

Mark your staggered pattern according to calculations—typically rows at 8″ and 16″ from the eaves, with guards offset in alternating rows. This staggered configuration distributes loads evenly.​

For maximum strength, install 2×4 blocking on the underside of roof decking before installation. This provides solid backing for fasteners to bite into, significantly improving holding power.

Use #12 or #14 self-tapping screws—preferably #12 for additional strength over standard #10 fasteners. Each pad-style guard requires two screws positioned through pre-drilled holes.​

Drill pilot holes with a 3/16″ bit to prevent panel distortion. Use a scratch awl to mark exact centers before drilling. Install rubber washers under screw heads to create weatherproof seals.

Adjust your drill clutch settings to achieve proper fastener tightness—overtightening indents ribs and compromises weatherproofing, while undertightening allows movement. Guards should sit flush without gaps but shouldn’t deform the panel.

[Embed YouTube installation tutorial here]

For comparison between attachment methods, see our mechanical vs. adhesive snow guard comparison.

Step 5: Add Adhesive Snow Guards (Supplemental Protection)

Adhesive-mounted guards provide supplemental protection between mechanically attached systems. While not suitable as primary retention on steep slopes, they effectively slow snow movement on lower pitches.​

Clean panel surfaces thoroughly with isopropyl alcohol before application. Surface contaminants prevent proper adhesion and cause early failure.

Apply industrial-grade adhesive according to manufacturer specifications—most require 50-60°F temperatures for proper curing. Avoid installation during extreme heat, cold, or precipitation.

Position adhesive guards in staggered rows between mechanical guards for enhanced retention. Press firmly for 30 seconds and allow 24-48 hours cure time before snow exposure.

These systems work best on roofs with pitches below 4:12 and in regions with moderate snowfall. Heavy snow loads require mechanical attachment for reliability.​

Step 6: Protect Gutters and Finish Details

Installing snow guards on metal roof edges requires special attention to prevent gutter damage. Even retained snow creates significant weight that can bend or detach drainage systems.​

Use the “pool noodle hack”—place foam pipe insulation in gutters during installation to prevent scratches from dropped tools or materials. This simple precaution preserves gutter finish and prevents rust formation.

Ensure 6-inch overlaps where bars connect. Insufficient overlap creates weak points where sections can separate under load.​

Clean all metal shavings (swarf) from the roof immediately after cutting bars. These particles rust quickly and stain panels, creating unsightly marks that are difficult to remove.

Apply touch-up paint to any scratched areas using manufacturer-matched colors. Even small scratches compromise the coating and accelerate corrosion.

Check our gutter maintenance guide for metal roofs  for additional protection tips.

completed snow guard installation on residential metal roof

snow guards on metal roof surfaces, thorough inspection ensures proper function and identifies any installation errors before snow season arrives.

Final inspection checklist:

  • All fasteners torqued to specification
  • No gaps between guards and panels
  • String line alignment maintained across entire run
  • Splice connections secure with color strips installed
  • All swarf removed from roof surface
  • Gutter protection removed
  • Touch-up paint applied where needed

Walk the roof perimeter to verify consistent spacing and alignment. Misaligned guards create aesthetic issues and may indicate installation problems.

Test clamp systems by attempting to slide them along seams—properly torqued clamps shouldn’t move. Wiggle through-fastened guards to ensure solid attachment without play.

Document your installation with photos showing guard placement, spacing, and overall coverage. This provides valuable reference for future maintenance or insurance claims.

Common Installation Mistakes That Compromise Safety

Even experienced contractors make errors when installing snow guards on metal roof systems. Understanding these pitfalls helps you avoid expensive corrections.​

Critical mistakes:

Partial installation: Installing guards only above entrances or patios creates dangerous concentration zones. Snow accumulates in a V-pattern, holding 3-4 times expected loads and causing catastrophic failure. Always install across the entire roof plane.​

Incorrect spacing: Manufacturer specifications exist for good reason—they’re based on engineering calculations for your specific conditions. Improvising spacing creates weak points or over-engineering that wastes money.

Inadequate fastener backing: Through-fastened installations without proper decking support rely solely on thin metal panel strength. This leads to fastener pull-through and system failure during heavy snow events.​

Poor weather timing: Installing during rain, extreme cold, or high heat affects adhesive curing, sealant performance, and metal expansion. Schedule installation during mild, dry conditions.

For professional installation services, visit our certified contractor network.

Cost Analysis and Return on Investment

Understanding project economics helps you make informed decisions about installing snow guards on metal roof surfaces.

System TypeMaterial Cost (per 100 sq ft)DIY Install TimeProfessional Cost
Clamp-on rail system$250-$4006-8 hours$800-$1,200
Pad-style mechanical$150-$2504-6 hours$500-$800
Adhesive supplemental$75-$1502-3 hours$300-$500
Complete hybrid system$350-$6008-12 hours$1,200-$2,000

Snow avalanche damage averages $3,000-$8,000 per incident, including gutter replacement, landscaping repairs, and potential liability claims. Proper retention systems pay for themselves after preventing just one major slide.​

Many insurance companies offer premium reductions of 5-10% for homes with certified snow retention systems. Check with your provider about potential savings.

Maintenance and Seasonal Inspection

Once installed, snow retention systems require minimal maintenance but benefit from annual inspections to ensure continued effectiveness.

Annual maintenance tasks:

  • Inspect all fasteners for tightness (torque check clamps)
  • Check for rust or coating damage
  • Verify no guards have shifted or become loose
  • Clean debris from beneath rail systems
  • Test adhesive guards for secure attachment
  • Document any wear or damage

Perform inspections in early fall before snow season begins. This provides time to address issues before they become critical.

After major snow events, visually inspect the system for any signs of stress, bending, or component failure. Address problems immediately to prevent progressive damage.

When to Hire Professional Installers

While DIY installation is feasible for experienced homeowners, certain situations require professional expertise.

Professional installation recommended for:

  • Roofs with pitches exceeding 7:12 (steep slopes create safety hazards)
  • Commercial buildings requiring engineered calculations
  • Complex roof geometries with multiple valleys or dormers
  • Projects requiring liability insurance coverage
  • Installations in areas with extreme snow loads (150+ lbs/sq ft)

Licensed contractors carry liability insurance protecting you from installation-related damage. They also understand local building codes and permit requirements.

Obtain quotes from at least three certified installers before selecting. Verify they’re trained by the snow guard manufacturer and carry current insurance certificates.

For engineering guidelines and load calculations, consult the International Building Code snow load requirements and Metal Construction Association installation standards.


Frequently Asked Questions

How far from the eave should snow guards be installed?
For most applications, install the first row 6-24 inches from the eave, depending on roof pitch. Steeper roofs (7:12 or greater) require closer placement (6-12 inches), while gentler slopes can position guards farther up (16-24 inches).

Can I install snow guards on an existing roof?
Yes, both clamp-on and mechanical systems install easily on existing roofs. Clamp systems require no penetrations, while through-fastened options need careful sealing around new fasteners.

Do snow guards work on all metal roof types?
Snow retention systems exist for every metal roof profile, including standing seam, corrugated, R-panel, and stone-coated steel. The attachment method varies based on panel design.

How long does installation take?
DIY installation typically requires 6-12 hours for an average residential roof (1,500-2,000 sq ft), depending on system complexity. Professional crews complete installations in 3-5 hours.

🏠 Roofing Tips & Updates

Get free roofing advice, cost guides, and seasonal maintenance tips.

Metal Roof Vents: 5 Installation Tips That Save Money

Proper ventilation is critical for extending the lifespan of your roofing system and preventing costly moisture damage. This comprehensive guide reveals five essential techniques that professional contractors use to install metal vents components efficiently while avoiding expensive mistakes.

Understanding Roof Ventilation Systems

Before diving into installation, it’s important to understand how attic ventilation works. A balanced system requires both intake vents at the eaves and exhaust vents at the ridge or roof peaks.

Ridge vents, turbine vents, and powered exhaust systems each serve specific purposes. Choosing the right type depends on your roof pitch, attic size, and local climate conditions.

For detailed information about different roofing materials, check out our complete metal roofing guide.

Tip 1: Calculate Ventilation Requirements Before Purchasing

How to install roof vents on metal roof
How to install roof vents on metal roof step by step Guide

The biggest money-waster is buying incorrect quantities or sizes. Use the 1:300 rule: you need 1 square foot of ventilation for every 300 square feet of attic space.

Quick calculation formula:

  • Measure your attic square footage
  • Divide by 300
  • Split 50/50 between intake and exhaust

This ensures you purchase exactly what’s needed, avoiding returns or supplemental orders that increase project costs.

Tip 2: Choose Strategic Placement to Minimize Penetrations

Every roof penetration is a potential leak point. Strategic placement reduces the number of holes while maximizing airflow efficiency.

Position ridge vents along the entire peak when possible. For turbine or box-style vents, space them evenly across the upper third of the roof slope. Avoid placing vents in valleys or where water naturally channels.

Fewer penetrations mean less sealant, fewer flashings, and reduced labor costs—typically saving $150-$300 per installation.

Tip 3: Use Proper Flashing and Sealant Techniques

Static Box Vents
Static Box Vents

Improper sealing causes 70% of ventilation-related leaks. Always use metal-specific sealants designed for thermal expansion and contraction.

Essential sealing steps:

  • Apply butyl tape under all flashing edges
  • Use high-quality polyurethane or silicone sealant rated for metal roofing
  • Install flashings with appropriate overlap (minimum 3 inches)
  • Secure with matching metal screws and rubber washers

Investing in premium sealants costs $20-40 more upfront but prevents thousands in water damage repairs. Learn more about roof maintenance best practices.

Tip 4: Match Vent Color and Profile to Existing Panels

Mismatched vents create aesthetic issues and may require custom fabrication later. Always order ventilation components that match your panel profile and color.

Most manufacturers offer vents specifically designed for standing seam, corrugated, or R-panel systems. Using compatible products ensures proper fit and eliminates the need for expensive adapters or custom flashings.

Color-matched vents also protect resale value—mismatched components can reduce home appeal by 5-8% according to roofing assessors.

Tip 5: Install During Optimal Weather Conditions

Choose a Metal Roofing Contractor Guide
Choose a Metal Roofing Contractor Guide 2025

Timing your installation saves money on labor and prevents material damage. Never install during rain, extreme heat (above 95°F), or freezing temperatures.

Sealants cure improperly in extreme conditions, and metal panels expand significantly in heat, affecting measurement accuracy. Mid-spring or early fall provides ideal conditions.

Professional contractors charge 15-25% more for rush installations or weather-delayed projects. Planning ahead keeps costs predictable.

Essential Maintenance Guidelines

Once installed, proper maintenance extends the life of your ventilation system and prevents costly repairs.

Annual Inspection Checklist

  • Check all sealant lines for cracks or gaps
  • Clear debris from vent openings
  • Inspect flashing for rust or separation
  • Verify turbine vents spin freely
  • Test powered vents for proper operation

These simple checks take 30 minutes annually but prevent the $800-$2,000 average cost of leak repairs.

For seasonal maintenance schedules, visit our guide home maintenance calendar.

Common Installation Mistakes to Avoid

Even experienced DIYers make errors that compromise ventilation effectiveness. Here are the most expensive mistakes:

Over-ventilation: Adding too many exhaust vents disrupts airflow balance and can actually reduce efficiency. Stick to calculated requirements.

Improper pitch alignment: Vents must align with roof pitch. Misalignment creates gaps where water enters.

Skipping underlayment: Always install ice and water shield around vent openings, even in warm climates.

Understanding these pitfalls helps you avoid the $500-$1,500 average cost to correct installation errors.

When to Call a Professional

While many homeowners successfully install basic ventilation components, certain situations require professional expertise:

  • Roofs with pitches steeper than 8:12
  • Historic or specialty panel profiles
  • Integration with solar panels or other roof-mounted equipment
  • Complex valley or hip configurations

Professional installation costs $200-$600 per vent but includes warranties and ensures code compliance. Compare quotes from at least three licensed contractors in your area.

For emergency roofing services, contact our 24/7 support team.

Cost Breakdown and ROI

Understanding project economics helps you make informed decisions:

ComponentDIY CostProfessional Cost
Ridge vent (10 ft)$45-$85$150-$250
Turbine vent$35-$60$200-$350
Powered vent$150-$300$400-$700
Labor (per vent)$0$100-$200

Proper ventilation reduces cooling costs by 10-15% annually and extends roof life by 3-5 years, providing significant long-term savings.

Energy efficiency improvements may also qualify for local utility rebates or tax credits—check your area’s programs.

Installing roof ventilation systems correctly the first time prevents expensive callbacks and repairs. By calculating requirements accurately, choosing strategic placement, using proper sealing techniques, matching materials, and timing installation appropriately, you’ll save hundreds while ensuring optimal performance.

Remember to maintain your system annually and don’t hesitate to consult professionals for complex installations. Your investment in proper ventilation pays dividends through lower energy bills and extended roof lifespan.

🏠 Roofing Tips & Updates

Get free roofing advice, cost guides, and seasonal maintenance tips.

How to Get a Free Quote for Roof Installation (7 Steps)

Getting a free quote for roof installation requires contacting 3-5 licensed roofing contractors through phone, online forms, or instant quote tools that use satellite imagery to measure your roof—most reputable roofers offer free estimates within 24-72 hours that include material costs, labor pricing, project timeline, and warranty details without obligation. Professional in-person estimates take 30-60 minutes and involve roof inspection, measurements, material recommendations, and detailed written quotes, while online instant quotes provide preliminary pricing ($8,000-$25,000 typical range) in minutes using aerial measurements and homeowner-provided information.

This comprehensive guide explains how to request free roof installation quotes, preparation steps, what quality estimates include, comparing multiple bids, red flags to watch for, and getting the most accurate pricing without paying inspection fees.


Why Roofing Companies Offer Free Quotes

Free Roof Quote or Estimate Request
A modern, well-maintained house with a clean roofline under a bright sky. Free Roof Quote

Industry Standard Practice

Most professional roofing contractors offer free estimates as standard business practice to earn your project. Free quotes allow homeowners to compare options without financial commitment while contractors demonstrate expertise and build trust.

What’s Included in Free Quotes:


Free Estimate vs. Paid Inspection

Free Estimate ($0):

Paid Inspection ($200-$400):

When to Pay for Inspection:


7 Steps to Get Free Roof Installation Quotes

Step 1: Research Local Roofing Contractors

Where to Find Reputable Roofers:

Minimum Criteria:

Red Flags:


Step 2: Choose Your Quote Method

Option A: Online Instant Quote Tools (Fastest)

Many roofing companies now offer instant online quotes using satellite imagery to measure your roof without home visits.

How It Works:

  1. Enter your address on contractor’s website
  2. Satellite technology measures roof dimensions
  3. Select material preferences (asphalt, metal, tile)
  4. Answer questions about roof condition, layers
  5. Receive preliminary quote in minutes via email

Pros:

Cons:

Best Online Quote Tools:


Option B: In-Person Free Estimates (Most Accurate)

Traditional method where contractor visits your home for thorough inspection and precise measurements.

How It Works:

  1. Call or submit online form requesting estimate
  2. Schedule appointment (usually within 3-7 days)
  3. Contractor inspects roof (30-60 minutes)
  4. Discusses material options and preferences
  5. Receives detailed written quote in 1-5 days

Pros:

Cons:


Step 3: Prepare Information Before Requesting Quotes

Gather These Details:

Roof History:

Home Specifications:

Project Preferences:

Insurance Information:


Step 4: Request Quotes from 3-5 Contractors

Why Multiple Quotes Matter:

How to Request:

Phone Call:

Online Form:

In-Person:


Step 5: During the Inspection (In-Person Estimates)

What Happens:

  1. Contractor introduces themselves, confirms project scope
  2. Measures roof from ground or climbs to inspect closely
  3. Checks roof condition (shingles, flashing, ventilation, gutters)
  4. Photographs damage or problem areas
  5. Enters attic (if accessible) to check decking, insulation, ventilation
  6. Discusses material options and preferences with you
  7. Explains what they found and recommendations
  8. Provides timeline for written quote delivery

Time Required: 30-60 minutes average

Questions to Ask During Inspection:


Step 6: Review the Written Quote

What a Quality Quote Includes:

Company Information:

Scope of Work:

Materials Breakdown:

Labor Costs:

Additional Services:

Pricing:

Timeline:

Warranties:


Step 7: Compare Quotes and Choose Contractor

How to Compare Estimates:

Create Comparison Spreadsheet:

FactorContractor AContractor BContractor C
Total Price$12,500$10,800$14,200
Material BrandGAF Timberline HDZIKO CambridgeOwens Corning Duration
Warranty (Labor)10 years5 yearsLifetime (50 yrs)
Timeline2-3 days3-4 days2 days
Reviews4.8 stars (150)4.2 stars (45)4.9 stars (220)
Years in Business15 years8 years22 years

Don’t Choose Solely on Price:

Evaluate:


Questions to Ask Before Hiring

Essential Questions:

  1. “Are you licensed and insured?” (Ask for proof—certificate of insurance, license number)
  2. “Who will be doing the work?” (In-house crew vs. subcontractors)
  3. “What permits are required and who pulls them?” (Contractor should handle)
  4. “What happens if you find unexpected damage during tear-off?” (Rotted decking, structural issues—get pricing policy)
  5. “What’s your payment schedule?” (Never pay 100% upfront; typical: 10-30% deposit, 40% midpoint, balance on completion)
  6. “How do you protect my property during installation?” (Tarps, magnetic sweepers for nails, landscaping protection)
  7. “What’s included in your warranty?” (Get written warranty documents)

Red Flags to Watch For

Warning Signs of Unreliable Contractors:

Storm Chasers:

Suspicious Pricing:

Lack of Credentials:

Poor Communication:


Online Roof Cost Calculators: Quick Estimates

Popular Free Roof Calculators:

www.Roofr.com

Jobber Roof Calculator:

Contractor-Specific Calculators:

How to Use:

  1. Enter property address
  2. Select roofing material (asphalt, metal, tile)
  3. Answer questions about roof condition
  4. Input contact information
  5. Receive instant estimate via email

Accuracy: ±15-25% (final quote after inspection may differ)


Maximizing Quote Accuracy

Tips for Most Accurate Free Quotes:

Be Transparent:

Allow Roof Access:

Ask Detailed Questions:

Get Everything in Writing:


FAQ

Do roofers give free estimates?
Yes, most professional roofing contractors offer free estimates as industry standard practice. Free quotes typically include inspection, measurements, material recommendations, and detailed written proposals within 24-72 hours.

How many roof quotes should I get?
Get 3-5 quotes to compare pricing, materials, and contractors. Expect pricing range of $2,000-$4,500 between bids for the same project.

How long does a free roof estimate take?
In-person estimates take 30-60 minutes for inspection and discussion. Written quotes arrive within 1-5 days. Online instant quotes provide preliminary pricing in 5-10 minutes.

Can I get a roof quote without a home visit?
Yes, many contractors offer instant online quotes using satellite imagery to measure your roof. Enter your address and preferences to receive preliminary pricing, though in-person inspections provide more accurate quotes.

What should a roof installation quote include?
Quality quotes include itemized material costs, labor pricing, project timeline, warranty details (materials and workmanship), payment schedule, and contractor license/insurance information.

Is the cheapest roof quote the best deal?
No. Quotes 20-30% below average often indicate inferior materials, rushed work, or hidden costs. Choose middle-range pricing with best value—quality materials, strong warranty, good reviews.

When should I pay for a roof inspection instead of free estimate?
Pay for comprehensive inspection ($200-$400) when buying a home, filing insurance claims, or investigating unknown problems. Free estimates work well for known repair/replacement projects.


Getting a free quote for roof installation is straightforward—contact 3-5 licensed roofing contractors via phone, online forms, or instant quote tools using satellite imagery, and most will provide free estimates within 24-72 hours including material costs, labor pricing, timelines, and warranty details without obligation. In-person estimates taking 30-60 minutes offer the most accurate pricing through direct roof inspection and measurements, while online instant quotes using aerial imagery provide preliminary pricing ($8,000-$25,000 typical range) in minutes for quick budgeting. Always compare multiple written quotes, verify contractor credentials (license, insurance, reviews), avoid suspiciously low bids, and choose contractors based on value—not just price—considering material quality, warranty strength, and professional reputation.

🏠 Roofing Tips & Updates

Get free roofing advice, cost guides, and seasonal maintenance tips.

Install Roof Vents on Metal Roofs Like a Pro: 8 Simple Steps

Installing roof vents on a metal roof requires specialized techniques to maintain the watertight integrity of metal panels while creating proper attic ventilation—mark vent location between ribs or on flat sections, cut opening with metal-cutting tools, install rubber boot or metal flashing base sealed with high-quality polyurethane sealant (never silicone on galvanized metal), secure vent with self-drilling metal screws with neoprene washers spaced every inch around perimeter, and apply additional sealant at all joints to prevent leaks. Professional installation costs $150–$400 per vent depending on type and roof complexity, while DIY projects save $100–$250 in labor but require metal-working tools and careful sealing.​

This comprehensive guide covers vent types suitable for metal roofs, required tools and materials, step-by-step installation procedures for different vent types, critical sealing techniques, common mistakes, and when to hire professionals.​


Types of Vents for Metal Roofs

1. Ridge Vents (Continuous Ventilation)

Description: Metal or low-profile ridge vent running full length of roof peak.

Best For: New metal roof installations, maximum ventilation, modern aesthetics

Installation Complexity: High (requires cutting ridge slot)

Cost: $3–$8 per linear foot installed


2. Turbine Vents (Wind-Powered)

Turbine vents Wind-Powered

Description: Spinning aluminum turbine mounted on metal flashing base.​

Best For: Hot climates, roofs with adequate wind exposure, visible ventilation

Installation Complexity: Moderate (circular hole in metal panel)

Cost: $150–$300 per vent installed​


3. Static Box Vents (Mushroom Vents)

Static Box Vents
Static Box Vents

Description: Low-profile metal or plastic vent with rain hood.​

Best For: Spot ventilation, existing metal roofs, budget installations

Installation Complexity: Moderate (circular or square cutout)

Cost: $100–$250 per vent installed​


4. Plumbing/Pipe Vents (Penetration Boots)

Pipe Vents
Pipe Vents

Description: Rubber or EPDM boot with metal base plate sealing around plumbing pipes.​

Best For: Bathroom/kitchen vents, plumbing stack penetrations

Installation Complexity: Moderate (precise pipe fitting)

Cost: $50–$150 per boot installed​


Tools & Materials Needed

Essential Tools

Cutting Tools:

Fastening Tools:

Layout Tools:

Safety Equipment:


Required Materials

Vent Components:

Fasteners & Sealants:

Optional:


Step-by-Step Installation: Static Box Vent

Step 1: Determine Vent Placement

Optimal Locations:

Ventilation Requirements:

Mark Location:


Step 2: Cut Opening in Metal Panel

For Circular Vents:

  1. Drill pilot hole at center mark using metal bit
  2. Insert hole saw or step bit into drill
  3. Cut circular opening matching vent diameter (typically 4–6 inches)
  4. Work slowly to prevent metal panel distortion
  5. Deburr edges with file or sandpaper​

For Square/Rectangular Vents:

  1. Mark outline with template
  2. Drill corner holes with metal bit
  3. Cut between holes using jigsaw with metal blade
  4. Clean and deburr all edges​

Pro Tip: If possible, position vent to utilize panel’s flat section rather than cutting through ribs.​


Step 3: Prepare Vent and Apply Sealant

Inspect Vent:

Apply Butyl Tape or Sealant:

  1. Clean metal surface around opening (remove debris, oil)
  2. Run continuous bead of polyurethane sealant on underside of vent flange
  3. Alternatively, apply butyl tape around entire flange perimeter​​

Critical: Do NOT skimp on sealant—this is primary leak barrier.​


Step 4: Position and Secure Vent

Positioning:

  1. Lower vent through opening from inside attic (if accessible)
  2. Or carefully position from outside, aligning hole with vent opening
  3. Press flange firmly against metal roof to spread sealant
  4. Ensure vent sits flush with no gaps​​

Fastening Pattern:

  1. Start with top screw (uphill side) to anchor position
  2. Install screws around perimeter every 1 inch
  3. Use self-drilling metal screws with neoprene washers
  4. Drive screws perpendicular to roof surface
  5. Tighten until washer compresses slightly (not crushed)
  6. Typical vent requires 12–20 screws depending on size​​

Important: Screws must penetrate roof deck below metal panel (minimum 1/2 inch penetration).


Step 5: Apply Exterior Sealant

Final Sealing:

  1. Apply continuous bead of sealant around entire flange perimeter
  2. Cover all screw heads with dab of sealant
  3. Seal any gaps between vent and metal panel
  4. Smooth sealant with gloved finger or caulk tool​

Sealant Application Tips:


Step 6: Install Vent Cap/Screen

Attach Vent Cap:

  1. Some vents have separate rain cap that snaps on
  2. Secure with included screws or rivets
  3. Ensure insect screen is in place (blocks wasps, rodents)​

Step-by-Step Installation: Plumbing Pipe Boot

Step 1: Determine Pipe Location

Pipe Penetration Considerations:


Step 2: Cut Opening for Pipe

Sizing:


Step 3: Install Rubber Boot

Rubber Pipe Boot Installation:

  1. Select boot sized to pipe diameter (3-inch, 4-inch, etc.)
  2. Slide boot over pipe from top
  3. Position metal flange base flat against metal roof
  4. Apply thick bead of sealant under entire flange​

Critical Sealing Points:


Step 4: Secure Boot Base

Fastening:

  1. Install screws every 1–2 inches around boot flange
  2. Use metal roofing screws with neoprene washers
  3. Apply sealant generously at all screw locations
  4. Additional sealant bead around pipe-boot junction​

Pro Tip: “Do your best, caulk the rest”—generous sealant application is key to leak-free pipe boots.​


Special Considerations for Metal Roofs

1. Sealant Selection (Critical)

Correct Sealant:

NEVER Use:

Why This Matters: Standard silicone contains acetic acid that eats through galvanized metal coating, causing rust and leaks within months.​


2. Panel Rib Considerations

Vent Placement Options:

Option A: Between Ribs (Preferred)

Option B: Spanning Ribs

Solution: Apply extra thick bead of sealant at rib peaks to eliminate gaps.​


3. Screw Placement & Sealing

Best Practices:


Installation: Ridge Vent on Metal Roof

Step 1: Measure Ridge Line

Preparation:


Step 2: Cut Ridge Opening

Cutting:

  1. Cut slot along ridge peak (width per manufacturer spec, typically 2–3 inches)
  2. Leave 6 inches uncut at each gable end (prevents weather infiltration)
  3. Use circular saw or reciprocating saw with metal blade
  4. Clean all metal shavings immediately (prevent rust)

Step 3: Install Ridge Vent

Installation:

  1. Apply sealant tape or butyl on both sides of ridge opening
  2. Center ridge vent over slot
  3. Fasten with screws every 8–12 inches on both sides
  4. Ensure vent aligns with roof slope on both sides
  5. Install end caps at gable ends
  6. Apply sealant at all seams and overlaps

Cost: $400–$1,200 for typical 40-foot ridge professionally installed.


Common Mistakes to Avoid

1. Using Wrong Sealant
Problem: Silicone corrodes galvanized metal
Solution: Use polyurethane sealant rated for metal roofs​

2. Insufficient Sealant
Problem: Leaks at flange edges and screw penetrations
Solution: Apply generous continuous beads; cover all screws​

3. Over-Tightening Screws
Problem: Crushed neoprene washers fail to seal
Solution: Tighten until washer compresses slightly, then stop​

4. Cutting Too Large Opening
Problem: Gap between vent and opening allows leaks
Solution: Cut opening to exact size; test-fit before sealing​

5. Skipping Interior Inspection
Problem: Vents installed where rafters block airflow
Solution: Check attic from inside; avoid placing vents directly over rafters​


DIY vs. Professional Installation

When DIY Is Feasible

Acceptable DIY Scenarios:

DIY Cost Savings: $100–$250 per vent in labor costs


When to Hire Professionals

Hire Pros For:

Professional Advantages:


Installation Costs (2025)

Professional Installation Costs

Vent TypeMaterialsLaborTotal Cost
Static Box Vent$30–$80$75–$150$100–$250
Turbine Vent$50–$150$100–$200$150–$350
Pipe Boot$15–$40$50–$100$65–$150
Ridge Vent (40 LF)$120–$320$300–$800$400–$1,200

DIY Material Costs

Static Box Vent Kit: $30–$80

Additional Materials:

Total DIY Cost: $50–$120 per vent


FAQ

How do you install a vent on a metal roof?
Mark location, cut opening with metal-cutting tools, apply polyurethane sealant under vent flange, secure with self-drilling screws with neoprene washers every inch, and apply additional sealant over all screws and seams.

Can you put roof vents on a metal roof?
Yes. Metal roofs accommodate ridge vents, static box vents, turbine vents, and pipe boots using proper metal-compatible mounting and sealing techniques.

What is the best sealant for metal roof vents?
Polyurethane-based roof sealants rated for metal (e.g., “Through the Roof,” “Geocel Pro Flex”). Never use standard silicone—acid corrodes galvanized coating.

How much does it cost to install a vent in a metal roof?
$100–$250 for static box vents; $150–$350 for turbine vents; $65–$150 for pipe boots; $400–$1,200 for ridge vents (40 LF). DIY saves $75–$200 per vent.

Do metal roofs need roof vents?
Yes. Metal roofs require proper attic ventilation (1 sq ft per 150 sq ft attic) to prevent condensation, reduce heat, and extend roof lifespan.

How many roof vents does a metal roof need?
Calculate attic square footage ÷ 150 = total vent area needed. Divide by vent NFA (net free area) rating. Example: 1,500 sq ft attic needs 10 sq ft ventilation.

Can I install roof vents myself on a metal roof?
Yes, for single-story roofs with proper tools and safety equipment. Ridge vents and steep roofs require professional installation.

Installing roof vents on a metal roof demands specialized techniques to maintain watertight integrity—mark locations between ribs when possible, cut precise openings with metal-cutting tools, apply generous polyurethane sealant (never standard silicone that corrodes galvanized coatings), secure vents with self-drilling screws with neoprene washers spaced every inch, and seal all screw heads and flange edges. Professional installation costs $100–$350 per vent depending on type, while DIY projects save $75–$200 in labor but require metal-working experience and proper safety equipment. Prioritize correct sealant selection, adequate fastener spacing, and generous sealant application at all penetrations to prevent leaks that damage insulation and structural components.

🏠 Roofing Tips & Updates

Get free roofing advice, cost guides, and seasonal maintenance tips.

Flat Roof Installation Guide: Steps, Costs & Materials

Flat Roof Installation Cost at a Glance

Membrane TypeCost per Sq Ft (Installed)LifespanBest For
EPDM (Rubber)$4 – $820-25 yearsBudget-conscious, residential
TPO$5 – $1015-20 yearsEnergy efficiency
PVC$6 – $1220-30 yearsChemical exposure, restaurants
Modified Bitumen$4 – $815-20 yearsDIY-friendly, low budget

This comprehensive guide covers flat roof system types, step-by-step installation procedures, material requirements, cost breakdowns, common mistakes, and when professional installation is essential versus DIY feasibility.​


Understanding Flat Roof Systems

Flat roof Installation Guide 2026
Flat roof Installation Guide

Not Actually Flat: The Slope Requirement

Critical Fact: “Flat” roofs aren’t truly flat—they require minimum slope for water drainage.​

Minimum Slope Standards:

  • Building code minimum: 1/4 inch per foot (1:48 ratio)
  • Recommended: 1/2 inch per foot for better drainage
  • Low-slope definition: Any roof <2:12 pitch​

Creating Slope:

  • Tapered insulation panels (most common on existing flat decks)
  • Structural framing with built-in slope
  • Crickets directing water to drains​

Why Slope Matters: Ponding water (standing >48 hours) accelerates membrane degradation, causes leaks, and voids warranties.​


Common Flat Roof Membrane Types

1. EPDM (Rubber Roofing)

Specifications:

  • Synthetic rubber (Ethylene Propylene Diene Monomer)
  • Thickness: 45-mil, 60-mil, or 90-mil
  • Color: Black (standard) or white
  • Attachment: Fully adhered, mechanically fastened, or ballasted​

Pros: Affordable ($4–$8/sq ft), durable (25–30 years), DIY-friendly (especially peel-and-stick versions)
Cons: Black absorbs heat, seams require careful sealing

Best For: Residential garages, porches, budget commercial projects​​


2. TPO (Thermoplastic Polyolefin)

Specifications:

  • White reflective membrane
  • Thickness: 45-mil to 80-mil
  • Heat-welded seams (permanent bonds)
  • Energy Star certified​

Pros: Energy-efficient, strong seams, 25–30 year lifespan
Cons: Requires professional installation (heat welding equipment)

Cost: $6–$12 per sq ft installed

Best For: Commercial buildings, hot climates, energy-conscious projects​


3. PVC (Polyvinyl Chloride)

Specifications:

  • White or tan membrane
  • Thickness: 45-mil to 80-mil
  • Heat-welded seams
  • Excellent chemical resistance​

Pros: Long lifespan (25–30 years), fire-resistant, works on occupied buildings
Cons: Higher cost than TPO/EPDM

Cost: $7–$13 per sq ft installed

Best For: Restaurants (grease resistance), rooftop decks, industrial facilities​


4. Modified Bitumen

Specifications:

  • Asphalt-based with rubber/plastic modifiers
  • Applied torch-down, cold-applied, or self-adhered
  • Granulated or smooth surface​

Pros: Good puncture resistance, familiar to contractors
Cons: Shorter lifespan (10–20 years), heavier than single-ply

Cost: $5–$10 per sq ft installed

Best For: Small commercial roofs, walkable surfaces​


Step-by-Step Flat Roof Installation Process

Comparison of flat roof homes with modern flat roof design versus traditional pitched roof homes showing architectural differences.
Flat roof homes offer modern aesthetics and rooftop space potential but require more maintenance attention than pitched roofs.

Step 1: Deck Inspection & Preparation

Assess Existing Deck:

  • Check for soft spots, rot, or sagging (indicates structural issues)
  • Ensure deck is solid: plywood (5/8-inch minimum), OSB, or concrete
  • Verify deck can support insulation + membrane + equipment loads​

Repairs Required:

  • Replace rotted or damaged decking sections
  • Add blocking or support where joists sag
  • Secure loose boards with screws
  • Fill gaps and level uneven areas​

Surface Cleaning:

  • Remove all debris, dust, and loose material
  • Power-wash concrete decks and allow to dry completely
  • Surface must be clean and dry for proper membrane adhesion​​

Step 2: Create or Verify Proper Slope

Slope Verification:

  • Use long level or laser to check pitch
  • Water should flow toward designated drainage points
  • Identify and mark low spots where water pools​

Correcting Flat Areas:

  • Tapered insulation panels: Pre-cut panels create slope without structural changes (most common retrofit method)
  • Crickets: Build small ridges directing water to drains
  • Structural modification: Add framing wedges (2×4 tapered cuts nailed to joists)​

Drain Placement:

  • Install drains at lowest points (minimum one per 1,000 sq ft)
  • Ensure drain tops are flush with finished roof surface
  • Consider scuppers (edge drains) as backup overflow protection​

Step 3: Install Vapor Barrier

Purpose: Prevents moisture from conditioned space migrating into insulation and condensing beneath membrane.​

Materials:

  • Self-adhering vapor barrier sheets
  • 6-mil polyethylene sheeting
  • Peel-and-stick rubberized asphalt membranes

Installation:

  1. Roll out vapor barrier across entire deck
  2. Overlap seams 6 inches minimum
  3. Seal seams with compatible tape
  4. Extend barrier up all parapets and curbs 12 inches​

When Required: Heated buildings in cold climates; not always needed in warm, dry climates.​


Step 4: Install Rigid Insulation

Insulation Types:

  • Polyisocyanurate (polyiso): Highest R-value per inch (R-6 to R-7)
  • Expanded polystyrene (EPS): Budget option (R-4 to R-5)
  • Extruded polystyrene (XPS): Good moisture resistance (R-5)
  • Tapered insulation: Pre-cut panels creating slope + R-value​

Installation Method:

  1. Stagger seam locations (avoid T-joints)
  2. Fit boards tightly together without gaps
  3. Secure with roofing plates and screws (if mechanically attached)
  4. Cover with 1/2-inch gypsum cover board for stability​

R-Value Requirements: Check local energy codes; typical range R-20 to R-30 for commercial.​


Step 5: Apply Base Sheet or Primer (System-Dependent)

Modified Bitumen Systems:

  • Install base sheet mechanically fastened to deck
  • Torch-down or cold-adhesive application

Single-Ply Membranes (EPDM/TPO/PVC):

  • Apply bonding adhesive or primer if fully adhered system
  • No base sheet needed for mechanically fastened or ballasted systems​​

Step 6: Install Roofing Membrane

EPDM Installation (Fully Adhered Method)

Materials: 60-mil EPDM membrane, bonding adhesive, seam tape, primer

Process:

  1. Roll out EPDM across roof; allow 30 minutes to relax and eliminate wrinkles​
  2. Fold back half the membrane exposing substrate
  3. Apply water-based adhesive to both substrate and membrane back with 9-inch roller
  4. Fold membrane back into place; roll with weighted roller to eliminate air bubbles
  5. Repeat for other half of membrane
  6. Overlap adjacent sheets 3–6 inches
  7. Prime overlap areas with seam primer
  8. Apply 6-inch EPDM seam tape; roll with 3-inch neoprene roller every inch​​

Peel-and-Stick EPDM (DIY-Friendly):

  1. Start at lowest point (eave or drain area)
  2. Peel back 2–3 feet of release film
  3. Position membrane and smooth into place
  4. Gradually peel more film, adhering as you go
  5. Roll entire surface with weighted roller
  6. Overlap seams 3 inches; seal with compatible tape​

TPO/PVC Installation (Heat-Welded)

Equipment Required: Hot-air welder (900°F+), seam roller

Process:

  1. Roll out membrane; let relax 30 minutes
  2. Position with proper overlaps (6–8 inches at seams)
  3. Mechanically fasten at seams or fully adhere with adhesive
  4. Heat-weld seams using hot-air gun at proper temperature
  5. Immediately roll welded seam with weighted roller
  6. Test seam integrity with probe or destructive pull test​

Critical: TPO/PVC requires professional installation; improper welding causes leaks.​


Step 7: Flash All Penetrations & Edges

Penetrations Include:

  • Plumbing vents and stacks
  • HVAC curbs and equipment
  • Skylights
  • Wall-to-roof transitions
  • Roof drains​

Flashing Techniques:

Pipe Boots:

  1. Cut EPDM patch 12 inches larger than pipe
  2. Cut X-pattern opening sized to pipe
  3. Apply bonding adhesive around pipe base
  4. Install boot; seal with clamps or mastic​

Walls/Parapets:

  1. Extend membrane 8–12 inches up wall
  2. Install termination bar every 8 inches
  3. Seal top edge with compatible caulk
  4. Install metal counter-flashing over termination​

Roof Drains:

  1. Custom-cut membrane to fit drain flange
  2. Apply heavy bead of mastic to drain flange
  3. Adhere membrane to flange; clamp ring secures
  4. Test drain seal after installation​

Step 8: Install Edge Flashing & Trim

Edge Treatments:

  • Drip edge/gravel stop: Metal flashing at roof perimeter directs water into gutters
  • Coping caps: Metal covering for parapet walls
  • Fascia trim: Covers roof edge at eaves​

Installation:

  1. Fasten metal trim every 12 inches with appropriate fasteners
  2. Seal between membrane and metal with compatible caulk
  3. Ensure positive drainage over edge​

Step 9: Final Inspection & Water Testing

Quality Checks:

  • Walk entire roof checking all seams (probe test)
  • Verify all penetrations properly sealed
  • Check edge flashings secure and sealed
  • Confirm no membrane wrinkles or fishmouths​

Water Testing:

  • Flood-test low areas with 2 inches of water
  • Monitor for 24 hours; check interior for leaks
  • Test drains for proper flow
  • Mark and repair any leaks discovered​

Flat Roof Installation Costs (2025)

Cost by Membrane Type (Installed)

Membrane SystemCost/SFTotal (1,500 SF)Lifespan
EPDM (60-mil)$4–$8$6,000–$12,00025–30 yrs
TPO$6–$12$9,000–$18,00025–30 yrs
PVC$7–$13$10,500–$19,50025–30 yrs
Modified Bitumen$5–$10$7,500–$15,00010–20 yrs
Built-Up Roof (BUR)$4–$9$6,000–$13,50015–25 yrs


Cost Breakdown Components

Materials (40–50% of total):

  • Membrane: $1.50–$5.00/sq ft
  • Insulation (R-20): $1.00–$2.50/sq ft
  • Cover board: $0.50–$1.00/sq ft
  • Adhesives/fasteners: $0.50–$1.00/sq ft

Labor (50–60% of total):

  • Tear-off (if needed): $1.00–$2.50/sq ft
  • Installation labor: $2.50–$8.00/sq ft
  • Flashing/details: $50–$200 per penetration​

DIY vs. Professional Flat Roof Installation

When DIY Is Feasible

Acceptable DIY Scenarios:

  • Small residential projects (garage, porch <500 sq ft)
  • Single-story with easy access
  • Peel-and-stick EPDM systems (no torches or welders)
  • Simple roof geometry (few penetrations)
  • Experience with construction projects​​

DIY Cost Savings: $2,500–$6,000 in labor on typical garage roof


When Professional Installation Is Essential

Hire Professionals For:

  • TPO or PVC systems (requires heat-welding equipment and training)
  • Torch-down modified bitumen (fire hazard without experience)
  • Commercial buildings (code compliance, permits, liability)
  • Complex roof geometry (multiple drains, equipment, skylights)
  • Roofs >1,000 sq ft
  • When warranty coverage is priority​

Professional Advantages:

  • Proper slope design and drainage
  • Manufacturer warranties (10–20 years material + labor)
  • Code compliance and permits
  • Liability insurance coverage
  • Specialized equipment (welders, large rollers)
  • Experience identifying and preventing common failures​

Common Flat Roof Installation Mistakes

1. Inadequate Slope
Problem: Standing water accelerates deterioration
Solution: Minimum 1/4-inch per foot slope toward drains​

2. Poor Seam Bonding
Problem: Leaks at membrane overlaps
Solution: Proper adhesive coverage, rolling, and heat-welding technique​

3. Insufficient Insulation
Problem: Energy loss, code violations
Solution: Verify local R-value requirements; typical R-20 to R-30​

4. Skipping Vapor Barrier
Problem: Condensation damages insulation
Solution: Install vapor barrier on heated buildings in cold climates​

5. Inadequate Penetration Flashing
Problem: Leaks around pipes, vents, drains
Solution: Custom-flash every penetration per manufacturer specs​


FAQ

How much does flat roof installation cost?
$4–$15 per square foot installed depending on membrane type. EPDM costs $4–$8/sq ft; TPO/PVC costs $6–$13/sq ft; modified bitumen costs $5–$10/sq ft.

Can I install a flat roof myself?
Yes, for small residential projects (<500 sq ft) using peel-and-stick EPDM. Professional installation essential for TPO/PVC (heat-welding required) or commercial projects.

What is the minimum slope for a flat roof?
1/4 inch per foot minimum per building code; 1/2 inch per foot recommended for better drainage. “Flat” roofs must have some slope to prevent ponding water.

How long does flat roof installation take?
1–2 days for small residential (500 sq ft); 3–7 days for commercial (5,000+ sq ft) depending on membrane type, insulation, and complexity.

What is the best flat roof material?
TPO offers best balance of cost, performance, and energy efficiency for most applications. EPDM is most economical. PVC best for chemical resistance.

Do flat roofs need insulation?
Yes. Building codes require R-20 to R-30 for commercial; R-10 minimum residential. Insulation prevents energy loss and provides stable substrate for membrane.

How long do flat roofs last?
EPDM/TPO/PVC: 25–30 years; Modified bitumen: 10–20 years; Built-up roofing: 15–25 years. Lifespan depends on installation quality, maintenance, and climate.

🏠

Ready to Start Your New Shingle Roof?

Get a free estimate from a certified roofing contractor. We’ll help you choose the right brand and roofing materials for your home, climate, and budget: with a no-obligation 2026 installed price.

Free inspection  ·  No obligation  ·  Licensed & insured

Flat roof installation demands specialized techniques ensuring proper slope (minimum 1/4-inch per foot), multi-layer assembly with vapor barrier and rigid insulation (R-20+), and waterproof membrane with meticulously sealed seams and penetrations. Professional installation costs $4–$15 per square foot—EPDM averaging $4–$8/sq ft for budget projects, TPO/PVC $6–$13/sq ft for energy-efficient commercial applications, and modified bitumen $5–$10/sq ft for walkable surfaces. DIY installation is feasible for small residential projects using peel-and-stick EPDM but professional expertise is essential for heat-welded TPO/PVC systems, proper drainage design, and commercial applications requiring permits and warranties. Prioritize proper slope, quality seam bonding, complete penetration flashing, and final water testing to ensure leak-free performance lasting 25–30 years.


Roof Tarp Installation Guide: Emergency DIY Steps & Costs

A roof tarp provides critical emergency protection after storm damage, preventing thousands of dollars in secondary water damage to interiors, insulation, and structural components until permanent repairs can be completed. Proper roof tarp installation requires a heavy-duty waterproof tarp (minimum 6-mil thickness), 2×4 wooden anchor boards, securing the tarp from peak to eaves with the damaged area fully covered plus 4 feet of overhang on all sides, and fastening through boards every 12–16 inches using 3-inch deck screws. DIY tarping costs $50–$200 for materials, while professional emergency tarping services charge $300–$800 depending on roof size, accessibility, and damage extent.

This comprehensive guide covers roof tarp types, step-by-step installation instructions, safety precautions, material requirements, cost breakdowns, and when to hire professional emergency tarping services.


Why Roof Tarping Is Critical After Damage

Prevents Secondary Water Damage

What Water Infiltration Damages:

Cost Comparison:

Time Value: Every hour a damaged roof remains exposed increases interior damage risk, especially during continued rain.


Buys Time for Permanent Repairs

Typical Scenarios:

Tarp Lifespan: Properly installed tarps protect 30–90 days; quality tarps in good weather last longer.


Types of Roof Tarps

1. Heavy-Duty Polyethylene Tarps (Most Common)

Specifications:

Cost: $30–$150 depending on size and thickness

Best For: Emergency temporary coverage (30–90 days)


2. Canvas Tarps

Specifications:

Cost: $80–$250

Pros: Durable, tear-resistant, reduces condensation
Cons: Heavier to handle, more expensive, not fully waterproof unless treated

Best For: Extended temporary coverage where breathability matters


3. Self-Adhesive Roof Tarps

Specifications:

Cost: $150–$400 per tarp

Pros: Fast installation, no additional roof damage, strong adhesion
Cons: Expensive, difficult to reposition, single-use only

Best For: Situations where nailing is undesirable or impossible


Materials Needed for Roof Tarp Installation

Essential Supplies

Tarp & Anchoring:

Tools:

Safety Equipment (Critical):


Step-by-Step Roof Tarp Installation

Step 1: Assess Damage and Safety

Ground Assessment:

Safety Evaluation:

When to Call Professionals: Extensive damage, steep pitch, unsafe conditions, or lack of proper safety equipment.


Step 2: Measure and Prepare Tarp

Measuring Damaged Area:

  1. Measure length and width of damaged section from ground
  2. Add 4 feet to all sides for proper overhang
  3. Round up to nearest tarp size available

Example: 8×10 foot damaged area → 16×18 foot tarp minimum (8+4+4 by 10+4+4)

Tarp Positioning Strategy:

Prepare Anchor Boards:


Step 3: Clear Debris Safely

From Ground or Safely Accessible Areas:

Caution: Do not walk on damaged or wet sections of roof.


Step 4: Position Tarp Over Damaged Area

Carrying Tarp to Roof:

Unfolding and Positioning:

  1. Start at highest point (near or over ridge)
  2. Unfold tarp downward toward eaves
  3. Center tarp over damaged area
  4. Ensure 4-foot minimum overhang on all sides of damage
  5. Smooth out wrinkles and folds (water pools in low spots)

Peak Method (Best):


Step 5: Secure Top Edge (Peak Side)

Board-and-Screw Method (Most Secure):

  1. Position 2×4 board along top edge of tarp
  2. Fold tarp edge over board twice (creates strong hem)
  3. Drive 3-inch screws through board, folded tarp, into roof deck every 12–16 inches
  4. Board creates wide bearing surface that prevents tarp from tearing through grommets

Alternative for Tile Roofs:


Step 6: Pull Taut and Secure Sides

Tensioning Tarp:

Side Securing:

  1. Position 2×4 board along each side edge
  2. Fold tarp over board twice
  3. Fasten with screws every 12–16 inches through board method

Corners:


Step 7: Secure Bottom Edge

Final Anchoring:

  1. Position 2×4 board along bottom edge of tarp
  2. Fold tarp edge over board
  3. Fasten securely every 12–16 inches
  4. Ensure tarp extends well past damaged area

Check Coverage:


Step 8: Add Supplemental Securing

Rope/Bungee Method (Additional Wind Protection):

Sandbag Weighting:


Roof Tarp Costs (2025)

DIY Material Costs

Basic Emergency Kit:

Premium Kit:


Professional Emergency Tarping Services

Service Call Costs:

What’s Included:

When Worth the Cost:


Common Roof Tarping Mistakes

1. Tarp Too Small

Problem: Insufficient coverage allows water infiltration around edges
Solution: Always add 4+ feet overhang beyond all edges of damage


2. Not Securing Over Peak

Problem: Water seeps under top edge of tarp
Solution: Extend tarp over roof peak whenever possible; secure top edge tightly


3. Wrinkles and Loose Areas

Problem: Water pools in low spots, causing ponding and tarp failure
Solution: Pull tarp taut during installation; eliminate all wrinkles


4. Inadequate Fastening

Problem: Wind lifts tarp, causing flapping damage and water entry
Solution: Use board-and-screw method every 12–16 inches; add extra fasteners at corners


5. Walking on Damaged Sections

Problem: Further roof damage or injury from collapse
Solution: Access tarp installation from undamaged areas only; use roof jacks on steep pitches


Safety Tips for Roof Tarping

Before Going on Roof:

On the Roof:

Ladder Safety:


When to Call Professional Tarping Services

Hire Professionals If:

Professional Advantages:


How Long Can a Roof Tarp Last?

Typical Lifespan:

Extending Tarp Life:

Not a Permanent Solution: Schedule permanent repairs within 30–60 days; tarps are temporary emergency measures only.


FAQ

How do you put a tarp on a roof?
Measure damaged area plus 4 feet overhang, position tarp from peak over damage, fold edges over 2×4 boards, secure with screws every 12–16 inches. Work from top to bottom, pulling tarp taut.

How much does it cost to tarp a roof?
DIY materials cost $50–$200; professional emergency tarping services charge $300–$800 depending on roof size, pitch, and accessibility.

What size tarp do I need for my roof?
Measure damaged area and add 4 feet to all sides. Example: 10×12 foot damage requires 18×20 foot minimum tarp.

Can I tarp my own roof?
Yes, for single-story homes with <6:12 pitch in dry conditions if you have proper safety equipment and comfort working at heights. Hire professionals for steep roofs or multi-story homes.

How long will a tarp last on a roof?
30–90 days depending on tarp quality, weather conditions, and installation quality. Not a permanent solution—schedule repairs within 60 days.

Do you nail or screw a roof tarp?
Use 3-inch deck screws through 2×4 boards for best hold. Screws resist wind uplift better than nails and are easier to remove later without damaging roof.

Can I tarp a roof in the rain?
Not recommended. Wet surfaces are slippery and dangerous. Wait for dry conditions, or call emergency professionals with proper safety equipment.


Conclusion

Roof tarp installation provides critical emergency protection preventing thousands in secondary water damage until permanent repairs can be completed. Proper installation requires a heavy-duty tarp (minimum 6-mil thickness) sized 4+ feet larger than damaged area on all sides, secured using the board-and-screw method every 12–16 inches from peak to eaves. DIY tarping costs $50–$200 in materials but demands strict safety protocols—single-story homes with <6:12 pitch only, dry conditions, and proper equipment. Professional emergency tarping ($300–$800) is essential for multi-story homes, steep roofs, extensive damage, or unsafe conditions. Inspect tarps weekly, schedule permanent repairs within 30–60 days, and never consider tarps as long-term solutions.

Next Steps:

Find Emergency Roofing Services

Learn About Storm Damage Roof Repair

Calculate Roof Repair Costs

🏠 Roofing Tips & Updates

Get free roofing advice, cost guides, and seasonal maintenance tips.

Metal Roof Cost Calculator: 2026 Roofing Budget Guide


A metal roof cost calculator helps homeowners estimate installation expenses by multiplying roof area (in square feet) by material and labor rates, typically $5–$16 per square foot installed, or $10,000–$40,000 for average-sized homes. The calculation requires measuring roof dimensions, factoring in pitch multipliers (1.0 for flat to 2.24 for 24:12 pitch), selecting material type (corrugated steel at $5–$12/sq ft vs. standing seam at $9–$16/sq ft vs. copper at $15–$30/sq ft), and adding costs for underlayment, trim, tear-off, and complexity adjustments.​

This comprehensive guide walks through manual calculation methods, explains cost variables, provides pricing tables by material and profile type, and offers step-by-step instructions to accurately estimate your metal roofing project budget.​


How to Calculate Metal Roof Costs (Step-by-Step)

Step 1: Measure Your Roof Area

Option A: Direct Roof Measurement (If Accessible)

  1. Measure roof length (eave to ridge) in feet
  2. Measure roof width (gable to gable) in feet
  3. Calculate area: Length × Width = Square Feet
  4. Repeat for each roof section
  5. Add all sections together​

Example: 40 ft length × 30 ft width = 1,200 sq ft


Option B: Footprint Measurement (From Ground)

  1. Measure building length and width at ground level
  2. Calculate footprint area: Length × Width
  3. Apply pitch multiplier based on roof slope​

Roof Pitch Multipliers:

Roof PitchMultiplierExample (1,200 SF footprint)
Flat (0:12)1.001,200 sq ft
3:121.031,236 sq ft
4:121.061,272 sq ft
5:121.081,296 sq ft
6:121.121,344 sq ft
7:121.161,392 sq ft
8:121.201,440 sq ft
9:121.251,500 sq ft
10:121.301,560 sq ft
12:121.411,692 sq ft

Calculation: 1,200 SF footprint × 1.25 multiplier (9:12 pitch) = 1,500 sq ft actual roof area


Option C: Online Satellite Measurement

Use tools like Google Project Sunroof or RoofingCalculator.com to obtain LiDAR-based measurements automatically.​


Step 2: Add Waste Factor

Add 10% to total area to account for cutting waste, overlaps, and mistakes.​

Example: 1,500 sq ft × 1.10 = 1,650 sq ft material needed


Step 3: Select Metal Roofing Material & Profile

Material and profile type are the largest cost variables.​

Material Costs (Installed, 2025):

MaterialCost/SF InstalledTotal Cost (1,500 SF)
Corrugated Steel$5–$12$7,500–$18,000
Standing Seam Steel$9–$16$13,500–$24,000
Aluminum$10–$14$15,000–$21,000
Galvalume Steel$8–$13$12,000–$19,500
Stone-Coated Steel$10–$16$15,000–$24,000
Copper$15–$30$22,500–$45,000
Zinc$12–$20$18,000–$30,000
Stainless Steel$15–$25$22,500–$37,500


Step 4: Calculate Material Costs

Formula: Roof Area × Material Price per SF = Material Cost

Example (Standing Seam Steel):


Step 5: Calculate Labor Costs

Labor typically accounts for 40–50% of total project cost.​

Labor Rates by Region (2025):

Example (Mid-Range Labor):


Step 6: Add Underlayment & Accessories

Underlayment:

Trim & Flashing:

Accessories:


Step 7: Calculate Tear-Off & Disposal (If Applicable)

Tear-Off Costs:


Step 8: Adjust for Roof Complexity

Complexity Multipliers:

Example Adjustment (Moderate Complexity):


Step 9: Add Permits & Inspections

Typical Costs:


Complete Cost Calculation Example

Project Details:

Calculation:

Cost ComponentCalculationTotal
Materials (panels)1,500 × $6/sq ft$9,000
Labor1,500 × $6/sq ft$9,000
Underlayment1,500 × $0.75/sq ft$1,125
Trim & Flashing150 LF × $8/LF$1,200
AccessoriesRidge vent, snow guards$800
Tear-Off & Disposal1,500 × $2 + $500$3,500
PermitsBuilding permit$400
Subtotal $25,025
Complexity Adjustment+15%+$3,754
TOTAL PROJECT COST $28,779

Cost per Square Foot: $28,779 ÷ 1,500 = $19.19/sq ft


Metal Roof Cost Ranges by Home Size (2025)

Average Total Installed Costs:

Home SizeRoof Area (Est.)Corrugated SteelStanding SeamCopper
1,000 SF1,200–1,500 SF$6,000–$18,000$10,800–$24,000$18,000–$45,000
1,500 SF1,800–2,200 SF$9,000–$26,400$16,200–$35,200$27,000–$66,000
2,000 SF2,400–2,800 SF$12,000–$33,600$21,600–$44,800$36,000–$84,000
2,500 SF3,000–3,500 SF$15,000–$42,000$27,000–$56,000$45,000–$105,000
3,000 SF3,600–4,200 SF$18,000–$50,400$32,400–$67,200$54,000–$126,000


Factors That Increase Metal Roof Costs

1. Roof Pitch

Impact: Steeper pitches require:


2. Roof Complexity

High-Cost Features:


3. Geographic Location

Regional Cost Variations:


4. Metal Gauge (Thickness)

Gauge Options:

Thicker = More Durable + Higher Cost


5. Coating & Finish Quality

Paint Systems:


Cost-Saving Strategies

1. Choose Exposed-Fastener Systems
Corrugated or R-panel roofs cost 30–50% less than standing seam.​

2. Install Over Existing Shingles
Eliminates tear-off costs ($1.50–$3/sq ft savings) if local codes permit.​

3. Schedule Off-Season Installation
Fall/winter installations may offer 10–20% discounts due to lower demand.​

4. Bundle with Other Projects
Coordinate with siding, gutters, or window projects for volume discounts.

5. Select 29-Gauge Steel
Thinner gauge reduces material costs 15–25% while still providing 40–50 year lifespan.

6. Simplify Roof Design
Minimize valleys, dormers, and penetrations during new construction planning.


Online Metal Roof Cost Calculators

Recommended Tools:

  1. https://roof-installation.com/roofing-cost-calculator/ Panel quantity + cost estimation
  2. RoofingCalculator.com – Uses Google LiDAR data for automatic measurements​
  3. Omnicalculator.com/metal-roof-cost – Manual input with detailed breakdowns​​​

Pro Tip: Use multiple calculators and compare results; average estimates for accuracy.

🧮

Got Your Estimate? Now Get a Real Quote From a Pro.

Our calculator gives you a solid ballpark — but your actual metal roof cost depends on pitch, access, existing deck condition, and local labor rates that no calculator can account for. A certified installer will give you a firm 2026 number in one free visit.

Most homeowners find their real quote is within 8–12% of our calculator figure — get yours confirmed before material prices change further.

Get My Free Metal Roof Estimate → 📞 Call for a Fast Quote
✅ Free inspection ✅ No obligation ✅ Licensed & insured ✅ Same-week availability


FAQ

How much does a metal roof cost per square foot?
$5–$16 per square foot installed on average. Corrugated steel costs $5–$12/sq ft; standing seam costs $9–$16/sq ft; copper costs $15–$30/sq ft.

How do I calculate metal roof cost?
Measure roof area (length × width × pitch multiplier), select material type, multiply area by material + labor rates ($5–$16/sq ft), add underlayment, trim, tear-off, and complexity adjustments.

How much does a metal roof cost for a 2,000 sq ft house?
$12,000–$33,600 for corrugated steel; $21,600–$44,800 for standing seam; $36,000–$84,000 for copper. Actual roof area is typically 20–40% larger than home square footage due to pitch.

What is the cheapest metal roofing option?
Corrugated or R-panel exposed-fastener steel at $5–$12 per square foot installed. 29-gauge galvanized or Galvalume offers best budget value.

Is a metal roof worth the cost?
Yes, for long-term ownership. Metal roofs last 40–70 years (vs. 20–30 for asphalt), require minimal maintenance, reduce energy costs 10–25%, and increase resale value.

How many squares is my roof?
Divide total square footage by 100. Example: 1,500 sq ft roof = 15 squares. Roofing professionals price per “square” (100 sq ft).

Do metal roofs increase home value?
Yes. Metal roofs typically add $15,000–$25,000 to home resale value and appeal to eco-conscious buyers seeking energy efficiency and longevity.


Conclusion

A metal roof cost calculator simplifies budgeting by multiplying roof area (square feet) by material and labor rates, typically $5–$16 per square foot installed, or $10,000–$40,000 for average homes. Accurate estimates require measuring roof dimensions, applying pitch multipliers to account for slope, selecting material type (corrugated vs. standing seam vs. premium metals), and adding costs for underlayment ($0.50–$1/sq ft), trim ($5–$15/LF), tear-off ($1.50–$3/sq ft), and complexity adjustments (+10–40%). Use online calculators for quick estimates, but obtain 3–5 contractor quotes for precise project pricing. Metal roofing delivers 40–70 year lifespans, energy savings, and increased home value that justify upfront investment compared to asphalt shingles requiring replacement every 20–30 years.

Next Steps:

Get Free Contractor Quotes

Compare Metal Roofing Types


🏠 Roofing Tips & Updates

Get free roofing advice, cost guides, and seasonal maintenance tips.

How to Choose a Metal Roofing Contractor: 2026 Expert Guide

Choosing the right metal roofing contractor determines whether your $15,000–$35,000 investment delivers 50+ years of leak-free performance or becomes a costly nightmare requiring premature replacement. The best metal roofing contractors demonstrate manufacturer certifications, maintain proper licensing and insurance, provide detailed written estimates with material specifications, offer comprehensive workmanship warranties (10+ years), and show verifiable portfolios of completed projects with satisfied customer references. Unlike asphalt shingle installation, metal roofing demands specialized skills in panel cutting, seam crimping, thermal movement accommodation, and flashing details that only experienced metal roof specialists possess.

This comprehensive guide equips homeowners with the knowledge to evaluate contractor credentials, identify red flags, ask critical questions, compare quotes accurately, and select qualified metal roofing professionals who deliver quality installations backed by solid warranties.


Why Metal Roofing Requires Specialized Contractors

Metal Roofing vs. Asphalt Shingle Installation

Specialized Skills Required:

Consequence of Hiring Generalists: Asphalt roofers without metal experience create oil-canning (panel waviness), improperly sealed seams, distorted panels from over-tightening, and premature failures requiring costly repairs.


Essential Contractor Credentials & Certifications

1. Licensing & Insurance Verification

Required Credentials:

How to Verify:

  1. Request copies of license, insurance certificates, bond
  2. Call insurance company to confirm active coverage
  3. Check state contractor licensing database online
  4. Verify license number matches business name

Red Flag: Contractors who hesitate to provide documentation or have expired credentials.


2. Manufacturer Certifications

Why They Matter:

Top Manufacturer Certifications:

How to Verify: Visit manufacturer website; search certified contractor database by zip code.


3. Industry Association Memberships

Professional Organizations:

What Membership Indicates:


Evaluating Contractor Experience & Portfolio

Choosing Metal Roofing Contractor
Choosing Metal Roofing Contractor Guide

Years in Business & Project Volume

Minimum Standards:

Questions to Ask:

Red Flag: Contractors who primarily install asphalt and only occasionally do metal projects.


Portfolio Review

What to Request:

Critical Evaluation Points:

Visit Completed Projects: Ask to drive by 2–3 local installations to see quality firsthand.


Customer References & Online Reviews

Reference Checks

Request from Contractor:

Questions to Ask References:

Red Flag: Contractor provides only 1–2 references or refuses to provide any.


Online Reviews & Reputation

Platforms to Check:

What to Look For:

Red Flag: No online presence, consistently low ratings, unresolved complaints, or defensive responses to criticism.


Critical Questions to Ask Contractors

Installation & Warranty Questions

1. Installation Experience:

2. Warranty Coverage:

3. Project Timeline & Crew:

4. Material Sourcing:


Business Practices & Protection

5. Payment Terms:

6. Permits & Inspections:

7. Project Management:


Comparing Contractor Quotes

What Detailed Estimates Should Include

Material Specifications:

Labor Details:

Warranty Terms:

Project Timeline:


Red Flags in Quotes

  1. Vague descriptions (“Install metal roof” without material specs)
  2. Significantly lower than competitors (30%+ below average suggests shortcuts)
  3. High-pressure tactics (“Price good for 24 hours only”)
  4. Cash-only requests (Avoid contractors who don’t accept credit/checks)
  5. Full payment upfront (Never pay 100% before completion)
  6. No written warranty (Verbal promises are unenforceable)

Apples-to-Apples Comparison

How to Compare 3–5 Quotes Fairly:

  1. Verify same material specs: Ensure all quotes specify same gauge, coating, underlayment
  2. Break down costs: Compare labor, materials, disposal separately
  3. Assess warranty value: Longer workmanship warranties add value
  4. Consider reputation: Lowest price + poor reviews = false economy
  5. Evaluate communication: Responsive, detailed contractors often deliver better service

Warning Signs & Red Flags to Avoid

Disqualifying Red Flags

1. Storm Chasers:

2. No Physical Address:

3. Unlicensed/Uninsured:

4. Requires Large Upfront Payment:

5. No Written Contract:

6. High-Pressure Sales:


Final Contractor Selection Checklist

Before Signing Contract, Verify:


FAQ

How do I find a qualified metal roofing contractor?
Start with manufacturer certification databases (GAF, CertainTeed, McElroy Metal), check local Better Business Bureau ratings, read Google reviews, and request references. Verify licensing, insurance, and 5+ years metal roofing specialization.

What certifications should a metal roofing contractor have?
Manufacturer certifications (GAF Master Elite, McElroy Authorized Installer, Sheffield Metals Certified), NRCA membership, state roofing contractor license, general liability insurance ($1M minimum), and workers’ compensation coverage.

How much should I pay upfront for metal roof installation?
No more than 10–30% deposit. Typical payment schedule: 10–30% deposit, 60% mid-project, 10–30% final payment upon completion and inspection. Never pay 100% upfront.

What questions should I ask metal roofing contractors?
Ask about metal roofing experience (years, project count), manufacturer certifications, workmanship warranty terms, crew composition (employees vs. subcontractors), material sourcing, payment schedule, and permit handling.

How do I verify a metal roofing contractor’s credentials?
Check state contractor licensing database online, call insurance company to confirm active coverage, verify manufacturer certifications on company websites, and review Better Business Bureau accreditation status.

What’s a reasonable workmanship warranty for metal roofing?
Minimum 10 years on workmanship; top contractors offer 15–25 year labor warranties. Manufacturer material warranties range 20–50 years depending on product and contractor certification level.

Should I choose the lowest-priced metal roofing contractor?
Not automatically. Verify all quotes include identical materials and services. Quotes 30%+ below average often indicate inferior materials, inexperienced crews, or unlicensed contractors who won’t honor warranties.


Conclusion

Choosing a qualified metal roofing contractor protects your $15,000–$35,000 investment and ensures 50+ years of leak-free performance. Prioritize contractors with manufacturer certifications, 5+ years metal roofing specialization, comprehensive insurance coverage, detailed written estimates specifying material gauges and coatings, and workmanship warranties of 10+ years. Avoid storm chasers, unlicensed operators, high-pressure sales tactics, and contractors requiring large upfront payments. Obtain 3–5 detailed quotes, verify credentials independently, check references thoroughly, and review online ratings before signing contracts. The best metal roofing contractors invest time in detailed consultations, provide transparent pricing, communicate professionally throughout projects, and stand behind their work long after installation completes.

🏠 Roofing Tips & Updates

Get free roofing advice, cost guides, and seasonal maintenance tips.

Tuff Rib Metal Roofing Installation: DIY Steps & Costs

Tuff rib metal roofing installation transforms homes and barns with durable, cost-effective exposed-fastener panels that homeowners can install themselves with proper planning and technique. The system features 36-inch-wide panels with distinctive 3/4-inch ribs spaced 9 inches apart, installed by fastening through flat sections adjacent to ribs using self-drilling screws at every purlin location and every 2 feet vertically. Professional installations cost $7–$11 per square foot, while DIY projects save $3–$4 per square foot in labor, making tuff rib one of the most economical metal roofing options delivering 40–50 years of weather protection.

This complete guide walks through substrate preparation, panel squaring, fastening patterns, trim installation, and finishing details to ensure professional results whether you hire contractors or tackle the project yourself.


Understanding Tuff Rib Metal Roofing Systems

Panel Specifications

Dimensions:

Material Options:

Minimum Slope: 3:12 pitch standard; 2.5:12 with special underlayment.


Pre-Installation Planning

Calculating Material Needs

Panel Quantity:

  1. Measure roof length (eave to ridge)
  2. Add 2–3 inches for eave overhang
  3. Measure roof width
  4. Divide width by 3 feet (36-inch coverage per panel)
  5. Add 10% waste factor

Example: 40-foot length × 30-foot width = 1,200 sq ft roof
→ 30 feet ÷ 3 feet = 10 panels wide
→ Order 11 panels (10% overage) at 40-foot length

Trim Requirements:


Essential Tools & Materials

Power Tools:

Hand Tools:

Safety Equipment:

Materials:


Step-by-Step Installation Process

Step 1: Prepare the Roof Substrate

Deck Requirements:

Critical: Check that roof is square before starting. Out-of-square structures cause panel misalignment and gaps at sidelaps.


Step 2: Install Moisture Barrier

Underlayment Application:

  1. Start at eave, roll underlayment horizontally toward ridge
  2. Overlap horizontal seams 6 inches
  3. Overlap vertical seams 6 inches
  4. Staple every 6 inches at edges, 12 inches through middle
  5. Keep underlayment flat and wrinkle-free
  6. Apply ice-and-water shield at eaves (first 3–6 feet in snow regions)

Pro Tip: Use high-temperature synthetic underlayment under metal roofs (rated to 250°F+) to prevent degradation from heat buildup.


Step 3: Install Eave Trim

Purpose: Directs water into gutters and provides finished edge.

Installation:

  1. Position eave trim with nailing flange toward ridge
  2. Place kick/hem facing away from eave (drip edge)
  3. Fasten with pancake screws every 12 inches
  4. Overlap trim sections 2 inches minimum
  5. Fold corners for maximum weather protection
  6. Install underlayment over nail flange

Panel Overhang: Panels will extend 2–3 inches past eave trim (1 inch if gutters installed).


Step 4: Install Valley Flashing (If Applicable)

W-Valley Method:

  1. Center valley flashing over valley centerline
  2. Fasten edges every 12 inches with pancake screws
  3. Overlap valley sections 6 inches with butyl tape seal
  4. Apply expanding foam tape 1 inch from bottom edge
  5. Panels will install over valley with 3-inch minimum clearance from center

Open Valley Method: Panels cut and trimmed at valley; requires precision cutting.


Step 5: Square and Install First Panel

Critical Step: First panel alignment determines entire roof square.

Process:

  1. Verify roof is square by measuring diagonals (should be equal)
  2. Position first panel at eave with proper overhang (2–3 inches)
  3. Align with rake edge or 1 inch past if using rake trim
  4. Use 48-inch rafter square to square panel to eave (90-degree angle)
  5. Tack top corners temporarily with 2 screws
  6. Verify alignment before full fastening
  7. Adjust if needed—do not proceed if first panel is off-square

Step 6: Fasten Panels with Proper Pattern

Fastening Pattern (Standard Non-High-Wind):

Vertical Spacing:

Horizontal Spacing:

Critical Fastening Rules:

  1. Drive screws perpendicular to roof (not angled)
  2. Tighten until washer compresses slightly but not crushed
  3. Over-tightening destroys neoprene seals → future leaks
  4. Under-tightening allows water infiltration
  5. Place fasteners 1 inch from panel edges

High-Wind Zones: Fasten every rib both sides, refer to Florida Product Approval (FPA) for hurricane-rated patterns.


Step 7: Overlap and Install Additional Panels

Sidelap Method:

  1. Next panel overlaps first panel by one full rib width
  2. Ribs must nest together precisely (misalignment creates gaps)
  3. Maintain consistent eave overhang across all panels
  4. Fasten through both layers where panels overlap
  5. Continue across roof width

End Laps (if required for longer roofs):


Step 8: Install Inside Closures at Eave

Purpose: Blocks insects, debris, wind-driven rain while allowing ventilation.

Installation:

  1. Place foam closures between ribs at eave before final row of fasteners
  2. Compress closures to fill gap between panel and eave trim
  3. Fasten through closures into deck
  4. Bottom row of screws catches closures and holds in place

Step 9: Install Rake Trim (Gable Edges)

Two Methods:

Method A (After panels installed):

  1. Install all panels first
  2. Place rake trim over panel edges
  3. Fasten every 12 inches through flange into deck
  4. Apply butyl tape between trim and panels for wind/water seal

Method B (Before panels installed):

  1. Install L-trim rake before panels
  2. Slide panel edges under trim flange
  3. Fasten trim every 36 inches maximum
  4. Seal properly to prevent water migration

Step 10: Install Ridge Cap with Ventilation

Vented Ridge Installation (Recommended):

  1. Stop panels 2 inches from ridge centerline on both sides
  2. Apply outside foam closures along ridge ribs on both roof planes
  3. Use vented closures to allow airflow while blocking weather
  4. Center ridge cap over ridge peak covering all closures
  5. Fasten through every major rib (9-inch spacing) on both sides
  6. Use 3/4–2 inch screws to penetrate cap, closure, panel, and deck
  7. Overlap ridge cap sections 6 inches with butyl tape
  8. Install end caps at ridge terminations

Non-Vented Ridge: Butt panels tight at ridge, install ridge cap directly over panels.


Step 11: Sidewall & Transition Flashing

Sidewall (Panel Meets Vertical Wall):

  1. Install Z-flashing or headwall flashing before panels
  2. Panels slide under upper leg
  3. Fasten upper leg into wall every 12 inches
  4. Seal lower leg to panels with butyl tape
  5. Caulk where flashing meets siding

Transitions (Upper/Lower Roof Planes):

  1. Install lower roof panels and outside closures
  2. Position transition flashing over lower panels covering closures
  3. Fasten on every major rib of lower roof
  4. Fasten upper leg over underlayment every 12 inches
  5. Butyl tape along upper nail strip for maximum seal

Installation Costs (2025)

DIY Material Costs

Per Square Foot:

Example (1,500 sq ft roof):


Professional Installation Costs

Per Square Foot:

Example (1,500 sq ft roof):

DIY Savings: $3,750–$6,000 on labor.


Common Installation Mistakes to Avoid

  1. Wrong fastener placement → Screwing through rib peaks distorts panels and causes leaks. Always fasten through flat areas.
  2. Over-tightening screws → Crushed neoprene washers fail within 5–10 years. Tighten until snug, not gorilla-tight.
  3. Poor first-panel square → Off-square first panel compounds across entire roof. Use rafter square and verify before fastening.
  4. Skipping underlayment → Direct panel-to-deck contact causes condensation rot. Always use moisture barrier.
  5. Inadequate panel overlap → Overlapping less than one full rib allows water infiltration at sidelaps.
  6. Missing closures → Skipping inside closures invites pest infestation and wind-driven rain.
  7. No butyl tape at laps → Unsealed laps leak during wind-driven rain and allow wind uplift.
  8. Walking on ribs → Panel denting and scratching. Walk only on flat sections between ribs.

Pro Installation Tips

1. Install in Dry, Calm Weather
Wind lifts panels; rain makes metal dangerously slippery.

2. Work with Helper
36-inch-wide panels are unwieldy; second person steadies panels during alignment.

3. Pre-Cut Panels on Ground
Safer than cutting on roof; reduces mistakes; measure twice, cut once.

4. Use Magnetic Screw Holder
Speeds installation and reduces dropped fasteners.

5. Keep Panels Clean
Metal shavings from cutting rust on panels. Brush off immediately.

6. Handle Panels Carefully
Sharp edges cut skin. Wear gloves. Avoid dragging panels (scratches coating).


FAQ

Can I install tuff rib metal roofing myself?
Yes, tuff rib is the most DIY-friendly metal roof system. Requires basic carpentry skills, proper tools, and safety equipment. Professional results depend on proper squaring and fastening techniques.

Do you screw through the rib or flat on tuff rib?
Always screw through the flat area adjacent to ribs, never through rib peaks. Fastening through ribs distorts panels and causes leaks.

What is the minimum pitch for tuff rib?
3:12 standard minimum; 2.5:12 with special high-temp underlayment and sealed fasteners. Check manufacturer specs for low-slope applications.

How many screws per square for tuff rib?
80–100 screws per 100 sq ft (one square). Example: 1,500 sq ft roof requires approximately 1,200–1,500 fasteners.

How long does tuff rib roofing last?
40–50 years with proper installation and fastener maintenance every 10–15 years. Galvalume-coated panels outlast galvanized.

Can you install tuff rib over existing shingles?
Yes, over one layer of shingles with furring strips or directly if shingles are flat. Always use underlayment between shingles and metal panels.

What gauge tuff rib should I use?
29-gauge for most residential applications; 26-gauge for higher wind zones (coastal, commercial) or heavy snow loads.


Conclusion

Tuff rib metal roofing installation delivers professional, long-lasting results when homeowners follow proper techniques: square the first panel meticulously, fasten through flats adjacent to ribs at every purlin and every 2 feet vertically, overlap panels one full rib width, and seal all laps with butyl tape. DIY projects save $3,750–$6,000 in labor on typical 1,500 sq ft roofs while delivering 40–50 years of weather protection. Prioritize safety with fall protection equipment, avoid over-tightening fasteners that crush neoprene washers, install moisture barrier to prevent condensation damage, and use vented ridge closures for maximum attic ventilation. Whether tackling installation yourself or hiring professionals, understanding these techniques ensures a leak-free, durable metal roof.

🏠 Roofing Tips & Updates

Get free roofing advice, cost guides, and seasonal maintenance tips.

Cost to Install Roof Vent: 2026 Pricing Guide by Vent Type

This comprehensive guide breaks down roof vent installation costs by type, size requirements, labor rates, and DIY feasibility to help homeowners budget accurately and choose the right ventilation system.

roof vent installation  costs by types
roof vent installation costs by types

Average Roof Vent Installation Costs (2025)

National Averages:

  • Per Vent Average: $475
  • Typical Range: $200–$750 per vent
  • Low End: $50–$100 (simple DIY box vent)
  • High End: $1,200–$2,000 (powered solar vent with professional install)​

Complete System Costs:

  • Basic ventilation system: $300–$1,500
  • Advanced system (ridge + intake): $1,000–$3,000
  • Powered/solar systems: $1,000–$3,000+​

These ranges include materials and professional labor. DIY installation eliminates labor costs but requires roofing experience and safety equipment.


Roof Vent Installation Costs by Type

Roof vent types
Roof vent types

Ridge Vents (Most Effective)

Ridge Vents
Ridge Vents (Most Effective)

Cost: $7–$15 per linear foot installed
Total for 40-foot ridge: $300–$750

Material Costs: $3–$6 per linear foot
Labor Costs: $4–$9 per linear foot

Pros: Continuous ventilation, low profile, no moving parts, works in any wind direction
Best For: New roof installations, comprehensive ventilation upgrades​

Installation Complexity: Moderate to high (requires cutting ridge slot, professional recommended)


Box Vents (Static Roof Vents)

Cost: $100–$200 per vent installed
Material Costs: $20–$50 per unit
Labor Costs: $80–$150 per vent

Pros: Affordable, reliable, no moving parts, easy installation
Cons: Require multiple units for adequate ventilation, visible on roof

Best For: Budget-conscious projects, hip roofs without continuous ridge, supplementing existing ventilation​

Installation Complexity: Low to moderate (DIY-friendly for experienced homeowners)


Turbine Vents (Wind-Powered)

Cost: $75–$300 per vent installed
Material Costs: $25–$100 per unit
Labor Costs: $50–$200 per vent

Pros: Active ventilation when spinning, effective in windy areas, no electricity needed
Cons: Visible, moving parts wear out, noisy in high winds, ineffective in calm weather

Best For: Windy climates, supplemental ventilation, barns/sheds​

Installation Complexity: Moderate (requires proper flashing and balancing)


Gable Vents

Cost: $75–$250 per vent installed
Material Costs: $25–$100 per unit
Labor Costs: $50–$150 per vent

Pros: Attractive, provides cross-ventilation, decorative options available
Cons: Less effective than ridge vents, can create dead zones in attic

Best For: Homes with gable ends, supplemental to soffit/ridge systems​

Installation Complexity: Moderate (requires cutting siding, framing opening)


Powered Roof Vents (Electric)

Cost: $300–$800 per vent installed
Material Costs: $150–$400 per unit
Labor Costs: $150–$400 (includes electrical work)

Pros: High CFM (cubic feet per minute) exhaust capacity, thermostat/humidistat controlled
Cons: Electricity costs, mechanical parts fail, can pull conditioned air from living space

Best For: Extremely hot attics, homes with inadequate passive ventilation​

Installation Complexity: High (requires electrical work; licensed electrician may be needed)


Solar-Powered Roof Vents

Cost: $300–$1,200 per vent installed
Material Costs: $200–$700 per unit
Labor Costs: $100–$500

Pros: No electricity costs, environmentally friendly, quiet operation, automatic operation
Cons: Higher upfront cost, dependent on sunlight, lower CFM than electric models

Best For: Eco-conscious homeowners, sunny climates, remote locations​

Installation Complexity: Moderate (no electrical wiring, but precise mounting required)


Soffit Vents (Intake)

Cost: $100–$500 for complete system (multiple vents)
Per Vent Material: $5–$15
Labor: $50–$300 depending on quantity

Pros: Essential intake component, low cost, hidden from view
Cons: Can be blocked by insulation, less effective alone

Best For: Balancing ridge vent exhaust (required for proper airflow)​

Installation Complexity: Low to moderate (cutting soffit, straightforward installation)


Comparison Table

Vent TypeCost/Unit InstalledLifespanEffectivenessBest Use
Ridge Vent$300–$750 (40 ft)20–40 yrsExcellentComplete ventilation
Box Vent$100–$20020–30 yrsGoodBudget, hip roofs
Turbine$75–$30010–20 yrsGood (wind-dependent)Windy areas
Gable Vent$75–$25030+ yrsModerateSupplemental
Powered (Electric)$300–$80010–15 yrsExcellentHigh heat areas
Solar$300–$1,20015–25 yrsVery goodEco-friendly
Soffit$100–$500 (system)30+ yrsEssential (intake)With ridge/exhaust

Factors Affecting Roof Vent Installation Cost

1. Labor Rates by Region

Regional Variations (2025):

  • High-Cost Areas (NYC, SF, LA, Boston): $75–$125/hour
  • Mid-Cost Areas (suburban metros): $50–$80/hour
  • Low-Cost Areas (rural regions): $40–$60/hour

Labor Time Estimates:

  • Ridge vent (40 ft): 3–6 hours
  • Box vent: 1–2 hours each
  • Turbine vent: 1.5–3 hours each
  • Powered vent: 2–4 hours (+ electrical)​

2. Roof Pitch & Accessibility

Pitch Impact:

  • Low pitch (≤4:12): Standard rates
  • Moderate pitch (5:12–7:12): +10–20% labor
  • Steep pitch (>7:12): +30–50% labor (additional safety equipment required)

Access Challenges: Multi-story homes, complex roof geometry, or limited staging areas increase labor time and costs.​


3. Number of Vents Required

Ventilation Calculation:
1 square foot net free area (NFA) per 150 square feet of attic space

Example: 1,500 sq ft attic ÷ 150 = 10 sq ft NFA needed = 1,440 sq inches total. Split 50/50 between intake (soffit) and exhaust (ridge/box vents).

Bulk Installation Savings: Installing multiple vents during one visit reduces per-vent cost 15–30% compared to individual installations.

​>>> Cost Vent Calculation <<<


4. Roof Condition & Repairs

Additional Costs:

  • Decking replacement: $2–$5 per sq ft (if rotted around vent location)
  • Flashing upgrades: $50–$150 per vent
  • Shingle replacement: $100–$300 if damaged shingles surround vent
  • Structural repairs: $200–$1,000+ for rafter/truss damage​

5. Timing & Scheduling

Best Times for Cost Savings:

  • Off-season (fall/winter): 10–20% discounts due to lower demand
  • Bundled with roof replacement: Saves 20–40% vs. standalone installation
  • Multiple vent installations: Economy of scale reduces per-vent cost

Emergency/Rush Jobs: +25–50% surcharge for immediate service.​


DIY vs. Professional Installation Costs

DIY Installation

Material-Only Costs:

  • Ridge vent: $3–$6 per linear foot
  • Box vent: $20–$50 each
  • Turbine vent: $25–$100 each
  • Solar vent: $200–$700 each

Additional DIY Costs:

  • Tools (if needed): $50–$200 (circular saw, drill, safety equipment)
  • Flashing materials: $20–$50
  • Roofing cement/sealant: $10–$30

Total DIY Savings: $150–$500 per vent in labor costs​

DIY Feasibility:

  • Easy: Box vents, soffit vents (ground-level)
  • Moderate: Turbine vents, gable vents
  • Difficult: Ridge vents (requires cutting ridge slot), powered vents (electrical work)

Risks: Improper installation causes leaks, voids warranties, and reduces ventilation effectiveness. Fall hazards are serious—use proper safety equipment or hire professionals.


Professional Installation

Total Costs (Labor + Materials):

  • Ridge vent system: $300–$900
  • Box vent (single): $100–$200
  • Turbine vent: $75–$300
  • Solar vent: $300–$1,200

Benefits:

  • Proper sizing and placement
  • Warranty coverage (1–10 years on workmanship)
  • Insurance and licensing
  • Safety compliance
  • Faster completion (1–6 hours vs. DIY full day)

When to Hire Pros: Multi-story homes, steep roofs, complex installations, powered vents requiring electrical work, or lack of roofing experience.​


Complete Ventilation System Costs

Basic System (Ridge + Soffit):

  • Ridge vent (40 ft): $300–$600
  • Soffit vents (complete): $200–$400
  • Total: $500–$1,000​

Enhanced System (Ridge + Soffit + Box Vents):

  • Ridge vent: $300–$600
  • Soffit vents: $200–$400
  • Box vents (2–4): $200–$800
  • Total: $700–$1,800

Premium System (Solar + Ridge + Soffit):

  • Solar vent (1–2): $600–$2,400
  • Ridge vent: $300–$600
  • Soffit vents: $200–$400
  • Total: $1,100–$3,400​

Hidden Costs to Consider

Potential Additional Expenses:

  • Roof inspection: $125–$360 (may be required before installation)
  • Permits: $50–$200 (varies by jurisdiction)
  • Removal of old vents: $50–$150 per vent
  • Attic insulation adjustment: $100–$500 (ensure vents aren’t blocked)
  • Gutter cleaning: $120–$235 (access requirement)
  • Shingle color matching: $50–$150 (if discontinued style)​

How to Reduce Roof Vent Installation Costs

1. Bundle with Roof Replacement
Save 20–40% by installing vents during roof replacement when deck is already exposed.

2. DIY Soffit Vents
Soffit vents are ground-level and DIY-friendly; hire pros for roof vents only.

3. Off-Season Installation
Schedule during fall/winter for 10–20% discounts.

4. Get Multiple Quotes
Compare 3–5 estimates; typical variance is 25–40%.

5. Choose Passive Vents
Ridge and box vents have no operational costs vs. powered vents (electricity).

6. Proper Sizing
Avoid over-ventilating (wasted money) or under-ventilating (ineffective); calculate exact needs.


FAQ

How much does it cost to install a roof vent?
Average cost is $200–$750 per vent installed, with ridge vents costing $300–$900 for complete systems and box vents $100–$200 each.

Can I install roof vents myself?
Box and soffit vents are DIY-feasible for experienced homeowners. Ridge vents and powered vents require professional installation due to complexity and safety concerns.

How many roof vents do I need?
Calculate 1 sq ft net free area per 150 sq ft attic space, split 50/50 between intake (soffit) and exhaust (ridge/box vents). Example: 1,500 sq ft attic needs 10 sq ft NFA total.

What type of roof vent is best?
Ridge vents paired with soffit vents provide most effective, uniform ventilation for typical homes. Box vents suit hip roofs; solar vents benefit eco-conscious homeowners.

Do roof vents increase home value?
Indirectly, yes. Proper ventilation extends roof lifespan, reduces energy costs, and prevents moisture damage—all factors that improve home condition and appeal.

How long does roof vent installation take?
1–2 hours per box/turbine vent; 3–6 hours for ridge vent system; full day for multiple vents. Professional crews complete faster than DIY.

Are powered roof vents worth the cost?
Only if passive ventilation is inadequate. Powered vents cost more upfront and have operational expenses. Ridge + soffit systems are more cost-effective long-term.

Conclusion

Roof vent installation costs $200–$750 per vent on average, with ridge vent systems providing best value at $300–$900 for complete continuous ventilation. Professional installation ensures proper sizing, placement, and sealing, protecting your investment and maintaining warranty coverage. While DIY installation of box and soffit vents can save $150–$500 in labor, ridge vents and powered systems benefit from professional expertise. Bundling vent installation with roof replacement, scheduling during off-peak seasons, and obtaining multiple quotes maximizes value. Proper ventilation extends roof lifespan 20–30% and reduces energy costs, making it a high-ROI home improvement.

🏠 Roofing Tips & Updates

Get free roofing advice, cost guides, and seasonal maintenance tips.

Ridge Vents FAQ: 25+ Questions Answered (2026 Guide)

Ridge vents generate dozens of questions from homeowners planning roof replacements or addressing ventilation problems. The most common concerns involve whether ridge vents work without soffit intake (they don’t—balanced airflow requires both), installation costs ($10–$18 per linear foot), potential leak risks (rare with proper installation), and sizing requirements (1 sq ft net free area per 150 sq ft attic space). Understanding ridge vent functionality, compatibility with different roof types, maintenance needs, and problem signs helps homeowners make informed decisions about attic ventilation systems that protect roofs and reduce energy costs.

This comprehensive FAQ compiles answers to 25+ ridge vent questions covering installation, performance, costs, troubleshooting, and maintenance based on common homeowner concerns and professional roofing experience.


Installation & Design Questions

Ridge Vents FAQ 2025

What is a ridge vent?

A ridge vent is a continuous exhaust ventilation system installed along the roof’s peak (ridge line). It consists of a perforated material covered by ridge cap shingles that allows hot air and moisture to escape from the attic while blocking rain, snow, and pests. Ridge vents typically feature internal baffles that create low pressure as wind passes over, drawing air from the attic space.


How does a ridge vent work?

Ridge vents work by creating balanced airflow through the attic. Cool, fresh air enters through intake vents (typically soffit vents at the eaves), travels upward through the attic space as it warms, and exits through the ridge vent at the roof peak. This continuous flow removes heat and moisture, preventing damage and reducing energy costs. Wind passing over the external baffle creates negative pressure that enhances exhaust.


Can I use ridge vents without soffit vents?

No. Ridge vents require adequate intake ventilation (soffit vents) to function properly. Without intake, the ridge vent may pull air through one section to feed another section, creating weather infiltration risks. Alternatively, it may pull conditioned air from living spaces through ceiling penetrations, wasting energy and creating negative pressure. Rule: Always balance intake and exhaust—50/50 split is ideal.


How much ridge vent do I need?

Calculate attic square footage ÷ 150 = required net free ventilating area (NFA) in square feet. Convert to square inches (× 144), divide by 2 (half for exhaust), then divide by your ridge vent’s NFA per linear foot. Example: 1,500 sq ft attic ÷ 150 = 10 sq ft NFA = 1,440 sq inches ÷ 2 = 720 sq inches exhaust. If vent provides 18 sq inches per foot, you need 40 linear feet.


What size slot do I cut for ridge vents?

Most ridge vents require a 1-inch wide slot on each side of the ridge board (2 inches total). Some manufacturers specify different widths—always consult installation instructions. Cut through roof decking only, never into the ridge board itself, as this compromises structural integrity.


Asphalt Shingles Installation
How to Install Asphalt Shingles

Can I install ridge vents on any roof?

Ridge vents work best on gable, hip, or combination roofs with continuous ridge lines and minimum 3:12 pitch. They’re less effective on flat roofs, complex multi-ridge designs without proper planning, or roofs lacking adequate soffit intake. Consult a roofing professional for unusual roof configurations.


How is a ridge vent installed?

After removing old ridge caps, cut a continuous slot along the ridge (1 inch each side of ridge board). Install ridge vent sections over the opening, securing with nails through flanges. Cover with overlapping ridge cap shingles. Installation takes 2–6 hours depending on ridge length and complexity. Professional installation ensures proper sealing and alignment.


Should I install ridge vents during roof replacement or after?

During roof replacement is ideal. The roof is already exposed, old ridge caps are removed, and installers can coordinate slot cutting with new shingle installation. Retrofitting ridge vents after roof replacement is possible but requires removing existing ridge caps, which may not match new vents perfectly.


Performance & Effectiveness Questions

Do ridge vents work in winter?

Yes. Ridge vents function year-round, exhausting moisture that would otherwise condense on cold attic surfaces, causing mold, rot, and ice dams. In winter, balanced ventilation prevents warm attic air from melting roof snow unevenly, which refreezes at eaves as ice dams.


Do ridge vents reduce cooling costs?

Yes. Ridge vents reduce attic temperatures by 20–40°F in summer, lowering HVAC loads 10–20%. Cooler attics mean less heat transfer to living spaces, reducing air conditioning runtime and costs. The effect is most pronounced in hot climates with adequate insulation.


Are ridge vents better than box vents?

Ridge vents provide continuous, uniform ventilation along the entire ridge, eliminating hot spots common with spaced box vents. They’re lower profile (nearly invisible), require no electrical power, and work regardless of wind direction. Box vents may suit specific situations (hip roofs without continuous ridge), but ridge vents are preferred for most applications.


Can you have too much ridge vent?

Generally no, but you can have imbalanced ventilation. Exhaust (ridge) should match intake (soffit) capacity. Excessive exhaust without adequate intake creates negative attic pressure, pulling conditioned air from living spaces. Always maintain 50/50 balance between intake and exhaust.


How do I ventilate a roof with multiple ridge heights?

Ventilate all ridges if they’re within 3 feet of each other in height. If ridges are more than 3 feet apart vertically, ventilate only the higher ridge to prevent the higher pressure from pulling air through the lower ridge vent (creating weather infiltration). Alternatively, separate the attic spaces with a barrier to create two independent ventilation zones.


Cost & Value Questions

How much does ridge vent installation cost?

DIY Materials: $3–$6 per linear foot
Professional Installation: $10–$18 per linear foot (materials + labor)
Typical 30-foot ridge: $300–$540 professionally installed. Costs vary by roof height, pitch, existing ridge condition, and regional labor rates.

Check for free our Roofing Cost Calculator : Here


Does a ridge vent increase home value?

Indirectly, yes. Proper attic ventilation extends roof lifespan, reduces energy costs, and prevents moisture damage—all factors that improve home condition and appeal. During home inspections, adequate ventilation is a positive finding that reassures buyers.


How long do ridge vents last?

Quality ridge vents last 20–40 years, often matching roof lifespan. UV-resistant materials and proper installation prevent premature degradation. Replace ridge vents when replacing the roof or if damaged by storms, excessive wear, or clogging.


Problems & Troubleshooting Questions

Can ridge vents leak?

Properly installed ridge vents rarely leak. Most “leaks” result from improper installation (missing end plugs, unsealed joints, inadequate roofing cement on flanges) or storm damage. Ridge vents are designed to shed water via overlapping ridge caps. If leaking occurs, inspect end closures, section joints, and flashing around the vent.


What are common ridge vent problems?

  1. Clogging: Debris (leaves, twigs) blocks airflow
  2. Storm damage: High winds dislodge caps; hail punctures vents
  3. Incorrect sizing: Inadequate ventilation causes heat/moisture buildup
  4. Animal intrusion: Birds, squirrels, rats enter through gaps
  5. Improper installation: Gaps allow weather infiltration
  6. Insufficient intake: Ridge vent can’t exhaust without soffit vents

How do I know if my ridge vent is clogged?

Check for excessive attic heat in summer, visible moisture or frost in winter, higher energy bills, or mold/mildew growth in attic. From outside, inspect ridge vent openings for debris accumulation. Test airflow on a windy day by holding tissue near soffit vents—it should draw inward if system is functioning.


Can animals get into ridge vents?

Yes, if vents lack proper baffles or screens. Birds, squirrels, rats, and bats can enter through gaps. Quality ridge vents include mesh screens or tight-fitting baffles that block pests while allowing airflow. Install hardware cloth over openings if animal intrusion occurs.


Do ridge vents get damaged in storms?

High winds can lift or dislodge poorly installed ridge caps. Hail can dent or puncture thin vent materials. Falling branches may crush sections. Inspect ridge vents after severe weather and repair damage promptly to prevent water infiltration.


Maintenance & Lifespan Questions

How do I maintain ridge vents?


Can I clean ridge vents myself?

Yes, for accessible debris removal. Use a leaf blower or soft brush to clear openings from exterior. Never use pressure washers (damage to vent materials and shingles). For internal blockages or animal nests, consider professional cleaning to avoid roof damage.


When should I replace ridge vents?

Replace ridge vents when:


Compatibility Questions

Can I add ridge vents to an existing roof?

Yes, but it requires removing existing ridge caps, cutting ridge slots, and installing new vents with matching ridge caps. Feasible as a retrofit but easier during roof replacement. Ensure adequate soffit intake exists before adding ridge vents.


Do ridge vents work with metal roofing?

Yes. Metal roofs use specialized ridge vents designed for metal panel profiles. Standing seam systems often include vented ridge caps as part of the roofing system. Exposed-fastener metal roofs use foam closures with vented ridge caps.


Can I use ridge vents with cathedral ceilings?

Yes, but requires careful planning. Cathedral ceilings need continuous air channels (baffles) from soffit to ridge to maintain ventilation. Spray foam insulation may block airflow—use rigid foam with ventilation channels or batt insulation with proper baffling.


Do I need ridge vents if I have gable vents?

Combining ridge vents with soffit vents is more effective than gable vents alone. Gable vents provide cross-ventilation but create dead zones. Ridge + soffit creates uniform airflow across the entire attic. If adding ridge vents, close or supplement gable vents to prevent short-circuiting airflow.


Comparison Questions

Ridge vent vs. turbine vent: which is better?

Ridge vents: Continuous, low-profile, no moving parts, work in any wind direction, quieter, longer lifespan.
Turbine vents: Visible, mechanical parts wear out, noisy in wind, effective only when spinning.
Winner: Ridge vents for most residential applications.


Ridge vent vs. power attic fan?

Ridge vents: Passive, no energy use, maintenance-free, balanced system.
Power fans: Active exhaust, electricity cost, can pull conditioned air from living space if intake inadequate.
Winner: Ridge vents are more energy-efficient and require less maintenance.


FAQ

Do ridge vents leak in heavy rain?
Properly installed ridge vents with overlapping ridge caps and sealed end plugs don’t leak. Design naturally sheds water. Most leaks result from installation errors or storm damage.

How long does ridge vent installation take?
2–6 hours for DIYers on 30-foot ridge. Professionals complete in 1–3 hours. Complex roofs take longer.

Can I install ridge vents in winter?
Yes, but cold temperatures make shingles brittle. Work during warmer parts of day. Avoid installing in snow, ice, or when temps drop below 40°F.

Will ridge vents void my roof warranty?
No, if installed per manufacturer specs. Improper installation (cutting into ridge board, inadequate sealing) may void warranty. Hire certified installers.

Do ridge vents reduce attic insulation effectiveness?
No. Proper ventilation prevents moisture that degrades insulation. Maintain air gap between insulation and roof deck using baffles.


Conclusion

Ridge vents provide effective, low-maintenance attic ventilation when properly installed with balanced soffit intake. They reduce energy costs, extend roof lifespan, prevent moisture damage, and work year-round in all climates. Success depends on correct sizing (1 sq ft NFA per 150 sq ft attic), adequate intake vents, proper installation with sealed joints and end plugs, and routine maintenance to prevent clogging. Address problems promptly—blocked vents, animal intrusion, and storm damage compromise performance. For complex roofs or significant ventilation upgrades, consult certified roofing professionals to ensure code compliance and optimal system design.

🏠 Roofing Tips & Updates

Get free roofing advice, cost guides, and seasonal maintenance tips.

Roof Ridge Vent Installation: Step-by-Step DIY Guide (2026)

Roof ridge vent installation creates continuous exhaust ventilation along the roof peak, preventing heat and moisture buildup that shortens shingle lifespan and increases cooling costs. The process involves cutting a 1–2 inch slot along both sides of the ridge board, securing the vent with roofing nails, and covering it with ridge cap shingles that allow air to escape while blocking rain and snow. When balanced with adequate soffit intake vents, ridge vents can extend roof life by 20–30% and reduce attic temperatures by 30°F in summer.

This comprehensive guide covers planning, cutting techniques, installation steps, common mistakes, and when to hire professionals for safe, effective ridge vent installation.


Why Install Ridge Vents?

Benefits of Ridge Vent Systems:

Ventilation Requirements: Building codes typically require 1 square foot of net free ventilating area per 150 square feet of attic space, balanced 50/50 between intake (soffit) and exhaust (ridge).


Before You Start: Planning & Preparation

Assess Your Roof

Ridge Vent Suitability:

Calculate Ventilation Needs:

  1. Measure attic square footage (length × width)
  2. Divide by 150 = required net free area (NFA) in sq ft
  3. Multiply by 144 to convert to square inches
  4. Divide by 2 (half intake, half exhaust)
  5. Check ridge vent specs for NFA per linear foot
  6. Calculate linear feet of ridge vent needed

Example: 1,200 sq ft attic ÷ 150 = 8 sq ft NFA needed = 1,152 sq inches ÷ 2 = 576 sq inches exhaust. If ridge vent provides 18 sq inches NFA per foot, you need 32 linear feet of ridge vent.


Gather Materials & Tools

Materials:

Tools:


Step-by-Step Ridge Vent Installation

Step 1: Remove Existing Ridge Cap Shingles

Process:

  1. Starting at one end, use pry bar to carefully lift ridge cap shingles
  2. Remove nails without damaging underlying shingles
  3. Work along entire ridge length
  4. Inspect exposed ridge for damage (replace rotted boards before proceeding)
  5. Clean debris from ridge area

Pro Tip: Save removed caps if in good condition; reuse if they fit over new vent (reduces waste and cost).


Step 2: Mark and Cut Ridge Slot

Marking the Cut Line:

  1. Snap chalk line 1 inch on both sides of ridge board centerline (creates 2-inch total slot)
  2. Leave 6–12 inches uncut at each roof end for structural integrity
  3. For hip roofs, cut to intersection of hip and ridge; close gap with blocking

Cutting the Slot:

  1. Set circular saw blade depth to cut through decking only (typically ⅝–¾ inch) — DO NOT cut into ridge board
  2. Make steady, controlled passes along chalk lines
  3. Wear safety glasses (flying debris) and gloves
  4. Work from stable position with fall protection
  5. Remove cut decking pieces carefully (avoid damaging surrounding shingles)
  6. Clean slot of sawdust and debris

Critical Safety: Never over-cut depth. Cutting into ridge board compromises structural integrity. Test blade depth on scrap first.


Step 3: Prepare Ridge Opening

Sealing and Protection:

  1. Apply roofing cement along cut edges of slot (prevents moisture infiltration into exposed deck)
  2. Inspect for any protruding nails or splinters (remove or flatten)
  3. Ensure slot is clear and uniform width along entire length
  4. Verify soffit vents are unobstructed (check from attic that air can flow)

Step 4: Install Ridge Vent Sections

Positioning:

  1. Insert end plug into first ridge vent section (closes off end)
  2. Center vent over ridge slot using alignment guides or measuring tape
  3. Ensure vent sits flat against roof surface (no gaps)
  4. For best appearance, align first section flush with gable end

Fastening:

  1. Pre-fasten first section with 2-inch roofing nails through pre-drilled holes
  2. Nail along flanges (not through vent opening area)
  3. Space nails per manufacturer specs (typically every 6–12 inches)
  4. Drive nails flush but not so deep they dent or distort vent

Connecting Sections:

  1. Overlap next section per manufacturer (typically 1–3 inches)
  2. Use male/female connectors if provided (ensures tight seal)
  3. Maintain continuous coverage along entire ridge opening
  4. Cut final section to length with utility knife
  5. Install end plug on final section

Sealing:


Step 5: Install Ridge Cap Shingles

Cap Shingle Preparation:

Installation:

  1. Start at end opposite prevailing wind direction
  2. Position first cap shingle over ridge vent, overlapping vent by 5–6 inches on each side
  3. Nail twice per cap: one nail on each side, 1 inch from edge, 6 inches from exposed end
  4. Overlap next cap shingle 5–6 inches (exposing 5–6 inches of previous cap)
  5. Continue along ridge, maintaining consistent overlap and alignment
  6. Ensure nails penetrate through vent into roof deck (not just vent material)
  7. Final cap: seal with roofing cement instead of nailing

Quality Check:


Step 6: Final Inspection

Inspection Checklist:

Test: On warm day, compare attic temperature before and after installation. Properly vented attics should feel noticeably cooler.


Common Ridge Vent Installation Mistakes

  1. Cutting into ridge board → Structural damage, sagging roof
  2. Inadequate soffit intake → Ridge vent can’t exhaust without supply air
  3. Improper overlap at joints → Water infiltration at seams
  4. Over-tightening fasteners → Distorted vent, reduced airflow
  5. Leaving end gaps open → Rain, snow, and pests enter attic
  6. Misaligned cap shingles → Uneven appearance, potential leaks
  7. Skipping roofing cement → Wind-driven rain penetrates flanges

Ridge Vent Installation Costs (2025)

DIY Costs:

Professional Installation:

Factors Affecting Cost:


DIY vs. Professional Installation

DIY Feasible When:

Hire a Professional When:

Safety Warning: Ridge work is dangerous. Falls from roof peaks are often fatal. Use proper fall arrest systems or hire pros.


FAQ

How long does ridge vent installation take?
2–6 hours for experienced DIYers on typical 30–40 foot ridge. Professionals complete it in 1–3 hours. Complex roofs take longer.

Can I install ridge vents myself?
Yes, if you have roofing experience, safety equipment, and a simple roof. Cutting the ridge slot requires precision—mistakes are costly. Consider hiring pros for steep or complex roofs.

Do I need soffit vents with ridge vents?
Yes. Ridge vents exhaust air; soffit vents provide intake. Without balanced intake, ridge vents don’t function properly. Aim for 50/50 intake/exhaust ratio.

How much ridge vent do I need?
Calculate attic square footage ÷ 150 = required net free area in sq ft. Convert to sq inches (× 144), divide by 2 (exhaust only), then divide by vent’s NFA per foot.

What size slot do I cut for ridge vents?
Most ridge vents require a 1-inch slot on each side of the ridge board (2 inches total width). Always verify with manufacturer specifications.

Can ridge vents leak?
Properly installed ridge vents rarely leak. Most leaks result from improper sealing at end plugs, joint overlaps, or missing roofing cement on flanges.

Do ridge vents work in winter?
Yes. They exhaust moisture from attic year-round, preventing condensation, ice dams, and mold. Ventilation is critical in all seasons.


Conclusion

Roof ridge vent installation enhances attic ventilation, extends shingle lifespan, and reduces energy costs when properly executed with balanced soffit intake. By cutting a precise slot along the ridge, securing continuous vent sections, and finishing with overlapping cap shingles, DIYers with roofing experience can successfully complete installations on simple gable roofs. Complex roof geometries, steep pitches, and multi-story homes benefit from professional installation to ensure structural integrity and watertight sealing. Prioritize safety with fall protection, verify adequate soffit ventilation before starting, and always follow manufacturer specifications for lasting, leak-free performance.

🏠 Roofing Tips & Updates

Get free roofing advice, cost guides, and seasonal maintenance tips.

How to Install a Metal Roof: Step-by-Step Guide (2026)

Installing a metal roof delivers decades of durability, energy efficiency, and low maintenance when done correctly. The process involves preparing the deck with waterproof underlayment, installing drip edges and closure strips, laying panels from eaves to ridge with proper overlap, securing with specialized fasteners, and finishing with ridge caps and flashing around penetrations. Metal roofing is more DIY-friendly than many homeowners expect, especially exposed-fastener systems on simple gable roofs, though standing seam installations require professional expertise.

This comprehensive guide walks through every step of metal roof installation, from planning and material selection to final inspection, with safety tips, common mistakes to avoid, and when to hire professionals.


Before You Start: Planning & Preparation

Assess Your Roof

Structural Check:

Choose Your Metal Roofing:

Material: Steel (most common), aluminum (coastal/corrosion resistance), copper (premium), zinc.


Gather Materials & Tools

Materials Needed:

Tools Required:


Step-by-Step Metal Roof Installation

Step 1: Remove Old Roofing (If Required)

Options:

If Tearing Off:

  1. Remove shingles, underlayment, and nails
  2. Inspect deck thoroughly
  3. Replace damaged plywood or OSB
  4. Ensure flat, solid surface

Step 2: Install Underlayment

Purpose: Waterproof barrier protects against leaks, condensation, and ice dams.

Materials:

Installation:

  1. Start at eaves, roll horizontally toward ridge
  2. Overlap seams 4–6 inches
  3. Staple or nail every 12–18 inches
  4. Apply ice-and-water shield at eaves, valleys, penetrations
  5. Ensure wrinkle-free application

Pro Tip: Use high-temp underlayment (rated to 250°F+). Metal roofs reach 180°F in summer; standard felt degrades.


Step 3: Install Drip Edge

Purpose: Directs water into gutters, protects fascia from rot.

Installation:

  1. Eaves first: Install drip edge along bottom edge BEFORE underlayment in most cases (check local code)
  2. Rakes second: Install along gable ends OVER underlayment
  3. Overlap sections 2 inches
  4. Nail every 8–12 inches into deck (not drip hem)
  5. Ensure continuous, straight alignment

Step 4: Plan Panel Layout

Critical Planning:

Panel Orientation: Install perpendicular to eaves (vertical on most roofs) for best water shedding.


Step 5: Install Closure Strips

Purpose: Block gaps under panel ribs at eaves, preventing wind-driven rain, pests, and air infiltration.

Types:

Installation: Place along eaves over drip edge before first panel; press firmly to adhere.


Step 6: Install First Metal Panel

Critical Step: First panel sets alignment for entire roof.

Installation:

  1. Position panel at eave with 1–2 inch overhang past drip edge
  2. Square panel using rafter square (check both ends)
  3. Align with chalk line or roof edge
  4. Temporarily tack top corners with screws
  5. Verify straight alignment before full fastening
  6. Install screws in flat sections (not ribs) every 12–18 inches
  7. Place screws 1 inch from panel edges

Fastener Tips:


Step 7: Continue Installing Panels

Overlap Pattern:

Working Upward:

Cutting Panels:


Step 8: Install Ridge Cap

Purpose: Seals roof peak, provides ventilation (if vented ridge cap used).

Installation:

  1. Install ridge vent (if using) before cap
  2. Position ridge cap over peak, overlapping panels 6–8 inches on each side
  3. Overlap cap sections 6 inches (work from end opposite prevailing wind)
  4. Fasten through cap into ridge board every 12–18 inches
  5. Use longer screws to reach structural support
  6. Seal final cap end with butyl tape or end cap closure

Step 9: Install Flashing & Penetrations

Critical Areas:

Flashing Principles:


Step 10: Install Rake Trim & Final Details

Rake Trim (Gable Edges):

  1. Install after panels are in place
  2. Cover panel edges with trim pieces
  3. Fasten every 12–18 inches
  4. Overlap trim sections 2 inches

Final Steps:


Safety Considerations

Fall Protection (Non-Negotiable):

Metal-Specific Hazards:


DIY vs. Professional Installation

DIY Feasible When:

Hire a Professional When:

Cost Comparison:

DIY Savings: $4,000–$8,000 on 1,000 sq ft roof, but mistakes cost more to fix than hiring pros initially.


Common Metal Roofing Installation Mistakes

  1. Wrong fastener placement (in ribs instead of flats) → Leaks, panel damage
  2. Over-tightening screws → Crushed washers, future leaks
  3. Improper panel overlap → Water infiltration
  4. Skipping closure strips → Wind-driven rain, pests
  5. Poor first-panel alignment → Entire roof off-square
  6. Inadequate flashing → Leaks at penetrations, valleys
  7. Walking on panels incorrectly → Dents, scratches, bent ribs

FAQ

How long does it take to install a metal roof?
2–4 days for professional crews on typical 2,000 sq ft roof. DIY projects take 1–2 weeks depending on experience and crew size.

Can I install a metal roof myself?
Yes, for simple roofs with exposed-fastener panels. Standing seam systems require professional installation due to specialized equipment and expertise.

Do I need to remove shingles before installing metal?
Not always. You can install metal over one layer of shingles using furring strips, which saves time and disposal costs. See our metal over shingles guide.

What pitch is required for metal roofing?
Minimum 3:12 for most systems. Lower pitches require special underlayment and sealing methods. Consult manufacturer specifications.

How do you cut metal roofing panels?
Use tin snips for small cuts or a circular saw with metal-cutting blade for long cuts. Always wear safety glasses and gloves.

What screws do you use for metal roofing?
#12 or #14 self-tapping screws with neoprene/EPDM washers, typically 1–3 inches long depending on substrate. Match screw color to panel.

How much overhang should metal roofing have?
1–2 inches at eaves and rakes to ensure water drips into gutters and clears fascia.


Conclusion

Installing a metal roof requires careful planning, proper materials, and attention to detail, but delivers 40–70 years of low-maintenance performance. By following manufacturer specifications for underlayment, panel overlap, fastener placement, and flashing details, DIYers can successfully install exposed-fastener systems on simple roofs. Standing seam installations and complex roof geometries benefit from professional expertise to ensure watertight seams and long-term durability. Prioritize safety with fall protection, take time to align the first panel correctly, and never compromise on proper flashing—these steps separate successful metal roofs from problematic ones-

Next Steps:

Compare Metal Roofing Types
Calculate Metal Roof Costs

🏠 Roofing Tips & Updates

Get free roofing advice, cost guides, and seasonal maintenance tips.

TPO Roofing: Steps, Costs & Installation Methods (2026)

TPO roofing installation has become the preferred choice for commercial flat roofs due to its energy efficiency, durability, and cost-effectiveness. The process involves preparing the substrate, installing insulation, laying thermoplastic membrane sheets with proper overlaps, and heat-welding seams at 900°F to create watertight bonds. TPO systems last 15–30 years when installed correctly using mechanically fastened, fully adhered, or ballasted methods—each suited to different building requirements and budgets.

This comprehensive guide covers preparation, installation methods, heat welding techniques, flashing details, costs, and critical quality control steps that ensure your TPO roof performs reliably for decades.


What is TPO Roofing?

TPO (Thermoplastic Polyolefin) is a single-ply roofing membrane made from polypropylene and ethylene-propylene rubber. Its white reflective surface reduces cooling costs by up to 30%, and heat-welded seams create a monolithic, watertight surface stronger than the membrane itself.

Key Benefits:

Common Applications: Commercial buildings, warehouses, retail centers, schools, hospitals, low-slope residential roofs.


TPO Installation Methods

1. Mechanically Fastened (Most Common)

How It Works: Membrane fastened to deck with plates and screws through insulation, overlapping seams hide fasteners.

Cost: $8–$12 per sq ft installed
Best For: Most commercial applications, high-wind zones, reroofing projects

Pros:

Cons:

Fastener Spacing: 6–12 inches apart along seams, engineered for local wind uplift codes.


2. Fully Adhered

How It Works: Membrane bonded directly to insulation or deck with water-based or solvent adhesive.

Cost: $10–$15 per sq ft installed
Best For: Occupied buildings (no noise), aesthetic preference, high-foot-traffic roofs

Pros:

Cons:

Adhesive Application: Rolled or sprayed onto substrate; membrane pressed into place; seams heat-welded.


3. Ballasted

How It Works: Membrane laid loosely over insulation, held down with rounded river rock or pavers (10–15 lbs per sq ft).

Cost: $6–$10 per sq ft installed
Best For: Roofs with adequate structural capacity, minimal penetrations

Pros:

Cons:

Ballast Requirements: Minimum 10 lbs per sq ft; increased at edges/corners per wind calculations.


Step-by-Step TPO Installation Process

Step 1: Roof Deck Preparation

Critical Checks:

Pro Tip: Deck must be completely dry before membrane installation. Trapped moisture causes blistering and delamination.


Step 2: Install Insulation

Purpose: Energy efficiency, thermal barrier, smooth substrate for membrane.

Insulation Types:

Installation:

  1. Lay insulation boards in staggered pattern (offset seams)
  2. Use two layers if thickness exceeds 2 inches (prevents thermal bridging)
  3. Mechanically fasten or adhere per manufacturer specs
  4. Install tapered system if roof lacks drainage slope
  5. Add coverboard layer (gypsum or high-density polyiso) for puncture protection

Thickness: Typically 2–6 inches total, depending on climate zone energy codes.


Step 3: Lay TPO Membrane

Membrane Relaxation:

Layout Strategy:

Membrane Handling:


Step 4: Fasten or Adhere Membrane

Mechanically Fastened Method:

  1. Install plates and fasteners along seam edges (6–12 inch spacing)
  2. Secure through membrane and insulation into deck
  3. Drive fasteners flush (not over-driven)
  4. Overlap next sheet 6 inches, covering fastener line
  5. Continue across roof in rows

Fully Adhered Method:

  1. Apply adhesive to substrate with roller or sprayer
  2. Allow adhesive to tack per manufacturer instructions
  3. Roll membrane into adhesive, working from center outward
  4. Use roller to ensure full contact and eliminate air pockets
  5. Overlap seams 6 inches for welding

Step 5: Heat Weld Seams

The Critical Step: Proper heat welding creates seams stronger than the membrane itself.

Heat Welding Process:

Equipment:

Technique:

  1. Insert welding nozzle between overlapping sheets
  2. Apply heat while moving at consistent speed
  3. Follow immediately with silicone roller to press seam
  4. Create 1.5–2 inch weld width
  5. Avoid over-heating (scorching) or under-heating (weak bond)

Quality Control:

Pro Tip: Temperature, speed, and roller pressure must be calibrated daily for ambient conditions. Cold weather requires higher heat; wind affects cooling.


Step 6: Install Flashing Details

Critical Flashing Areas:

Flashing Installation:

  1. Cut TPO flashing pieces to fit
  2. Clean all surfaces thoroughly
  3. Apply primer where specified (porous substrates)
  4. Heat weld flashing to field membrane
  5. Secure top edges with termination bars
  6. Seal exposed edges with compatible caulk

Drain Preparation:


Step 7: Final Inspection & Quality Control

Inspection Checklist:

Testing:


TPO Roofing Installation Costs (2025)

National Averages:

Cost Breakdown (2,000 sq ft roof, mechanically fastened):

ComponentCost
TPO Membrane (60 mil)$2,000–$3,000
Insulation (4″ polyiso)$3,000–$4,500
Fasteners & Plates$800–$1,200
Labor (3–5 days)$6,000–$9,000
Edge Metal & Flashing$1,500–$2,500
Total$13,300–$20,200

Factors Affecting Cost:


Common TPO Installation Mistakes

  1. Insufficient Membrane Relaxation → Wrinkles cause weak seams and ponding
  2. Improper Welding Temperature/Speed → Weak seams fail prematurely
  3. Skipping Seam Probing → Undetected leaks cause water damage
  4. Poor Flashing Details → 80% of TPO leaks occur at flashings
  5. Installing on Wet Substrate → Moisture traps cause blistering
  6. Wrong Fastener Spacing → Wind uplift failures
  7. Ignoring Drainage → Ponding water voids warranties

FAQ

How long does TPO roofing installation take?
2–5 days for typical 2,000 sq ft roof, depending on complexity, weather, and crew size. Large commercial roofs may take 1–4 weeks.

Can I install TPO roofing myself?
No. TPO installation requires specialized heat-welding equipment, training, and experience. Improper installation voids warranties and causes leaks. Always hire certified professionals.

What’s the difference between mechanically fastened and fully adhered TPO?
Mechanically fastened uses plates and screws (faster, cheaper). Fully adhered uses bonding adhesive (smoother, better wind resistance, higher cost).

How long does TPO roofing last?
15–30 years with proper installation and maintenance. Lifespan depends on membrane thickness (45–80 mil), climate, and maintenance quality.

What thickness TPO membrane should I use?
60 mil is standard for most commercial applications. 80 mil for high-traffic or mechanically intensive roofs. 45 mil for budget-conscious projects with minimal foot traffic.

Is TPO better than EPDM or PVC?
TPO offers best balance of cost, energy efficiency, and performance. EPDM is cheaper but less energy-efficient. PVC is more chemical-resistant but costlier.

Do TPO roofs need maintenance?
Yes. Inspect twice yearly, clean drains, remove debris, check seams. Professional inspections every 3–5 years extend lifespan.


Conclusion

TPO roofing installation combines energy efficiency, durability, and cost-effectiveness when executed with proper substrate preparation, insulation, membrane attachment, and heat-welded seams. Mechanically fastened systems offer fastest installation and best wind resistance for most commercial applications, while fully adhered methods provide superior aesthetics and performance for occupied buildings. Always hire certified TPO installers with heat-welding expertise, verify quality control through seam probing, and maintain proper drainage to ensure your TPO roof delivers 15–30 years of reliable, leak-free performance.

🏠 Roofing Tips & Updates

Get free roofing advice, cost guides, and seasonal maintenance tips.

How to Install Metal Roofing Over Shingles: Complete Guide

Installing metal roofing over shingles eliminates costly tear-off labor, reduces waste, and can save homeowners $2,000–$5,000 compared to full replacement. This overlay method works when existing shingles are in good condition, local codes permit it, and proper preparation with underlayment and furring strips creates a ventilated, flat surface for metal panels. However, the approach isn’t suitable for every roof damaged shingles, structural issues, or poor ventilation can compromise the new metal roof’s performance.

This guide covers when overlay installation makes sense, required materials and tools, step-by-step installation process, ventilation strategies, code compliance, and common mistakes that lead to leaks or premature failure.


Can You Install Metal Roofing Over Shingles?

According to the Metal Roofing Alliance, metal now accounts for nearly 15% of all residential roofing installations in the U.S., up from under 5% a decade ago — a trend driven by energy efficiency, longevity, and improved aesthetics.

Short Answer: Yes, in most cases, but only if specific conditions are met.

When Overlay Works:

When You Must Tear Off:

Weight Considerations: Metal roofing weighs 1/3 to 1/2 as much as asphalt shingles, making it structurally safe to install over existing materials without additional support.​


How to Install Metal Roofing 2025
How to Install Metal Roofing guide 2025

Benefits of Installing Metal Over Shingles

Cost Savings

Tear-Off Costs Avoided:

Total Savings: $2,000–$5,000 for typical 2,000 sq ft roof.

Time Efficiency

Timeline Comparison:

Faster completion means less weather exposure risk and disruption.

Environmental Benefits

Keeping old shingles out of landfills reduces construction waste. Asphalt shingles account for 11 million tons of landfill waste annually.

Additional Insulation

The existing shingle layer adds an insulating barrier between metal and deck, improving thermal performance and reducing noise during rain.


Drawbacks to Consider

Potential Issues:

When Drawbacks Outweigh Benefits: If existing shingles have widespread damage, structural issues exist, or ventilation is poor, tear-off and fresh start are safer long-term investments.


Step-by-Step Installation Process

Step 1: Roof Inspection

Critical Checks:

If Problems Found: Repair damaged areas or consider full tear-off.


Step 2: Clean and Repair Surface

Preparation:

Pro Tip: Use roof jacks and safety harness. Metal roofs are slippery during installation.


Step 3: Install Synthetic Underlayment

Purpose: Moisture barrier and smooth surface for metal panels.

Material: High-temperature synthetic underlayment (not felt—traps heat)

Installation:

Critical: Use breathable underlayment to prevent moisture trapping between layers.


Step 4: Install Furring Strips (Purlins)

Purpose: Creates ventilation gap, flat surface, and attachment points for metal panels.

Material: 1×4 or 2×4 treated lumber

Spacing: 24 inches on-center (perpendicular to metal panel direction)

Installation:

  1. Snap chalk lines to mark furring strip locations
  2. Run strips horizontally across roof (vertical for vertical-seam panels)
  3. Secure through shingles into rafters with 3-inch deck screws
  4. Verify strips are level and straight (use string lines)
  5. Add blocking at panel seams and ridge

Ventilation: Leave 1–2 inch gaps at eaves and ridge to allow airflow beneath metal.


Step 5: Install Drip Edge and Trim

Before Panels:


Step 6: Install Metal Panels

Panel Types:

Installation (Exposed Fastener):

  1. Start at eave, align first panel with edge (1-inch overhang)
  2. Square panel using rafter square
  3. Fasten with metal roofing screws (with neoprene washers) into furring strips
  4. Overlap next panel per manufacturer specs (typically 1–2 inches)
  5. Maintain consistent overlap and screw pattern across roof
  6. Work from bottom to top, eave to ridge

Fastener Placement:

Pro Tip: Pre-drill screw holes in cold weather to prevent panel cracking.


Step 7: Install Ridge Cap and Flashing

Ridge Cap:

Final Flashings:


Step 8: Final Inspection

Quality Checks:

Building Inspection: Schedule final inspection per permit requirements.


Materials and Tools Needed

Materials (2,000 SF Roof)

ItemQuantityCost
Metal Panels (standing seam or exposed fastener)22 squares (10% waste)$6,000–$12,000
Synthetic Underlayment22 squares$400–$800
Furring Strips (1×4, 24″ O.C.)800 linear feet$400–$600
Metal Roofing Screws (1,000–1,500 count)2–3 boxes$150–$300
Drip Edge & Trim200 linear feet$300–$600
Ridge Cap40 linear feet$200–$400
Closure Strips100 linear feet$50–$100
TOTAL MATERIALS$7,500–$14,800

Labor (if hiring pros): $3,000–$6,000 (overlay saves $2,000–$5,000 vs. tear-off)


Tools Required


Ventilation Requirements

Critical: Trapped moisture between metal and shingles causes rot and mold.

Ventilation Strategy:

  1. Ridge Vent: Install vented ridge cap (continuous exhaust)
  2. Soffit Vents: Ensure adequate intake at eaves
  3. Air Gap: Furring strips create 1–2 inch ventilation channel beneath metal
  4. Ratio: 1 sq ft net free area per 150 sq ft of attic space (balanced intake/exhaust)

Without Proper Ventilation: Condensation forms on underside of metal, degrading shingles and deck.


Building Codes and Permits

Code Compliance:

Before Starting:

Failure to Permit: Can result in fines, forced tear-off, insurance claim denials.


Common Mistakes to Avoid

  1. Skipping furring strips → Uneven surface, no ventilation, screw pullout
  2. Installing over damaged shingles → Hidden rot worsens, future leaks
  3. Wrong screw placement (not into furring strips) → Fasteners pull out
  4. Inadequate ventilation → Trapped moisture, condensation, rot
  5. Ignoring code requirements → Permit violations, insurance issues
  6. Over-tightening screws → Crushed neoprene washers, eventual leaks
  7. Poor panel alignment → Water infiltration at overlaps

FAQ

How much does it cost to install metal roofing over shingles?
$10,500–$20,800 for a 2,000 sq ft roof (materials + labor). Overlay saves $2,000–$5,000 vs. tear-off and replacement.

Do I need furring strips to install metal over shingles?
Yes. Furring strips create ventilation gaps, provide flat fastening surface, and prevent moisture trapping. Skipping them voids most warranties and causes rot.

Can I DIY metal roof installation over shingles?
Yes, if you have roofing experience, proper safety equipment, and a simple roof. Exposed-fastener panels are most DIY-friendly. Hire pros for standing seam systems.

Will installing metal over shingles void my warranty?
It depends on the manufacturer. Some allow overlay with proper preparation (furring strips, ventilation); others require tear-off. Verify before purchasing materials.

How long does metal roofing over shingles last?
30–50 years with proper ventilation and installation. Lifespan matches standard metal roof installations when done correctly.

Do I need a permit to install metal over shingles?
Yes, in most jurisdictions. Contact your local building department to confirm requirements and schedule inspections.

What if my shingles are damaged?
Repair localized damage or tear off entirely. Installing over widespread damage conceals problems and leads to costly future repairs.


Conclusion

Installing metal roofing over shingles saves time, money, and environmental waste when conditions are right: sound structure, good shingles, code compliance, and proper ventilation design. Furring strips and synthetic underlayment are non-negotiable for creating a ventilated, flat surface that prevents moisture trapping. While overlay installation reduces costs by $2,000–$5,000, attempting it over damaged shingles or without adequate ventilation leads to expensive failures. Always verify local codes, obtain permits, and prioritize proper preparation for a metal roof that lasts 30–50 years.

🏠 Roofing Tips & Updates

Get free roofing advice, cost guides, and seasonal maintenance tips.

About

Our construction business is dedicated to delivering high-quality, innovative building solutions, every project is completed

Contact

+1 337 376 8664

7725 W 6th Ave unit b, Lakewood, CO 80214, USA

Roof Installation © 2026 All Right Reserved

📊 Free Cost Guide 🔢 Free Calculator