Preloader Close
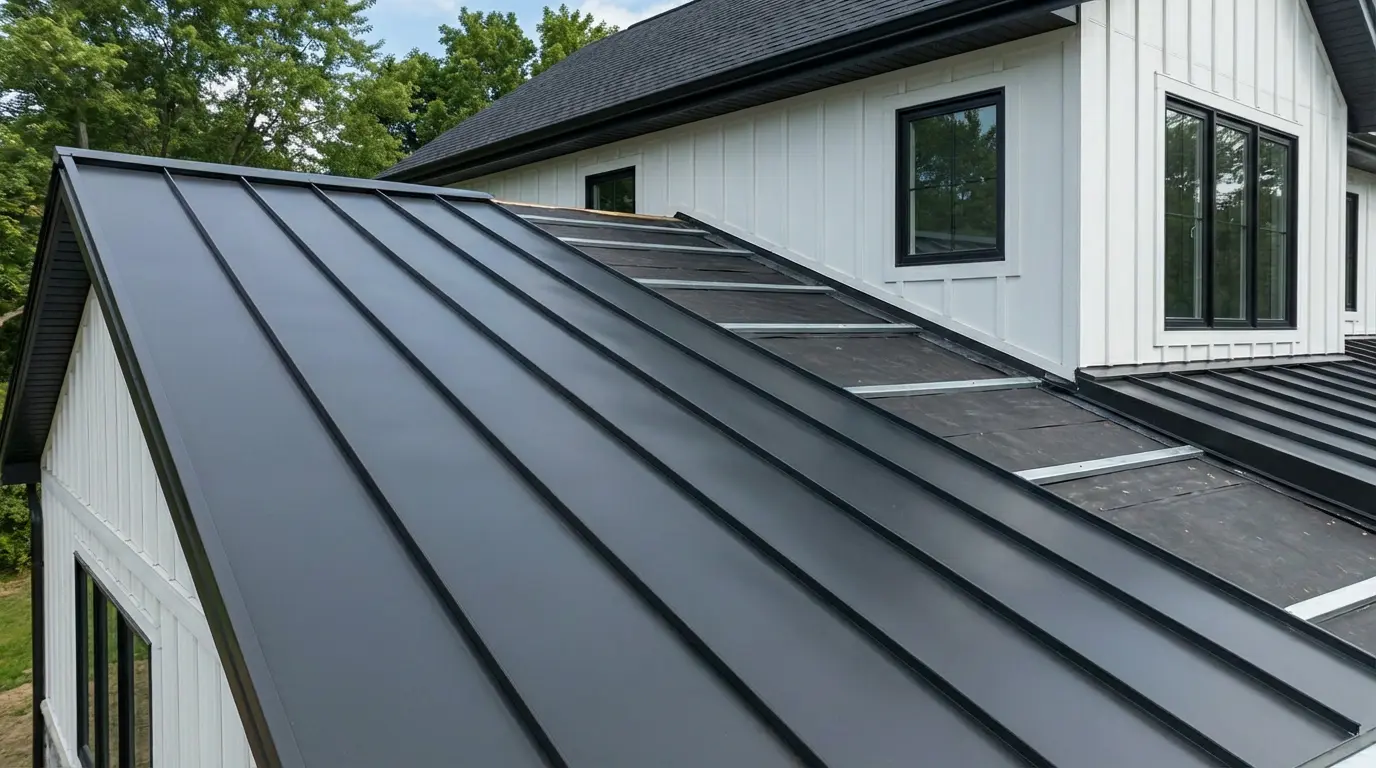
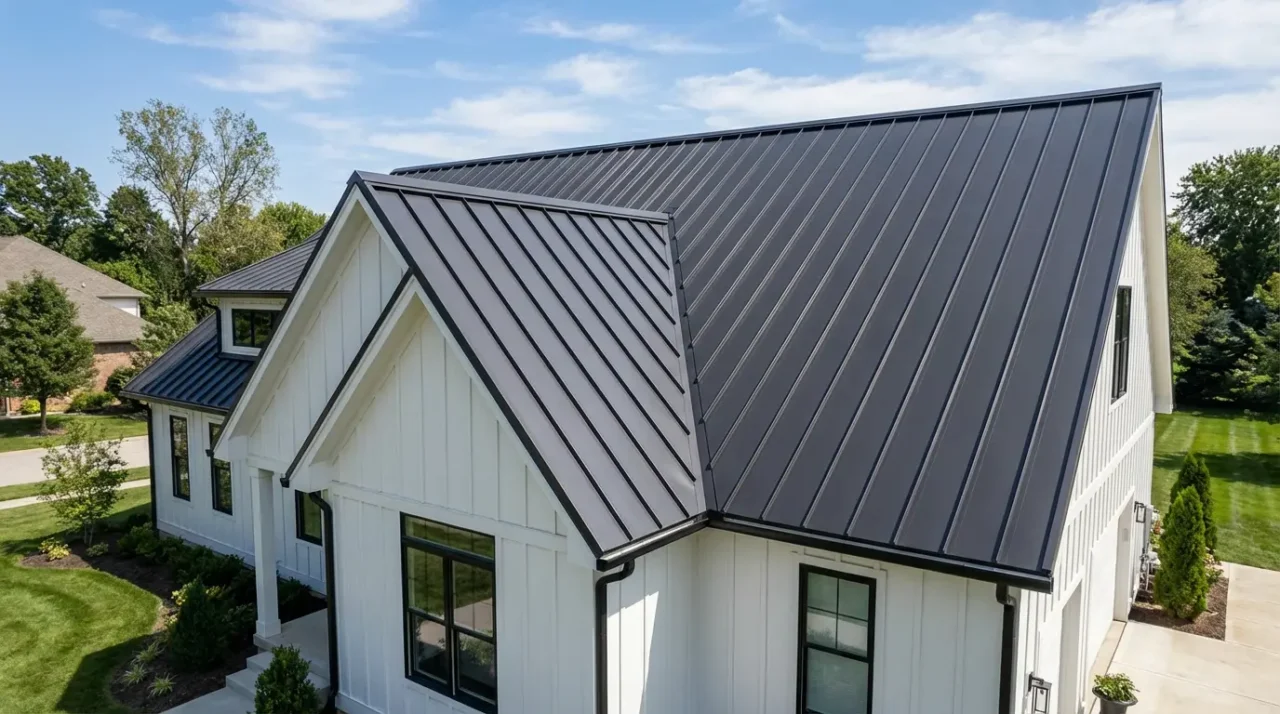
Snap lock standing seam metal roof systems cost $8-$14 per square foot installed and feature factory-formed male and female edges that interlock over concealed clips without requiring expensive mechanical seamers, making them 30-40% faster to install than traditional field-seamed systems. Standard snap lock panels measure 12-19 inches wide with 1.5-2 inch raised seams, secured using floating clips spaced 12 inches on center at roof edges and 24 inches in field areas to accommodate thermal expansion. This snap-together design creates perfectly straight standing seams while allowing DIY installation, though minimum roof slope requirements of 3:12 pitch (versus 0.5:12 for mechanical seam) limit low-slope applications.
Table of Contents
Standing seam metal roofing systems dominate the residential and commercial roofing market, with snap lock variations accounting for approximately 60% of new installations due to simplified installation requirements and cost savings averaging $2-$4 per square foot compared to mechanically seamed alternatives. The snap lock mechanism eliminates the need for $3,000-$8,000 mechanical seaming equipment while producing consistent, factory-quality seams that contractors and DIY installers can achieve using basic hand tools.
This comprehensive guide covers snap lock standing seam panel specifications, complete installation procedures, clip spacing requirements, cost comparisons vs mechanical seam systems, tool requirements, common installation mistakes, and when snap lock makes sense versus traditional field-seamed metal roofing.
What is Snap Lock Standing Seam Metal Roof?
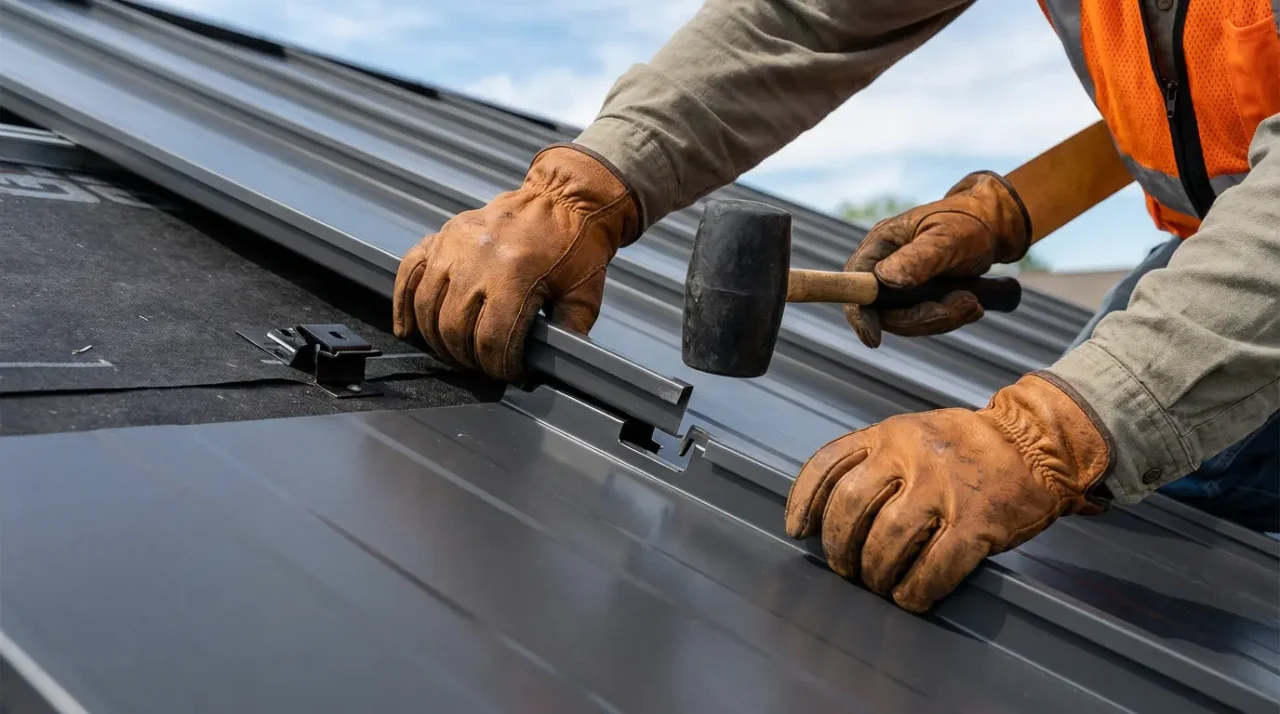
Snap lock standing seam metal roofing uses factory-bent panels with pre-formed interlocking edges one male edge and one female edge that snap together over concealed metal clips secured to the roof deck, creating continuous vertical seams without mechanical crimping tools. Each panel features a raised seam (typically 1.5-2 inches high) that runs perpendicular to the roof slope, with the snap-lock mechanism providing weather-tight connections through hand pressure, foot pressure, or light mallet taps.
Snap Lock vs Mechanical Seam Standing Seam
Field-Seamed (Mechanical) Standing Seam:
- Requires mechanical seaming tools ($3,000-$8,000 investment)
- Panels crimped together on-site using hand seamers or electric seamers
- Creates slight imperfections for traditional aesthetic
- Suitable for low-slope roofs (down to 0.5:12 pitch)
- Installation time: 8-12 hours per square (100 sq ft)
Snap Lock Standing Seam:
- No mechanical seamers required panels snap together by hand
- Factory-formed edges ensure perfectly straight seams
- Faster installation: 5-8 hours per square
- Minimum slope requirement: 3:12 pitch
- Cost savings: $2-$4 per square foot vs mechanical seam
Key Components of Snap Lock Systems
Concealed Clips:
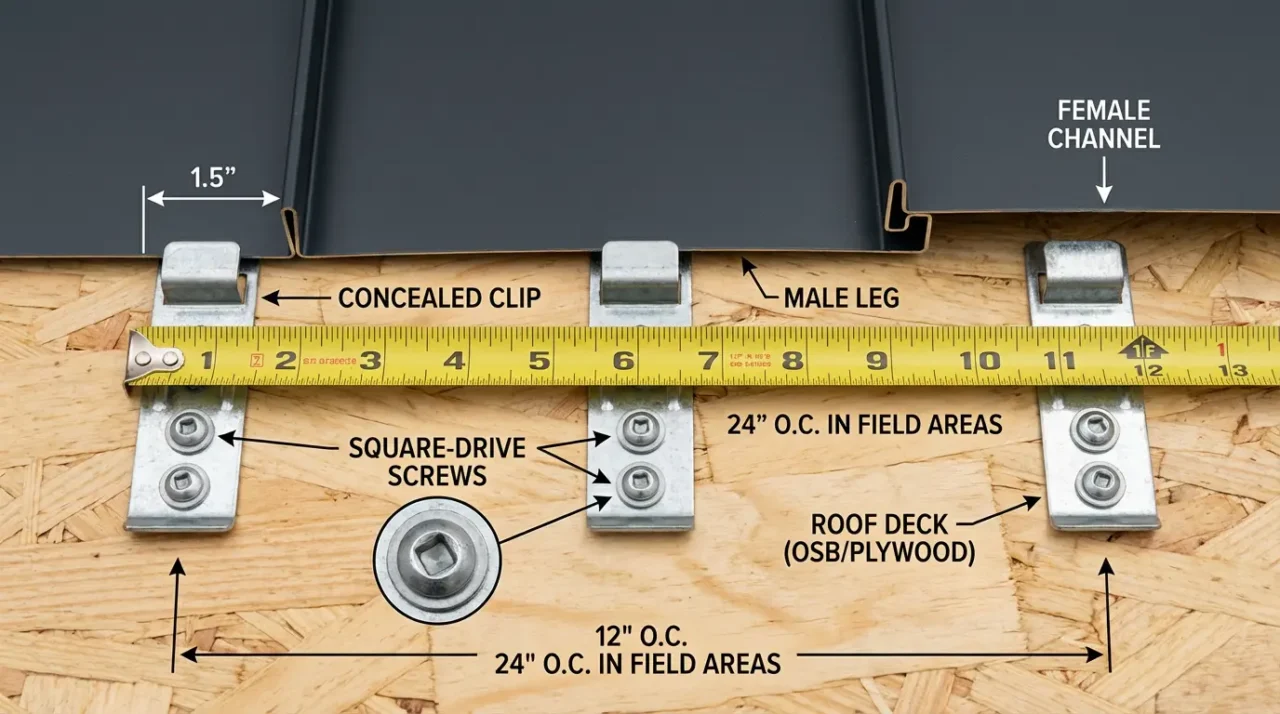
Aluminum or galvanized steel clips attach to roof deck with screws, hooking over panel edges to secure panels while allowing thermal movement. Clip spacing determines wind uplift resistance and panel stability.
Male Edge (Hook Edge):
Raised vertical leg with outward-facing hook that snaps over the clip and into the adjacent panel’s female edge.
Female Edge (Receiving Edge):
Inward-facing channel that receives the male edge from the adjacent panel, creating the interlock.
Floating Attachment:
Clips secure panels at seams only never through panel faces allowing metal to expand/contract 1/8 to 1/4 inch per 20 feet of length with temperature changes.
Snap Lock Standing Seam Metal Roof Cost (2026 Pricing)
Material costs, panel gauge, finish quality, and installation complexity determine total snap lock standing seam project expenses.
Cost Per Square Foot Breakdown
| Cost Component | DIY Material Cost | Professional Install Cost | Notes |
|---|---|---|---|
| Snap Lock Panels (24-26 gauge) | $3.50-$5.50/sf | $5.50-$8.50/sf | Painted steel finish |
| Snap Lock Panels (22 gauge premium) | $4.50-$6.50/sf | $6.50-$10.00/sf | Kynar 500/PVDF coating |
| Aluminum Snap Lock | $5.00-$7.50/sf | $7.50-$11.50/sf | .032-.040 thickness |
| Concealed Clips + Fasteners | $0.40-$0.70/sf | Included | 250-300 clips per square |
| Underlayment (synthetic high-perm) | $0.55-$0.85/sf | Included | Required for warranty |
| Trim/Flashing (eave, ridge, rake) | $8-$15/linear ft | Included | Custom-bent to match panels |
| Labor (professional installation) | N/A | $3.00-$5.50/sf | Varies by region/complexity |
| Total Installed Cost | $5.00-$8.00/sf | $8.00-$14.00/sf | Average residential project |
Project Cost Examples by Roof Size
1,200 SF Ranch Home (Simple Gable, 5:12 Pitch):
- DIY materials: $6,000-$9,600
- Professional installation: $9,600-$16,800
- Time to install (DIY): 4-6 days
- Time to install (professional crew): 2-3 days
2,400 SF Two-Story (Hip Roof, Multiple Dormers):
- DIY materials: $12,000-$19,200
- Professional installation: $19,200-$33,600
- Complexity adds 20-35% to baseline costs
3,500 SF Complex Roof (Multiple Valleys, Skylights, 8:12+ Pitch):
- Professional installation recommended: $28,000-$49,000
- Steep pitch adds 25-40% labor premium
- Includes skylight integration and complex flashing
Snap Lock Standing Seam Panel Specifications
Understanding panel dimensions, gauge options, and material choices ensures proper system selection for your application.
Standard Panel Dimensions
Panel Width (Coverage):
- 12 inches: Narrow profile for traditional look, more seams per roof
- 16 inches: Most common residential width, balances aesthetics and efficiency
- 17-18 inches: Popular commercial width
- 19 inches: Maximum coverage, fewer seams, modern appearance
Seam Height:
- 1.5 inches: Standard residential snap lock profile
- 2.0 inches: Enhanced profile for commercial or premium residential
- 2.5 inches: Maximum height for architectural emphasis
Panel Length:
- Custom-cut to roof measurement (typically 6-40 feet continuous)
- Panels run continuously from eave to ridge for single-piece installation
- No horizontal seams = superior weather protection
Material Gauge and Thickness
| Gauge | Thickness (inches) | Weight (lbs/sf) | Best Application | Durability Rating |
|---|---|---|---|---|
| 29 gauge | 0.0142″ | 0.60 | Budget residential, low-wind zones | 30-40 years |
| 26 gauge | 0.0179″ | 0.75 | Standard residential, most common | 40-50 years |
| 24 gauge | 0.0239″ | 0.95 | Premium residential, high-wind zones | 50-60 years |
| 22 gauge | 0.0299″ | 1.20 | Commercial, coastal applications | 60-70 years |
Aluminum Options:
- .032″ thickness: Equivalent to 26-27 gauge steel
- .040″ thickness: Equivalent to 24 gauge steel
- Benefits: Rust-proof, lighter weight (40% less than steel), higher cost ($1.50-$2.50/sf premium)
Paint and Finish Systems
Polyester Paint (Economy):
- Cost: Baseline pricing
- Warranty: 25-30 years fade/chalk resistance
- Best for: Budget projects, non-visible roofs
SMP (Silicone Modified Polyester):
- Cost: Add $0.30-$0.60/sf
- Warranty: 30-35 years
- Best for: Standard residential applications
PVDF/Kynar 500 (Premium):
- Cost: Add $0.80-$1.50/sf
- Warranty: 40+ years fade/chalk resistance
- Best for: Coastal, high-UV environments, premium homes
Color Selection Impact:
- Light colors (white, light gray, tan): Better heat reflection, lower cost
- Dark colors (black, dark bronze, dark gray): Heat absorption, +$0.20-$0.40/sf premium
- Custom colors: +$0.50-$1.00/sf, longer lead times
How to Install Snap Lock Standing Seam Metal Roof: Step-by-Step
Proper installation requires attention to layout, clip placement, and thermal expansion accommodation.
Pre-Installation Requirements
Roof Deck Preparation:
- Minimum 15/32″ plywood or 7/16″ OSB sheathing
- Rafters spaced maximum 24 inches on center
- Moisture content below 19% verified with moisture meter
- All damaged sections replaced, deck smooth and flat
Underlayment Installation:
- High-perm synthetic underlayment (30+ perms minimum) required
- Install horizontally from eave to ridge
- 6-inch side laps, 6-inch end laps
- Ice and water shield in valleys and first 24 inches at eaves (cold climates)
Minimum Slope Verification:
- Snap lock systems require 3:12 pitch minimum (3 inches rise per 12 inches run)
- Lower slopes risk water infiltration at snap connections
- Mechanical seam systems required for slopes under 3:12
Step 1: Install Eave Drip Edge and Trim
Begin at the eave (bottom edge) by installing drip edge trim under the underlayment to direct water away from fascia boards. The eave trim features a hemming channel that secures panel bottom edges while allowing thermal expansion panels hook into the 1-inch hem but can slide lengthwise as metal expands/contracts.
Eave Trim Installation:
- Position drip edge flush with fascia top
- Secure with pancake head screws every 12 inches
- Overlap trim pieces 2 inches minimum at joints
- Seal overlaps with butyl tape or approved sealant
Step 2: Install Rake Trim and Valley Flashing
Rake Trim (Gable Edges):
Install sub-panel flashing at rake edges before panels, creating a pocket that conceals trimmed panel edges for clean appearance. Secure every 12 inches with fasteners appropriate for substrate.
Valley Flashing:
- Use pre-bent valley metal or field-form from flat stock
- Minimum 24 inches wide (12 inches each side of valley center)
- Apply ice and water shield under valley metal
- Install joggle cleats every 12 inches along valley centerline for panel attachment
Step 3: Determine Panel Layout and Cut First Panel
Calculate panel layout to achieve symmetric appearance:
- Measure roof width at eaves and ridge
- Divide by panel coverage width (e.g., 16 inches)
- Adjust first and last panel widths for equal appearance
- Ensure standing seams align across valleys and on both sides of hips
Cutting First Panel:
- Trim width using tin snips or shears (cut from male edge side only)
- Cut panels 1/8 to 1/4 inch short of ridge to accommodate thermal expansion
- Notch vertical legs at eave end equal to hem depth (typically 1 inch)
- Use panel hemming tool to fold eave end 180 degrees over drip edge
Step 4: Install Concealed Clips
Clip spacing determines wind uplift resistance and must follow manufacturer specifications:
Edge Zone Clip Spacing (first 3 panels from each rake):
- 12 inches on center along entire seam length
- Higher wind loads at roof perimeter require closer spacing
Field Area Clip Spacing (interior panels):
- 6 inches from eave end (first clip)
- 12 inches from eave (second clip)
- 24 inches on center for remaining seam length
- 12 inches from ridge (final clip before ridge)
Clip Installation Technique:
- Position clip over panel male edge location
- Secure with flathead square-drive screws (never Phillips head)
- Use drill with clutch setting to prevent over-tightening (never impact drivers)
- Tighten until clip is snug but panel can still slide freely for thermal movement
- Verify panel slides 1/8 to 1/4 inch in both directions after all clips installed
Step 5: Install First Panel
Position the first panel with trimmed edge tucked into rake trim pocket:
- Align panel square to eave and ridge (critical for entire roof alignment)
- Hook hemmed bottom edge over eave drip edge
- Press panel down firmly to seat hem
- Verify panel coverage at ridge and eave (should match calculations)
- Check plumb alignment with level or straight edge
Critical: Have helpers at eave and ridge simultaneously verify panel position before proceeding first panel alignment determines squareness of entire installation.
Step 6: Snap Subsequent Panels into Place
Each panel snaps over the clips and into the previous panel:
- Position panel male edge over installed clips
- Align female edge with previous panel’s male edge
- Starting at eave, press down firmly or tap with rubber mallet until snap is heard/felt
- Work from bottom to top, snapping entire seam length
- Verify seam is fully engaged no gaps visible
- Check that panel slides freely after snapping (confirms proper thermal movement)
Installation Speed:
Experienced installers snap 200-300 linear feet of seam per hour; beginners allow 100-150 feet per hour.
Step 7: Valley and Hip Transitions
Valley Panel Treatment:
- Install panels continuous across valley on both sides
- Field-cut valley panel to fit tight between panel ribs
- Mark panel for valley cut using chalk line
- Cut panels at 45-degree angle along valley centerline
- Hand-bend panel bottom edge to match valley slope angle
- Lock panel onto joggle cleat along valley before pushing tight
- Back panel off 1/8 inch from valley center to allow expansion
Hip Transitions:
Similar process to valleys but using hip clips and pre-bent hip cap trim that covers seam intersection.
Step 8: Ridge Cap Installation
Ridge Closure Process:
- Install panels continuous to ridge on both sides
- Field-cut Z-closure pieces to fit tight between panel ribs
- Apply 7/8-inch double-bead butyl tape to Z-closure base
- Install Z-closures onto panels at both sides of ridge
- Fasten Z-closures with appropriate screws (minimum 4 per piece, 12 inches maximum spacing)
- Install ridge cap trim over Z-closures
- Secure ridge cap per manufacturer specifications (typically exposed fasteners every 12 inches)
Vented Ridge Options:
Use ridge vent clips and perforated closure material to maintain attic ventilation while sealing ridge against weather infiltration.
Step 9: Penetration Flashing (Vents, Chimneys, Skylights)
Pipe Vent Flashing:
- Install panels continuous across vent location
- Apply 7/8-inch double-bead tape sealant to vent clip legs
- Install 2 vent clips toward top of panel (one fastener each, lower position only)
- Lift upper end of clips, tuck vent boot flange underneath
- Secure upper fasteners through boot flange into clips
- Apply additional sealant around boot base
Skylight Integration:
Use manufacturer-specific metal roof flashing kits (Velux, Fakro) designed for standing seam profiles these kits include step flashing that integrates with panel seams without penetrating roof deck.
Snap Lock Standing Seam Tools and Equipment
Required tools for DIY installation differ significantly from mechanical seam requirements.
Essential Tools (Required)
- Tin Snips/Aviation Shears: Left-cut, right-cut, and straight-cut for trimming panels ($15-$40 each)
- Rubber Mallet: For tapping panels into snap engagement without denting ($12-$25)
- Cordless Drill with Clutch: For installing clips never use impact drivers ($100-$300)
- Square-Drive Bit Set: Flathead square-drive bits prevent cam-out (#2 and #3 sizes, $8-$15)
- Measuring Tape (25-30 ft): For layout and panel measurement ($15-$30)
- Chalk Line: For marking cut lines and layout lines ($8-$15)
- Speed Square: For checking panel alignment and making angle cuts ($10-$20)
- Panel Hemming Tool: For creating eave hem ($40-$80)
- Level (4-6 ft): Verify first panel plumb alignment ($30-$60)
- Safety Equipment: Roof harness, non-slip shoes, gloves, safety glasses ($150-$400)
Helpful Tools (Recommended)
- Panel Cart/Dolly: Moves panels from delivery to roof without damage ($80-$200)
- Panel Lifter: Assists with positioning long panels ($50-$120)
- Bending Brake (48-60″): For custom flashing fabrication ($300-$800)
- Circular Saw with Metal Blade: Faster panel trimming than snips ($120-$250)
- Cordless Screwdriver: Fine-tuning clip tension ($60-$150)
Tools NOT Required (Snap Lock Advantage)
- ❌ Mechanical Seamer ($3,000-$8,000 savings)
- ❌ Electric Seaming Cart ($5,000-$12,000 savings)
- ❌ Seaming Pliers (manual crimper)
- ❌ Specialty bending tools for field seaming
Total Tool Investment:
- DIY snap lock: $500-$1,200
- Professional snap lock: $1,500-$3,000
- Mechanical seam professional: $8,000-$15,000
Common Snap Lock Standing Seam Installation Mistakes
Even experienced installers make errors that compromise performance and warranty coverage.
Mistake 1: Using Impact Drivers for Clip Installation
Problem: Impact drivers deliver sudden torque that over-tightens clips, preventing thermal movement and causing panel buckling or fastener stripping.
Solution: Use cordless drills with adjustable clutch settings. Set clutch to stop when clip is snug but panel still slides freely. Manufacturers specifically prohibit impact drivers in installation manuals.
Cost of Error: Warped panels, popped fasteners, voided warranty.
Mistake 2: Incorrect Clip Spacing
Problem: Spacing clips too far apart (over 24 inches in field, over 12 inches at edges) allows panels to flutter in wind, creating noise and accelerating fastener fatigue.
Solution: Follow manufacturer spacing requirements exactly:
- 12″ OC at roof edges (3 panels from rake/eave)
- First clip 6″ from eave, second at 12″, then 24″ OC in field
- 12″ from ridge for final clip
Cost of Error: Wind damage, noise complaints, expensive re-fastening.
Mistake 3: Inadequate Thermal Expansion Allowance
Problem: Installing panels too tight against ridge or in valleys without expansion gaps causes buckling when metal expands in summer heat (steel expands 1/8″ per 20 feet per 100°F temperature increase).
Solution:
- Cut panels 1/8 to 1/4 inch short of ridge
- Back valley panels off 1/8 inch from valley center after locking
- Verify all panels slide freely after clip installation
- Never use sealant or fasteners that restrict panel movement
Cost of Error: Buckled panels (“oil canning”), stress cracks at fasteners.
Mistake 4: First Panel Not Square
Problem: If first panel isn’t perfectly aligned perpendicular to eave and parallel to rake, every subsequent panel magnifies the error by the final panel, seams may be several inches out of alignment.
Solution:
- Measure from eave to ridge at both panel edges before securing
- Have helpers at eave and ridge verify alignment simultaneously
- Use string lines or laser level for long panels (over 30 feet)
- Don’t rush first panel take extra time to ensure perfection
Cost of Error: Entire roof out of square, obvious seam misalignment, complete re-installation required.
Mistake 5: Snapping Panels from Top to Bottom
Problem: Attempting to snap seams starting at ridge and working toward eave can trap air or create incomplete engagement at bottom.
Solution: Always snap from bottom (eave) to top (ridge). This ensures each section locks completely before proceeding upward, and gravity assists proper seating.
Mistake 6: Over-Tightening Ridge/Hip Fasteners
Problem: Fasteners that penetrate through panel faces (exposed fasteners at ridge, hip, and rake trim) must not over-compress metal, which prevents thermal movement and creates stress points.
Solution: Tighten exposed fasteners until washer just contacts panel surface visible gap of 1/32 inch is acceptable and preferred. Use clutch drill or hand-tighten final 1/4 turn.
Snap Lock vs Mechanical Seam: Which is Better?
Choosing between snap lock and field-seamed standing seam depends on slope, budget, aesthetics, and installation expertise.
When Snap Lock is Better
Low-Slope Roofs (3:12 to 5:12 pitch):
- Snap lock suitable for slopes 3:12 and above
- Faster installation saves labor costs
- Perfectly straight seams look cleaner than hand-crimped seams
DIY Installations:
- No expensive seaming tools required
- Snap mechanism intuitive for non-professionals
- Online tutorials widely available
- Mistakes easier to correct (unsnap and reposition vs uncrimp and re-crimp)
Budget-Conscious Projects:
- Saves $2-$4 per square foot in installation costs
- Tool investment under $1,200 vs $8,000+ for mechanical
- Faster installation reduces labor time by 30-40%
Modern Aesthetic Preference:
- Factory-formed seams perfectly straight and uniform
- Contemporary look suits modern architectural styles
When Mechanical Seam is Better
Very Low-Slope Applications (0.5:12 to 3:12 pitch):
- Mechanical seam approved down to 0.5:12 (1/2 inch per foot)
- Tighter crimp provides better weather seal at low slopes
- Many snap lock warranties void below 3:12
Traditional Aesthetic:
- Hand-crimped seams show slight irregularities valued in historic or rustic architecture
- Preferred for farmhouse, barn, or traditional styles
Extreme Wind Zones (150+ mph design):
- Double-lock mechanical seam provides superior wind uplift resistance
- Coastal hurricane zones often specify mechanical seam
- Some building codes require mechanical seam in high-wind areas
Commercial/Industrial Projects:
- Longer panel lengths (60+ feet) benefit from mechanical seam strength
- Wider panel coverage options available
- Enhanced structural performance for large roof areas
Performance Comparison Table
| Factor | Snap Lock | Mechanical Seam |
|---|---|---|
| Minimum Slope | 3:12 pitch | 0.5:12 pitch |
| Installation Cost | $8-$14/sf | $10-$18/sf |
| Installation Speed | 5-8 hrs/square | 8-12 hrs/square |
| Tool Investment (professional) | $1,500-$3,000 | $8,000-$15,000 |
| DIY Friendly | Yes | No (specialized skills) |
| Seam Appearance | Perfectly straight | Slight variations |
| Wind Uplift Rating | 90-150 psf | 100-180 psf |
| Thermal Movement | Excellent (floating clips) | Excellent (floating clips) |
| Warranty (typical) | 30-50 years | 30-50 years |
| Repair Difficulty | Moderate (unsnap/re-snap) | Difficult (uncrimp/re-crimp) |
Snap Lock Standing Seam Maintenance and Longevity
Proper maintenance extends roof life and maintains warranty coverage.
Annual Inspection Checklist
Visual Inspection from Ground:
- Look for loose or displaced panels
- Check for dents or damage from fallen branches
- Verify ridge cap and trim pieces secure
On-Roof Inspection (if safe):
- Walk panels carefully (step in panel flats between seams, never on seams)
- Check clip fasteners for backing out or looseness
- Inspect seams for disengagement or separation
- Verify thermal movement still possible (panels slide 1/8-1/4 inch)
- Examine flashing around penetrations for sealant failure
Valley and Transition Points:
- Clear debris from valleys that could trap water
- Verify valley metal secure and seams sealed
- Check ridge vent function if present
Maintenance Schedule
Every 6 Months:
- Clear roof of debris (leaves, branches)
- Clean gutters to prevent ice dam formation
Annually:
- Full roof inspection per checklist above
- Touch up scratched paint with manufacturer-approved touch-up paint
Every 3-5 Years:
- Inspect and re-seal penetration flashings if needed
- Check exposed fasteners (ridge, hip, rake trim) for corrosion
- Replace any deteriorated sealant
Every 10-15 Years:
- Professional inspection recommended
- Re-tighten any loose fasteners
- Evaluate coating condition (consider re-coating dark colors showing fade)
Expected Lifespan
Panel Longevity:
- 26 gauge steel with PVDF coating: 40-50 years
- 24 gauge steel with PVDF coating: 50-60 years
- Aluminum snap lock: 50-70 years (rust-proof advantage)
Component Lifespan:
- Fasteners (stainless or painted): 40-50 years
- Clips (aluminum or galvanized): 40-60 years
- Sealants at penetrations: 10-20 years (require maintenance)
- Underlayment (if high-quality synthetic): 40-50 years
Factors Reducing Lifespan:
- Salt air/coastal environments: Reduce lifespan 20-30%
- High UV exposure (desert climates): Coating degrades faster (fade/chalk)
- Improper installation (restricted thermal movement): Creates stress failures in 10-20 years
- Lack of maintenance: Reduces lifespan by 25-40%
Frequently Asked Questions
What is the difference between snap lock and standing seam?
Snap lock is a type of standing seam metal roofing that uses factory-formed interlocking edges that snap together over concealed clips without mechanical crimping tools, while traditional standing seam (field-seamed) requires panels be crimped together on-site using expensive seamers. Snap lock installs 30-40% faster and costs $2-$4 less per square foot but requires minimum 3:12 roof pitch, whereas mechanical seam works on slopes down to 0.5:12.
Can I install snap lock standing seam myself?
Yes, snap lock standing seam is DIY-friendly for homeowners with basic construction skills and comfort working on roofs. Required tool investment is $500-$1,200 versus $8,000+ for mechanical seam equipment, and panels snap together using hand pressure or rubber mallet taps. However, proper safety equipment, understanding of clip spacing (12 inches at edges, 24 inches in field), and attention to first panel alignment are critical for successful installation.
How much does snap lock metal roof cost per square foot?
Snap lock standing seam metal roof costs $8-$14 per square foot professionally installed or $5-$8/sf for DIY material costs. Pricing depends on material gauge (26 gauge standard, 24 gauge premium), finish type (polyester vs PVDF coating adds $0.80-$1.50/sf), panel width, and roof complexity. A typical 1,500 square foot residential roof costs $12,000-$21,000 installed.
What is the minimum slope for snap lock metal roof?
Snap lock standing seam requires minimum 3:12 pitch (3 inches of rise per 12 inches of horizontal run) per most manufacturer specifications and warranty requirements. Lower slopes risk water infiltration at snap connections roofs with slopes under 3:12 must use mechanical seam systems approved down to 0.5:12 pitch, which provide tighter weather sealing through crimped connections.
How far apart should clips be on snap lock panels?
Snap lock panel clips must be spaced 12 inches on center along the entire seam length for the first 3 panels from each roof edge (high wind-load areas), with field area panels requiring clips at 6 inches from eave, 12 inches from eave, then 24 inches on center for remaining seam length, and final clip 12 inches from ridge. Proper clip spacing ensures wind uplift resistance and prevents panel flutter.
Can snap lock standing seam be installed over shingles?
Snap lock standing seam should not be installed directly over existing shingles because the uneven surface prevents proper clip attachment and thermal movement, voiding manufacturer warranties. Remove old shingles and install over smooth roof deck with appropriate underlayment (minimum 15/32″ plywood or 7/16″ OSB), or install vertical furring strips over shingles to create flat plane for clip attachment (adds $1.50-$2.50/sf).
How long does snap lock metal roof last?
Snap lock standing seam metal roofs last 40-60 years depending on material gauge, coating type, and climate conditions. Premium systems with 24 gauge steel and PVDF/Kynar coatings reach 50-60 year lifespans, while standard 26 gauge with polyester coatings last 40-50 years. Aluminum snap lock panels are rust-proof and can exceed 70 years in optimal conditions with proper maintenance.
Do snap lock panels expand and contract?
Yes, snap lock panels expand and contract with temperature changes steel expands approximately 1/8 inch per 20 feet of length per 100°F temperature increase. The concealed clip system accommodates this movement by securing panels at seams only (never through panel faces), allowing panels to slide lengthwise within clips. Panels must be cut 1/8-1/4 inch short of ridge and backed off from valleys to prevent thermal buckling.
What tools do I need to install snap lock panels?
Essential tools for snap lock installation include tin snips ($15-$40), rubber mallet ($12-$25), cordless drill with clutch never impact driver ($100-$300), square-drive bits ($8-$15), measuring tape ($15-$30), chalk line ($8-$15), panel hemming tool ($40-$80), level ($30-$60), and safety equipment ($150-$400). Total tool investment is $500-$1,200 versus $8,000+ required for mechanical seam systems.
Can you walk on snap lock standing seam roof?
Yes, you can walk on snap lock standing seam roofs but only step in the flat panel areas between raised seams never step directly on seams, which can disengage snap locks or bend seam edges. Wear soft-soled shoes to prevent scratching paint finish, and avoid walking on roofs when panels are hot (above 120°F) as metal becomes more susceptible to denting. Use roof ladder or walkboards for steep pitches above 8:12.
🏠 Roofing Tips & Updates
Get free roofing advice, cost guides, and seasonal maintenance tips.
Roofing content specialist with 5+ years researching U.S. residential and commercial roofing. Has documented 200+ projects covering installation costs, material selection, contractor vetting, and DIY guides for homeowners across all climate zones.
Steel Roof Pros and Cons: Is a Steel Roof Worth It?
Steel Roof Pros and Cons: Is a Steel Roof Worth It?
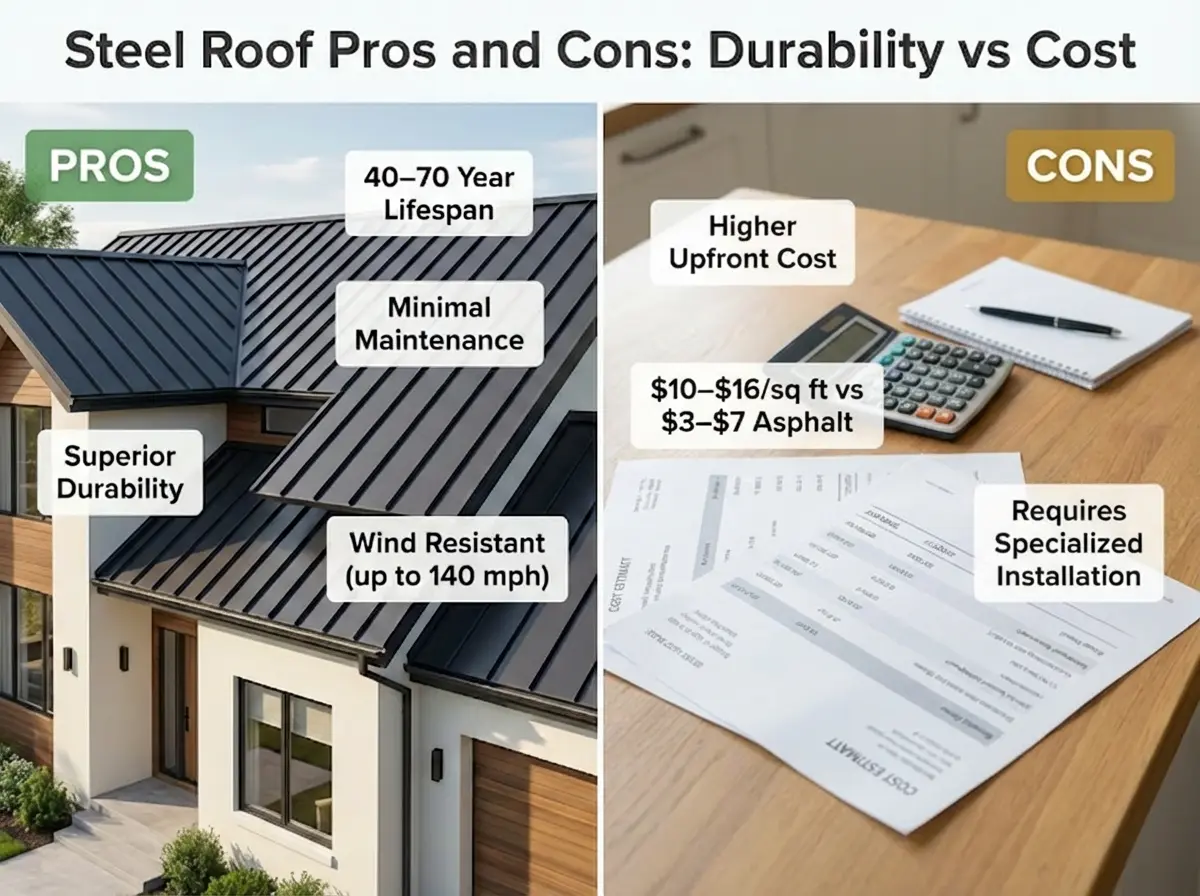
Steel roof pros and cons boil down to exceptional longevity (40–70+ years), superior durability against wind/hail/fire, and energy efficiency (pros), balanced against higher upfront cost, rain noise, and potential for denting or rust if protective coatings fail (cons). Understanding metal roofing pros and cons and how steel compares to asphalt shingles, aluminum, and other roofing materials helps homeowners make informed decisions about roof replacement and long-term value.
This guide covers the top advantages and disadvantages of steel roofs, real-world cost comparisons, how steel performs in different climates, and whether a steel roof is the right choice for your home in 2026.
Table of Contents
What is a steel roof (and why homeowners choose it)
A steel roof is a metal roofing system made from galvanized or coated steel panels (standing seam, corrugated, or shingle-style) valued for longevity, low maintenance, fire resistance, and modern aesthetics. Steel roofing has become a popular choice for residential and commercial buildings because it offers numerous advantages over traditional materials like asphalt shingles, particularly in areas prone to extreme weather.
When evaluating steel roof pros and cons, most homeowners focus on three questions: How long will it last? What does it cost upfront vs long-term? And will the downsides (noise, cost, appearance) outweigh the benefits?
Steel roof pros: top advantages
Steel roofing delivers performance, durability, and value that asphalt shingles and other materials struggle to match.
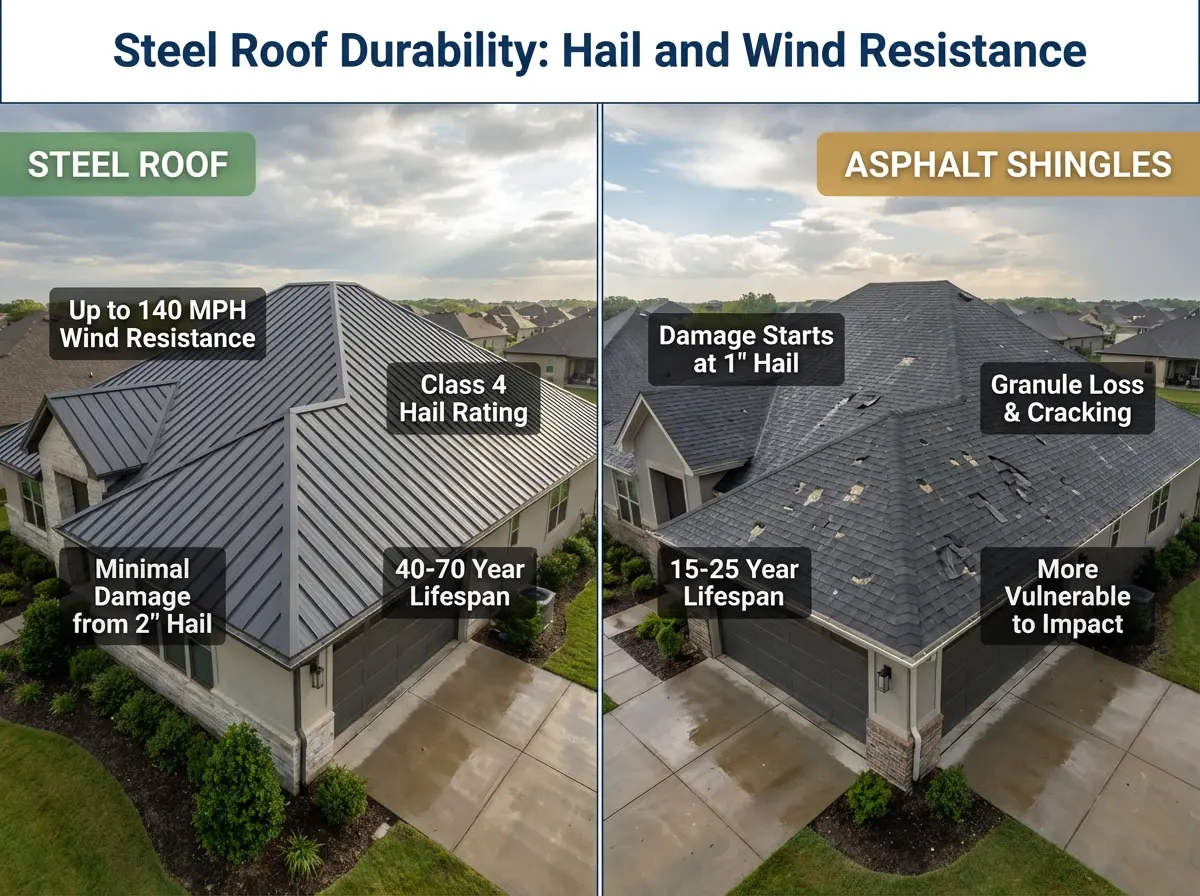
Pro #1: Exceptional longevity (40–70+ years)
The exceptional durability of steel roof panels allows them to withstand harsh weather conditions and maintain their longevity over time, with properly installed and maintained steel roofs lasting for decades and well-maintained steel roofs have been known to last well over 100 years. Manufacturers often offer 40- to 50-year warranties (sometimes called “Lifetime Warranties”), and even a paint default does not signal the end of the roof because it can be painted again and again as needed.
In contrast, asphalt shingles typically last 15–30 years, meaning homeowners may need to replace an asphalt roof 2–3 times over the same period that one steel roof lasts.
Pro #2: Superior durability (wind, hail, fire resistance)
Steel roof panels are designed to withstand extreme weather events such as heavy rain, snowstorms, hailstorms, and high winds. Champion Roofing notes metal roofs can withstand wind gusts up to 140 miles per hour as well as impacts from hail, debris, or other falling objects.
Steel is by nature a hard substance, and steel roofing is actually the recommended roofing material in hail-prone areas because of its impact-resistance, as well as in hurricane zones because of its wind-resistance, and in areas subject to forest fires because of its fire-resistance. Unlike other roofing materials such as asphalt or wood, steel roof panels are not prone to rotting, warping, or cracking, and steel is a non-combustible material that does not burn or easily catch fire.
Pro #3: Energy efficiency and heat reflection
Steel roof panels are more energy efficient than other common roofing materials such as asphalt shingles because steel has a high reflectivity rate, reflecting a significant amount of solar radiation away from the building, which helps reduce the heat the roof absorbs and results in lower cooling costs during hot weather. While asphalt shingles absorb radiant heat, the physical properties of steel cause radiant heat from outside (during summer) or inside (during winter) to bounce off steel roof panels, meaning your AC doesn’t have to work as hard when heat is trying to get in, and your heating system doesn’t have to work as hard when heat is trying to escape.
Steel roof panels can also be designed with insulation layers or coatings that further enhance their energy efficiency, helping prevent heat transfer between the interior and exterior of the building, keeping indoor temperature stable, and reducing the need for heating or cooling systems.
Pro #4: Low maintenance requirements
Steel roof panels require minimal maintenance compared to other types of roofs they do not need regular cleaning or painting like traditional roofing materials, and steel roofs are less likely to develop leaks or suffer from water damage since they have fewer seams than other roofs. Steel is also resistant to pests such as termites and rodents, which can cause significant damage to roofs made from wood or other organic materials.
This low-maintenance profile makes steel roofs an attractive option for homeowners who want a reliable, hands-off roofing solution that lasts many years.
Pro #5: Environmental benefits and recyclability
Steel is one of the most recycled construction materials, and the extended lifespan of steel roof panels (up to 50 years or more) reduces the overall demand for new roofing materials and the energy required for manufacturing and transportation, minimizing the environmental impact associated with frequent roof replacements. At the end of its life, steel roofing is 100% recyclable, unlike asphalt shingles that typically end up in landfills.
Pro #6: Better resale value and insurance discounts
Metal roofs can increase property value and may qualify homeowners for insurance discounts because of their superior fire, wind, and hail resistance. If you’re planning to stay in your home long-term, the combination of energy savings, lower maintenance costs, and potential insurance benefits can add significant value beyond the roof’s protective function.
Steel roof cons: key disadvantages
While steel roofs offer many advantages, they come with trade-offs that homeowners must consider.
Con #1: Higher upfront cost
Perhaps the biggest disadvantage to steel roofing is the upfront cost although some steel panels are actually cheaper than shingles, other panels can cost 2x, 3x, or 5x as much as shingles, and this upfront cost can be hard to swallow. Steel roof panels are relatively expensive compared to traditional roofing materials such as asphalt shingles or wooden shakes, and the cost of materials, specialized tools, and labor can add up quickly, making it a significant investment upfront.
However, given their long lifespan, steel panels are going to cost less in the end because homeowners avoid repeated replacement costs.
Con #2: Noise during rain and hail
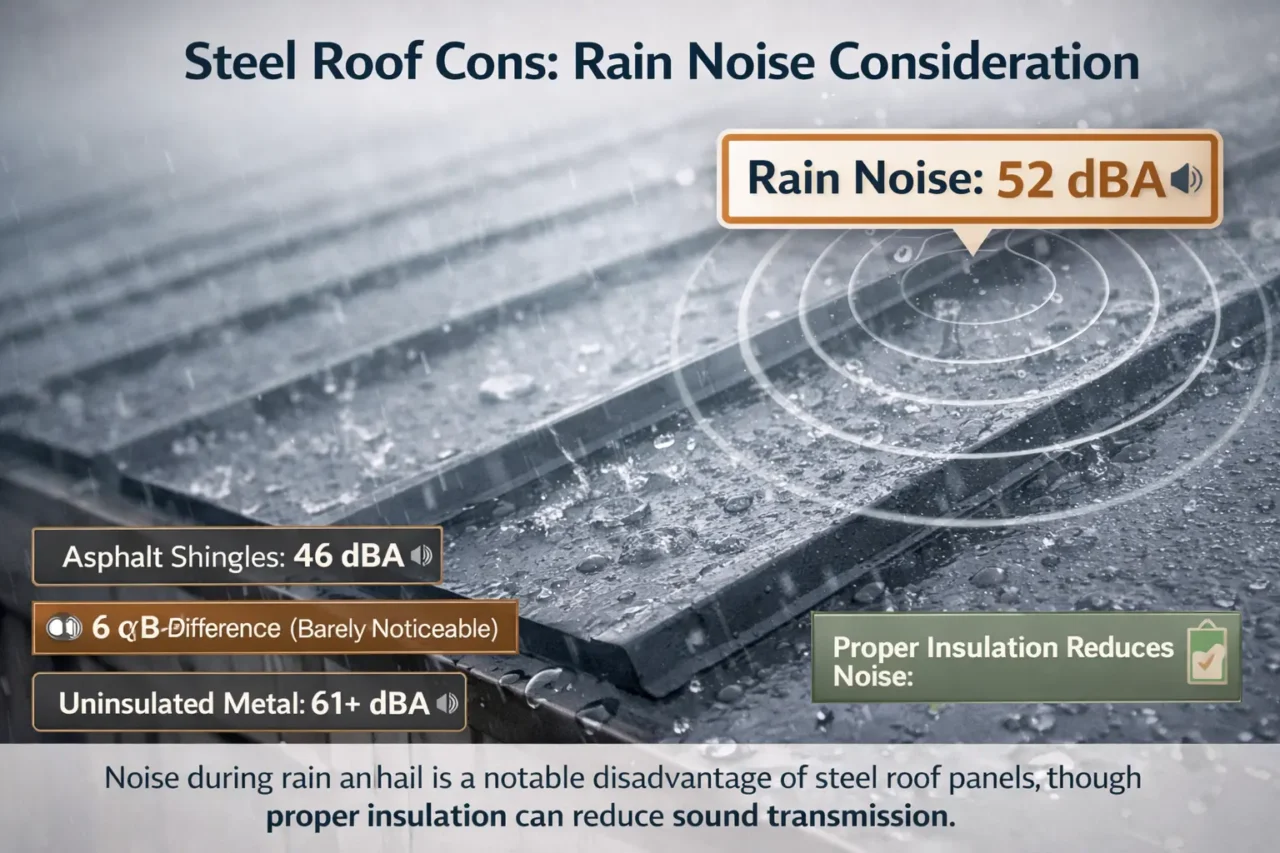
Noise is a notable disadvantage of steel roof panels when rain or hail hits the steel surface, it creates a loud impact noise that can be bothersome for homeowners, especially during heavy storms. The noise level can vary depending on the thickness and design of the steel panels, but it is generally louder than other roofing materials such as asphalt or clay tiles.
While some homeowners may find the sound of rain soothing, others may find it disruptive, mainly if they live in areas with frequent rainfall. Proper insulation and underlayment can reduce noise transmission into living spaces, but steel will never be as quiet as asphalt shingles during storms.
Con #3: Susceptibility to denting and scratches
One concern with steel roofing is the potential for minor issues like small dents or scratches over time, especially from hail, falling branches, or foot traffic during maintenance. The strength of the steel roof panel is usually tied to its thickness (measured in gauges), with lower gauge numbers meaning thicker, more dent-resistant steel.
Thinner gauges (28–29 gauge) are more affordable but more prone to cosmetic damage, while heavier gauges (22–24 gauge) resist denting better but cost more.
Con #4: Rust and corrosion risk (if coatings fail)
One of the primary disadvantages of steel roof panels is their susceptibility to rust and corrosion while steel is known for its strength, it is also prone to oxidation when exposed to moisture and air, and over time this can lead to rust formation, which affects the roof’s appearance and compromises its structural integrity. Manufacturers often coat steel panels with protective layers such as paint or galvanized/Galvalume coatings to combat this issue, but these protective measures may degrade over time, making regular maintenance and reapplication necessary.
The inventions of Galvalume (aluminum-zinc coating) and galvanized (zinc coating) have greatly increased steel’s ability to defy rust, and specially engineered paint systems allow manufacturers to offer 40- to 50-year warranties.
Con #5: Complex installation and specialized labor
Steel roof panels require periodic maintenance to ensure their longevity and performance, including inspecting for rust or corrosion, repairing damaged coatings, and replacing loose or damaged panels. Installation also requires specialized skills and tools, which may increase labor costs compared to installing asphalt shingles.
Improper installation can lead to leaks, panel movement, or premature coating failure, so hiring experienced metal roofing contractors is essential.
Con #6: Thermal expansion and oil canning
Steel expands and contracts with temperature changes, which can cause fasteners to loosen over time if not installed with proper expansion clips or floating fasteners. Some steel roofing profiles (especially flat or lightly profiled panels) can also exhibit “oil canning” visible waviness in the panel surface which is a cosmetic issue that doesn’t affect performance but can be noticeable.
Steel roof pros and cons: cost comparison vs asphalt shingles
Understanding long-term cost is critical when weighing steel roof pros and cons.
Upfront cost comparison
| Roofing material | Cost per sq ft (installed) | Typical 2,000 sq ft roof cost |
|---|---|---|
| Asphalt shingles (3-tab) | $3.50–$5.00 | $7,000–$10,000 |
| Asphalt shingles (architectural) | $4.00–$8.50 | $8,000–$17,000 |
| Steel roof (corrugated) | $7.00–$12.00 | $14,000–$24,000 |
| Steel roof (standing seam) | $10.00–$16.00 | $20,000–$32,000 |
Steel roofs cost roughly 2x more upfront than architectural shingles.
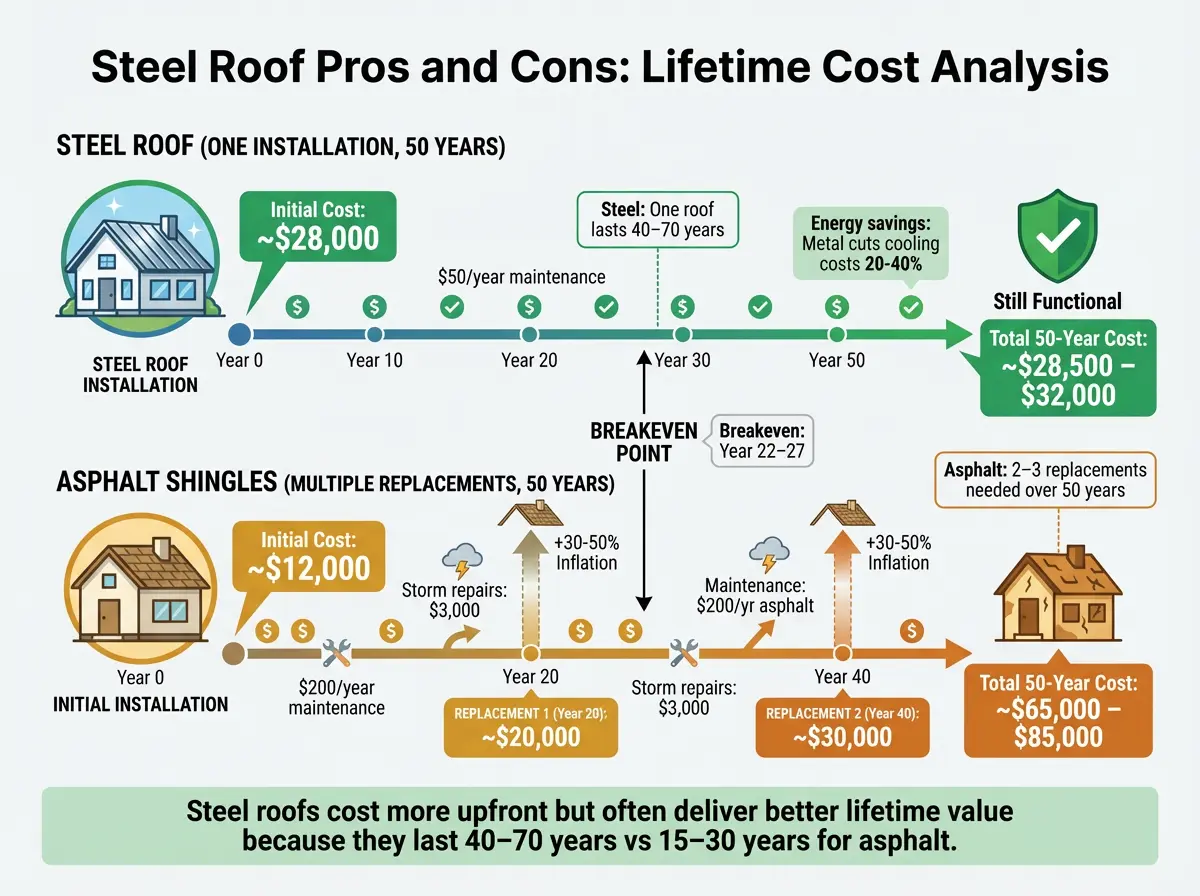
Lifetime cost analysis (40–50 years)
When you zoom out over 40–50 years, the math changes.
Steel roof:
- High upfront cost, but likely one installation
- Fewer storm repairs
- Potential energy and insurance savings
Asphalt shingle roof:
- Lower upfront cost
- But potentially two full replacements plus storm repairs over the same timeframe
If you’re planning to move within 5–10 years, shingles often pencil out better; if you see yourself staying for the long haul, steel starts to look more attractive from a total-cost-of-ownership standpoint.
Metal roofing pros and cons: steel vs aluminum vs copper
Steel is the most common metal roofing material, but aluminum and copper have different pros and cons.
Steel vs aluminum
Pros of aluminum:
- Lighter weight (easier to install, less structural load)
- Better corrosion resistance in coastal/salt environments
Cons of aluminum:
- More expensive than steel ($14–$20/sf vs $7–$16/sf)
- Softer metal, more prone to denting than heavier-gauge steel
Steel vs copper
Pros of copper:
- Beautiful patina develops over time
- 70–100+ year lifespan
- Superior corrosion resistance
Cons of copper:
- Very expensive ($15–$30/sf installed)
- Requires specialized installation
- Can stain other building materials if runoff isn’t managed
Steel offers the best balance of performance, cost, and availability for most residential projects.
When a steel roof makes sense (and when it doesn’t)
Steel roof pros and cons depend heavily on your situation, climate, and priorities.
Steel roofs are a great choice if:
- You plan to stay in your home 15+ years (long enough to realize lifetime cost savings).
- You live in a high-wind, hail-prone, or wildfire-risk area where durability matters most.
- You want low-maintenance roofing and don’t mind paying more upfront.
- Energy efficiency and environmental impact are priorities.
- You value modern aesthetics and can afford the premium for standing seam or specialty profiles.
Steel roofs may not be the best fit if:
- You’re on a tight budget and plan to sell within 5–10 years.
- You’re sensitive to rain noise and don’t want to invest in additional soundproofing.
- Your home’s structure requires reinforcement to support the added weight (less common, but possible on older homes).
- You prefer the traditional look of asphalt shingles or clay tiles.
Steel roof pros and cons in different climates
Climate plays a major role in whether steel roof pros outweigh the cons for your specific location. In hot, sunny climates like Arizona, Texas, or Florida, steel’s reflective properties deliver measurable energy savings by bouncing solar heat away from the building, reducing air conditioning loads by up to 25% compared to dark asphalt shingles. The fire resistance of steel roofing also makes it an excellent choice for wildfire-prone regions in California, Colorado, and the Pacific Northwest, where ember storms can ignite traditional roofing materials.
In cold climates with heavy snow, steel roofs shed snow efficiently because of their smooth, slippery surface, reducing the risk of ice dams and structural overload that can plague asphalt shingle roofs. However, steel roofs in coastal or high-humidity areas face increased corrosion risk from salt air, making Galvalume coating and premium paint systems essential to prevent premature rust. Homes in hail-prone regions like the Great Plains benefit enormously from steel’s impact resistance, but homeowners should specify heavier gauge panels (22–24 gauge) to minimize visible denting after severe storms. Understanding how your local weather patterns interact with steel roof pros and cons helps you make the right material choice for long-term performance.
How to minimize steel roof cons
Smart design and installation choices can reduce or eliminate many steel roof disadvantages.
Reducing noise
Install quality underlayment and attic insulation to dampen sound transmission during rain and hail events.
Preventing rust and corrosion
Choose Galvalume or galvanized steel with premium paint systems (Kynar 500/PVDF) for maximum corrosion resistance, and inspect/maintain protective coatings regularly.
Avoiding dents
Select heavier gauge steel (22–24 gauge) in hail-prone areas, and avoid foot traffic on the roof when possible.
Managing upfront cost
Consider corrugated or R-panel steel profiles instead of standing seam to reduce material costs, or finance the roof to spread payments over time while realizing energy savings immediately.
FAQ: steel roof pros and cons
What are the main pros of a steel roof?
Steel roof pros include 40–70 year lifespan, superior wind/hail/fire resistance, energy efficiency, low maintenance, and 100% recyclability.
What are the main cons of a steel roof?
Steel roof cons include higher upfront cost (2–3x asphalt shingles), rain/hail noise, potential for denting and rust if coatings fail, and specialized installation requirements.
How long does a steel roof last?
Steel roofs typically last 40–70+ years with proper maintenance, and well-maintained steel roofs have been known to last over 100 years.
Is a steel roof worth the extra cost?
Steel roofs deliver better lifetime value if you stay in your home 15+ years, because their long lifespan and low maintenance offset higher upfront cost.
Are steel roofs noisy?
Yes rain and hail create louder impact noise on steel roofs compared to asphalt shingles, though proper underlayment and insulation can reduce sound transmission.
Can steel roofs rust?
Steel roofs can rust if protective galvanized or Galvalume coatings degrade, but modern coatings and paint systems greatly reduce rust risk and often come with 40–50 year warranties.
Do steel roofs dent easily?
Denting depends on gauge thickness heavier gauge (22–24) steel resists denting better than thinner gauge (28–29) steel, especially in hail-prone areas.
Are steel roofs energy efficient?
Yes steel roofs reflect solar heat and reduce cooling costs compared to asphalt shingles, which absorb heat.
Do steel roofs increase home value?
Metal roofs can increase property value and may qualify homeowners for insurance discounts due to superior durability and fire resistance.
What is better: steel roof or asphalt shingles?
Steel roofs last longer (40–70 years) and resist storms better but cost more upfront; asphalt shingles cost less initially but need replacement every 15–30 years.
🏠 Roofing Tips & Updates
Get free roofing advice, cost guides, and seasonal maintenance tips.
Roofing content specialist with 5+ years researching U.S. residential and commercial roofing. Has documented 200+ projects covering installation costs, material selection, contractor vetting, and DIY guides for homeowners across all climate zones.
Asphalt Roofing Nails: Sizes, Types & Where to Buy
Asphalt Roofing Nails: Sizes, Types & Where to Buy
Asphalt nails more commonly called roofing nails are one of the most important “small parts” in an asphalt shingle roof because correct nail type, size, and placement directly control wind resistance, leak risk, and warranty compliance. If you’re looking up where to nail shingles, the short answer is: follow the manufacturer’s printed nail line (or designated nailing zone), keep nails at least 1 inch from the shingle ends, and use the correct number of nails (typically 4, or 6 in high-wind/steep-slope conditions).
This guide explains everything a homeowner, DIYer, or new roofer needs to know about asphalt nails: nail types and materials, required diameters and head sizes, nail length and deck penetration rules, nail placement on 3-tab vs laminated (architectural) shingles, 4‑nail vs 6‑nail patterns, what “high nailing” is, how pneumatic nailers should be set, and the most common mistakes that cause blow-offs and leaks.
Table of Contents
Asphalt nails are not just “fasteners”—they’re part of the roof’s wind‑resistance system. When asphalt nails are placed in the correct nailing zone, the nail head clamps the shingle without tearing the mat, and the fastener penetrates the roof deck enough to resist uplift forces during gusts. That’s why learning where to nail shingles correctly matters as much as choosing a premium shingle brand.
In many real-world blow‑off cases, the shingle itself isn’t defective—the asphalt nails were installed too high (missing the intended layers), too low (visible exposure), overdriven (cutting into the mat), or underdriven (holding the shingle up and preventing sealing). ARMA notes that improperly located and/or driven nails can lead to sealing failures, blow-offs, raised tabs, and buckling.
What are asphalt nails?
“Asphalt nails” usually refers to roofing nails used to fasten asphalt shingles to roof decking. These nails are designed with a wide head for holding power and a corrosion-resistant finish for long-term exposure to moisture and temperature swings.
In practice, selecting asphalt nails is not just about “any nail that fits” industry guidance specifies minimum shank diameter, minimum head diameter, corrosion resistance, and sufficient length to properly penetrate the roof deck.
Why asphalt nails matter more than people think
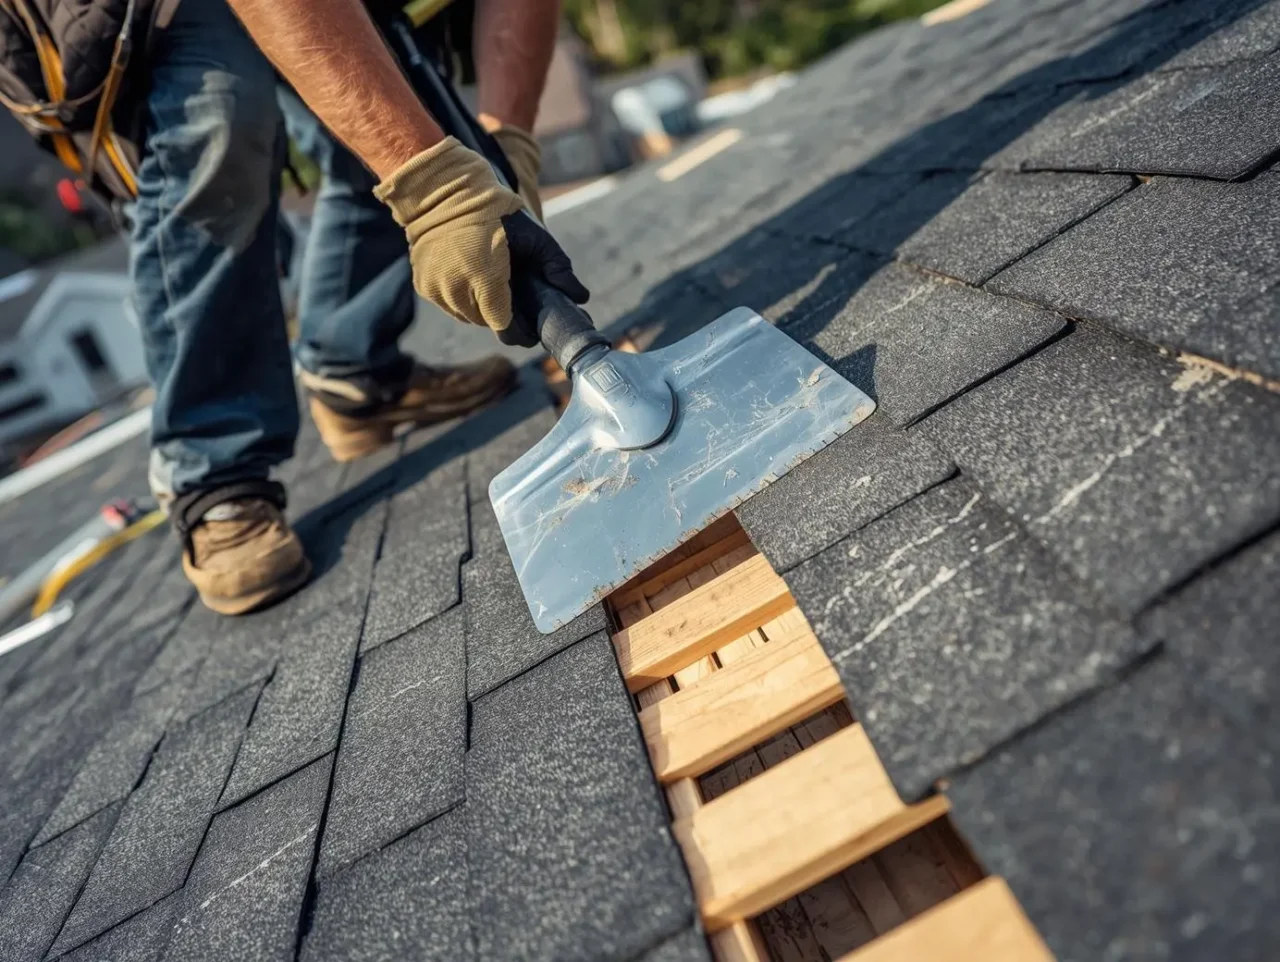
Shingles are a system: the sealant strip, shingle overlap, starter strip, underlayment, and asphalt nails all work together to resist wind uplift and keep water moving down the roof surface. If nails are placed too high, too low, crooked, overdriven, or underdriven, the shingle may not be fastened through the proper layers or may not seal correctly reducing wind performance and increasing leak risk.
ARMA (Asphalt Roofing Manufacturers Association) highlights that nail placement guidance is usually provided in the manufacturer installation instructions, including the recommendation that no nail head should be less than 1 inch from either end of the shingle. Owens Corning similarly stresses that shingle nailing patterns and nail counts relate to wind warranty and code requirements.
Asphalt nails vs roofing staples
Some older roofs were installed with staples, and homeowners sometimes ask if staples are “fine” for repairs. ARMA’s guidance emphasizes nails as the required fastening method under model codes and focuses its recommendations on roofing nails rather than staples. If you’re patching or re-roofing, matching the intended fastening system with proper asphalt nails (correct gauge, head size, and penetration) is the safer approach for performance and compliance.
Minimum nail penetration
Choosing asphalt nails by length only works if the nail actually penetrates the deck correctly after passing through shingles, underlayment, and any flashing layers. ARMA says to select nails long enough to penetrate at least ¾ inch into the roof deck, and if the deck is less than ¾ inch thick, the nail should penetrate through the sheathing at least 1/8 inch. That deck penetration rule is one of the most important “invisible” factors in where to nail shingles because perfect placement still fails if the nail doesn’t bite solid wood.
This is also why roof-overs (installing new shingles over existing shingles) can change asphalt nail selection. ARMA says nail length should account for the number of shingle layers, shingle thickness(es), underlayment, and flashing. If your roof has extra layers, longer asphalt nails may be required to maintain the minimum penetration rule.
Where to nail shingles on sealant-strip shingles
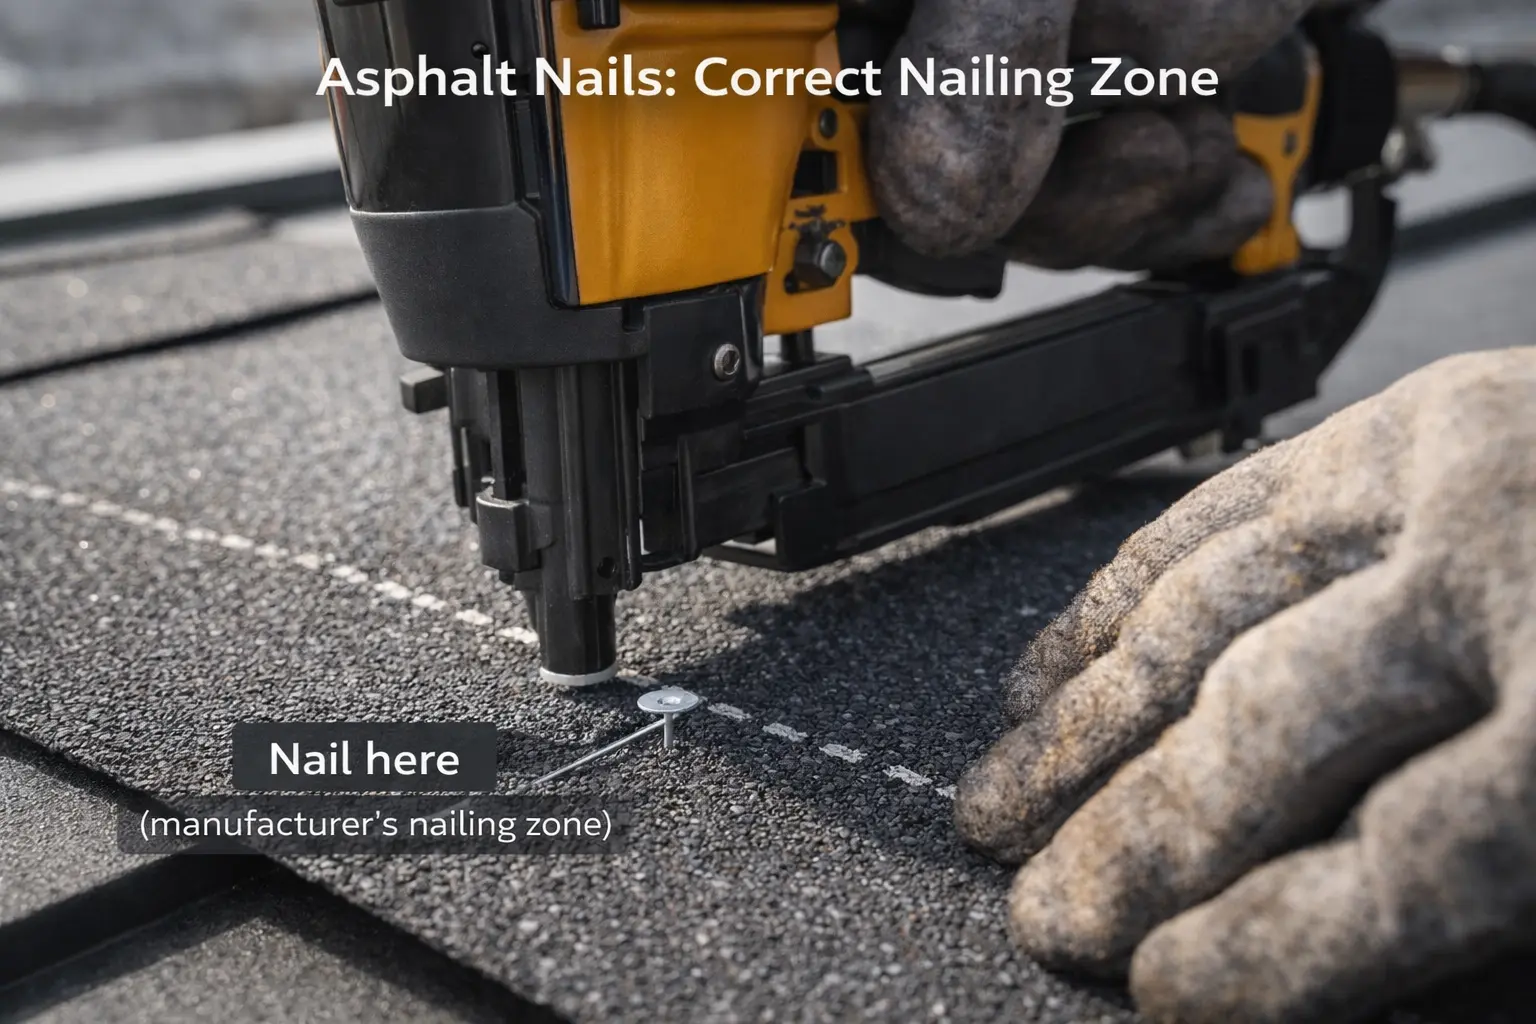
A quick way to understand where to nail shingles is to identify whether the sealant is on the top surface or the back surface of the shingle. ARMA explains that for most shingles with sealant on the top surface, nails should be placed below the sealant strip but above the area that will be visible after the roof is complete. For shingles with sealant on the back surface, manufacturers often print a line (or lines) indicating where asphalt nails should be placed.
This matters because the correct nailing zone is designed to both fasten the shingle and properly secure the overlapping course. ARMA also notes that for multi-layer laminated shingles, manufacturers may require nails be positioned so they penetrate both/all shingle layers, so the “where to nail shingles” answer is sometimes different for architectural shingles than for three-tab shingles.
End distance rule
Even if you follow the nail line perfectly, asphalt nails placed too close to the edges increase the risk of tearing and wind damage. ARMA states no nail head should be less than 1 inch from either end of the shingle. That rule is easy to miss when you’re rushing, but it’s a major part of correct where to nail shingles layout and consistent wind performance.
ARMA also recommends that, whenever possible, no cutout or end joint should be less than 2 inches from a nail in an underlying course. This helps prevent weak points from stacking on top of each other and reduces the chance of localized buckling or blow‑offs.
Roofing nail requirements (minimum specs)
When shopping for asphalt nails, you’re typically choosing among multiple materials and sizes, but there are widely cited minimums.
Minimum shank diameter and head diameter
ARMA states that nails are required to have a minimum nominal shank diameter of 12 gauge (0.105″) and a minimum head diameter of 3/8″ (0.375″). Atlas also states nails should have a minimum nominal shank diameter of 11- or 12-gauge and a minimum head diameter of 3/8″.
Corrosion-resistant material
ARMA specifies corrosion-resistant roofing nails such as galvanized steel, stainless steel, aluminum, or copper, and notes galvanizing is a typical method of achieving corrosion resistance. The reason this matters is simple: rusted nails can lose holding power and stain roofing materials over time.
Penetration into roof deck
A common requirement for roofing nails is to penetrate the roof deck adequately; Construction Mentor notes roof decking penetration should be at least 3/4″ (or 1/8″ past the underside of the deck), which is why 1″ or 1-1/4″ nails are commonly used for asphalt/fiberglass shingles depending on assembly thickness.
Asphalt nail sizes (how long should roofing nails be?)
Correct nail length is one of the most searched questions related to asphalt nails, because “too short” is a hidden failure.
Common nail length for asphalt shingles
FastenerUSA states the most commonly recommended nail size for asphalt shingles is 1-1/4 inch. This length is commonly sufficient for a standard single-layer shingle installation over typical underlayment and sheathing, assuming it achieves proper penetration.
When you need longer nails
If you’re installing over thicker assemblies (for example, roof-overs or additional layers), Atlas notes nails must be a minimum of 1-1/4″ long and Atlas recommends a 2″ nail for a roof-over. The key principle is that nail length must still achieve adequate penetration into the deck after going through shingles and underlayment layers.
Nail head size matters too
Even if the nail is long enough, too small a head can pull through shingles under wind uplift; minimum head diameter guidance (3/8″) is intended to reduce pull-through risk.
Where to nail shingles (the core rule)
If you only remember one thing about where to nail shingles, it’s this: nails must go in the manufacturer’s designated nailing zone so they fasten the shingle properly and secure the layer below.
Nail line / nailing zone
Most modern shingles include a nail line or “StrikeZone-style” reinforced zone, and manufacturers specify where nails should be placed to penetrate through required layers especially for laminated shingles. ARMA explicitly notes that for multi-layer laminated shingles, manufacturers may require nails be positioned so they penetrate all shingle layers, and you should consult manufacturer instructions for placement and pattern.
Distance from shingle ends
ARMA states no nail head should be less than 1 inch (25 mm) from either end of the shingle. This reduces edge tearing and helps prevent wind from catching and ripping the shingle at its weakest points.
Avoid nailing too close to joints below
ARMA notes that whenever possible you should ensure no cutout or end joint is less than 2″ from a nail in an underlying course. This reduces the chance of concentrating stress at joint lines.
Asphalt nails and nailing patterns (4 nails vs 6 nails)
“How many nails per shingle” is tied to wind rating and local code.
Standard 4-nail pattern
Owens Corning describes a four-nail fastening pattern per shingle (for Duration shingles) as required to take advantage of the maximum wind warranty available for that product. In many standard installations, 4 nails per shingle is typical when manufacturer instructions and local codes allow it.
6-nail pattern (high wind / steep slope / code)
Owens Corning states six nails are required for structures with slopes exceeding 60 degrees (21 inches per foot), and notes local building codes may require six nails as well. ARMA reinforces that nail quantity and placement varies by product and manufacturer instructions.
Why 6 nails often performs better
Pro Tool Reviews recommends a 6-nail pattern regardless of whether you live in a high-wind area, arguing it adds little effort and cost but can help reduce early failure risk. Whether you adopt 6 nails everywhere depends on manufacturer instructions, wind zone requirements, and warranty conditions.
Where to nail shingles: 3-tab vs architectural shingles
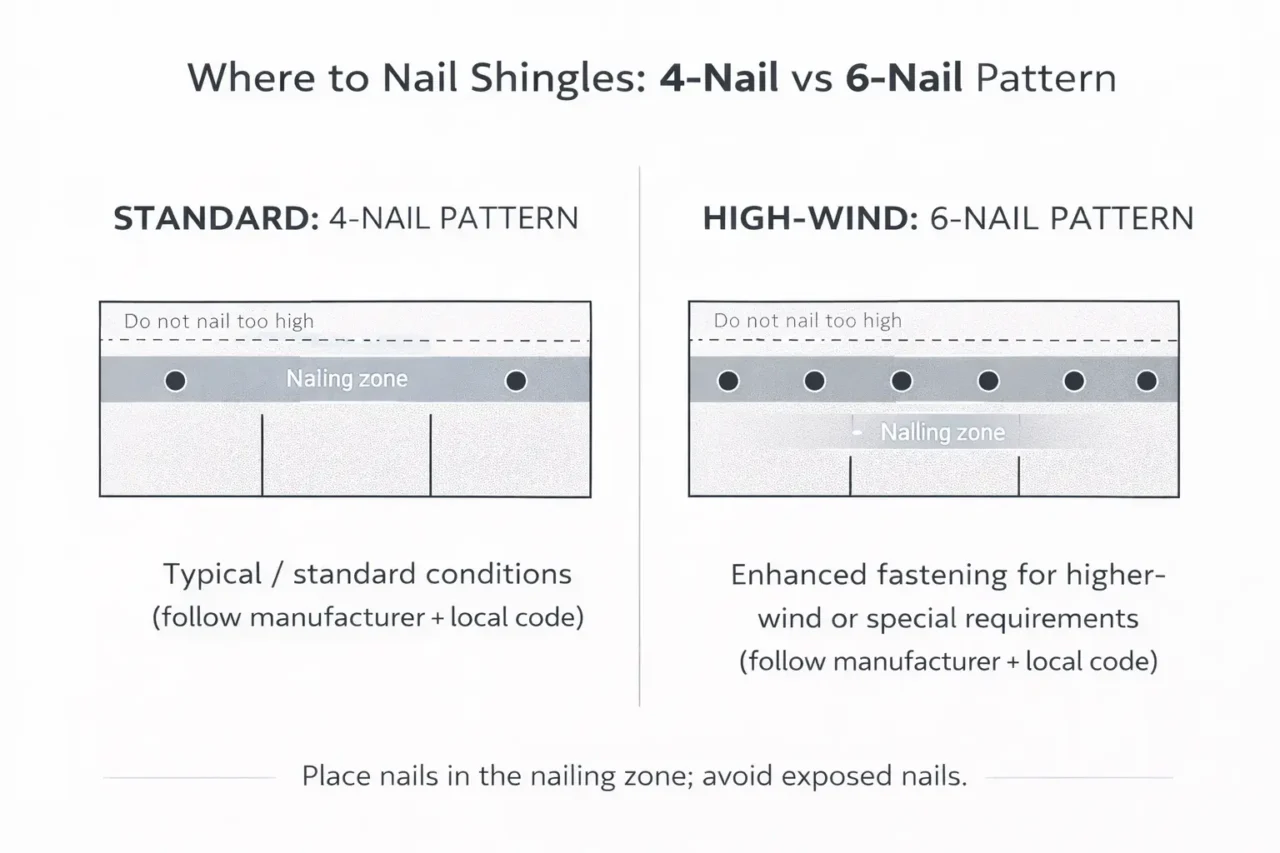
Different shingle designs can change the correct nailing zone, even though the concept stays the same.
Three-tab shingles
Three-tab shingles typically have a straightforward nailing zone designed so nails secure the shingle and catch the top edge of the course below. Manufacturer instructions will show the exact line and spacing.
Laminated (architectural) shingles
Laminated shingles can require nails to penetrate through multiple layers; ARMA notes manufacturers may require nails positioned to penetrate both/all shingle layers. This is why “high nailing” (nails too high) is especially risky on laminated shingles: the nail may miss critical layers and reduce wind resistance.
High-wind areas in the U.S. (what changes)
High-wind zones in the United States (coastal regions, tornado-prone areas, hurricane corridors) often trigger code requirements and manufacturer instructions that push installers toward 6 nails and stricter placement discipline. Owens Corning explicitly notes building codes may require 6 nails in some areas, and nail counts can vary by product line.
For homeowners, the best practice is to ask your roofer which fastening pattern they are using and to confirm it matches both code and the shingle manufacturer’s instructions for your local wind region.
Asphalt nails: common installation mistakes (and what they cause)
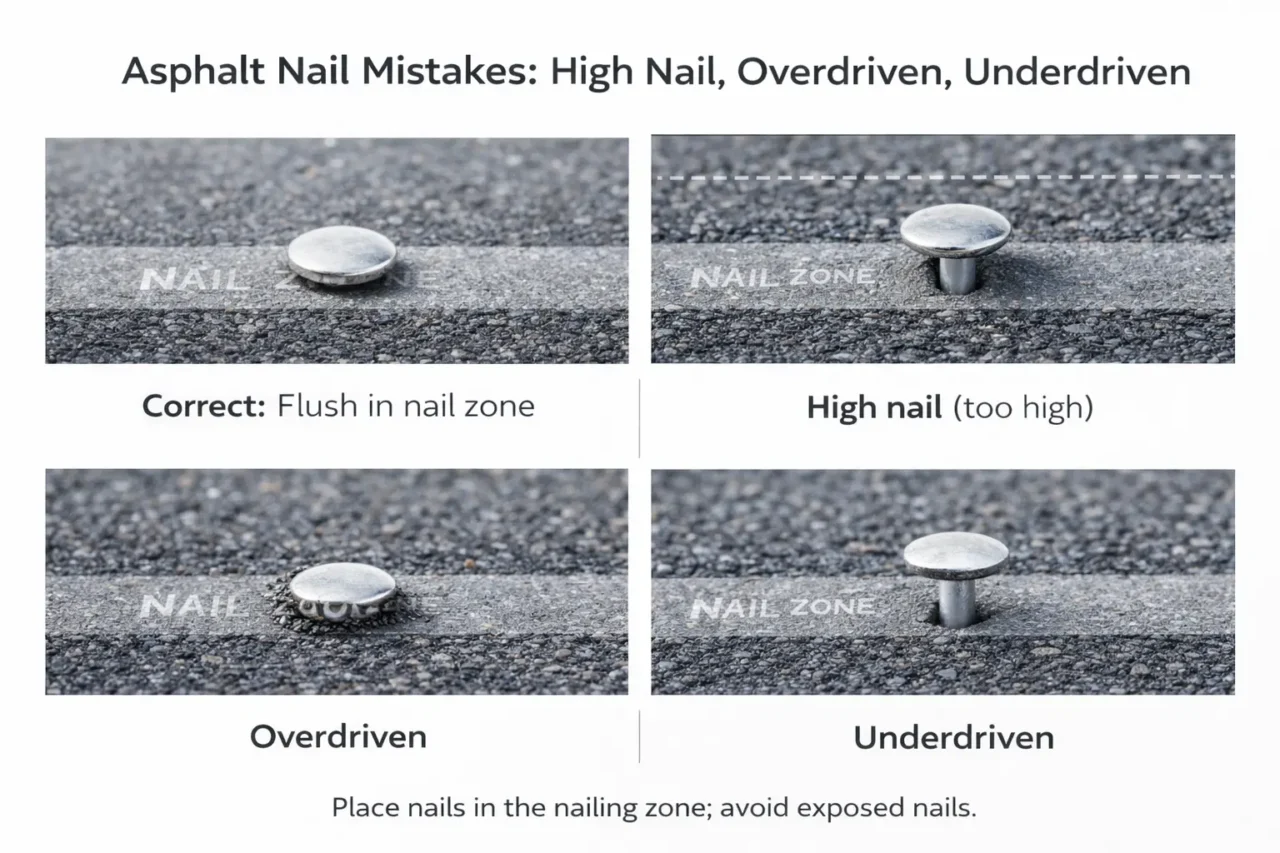
Many roof failures blamed on “bad shingles” are actually fastening problems.
High nailing (nails too high)
A “high nail” means the nail is driven above the correct nail line so it doesn’t properly secure the intended layers; guides emphasize this is especially critical with laminate shingles. High nailing reduces wind resistance and can lead to blow-offs because the shingle isn’t fastened where it’s designed to resist uplift.
Overdriven nails (too deep)
Overdriven nails cut into the shingle mat, reducing holding power and increasing the chance of tear-through in high winds. ARMA’s general guidance implies nails must be properly driven and aligned; if nails distort the shingle or mat, the fastening system is compromised.
Underdriven nails (not flush)
Underdriven nails can hold shingle edges up, interfere with sealing, and create bumps that telegraph through the roof surface. They can also puncture the shingle above as courses overlap.
Crooked nails
Crooked nails reduce contact area and can cut into shingles unevenly, especially if the head edge bites into the mat. Proper nailer technique (or hammer control) matters for consistent fastening.
Pneumatic nailers vs hand nailing (setting matters)
Many roofs are installed with pneumatic nailers, which makes asphalt nails selection and nailer settings critical. If air pressure is too high, nails can be overdriven; if too low, nails may sit proud.
A practical best practice is to do a test strip and inspect nails before continuing across the roof. This helps ensure nails are flush, straight, and placed correctly in the nail zone.
How many asphalt nails do you need? (Quick estimating)
Estimating nail quantity helps DIYers and homeowners validate material lists.
ARMA provides a reference that nails required vary, and provides examples such as about 256 nails per square for certain metric shingle formats and 312 nails per square for some English formats, depending on product and nailing pattern. Because nail count changes with 4-nail vs 6-nail patterns and with shingle dimensions, you should check your shingle wrapper or product instructions for exact counts.
Best practices checklist (quick)
Use this checklist to verify a proper install using asphalt nails:
- Use corrosion-resistant nails that meet minimum shank and head diameter requirements.
- Choose nail length that achieves adequate deck penetration after passing through all roofing layers.
- Place nails in the manufacturer’s nailing zone and at least 1 inch from shingle ends.
- Use 6 nails per shingle when required by slope, code, or manufacturer instructions (and consider it for better wind resistance).
- Avoid high nails, overdriven nails, and underdriven nails each reduces performance.
FAQ: asphalt nails and where to nail shingles
What size nails for asphalt shingles?
A commonly recommended size is 1-1/4 inch roofing nails for standard asphalt shingles, but the correct length depends on your roof assembly thickness and required deck penetration.
What are the minimum specs for roofing nails?
ARMA states roofing nails should have a minimum nominal shank diameter of 12 gauge (0.105″) and a minimum head diameter of 3/8″, and should be corrosion-resistant.
Where exactly do you nail shingles?
You nail shingles in the manufacturer’s specified nail line/nailing zone, keeping nail heads at least 1 inch from the ends of the shingle, and ensuring nails properly fasten required layers (especially for laminated shingles).
Is 4 nails per shingle enough?
Many systems use 4 nails per shingle under standard conditions, but 6 nails may be required in high-wind regions or on steep slopes, and the required pattern depends on manufacturer instructions and code.
Why are high nails bad?
High nails are driven above the nail line and may not properly fasten the shingle layers, reducing wind resistance and increasing the risk of shingle blow-off.
🏠 Roofing Tips & Updates
Get free roofing advice, cost guides, and seasonal maintenance tips.
Roofing content specialist with 5+ years researching U.S. residential and commercial roofing. Has documented 200+ projects covering installation costs, material selection, contractor vetting, and DIY guides for homeowners across all climate zones.

ELK Roofing Shingles Colors: Complete GAF-ELK Guide
ELK Roofing Shingles Colors: Complete GAF-ELK Guide
ELK roofing shingles colors encompass 28+ High Definition color options ranging from popular nationwide choices like Weathered Wood, Charcoal, Slate, Barkwood, Hickory, Shakewood, and Hunter Green to regional specialty colors including Driftwood, Birchwood, Biscayne Blue, Mission Brown, Pewter Gray, Patriot Red, and Copper Canyon all featuring GAF-ELK’s patented Diamond Cut™ granules and Color Lock™ ceramic firing technology creating enhanced shadow effects and multi-dimensional appearance.
Since GAF acquired ELK Corporation, ELK roofing shingles colors now fall under the GAF Timberline® product family, with the Timberline Prestique® 30, Prestique® 40, and Prestique® Lifetime series offering these High Definition color blends across different warranty tiers and thickness levels. This comprehensive guide explores every available ELK roofing shingles color, explains GAF-ELK’s High Definition color technology, provides color selection tips matching architectural styles, details regional availability variations, shows how to coordinate shingle colors with siding/brick/trim, and helps homeowners choose ideal colors for curb appeal, energy efficiency, and long-term value.
<!– –>
Understanding ELK Roofing Shingles Colors (GAF-ELK High Definition Technology)
ELK roofing shingles colors leverage proprietary manufacturing technology creating depth, dimension, and visual interest impossible with standard single-color granules.
What are ELK roofing shingles?
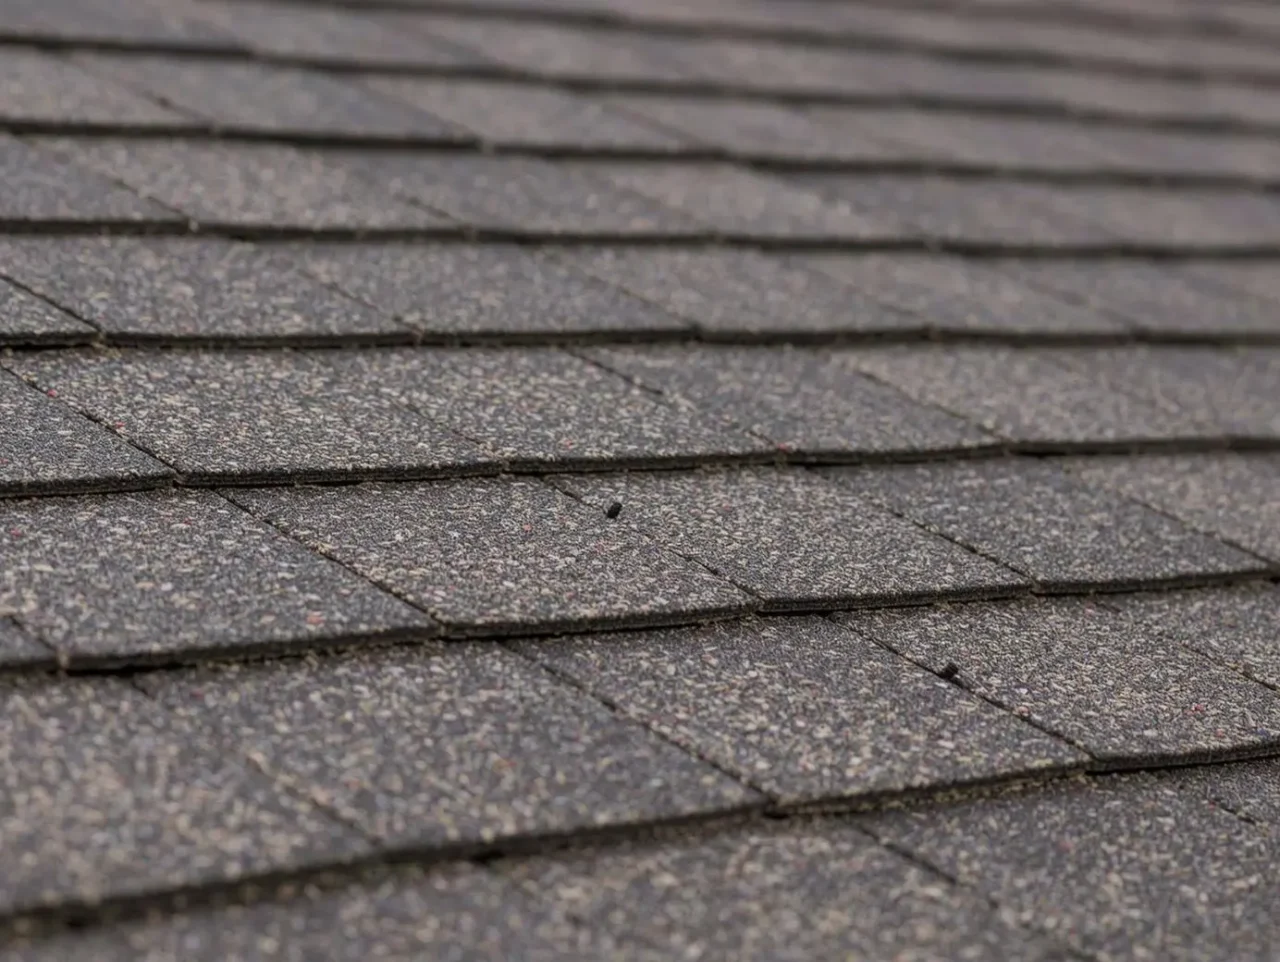
ELK Corporation manufactured premium architectural asphalt shingles before GAF Materials Corporation acquired the company, merging product lines under the GAF-ELK brand and eventually transitioning to the current GAF Timberline® family. While “ELK” as a standalone brand is discontinued, millions of homes still feature ELK roofing shingles colors from the Timberline Prestique® series, and GAF continues offering these same High Definition color options in current Timberline HDZ® products.
High Definition color technology
ELK roofing shingles colors feature GAF-ELK’s patented “High Definition” color blends using multiple complementary granule shades rather than single-color granules creating flat appearance. The GAF Timberline Prestique® brochure explains these shingles utilize Diamond Cut™ granules with “multi-faceted design and light-reflective construction” adding “dimension and depth,” plus Color Lock™ ceramic firing that “maintains true color longer” through UV-resistant granule treatment.
How High Definition differs from standard shingles
Standard three-tab or basic architectural shingles use uniform-color granules creating flat, monochromatic appearance, while ELK roofing shingles colors blend multiple complementary tones within each color name for example, “Weathered Wood” combines light tan, medium brown, gray, and darker brown granules mimicking aged wood shake variation. This blending creates “enhanced shadow effect” making roofs appear more textured and dimensional from ground level.
Popular ELK Roofing Shingles Colors (Available Nationwide)
The GAF-ELK Timberline Prestique® color brochure identifies seven “Most Popular Colors” available nationwide across all manufacturing locations.
1. Weathered Wood
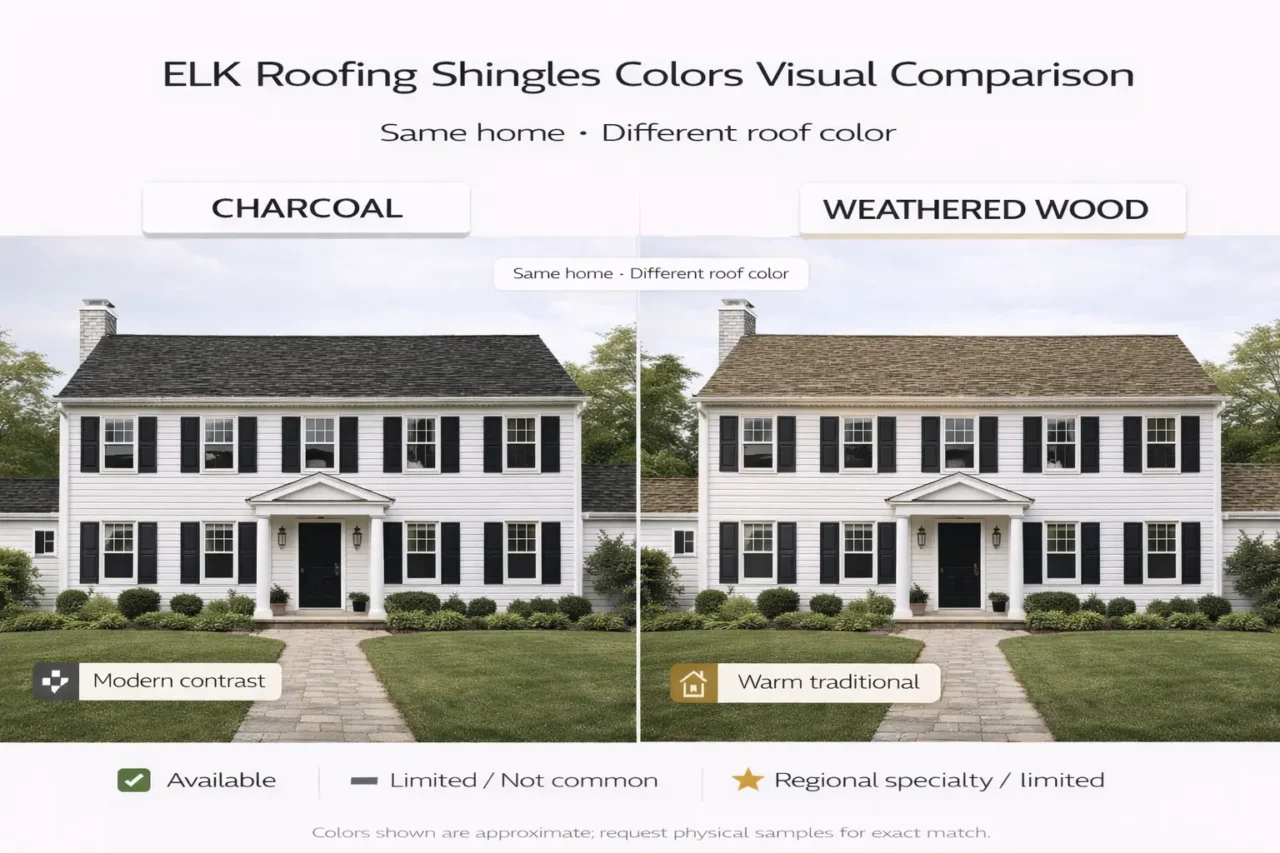
Weathered Wood is the most popular ELK roofing shingles color combining neutral brown, tan, and gray tones creating timeless versatile appearance complementing virtually any architectural style from traditional Colonial to contemporary Craftsman. GAF describes Weathered Wood as ideal for homes wanting “sunset shadows, all day long” through its warm earth-tone palette. This color pairs exceptionally well with cream/beige/tan siding, white trim, and natural brick.
2. Charcoal
Charcoal delivers deep gray-black sophistication making dramatic statements on white, light gray, or cream homes where high contrast enhances architectural details. GAF notes black and gray shingles are “formal and dignified” providing “elegant contrast to almost any paint, siding, or brick color.” Charcoal is particularly popular in modern and contemporary designs.
3. Slate
Slate features cool gray tones with subtle blue undertones mimicking natural slate roofing aesthetics at asphalt shingle pricing. This classic ELK roofing shingles color suits Colonial, Victorian, and traditional architecture, coordinating well with gray, blue, or white exterior palettes.
4. Barkwood
Barkwood presents rich brown tones evoking natural wood bark with warm earthy character ideal for rustic, cabin-style, or traditional homes in wooded settings. GAF categorizes browns as “simple and dependable” offering “warmth while allowing other colors on a home to appear richer and brighter.”
5. Hickory
Hickory blends warm tan-brown tones creating medium-value neutral ELK roofing shingles color that complements beige, tan, brown, and earth-tone exteriors without overwhelming architectural features. This versatile option works across multiple architectural styles from Ranch to Cape Cod.
6. Shakewood
Shakewood delivers multi-tonal brown variation specifically designed to mimic authentic cedar shake roofing through carefully blended light, medium, and dark brown granules. GAF positions Shakewood among “rustic and romantic” brown options providing visual depth superior to flat single-color brown shingles.
7. Hunter Green
Hunter Green is the only green option among popular nationwide ELK roofing shingles colors, offering forest green tones that create natural harmonious appearance ideal for homes in wooded environments or properties wanting to emphasize sustainability aesthetics. GAF describes green as “the color of balance and renewal” giving “sense of sustainability and harmony with nature,” noting it’s “often found on white homes.”
Regional ELK Roofing Shingles Colors (Specialty Options)
Beyond the seven popular colors available nationwide, GAF-ELK manufactured 20+ regional specialty colors with availability varying by manufacturing facility serving different geographic markets.
Brown and red tones
- Mission Brown: Terracotta-influenced brown suitable for Spanish/Mediterranean architecture
- Patriot Red: Bold red creating confident romantic statements, described as “unique alternative to black roof shingles on white home”
- Sunset Brick: Red-brown mimicking traditional brick tones
- Sienna Sunset: Warm reddish-brown blend
Gray variations
- Pewter Gray: Medium gray with metallic undertones providing modern neutral option
- Oyster Gray: Light warm gray with beige influences creating soft neutral palette
- Fox Hollow Gray: Gray blend designed for contemporary and transitional styles
- Williamsburg Slate: Classic slate-gray mimicking historic Colonial Williamsburg architecture
- Cliffside: Dimensional gray blend
- Midnight Mesa: Deep charcoal-gray approaching black
Light and neutral tones
- Birchwood: Pale tan with subtle variation creating light neutral roof appearance
- Driftwood: Light weathered gray-brown blend mimicking beach-weathered wood
- Sierra Sand: Warm sand-beige tones
Specialty colors
- Biscayne Blue: Blue-gray coastal aesthetic particularly popular in Florida and coastal markets
- Copper Canyon: Gold-copper blend among “beige and gold” options associated with “luxury and extravagance”
- Golden Amber: Warm golden-brown tones
- Chestnut Valley: Rich chestnut brown
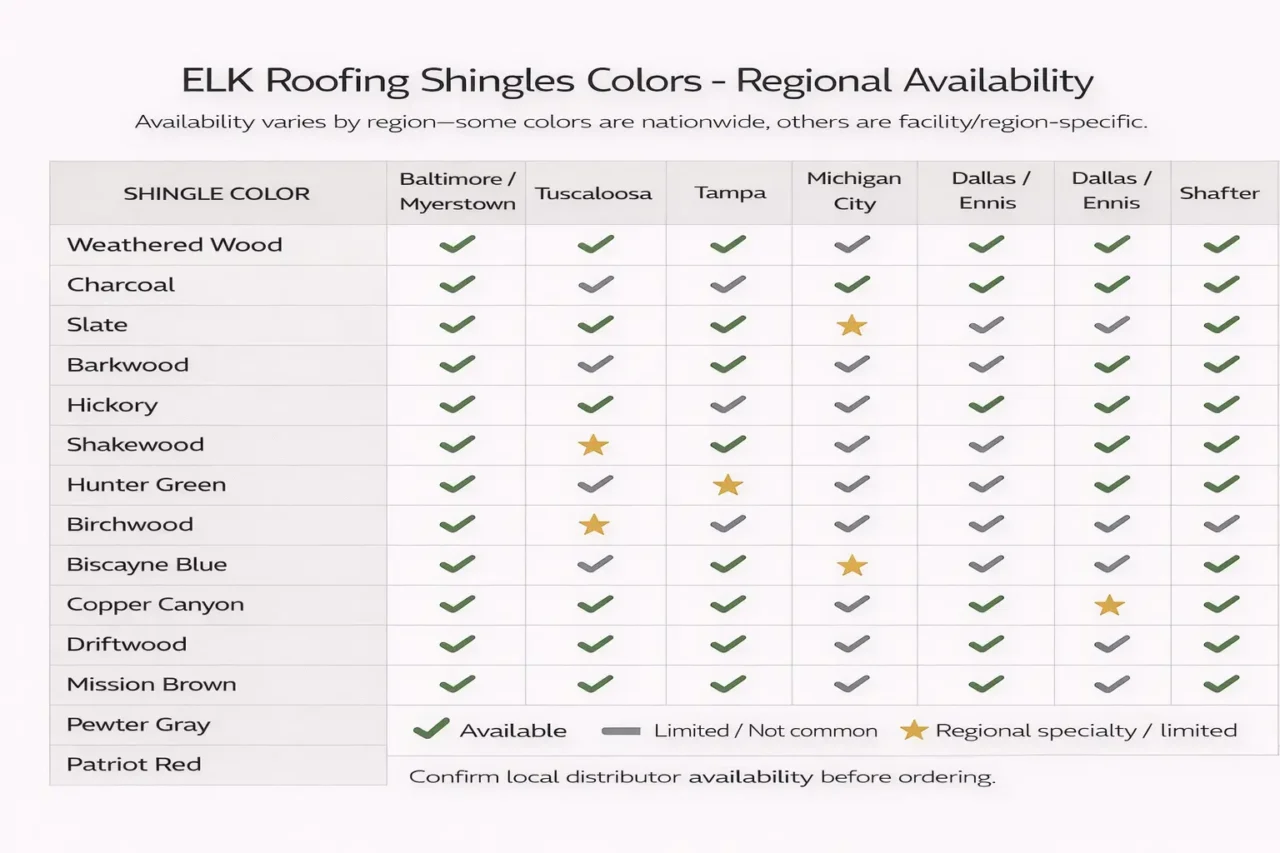
ELK Roofing Shingles Colors by Product Series
GAF-ELK offered ELK roofing shingles colors across three thickness/warranty tiers within the Timberline Prestique® family.
Timberline Prestique® 30 HD colors
The standard-weight 30-year warranty tier offered most but not all colors availability chart in GAF-ELK brochure uses “l” symbol indicating Prestique 30 availability. Generally, popular nationwide colors (Weathered Wood, Charcoal, Slate, Barkwood, Hickory, Shakewood, Hunter Green) were available in Prestique 30, while some regional specialty colors were limited to thicker Prestique 40 or Lifetime tiers.
Timberline Prestique® 40 HD colors
The heavyweight 40-year warranty tier expanded color availability in certain regions chart uses “u” symbol for Prestique 40 availability. This mid-tier product offered 15% thicker construction than Prestique 30 while maintaining same High Definition ELK roofing shingles colors.
Timberline Prestique® Lifetime HD colors
The super-heavyweight lifetime warranty tier (32% thicker than standard architectural shingles) offered broadest color selection chart uses “s” symbol indicating Lifetime availability. Homeowners willing to invest in premium lifetime warranty could access virtually all ELK roofing shingles colors including limited regional options.
Designer Shingle Colors (Premium ELK Options)
Beyond the Timberline Prestique® series, GAF-ELK also manufactured premium designer shingle lines with exclusive ELK roofing shingles colors.
Grand Slate™ Lifetime Designer colors
The Grand Slate™ line offered luxury slate-appearance shingles in exclusive designer colors:
- Bristol Gray: Dimensional gray slate appearance
- Aged Oak: Weathered wood-tone brown
- Essex Green: Rich hunter green slate simulation
- Middlebury Brown: Deep brown slate aesthetic
- Sheffield Black: Dramatic black slate look
- Welsh Gray: Classic Welsh slate gray
Additional designer line colors
Roofing Contractor magazine reported GAF-ELK’s lifetime designer shingles included additional exclusive colors like Antique Slate, Florida Blend, Terra Cotta, and San Gabriel.
How to Choose ELK Roofing Shingles Colors (Selection Guide)
Selecting optimal ELK roofing shingles colors requires balancing aesthetics, climate, resale value, and personal preference.
Match architectural style
- Colonial/Traditional: Slate, Charcoal, Williamsburg Slate, Weathered Wood
- Modern/Contemporary: Charcoal, Pewter Gray, Midnight Mesa, Fox Hollow Gray
- Spanish/Mediterranean: Mission Brown, Sunset Brick, Terra Cotta, Barkwood
- Craftsman/Bungalow: Weathered Wood, Shakewood, Hickory, Barkwood
- Coastal/Beach: Biscayne Blue, Driftwood, Oyster Gray, Birchwood
Coordinate with exterior colors
GAF provides specific pairing recommendations:
Siding Color → Recommended Shingle Colors
- White/Cream: Charcoal, Slate, Hunter Green, Weathered Wood, Patriot Red
- Gray: Charcoal, Slate, Weathered Wood, Pewter Gray
- Beige/Tan: Weathered Wood, Barkwood, Hickory, Shakewood
- Brown: Charcoal, Slate, Hunter Green
- Red Brick: Charcoal, Slate, Weathered Wood, Pewter Gray
- Yellow: Charcoal, Slate, Hunter Green
Consider energy efficiency
U.S. Department of Energy recommends lighter-colored shingles in warmer climates because they reflect more sunlight reducing cooling costs, while darker colors absorb heat beneficial in cold climates. For hot climates, consider lighter ELK roofing shingles colors like Birchwood, Driftwood, Oyster Gray, or Sierra Sand.
Assess neighborhood and resale value
Survey surrounding homes to identify predominant roof color palettes dramatic departures from neighborhood norms can affect resale appeal. Neutral versatile ELK roofing shingles colors like Weathered Wood, Charcoal, and Slate typically offer broadest buyer appeal.
Current GAF Timberline HDZ® Color Equivalents
Since ELK roofing shingles colors are now part of GAF’s Timberline HDZ® product line, homeowners can access equivalent modern colors.
Timberline HDZ® color palette
GAF Timberline HDZ® (the successor to ELK Timberline Prestique®) offers similar High Definition colors:
Popular GAF HDZ Colors (equivalent to ELK):
- Weathered Wood (same name/palette)
- Charcoal (same)
- Shakewood (same)
- Barkwood (same)
- Mission Brown (same)
- Hunter Green (same)
- Pewter Gray (same)
- Birchwood (same)
Additional GAF HDZ options:
- Oyster Gray, Fox Hollow Gray, Williamsburg Slate, Patriot Red, Sunset Brick, Hickory, Biscayne Blue, Copper Canyon, Driftwood, Golden Amber, Chestnut Valley
Homeowners needing to match existing ELK roofing shingles colors for additions or repairs can typically find identical or extremely close color matches in current GAF Timberline HDZ® inventory.
Regional Color Availability (Understanding GAF Manufacturing Locations)
ELK roofing shingles colors availability varies by GAF manufacturing facility serving different geographic markets.
Manufacturing locations and territories
GAF-ELK operated seven primary manufacturing facilities:
- Baltimore/Myerstown (Mid-Atlantic)
- Tuscaloosa (Southeast)
- Tampa (Florida/Southeast)
- Michigan City (Midwest)
- Minneapolis (Upper Midwest)
- Dallas/Ennis (South/Southwest)
- Shafter (West Coast)
Popular colors (Weathered Wood, Charcoal, Slate, Barkwood, Hickory, Shakewood, Hunter Green) shipped from all locations, while regional specialty colors like Biscayne Blue concentrated in Tampa facility serving Florida market, and Copper Canyon focused on Western facilities.
Special order options
Some ELK roofing shingles colors marked as “special order” in certain regions could be obtained but required advance ordering and potentially longer lead times or minimum quantity requirements.
Visualizing ELK Roofing Shingles Colors (Tools and Resources)
Accurately visualizing ELK roofing shingles colors on specific homes helps avoid costly color regret.
Physical samples (essential step)
GAF and roofing contractors emphasize viewing full-size physical shingle samples before finalizing color selection because printed brochures and digital screens cannot accurately reproduce granule colors, reflectivity, and dimensional shadow effects. The Timberline Prestique® brochure explicitly states: “It is difficult to reproduce the color clarity and actual color blends of these products. Before selecting your color, please ask to see several full-size shingles.”
GAF Virtual Remodeler tool
GAF provides online Virtual Remodeler allowing homeowners to upload home photos and digitally preview different shingle colors on their actual house—though this tool approximates ELK roofing shingles colors, physical samples remain necessary for final verification.
Neighborhood observation
Driving through neighborhoods observing installed ELK roofing shingles colors on homes with similar architectural styles provides real-world color performance data showing how colors weather, how they appear at different times of day, and how they coordinate with common exterior finishes.
Maintenance and Longevity of ELK Roofing Shingles Colors
Proper care preserves the vibrant appearance of ELK roofing shingles colors throughout warranty periods.
Color retention technology
ELK roofing shingles colors utilize Color Lock™ ceramic firing technology treating granules to resist UV degradation and maintain true color longer than standard non-ceramic granules. Additionally, UV Blocker granules protect against damaging sunlight improving color durability and extending shingle life.
Algae resistance (StainGuard®)
Black algae streaks (Gloeocapsa magma) can discolor ELK roofing shingles colors creating unsightly appearance GAF-ELK incorporated copper-based StainGuard® algae protection in most colors (except Western regions where algae is rare) preventing blue-green discoloration.
Cleaning recommendations
If algae or moss develops despite StainGuard® protection, gentle cleaning using approved roof cleaning solutions can restore original ELK roofing shingles colors without damaging granules avoid pressure washing which dislodges granules accelerating shingle aging.
🎨
Found Your ELK Color? Time to Check if It’s Still Performing.
ELK shingles were acquired by GAF in 2007 — most ELK colors have direct GAF Timberline equivalents available today. If your ELK roof is 15+ years old, a free inspection will confirm whether it’s performing — or whether a color-matched replacement is the right next step.
We’ll match your existing ELK color to the nearest available 2026 equivalent — and give you a free no-obligation replacement estimate.
Free color match consultation · No obligation · Licensed & insured
Frequently Asked Questions: ELK Roofing Shingles Colors
What colors are available in ELK roofing shingles?
ELK roofing shingles colors include 7 popular nationwide options (Weathered Wood, Charcoal, Slate, Barkwood, Hickory, Shakewood, Hunter Green) plus 20+ regional specialty colors like Birchwood, Biscayne Blue, Mission Brown, Pewter Gray, Driftwood, and Copper Canyon.
Are ELK roofing shingles still available?
ELK as standalone brand is discontinued after GAF acquisition, but ELK roofing shingles colors continue in GAF Timberline HDZ® product line offering same High Definition color blends with equivalent or improved technology.
What is the most popular ELK shingle color?
Weathered Wood is the most popular ELK roofing shingles color, offering versatile neutral brown-tan-gray blend complementing virtually any architectural style and exterior color scheme.
How do I match existing ELK shingle colors?
Contact GAF or local roofing contractors with photos of existing shingles most ELK roofing shingles colors have direct equivalents in current GAF Timberline HDZ® line allowing accurate color matching for repairs or additions.
Do ELK shingle colors affect energy efficiency?
Yes lighter ELK roofing shingles colors (Birchwood, Driftwood, Oyster Gray) reflect more sunlight reducing cooling costs in hot climates, while darker colors (Charcoal, Slate) absorb heat beneficial in cold climates.
What is High Definition color technology?
High Definition ELK roofing shingles colors use multiple complementary granule shades, Diamond Cut™ multi-faceted granules, and Color Lock™ ceramic firing creating dimensional appearance with enhanced shadow effects versus flat single-color shingles.
Can I see ELK roofing shingles colors before ordering?
Yes request full-size physical samples from GAF dealers or roofing contractors because printed/digital images cannot accurately reproduce actual ELK roofing shingles colors, granule reflectivity, and shadow effects.
Which ELK shingle colors are Energy Star qualified?
GAF-ELK offered select lighter ELK roofing shingles colors with Energy Star qualification in certain regions check with GAF for current Energy Star certified Timberline HDZ® color options.
🏠 Roofing Tips & Updates
Get free roofing advice, cost guides, and seasonal maintenance tips.
More Frequently Asked Questions
Common questions homeowners ask us about this topic, updated for 2026.
What are the most popular ELK shingle colors in 2026?
The 7 most-requested ELK roofing shingle colors nationwide are Weathered Wood, Charcoal, Pewter Gray, Williamsburg Slate, Hickory, Barkwood, and Hunter Green. Weathered Wood remains the bestseller because it pairs with nearly every exterior color palette.
Are ELK shingles still being manufactured?
ELK was acquired by GAF in 2007 and the ELK brand was phased out in favor of GAF Timberline. Modern equivalents to popular ELK colors are sold under the GAF Timberline HDZ line. You can typically match an existing ELK roof using GAF’s color-equivalent chart.
How long do ELK roof shingles last?
Most ELK Prestique shingles came with a 30-year limited warranty and typically last 22-28 years in moderate climates. Lifespan drops to 18-22 years in harsh climates (heavy UV, hail, freeze-thaw cycles) and extends toward 30 years in mild coastal climates.
What is the best ELK shingle color for hot climates?
For hot climates (Sun Belt, Southwest), choose lighter ELK colors like Pewter Gray, Weathered Wood, or White Frost — they reflect more solar heat and can lower attic temperatures by 10-20°F. Cool-roof rated equivalents reduce summer cooling costs by 7-15%.
How much do ELK-equivalent shingles cost per square in 2026?
GAF Timberline HDZ (ELK’s direct successor) ranges from $115-$165 per square (100 sq ft) for materials only in 2026. Installed cost averages $385-$520 per square in most US markets, with premium colors adding 10-15% over standard colors.
Can I match ELK shingles to my existing roof for a repair?
Yes — GAF maintains a color-equivalency chart that maps every discontinued ELK Prestique color to the closest current GAF Timberline HDZ shade. For best results, take a sample shingle to a GAF dealer who can color-match in person. Slight tonal differences may remain due to weathering of the original roof.
For more on this topic, see Roofing Shingles Clearance: Cheap & Discounted Options.
Roofing content specialist with 5+ years researching U.S. residential and commercial roofing. Has documented 200+ projects covering installation costs, material selection, contractor vetting, and DIY guides for homeowners across all climate zones.
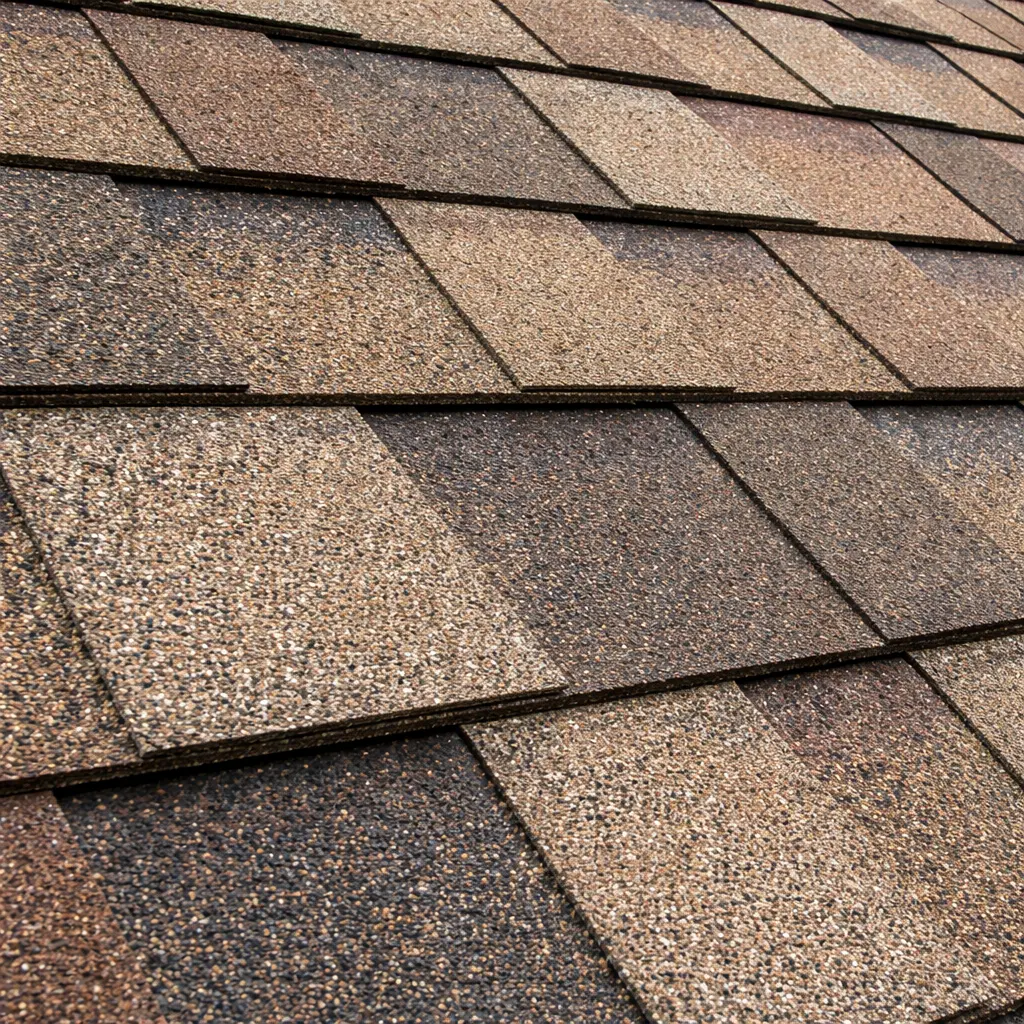
ELK Prestique 30 Year Shingles: The Complete Guide
ELK Prestique 30 Year Shingles: The Complete Guide
ELK Prestique 30 year shingles (marketed as GAF-ELK Timberline® Prestique® 30 High Definition Shingles after GAF acquired ELK) are standard-weight architectural asphalt shingles featuring patented High Definition color blends with enhanced shadow effects, Dura Grip® adhesive providing 110 mph limited wind warranty, Class A fire rating from Underwriters Laboratories, 30-year limited transferable warranty with Smart Choice® Protection covering material and installation labor for the first five years, and StainGuard® algae discoloration protection.
These fiberglass asphalt shingles measure 13¼” × 39⅜” (metric) or 12″ × 36⅜” (English), come approximately 64 pieces per square (metric) or 78 pieces per square (English) in 3 bundles per square, provide 5⅝” exposure (metric) or 5″ exposure (English), and are manufactured with GAF’s proprietary Micro Weave® core offering superior strength foundation resisting cracking and splitting. This comprehensive guide explains everything homeowners and contractors need to know about ELK Prestique 30 year shingles: technical specifications, warranty coverage, available colors, installation requirements, performance characteristics, comparison to Prestique 40 and Lifetime models, and how these discontinued-but-still-installed shingles compare to modern GAF Timberline HDZ replacements.
What Are ELK Prestique 30 Year Shingles? (Product Overview)
ELK Prestique 30 year shingles represent the entry-level tier in GAF-ELK’s Timberline® Prestique® High Definition shingle series, positioned as an upgrade from standard three-tab shingles and basic architectural shingles while remaining more affordable than premium Prestique 40 and Prestique Lifetime models. GAF-ELK (now simply GAF after the companies merged) designed these shingles specifically for homeowners wanting to “upgrade from standard architectural shingles” with enhanced appearance through thicker laminated construction and proprietary High Definition color technology.
The GAF-ELK merger and product evolution
ELK Corporation merged with GAF Materials Corporation, creating the combined GAF-ELK brand that marketed Timberline® Prestique® shingles before eventually transitioning to the current GAF Timberline HDZ® product line. While ELK Prestique 30 year shingles are technically discontinued as new production, millions of squares remain installed on homes across North America, and understanding their specifications helps homeowners with existing installations plan maintenance, repairs, or eventual replacement.
High Definition shingle technology
The “High Definition” designation in ELK Prestique 30 year shingles refers to GAF-ELK’s patented color blending process using multiple granule shades and Diamond Cut™ granules with multi-faceted design creating depth, dimension, and enhanced shadow effects mimicking premium slate or shake roofing aesthetics at asphalt shingle pricing. This technology differentiates Prestique shingles from flat-appearance three-tab shingles and basic architectural laminates.
ELK Prestique 30 Year Shingles Technical Specifications
Understanding ELK Prestique 30 year shingles specifications helps contractors bid accurately and homeowners verify product quality.
Physical dimensions and coverage
- Shingle size: 13¼” × 39⅜” (metric) / 12″ × 36⅜” (English)
- Pieces per square: Approximately 64 pieces (metric) / 78 pieces (English)
- Bundles per square: Approximately 3 bundles
- Exposure: 5⅝” (metric) / 5″ (English)
- Nails required: Approximately 256 nails per square (metric) / 312 nails per square (English)
Construction and materials
ELK Prestique 30 year shingles use fiberglass asphalt construction with multiple proprietary components:
- Micro Weave® Core: Fiberglass mat providing superior strength foundation resisting cracking and splitting
- FiberTech® Components: Non-combustible fibers incorporated into core providing UL Class A fire rating
- SpecSelect Grading System Asphalt: Finest quality asphalt improving weathering in harsh conditions
- Diamond Cut™ Granules: Multi-faceted design and light-reflective construction adding dimension and depth
- Color Lock™ Ceramic Firing: Maintains true color longer through UV-resistant granule treatment
- UV Blocker Granules: Protects against damaging sunlight improving durability and extending shingle life
- Dura Grip® Adhesive: Locks shingles in place gripping tight in strong gale-force winds
Weight classification
ELK Prestique 30 year shingles are classified as “standard weight design” distinguishing them from the “heavyweight” Prestique 40 and “super heavyweight” Prestique Lifetime models in the product line. This standard weight construction balances cost efficiency with adequate performance for most residential applications.
ELK Prestique 30 Year Shingles Warranty Coverage
Warranty protection is a critical consideration when evaluating ELK Prestique 30 year shingles and understanding what coverage remains for existing installations.
Limited transferable warranty
ELK Prestique 30 year shingles include a 30-year limited transferable warranty covering manufacturing defects and premature failure under normal weather conditions. The transferable aspect means warranty benefits transfer to subsequent homeowners if the property sells within the warranty period—valuable for resale.
Smart Choice® Protection (first 5 years)
GAF-ELK provided Smart Choice® Protection covering both non-prorated material replacement AND installation labor costs for the first five years of the warranty period—significantly more comprehensive than standard material-only warranties competitors offered. This means if shingles failed within five years due to manufacturing defect, GAF-ELK covered both new shingles and contractor labor installing them.
After the initial five-year Smart Choice® period, the warranty continues but transitions to prorated material-only coverage for years 6-30.
Wind resistance warranty
ELK Prestique 30 year shingles carry a 110 mph limited wind warranty when installed according to manufacturer specifications using recommended installation methods and proper fastening patterns. This warranty coverage requires shingles to be installed with Dura Grip® adhesive fully activated and adequate nailing (4 or 6 nails per shingle depending on roof slope and wind exposure).
StainGuard® Algae Discoloration Warranty
In all regions except the Western United States, ELK Prestique 30 year shingles included StainGuard® algae discoloration limited warranty protecting against unsightly black streaks caused by algae growth (Gloeocapsa magma). This copper-granule-based algae resistance technology was available “in all areas except Western Region” per GAF-ELK specifications.
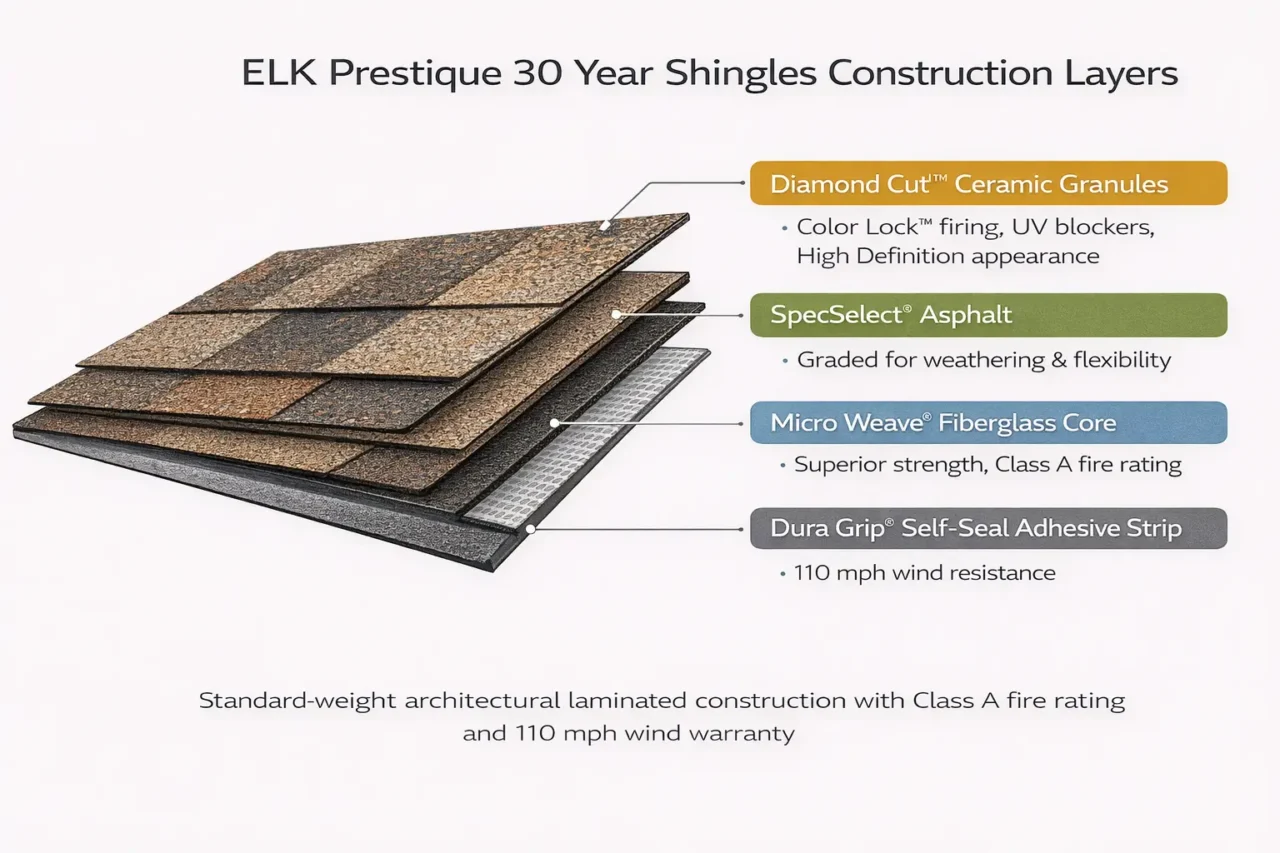
Performance Characteristics and Certifications
ELK Prestique 30 year shingles meet rigorous industry standards and performance testing requirements.
Fire resistance rating
Class A Fire Rating from Underwriters Laboratories (UL 790)—the highest fire resistance classification possible for roofing materials, meaning shingles resist severe fire exposure and won’t spread flames across roof surface. This rating is achieved through FiberTech® non-combustible fibers incorporated into the fiberglass core.
Wind resistance testing
ELK Prestique 30 year shingles pass UL 997 modified to 110 mph testing (except Baltimore manufacturing location which had different specs) and ASTM D7158 Class H impact resistance testing. These certifications verify shingles resist wind uplift forces and impact from hail or debris when properly installed.
Industry standards compliance
- ASTM D3462: Standard specification for asphalt shingles made from glass felt and surfaced with mineral granules
- CSA A123.5-98: Canadian Standards Association asphalt shingle specification
- Florida Building Code Approved: Meets Florida’s stringent hurricane-region building requirements
- Texas Department of Insurance Approved: Certified for use in Texas high-wind zones
- Dade County Approved: Meets Miami-Dade County’s extreme weather performance standards
- ICC Report Approved: International Code Council evaluation service report confirms code compliance
Available Colors: ELK Prestique 30 Year Shingles
ELK Prestique 30 year shingles were manufactured in multiple High Definition color blends designed to complement various architectural styles.
While specific color availability varied by manufacturing location and region, common ELK Prestique 30 year shingles colors included:
- Weathered Wood: Popular neutral brown/tan blend mimicking aged wood shakes
- Charcoal: Deep gray with black shadow accents for contemporary homes
- Birchwood: Lighter tan/beige suitable for traditional colonial architecture
- Pewter Gray: Medium gray with subtle blue undertones
- Hunter Green: Forest green for homes in wooded settings
- Shakewood: Multi-tonal brown mimicking cedar shake appearance
- Mission Brown: Rich brown with terra cotta highlights for Spanish/Mediterranean styles
Color availability depended on manufacturing facility (Michigan City, Minneapolis, Dallas/Ennis, Fontana/Shafter, Baltimore) with some colors special-order in certain regions.
Installation Requirements for ELK Prestique 30 Year Shingles
Proper installation is critical to achieving the full performance potential and warranty coverage of ELK Prestique 30 year shingles.
Deck preparation and underlayment

- Roof deck: Clean, dry, smooth surface free of protrusions—typically plywood or OSB sheathing minimum 7/16″ thick
- Underlayment: GAF-ELK recommended Weather Watch® or StormGuard® waterproofing membranes at eaves, valleys, and vulnerable areas; asphalt-saturated felt (#15 or #30) or synthetic underlayment over remaining deck
- Drip edge: Metal drip edge installed at eaves before underlayment and at rakes over underlayment
Starter strips and first course
GAF-ELK recommended WeatherBlocker™ or Pro-Start™ pre-cut starter strip shingles along eaves and rakes providing adhesive seal preventing wind-driven rain infiltration and wind uplift of first shingle course.
Nailing requirements
ELK Prestique 30 year shingles require proper nailing for warranty compliance:
- Standard application (slopes 4:12 to 21:12): Minimum 4 nails per shingle positioned 5⅝” from bottom edge and 1″ from each end, with two middle nails spaced to penetrate through overlapping shingle tab
- High-wind areas or steep slopes (>21:12): 6 nails per shingle with additional nails near shingle ends for enhanced wind resistance
- Nail type: Minimum 11 or 12-gauge roofing nails with 3/8″ to 7/16″ diameter heads, minimum 1″ long (1¼” for wood decks over ¾” thick)
- Penetration: Nails must penetrate minimum ¾” into wood deck or through plywood/OSB sheathing
Dura Grip® adhesive activation
The Dura Grip® self-sealing adhesive strip on ELK Prestique 30 year shingles requires adequate heat and pressure to fully activate—installer must ensure each shingle’s adhesive contacts the shingle below and weather conditions allow proper bonding (typically requires 70°F+ temperatures for several days post-installation).
Ridge cap finishing
GAF-ELK strongly recommended premium Timbertex® ridge cap shingles (or Ridglass® in Western regions) rather than cutting field shingles for ridge caps—these specialized hip and ridge shingles provide superior aesthetics, wind resistance, and waterproofing at roof peaks and hips.
ELK Prestique Product Line Comparison (30 vs 40 vs Lifetime)
Understanding where ELK Prestique 30 year shingles fit within the broader Prestique product family helps homeowners evaluate upgrade options.
| Feature | Prestique 30 HD | Prestique 40 HD | Prestique Lifetime HD |
|---|---|---|---|
| Weight | Standard weight | Heavyweight (15% thicker than standard) | Super heavyweight (32% thicker than standard) |
| Warranty | 30-year limited transferable | 40-year limited transferable | Lifetime limited transferable |
| Smart Choice® Protection | First 5 years (material + labor) | First 5 years (material + labor) | First 10 years (material + labor) |
| Wind Warranty | 110 mph | 110 mph | 130 mph |
| Bundles per Square | 3 bundles | 4 bundles | 4 bundles |
| Relative Cost | Base price point | ~20-30% premium over Prestique 30 | ~40-50% premium over Prestique 30 |
The Prestique 40 and Lifetime models offer thicker construction, longer warranties, and (in the Lifetime’s case) higher wind resistance, but ELK Prestique 30 year shingles provided the most cost-effective entry into High Definition architectural shingle aesthetics.
Modern Replacement: GAF Timberline HDZ®
Since ELK Prestique 30 year shingles are discontinued, homeowners needing repairs or replacements should understand GAF’s current equivalent product.
GAF Timberline HDZ® as successor
GAF Timberline HDZ® shingles represent the modern evolution of the Timberline product line that included Prestique models, featuring:
- LayerLock® technology: Adhesive replaced Dura Grip® with enhanced bonding
- StrikeZone® nailing area: Reinforced common bond area improving blow-off resistance
- Dual Shadow Line: Similar High Definition appearance to Prestique models
- Limited lifetime warranty: Upgraded from 30-year coverage
- 130 mph wind warranty: Improved from Prestique 30’s 110 mph rating
- 15-year algae protection: Extended StainGuard® coverage
Homeowners with existing ELK Prestique 30 year shingles can typically match colors when replacing sections, though exact color matching may require consulting with GAF representatives or roofing contractors familiar with both product lines.
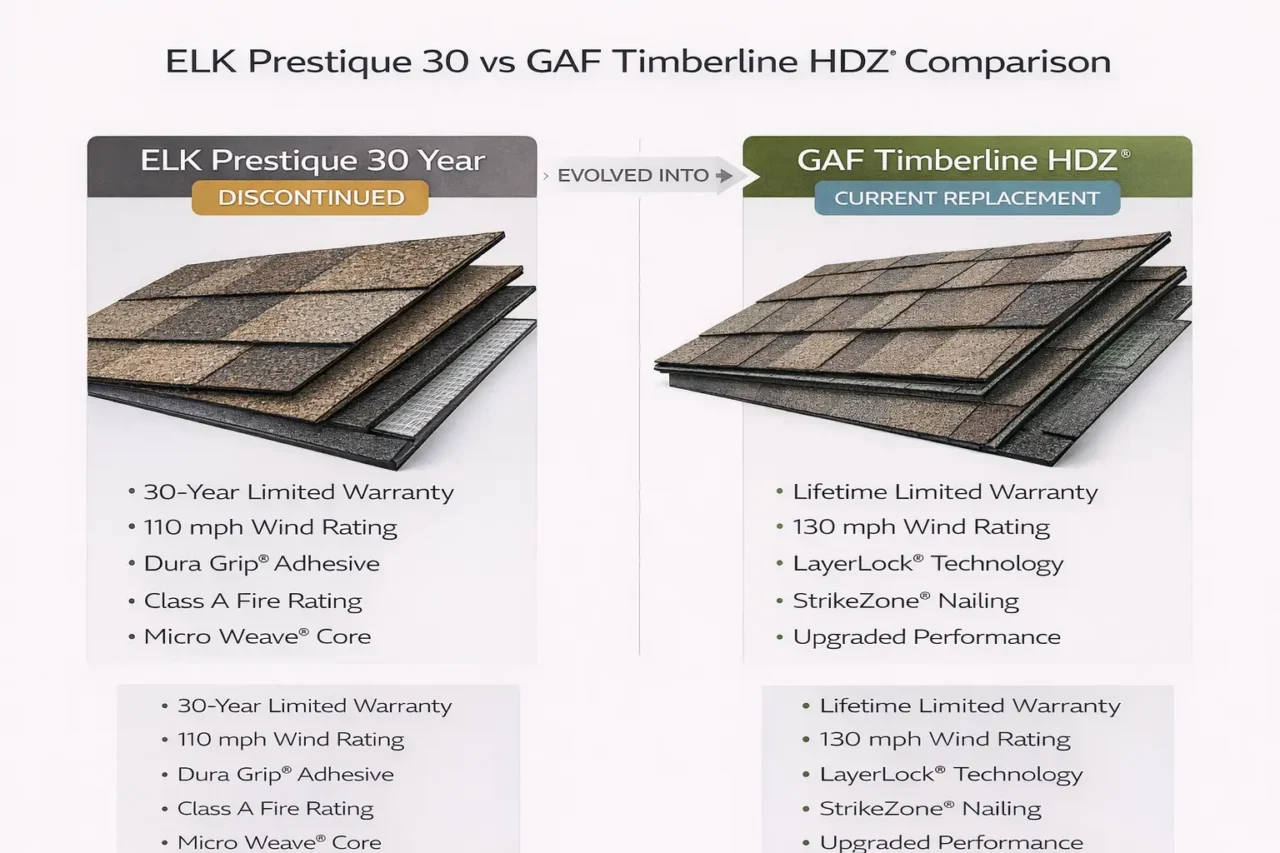
Maintenance and Inspection for ELK Prestique 30 Year Shingles
Proper maintenance extends the lifespan of ELK Prestique 30 year shingles and helps homeowners maximize warranty coverage.
Annual inspection checklist
- Check for missing, cracked, or curled shingles: Wind damage and UV exposure cause gradual deterioration
- Inspect flashing: Metal flashing around chimneys, vents, and valleys is common leak source
- Clear debris: Remove leaves, branches, and moss preventing water accumulation
- Examine algae growth: Black streaks indicate Gloeocapsa magma algae requiring treatment or covered by StainGuard® warranty
- Assess granule loss: Excessive granules in gutters signal accelerated aging
- Check Dura Grip® seal: Ensure shingle tabs remain sealed—lifted tabs indicate adhesive failure or improper installation
When to repair vs replace
- Repair: Isolated damage affecting <10% of roof area, shingles under 15 years old with good overall condition
- Replace: Widespread damage, significant granule loss, shingles approaching 25-30 year mark, or multiple leak sources
Cost Considerations: ELK Prestique 30 Year Shingles
While ELK Prestique 30 year shingles are no longer manufactured, understanding historical pricing helps homeowners budget for comparable modern alternatives.
Original pricing (when manufactured)
ELK Prestigue 30 year shingles typically retailed at mid-range architectural shingle pricing—approximately $85-$125 per square (100 sq ft) for materials only, with total installed costs $300-$500 per square including labor, underlayment, and accessories.
Current replacement costs
Homeowners replacing ELK Prestique 30 year shingles with modern GAF Timberline HDZ® should budget:
- Materials: $100-$150 per square for comparable quality
- Labor: $150-$300 per square depending on region, roof complexity, pitch
- Total installed: $350-$600 per square
- Complete roof replacement (2,000 sq ft): $7,000-$12,000 typical range
🏠
Is Your ELK Prestique 30-Year Roof Due for Replacement?
ELK Prestique 30-year shingles installed before 2000–2007 are now 18–26 years old — at or past their expected service life. Replacement costs currently run $100–$150 per square for materials with GAF Timberline equivalents as the closest modern match.
Get a free inspection to confirm whether yours need replacing — and lock in your 2026 quote before late-season scheduling fills up.
Free inspection · No obligation · Licensed & insured contractors
Frequently Asked Questions: ELK Prestique 30 Year Shingles
Are ELK Prestique 30 year shingles still manufactured?
No—ELK Prestique 30 year shingles are discontinued following GAF’s acquisition of ELK and product line consolidation, with GAF Timberline HDZ® serving as the modern equivalent.
What is the warranty on ELK Prestique 30 year shingles?
ELK Prestique 30 year shingles carry a 30-year limited transferable warranty with Smart Choice® Protection (material + labor) for the first 5 years, 110 mph wind warranty, and StainGuard® algae protection in most regions.
How long do ELK Prestique 30 year shingles last?
Properly installed and maintained ELK Prestique 30 year shingles typically last 20-30 years depending on climate, ventilation, and exposure—though warranty is 30 years, practical lifespan averages 22-28 years in moderate climates.
Can I still get ELK Prestique 30 shingles for repairs?
Limited inventory may exist through specialty roofing suppliers, but most contractors recommend GAF Timberline HDZ® as compatible replacement when repairing sections of roofs with ELK Prestique 30 year shingles.
What is the wind rating for ELK Prestique 30 year shingles?
ELK Prestique 30 year shingles are warranted to withstand winds up to 110 mph when installed according to manufacturer specifications with proper nailing and Dura Grip® adhesive activation.
Do ELK Prestique 30 shingles resist algae?
Yes—ELK Prestique 30 year shingles include StainGuard® algae discoloration limited warranty protection in all regions except the Western United States, using copper-based granules preventing black algae streaks.
What replaced ELK Prestique 30 year shingles?
GAF Timberline HDZ® shingles replaced ELK Prestique 30 year shingles as the current standard architectural shingle offering similar High Definition appearance with upgraded LayerLock® technology and lifetime warranty.
🏠 Roofing Tips & Updates
Get free roofing advice, cost guides, and seasonal maintenance tips.
Roofing content specialist with 5+ years researching U.S. residential and commercial roofing. Has documented 200+ projects covering installation costs, material selection, contractor vetting, and DIY guides for homeowners across all climate zones.
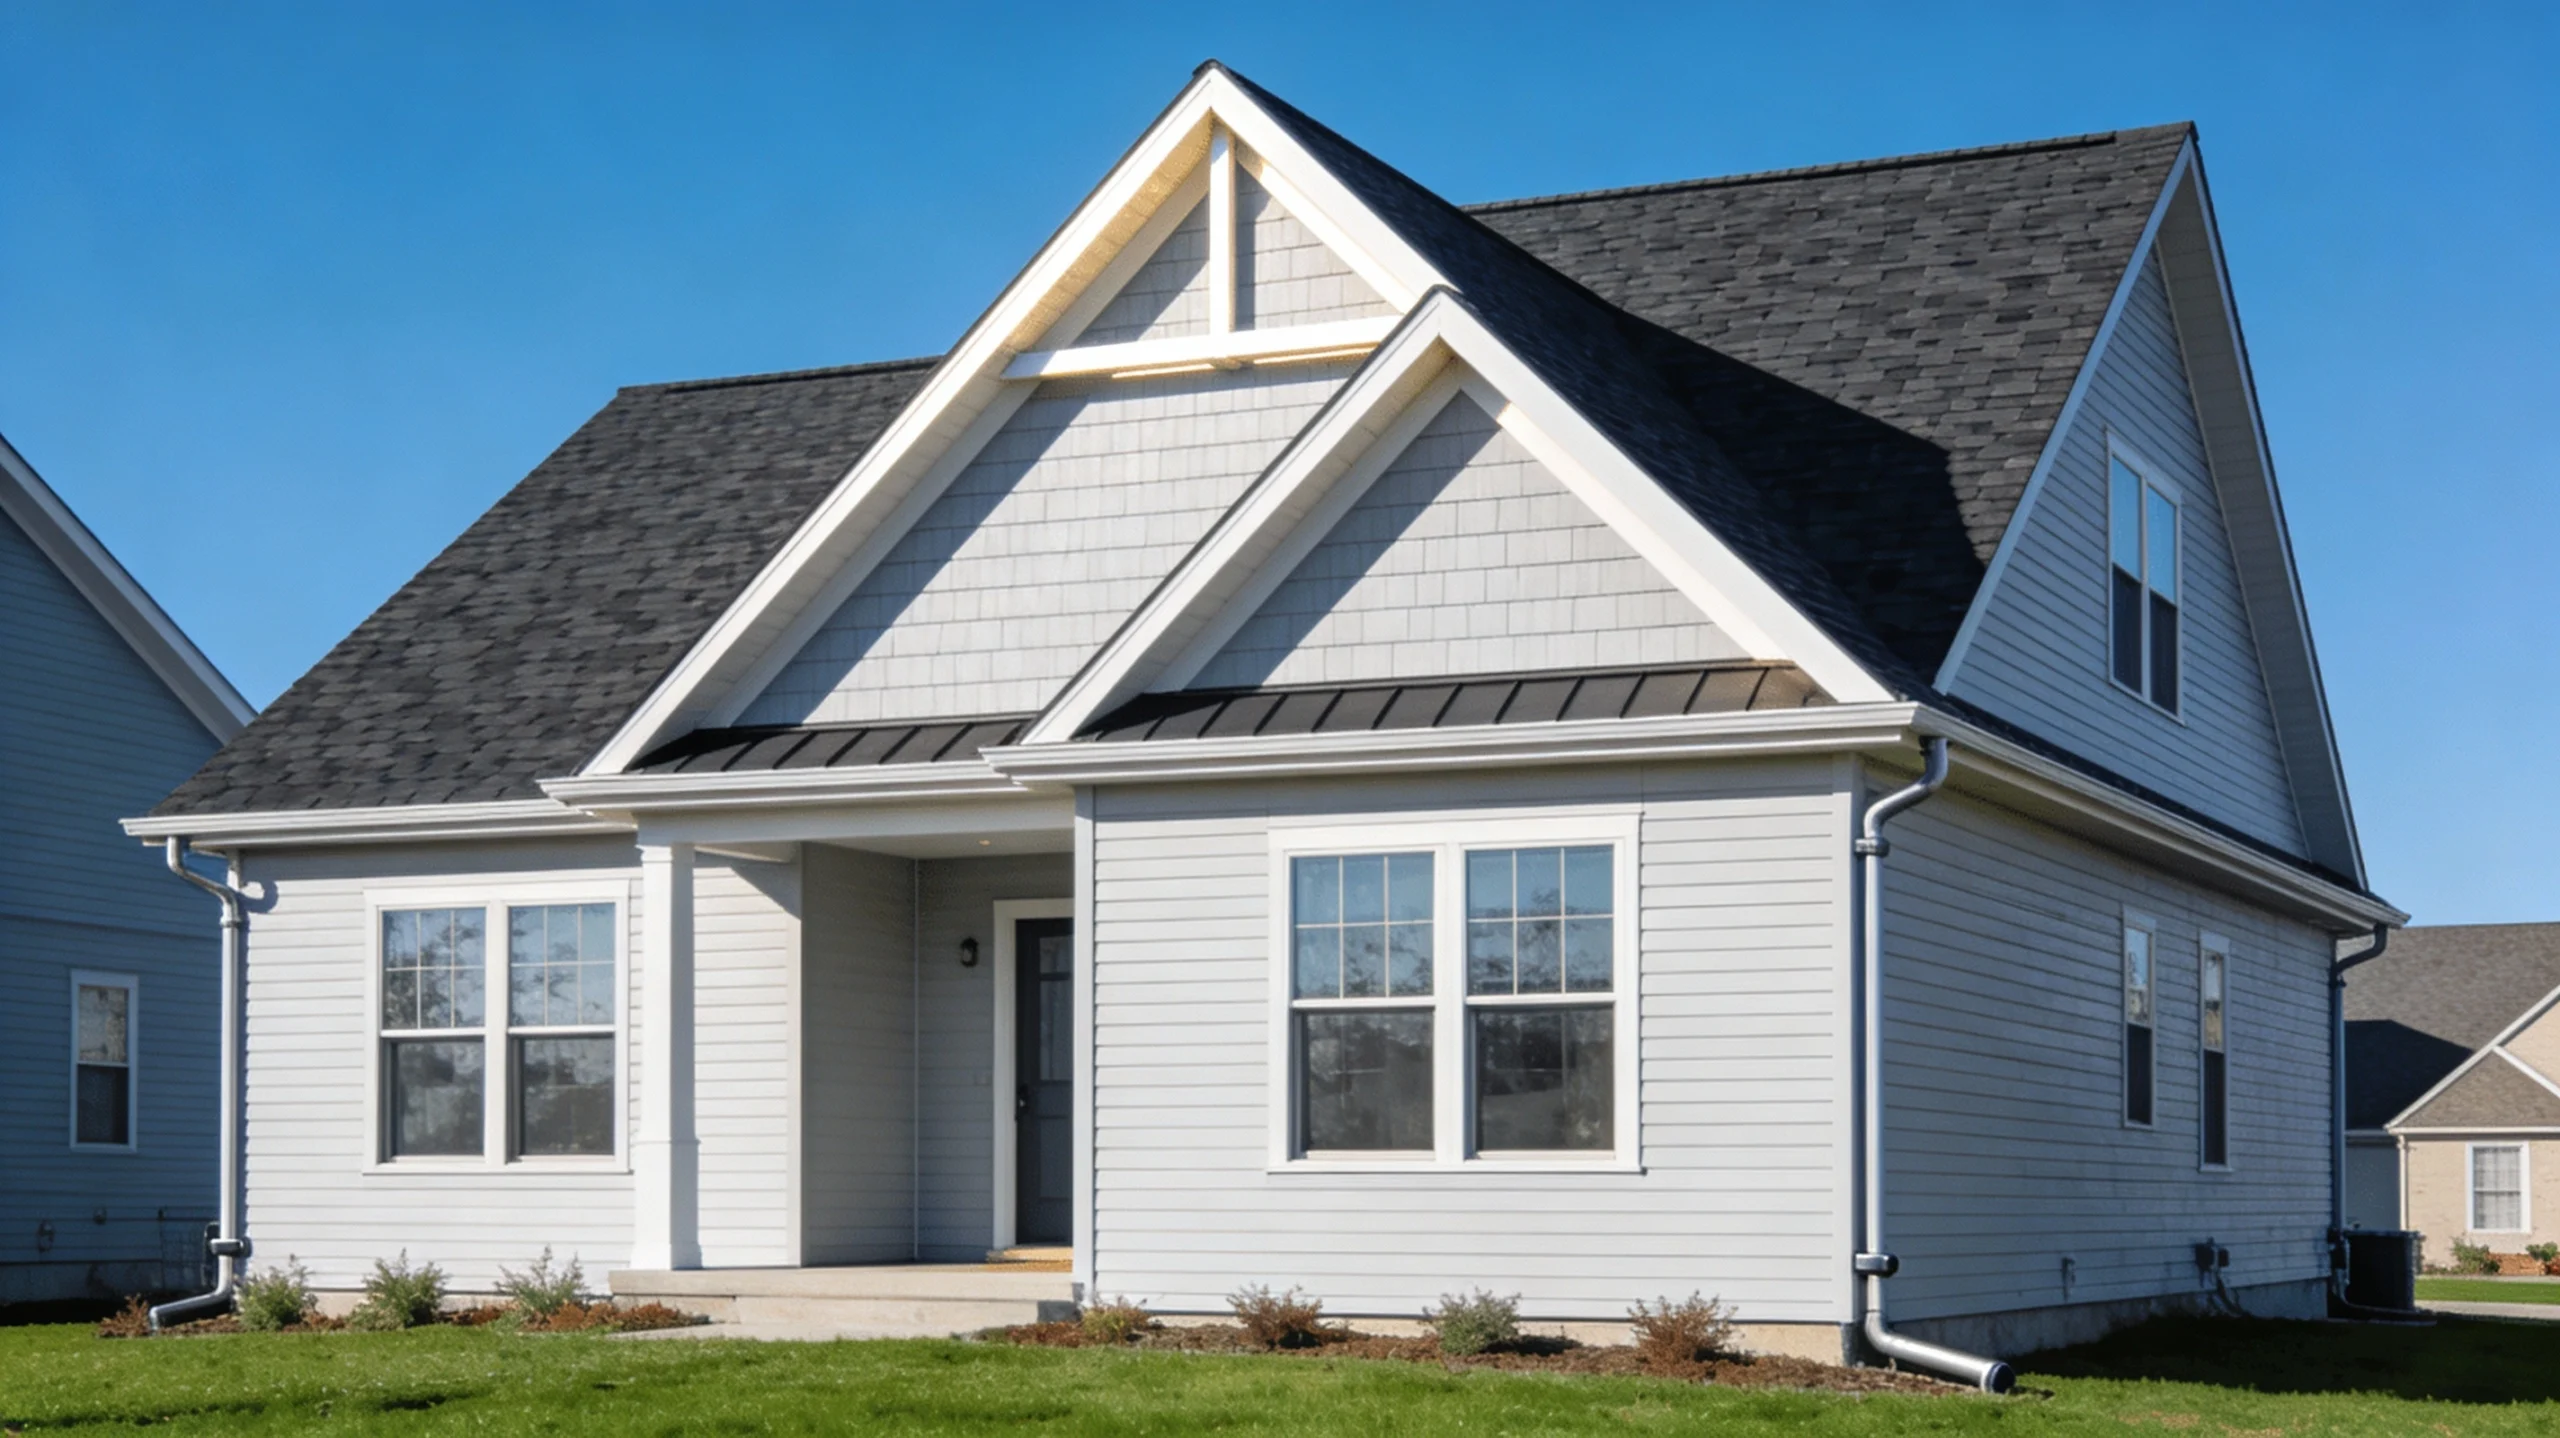
The gable roof shape ranks as the most common roof design in cold and temperate climates, featuring two sloping sides that meet at a central ridge to form distinctive triangular end walls. This classic inverted “V” configuration efficiently sheds water, snow, and debris while providing excellent attic ventilation and increased interior space making gable roofs the preferred choice for residential construction from Cape Cod cottages to modern farmhouses. Understanding different types of roof styles helps homeowners select optimal designs balancing aesthetics, climate performance, cost, and architectural compatibility for new construction or replacement projects.
Beyond the standard gable roof shape, residential and commercial buildings employ eight major roof styles each offering distinct advantages: hip roofs providing superior wind resistance, gambrel roofs maximizing attic space, mansard roofs enabling full-story additions, shed roofs delivering contemporary aesthetics, flat roofs accommodating rooftop access, butterfly roofs creating dramatic modern statements, bonnet roofs offering extended porches, and saltbox roofs solving asymmetrical design challenges. This comprehensive guide explores each roof type’s characteristics, benefits, drawbacks, and ideal applications helping you understand which style best suits your home’s architecture, local climate, and functional requirements.
The gable roof shape dominates North American residential roofing due to simplicity, cost-effectiveness, and proven performance across diverse weather conditions while variations like cross-gable, Dutch gable, and box gable designs add architectural interest and functional benefits.
Table of Contents
What is a gable roof shape?
The gable roof shape consists of two sloping roof sections whose upper edges meet to form a horizontal ridge, creating triangular wall sections called gables at each end.
Basic gable roof definition and characteristics
Structural composition:
A gable roof features two flat or pitched sides that join at the top in an inverted “V” shape, forming the roof ridge running horizontally along the peak. The triangular portion of the vertical wall extending from the ridge peak down to the eaves at each open end constitutes the gable the defining architectural element giving this roof style its name.
Key identifying features:
- Two sloping roof planes meeting at central ridge line
- Triangular gable ends on opposing walls (typically front/back or side walls)
- Simple symmetrical design with matching pitch on both sides
- Ridge board running length of roof at highest point
- Rafters or trusses supporting pitched sides
Pitch variations:
The pitch or slope angle of gable roof shapes varies greatly depending on climate requirements, architectural style, and homeowner preference. Steeper pitches (8:12 to 12:12) excel in heavy snowfall regions by efficiently shedding snow, while moderate pitches (4:12 to 6:12) provide balanced performance for most climates, and lower pitches (3:12 to 4:12) suit areas with minimal precipitation.
Why gable roofs are so popular
Cost-effectiveness:
Simple gable roof shapes rank among the most economical roof designs due to straightforward construction requiring fewer materials, less complex framing, and reduced labor hours compared to hip, mansard, or other elaborate roof styles.
Weather performance:
Gable roofs excel in cold climates and rainy regions by allowing snow, rain, and leaves to slide off efficiently rather than accumulating like on flat roofs. The steep pitch prevents moisture retention that causes leaks and structural damage, making gable designs ideal for areas with significant precipitation.
Interior space benefits:
Steeply sloped gable roofs increase usable attic space dramatically, allowing for vaulted ceilings, bonus rooms, or additional storage that flat or low-pitch roofs cannot accommodate.
Natural ventilation:
The triangular gable ends provide ideal locations for gable vents facilitating natural airflow, regulating attic temperature and humidity levels, improving energy efficiency, and preventing moisture buildup that leads to mold and structural deterioration.
Architectural versatility:
Gable roofs complement virtually every architectural style from traditional Colonial and Cape Cod to contemporary farmhouse and craftsman designs, offering timeless aesthetic appeal.
Gable roof advantages and disadvantages
Advantages:
- Simple construction lowering build costs 15-30% compared to complex designs
- Excellent water and snow shedding preventing accumulation and leaks
- Enhanced attic ventilation through gable vents reducing cooling costs
- Increased interior space allowing vaulted ceilings and bonus rooms
- Easy maintenance and repair due to accessible roof planes
- Wide range of roofing material compatibility (asphalt, metal, tile, wood shake)
Disadvantages:
- Vulnerable to wind damage in high-wind regions—gable ends can catch wind like sails, potentially causing roof failure during hurricanes or tornadoes
- Less structurally stable than hip roofs lacking four-sided support
- Requires proper bracing in high-wind zones to prevent gable end collapse
- Not recommended for coastal hurricane zones or tornado alley without reinforcement
- Fewer overhangs on gable ends may provide less wall protection from rain
Types of gable roof styles
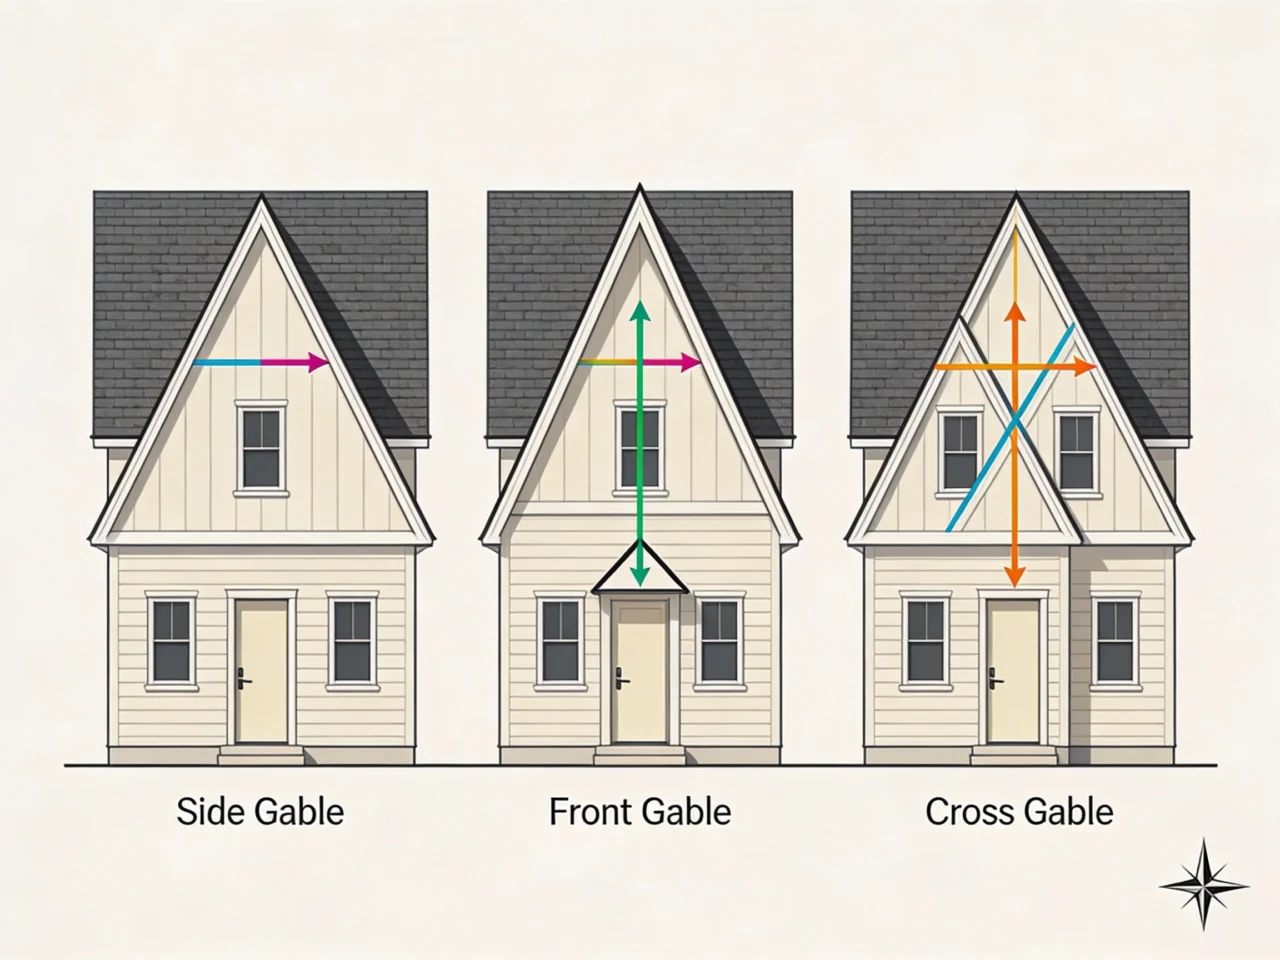
The standard gable roof shape has multiple variations offering different aesthetic and functional benefits.
Standard or side gable roof
Definition:
The traditional gable roof shape where the triangular gable ends face the front and back of the house, while the sloping sides face the street. This side-gabled orientation represents the most basic and common gable configuration seen on ranch homes, cottages, and bungalows.
Characteristics:
- Two equal-pitch roof slopes meeting at central ridge
- Ridge runs parallel to street or longest dimension of building
- Gable ends positioned on shortest walls (typically front and rear)
- Simple rectangular footprint
- Most economical gable design to construct
Best applications:
- Simple rectangular homes without complex layouts
- Traditional Cape Cod and Colonial architectural styles
- Budget-conscious new construction
- Homes in moderate climates without extreme weather
Front gable roof
Definition:
Front gable roofs orient the triangular gable end toward the street, creating prominent triangular facade as the home’s most visible architectural element.
Characteristics:
- Gable end faces front of property (curb appeal focal point)
- Ridge runs perpendicular to street
- Often features prominent front porch beneath gable overhang
- Creates dramatic vertical emphasis on home’s facade
- Common on Victorian, Gothic Revival, and craftsman bungalow styles
Aesthetic impact:
Front gable orientation creates strong vertical lines and architectural presence, making homes appear taller and more imposing while providing sheltered entry areas beneath the front gable overhang.
Cross gable roof
Definition:
Cross gable roofs consist of two or more gable roof sections intersecting at perpendicular or varying angles, creating multiple ridges and valleys.
Characteristics:
- Two gable rooflines meeting at 90-degree angle forming “T” or “L” shape
- Creates complex roofline with multiple ridges and valleys
- Accommodates complex floor plans with wings, additions, and varied room layouts
- Often used to define separate architectural elements (garage, porch, main house)
Benefits:
- Adds architectural interest and visual complexity to home exterior
- Accommodates T-shaped, L-shaped, or irregular floor plans
- Creates distinct zones highlighting different home areas
- Provides additional attic space and ventilation options
Design applications:
Cross gable roofs suit homes with attached garages, covered porches, dormers, or additions requiring separate roof sections—common on larger suburban homes with complex layouts.
Dutch gable roof (gablet roof)
Definition:
Dutch gable roofs combine gable and hip roof elements, featuring a small gable (gablet) positioned at the top of a hip roof end, creating a unique hybrid design.
Characteristics:
- Hip roof at lower portion with small gable section at peak
- Combines hip roof wind resistance with gable ventilation benefits
- Gablet section often features decorative window or vent
- Creates distinctive European-inspired aesthetic
Advantages:
- Balances traditional gable appearance with hip roof stability
- Provides ventilation opportunities through gablet vents
- Adds architectural elegance and curb appeal
- Performs better in high winds than standard gable roofs
Style compatibility:
Dutch gable roofs complement craftsman, Tudor, and European cottage architectural styles adding sophistication and old-world charm.
Box gable roof
Definition:
Box gable roofs feature gable ends that extend beyond the building’s exterior walls, creating triangular overhangs that resemble boxes.
Characteristics:
- Gable end extends outward past wall plane
- Creates covered overhang protecting walls and foundation
- Adds visual depth and shadow lines to facade
- Provides additional interior space at gable ends
Functional benefits:
- Enhanced protection for walls and foundation from precipitation
- Additional overhang sheltering windows and doors
- Elegant architectural detail adding character
- Can accommodate larger gable vents for improved ventilation
Gambrel roof (barn roof)
Definition:
Gambrel roofs modify the standard gable roof shape by incorporating two different slopes on each side a shallow slope near the ridge transitioning to a steeper slope near the eaves.
Characteristics:
- Each roof side features two distinct pitch angles
- Upper slope relatively shallow (flat appearance from distance)
- Lower slope much steeper (approaching vertical in some designs)
- Creates classic barn or Dutch Colonial appearance
Space maximization:
Gambrel roofs dramatically increase usable attic space compared to standard gable roofs by pushing the steep lower slope outward, creating nearly full-height second story with minimal “dead” space under eaves.
Common applications:
- Barns and agricultural buildings (classic American barn profile)
- Dutch Colonial residential architecture
- Homes requiring maximum second-floor living space
- Garages and outbuildings where vertical storage important
8 different types of roof styles beyond gable
Understanding various roof types helps homeowners select designs optimized for specific architectural needs, climate conditions, and aesthetic preferences.
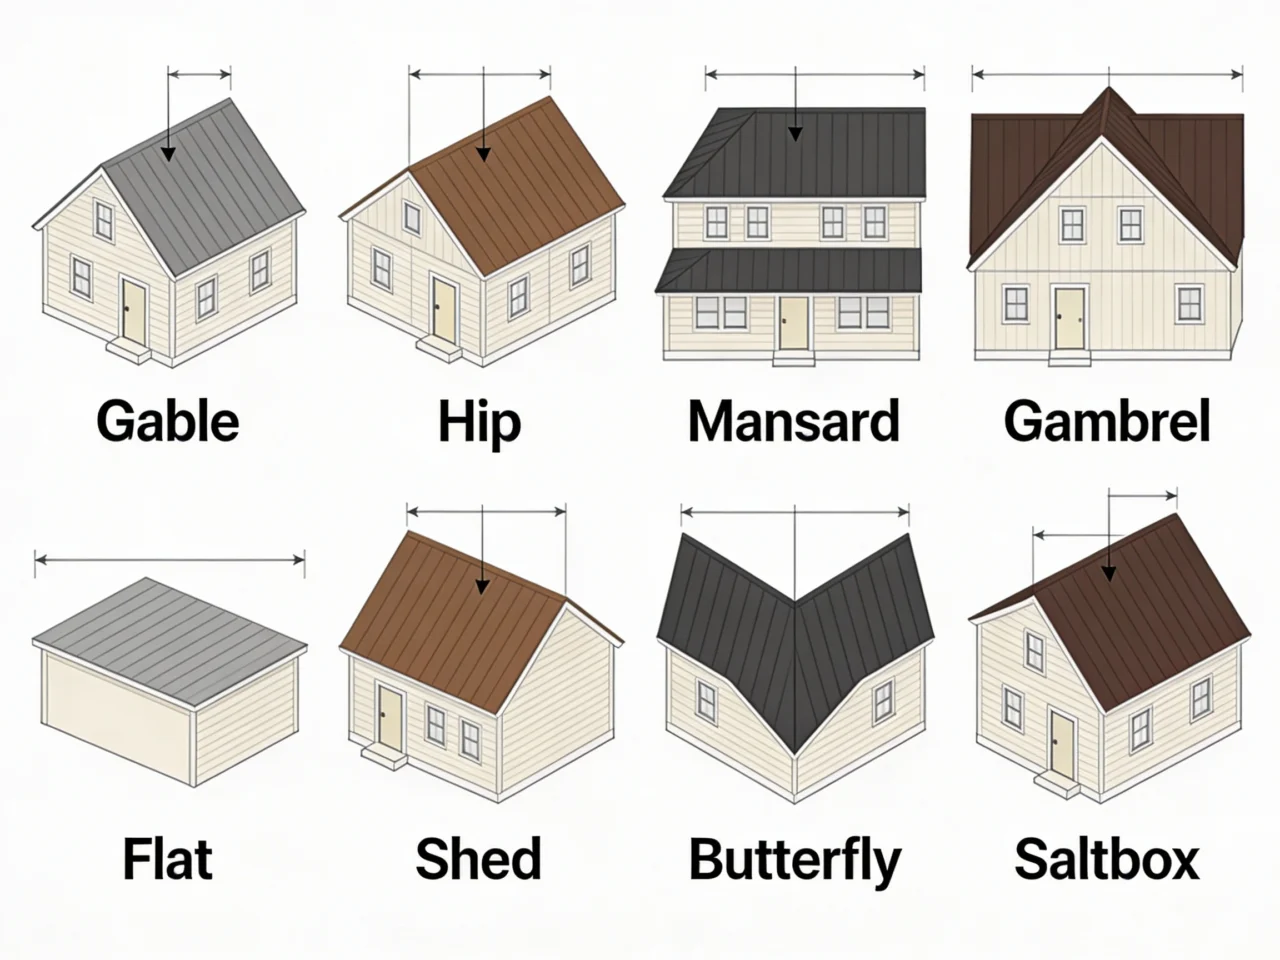
Hip roof
Definition:
Hip roofs feature four sloping sides that all meet at the top ridge (or at a single point on square buildings), eliminating vertical gable ends entirely.
Characteristics:
- All four sides slope downward toward walls
- No vertical gable ends (distinguishing feature from gable roofs)
- Hips (external angles) where adjacent roof planes meet
- Can form pyramid shape on square buildings
- Requires more complex framing than gable roofs
Advantages over gable roofs:
- Superior wind resistance—four-sided support prevents wind catching vertical surfaces
- More structurally stable with self-bracing properties
- Performs excellently in hurricane-prone coastal regions
- Overhangs on all four sides provide complete perimeter protection
Disadvantages:
- Higher construction costs (20-30% more than comparable gable)
- Reduced attic space due to sloping on all sides
- More complex framing requiring skilled carpentry
- Less ventilation area without vertical gable ends for vents
Mansard roof
Definition:
Mansard roofs feature four sides each with two distinct slopes—the lower slope nearly vertical, the upper slope barely visible from ground level.
Characteristics:
- Four-sided design with dual pitch on each side
- Lower slope extremely steep (almost vertical walls)
- Upper slope low-pitch or nearly flat
- French Second Empire architectural signature
- Creates full usable story within roof structure
Space advantages:
Mansard roofs transform roof space into full-height living areas with dormers providing light and ventilation, effectively adding an entire floor without increasing building footprint.
Aesthetic considerations:
Distinctive French Renaissance appearance suits Victorian and Second Empire homes but appears out of place on contemporary or traditional American architecture.
Flat roof
Definition:
Flat roofs have minimal pitch (typically 1:12 to 2:12) creating nearly horizontal roof surfaces, common on commercial buildings and modern residential architecture.
Characteristics:
- Slight pitch for water drainage (not truly flat)
- Simple construction with minimal framing
- Accessible surface for rooftop equipment, gardens, or patios
- Requires specialized waterproofing membranes
- Common on commercial and contemporary designs
Advantages:
- Lowest construction cost of any roof type
- Usable rooftop space for HVAC equipment, solar panels, or recreation
- Modern architectural aesthetic
- Simplest maintenance access
Disadvantages:
- Poor water and snow shedding leads to ponding
- Higher maintenance requirements and leak potential
- Shorter lifespan than pitched roofs (15-25 years typical)
- Not suitable for snowy climates
- Limited insulation space reducing energy efficiency
Shed roof (skillion roof)
Definition:
Shed roofs feature single sloping plane with no ridge line—essentially half of a gable roof extending from high wall to low wall.
Characteristics:
- Single continuous slope (no ridge or valley)
- High wall on one side, low wall on opposite
- Simple framing (easiest pitched roof to construct)
- Contemporary modern aesthetic
- Often used on additions, porches, and outbuildings
Modern applications:
Shed roofs dominate contemporary and mid-century modern architecture, often combined at different angles creating dynamic rooflines with multiple shed roof sections.
Benefits:
- Extremely cost-effective construction
- Excellent water shedding in one direction
- Accommodates clerestory windows on high wall
- Easy solar panel installation on south-facing slope
- Creates dramatic high ceilings on interior
Butterfly roof (V-shaped roof)
Definition:
Butterfly roofs invert the traditional gable shape, sloping downward from both sides toward a central valley, resembling butterfly wings.
Characteristics:
- Two roof planes sloping inward forming central valley
- Inverted “V” shape (opposite of gable)
- High exterior walls on both sides
- Low center line where planes meet
- Mid-century modern architectural signature
Distinctive features:
- Creates dramatic upward-sweeping roofline
- Allows extensive vertical windows on both sides
- Collects rainwater at center valley for harvesting
- Maximizes natural light and views
Drawbacks:
- Complex waterproofing at central valley
- Higher leak potential than conventional designs
- Expensive construction requiring skilled contractors
- Snow and debris accumulation in center valley
Bonnet roof
Definition:
Bonnet roofs resemble hip roofs but feature double slopes on all four sides with the lower slope shallower than the upper, creating covered porches around the building perimeter.
Characteristics:
- Four-sided design with dual pitch
- Steep upper slopes, gentle lower slopes
- Lower slopes create wraparound covered porch areas
- French vernacular and Southern plantation style
- Inverted mansard configuration
Applications:
Bonnet roofs suit Southern U.S. architecture where extended porches provide shade and outdoor living space, common on French Colonial and Louisiana plantation homes.
Saltbox roof
Definition:
Saltbox roofs feature asymmetrical gable design with one long slope (rear) and one short slope (front), creating distinctive Colonial New England profile.
Characteristics:
- Two slopes of unequal length meeting at ridge
- Long rear slope extending to first floor or ground level
- Short front slope resembling standard gable
- Accommodates two-story front, single-story rear
- Colonial American architectural signature
Historical context:
Saltbox design originated in Colonial New England as tax-avoidance strategy and practical addition method—extending rear roof accommodated rear lean-to additions without full two-story construction.
Dome roof
Definition:
Dome roofs feature curved hemispherical or polygonal shapes creating iconic circular structures used on special-purpose buildings.
Characteristics:
- Curved three-dimensional shape
- No ridges, valleys, or distinct roof planes
- Circular or polygonal footprint
- Exceptional structural strength
- Monumental architectural statement
Applications:
Dome roofs suit religious buildings (churches, mosques, temples), government structures (capitol buildings), and specialized residential construction (geodesic domes, observatories).
Gable roof vs hip roof: key differences
Comparing gable roof shape against hip roof design helps homeowners understand trade-offs between cost, performance, and aesthetics.
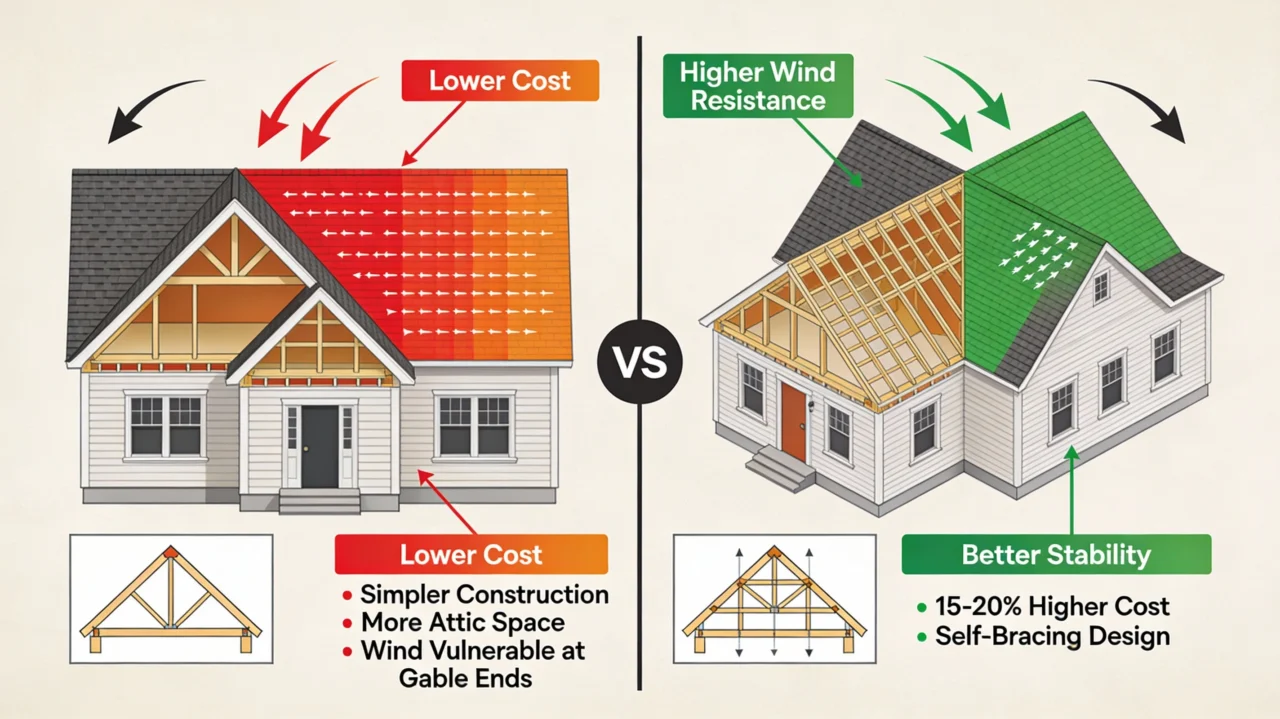
Structural differences
Gable roof structure:
- Two sloping sides meeting at central ridge
- Vertical triangular gable ends on two sides
- Ridge beam running length of building
- Simpler framing with fewer components
- Less structural bracing (potentially vulnerable)
Hip roof structure:
- Four sloping sides meeting at ridge or single peak
- No vertical gable ends
- Hip rafters forming external angles
- Self-bracing design providing structural stability
- More complex framing requiring additional lumber
Cost comparison
Gable roof costs:
- Lower material requirements (15-30% less lumber)
- Simpler labor reducing installation time
- Fewer complex cuts and angles
- Total cost: $5-$12 per square foot installed (average)
Hip roof costs:
- Higher material usage (more rafters, ridge boards, hip rafters)
- Complex framing requiring skilled carpenters
- Longer installation time
- Total cost: $7-$15 per square foot installed (20-30% premium over gable)
Performance in different climates
Gable roofs excel in:
- Heavy snowfall regions—steep pitch sheds snow efficiently
- Rainy climates—excellent water runoff
- Cold climates—attic ventilation prevents ice dams
- Moderate weather zones—balanced performance
Gable roofs struggle in:
- Hurricane-prone coastal areas—gable ends catch wind
- Tornado alley—structural vulnerability to extreme winds
- High-wind regions without proper bracing
Hip roofs excel in:
- Coastal hurricane zones—four-sided support resists wind
- High-wind regions—aerodynamic shape deflects wind
- Areas requiring maximum structural stability
Hip roofs limitations:
Aesthetic considerations
Gable roof aesthetics:
- Classic American residential appearance
- Strong vertical lines and triangular emphasis
- Versatile styling from traditional to contemporary
- Prominent architectural features (gable ends)
Hip roof aesthetics:
- Elegant, refined appearance
- Low-profile design appearing less imposing
- Symmetrical uniform appearance from all angles
- Sophisticated European influence
Choosing the right roof type for your home
Selecting optimal roof style requires balancing climate performance, architectural compatibility, budget constraints, and personal preferences.
Climate and weather considerations
Snow-heavy regions:
Steep-pitch gable, gambrel, or saltbox roofs shed snow effectively preventing dangerous accumulation and structural stress. Pitch should exceed 6:12 in areas with regular heavy snowfall.
High-wind and hurricane zones:
Hip roofs provide superior wind resistance for coastal and tornado-prone areas, though properly braced gable roofs with hurricane straps can perform adequately. Avoid standard gable designs in extreme wind zones without structural reinforcement.
Hot humid climates:
Gable roofs with prominent gable vents provide superior attic ventilation reducing cooling costs and preventing moisture damage in humid Southeast and Gulf Coast regions.
Rainy climates:
All pitched roof types (gable, hip, shed) perform well in rainy regions—avoid flat roofs where water pooling causes leaks and deterioration.
Architectural style compatibility
Traditional Colonial/Cape Cod:
Side gable or front gable roofs with moderate pitch (6:12 to 8:12)
Victorian/Gothic Revival:
Steep front gables, cross gables, or mansard roofs
Craftsman/Bungalow:
Low-pitch gable or hip roofs with wide overhangs
Ranch/Mid-century Modern:
Low-pitch gable, hip, or shed roofs with clean lines
Contemporary/Modern:
Shed, butterfly, or flat roofs with dramatic angles
Mediterranean/Spanish:
Low-pitch hip or mansard roofs with tile covering
Farmhouse:
Gable, gambrel, or saltbox roofs
Budget and complexity
Most economical roof types:
- Standard gable (simplest, lowest cost)
- Shed roof (minimal framing)
- Side gable (straightforward construction)
Moderate cost roof types:
- Hip roof (20-30% more than gable)
- Cross gable (depends on complexity)
- Gambrel (moderate framing complexity)
Expensive roof types:
- Mansard (complex dual-pitch framing)
- Butterfly (intricate waterproofing)
- Dutch gable (hybrid design)
- Dome (specialized construction)
Interior space requirements
Maximum attic space:
- Gambrel roof (nearly full second-story height)
- Steep-pitch gable (vaulted ceilings, bonus rooms)
- Mansard roof (full usable story)
Moderate attic space:
Minimal attic space:
- Hip roof (slopes on all sides reduce volume)
- Low-pitch roofs (limited headroom)
- Flat roof (no attic—ceiling against roof deck)
Frequently asked questions about gable roof shape and roof types
What is a gable roof shape?
A gable roof shape consists of two sloping sides that meet at a central horizontal ridge, forming triangular gable ends on opposing walls where the roof structure creates an inverted “V” silhouette. This classic design represents the most common roof type in North America due to simple construction, excellent weather protection, and versatile aesthetic compatibility.
What are the main different types of roof styles?
The eight main different types of roof styles include gable roofs (triangular ends with two slopes), hip roofs (four sloping sides without gable ends), mansard roofs (four-sided with dual slopes creating additional living space), gambrel roofs (barn-style with two slopes per side), flat roofs (minimal pitch for modern designs), shed roofs (single slope), butterfly roofs (inverted V-shape), and saltbox roofs (asymmetrical gable with unequal slopes).
What is the difference between a gable roof and a hip roof?
Gable roofs feature two sloping sides with vertical triangular gable ends providing excellent ventilation and attic space at lower cost, while hip roofs have four sloping sides meeting at a ridge with no vertical ends offering superior wind resistance and structural stability at 20-30% higher construction cost. Gable roofs excel in snowy climates, whereas hip roofs perform better in high-wind coastal hurricane zones.
What are the disadvantages of gable roofs?
Gable roofs are vulnerable to wind damage in hurricane and tornado zones where vertical gable ends can catch wind like sails causing structural failure, require additional bracing for high-wind areas, provide less structural stability than four-sided hip roofs, and offer limited overhang protection on gable end walls. Proper reinforcement with hurricane clips and gable end bracing mitigates wind vulnerability in extreme weather regions.
What is a cross gable roof?
A cross gable roof consists of two or more gable roof sections intersecting at perpendicular angles (typically 90 degrees) forming multiple ridges and valleys in “T”, “L”, or complex configurations. This design accommodates complex floor plans with separate wings for garages, porches, or additions while adding architectural interest and creating distinct visual zones highlighting different home areas.
What roof type is best for snowy climates?
Steep-pitch gable roofs, gambrel roofs, and saltbox roofs perform best in heavy snowfall regions by efficiently shedding snow before dangerous accumulation occurs, with pitches exceeding 6:12 recommended for areas with regular significant snowfall. The smooth sloping surfaces prevent ice dam formation and reduce structural stress from snow weight compared to flat or low-pitch roofs.
What is a Dutch gable roof?
A Dutch gable roof (also called gablet roof) combines hip and gable roof elements by featuring a hip roof at the lower portion with a small gable section positioned at the peak, creating a hybrid design that balances the wind resistance of hip roofs with the ventilation benefits and aesthetic appeal of gable ends. This European-inspired style adds architectural elegance while improving performance in high-wind conditions.
How much does a gable roof cost compared to other roof types?
Gable roofs cost $5-$12 per square foot installed representing the most economical pitched roof option, while hip roofs run $7-$15 per square foot (20-30% premium), shed roofs cost $4-$10 per square foot, gambrel roofs range $8-$14 per square foot, and complex designs like mansard or butterfly roofs exceed $12-$20 per square foot due to intricate framing requirements. Simple gable construction requires fewer materials and less skilled labor reducing overall project costs.
Selecting the ideal roof style for lasting protection
The gable roof shape dominates residential construction across North America through proven performance combining cost-effective construction, superior water and snow shedding, enhanced attic ventilation, increased interior space, and timeless aesthetic versatility suiting traditional through contemporary architectural styles. Understanding different types of roof styles—including hip roofs for wind resistance, gambrel roofs for space maximization, shed roofs for modern aesthetics, and specialized designs like mansard, butterfly, and saltbox enables homeowners to select optimal designs balancing climate performance, architectural compatibility, budget constraints, and functional requirements.
Gable roof variations including standard side gable, front gable, cross gable, Dutch gable, and box gable configurations provide design flexibility addressing specific architectural needs while maintaining the fundamental advantages of simple two-slope construction. Climate considerations prove critical steep gable roofs excel in snowy regions through efficient snow shedding, hip roofs dominate hurricane-prone coastal areas through superior wind resistance, and properly ventilated gable designs reduce cooling costs in hot humid climates.
Choosing the right roof type requires evaluating multiple factors: local weather patterns determining pitch and structural requirements, architectural style dictating appropriate roof profiles, budget constraints influencing complexity selection, interior space needs affecting attic volume, and long-term maintenance considerations impacting lifecycle costs. Consulting licensed roofing contractors and architects ensures your roof selection optimizes performance, aesthetics, and value for your specific home and location remember that roof replacement represents one of the largest home improvement investments warranting careful research and professional guidance.
🏠 Roofing Tips & Updates
Get free roofing advice, cost guides, and seasonal maintenance tips.
Roofing content specialist with 5+ years researching U.S. residential and commercial roofing. Has documented 200+ projects covering installation costs, material selection, contractor vetting, and DIY guides for homeowners across all climate zones.
Minimum Roof Pitch for Shingles: 2026 Install Guide
Minimum Roof Pitch for Shingles: 2026 Install Guide
The minimum roof pitch for shingles determines whether your asphalt shingle roof installation will shed water properly or face chronic leaks and warranty problems. Most manufacturers and building codes set 2:12 as the minimum roof pitch for shingles, but only when specific underlayment requirements are met. Understanding slope requirements before you install shingles can save thousands in repairs and prevent premature roof failure.
Roof pitch is expressed as “rise over run” a 4:12 pitch means the roof rises 4 inches for every 12 inches of horizontal distance. The minimum roof pitch for shingles matters because asphalt shingles are a water-shedding system, not waterproof. They need enough slope for gravity to carry water downhill over overlapping courses. Below certain angles, water moves too slowly, wind-driven rain pushes under tabs, and capillary action pulls moisture backward into the roof assembly.
This comprehensive guide explains the real-world minimum roof pitch for shingles, manufacturer requirements, underlayment systems for low-slope installations, how to measure pitch accurately, and when to switch from shingles to low-slope membranes. Whether you’re a homeowner planning a roof replacement or a contractor verifying code compliance, you’ll find practical, actionable guidance here.
Table of Contents
Understanding the 2:12 Minimum Roof Pitch for Shingles
The minimum roof pitch for shingles in most manufacturer specifications and building codes is 2:12, meaning the roof rises 2 inches for every 12 inches of horizontal run. However, this minimum comes with strict conditions that many homeowners and even some contractors overlook.
At exactly 2:12 pitch, water drains significantly slower than on steeper roofs. Snow melts more gradually. Wind-driven rain has more opportunity to push under shingle laps. These factors make the minimum roof pitch for shingles a threshold that requires enhanced installation practices rather than a comfortable working range.
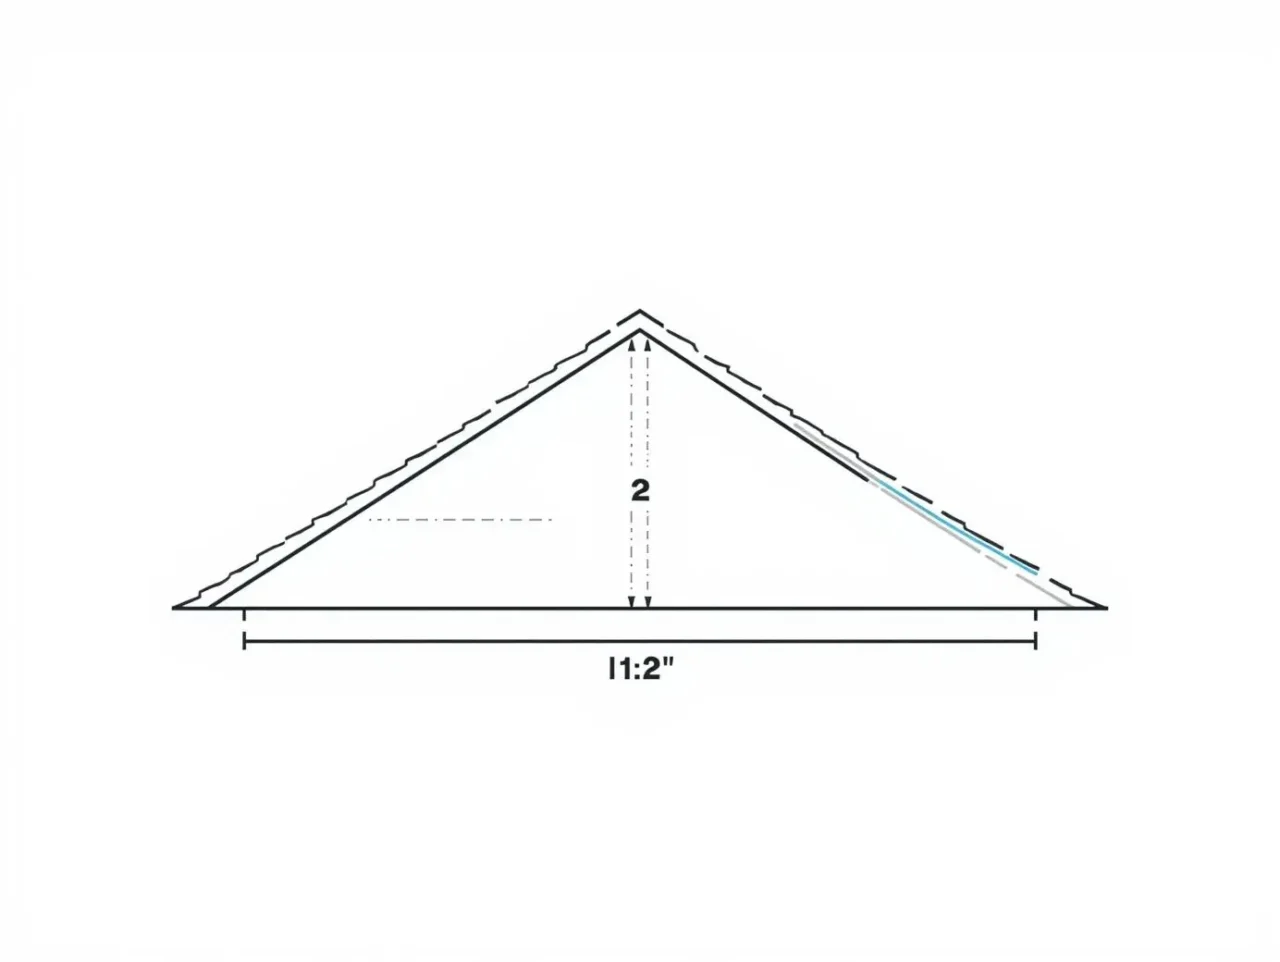
Slow water movement: On a 2:12 roof, water already moves noticeably slower than on a 6:12 or 8:12 slope. Drainage time increases dramatically, giving moisture more opportunity to find entry points through nail holes or worn sealant strips.
Capillary action: Water can wick uphill between overlapping shingle layers through capillary action. With low pitch and slow drainage, capillary forces have more time to pull water backward under shingle laps, defeating the gravity-based shedding design.
Wind uplift and driven rain: Strong winds can lift shingle tabs and push water upslope. The flatter the roof, the easier it is for wind to overcome gravity and force water under overlapping courses.
Ponding in depressions: Even minor deck irregularities or structural settling can create slight depressions where water ponds on low-slope roofs. Standing water accelerates shingle deterioration and finds any available leak path.
At the minimum roof pitch for shingles of 2:12, these risks become manageable only with upgraded underlayment systems that provide a secondary waterproof barrier.
Manufacturer Requirements at Minimum Pitch
Every major asphalt shingle manufacturer publishes technical manuals specifying their minimum roof pitch for shingles. While specific details vary slightly, the consensus is remarkably consistent:
GAF shingles: Minimum slope 2:12 for Timberline HDZ and most architectural lines, with double underlayment or self-adhered membrane required from 2:12 to 4:12.
CertainTeed shingles: Minimum 2:12 slope; requires two layers of underlayment or full-coverage peel-and-stick membrane on slopes under 4:12.
Owens Corning shingles: 2:12 minimum for Duration and Oakridge series; special low-slope application instructions mandatory below 4:12.
IKO shingles: Most lines allow 2:12 minimum with enhanced underlayment; some premium products may specify 3:12 or higher.
Installing shingles below the minimum roof pitch for shingles specified in the manufacturer’s manual automatically voids the warranty. If leaks or premature failure occurs, warranty claims will be denied based on improper application outside approved specifications.
The Three Critical Slope Zones
For practical asphalt shingle roof installation planning, roof slopes fall into three distinct zones with different requirements and performance characteristics:
Zone 1: Standard Slope (4:12 and Steeper)
Roofs at 4:12 pitch or steeper represent the ideal range where asphalt shingles perform best. This is well above the minimum roof pitch for shingles, and installation is straightforward:
- Single-layer underlayment: Standard synthetic underlayment or #30 felt is typically sufficient.
- Excellent water shedding: Gravity moves water quickly off the roof surface, minimizing exposure time and leak risk.
- Better snow performance: Snow slides off more readily, reducing ice dam formation in cold climates.
- Simpler installation: Roofers can work more safely and efficiently on moderate slopes.
- Longer shingle life: Reduced moisture exposure and better drainage extend service life.
Most professional roofers prefer slopes of 4:12 or greater for asphalt shingle roof installation because they offer the best combination of performance, safety, and ease of work.
Zone 2: Low Slope (2:12 to 4:12)
The 2:12 to 4:12 range is where the minimum roof pitch for shingles requirements become critical. Shingles can work here, but only with enhanced underlayment:
- Double underlayment required: Most manufacturers mandate either two layers of underlayment or full-coverage self-adhered membrane.
- Slower drainage: Water moves more slowly, increasing exposure time and requiring better secondary protection.
- Greater wind vulnerability: Wind-driven rain poses higher risk of water intrusion under shingle laps.
- Ice dam susceptibility: In cold climates, low slopes are more prone to ice dam backup that forces water under shingles.
- Warranty conditions: Enhanced installation requirements must be met or warranties are void.
If your roof falls in this zone at the minimum roof pitch for shingles, budget for upgraded underlayment materials and follow manufacturer specifications exactly.
Zone 3: Too Flat for Shingles (Below 2:12)
Below 2:12 pitch, standard asphalt shingles are not approved and should not be used:
- Water ponding: Even slight deck irregularities cause standing water that defeats water-shedding design.
- Extremely slow drainage: Water moves so slowly that capillary action and wind easily overcome gravity.
- No warranty coverage: All manufacturers exclude slopes below their specified minimum from warranty protection.
- High leak risk: Chronic leaks are nearly inevitable on shingles installed below the minimum roof pitch for shingles.
- Code violations: Building inspectors will fail installations that don’t meet minimum slope requirements.
If you measure below 2:12, plan for low-slope roofing systems like modified bitumen, TPO, PVC, or EPDM membranes instead of shingles.
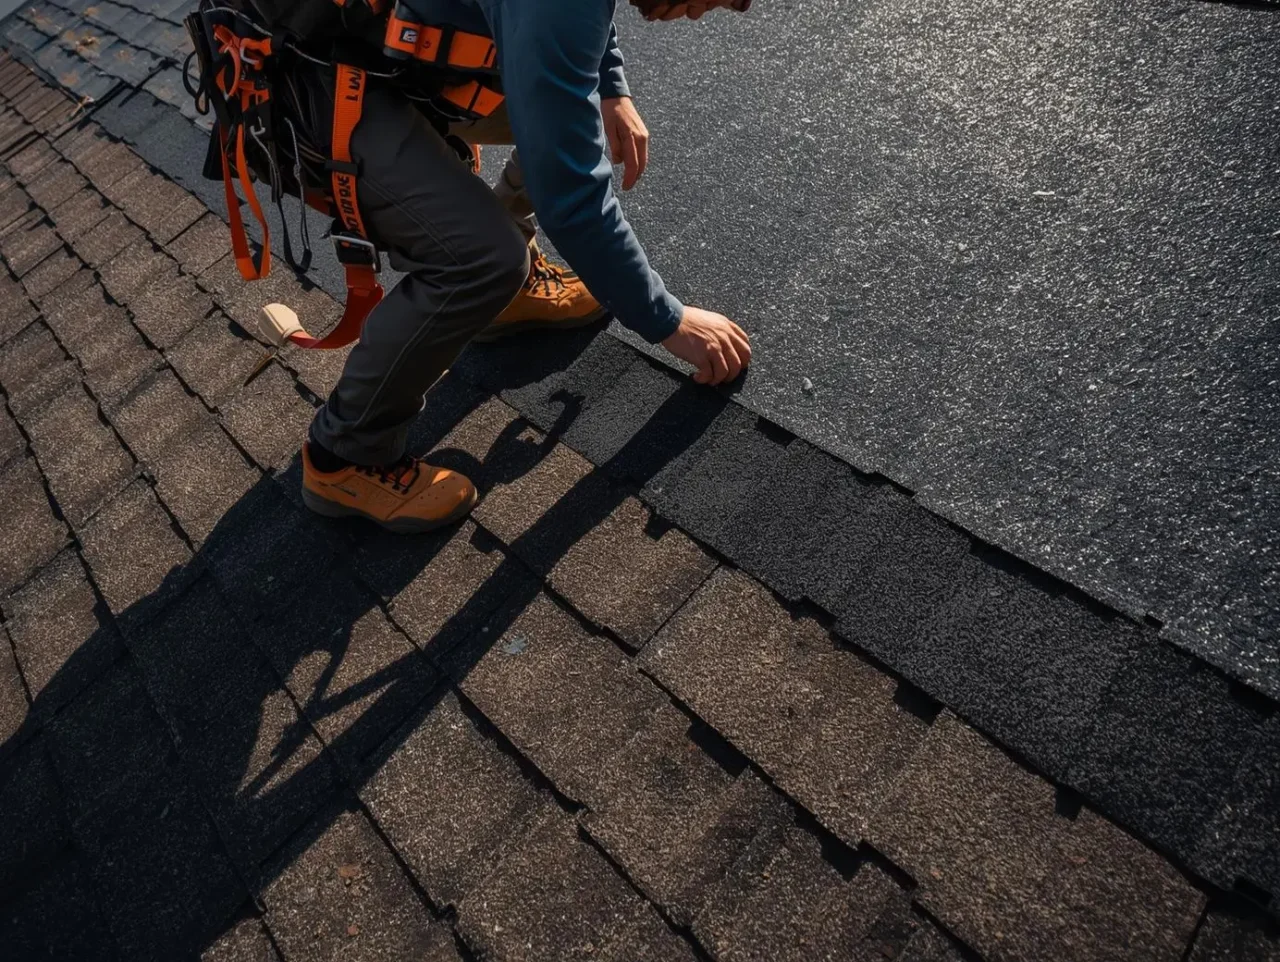
At the minimum roof pitch for shingles between 2:12 and 4:12, the underlayment system transforms from a simple backup layer to a critical waterproofing component. Manufacturers specify two main approaches to meet low-slope requirements:
Option 1: Full-Coverage Self-Adhered Membrane
The most reliable method for meeting minimum roof pitch for shingles requirements is installing a continuous self-adhered membrane across the entire roof deck:
Installation process:
- Apply peel-and-stick ice-and-water shield or similar self-adhered membrane starting at the eave
- Overlap seams by 6 inches minimum, rolling firmly to create watertight bonds
- Continue coverage to the ridge, ensuring no gaps or unbonded areas
- Install shingles over the membrane following standard nailing patterns
Advantages of full-coverage membrane:
- Self-sealing around nails prevents water infiltration even if it gets under shingles
- Continuous waterproof barrier protects deck from any shingle breaches
- Highest level of protection for roofs at the minimum roof pitch for shingles
- Excellent protection in high-wind or ice-dam-prone regions
Cost considerations:
Self-adhered membranes cost approximately $0.75-$1.50 per square foot compared to $0.15-$0.40 for standard underlayment, adding $750-$1,500 to a 1,000-square-foot roof project. However, this investment provides maximum protection when working at the minimum roof pitch for shingles.
Option 2: Double-Layer Underlayment
The second approved method for the minimum roof pitch for shingles is installing two layers of felt or synthetic underlayment with proper overlap:
Installation process:
- Install first course horizontally at the eave edge
- Begin second course starting 19 inches up from eave (for #30 felt) or per manufacturer specs
- Each subsequent course overlaps the one below by at least 19 inches
- Result is every point on the deck covered by two layers with staggered seams
- Provides double protection barrier if water penetrates shingles
Advantages of double underlayment:
- More economical than full self-adhered membrane
- Approved by all major manufacturers at minimum roof pitch for shingles
- Creates redundant protection without self-sealing features
- Works well in moderate climates without extreme weather
When to choose each option:
Choose full-coverage membrane when:
- Roof is exactly at 2:12 (the absolute minimum roof pitch for shingles)
- Climate includes heavy rain, snow, or frequent ice dams
- Budget allows for maximum protection
- Local building codes require enhanced protection
Choose double-layer underlayment when:
- Roof is 3:12 or higher (above bare minimum)
- Climate is moderate without extreme conditions
- Budget is constrained but code compliance required
- Standard protection adequate for regional weather patterns
Never skip the enhanced underlayment requirements at the minimum roof pitch for shingles. Single-layer installations in the 2:12-4:12 range void warranties and create high leak risk.
How to Measure Roof Pitch
Before determining whether your roof meets the minimum roof pitch for shingles, you need an accurate measurement. You can measure pitch from inside the attic or on top of the roof if safe access is available.
Simple Level and Tape Method
The most reliable DIY approach uses a 12-inch level and tape measure:
From inside the attic:
- Find a rafter running from eave to ridge
- Place one end of a 12-inch level against the bottom of the rafter
- Hold the level perfectly horizontal (check the bubble)
- From the other end of the level, measure straight up to the underside of the rafter
- The vertical measurement in inches is your pitch rise over 12 inches of run
From on top of the roof (if safely accessible):
- Place one end of a 12-inch level flat on the roof surface
- Hold the level horizontal
- Measure vertically down from the other end of the level to the roof surface
- The vertical measurement is your roof pitch rise
Interpreting measurements:
- 2 inches = 2:12 (exactly at the minimum roof pitch for shingles)
- 3 inches = 3:12 (low slope, enhanced underlayment required)
- 4 inches = 4:12 (threshold between low slope and standard)
- 6 inches = 6:12 (standard slope, good shingle performance)
- 1.5 inches = 1.5:12 (below minimum roof pitch for shingles, use membranes)
If you measure between 1.75 and 2.25 inches, treat it conservatively as 2:12 and follow all low-slope installation requirements for the minimum roof pitch for shingles.
Smartphone Apps and Digital Tools
Several smartphone apps can measure roof pitch using the phone’s built-in accelerometer:
- Place phone flat on roof surface or against rafter
- App reads angle and converts to pitch notation
- Verify accuracy by cross-checking with manual level method
Digital angle finders and laser levels offer similar convenience for contractors measuring multiple roofs. Regardless of tool, accuracy is critical when working near the minimum roof pitch for shingles threshold.
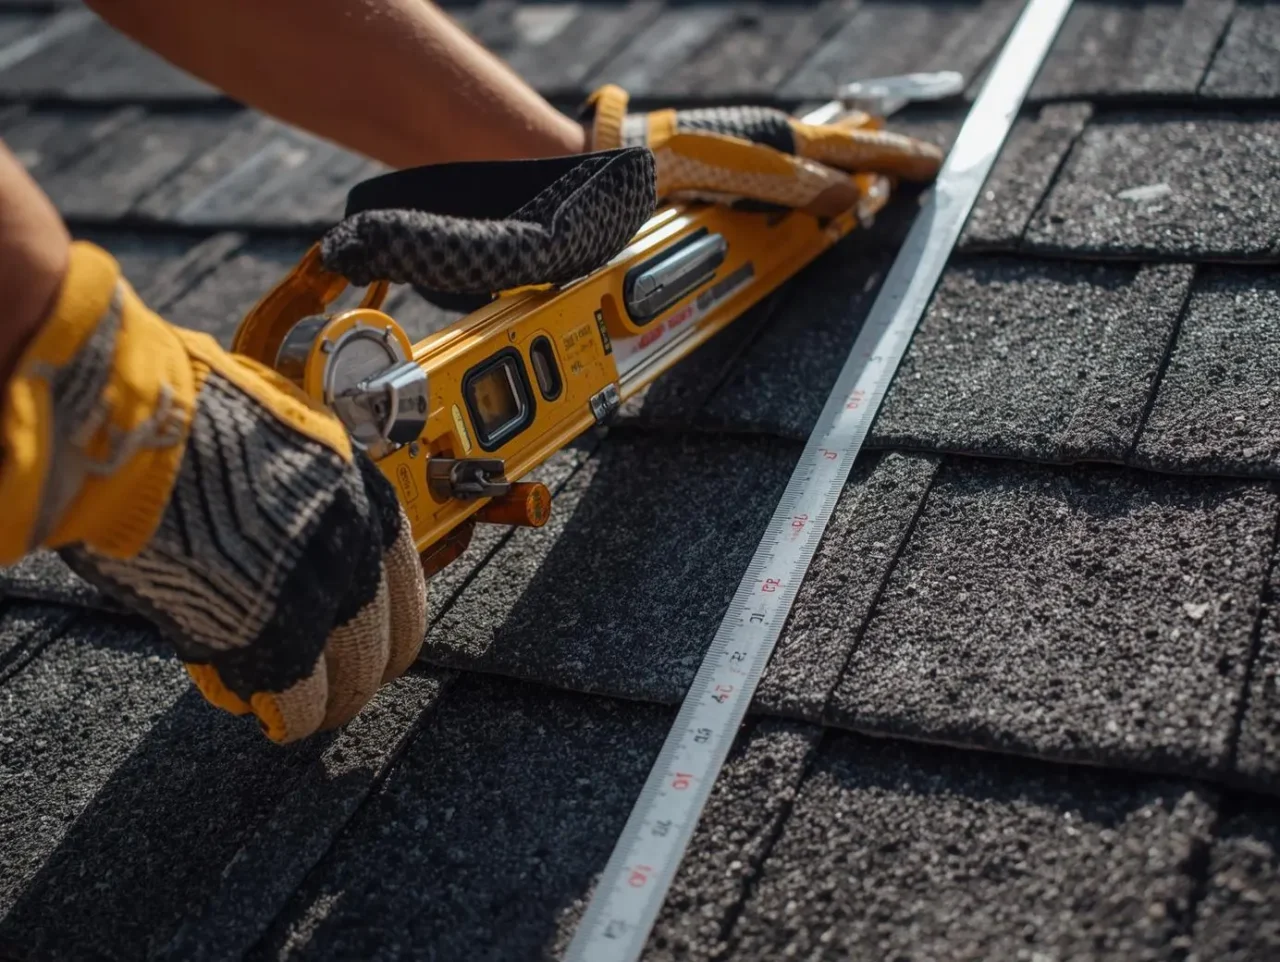
Below the minimum roof pitch for shingles of 2:12, attempting to install asphalt shingles creates serious problems that no amount of careful workmanship can overcome. The physics of water drainage simply don’t support shingle performance on very flat roofs.
Problems with Shingles on Too-Flat Roofs
Water ponding: On roofs below the minimum roof pitch for shingles, even minor deck irregularities, structural settling, or sagging between rafters creates depressions where water ponds. Standing water finds leak paths through nail holes, worn sealant, or aging shingles.
Reverse flow: With insufficient slope, capillary action and wind pressure easily overcome the weak gravitational pull. Water wicks backward under shingle laps or gets driven uphill by wind, defeating the overlap protection design.
Snow and ice accumulation: In cold climates, snow doesn’t slide off flat roofs. It melts slowly, creating persistent moisture exposure. Ice dams form easily, backing water under multiple shingle courses.
Accelerated deterioration: Prolonged moisture exposure on roofs below the minimum roof pitch for shingles causes premature granule loss, asphalt degradation, and shingle curling. A 30-year shingle might fail in 10-15 years.
Warranty void: Installing below manufacturer’s specified minimum roof pitch for shingles automatically voids all warranty coverage. If problems arise, you have no recourse.
Low-Slope Roofing Alternatives
When your measured pitch falls below the minimum roof pitch for shingles, switch to materials designed for low-slope or flat roof applications:
Modified bitumen: Multi-layer systems using reinforced asphalt sheets, either torch-applied or self-adhered. Works on slopes from flat to 3:12. Durable and proven, though installation requires experience.
TPO (Thermoplastic Polyolefin): Single-ply white membrane that reflects heat, mechanically attached or fully adhered. Excellent for flat to low-slope applications (1/4:12 to 3:12). Growing in popularity for residential and commercial use.
PVC (Polyvinyl Chloride): Premium single-ply membrane with excellent durability and chemical resistance. Higher cost than TPO but longer service life. Suitable for flat to low-slope roofs.
EPDM rubber: Black rubber membrane available in large sheets, fully adhered or mechanically attached. Proven performance on flat and low-slope roofs (flat to 2:12). More economical than TPO or PVC.
Built-up roofing (BUR): Traditional multi-layer system of asphalt and reinforcing fabrics, topped with gravel. Heavy and labor-intensive but extremely durable on flat roofs.
These systems are designed to be waterproof, not just water-shedding like shingles. They handle standing water, slow drainage, and wind-driven rain that would overwhelm roofs below the minimum roof pitch for shingles.
Transition Roofs: When to Mix Materials
Complex roof designs sometimes combine slopes above and below the minimum roof pitch for shingles. For example:
- Main house roof at 6:12 (shingles work great)
- Attached porch roof at 1:12 (below minimum roof pitch for shingles)
In these situations, install shingles on the steep section and a low-slope membrane on the flat section. Properly flash the transition between materials to prevent leaks at the material change line.
Many roofing contractors encounter these mixed-pitch scenarios and routinely combine different roofing materials based on actual slope measurements rather than trying to force one material across inappropriate pitches.
Climate and Regional Considerations
While 2:12 serves as the general minimum roof pitch for shingles, regional climate conditions influence whether working at or near this minimum is advisable:
Cold and Snowy Climates
In regions with heavy snowfall and freezing temperatures, roofs at the minimum roof pitch for shingles face additional challenges:
Ice dam formation: Low-slope roofs allow snow to accumulate rather than slide off. When attic heat melts the snow, water runs down to the cold eave and refreezes, forming ice dams that back water under shingles.
Prolonged snow cover: Snow sits on low-slope roofs for weeks or months, creating sustained moisture exposure as it slowly melts.
Freeze-thaw cycles: Moisture trapped in shingle crevices or under laps freezes and expands, accelerating damage on roofs at the minimum roof pitch for shingles.
Design recommendations for cold climates:
- Prefer 4:12 or steeper pitch when possible to encourage snow sliding
- Install full-coverage ice-and-water shield at eaves (typically 3-6 feet up from eave edge)
- Ensure excellent attic insulation and ventilation to minimize heat loss that causes melting
- Consider metal roofing on low slopes instead of shingles for better snow shedding
Many northern building codes require enhanced ice dam protection regardless of pitch, but requirements intensify as you approach the minimum roof pitch for shingles.
Hot and Dry Climates
In arid regions with minimal precipitation and high heat, roofs at the minimum roof pitch for shingles face different stresses:
Heat buildup: Low slopes present more surface area directly facing the sun, increasing attic temperatures and accelerating shingle aging.
UV exposure: Prolonged intense sunlight degrades asphalt and granules faster on any roof, but low slopes spend more time under direct sun angles.
Wind susceptibility: Desert winds can be strong and sustained; low-slope roofs near the minimum roof pitch for shingles are more vulnerable to wind uplift that lifts shingle tabs.
Minimal drainage issues: The good news is that rain is infrequent, so slow drainage at minimum pitch is less problematic than in wet climates.
Design recommendations for hot, dry climates:
- Enhanced ventilation to exhaust attic heat
- Light-colored or reflective shingles to reduce heat absorption
- High-quality shingles with superior UV protection and granule adhesion
- Secure nailing and sealing given high wind potential
While water management is less critical in dry climates, shingles at the minimum roof pitch for shingles still need proper installation to handle occasional intense storms and high winds.
Wet and Humid Climates
Regions with frequent rain, high humidity, or tropical storms present the most challenging conditions for roofs at the minimum roof pitch for shingles:
Constant moisture exposure: Frequent rain means water moves across low-slope roofs regularly, increasing leak risk at any vulnerability.
Algae and moss growth: Humid conditions promote biological growth that holds moisture against shingles and accelerates deterioration.
Wind-driven rain: Tropical storms and coastal weather can drive rain horizontally or even upward, easily defeating low-slope shingle defenses.
Hurricane wind uplift: Extreme winds in hurricane zones lift shingle tabs and test adhesive and nailing, especially on roofs at the minimum roof pitch for shingles.
Design recommendations for wet, humid climates:
- Strongly prefer 4:12 or steeper pitch to improve drainage
- Install full-coverage self-adhered membrane, not just double felt
- Use algae-resistant shingles with copper or zinc granules
- Enhanced nailing patterns and sealant for wind resistance
- Consider metal or tile roofing on low slopes for superior performance
Building codes in coastal areas often mandate specific wind ratings and fastening requirements. On roofs at the minimum roof pitch for shingles, these requirements become even more critical for long-term performance.
Frequently Asked Questions
What is the minimum roof pitch for shingles?
The minimum roof pitch for shingles is typically 2:12 (2 inches of rise per 12 inches of horizontal run) for most asphalt shingle products. However, this minimum is only acceptable when you install enhanced underlayment—either full-coverage self-adhered membrane or double-layer felt/synthetic underlayment. Between 2:12 and 4:12, shingles are considered “low-slope” applications requiring special installation procedures. Above 4:12, shingles perform optimally with standard single-layer underlayment.
Can you install shingles on a 1:12 pitch roof?
No, you should not install standard asphalt shingles on a 1:12 pitch roof because it falls below the minimum roof pitch for shingles specified by manufacturers and building codes. At 1:12, water drains too slowly, ponding becomes inevitable, and wind-driven rain easily penetrates under shingle laps. Installing shingles below the minimum roof pitch for shingles voids all manufacturer warranties and creates high leak risk. For roofs below 2:12, use low-slope roofing systems like modified bitumen, TPO, PVC, or EPDM membranes designed for flat and low-slope applications.
What happens if you install shingles below minimum pitch?
Installing shingles below the minimum roof pitch for shingles causes multiple serious problems:
- Water ponds in depressions instead of draining, leading to leaks through nail holes and seams
- Capillary action and wind pressure overcome insufficient gravity, pulling water backward under shingles
- Snow accumulates rather than sliding off, creating prolonged moisture exposure
- Shingles deteriorate prematurely from constant dampness
- Manufacturer warranties are voided, leaving you with no coverage for premature failure
- Building inspectors may fail the installation for code violations
The only solution is removing the shingles and installing appropriate low-slope roofing membranes designed for pitches below the minimum roof pitch for shingles.
Do you need special underlayment at minimum pitch?
Yes, when working at or near the minimum roof pitch for shingles between 2:12 and 4:12, you must install enhanced underlayment. All major manufacturers require either:
Option 1: Full-coverage self-adhered membrane (peel-and-stick ice-and-water shield) across the entire roof deck, which self-seals around nails and provides waterproof protection
Option 2: Double-layer underlayment installation where two courses of felt or synthetic underlayment cover every point on the deck with staggered seams
Standard single-layer underlayment is only acceptable on pitches of 4:12 or steeper. Skipping enhanced underlayment requirements at the minimum roof pitch for shingles voids warranties and creates substantial leak risk.
How do you measure roof pitch accurately?
To measure roof pitch and verify you meet the minimum roof pitch for shingles:
- Use a 12-inch level and tape measure
- From the attic: Place level against rafter bottom, hold horizontal, measure vertically from level end to rafter
- From the roof: Place level on roof surface, hold horizontal, measure vertically down to roof
- The vertical measurement in inches is your pitch (2 inches = 2:12, 4 inches = 4:12, etc.)
- If you measure close to 2 inches, treat conservatively as exactly at the minimum roof pitch for shingles and follow all low-slope requirements
Smartphone apps with accelerometers can also measure pitch, but verify accuracy with manual measurement when working near the critical minimum roof pitch for shingles threshold.
What roofing works better than shingles on low slopes?
For roofs below the minimum roof pitch for shingles (under 2:12) or barely meeting it where you want superior performance, consider these alternatives:
Modified bitumen: Reinforced asphalt rolls torch-applied or self-adhered in multiple layers; works flat to 3:12
TPO membrane: White reflective single-ply membrane, mechanically attached or fully adhered; excellent flat to low-slope
PVC membrane: Premium single-ply with superior durability; higher cost but longer life
EPDM rubber: Black rubber membrane in large sheets; proven performance and economical
Metal roofing: Standing seam metal works on slopes as low as 1:12 with proper detailing
These systems are waterproof rather than water-shedding, making them better suited for slopes at or below the minimum roof pitch for shingles.
The minimum roof pitch for shingles of 2:12 represents a critical threshold where asphalt shingles can still function, but only with enhanced underlayment systems and careful installation following manufacturer specifications. Between 2:12 and 4:12, shingles work in a “low-slope” zone requiring double underlayment or full self-adhered membrane protection. At 4:12 and steeper, shingles perform optimally with standard installation methods.
Before starting any asphalt shingle roof installation, measure your actual roof pitch accurately to determine whether you meet the minimum roof pitch for shingles and what underlayment system is required. For roofs below 2:12, plan for appropriate low-slope roofing membranes rather than trying to force shingles onto slopes where they cannot perform reliably. When in doubt, consult with licensed roofing contractors who can assess your specific situation and recommend the best materials and methods for your roof’s actual pitch and local climate conditions.
🏠 Roofing Tips & Updates
Get free roofing advice, cost guides, and seasonal maintenance tips.
Roofing content specialist with 5+ years researching U.S. residential and commercial roofing. Has documented 200+ projects covering installation costs, material selection, contractor vetting, and DIY guides for homeowners across all climate zones.
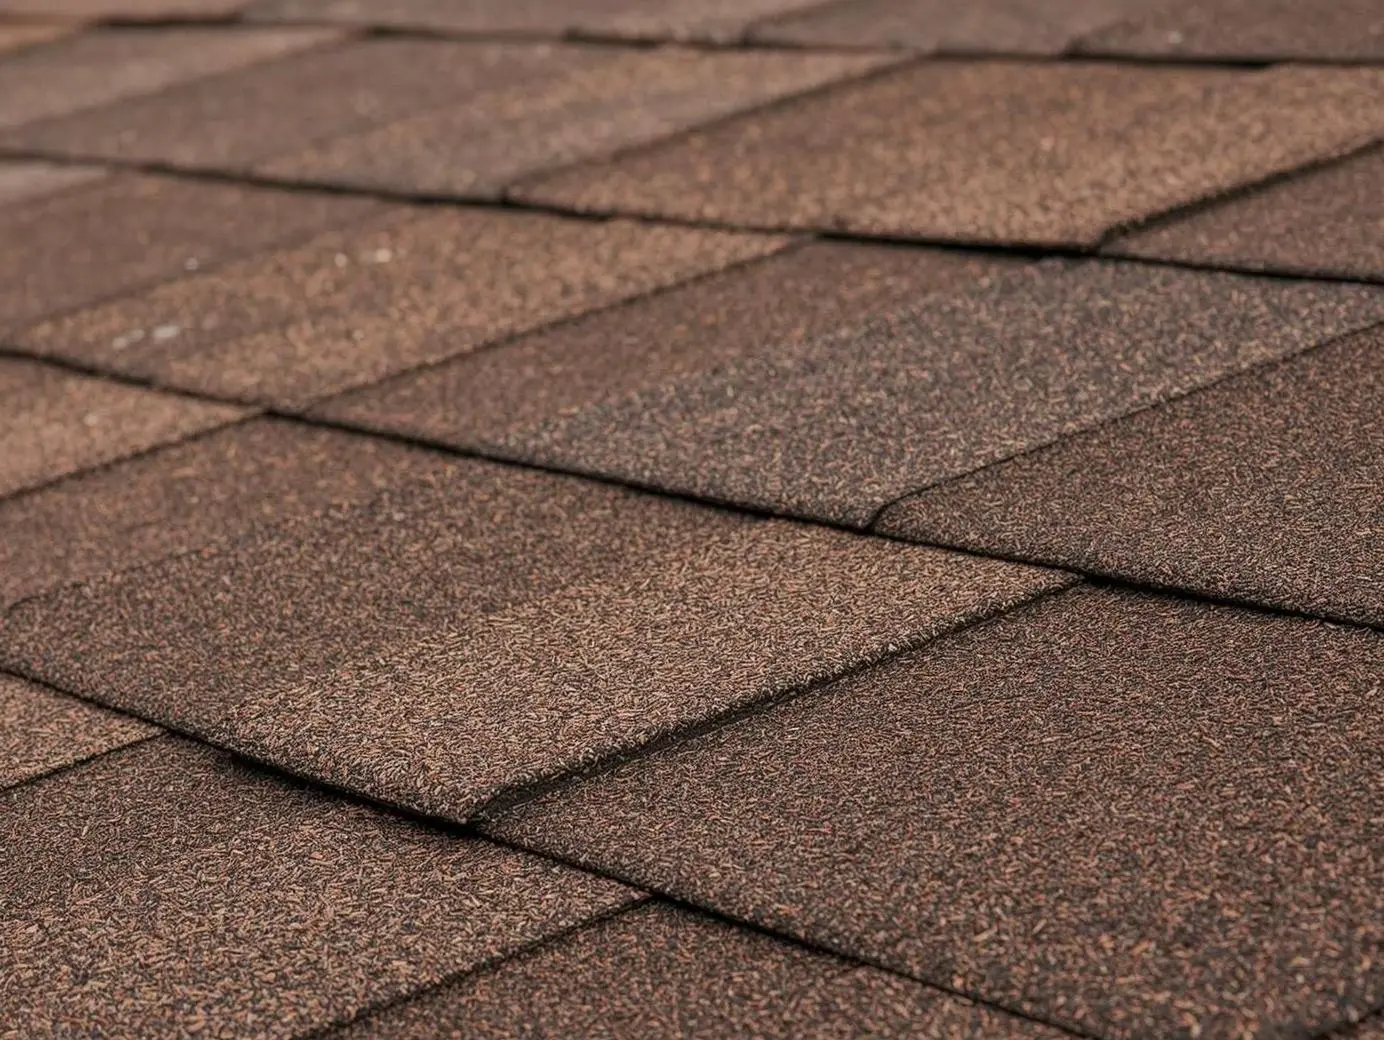
Elk Prestique Shingles: Owner Guide & Replacements
Elk Prestique Shingles: Owner Guide & Replacements
Elk Prestique shingles are premium architectural asphalt roofing shingles that feature High Definition color blends and enhanced thickness—up to 32% thicker than standard architectural shingles—designed to replicate the dimensional appearance of natural wood shakes. Originally manufactured by Elk Corporation, the Prestique line became part of GAF’s product family following GAF’s acquisition of Elk in 2007 (merger completed in early 2007), and the products were subsequently rebranded as “GAF Timberline Prestique” or “GAF-Elk Prestique” shingles. The Prestique family included multiple variants such as Prestique 30, Prestique 40, Prestique Lifetime, Prestique Grande, Prestique Plus, Prestique Gallery Collection, and Prestique Cool Series, each offering different warranty periods, weight classes, and performance characteristics.
This comprehensive guide helps homeowners identify whether they have Elk Prestique shingles on their roofs, understand the product specifications and expected service life, determine when replacement is needed, and find suitable modern GAF equivalents in 2025. Whether you’re researching an existing Elk Prestique roof for maintenance planning, need warranty support, or are evaluating replacement options after 20+ years of service, this article provides the detailed technical and practical information you need.
Understanding Elk Prestique Shingles What They Are
Elk Corporation was a leading roofing manufacturer founded in 1910 and headquartered in Dallas, Texas, known for producing premium asphalt shingles and building materials. In February 2007, Building Materials Corporation of America (GAF’s parent company) completed its acquisition of Elk Corporation in a transaction valued at approximately $948 million, creating North America’s largest roofing manufacturer with a combined 35 manufacturing facilities. Following the merger, GAF honored all existing Elk warranties and gradually integrated Elk’s product lines into the GAF brand family, with the Prestique series becoming “GAF Timberline Prestique” shingles by 2008.
The “Prestique” designation refers to a premium tier within the Timberline architectural shingle family that emphasizes visual depth and dimensional appearance. Key characteristics of Elk Prestique shingles include:
- High Definition® color blends: A patented multi-tonal granule application process (U.S. Patent No. 5,666,776) that uses computer-controlled “feathering” techniques to create randomized shadow bands and enhanced depth, mimicking the varied tones of natural cedar shakes.
- Enhanced thickness: Prestique Lifetime shingles are up to 32% thicker than standard architectural shingles (comparing to Prestique 30 baseline), resulting in pronounced shadow lines and a more substantial wood-shake appearance.
- Multiple weight classes: Ranging from standard weight (Prestique 30) to super heavyweight (Prestique Lifetime), offering progressively greater durability and aesthetic impact.
- Superior performance: Designed with GAF-Elk’s Micro Weave® core for strength, Dura Grip® adhesive for wind resistance, and Class A fire ratings from Underwriters Laboratories.
Today, homeowners search for “Elk Prestique shingles” information for several key reasons: identifying the exact product variant installed on their existing roof (for warranty claims or repairs), understanding the expected lifespan of a 15-25 year old Elk roof, researching whether discontinued Elk colors can be matched when replacing damaged sections, and determining which current GAF Timberline HDZ or Ultra HDZ products serve as modern replacements.
The transition from legacy “Elk Prestique” branding to “GAF Timberline Prestique” and eventually to today’s GAF Timberline HDZ lineup means that while original Elk-branded shingles are no longer manufactured, GAF continues to support warranties and offers direct replacement products with comparable or superior specifications.
Elk Prestique Product Line Variants and Specifications
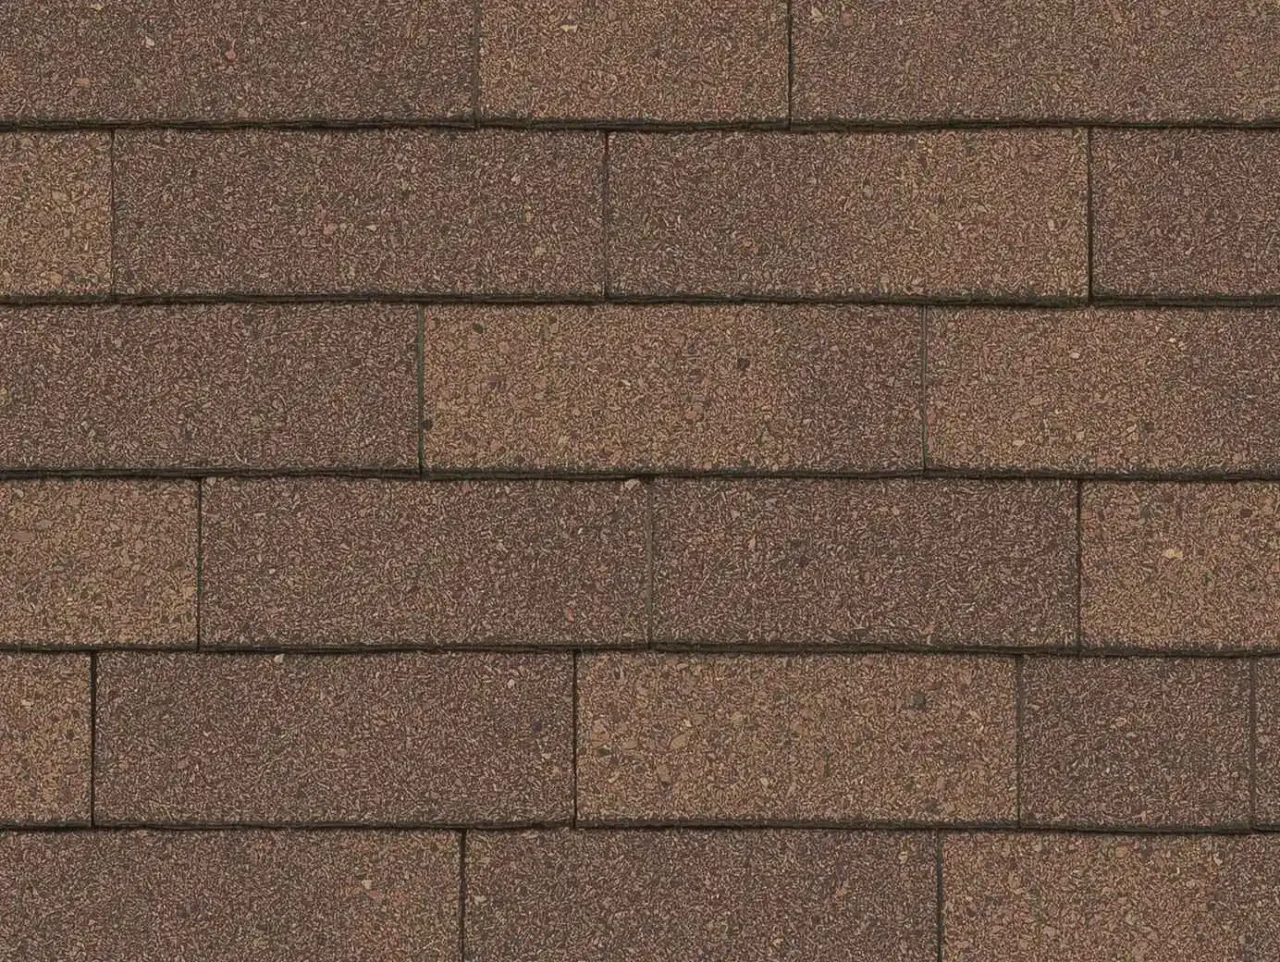
The Elk Prestique family comprised multiple product tiers designed to meet different budget levels, aesthetic preferences, and performance requirements. Below is a detailed breakdown of each major variant with technical specifications:
Product comparison table
| Product Variant | Warranty Period | Weight Class | Thickness vs. Standard | Wind Rating | Fire Rating | Key Features |
|---|---|---|---|---|---|---|
| Prestique 30 | 30-year ltd. transferable | Standard weight | Baseline/standard architectural | 110 mph ltd. (with special installation) | Class A UL 790 | Entry-level HD blend; Smart Choice® protection first 5 years |
| Prestique 40 | 40-year ltd. transferable | Heavyweight | Thicker than Prestique 30 | 110 mph ltd. (with special installation) | Class A UL 790 | Popular mid-tier upgrade; Smart Choice® 5 years |
| Prestique Lifetime | Lifetime ltd. transferable | Super heavyweight | Up to 32% thicker than standard architectural | 130 mph ltd. (with special installation) | Class A UL 790 | Premium tier; Smart Choice® 10 years; thickest option |
| Prestique Grande | 40-year ltd. transferable | Heavyweight | 40% larger profile than standard shingles | 90 mph ltd. | Class A UL | Oversized dimensional shingles for dramatic scale |
| Prestique Plus | 50-year ltd. transferable | Super heavyweight | Enhanced thickness | 110 mph ltd. | Class A UL | Wide color selection; longer warranty |
| Prestique Gallery Collection | 50-year ltd. transferable | Super heavyweight | Enhanced thickness | 110 mph ltd. | Class A UL | Artist-designed colors (Balsam Forest, Sienna Sunset, Weathered Sage) |
| Prestique Cool Series | Lifetime ltd. transferable | Super heavyweight | Similar to Prestique Lifetime | 130 mph ltd. | Class A UL | Energy-saving reflective granules; ENERGY STAR® qualified (white only) |
Detailed technical specifications (Prestique 30, 40, Lifetime)
All three core Prestique variants share common dimensional and installation specifications:
- Dimensions: 13¼” × 39⅜” (Metric) / 12″ × 36⅜” (English)
- Coverage: Approximately 64 pieces per square (Metric); varies slightly by plant and variant
- Bundles per square: 3 bundles (Prestique 30) or 4 bundles (Prestique 40/Lifetime)
- Nails per square: Approximately 256 nails (Metric)
- Exposure: 5⅝” (Metric) / 5″ (English)
Core technology and materials
Elk Prestique shingles incorporated several proprietary GAF-Elk technologies:
- Micro Weave® core: A fiberglass-reinforced asphalt mat providing superior strength and resistance to cracking and splitting.
- FiberTech® components: Non-combustible fibers in the core enabling Class A fire rating.
- Dura Grip® adhesive system: High-performance sealant that locks shingles in place and helps achieve wind resistance ratings up to 130 mph when properly installed.
- Diamond Cut™ granules: Multi-faceted ceramic granules with light-reflective properties that add dimension and depth to the shingle surface.
- Color Lock™ ceramic firing: Specialized granule treatment that maintains true color longer by resisting UV degradation.
- UV Blocker (in granules): Protection against damaging sunlight that improves durability and extends service life.
- SpecSelect asphalt grading system: Use of premium-quality asphalt formulations to improve weathering performance in harsh conditions.
Algae resistance and regional availability
StainGuard® Algae Discoloration limited warranty was available on Prestique 40 and Lifetime shingles in all regions except the Western U.S., offering protection against unsightly black streaks caused by algae (Gloeocapsa magma) growth. This feature was particularly important in humid climates where algae thrive on roofing surfaces.
Certifications and approvals
Elk Prestique shingles met or exceeded rigorous industry standards:
- ASTM D3018 Type 1 (fiberglass asphalt shingles)
- ASTM D3161 Type 1 Class F (wind resistance, select plants)
- ASTM D3462 (tear strength and other physical properties)
- UL 997 modified to 110 mph wind testing
- ASTM D7158 Class H (impact resistance)
- Florida Building Code approved
- Dade County (Miami-Dade) approved for high-wind zones
- Texas Department of Insurance approved
- ICC (International Code Council) Report approved
- CSA A123.5-98 (Canadian standards)
How to Identify If You Have Elk Prestique Shingles
Determining whether your roof features Elk Prestique shingles is essential for warranty claims, accurate repair matching, and replacement planning. Here are systematic identification methods:
Visual identification on the roof
- Look for embossing or branding: Many Elk Prestique shingles have “ELK” or “GAF-ELK” embossed on the back surface or printed on packaging materials left by installers (sometimes found in attics or garages).
- Assess shingle thickness: Prestique shingles, especially the Lifetime variant, are noticeably thicker and more dimensional than standard 3-tab shingles or even basic architectural shingles. From ground level or ladder, look for pronounced shadow lines and a chunky, wood-shake profile.
- Examine color and texture: High Definition® color blends feature multi-tonal granule patterns with distinct shadow bands that create visible depth, unlike flat single-color shingles.
- Count layers at edges: Architectural shingles like Prestique have visible laminated layers when viewed from rake edges or valleys, with Lifetime variants showing the most substantial layering.
Age and installation date indicators
Elk Prestique shingles were most popular from approximately 2000 to 2015, though they were available throughout the 1990s and into the late 2000s before full GAF brand integration. If your roof was installed during this window, especially between 2002-2012, there’s a higher probability it features Elk Prestique products.
Documentation review
- Original roofing contracts and invoices: Check paperwork from your roof installation for specific product names, model numbers, and color selections.
- Warranty certificates: Elk provided written warranty documents at the time of installation; these often include the exact product line and date of purchase.
- Home inspection reports: If you purchased your home with a pre-existing roof, the inspection report may identify the shingle manufacturer and type.
- Building permits: Municipal permit records sometimes include roofing material specifications submitted by contractors.
Professional inspection and identification
Hiring a licensed roofing contractor or certified GAF Master Elite contractor can provide definitive identification:
- Experienced roofers can recognize Elk Prestique shingles by their distinctive High Definition® blends, thickness profiles, and granule patterns.
- Contractors have access to historical product catalogs, color chips, and specification sheets to compare against your roof.
- Professional inspection also assesses current condition, remaining service life, and whether repairs or full replacement are advisable.
Why accurate identification matters
- Warranty claims: GAF honors legacy Elk warranties, but you must provide proof of product and installation date to file claims for manufacturing defects or premature failure.
- Repair matching: Matching discontinued Elk Prestique colors precisely is challenging; knowing your exact variant and color helps contractors blend repairs or recommend full replacement when partial fixes won’t blend.
- Replacement planning: Understanding which Prestique variant you have (30, 40, Lifetime) helps determine expected remaining lifespan and budget for future replacement with equivalent GAF Timberline HDZ products.
Elk Prestique Color Options and Aesthetics
Elk Prestique shingles were offered in a range of High Definition® color blends designed to replicate the natural variation found in wood shake roofing. The most popular and widely available colors included:
Most popular nationwide colors
- Weathered Wood: The best-selling Elk Prestique color, featuring warm brown tones with gray and tan highlights that mimic naturally weathered cedar shakes. This color remains available in the current GAF Timberline HDZ lineup as “Weathered Wood,” making it the easiest Elk Prestique color to match for repairs or replacements.
- Barkwood: Rich brown with darker shadow bands and moderate amber undertones.
- Charcoal: Deep gray-black blend with subtle lighter accents, popular for modern and traditional homes.
- Hickory: Warm mid-tone brown with rustic character.
- Shakewood: Medium brown with golden highlights emulating shake-style cedar.
- Slate: Cool gray tones with blue-gray accents for contemporary aesthetics.
- Hunter Green: Forest green blend, less common but popular in wooded settings.
Regional specialty colors
Certain colors had limited regional availability depending on manufacturing plant:
- Driftwood: Light weathered gray-brown blend
- Birchwood: Pale tan with subtle variation
- Biscayne Blue: Blue-gray coastal aesthetic (primarily Florida/Southeast)
- Oyster Gray: Soft neutral gray
- Mission Brown: Warm reddish-brown
- Fox Hollow Gray: Medium gray with brown undertones
- Pewter Gray: Cool silver-gray
- Patriot Red: Brick red tones
- Sunset Brick: Warm terracotta-red
- Copper Canyon: Southwestern rust/copper blend
- Williamsburg Slate: Historic blue-gray slate appearance
- White: ENERGY STAR® qualified cool roof option (special order in most locations)
Prestique Gallery Collection artist colors
In collaboration with artist Bart Forbes, Elk introduced limited-edition designer colors:
- Sienna Sunset: Rich amber and sienna tones with sunset-inspired warmth
- Balsam Forest: Deep green with forest undertones
- Weathered Sage: Muted sage green with gray accents
High Definition® color blend technology explained
The visual appeal of Elk Prestique shingles stems from the patented High Definition® manufacturing process:
- Shadow band application: Computer-controlled equipment applies darker granule blends in precise bands across each shingle, creating consistent shadow zones that add perceived depth.
- Randomized top layer: The visible surface uses multiple granule colors blended randomly to avoid repetitive patterns and mimic natural material variation.
- Enhanced thickness amplification: On thicker Prestique 40 and Lifetime shingles, the physical layering creates actual shadows when sunlight hits the roof at angles, reinforcing the visual depth from color alone.
This combination produces a roof that appears textured and dimensional from the street, significantly more attractive than flat single-tone shingles.
Architectural style compatibility
Elk Prestique shingles work especially well on:
- Traditional homes: Colonial, Cape Cod, and Georgian architecture benefit from the classic wood-shake appearance, especially in Weathered Wood, Barkwood, or Charcoal.
- Craftsman and bungalow styles: The rustic, artisan character of Prestique shingles complements exposed rafter tails, tapered columns, and natural materials.
- Ranch homes: Horizontal lines pair nicely with the dimensional roofline created by thick Prestique shingles.
- Mountain and log homes: Elk Prestique shingles in earthy browns and greens blend into wooded settings.
Color longevity and weathering
High-quality Elk Prestique shingles feature Color Lock™ ceramic-fired granules and UV Blocker technology to resist fading. In typical conditions:
- Years 1-10: Colors remain vivid and true to original installation appearance.
- Years 10-20: Gradual, subtle lightening as UV exposure affects granule surfaces; algae may cause dark streaking in humid climates if StainGuard® protection expires.
- Years 20-30+: Noticeable fading and weathering, though quality Prestique shingles often retain recognizable color longer than economy products.
When replacing sections of an Elk Prestique roof, color matching becomes progressively more difficult as the existing roof ages and weathers, while new shingles (even in the same color name) come from different production runs with potentially different formulations.
Expected Lifespan and Performance of Elk Prestique Roofs
Understanding the realistic service life of Elk Prestique shingles helps homeowners plan maintenance budgets and replacement timing. Warranty periods provide a baseline, but actual performance depends on numerous factors.
Warranty vs. actual lifespan comparison
| Prestique Variant | Warranty Coverage | Typical Actual Lifespan |
|---|---|---|
| Prestique 30 | 30-year limited transferable | 20-30 years |
| Prestique 40 | 40-year limited transferable | 30-40 years |
| Prestique Lifetime | Lifetime limited transferable | 35-50+ years |
| Prestique Grande | 40-year limited transferable | 28-38 years[estimate based on industry standards] |
| Prestigue Plus / Gallery | 50-year limited transferable | 35-50 years[estimate based on industry standards] |
Note: “Lifetime” warranties in the roofing industry typically mean the expected lifespan of the shingle when installed on a single-family owner-occupied residence, often interpreted as 40-50+ years.
Key performance factors affecting longevity
1. Proper installation and ventilation
Correct installation is critical for warranty validity and maximum lifespan:
- Nailing specifications: Using approximately 256 nails per square in the designated nailing zone prevents blow-offs and premature tab lifting.
- Adequate attic ventilation: A minimum 1:150 ventilation ratio (1 square foot of net free vent area per 150 square feet of attic space) prevents heat and moisture buildup that accelerates shingle aging. Poor ventilation is among the most common causes of premature shingle failure and voids warranties.
- Proper underlayment and flashings: Installing Weather Watch® or StormGuard® leak barrier at vulnerable areas (eaves, valleys, penetrations) prevents water infiltration that rots decking and shortens shingle life.
2. Climate and environmental conditions
- UV exposure: Intense sunlight in southern latitudes and high-altitude locations accelerates granule degradation and asphalt oxidation, shortening lifespan by 5-10 years compared to moderate climates.
- Temperature extremes: Repeated freeze-thaw cycles in northern climates cause expansion/contraction stress; extreme heat in deserts accelerates asphalt aging.
- Humidity and precipitation: Persistent moisture promotes algae/moss growth, granule dislodgment from freeze-thaw, and potential rot in underlying materials.
- Wind exposure: Homes on ridges, coasts, or open plains experience higher wind speeds that lift shingle tabs and cause blow-offs if adhesive sealing is inadequate.
3. Maintenance frequency
Regular maintenance extends Elk Prestique roof life:
- Annual inspections: Catching and repairing minor damage early prevents escalation into major leaks.
- Gutter cleaning: Clogged gutters cause water backup that infiltrates under shingles at eaves.
- Debris removal: Leaves, branches, and pine needles trap moisture against shingles, accelerating deterioration.
- Algae/moss treatment: Prompt removal of biological growth prevents root penetration that dislodges granules.
4. Storm exposure and impact damage
Hail, falling tree limbs, and wind-driven debris cause punctures, cracks, and granule loss that compromise individual shingles and accelerate overall roof aging. While Class H impact resistance (ASTM D7158) provides some protection, severe hail events can still damage even premium Prestique Lifetime shingles.
Common failure patterns in aging Elk Prestique roofs
Granule loss (20-25+ years)
As asphalt oxidizes and binder deteriorates, granules wash away in rain, exposing the black asphalt substrate. Check gutters and downspouts for accumulating granules as an early warning sign.
Cracking, curling, and cupping
Thermal cycling causes shingles to become brittle over time; edges curl upward or tabs cup downward, reducing weather protection and allowing wind to lift shingles.
Thermal splitting
In roofs with inadequate ventilation, excessive attic heat causes horizontal cracks through shingle tabs, often voiding warranty coverage since improper ventilation is an installation defect.
Algae and moss growth
In humid regions without effective StainGuard® protection (or after the algae warranty expires), black streaks from Gloeocapsa magma algae detract from curb appeal, while moss root systems dislodge granules and lift shingle edges.
Signs your Elk Prestique roof needs replacement
Consider full replacement when you observe:
- Widespread granule loss: Large areas of exposed black asphalt substrate across multiple roof planes
- Multiple leaks: Water stains on ceilings or in the attic indicate compromised shingle integrity
- Visible cracking or damaged shingles: Cracks, tears, or missing pieces across large sections rather than isolated spots
- Severe curling or cupping: Shingle edges lifted more than ¼ inch, allowing water infiltration
- Age exceeding expected lifespan: Prestique 30 roofs older than 25-30 years, Prestique 40 older than 35-40 years, even if visually intact, may lack adequate weather protection
- Failed or expired warranty: If your roof has surpassed the Smart Choice® non-prorated period and entered the prorated phase, replacement costs may be more economical than repeated repairs
Elk Prestique Warranty Information
Understanding warranty coverage is crucial for Elk Prestique owners, especially since GAF assumed responsibility for all legacy Elk warranties after the 2007 merger.
Original Elk warranty structure
Smart Choice® Protection
Elk Prestique shingles included Smart Choice® Protection, a non-prorated warranty period covering both materials and installation labor:
- Prestique 30: First 5 years full coverage (materials + labor)
- Prestique 40: First 5 years full coverage
- Prestique Lifetime: First 10 years full coverage
During the Smart Choice® period, GAF-Elk covered 100% of material costs and reasonable labor costs to repair or replace defective shingles.
Limited transferable warranty
After the Smart Choice® period, warranties became limited and prorated:
- Coverage gradually decreased over time based on a depreciation schedule
- Warranties transferred to subsequent homeowners with reduced terms (typically prorated immediately upon transfer)
- Material coverage only; labor costs became the homeowner’s responsibility
Wind warranty coverage
- Prestique 30 and 40: Up to 110 mph limited wind warranty when installed with 6 nails per shingle according to specifications
- Prestique Lifetime: Up to 130 mph limited wind warranty with proper installation
- Prestique Grande: Up to 90 mph limited wind warranty
- Prestique Plus and Gallery Collection: Up to 110 mph limited wind warranty
Special installation requirements (6 nails per shingle instead of standard 4) were mandatory to qualify for maximum wind warranty coverage.
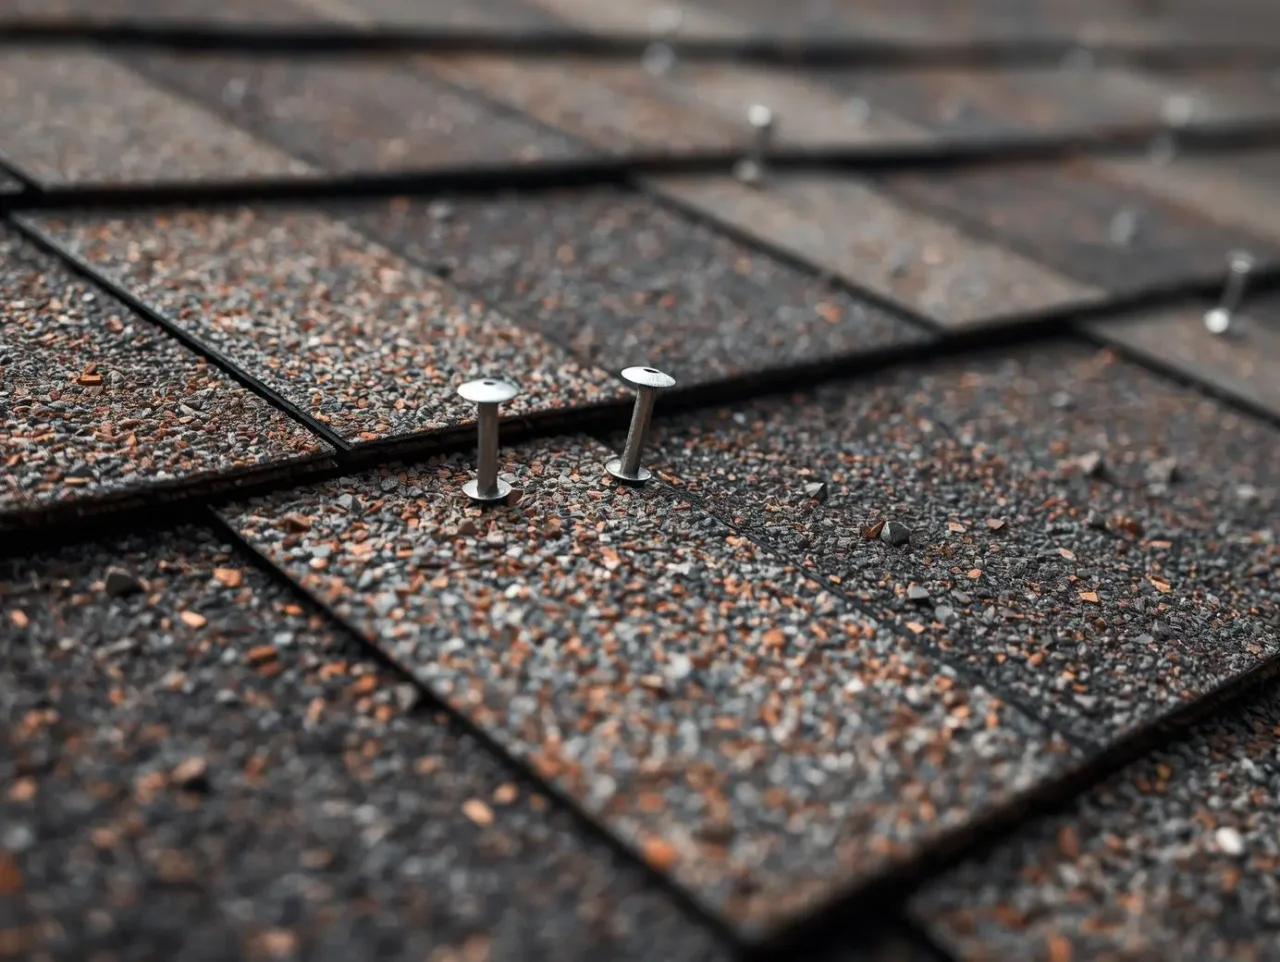
StainGuard® Algae Discoloration warranty
Available on Prestique 40 and Lifetime variants in all regions except the Western U.S., this warranty protected against algae-related black streaking for 10-25 years depending on the specific product and manufacturing date.
Post-GAF acquisition warranty status
When GAF acquired Elk Corporation in 2007, GAF publicly committed to honoring all existing Elk warranties without interruption:
“There will be no change in warranty coverage or commitments” – GAF-Elk joint statement, March 2007
This means homeowners with Elk Prestique roofs installed before or after the merger can still file warranty claims through GAF’s customer service infrastructure.
How to file warranty claims with GAF for legacy Elk products
Step 1: Gather required documentation
- Proof of purchase: Original sales receipt, roofing contract, or invoice showing Elk Prestique product purchase
- Installation date: Exact or approximate date of roof installation (within 30-60 days)
- Professional installation certification: Name and contact information for the installing contractor
- Evidence of defect: Photos clearly showing the alleged manufacturing defect, premature granule loss, or other covered failure
- Maintenance records: Documentation showing you maintained the roof properly (annual inspections, repairs, etc.)
Step 2: Contact GAF customer service
- Call GAF’s residential warranty support line: 1-877-423-7663
- Or submit a warranty claim online at https://www.gaf.com
- Provide all documentation and be prepared to answer questions about installation conditions, attic ventilation, and roof history
Step 3: Professional inspection
GAF may require an inspection by a GAF Master Elite contractor or GAF representative to verify the defect and assess whether it falls under warranty coverage.
Step 4: Claim processing
Typical warranty claim timelines range from 2-6 weeks for evaluation and decision. If approved, GAF will provide replacement materials or financial compensation according to the prorated schedule, depending on your roof’s age.
Coverage limitations and common exclusions
Elk Prestique warranties do not cover:
1. Improper installation or workmanship defects
- Incorrect nailing (wrong location, insufficient nails, overdriven or underdriven)
- Failure to use required underlayment, leak barrier, or starter strips
- Poor flashing details around chimneys, valleys, or penetrations
- Mixing incompatible products or using non-approved accessories
2. Inadequate attic ventilation
This is the most common reason for warranty claim denials. If GAF determines that insufficient ventilation caused premature thermal aging, cracking, or granule loss, the warranty is void.
3. Normal weathering and gradual wear
- Gradual color fading over 15-20+ years
- Minor granule loss consistent with normal aging
- Slight curling or surface wear within expected parameters for the roof’s age
4. Acts of nature and physical damage
- Hail damage (covered by homeowners insurance, not manufacturer warranty)
- Wind damage below the rated wind speed threshold
- Falling tree limbs, debris impact, or vandalism
- Lightning strikes, fire, or earthquake damage
- Ice dam formation or water infiltration from clogged gutters
5. Unauthorized modifications or repairs
- Walking on the roof excessively or improperly
- Installing satellite dishes, solar panels, or HVAC equipment without proper flashing
- Applying unapproved coatings, sealants, or pressure washing
Warranty transfer process
If you purchased a home with an existing Elk Prestique roof, the warranty may be transferable:
- Contact GAF within 12 months of property transfer with the original warranty certificate and proof of home purchase
- GAF will issue a transferred warranty, typically prorated to the remaining coverage period
- Transferred warranties often have reduced coverage limits compared to the original homeowner’s warranty
Replacing Elk Prestique Shingles – Current Equivalents and Options
Since Elk Prestique shingles are no longer manufactured under the Elk brand name, homeowners needing repairs or full replacement must choose from modern GAF equivalents or alternative brands. Here’s a comprehensive guide to replacement options in 2025:
Modern GAF replacements: Product evolution chart
| Legacy Elk Product | Current GAF Equivalent | Key Differences | Approximate 2025 Material Price Range (per square) |
|---|---|---|---|
| Elk Prestique 30 | GAF Timberline HD or HDZ | HDZ adds LayerLock™ technology and StrikeZone™ nailing area for easier installation and enhanced wind performance (up to 130 mph with accessories) | $95-$135 |
| Elk Prestique 40 | GAF Timberline HDZ | HDZ offers comparable thickness with enhanced wind resistance up to 130 mph (no maximum wind speed limit with WindProven™ Limited Wind Warranty when installed with 4 qualifying accessories) | $95-$135 |
| Elk Prestique Lifetime | GAF Timberline HDZ or Timberline Ultra HDZ | Ultra HDZ is 53% thicker than standard architectural shingles (vs. 32% for Prestique Lifetime), provides Class 4 impact resistance, and includes advanced warranties | HDZ: $95-$135; Ultra HDZ: $150-$200 |
Note: Pricing reflects typical contractor/distributor costs per square (100 sq ft) in 2025 and varies by region, volume, and market conditions.
GAF Timberline HDZ: The direct Prestique replacement
GAF Timberline HDZ shingles are the most direct replacement for Elk Prestique 30 and 40 products:
Key features:
- LayerLock™ technology: Mechanical locking of shingle layers for superior blow-off resistance
- StrikeZone™ nailing area: Largest nailing target in the industry (up to 600% larger), reducing installation errors and improving wind performance
- DuraGrip™ adhesive: Enhanced sealant formulation similar to original Dura Grip® in Elk products
- Limited lifetime warranty: With 10-year Smart Choice® protection when installed by GAF-certified contractors
- 130 mph wind resistance: Standard coverage; unlimited wind speed coverage available with GAF System Plus warranty (requires 4 qualifying accessories)
- StainGuard Plus™ algae protection: 25-year coverage in most regions (30-year StainGuard Plus PRO on Ultra HDZ)
Weathered Wood color availability:
The most popular Elk Prestique color, Weathered Wood, remains available in GAF Timberline HDZ, making it the easiest legacy Elk color to match. While the exact granule formulation may differ slightly from vintage Elk Prestique, GAF Weathered Wood provides a close visual match suitable for most partial repairs or full replacements.
GAF Timberline Ultra HDZ: Premium upgrade option
For homeowners who had Elk Prestique Lifetime and want the thickest, most premium replacement, GAF Timberline Ultra HDZ offers:
- 53% greater thickness than standard architectural shingles (exceeding Prestique Lifetime’s 32%)
- Class 4 impact resistance: UL 2218 Class 4 rating for superior hail protection, potentially qualifying for homeowners insurance discounts
- Dual Shadow Line: GAF’s patented design creating dramatic shadow effects throughout the day
- 30-year StainGuard Plus PRO algae protection: 10% more algae-fighting technology than standard Timberline HDZ
- 15-year WindProven™ Limited Wind Warranty: Infinite wind speed protection when installed with 4 required GAF accessories
Alternative replacement options from other manufacturers
If GAF products don’t meet your budget or aesthetic preferences, these brands offer comparable alternatives:
CertainTeed Landmark series
- Landmark PRO: Comparable weight and performance to Elk Prestique 40; Class 4 impact resistance available (Landmark PRO IR)
- StreakFighter® algae protection: Lifetime limited warranty against algae staining
- Pricing: Approximately $100-$145 per square
Owens Corning Duration series
- Duration®: Premium architectural shingles with SureNail® Technology for enhanced wind resistance up to 130 mph
- TruDefinition® color platform: Multi-dimensional color blends similar to Elk’s High Definition® technology
- Pricing: Approximately $95-$140 per square
Why exact color matching may not be possible
Even when manufacturers offer colors with identical names (like “Weathered Wood”), several factors prevent perfect matches:
- Formulation changes: Granule suppliers, asphalt sources, and manufacturing processes have evolved over 15-20 years since Elk Prestique production
- Weathering and fading: Your existing 15-25 year old Elk shingles have faded, oxidized, and weathered; brand-new replacement shingles will always look fresher and more vibrant
- Discontinued colors: Many regional and specialty Elk Prestique colors (Sienna Sunset, Balsam Forest, Copper Canyon) are no longer produced by GAF
- Production batch variation: Even shingles from the same color line can vary slightly between manufacturing plants and production runs
Partial replacement vs. full roof replacement considerations
When partial replacement makes sense:
- Damage is localized to one slope or small section (e.g., tree limb impact)
- Your Elk Prestique roof is less than 15 years old and otherwise in good condition
- You can accept visible color differences between old and new sections
- Budget constraints prohibit full replacement
When full replacement is the better choice:
- Your Elk Prestique roof is 20+ years old and showing widespread aging signs
- Multiple roof planes need repair, making piecemeal fixes uneconomical
- Underlying decking requires replacement or extensive repairs
- You want consistent color and appearance across the entire roof
- The cost of multiple partial repairs over 5-10 years would exceed full replacement cost
Cost expectations for 2025 Elk Prestique replacement projects
Materials costs per square (100 sq ft):
- GAF Timberline HDZ: $95-$135
- GAF Timberline Ultra HDZ: $150-$200
- CertainTeed Landmark PRO: $100-$145
- Owens Corning Duration: $95-$140
Labor rates (national averages):
- Basic tear-off and installation: $3.50-$5.50 per square foot ($350-$550 per square)
- Complex roofs (steep pitch, multiple valleys, dormers): $5.00-$7.00 per square foot
Total installed cost examples for typical 2,000 sq ft roof (20 squares):
- GAF Timberline HDZ replacement: $12,900-$23,700 depending on warranty level and roof complexity
- Materials (20 squares × $95-$135): $1,900-$2,700
- Labor and accessories: $7,000-$11,000
- Total: Typically $12,000-$18,000 for most homeowners
- GAF Timberline Ultra HDZ replacement: $15,000-$25,000+ depending on accessories and labor rates
Matching considerations for partial repairs
If you decide to repair rather than replace your Elk Prestique roof:
Blending strategies:
- Install new shingles on less-visible rear slopes while keeping weathered Elk Prestique on front-facing slopes
- Use GAF Timberline HDZ in Weathered Wood or similar neutral tones that blend reasonably well with aged Elk colors
- Position new shingles near roof peaks, valleys, or edges where color transitions are less noticeable from ground level
Accept imperfect matches:
- Acknowledge that perfect color matching is impossible with discontinued products
- Prioritize functional weather protection over aesthetic perfection for budget-driven repairs
When full replacement makes more financial sense:
- If repair costs exceed 30-40% of full replacement cost
- When your Elk Prestique roof has less than 5-10 years of service life remaining
- If you plan to sell your home soon (mismatched repairs reduce curb appeal and resale value)
Installation and Maintenance Best Practices
Installing GAF Timberline HDZ as Elk Prestique replacement
While legacy Elk Prestique inventory is largely unavailable in 2025, if you source new-old-stock or install modern GAF Timberline HDZ replacements, follow these specifications:
Nailing specifications:
- GAF Timberline HDZ: 4 nails per shingle in the StrikeZone™ nailing area; 6 nails for high-wind applications (110+ mph zones)
- Legacy Elk Prestique: 256-312 nails per square (approximately 4-6 nails per shingle depending on variant and wind exposure)
- Use corrosion-resistant roofing nails (minimum 1¼” long for new decks, 1½” for re-roofs over existing shingles)
Bundle blending to prevent color banding:
- Mix shingles from multiple bundles during installation to randomize minor color variations between production batches
- This technique prevents visible “striping” or banding across roof planes
Ventilation requirements:
Proper attic ventilation is mandatory for warranty validity and critical for maximum shingle lifespan:
- Minimum 1:150 ratio: 1 square foot of net free ventilation area per 150 square feet of attic space
- Balanced intake and exhaust: Install continuous soffit vents for intake air and ridge vents or roof vents for exhaust
- Inadequate ventilation causes excessive attic heat (130-160°F in summer), which accelerates asphalt aging, granule adhesion failure, and thermal splitting
Professional installation importance:
- GAF requires professional installation by licensed contractors for full warranty coverage, especially for Golden Pledge and Silver Pledge enhanced warranties
- DIY installation typically voids manufacturer warranties beyond basic material coverage
Maintenance for existing Elk Prestique roofs
Extend the service life of your Elk Prestique roof with regular maintenance:
Annual inspection checklist:
- Inspect from ground level with binoculars after storms (avoid walking on roof unnecessarily)
- Check for missing, cracked, or curled shingles
- Look for granule accumulation in gutters (sign of accelerated wear)
- Examine flashings around chimneys, vents, and valleys for gaps or rust
- Inspect attic for water stains, mold, or daylight penetration through roof deck
Gutter cleaning (twice yearly minimum):
- Clean gutters in spring after pollen/seed season and fall after leaf drop
- Clogged gutters cause water backup that infiltrates under shingles at eaves, rotting fascia boards and roof decking
Debris removal:
- Remove leaves, branches, and pine needles from roof valleys and behind chimneys where moisture accumulates
- Trim overhanging tree branches to reduce debris and limit shade that promotes algae/moss growth
Moss and algae treatment:
- In humid climates, treat algae staining with approved roof cleaning solutions (sodium hypochlorite or sodium percarbonate mixtures)
- Avoid pressure washing, which damages granules and voids warranties
- Consider installing zinc or copper strips near roof peaks; rainwater flowing over metal inhibits algae growth
When to repair vs. replace individual shingles:
- Repair: Isolated damage to 5-10 shingles or fewer from localized storm damage or falling debris
- Replace: Widespread damage across multiple roof planes, or when repair costs approach 30-40% of full replacement cost
Professional roofing services
When to hire a contractor for inspection:
- Your Elk Prestique roof is 20+ years old
- You’ve experienced recent severe weather (hail, high winds, heavy snow loads)
- You notice leaks or water stains in your attic or ceilings
- You’re considering selling your home and need a professional assessment for buyers
Questions to ask contractors about Elk Prestique roof condition:
- What is the estimated remaining service life of my Elk Prestique roof?
- Are there visible signs of granule loss, cracking, or curling?
- Is attic ventilation adequate, or do I need improvements to extend roof life?
- Can you match my Elk Prestique color with current GAF Timberline HDZ products for repairs?
- What would be the cost difference between partial repair and full replacement?
- Do I qualify for any remaining warranty coverage from GAF for manufacturing defects?
Red flags indicating replacement urgency:
- Contractor finds widespread granule loss exposing black asphalt substrate across 30%+ of roof area
- Multiple leaks detected during attic inspection, indicating compromised shingle integrity
- Severe curling or cupping (shingle edges lifted ½ inch or more)
- Roof age exceeding warranty period (Prestique 30 older than 30 years, Prestique 40 older than 40 years)
- Visible sagging or structural issues requiring deck replacement
🏠
Is Your ELK Prestique Roof Past Its Prime?
ELK Prestique shingles installed before 2007 are now 18–25 years old — at or past their rated service life. Real-world reviews confirm many 50-year rated ELK shingles are showing failure signs at 20–22 years. Don’t wait for interior water damage to tell you it’s time.
Get a free professional inspection and a firm 2026 replacement estimate — before late-season contractor availability tightens.
Free inspection · No obligation · Licensed & insured contractors
Frequently Asked Questions About Elk Prestique Shingles
Are Elk Prestique shingles still manufactured?
No, Elk Prestique shingles are no longer manufactured under the Elk brand name. GAF acquired Elk Corporation in 2007 and gradually integrated Elk’s product lines into the GAF brand family by 2008. The Prestique line evolved into “GAF Timberline Prestique” and eventually into today’s GAF Timberline HDZ and Timberline Ultra HDZ product families. While you cannot purchase new Elk-branded Prestique shingles, GAF Timberline HDZ serves as the direct modern replacement with comparable or superior performance specifications.
How long do Elk Prestique shingles typically last?
Elk Prestique shingles typically last 20-50 years depending on the specific product variant, installation quality, climate conditions, and maintenance:
- Prestique 30: 20-30 years actual performance
- Prestique 40: 30-40 years actual performance
- Prestique Lifetime: 35-50+ years actual performance
Factors that extend lifespan include proper attic ventilation (1:150 ratio minimum), professional installation with correct nailing patterns, moderate climate conditions, regular maintenance, and prompt repair of storm damage. Conversely, inadequate ventilation, extreme UV exposure, severe weather, and neglected maintenance can reduce service life by 10-15 years.
What is the difference between Elk Prestique 30, 40, and Lifetime?
The primary differences are warranty length, shingle thickness, weight class, and wind resistance:
- Prestique 30: 30-year limited transferable warranty, standard weight, baseline thickness for architectural shingles, 110 mph wind rating, 5-year Smart Choice® protection
- Prestique 40: 40-year limited transferable warranty, heavyweight construction thicker than Prestique 30, 110 mph wind rating, 5-year Smart Choice® protection
- Prestique Lifetime: Lifetime limited transferable warranty, super heavyweight design up to 32% thicker than standard architectural shingles, 130 mph wind rating, 10-year Smart Choice® protection covering materials and labor
All three variants feature GAF-Elk’s patented High Definition® color blends, Class A fire rating, Micro Weave® core, and Dura Grip® adhesive, with the main value distinction being increased thickness, enhanced durability, and longer warranty coverage as you move up the product line.
Can I replace just a section of my Elk Prestique roof?
Yes, you can replace sections of your Elk Prestique roof, but be aware of color matching challenges: Since Elk Prestique shingles are no longer manufactured under the original brand, exact color matches are impossible. Your best options include:
- Use GAF Timberline HDZ in Weathered Wood (or the closest available color to your original Elk Prestique), accepting that new shingles will appear brighter and slightly different from your weathered existing shingles.
- Install repairs on less-visible roof slopes (rear or side elevations) while keeping original Elk Prestique on front-facing areas.
- Consider full replacement if repairs affect prominent roof planes or if your Elk Prestique roof is 20+ years old with limited remaining service life.
Partial replacement makes the most sense when damage is localized, your roof is relatively young (under 15 years), and you’re willing to accept visible color variation for budget reasons.
Does GAF honor old Elk Prestique warranties?
Yes, GAF honors all legacy Elk Prestique warranties issued before and after the 2007 acquisition. When GAF acquired Elk Corporation, the company publicly committed to maintaining “no change in warranty coverage or commitments” for existing Elk customers. To file a warranty claim for your Elk Prestique roof:
- Gather documentation: original purchase receipt, installation date, contractor information, and photos of the defect
- Contact GAF customer service at 1-877-423-7663 or submit a claim online at https://www.gaf.com
- Provide all required documentation and be prepared for a professional inspection
Note that warranties do not cover installation defects, inadequate ventilation, normal weathering, or storm damage (covered by homeowners insurance). GAF will evaluate claims according to the original Elk warranty terms and prorated schedule based on your roof’s age.
What are the best replacement options for Elk Prestique shingles?
The best modern replacement for Elk Prestique shingles is GAF Timberline HDZ, which offers comparable thickness, enhanced wind resistance, and similar High Definition color aesthetics:
- For Prestique 30 or 40: GAF Timberline HDZ provides equivalent performance with upgraded LayerLock™ technology and StrikeZone™ nailing for easier installation and up to 130 mph wind resistance.
- For Prestique Lifetime: GAF Timberline Ultra HDZ offers 53% greater thickness (exceeding Prestique Lifetime’s 32%), Class 4 impact resistance, and premium warranties.
Alternative options from other manufacturers include CertainTeed Landmark PRO (comparable weight and Class 4 impact resistance available) and Owens Corning Duration (premium architectural shingles with SureNail® Technology). For the closest color match to the popular Elk Prestique Weathered Wood, choose GAF Timberline HDZ Weathered Wood.
How much does it cost to replace an Elk Prestique roof in 2025?
The cost to replace an Elk Prestique roof in 2025 typically ranges from $12,000 to $18,000 for a standard 2,000 square foot (20-square) residential roof with moderate complexity:
- Materials: $1,900-$2,700 for GAF Timberline HDZ shingles (20 squares × $95-$135 per square)
- Labor and installation: $7,000-$11,000 depending on roof pitch, complexity, and regional labor rates ($3.50-$5.50 per square foot)
- Total installed cost: $12,000-$18,000 for most homeowners with GAF Timberline HDZ replacement
Costs increase for:
- Steep-pitch roofs (over 6:12 slope)
- Multiple dormers, valleys, and complex geometries
- Premium products like GAF Timberline Ultra HDZ ($15,000-$25,000+ total)
- Additional repairs to decking, fascia, or ventilation systems
- Enhanced warranties (GAF Golden Pledge adds $2,000-$5,000)
Regional variations are significant: Southern states may see lower labor costs ($3.00-$4.50/sq ft), while Northeast and West Coast markets often exceed $5.50-$7.00 per square foot.
What colors were available in the Elk Prestique line?
Elk Prestique shingles were offered in a wide range of High Definition® color blends: The most popular nationwide colors included Weathered Wood (best-selling, available today in GAF Timberline HDZ), Barkwood, Charcoal, Hickory, Shakewood, Slate, and Hunter Green. Regional specialty colors included Driftwood, Birchwood, Biscayne Blue, Oyster Gray, Mission Brown, Fox Hollow Gray, Pewter Gray, Patriot Red, Sunset Brick, Copper Canyon
🏠 Roofing Tips & Updates
Get free roofing advice, cost guides, and seasonal maintenance tips.
Related reading: ELK Prestique 30 Year Shingles: The Complete Guide.
Roofing content specialist with 5+ years researching U.S. residential and commercial roofing. Has documented 200+ projects covering installation costs, material selection, contractor vetting, and DIY guides for homeowners across all climate zones.
Capstone Shingles: Complete 2026 Cost & Installation Guide
Capstone Shingles: Complete 2026 Cost & Installation Guide
Capstone shingles, commonly known as ridge cap shingles or hip and ridge shingles, are specialized roofing products designed to finish and weatherproof the peaks, hips, and ridges where roof planes meet. These critical finishing components serve both functional and aesthetic purposes, creating watertight seals at vulnerable roof junctions while providing a polished, professional appearance that completes your roofing system.
In 2025, capstone shingles cost between $35 and $75 per bundle, with each bundle covering 20-33 linear feet depending on the product type and manufacturer. Installation costs add $1.50-$3.50 per linear foot for professional labor, bringing total installed pricing to $3.00-$7.00 per linear foot for complete ridge and hip finishing. Most residential roofs require 40-150 linear feet of ridge cap coverage, translating to total capstone shingle costs of $120-$1,050 for materials and labor combined.
Understanding capstone shingle types, proper installation techniques, brand options, and selection criteria ensures your roof receives the weather protection and visual appeal necessary for decades of reliable performance. This comprehensive guide examines everything homeowners and contractors need to know about selecting, installing, and maintaining capstone shingles for optimal results.
Table of Contents
Understanding capstone shingles and their purpose
Capstone shingles represent a specialized category of roofing materials engineered specifically for the unique demands of ridge and hip applications where standard field shingles cannot provide adequate protection.
What are capstone shingles?
Capstone shingles, technically called ridge cap shingles or hip and ridge shingles, are pre-scored roofing shingles designed to bend over roof peaks and hips, creating finished, weatherproof transitions at these critical junctions. Unlike flat field shingles that cover the main roof surfaces, capstone shingles feature center perforations or pre-bending that allows them to conform to the angle where two roof planes meet without cracking or breaking.
Critical functions of capstone shingles:
These specialized shingles perform several essential roles in complete roofing systems:
Weatherproofing vulnerable areas:
- Seal the exposed ridge where roof decking from opposite slopes meets, preventing wind-driven rain, snow, and debris from penetrating into the attic space
- Create overlapping layers that shed water away from the peak rather than allowing infiltration
- Protect against ice dam formation at ridge lines in cold climates
- Prevent wind uplift at the most exposed portions of the roof structure
Aesthetic finishing:
- Provide dimensional, textured appearance matching field shingle profiles
- Complete the roof’s visual presentation with professional-grade finishing
- Conceal exposed nails and rough edges at peaks and hips
- Create clean, straight ridge lines enhancing curb appeal
Ventilation integration:
- Install over ridge vent systems creating exhaust pathways for attic air
- Allow proper airflow while maintaining weather protection
- Support balanced ventilation systems extending shingle lifespan
Structural protection:
- Cover and protect ridge boards and hip rafters from UV degradation
- Prevent moisture penetration into structural wood members
- Extend overall roof system longevity through comprehensive coverage
Differences from field shingles:
Capstone shingles differ from standard roofing shingles in several important ways:
- Thickness: Ridge caps are typically 30-50% thicker than field shingles, providing enhanced durability at high-wear locations
- Bendability: Formulated with more flexible asphalt compounds allowing bending without cracking
- Dimensions: Pre-cut to 12″ x 12″ or 12″ x 36″ (perforated into three sections) versus larger field shingle sizes
- Exposure rate: Designed for 5-7 inch exposure versus 5-5.67 inch for standard shingles
- Cost: Premium pricing reflecting specialized manufacturing and performance characteristics
According to IKO’s ridge cap installation guide, proper ridge cap shingles are essential for every sloped roof, as attempting to use field shingles at ridges and hips creates inferior weather protection and premature failure.
Different types of capstone shingles for various applications
Ridge cap shingle options range from basic economical products to premium architectural systems matching high-end designer roofs.
Standard 3-tab style ridge caps:
The most economical capstone shingle option uses basic 3-tab technology:
- Construction method: Often created by cutting standard 3-tab field shingles into individual thirds along pre-scored lines
- Cost: $25-$40 per bundle (approximately 20-25 linear feet coverage)
- Price per linear foot: $1.00-$2.00 for materials
- Appearance: Flat, uniform profile with minimal dimensional character
- Thickness: Standard single-layer construction (approximately 0.5 inches)
- Best applications: Budget-conscious projects, agricultural buildings, sheds, garages, rental properties where premium aesthetics aren’t required
- Advantages: Lowest cost, adequate weather protection, simple installation
- Limitations: Less visually appealing than architectural options, shorter lifespan (20-25 years typical)
Pre-formed architectural ridge caps:
Purpose-manufactured capstone shingles designed to complement architectural field shingles:
- Construction: Multi-layer laminated design creating pronounced dimensional profile
- Cost: $45-$75 per bundle (20-33 linear feet coverage depending on brand)
- Price per linear foot: $1.50-$3.00 for materials
- Appearance: Thicker, more substantial look with enhanced shadow lines matching architectural shingles
- Thickness: 0.75-1.25 inches creating bold ridge presence
- Best applications: Residential homes with architectural field shingles, properties emphasizing curb appeal
- Popular products:
- Advantages: Enhanced aesthetics, better wind resistance, longer warranties (30-40 years), factory pre-scored for consistent installation
- Installation benefits: Pre-scored design eliminates difficult cuts saving labor time
Specialty designer ridge caps:
Premium capstone shingles matching luxury designer field shingle profiles:
- Construction: Ultra-thick multi-layer designs, specialized textures, unique profiles
- Cost: $60-$95 per bundle
- Price per linear foot: $2.50-$4.00 for materials
- Appearance: Maximum dimensional character, often 1.0-1.5 inches thick, distinctive shadow patterns
- Best applications: High-end residential projects, luxury homes, historic properties, architecturally significant buildings
- Examples:
- GAF Timbertex (wood shake appearance): $75-$95 per bundle
- CertainTeed Presidential Shake TL: $70-$90 per bundle
- Premium impact-resistant options: $65-$85 per bundle
- Advantages: Unmatched aesthetics, superior durability, enhanced impact and wind ratings
- Warranty: Often match premium field shingle warranties (40-50 years or lifetime limited)
Comparison table by type:
| Capstone Shingle Type | Cost Per Bundle | Coverage | Price/LF | Thickness | Lifespan | Best For |
|---|---|---|---|---|---|---|
| 3-tab cut caps | $25-$40 | 20-25 LF | $1.00-$2.00 | 0.5″ | 20-25 years | Budget projects |
| Standard architectural | $45-$65 | 25-30 LF | $1.50-$2.60 | 0.75-1.0″ | 30-40 years | Residential homes |
| Premium architectural | $60-$85 | 25-33 LF | $2.00-$3.40 | 1.0-1.25″ | 40-50 years | Upscale residential |
| Designer specialty | $75-$95 | 20-28 LF | $2.50-$4.00 | 1.0-1.5″ | 40-50+ years | Luxury homes |
These capstone shingle costs reflect materials only; professional installation adds labor charges discussed in the pricing section below.
How much do capstone shingles cost in 2025?
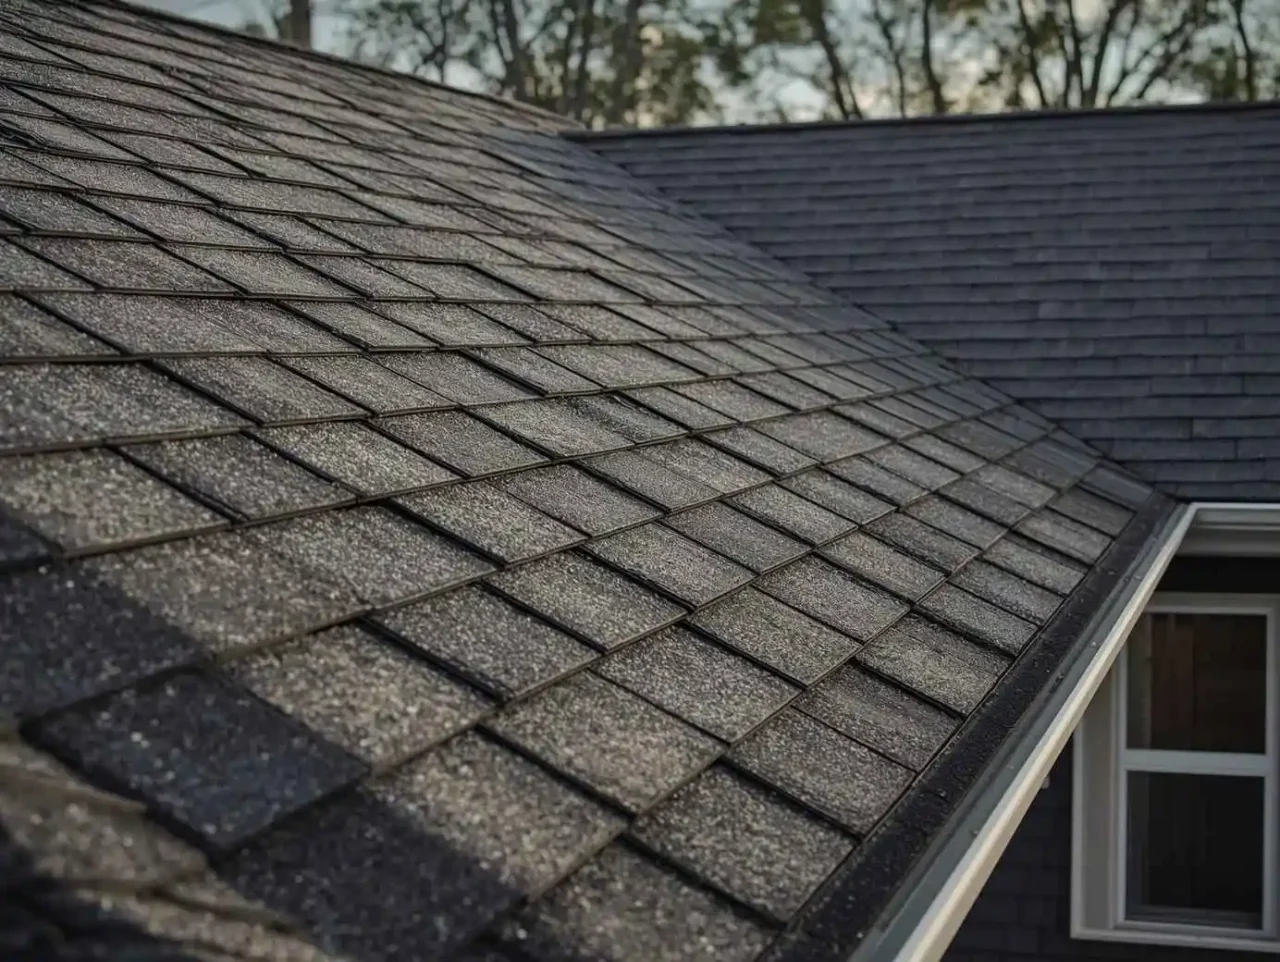
Complete capstone shingle project costs include materials, labor, and accessories for proper installation.
Material costs by product tier:
Actual 2025 pricing from suppliers and retailers:
Budget tier (3-tab style):
- Cost per bundle: $25-$40
- Coverage per bundle: 20-25 linear feet
- Material cost per linear foot: $1.00-$2.00
- Bundles needed for 100 LF: 4-5 bundles
- Total material cost (100 LF): $100-$200
Standard architectural tier:
- Cost per bundle: $45-$65
- Coverage per bundle: 25-30 linear feet
- Material cost per linear foot: $1.50-$2.60
- Example: GAF Seal-A-Ridge Charcoal $49.35 per bundle, 25 LF coverage
- Example: GAF Seal-A-Ridge (standard colors) $70.30 per bundle, 25 LF
- Bundles needed for 100 LF: 3.5-4 bundles
- Total material cost (100 LF): $175-$280
Premium architectural tier:
- Cost per bundle: $60-$85
- Coverage per bundle: 25-33 linear feet
- Material cost per linear foot: $2.00-$3.40
- Bundles needed for 100 LF: 3-4 bundles
- Total material cost (100 LF): $200-$340
Designer specialty tier:
- Cost per bundle: $75-$95
- Coverage per bundle: 20-28 linear feet
- Material cost per linear foot: $2.50-$4.00
- Bundles needed for 100 LF: 3.5-5 bundles
- Total material cost (100 LF): $265-$475
Professional installation labor costs:
Labor represents a significant portion of total capstone shingle expenses:
- Labor rate per linear foot: $1.50-$3.50 depending on roof complexity, pitch, and regional rates
- Simple gable roof (low pitch, straight ridge): $1.50-$2.25 per LF
- Standard complexity (moderate pitch, some hips): $2.00-$2.75 per LF
- Complex roof (steep pitch, multiple hips/ridges): $2.50-$3.50 per LF
- Ridge vent integration: Add $0.50-$1.00 per LF for vent installation beneath caps
Total installed cost calculations:
Combining materials and labor for complete project pricing:
Standard architectural capstone shingles:
- Materials: $1.80 per LF (average)
- Labor: $2.25 per LF (average)
- Total installed: $4.05 per LF
Premium/designer capstone shingles:
- Materials: $2.70 per LF (average)
- Labor: $2.75 per LF (average complexity)
- Total installed: $5.45 per LF
Typical residential roof requirements:
Linear footage varies dramatically based on roof style:
Simple gable roof:
- Ridge length: 30-50 linear feet (single ridge line)
- Material cost: $54-$150 (architectural caps)
- Labor cost: $60-$125
- Total project: $114-$275
Hip roof (standard home):
- Ridge + hips: 60-120 linear feet
- Material cost: $108-$360 (architectural caps)
- Labor cost: $120-$330
- Total project: $228-$690
Complex roof (multiple planes, dormers):
- Ridge + hips + valleys: 100-200+ linear feet
- Material cost: $180-$680 (architectural caps)
- Labor cost: $200-$700
- Total project: $380-$1,380
Proportion of total roof cost:
Capstone shingles typically represent 3-5% of complete roof replacement expenses. For a $12,000 total roof replacement, ridge caps account for $360-$600 of the project cost—a small percentage that shouldn’t be compromised given their critical protective function.
According to roofing industry standards, investing in quality capstone shingles matching your field shingle grade ensures comprehensive protection and maintains manufacturer warranty compliance.
Top capstone shingle brands and product options
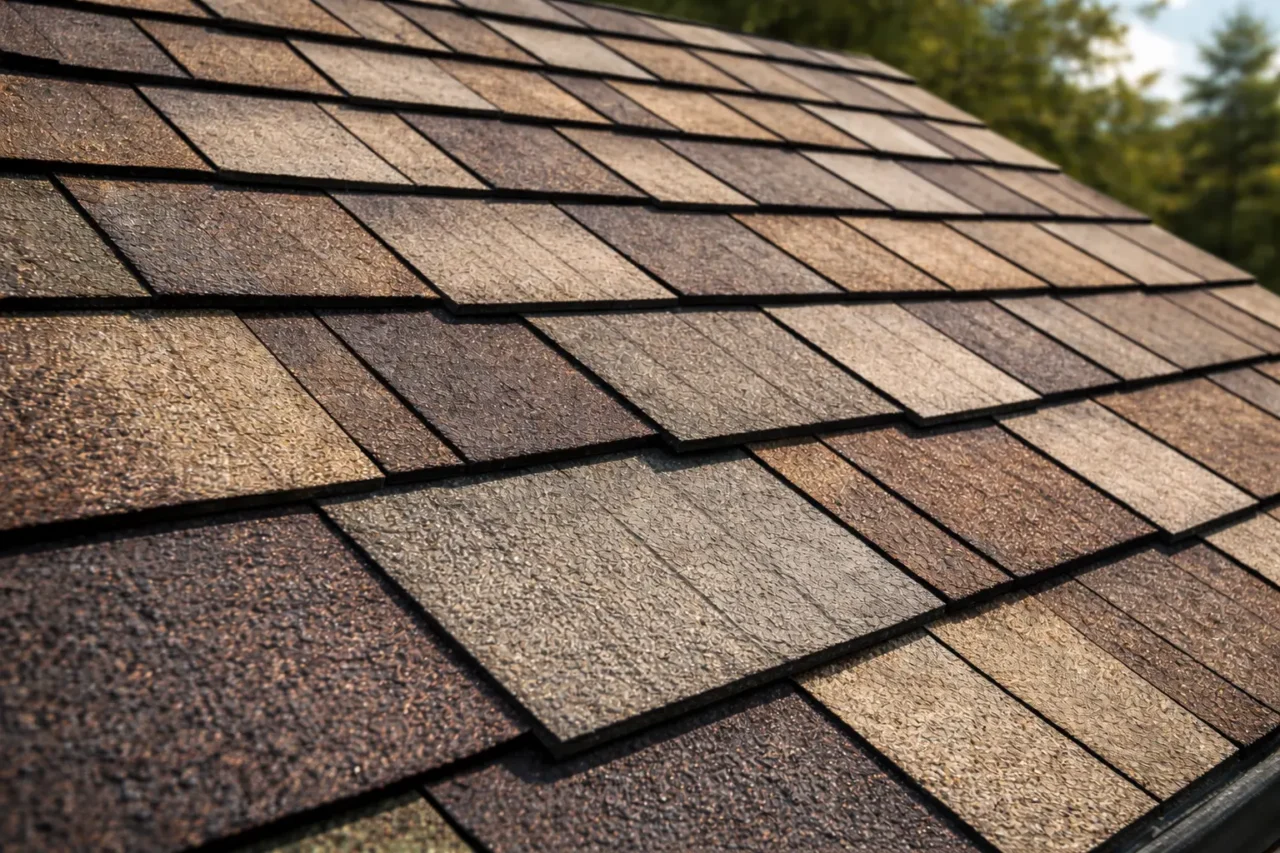
Major roofing manufacturers offer specialized ridge cap products engineered to complement their field shingle lines.
GAF – Industry leader:
GAF commands approximately 25-30% market share in residential roofing with comprehensive capstone shingle offerings:
GAF Seal-A-Ridge:
- Profile: Standard architectural ridge cap with pre-scored design
- Dimensions: 12″ W x 36″ L, separates into three 12″ x 12″ pieces
- Coverage: 25 linear feet per bundle
- Pricing: $49-$70 per bundle depending on color
- Colors: Matches GAF Timberline HDZ and architectural shingle color palette
- Features: Pre-scored eliminates cutting, dual-layer construction, Scotchgard Protector for algae resistance
- Warranty: Part of GAF Lifetime Roofing System, transferable limited lifetime warranty
- Installation: Designed for easy separation and bending over ridge
GAF Timbertex:
- Profile: Premium designer ridge cap mimicking wood shake appearance
- Pricing: $75-$95 per bundle
- Best for: High-end homes, wood shake aesthetic without maintenance
- Unique feature: Ultra-thick profile creating pronounced shadow lines
GAF Pro-Cut:
- Profile: Basic 3-tab style for budget applications
- Pricing: $35-$50 per bundle
- Coverage: 20-25 linear feet
- Best for: Rental properties, utility buildings
CertainTeed – Quality alternative:
CertainTeed offers ridge caps known for excellent color matching accuracy:
CertainTeed Shadow Ridge:
- Profile: Architectural ridge cap matching Landmark series shingles
- Pricing: $48-$72 per bundle
- Coverage: 25-30 linear feet
- Colors: Full Landmark color range with exceptional match quality
- Warranty: 25-40 years depending on system components
CertainTeed Presidential Shake TL:
- Profile: Designer ridge cap for Presidential TL luxury shingles
- Pricing: $70-$90 per bundle
- Features: Triple-layer construction, ultra-thick profile
- Best for: Premium architectural installations
Owens Corning – Innovation focus:
Owens Corning emphasizes wind resistance and durability:
Owens Corning SureNail Hip & Ridge:
- Profile: Enhanced wind resistance through SureNail Technology
- Pricing: $52-$75 per bundle
- Coverage: 25-30 linear feet
- Features: Integrated reinforcement zone improving nail hold strength
- Wind rating: Up to 130 mph when properly installed
- Warranty: Matches Duration series warranties (25-50 years)
Owens Corning Duration STORM:
- Profile: Impact-resistant ridge cap for hail-prone regions
- Pricing: $65-$85 per bundle
- Class 4 impact rating: Highest residential impact resistance
- Insurance benefits: Often qualifies for premium discounts
IKO – Value-oriented:
IKO provides budget-friendly options with solid performance:
IKO UltraHP Hip & Ridge:
- Profile: Standard architectural ridge cap
- Pricing: $40-$65 per bundle
- Coverage: 25-33 linear feet
- Colors: Matches Dynasty and Cambridge series
- Advantages: Competitive pricing, adequate performance
IKO EZ-Ridge:
- Profile: Basic ridge cap with easy installation features
- Pricing: $38-$55 per bundle
- Best for: Budget-conscious projects
Atlas – Specialty options:
Atlas serves niche markets with unique offerings:
Atlas Pro-Cut Hip & Ridge:
- Pricing: $42-$68 per bundle
- Coverage: 20-28 linear feet
- Features: Good color range, reliable performance
Atlas StormMaster:
- Profile: Enhanced wind and impact resistance
- Pricing: $58-$78 per bundle
- Best for: Severe weather zones
Brand comparison summary:
| Brand | Product Line | Price Range | Coverage | Key Feature |
|---|---|---|---|---|
| GAF | Seal-A-Ridge | $49-$70 | 25 LF | Pre-scored, market leader |
| GAF | Timbertex | $75-$95 | 20-25 LF | Designer wood-look |
| CertainTeed | Shadow Ridge | $48-$72 | 25-30 LF | Superior color matching |
| Owens Corning | SureNail | $52-$75 | 25-30 LF | Enhanced wind resistance |
| IKO | UltraHP | $40-$65 | 25-33 LF | Budget-friendly |
For detailed specifications and installation guidelines, consult the GAF ridge cap product page and manufacturer installation manuals.
How to install capstone shingles properly
Correct installation techniques ensure weather protection and longevity from your capstone shingle investment.
Materials and tools needed:
Before beginning installation, gather necessary components:
Materials:
- Ridge cap shingles (calculate linear footage + 10% waste)
- Ridge starter strip or cut field shingles for starter course
- Roofing nails: 1.5″ minimum length, corrosion-resistant
- Roofing cement/sealant for final cap and repairs
- Ridge vent (if installing ventilated ridge system)
- Closure strips matching panel profile (if applicable)
Tools:
- Roofing hammer or pneumatic nailer
- Utility knife with hook blades
- Chalk line for alignment
- Tape measure
- Tin snips or shears
- Safety harness and roof jacks
- Extension ladder
Step-by-step installation process:
Professional techniques for weathertight ridge cap installation:
Step 1 – Prepare the ridge:
- Ensure ridge line is clean, straight, and free of debris
- Verify all field shingles are properly installed to within 6-8 inches of ridge
- Check that both roof slopes meet evenly at the peak
- Install ridge vent if using a ventilated system (before cap shingles)
Step 2 – Apply starter course:
- Cut field shingles into starter strips or use manufactured ridge starter
- Apply starter strip along entire ridge length
- Nail starter in place approximately 2 inches from ridge center on each side
- Purpose: Creates first layer preventing weather penetration
Step 3 – Begin cap installation:
- Start from the end opposite the prevailing wind direction (caps overlap toward wind)
- For hip applications, begin at the bottom of the hip working upward
- Separate pre-scored capstone shingles at perforations creating individual 12″ sections
- Bend each cap shingle along centerline (warm shingles on cool days to prevent cracking)
Step 4 – Set first cap:
- Position first cap at ridge end, overhanging edge by 1/4″ to 3/4″
- Ensure cap is centered over ridge with equal overhang on both sides
- Bend cap firmly into place following ridge angle
- Nail with 2 nails per side (4 total) positioned:
Step 5 – Continue installation:
- Apply second cap shingle overlapping first by 5-6 inches (exposing 5-7 inches of previous cap)
- Maintain consistent exposure throughout installation for uniform appearance
- Nail using same 4-nail pattern: two per side, positioned 1″ from edge and 5-5/8″ from butt
- Continue pattern along entire ridge length
Step 6 – Finish termination:
- At final ridge end, overhang cap by 1/4″-3/4″ matching starter end
- Apply dab of roofing cement under final cap edge
- Seal exposed nails on final cap with roofing cement
- Ensure clean, straight ridge line with consistent exposure
Critical installation techniques:
Professional best practices ensuring optimal performance:
Proper bending:
- Warm capstone shingles in sun before bending in temperatures below 50°F
- Avoid forcing cold shingles which crack at fold line
- Bend gradually over ridge achieving smooth, tight fit
- Ensure both sides drape evenly without gaps
Correct exposure:
- Maintain 5-7 inch exposure (varies slightly by manufacturer)
- Use consistent exposure for uniform appearance
- Excessive exposure (over 7″) reduces protection layers
- Insufficient exposure wastes materials and creates bulky appearance
Nailing pattern precision:
- Position nails 5-5/8″ from butt edge ensuring next cap covers nail heads
- Keep nails 1″ from side edges preventing crack initiation
- Drive nails flush, not overdriven (crushes shingle) or underdriven (leaves exposed heads)
- Use 4 nails per cap shingle for maximum wind resistance
Common installation mistakes to avoid:
Errors that compromise performance and appearance:
- Insufficient overlap: Less than 5″ overlap creates leak paths and wind vulnerability
- Wrong direction: Installing caps toward prevailing wind allows wind-driven rain under edges
- Field shingles as caps: Using unmodified field shingles lacks flexibility, cracks easily, provides inferior protection
- Improper nailing: High nails get exposed; low nails visible on finished roof; side-edge nails cause cracking
- Inconsistent exposure: Varies ridge appearance, looks unprofessional
- Cold-weather forcing: Bending brittle cold shingles causes center-line cracking
- Color mixing neglect: Not blending from multiple bundles creates color banding
[Embed YouTube video: How to Install Ridge Cap Shingles Properly – Step by Step Tutorial]
Capstone shingles and ridge vent compatibility
Integrating ridge ventilation with capstone shingles creates energy-efficient roofing systems.
Ridge vent systems explained:
Ridge vents provide continuous exhaust ventilation along roof peaks:
Purpose and benefits:
- Exhaust hot attic air through peak opening, drawing fresh air through soffit vents
- Reduce attic temperatures by 20-40°F in summer months
- Lower cooling costs by 10-20% in hot climates
- Prevent moisture accumulation reducing mold, mildew, and wood rot
- Extend shingle lifespan by minimizing thermal stress
- Eliminate need for box vents or turbines creating cleaner roof appearance
Types of ridge vents:
- Rigid plastic vents: Pre-formed channels with internal baffles, $3-$6 per LF installed
- Rolled membrane vents: Flexible synthetic mesh, $2-$4 per LF installed
- Aluminum vents: Metal construction for maximum durability, $5-$8 per LF installed
- Shingle-over vents: Low-profile designs specifically for capstone shingle installation
Installing capstone shingles over ridge vents:
Proper sequencing and technique ensure both ventilation and weather protection:
Installation sequence:
- Complete field shingle installation to within 6-8″ of ridge on both slopes
- Cut 6-8″ wide opening along ridge center removing decking/sheathing
- Install ridge vent product over opening following manufacturer specifications
- Apply ridge cap starter course over vent
- Install capstone shingles over vent using proper nailing pattern
Special considerations:
- Nailing zones: Ridge vents include designated nailing strips; avoid nailing through vent openings
- Low-profile vents: Shingle-over style vents maintain slim profile beneath caps
- Proper starter: Use ridge starter ensuring first cap layer doesn’t block vent openings
- Exposure maintenance: Consistent exposure keeps capstone shingles centered over vent
- Sealant caution: Never seal vent openings with roofing cement; blocks airflow
Performance benefits:
Combined ridge vent and capstone shingle systems deliver measurable advantages:
- Energy savings: $150-$400 annually in reduced cooling costs (hot climates)
- Shingle longevity: Cooler attic temperatures extend field shingle life 15-25%
- Warranty compliance: Many premium shingle warranties require adequate ventilation
- Moisture control: Prevents condensation damage to roof decking and insulation
- Ice dam prevention: Cooler roof decks in winter reduce melt-freeze cycles
Compatibility considerations:
Not all capstone shingles work equally well with all ridge vent types:
- Standard architectural caps: Compatible with all vent styles
- Ultra-thick designer caps: May require low-profile vents avoiding bulky ridge appearance
- 3-tab caps: Work with basic vents but provide less dimensional character
- Special-order caps: Some manufacturers offer vent-specific ridge cap products
Review our ridge vent installation guide for comprehensive ventilation strategies.
Choosing capstone shingles for appearance and style
Aesthetic decisions significantly impact overall roof presentation and property value.
Matching field shingles:
Color and profile coordination creates cohesive roofing systems:
Manufacturer matching:
- Same brand essential: Each manufacturer’s color formulations differ; mixing brands creates mismatches
- Example: GAF Charcoal field shingles require GAF Charcoal ridge caps for seamless integration
- Lot variation: Even same-brand products from different production runs may vary slightly
- Blending strategy: Mix shingles from multiple bundles during installation minimizing any color variation
Profile coordination:
- Architectural field = architectural caps: Match dimensional profiles for consistent appearance
- 3-tab field accepts 3-tab caps: Budget projects maintain uniform look with basic products
- Designer field requires designer caps: Premium shingles demand matching premium ridge caps
- Mixed profiles: Using thin caps on thick architectural roofs creates visual disconnect
Dimensional impact on appearance:
Capstone shingle thickness dramatically affects roof character:
Standard thickness (0.5-0.75″):
- Creates subtle ridge definition
- Blends smoothly with field shingles
- Appropriate for traditional styles and conservative aesthetics
- Less pronounced shadow lines
- Best for: Colonial, ranch, simple gable roofs
Enhanced thickness (0.75-1.25″):
- Pronounced ridge presence drawing eye to roof peaks
- Bold shadow lines adding dimension
- Popular on architectural shingle roofs
- Creates “premium” appearance
- Best for: Two-story homes, complex roofs, upscale neighborhoods
Ultra-thick designer (1.0-1.5″):
- Maximum visual impact and depth
- Heavy shadow patterns visible from street
- Luxury aesthetic emphasizing craftsmanship
- Can overwhelm small roofs; ideal for larger homes
- Best for: Estate homes, luxury properties, architecturally significant buildings
Color selection strategies:
Three approaches to capstone shingle color choice:
Monochromatic (matching):
- Ridge caps identical color to field shingles
- Most common approach creating unified appearance
- Safe choice for all architectural styles
- Advantages: Seamless look, traditional aesthetic, easy specification
- Example: Weathered Wood field with Weathered Wood caps
Contrasting (accent):
- Ridge caps in complementary color creating definition
- Emphasizes roof peaks and architectural features
- Modern or contemporary aesthetic
- Requires careful color selection avoiding clashing
- Example: Charcoal field with Pewter Gray caps for subtle contrast
Blended (multi-tonal):
- Ridge caps blending multiple field shingle colors
- Natural, organic appearance
- Popular with variegated architectural shingles
- Creates depth and visual interest
- Example: Mixed earth tones at ridge on multi-colored field shingles
Proportional considerations:
Roof size and style influence optimal capstone shingle selection:
Small roofs (under 1,500 sq ft):
- Standard thickness caps avoid overwhelming roof
- Subtle colors prevent ridge from dominating
- Proportional profile matching house scale
Large roofs (over 2,500 sq ft):
- Enhanced or ultra-thick caps provide appropriate visual weight
- Bold profiles visible from street enhance curb appeal
- Luxury homes justify premium designer options
Complex roofs (multiple planes, dormers):
- Consistent capstone shingles across all ridges and hips creates unity
- Color-matched caps tie together disparate roof sections
- Quality caps essential given extensive linear footage
How capstone shingles perform in different climates
Weather resistance varies by product quality and installation technique.
Wind resistance capabilities:
Proper installation determines wind performance:
Standard installation wind ratings:
- 3-tab caps: 60-90 mph wind resistance when properly installed
- Architectural caps: 110-130 mph typical ratings
- Premium caps with enhanced adhesive: 130-150 mph capabilities
Enhanced wind zone installation:
- Hurricane zones require 6-nail pattern (3 per side) instead of standard 4-nail
- Reduced exposure (4-5 inches) increases overlap layers
- Roofing cement dabs under each cap edge
- Special high-wind adhesive strips on premium products
Critical factors:
- Installation direction (caps overlap toward prevailing wind) prevents uplift
- Proper nailing pattern (5-5/8″ from butt, 1″ from edge) ensures subsequent caps cover fasteners
- Adequate adhesive strip contact between layers
- Quality materials with aggressive adhesives
Weather exposure challenges:
Ridge caps endure the harshest roof conditions:
UV exposure:
- Peaks receive maximum sun exposure accelerating granule loss
- Premium capstone shingles use enhanced UV-resistant granules
- PVDF coatings on high-end products maintain color 40+ years
- Standard caps fade noticeably after 15-20 years in intense sun climates
Temperature extremes:
- Daily thermal cycling (hot days, cool nights) stresses ridge materials
- Quality asphalt compounds resist cracking from expansion/contraction
- Designer caps with flexible formulations perform better in variable climates
Precipitation exposure:
- Ridge caps shed water down both roof slopes
- Proper overlap (5-6 inches minimum) critical for leak prevention
- Architectural profile channels water more effectively than flat 3-tab caps
- Ice and snow accumulation at ridges requires adequate sealing
Impact resistance:
Hail damage concentrates at exposed roof peaks:
Standard caps:
- Adequate resistance to small hail (under 1 inch)
- Damage likely from large hail (1.5+ inches)
- Granule loss, denting, cracking possible
Class 4 impact-resistant caps:
- Owens Corning Duration STORM, CertainTeed Impact Resistant options
- Cost premium: $15-$25 per bundle over standard
- Insurance discounts: 10-35% in hail-prone states
- Testing: Withstand 2-inch steel ball dropped from 20 feet
Climate-specific recommendations:
Optimal capstone shingle selection by region:
Hot, sunny climates (Southwest, South):
- Light colors reflecting solar heat
- Premium granules resisting UV degradation
- Cool roof rated options reducing attic temperatures
- PVDF coatings maintaining appearance decades
- Brands: GAF Timberline HDZ with reflective granules, CertainTeed Landmark Solaris
Cold, snowy climates (Northeast, Mountain states):
- Flexible compounds preventing cold-weather cracking
- Enhanced adhesive performing in low temperatures
- Proper ice and water shield beneath caps at eaves
- Brands: IKO Marathon Plus (cold-weather formula), Atlas StormMaster
Humid, rainy climates (Southeast, Pacific Northwest):
- Algae-resistant caps with copper or zinc granules
- Steep profile shedding water quickly
- Enhanced adhesive resisting moisture
- Brands: GAF with Scotchgard Protector, CertainTeed StreakFighter
Coastal, high-wind zones (Gulf Coast, Atlantic Coast):
- Architectural caps with superior wind ratings
- Enhanced nailing patterns required by code
- Corrosion-resistant fasteners essential
- Brands: Owens Corning SureNail (130 mph rating), CertainTeed Landmark Premium
Severe weather (hail belts, tornado alley):
- Class 4 impact-resistant caps reducing damage
- Insurance premium discounts
- Enhanced wind performance features
- Brands: Owens Corning Duration STORM, GAF Timberline HDZ RS
Should you install capstone shingles yourself?
DIY feasibility depends on experience, roof characteristics, and comfort with heights.
DIY installation assessment:
Ridge cap installation difficulty level: Moderate:
Skills required:
- Comfortable working at roof peak elevations
- Basic roofing knowledge (exposure, nailing patterns, sealing)
- Ability to maintain straight lines and consistent spacing
- Physical capability handling materials at heights
- Understanding of safety equipment and fall protection
Time investment:
- Simple gable roof (30-40 LF): 3-5 hours for experienced DIYer
- Hip roof (60-100 LF): 6-10 hours
- Complex roof (100+ LF): 1-2 full days
- Learning curve adds 30-50% time for first-time installers
Cost savings:
- Professional labor: $150-$500 for typical residential ridge/hip work
- DIY saves entire labor cost but requires tool investment
- Mistakes can cost more than hiring professionals initially
Tools and materials needed:
One-time investments for DIY capstone shingle installation:
Essential tools:
- Roofing hammer or pneumatic nailer: $100-$400
- Utility knife with hook blades: $15-$30
- Chalk line: $10-$20
- 25-foot tape measure: $15-$25
- Tin snips: $15-$30
- Tool subtotal (if purchasing): $155-$505
Safety equipment:
- Fall protection harness: $100-$250
- Roof jacks and planks: $75-$150
- Safety glasses: $10-$20
- Work gloves: $15-$30
- Extension ladder (if not owned): $150-$400
- Safety subtotal: $350-$850
Total tool/safety investment: $505-$1,355 if starting from scratch
When DIY makes sense:
Scenarios favoring self-installation:
- Simple gable roofs with easy access and low-moderate pitch (4:12 to 6:12)
- Homeowner experienced with basic roofing or construction
- Adequate time available (no rush deadline)
- Already own basic roofing tools and safety equipment
- Comfortable working at heights
- Desire to learn roofing skills
- Budget-conscious project where labor savings meaningful
When to hire professionals:
Situations requiring contractor expertise:
Roof characteristics:
- Steep pitch (8:12 or greater) creating dangerous working conditions
- High elevations (three-story homes, tall peaks)
- Complex geometries with multiple hips, valleys, dormers
- Ridge vent integration requiring specialized knowledge
- Large projects (100+ linear feet) benefiting from crew efficiency
Homeowner factors:
- No prior roofing experience
- Uncomfortable with heights or fall protection equipment
- Physical limitations preventing safe roof work
- Time constraints requiring fast completion
- Desire for warranty protection on both materials and workmanship
Warranty considerations:
- Some premium shingle warranties require licensed contractor installation
- Manufacturer may deny claims if DIY installation violates specifications
- Professional installation includes workmanship warranty (typically 1-5 years)
- Insurance claims require proper installation documentation
Professional installation advantages:
Benefits justifying labor costs:
- Proper technique: Experienced installers ensure weathertight seals, correct exposure, optimal nailing
- Efficiency: Professional crews complete in hours what takes DIYers days
- Warranty protection: Preserves manufacturer coverage, adds workmanship guarantees
- Safety: Professionals have proper equipment, training, insurance
- Quality materials: Contractors often access contractor-grade products and pricing
- Integrated service: Ridge caps installed during full roof replacement ensures system compatibility
Middle-ground approach:
Some homeowners hire professionals for field shingles but DIY ridge caps as learning experience on simpler portion of project. This works best on simple gable roofs where ridge cap runs are straight and accessible.
Review our DIY roofing safety guide before attempting any roof work.
Understanding capstone shingle warranties
Warranty coverage protects your investment and varies significantly by product tier.
Manufacturer material warranties:
Defect protection from major brands:
3-tab capstone shingles:
- Warranty period: 20-25 years limited
- Coverage: Manufacturing defects, excessive granule loss, premature failure
- Transferable: Usually yes, with reduced coverage (10-15 years typical)
- Pro-rata: Coverage decreases over time after initial 10-year full coverage period
Standard architectural capstone shingles:
- Warranty period: 25-40 years limited (GAF Seal-A-Ridge: part of Lifetime System)
- Coverage: Manufacturing defects, color fading beyond specified limits, material failure
- Transferable: Yes, often maintains full term for first transfer
- Pro-rata: Varies by manufacturer, many offer non-pro-rated extended periods
Premium/designer capstone shingles:
- Warranty period: 40-50 years limited or “lifetime” (defined as 50+ years)
- Coverage: Enhanced protection including algae resistance (10-25 years), wind damage (limited)
- Transferable: Full transfer with registration
- Pro-rata: Extended full-coverage periods before degradation begins
Installation workmanship warranties:
Separate coverage from contractors:
Professional installation:
- Standard workmanship warranty: 1-2 years covering labor and installation defects
- Enhanced warranties: 5-10 years available from premium contractors
- Coverage: Installation errors, improper nailing, leak resulting from faulty application
- Requirements: Often requires using contractor’s preferred materials, full roof replacement
DIY installation:
- No workmanship warranty
- Homeowner assumes all installation liability
- Manufacturer material warranty still applies if installation follows specifications
- Risk: Installation errors may void material warranty
What warranties cover:
Typical inclusions in capstone shingle warranties:
- Manufacturing defects (delamination, premature granule loss, cracking)
- Excessive color fading beyond manufacturer specifications (usually 10% maximum)
- Algae growth (if algae-resistant product within specified coverage period)
- Material failure under normal weather conditions
- Adhesive failure causing shingle blow-off
What warranties exclude:
Common exclusions homeowners must understand:
- Installation errors or workmanship defects
- Damage from severe weather events (hail, hurricanes, tornadoes – covered by homeowners insurance instead)
- Normal wear and weathering
- Foot traffic or mechanical damage
- Lack of maintenance (debris accumulation, moss growth)
- Improper ventilation damaging shingles
- Use of incompatible accessories or materials
- Alterations or repairs by unlicensed individuals
Maintaining warranty validity:
Required practices preserving coverage:
Installation compliance:
- Follow manufacturer installation instructions precisely
- Use recommended accessories (starter strips, underlayment, nails)
- Maintain proper nailing patterns and exposure rates
- Install over adequate ventilation systems
Documentation:
- Keep purchase receipts and installation records
- Register warranty with manufacturer (required for some benefits)
- Photograph installation for future reference
- Maintain contractor certifications if professionally installed
Ongoing maintenance:
- Perform annual inspections checking for damage or wear
- Address minor repairs promptly preventing escalation
- Keep gutters clean preventing water backup
- Remove debris, moss, and algae growth
- Document maintenance activities
Claiming warranty benefits:
Process for warranty claims on defective capstone shingles:
- Contact manufacturer: Report issue through customer service or online portal
- Provide documentation: Photos of damage, purchase receipts, installation records
- Inspection: Manufacturer may send representative or request contractor evaluation
- Determination: Manufacturer decides if issue is warranty-covered
- Resolution: Pro-rated credit, replacement materials, or repair authorization
- Timeframe: Most claims resolved within 2-4 weeks
Transferring warranties:
Selling your home with warranty coverage:
- Most manufacturer warranties transfer to subsequent homeowners
- Registration transfer sometimes required within specified timeframe
- Transferred coverage often reduced (lifetime becomes 20-30 years)
- Workmanship warranties typically non-transferable
- Warranty transfer enhances home value and marketability
For specific warranty terms, review manufacturer documentation or consult the National Roofing Contractors Association warranty guidelines.
Maintaining capstone shingles for maximum lifespan
Routine care extends performance and identifies issues before major failures.
Routine inspection schedule:
Regular evaluation prevents surprises:
Annual inspections:
- Conduct visual inspection from ground using binoculars
- Look for lifted, cracked, missing, or damaged capstone shingles
- Check for granule loss creating bare spots
- Identify sealant failure or exposed nail heads
- Examine ridge line straightness and consistent exposure
- Best timing: Spring and fall avoiding extreme weather
Post-storm inspections:
- Inspect within 24-48 hours after major weather events
- Check for wind damage (lifted or blown-off caps)
- Identify hail impact damage (dents, cracking, granule loss)
- Document damage immediately for insurance claims
- Photograph from ground and close-up if safely accessible
Professional inspections:
- Every 3-5 years for comprehensive evaluation
- Cost: $150-$300 for professional roof inspection
- Benefits: Expert identification of subtle issues, safety compliance, detailed reporting
Common capstone shingle issues:
Problems requiring attention:
Wind-lifted caps:
- Caps at ridge termination curl upward from wind exposure
- Typically occurs at gable ends facing prevailing winds
- Repair: Re-seal with roofing cement, add extra nail, replace if damaged
- Cost: $50-$100 per repair location
Cold-weather cracking:
- Center-line cracks from foot traffic or installation in cold weather
- Appears as splits along ridge fold line
- Repair: Replace cracked caps, seal with roofing cement temporarily
- Cost: $75-$150 per damaged cap section
Granule loss:
- UV exposure accelerates granule deterioration at peaks
- Creates bare spots exposing asphalt base
- Repair: Replace caps when 30%+ granules lost
- Cost: $3-$7 per linear foot for partial replacement
Moss and algae growth:
- Green moss or black algae streaks in humid, shaded climates
- Cosmetic issue initially, retains moisture shortening lifespan if untreated
- Treatment: Zinc or copper strip installation, algaecide application, soft washing
- Cost: $200-$600 for professional treatment
Sealant failure:
- Adhesive strips lose bond allowing cap movement
- Occurs in extreme temperature cycling or aging materials
- Repair: Apply roofing cement under lifted areas, add nails if necessary
- Cost: $25-$75 per location
Repair procedures and costs:
Common fixes extending capstone shingle life:
Individual cap replacement:
- Process: Remove damaged cap, install new cap matching existing
- Difficulty: Moderate, requires matching material and proper integration
- Cost: $50-$150 per repair including materials and labor
- When needed: Cracked, severely damaged, or missing individual caps
Re-sealing lifted corners:
- Process: Apply roofing cement under lifted edges, weight or nail down
- Difficulty: Easy DIY task if safely accessible
- Cost: $25-$75 per location (professional), $5-$15 DIY
- When needed: Wind-lifted caps, adhesive failure, minor damage
Partial ridge replacement:
- Process: Replace 10-20 foot section of damaged ridge caps
- Difficulty: Moderate, requires proper integration with existing caps
- Cost: $300-$700 depending on length and materials
- When needed: Storm damage, concentrated deterioration, color mismatch repair
Full ridge/hip replacement:
- Process: Remove and replace all capstone shingles maintaining field shingles
- Difficulty: Requires professional contractors
- Cost: $3-$7 per linear foot installed ($300-$1,500 typical project)
- When needed: Aging caps nearing end of life, widespread damage, aesthetic refresh
Preventive maintenance strategies:
Practices extending capstone shingle longevity:
Gutter maintenance:
- Clean gutters twice yearly preventing water backup
- Overflowing gutters saturate ridge area causing premature failure
- Install gutter guards reducing maintenance frequency
Debris removal:
- Remove leaves, branches, and organic material from ridge areas
- Trapped debris retains moisture accelerating deterioration
- Trim overhanging branches preventing constant shade and debris accumulation
Algae/moss prevention:
- Install zinc or copper strips below ridge caps releasing algae-inhibiting metals during rain
- Cost: $2-$4 per linear foot
- Apply preventive treatments every 2-3 years in humid climates
- Soft-wash cleaning removes growth without damaging shingles
Attic ventilation maintenance:
- Verify ridge vents remain clear and functional
- Check soffit vents aren’t blocked by insulation
- Proper ventilation reduces thermal stress extending cap life 15-25%
Proactive repair:
- Address minor issues immediately preventing escalation
- Replace 1-2 damaged caps promptly avoiding water infiltration
- Small repairs ($50-$150) prevent major replacements ($300-$1,500)
Review our seasonal roof maintenance checklist for comprehensive care strategies.
Frequently asked questions about capstone shingles
What are capstone shingles used for?
Capstone shingles, also called ridge cap shingles or hip and ridge shingles, are specialized roofing products designed to finish and weatherproof roof peaks, ridges, and hips where two roof planes meet. They create watertight seals at these vulnerable junctions, integrate with ridge ventilation systems, provide professional aesthetic finishing, and protect exposed ridge boards from weather damage.
How much do capstone shingles cost?
Capstone shingles cost $25-$95 per bundle in 2025, with most homeowners paying $45-$75 for standard architectural ridge caps covering 25-30 linear feet per bundle. Installation labor adds $1.50-$3.50 per linear foot, bringing total installed costs to $3.00-$7.00 per linear foot. Complete residential projects typically range from $120-$1,050 for materials and labor depending on ridge/hip length and product selection.
How many linear feet does a bundle of ridge cap shingles cover?
Most ridge cap shingle bundles cover 20-33 linear feet depending on the manufacturer and product line. GAF Seal-A-Ridge covers 25 linear feet per bundle, while some premium architectural products extend to 30-33 linear feet. Basic 3-tab style caps typically provide 20-25 linear feet coverage. Always check specific product specifications, as coverage varies by brand and style.
Can I make my own ridge cap shingles?
Yes, you can create basic ridge caps by cutting standard 3-tab field shingles into thirds along their pre-scored lines, producing three 12″ x 12″ cap pieces per shingle. This budget approach works adequately for utility buildings and simple projects but lacks the enhanced thickness, flexibility, and dimensional character of purpose-manufactured architectural ridge caps. Pre-formed caps also include warranties and pre-scoring for easier installation with better performance.
Do capstone shingles need to match my roof shingles?
Yes, capstone shingles should match both the color and profile style of your field shingles for optimal appearance and performance. Use the same manufacturer and exact color ensuring seamless integration—for example, GAF Charcoal field shingles require GAF Charcoal ridge caps. Architectural field shingles need architectural ridge caps for dimensional consistency, while 3-tab roofs accept 3-tab caps. Mixing brands or mismatching profiles creates noticeable visual discontinuity.
How long do ridge cap shingles last?
Ridge cap shingle lifespan matches field shingle warranties, ranging from 20-50+ years depending on product quality. Budget 3-tab caps last 20-25 years, standard architectural caps provide 30-40 years service, and premium designer caps deliver 40-50 years or more. Actual longevity depends on climate conditions, installation quality, maintenance practices, and exposure to severe weather. Ridge caps often wear faster than field shingles due to maximum UV and weather exposure.
Should I install ridge caps myself or hire a professional?
Hire professionals for steep roofs (8:12+ pitch), high elevations, complex geometries, or if you lack roofing experience. Experienced DIYers can successfully install capstone shingles on simple, accessible gable roofs with moderate pitch, saving $150-$500 in labor costs. Professional installation ensures proper technique, preserves warranties, provides workmanship guarantees, and typically completes in hours versus 1-2 days for DIY. Installation errors can create leaks costing far more than professional labor.
Making informed capstone shingle decisions
Capstone shingles represent essential finishing components for every sloped roof, providing weatherproofing at vulnerable ridge and hip junctions while creating polished, professional aesthetic presentation. Quality ridge caps cost $35-$75 per bundle ($1.50-$3.00 per linear foot for materials), with complete installed projects ranging from $3.00-$7.00 per linear foot including professional labor.
Selecting appropriate capstone shingles requires matching field shingle manufacturers and colors, choosing profile styles consistent with roof aesthetics, considering climate-specific performance features, and balancing budget with longevity expectations. While ridge caps represent only 3-5% of total roof replacement costs, compromising quality
🏠 Roofing Tips & Updates
Get free roofing advice, cost guides, and seasonal maintenance tips.
Roofing content specialist with 5+ years researching U.S. residential and commercial roofing. Has documented 200+ projects covering installation costs, material selection, contractor vetting, and DIY guides for homeowners across all climate zones.

20 Ft Metal Roofing Price: Complete 2026 Cost Guide
20 Ft Metal Roofing Price: Complete 2026 Cost Guide
The 20 ft metal roofing price ranges from $25 to $90 per panel in 2025, with most homeowners paying $35-$60 for standard corrugated or R-panel options in galvanized steel or Galvalume finishes. Premium standing seam panels, thicker gauge metals, and specialty coatings push prices toward the upper range, while basic corrugated galvanized panels represent the most economical choice for agricultural buildings, shops, and utility structures.
Twenty-foot panels have become the preferred length for residential and agricultural roofing projects because they minimize seams, provide efficient coverage (32-50 square feet per panel depending on width), and create cleaner aesthetic lines across roof surfaces. Understanding the factors affecting 20 ft metal roofing price—including material composition, gauge thickness, coating options, and profile style—enables accurate budgeting and ensures you select panels appropriate for your climate, building type, and longevity expectations.
This comprehensive guide breaks down 20-foot metal panel pricing by material type, explains how gauge thickness affects costs and performance, compares panel profiles and coating options, calculates total installed expenses including labor and accessories, and reveals where to find the best prices for your specific project requirements.
Table of Contents
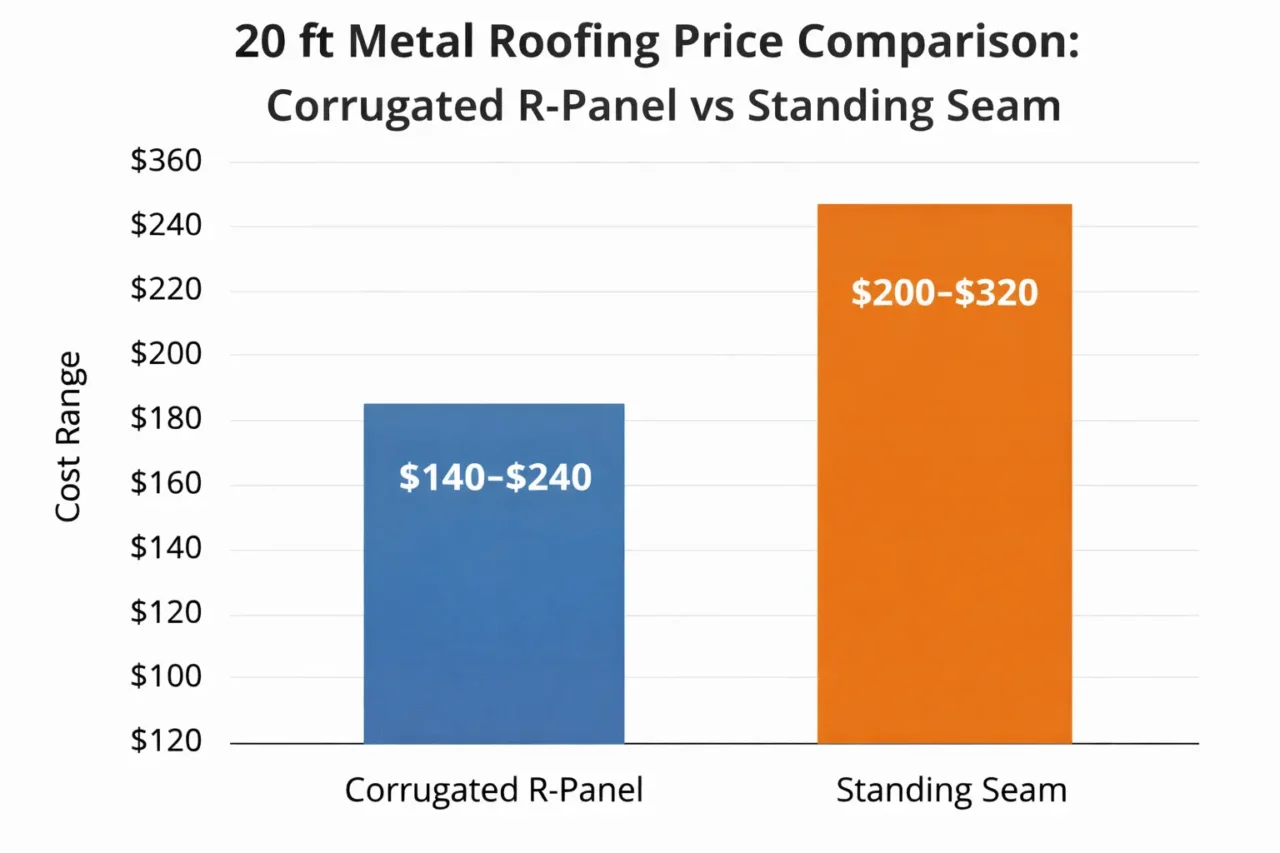
What is the average 20 ft metal roofing price in 2025?
Twenty-foot metal roofing panels deliver substantial coverage while remaining manageable for installation, making them the industry-standard length for many residential and commercial applications.
Price ranges by material and profile type:
Current market data for 20 ft metal roofing price shows:
- Corrugated galvanized steel (29-gauge): $25-$45 per 20-ft panel
- R-panel Galvalume (26-29 gauge): $35-$55 per 20-ft panel
- PBR (Purlin Bearing Rib) panels: $30-$50 per 20-ft panel
- 5V crimp panels: $28-$48 per 20-ft panel
- Standing seam panels (24-26 gauge): $60-$90 per 20-ft panel
- Painted/coated panels (premium finishes): Add $10-$30 per panel over bare metal prices
Coverage calculations for 20-foot panels:
Panel width determines actual coverage area, affecting the number of panels needed and overall 20 ft metal roofing price for complete projects:
- Corrugated panels (26″ wide): 20 ft × 2.17 ft = 43.3 sq ft gross, approximately 37 sq ft net coverage after side overlap
- R-panel (36″ wide): 20 ft × 3 ft = 60 sq ft gross, approximately 50 sq ft net coverage
- Standing seam (12-18″ wide): 20 ft × 1-1.5 ft = 20-30 sq ft per panel, installed with specialized clips
Cost per square foot for materials only:
When calculating 20 ft metal roofing price on a per-square-foot basis for direct comparison with other roofing materials:
- Basic corrugated steel: $0.65-$1.20 per sq ft material cost
- Galvalume R-panel: $0.70-$1.10 per sq ft material cost
- Painted steel panels: $1.00-$1.50 per sq ft material cost
- Standing seam systems: $1.80-$3.00 per sq ft material cost
- Premium aluminum/specialty: $2.00-$4.00 per sq ft material cost
Note that 20-foot length refers to panel measurement along the slope; panels typically come in widths from 26 inches to 40 inches depending on profile type.
According to HomeGuide’s 2025 metal roofing data, metal roofing materials cost $3-$20 per square foot depending on type and gauge, with 20-foot panels generally offering better per-square-foot value than shorter lengths due to reduced waste and fewer overlaps.
How material selection affects 20 ft metal roofing price
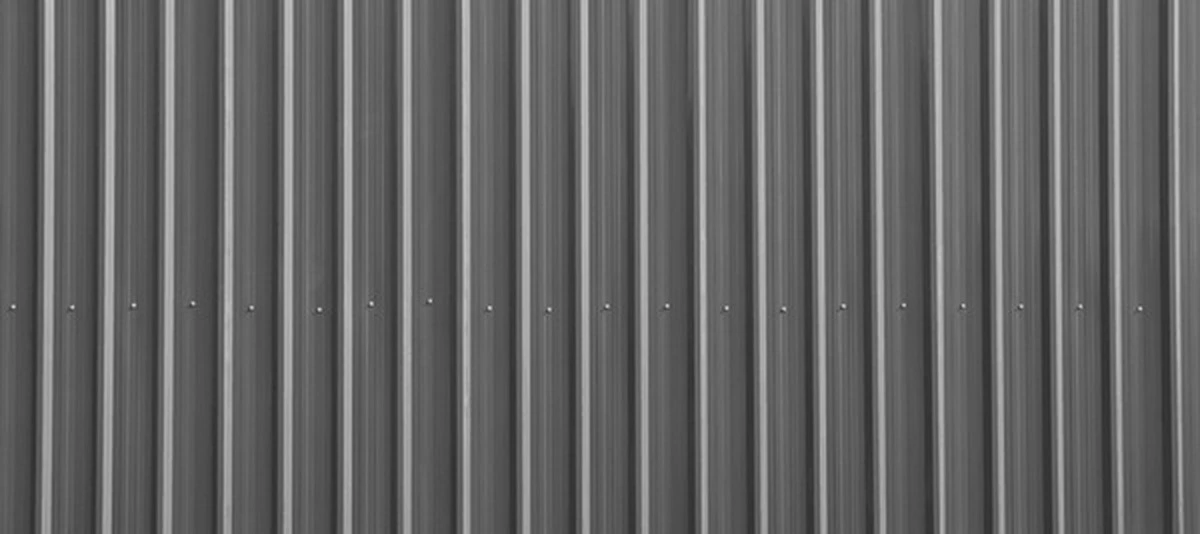
The base metal composition represents the primary cost driver for 20-foot panels, influencing both upfront purchase price and long-term value through lifespan and maintenance requirements.
Galvanized steel 20-foot panels:
Galvanized steel uses zinc coating to protect the steel core from rust and corrosion:
- 20 ft metal roofing price: $25-$45 per panel (29-gauge standard)
- Coating: Hot-dip galvanized zinc layer (G60 or G90 designation indicating coating weight)
- Lifespan: 20-30 years with proper maintenance in non-coastal environments
- Weight: Medium density requiring standard structural support
- Best applications: Agricultural buildings, barns, shops, utility structures, budget-conscious residential projects
- Advantages: Lowest initial cost, widely available, adequate corrosion protection for most climates
- Disadvantages: Shorter lifespan than Galvalume, scratches expose bare steel to rust, less heat-reflective than aluminum-zinc coatings
Galvalume 20-foot panels:
Galvalume combines aluminum (55%), zinc (43.4%), and silicon (1.6%) in a protective alloy coating offering superior corrosion resistance:
- 20 ft metal roofing price: $35-$60 per panel (26-29 gauge typical)
- Coating: Aluminum-zinc alloy providing better corrosion protection than galvanized
- Lifespan: 40-50 years, often warranted for 25-40 years against perforation
- Heat reflection: Superior to galvanized, reducing attic temperatures and cooling costs
- Best applications: Residential roofing, coastal areas (with proper coatings), high-moisture environments, commercial buildings
- Advantages: Excellent corrosion resistance, better paint adhesion, longer service life, improved energy efficiency
- Disadvantages: 20-40% higher cost than galvanized, requires care near concrete/masonry to prevent alkaline corrosion
According to Western States Metal Roofing cost data, steel metal panels range from $2.00-$5.00 per square foot depending on gauge and coating, translating to $40-$100+ for 20-foot panels covering 40-50 square feet.
Painted and coated 20-foot panels:
Premium paint systems applied over Galvalume base metal provide color options and enhanced protection:
- 20 ft metal roofing price: $40-$70 per panel depending on coating quality
- SMP (Silicone Modified Polyester): Mid-grade paint system, $1.75-$2.50 per sq ft material cost
- PVDF (Kynar 500/Hylar 5000): Premium coating with superior UV resistance, $2.60-$5.00 per sq ft
- Specialty finishes: Metallic, textured, or custom colors add $4.15-$8.25 per sq ft
- Warranty: 25-30 years for SMP, 30-40 years for PVDF systems
- Best applications: Residential homes prioritizing curb appeal, buildings where aesthetics matter, harsh UV environments
Aluminum 20-foot panels:
Aluminum offers natural corrosion resistance without coatings, making it ideal for coastal and marine environments:
- 20 ft metal roofing price: $55-$85 per panel (typical residential gauge)
- Weight: Approximately 1/3 the weight of steel, reducing structural load requirements
- Lifespan: 50+ years with minimal maintenance
- Corrosion: Naturally rust-proof, forms protective oxidation layer
- Best applications: Coastal homes, salt-air exposure, applications requiring lightweight materials
- Cost installed: $6.50-$21 per sq ft including installation
- Disadvantages: Higher initial cost, softer metal prone to denting, limited color options compared to painted steel
Copper 20-foot panels:
Copper represents the premium tier among metal roofing materials, rarely used in standard 20-foot corrugated or R-panel profiles:
- 20 ft metal roofing price: $150-$300+ per panel (when available in this format)
- Lifespan: 100+ years, often outlasting the building structure
- Appearance: Develops attractive green patina over 10-20 years
- Cost installed: $20-$40 per sq ft
- Best applications: Historic restoration, architectural landmarks, luxury residential projects
- Limitations: Most commonly used in standing seam profiles rather than exposed-fastener panels
Material comparison table:
| Material | Price Per 20-Ft Panel | Coverage | Cost Per Sq Ft | Lifespan | Best Use |
|---|---|---|---|---|---|
| Galvanized steel | $25-$45 | 37-50 sq ft | $0.65-$1.20 | 20-30 years | Agricultural, budget projects |
| Galvalume steel | $35-$60 | 37-50 sq ft | $0.70-$1.20 | 40-50 years | Residential, commercial |
| Painted Galvalume (SMP) | $40-$65 | 37-50 sq ft | $1.00-$1.50 | 30-40 years | Residential aesthetics |
| Painted Galvalume (PVDF) | $50-$75 | 37-50 sq ft | $1.30-$1.80 | 40-50 years | Premium residential |
| Aluminum | $55-$85 | 37-50 sq ft | $1.50-$2.30 | 50+ years | Coastal areas |
| Copper | $150-$300+ | Variable | $7.50-$15.00+ | 100+ years | Luxury, historic |
These 20 ft metal roofing price ranges reflect materials only; installation adds $4-$8 per square foot depending on roof complexity and regional labor rates.
:
- 20 ft metal roofing price: Base pricing tier ($25-$50 per panel)
- Material cost: $1.00-$3.00 per sq ft
- Strength: Adequate for residential roofs with 24-inch purlin/rafter spacing
- Applications: Residential roofing, wall siding, barns and sheds in mild climates
- Weight: Lightest option, approximately 50-60 lbs per 20-ft panel (36″ wide)
- Advantages: Most economical, easier to handle and cut, sufficient for most residential applications
- Limitations: More prone to denting from hail or foot traffic, requires closer purlin spacing
26-gauge panels (0.0179 inches thick):
- 20 ft metal roofing price: 15-25% premium over 29-gauge ($30-$65 typical)
- Material cost: $1.50-$5.00 per sq ft
- Strength: Enhanced dent resistance and structural capacity
- Applications: Residential roofs in severe weather zones, commercial buildings, wider purlin spacing (up to 4-5 feet)
- Weight: Medium, approximately 65-75 lbs per 20-ft panel
- Advantages: Better wind uplift resistance, reduced oil-canning (waviness), improved longevity
- Trade-offs: Higher cost but allows fewer purlins potentially offsetting expense
24-gauge panels (0.0239 inches thick):
- 20 ft metal roofing price: 25-40% premium over 29-gauge ($35-$75 range)
- Material cost: $3.00-$7.00 per sq ft for PVDF coatings
- Strength: Commercial-grade thickness for extreme conditions
- Applications: Commercial buildings, industrial facilities, areas with heavy snow loads or severe hail
- Weight: Heavy, approximately 80-95 lbs per 20-ft panel
- Advantages: Maximum dent resistance, minimal oil-canning, longest service life, widest purlin spacing capabilities
- Cost analysis: Higher material cost but structural savings from reduced framing
22-gauge and heavier (0.0299+ inches thick):
- 20 ft metal roofing price: Premium pricing, $4.00-$8.00+ per sq ft
- Applications: Specialized commercial, industrial, or architectural applications requiring maximum strength
- Availability: Often custom order for 20-foot lengths
- Best for: High-end residential, commercial roofs with exceptional longevity requirements
Gauge selection considerations:
Choosing appropriate gauge for your 20 ft metal roofing price budget:
- 29-gauge works when: Standard residential roof, 24″ rafter spacing, moderate climate, budget-focused
- 26-gauge recommended for: Commercial applications, coastal wind zones, hail-prone regions, wider purlin spacing
- 24-gauge necessary for: Heavy snow loads, commercial buildings, extreme weather exposure, high-traffic roofs requiring walking
According to roofing industry standards, thicker gauges reduce long-term maintenance costs and extend service life by 20-40% compared to thinner materials, often justifying the initial price premium.
20 ft metal roofing price by profile style
Panel profile affects both aesthetics and installation complexity, directly influencing material and labor costs.
Corrugated panels:
The classic wavy pattern remains the most economical profile for 20-foot panels:
- 20 ft metal roofing price: $25-$50 per panel (29-gauge galvanized)
- Profile: Repeating rounded or trapezoidal waves, typically 2.5-inch or 7/8-inch corrugation spacing
- Panel width: 26-28 inches actual, approximately 24-26 inches coverage after overlap
- Coverage per panel: 37-40 sq ft per 20-ft panel
- Cost installed: $7-$12 per sq ft including labor
- Fastening: Exposed fasteners through panel peaks into purlins/rafters
- Best applications: Agricultural buildings, barns, shops, sheds, traditional aesthetic
- Advantages: Lowest cost, simple DIY installation, widely available, effective water drainage
- Disadvantages: Exposed fasteners require maintenance, more leak points than concealed systems
R-panel (PBR – Purlin Bearing Rib):
Vertical ribs with flat areas between create clean, modern lines:
- 20 ft metal roofing price: $30-$55 per panel
- Profile: 1.25-inch tall vertical ribs spaced 9 inches on center with flat pans between
- Panel width: 36 inches typical, 3-foot coverage width
- Coverage per panel: 50-52 sq ft per 20-ft panel (best coverage efficiency)
- Cost installed: $7-$12 per sq ft
- Fastening: Exposed fasteners through flat pans (not rib peaks)
- Best applications: Residential homes, commercial buildings, clean contemporary aesthetic
- Advantages: Efficient coverage, modern appearance, better strength-to-weight ratio than corrugated
- Popular option: Frequently specified for residential metal roofing projects
Standing seam panels:
Premium concealed-fastener system with raised vertical seams:
- 20 ft metal roofing price: $60-$90 per panel (material only; often priced differently by contractors)
- Profile: Raised vertical seams 12-24 inches on center, typically 1-2 inches tall
- Panel width: 12-18 inches coverage per panel
- Coverage per panel: 20-30 sq ft per 20-ft panel
- Cost installed: $10-$16 per sq ft
- Material cost alone: $3-$4 per sq ft for panels
- Fastening: Concealed clips allow thermal movement, no exposed fasteners
- Best applications: Premium residential, architectural projects, buildings requiring maximum longevity
- Advantages: No fastener penetrations through panels, superior weather protection, sleek modern appearance, 40-70 year lifespan
- Installation: Requires specialized equipment and expertise, increasing labor costs 60-70% of total project
5V crimp panels:
Five distinct V-shaped ribs in traditional profile:
- 20 ft metal roofing price: $28-$48 per panel
- Profile: Five 2.67-inch tall V-shaped ribs across 26-inch width
- Coverage per panel: 37-40 sq ft
- Best applications: Agricultural buildings, barn-style aesthetics, simple installations
- Characteristics: Similar to corrugated in cost and installation simplicity
U-panel:
Rounded profile resembling corrugated but with wider, more pronounced ribs:
- 20 ft metal roofing price: $32-$58 per panel
- Profile: Wider U-shaped ribs providing modern appearance with good structural strength
- Applications: Contemporary agricultural, commercial, residential accent roofs
Profile comparison for 20-foot panels:
| Profile Type | Price Range | Coverage/Panel | Installed Cost/Sq Ft | Installation Difficulty | Best For |
|---|---|---|---|---|---|
| Corrugated | $25-$50 | 37-40 sq ft | $7-$12 | Easy (DIY-friendly) | Budget, agricultural |
| R-panel (PBR) | $30-$55 | 50-52 sq ft | $7-$12 | Easy-Moderate | Residential, commercial |
| 5V crimp | $28-$48 | 37-40 sq ft | $7-$12 | Easy | Traditional, barns |
| U-panel | $32-$58 | 40-45 sq ft | $8-$13 | Moderate | Contemporary |
| Standing seam | $60-$90 | 20-30 sq ft | $10-$16 | Difficult (professional) | Premium residential |
Note that standing seam systems often use shorter panel lengths (12-16 feet common) due to thermal expansion requirements, making true 20-foot standing seam panels less common than exposed-fastener 20-footers.
!
[Embed YouTube video: How to Calculate Metal Roofing Costs – Panel Coverage and Pricing]
How coatings affect 20 ft metal roofing price
Protective coatings and paint systems add cost but dramatically extend panel life and enhance appearance.
Bare/mill finish:
- 20 ft metal roofing price: Base cost with no upcharge
- Appearance: Raw galvanized (silver) or Galvalume (dull silver) finish
- Protection: Metal coating only (zinc or aluminum-zinc alloy)
- Applications: Non-visible areas, agricultural buildings, workshops where aesthetics aren’t priority
- Considerations: Will weather and may develop white rust or staining over time
SMP (Silicone Modified Polyester) painted finish:
- 20 ft metal roofing price: Add $10-$20 per panel over bare metal
- Material cost: $1.75-$2.50 per sq ft
- Performance: Standard paint system with good color retention and UV resistance
- Warranty: 25-30 years typical against fading, chalking, and film integrity
- Color options: Full range of standard colors included in pricing
- Best for: Residential projects balancing cost and appearance
- Fade resistance: Moderate; expect some fading in intense sun exposure over 15-20 years
PVDF (Kynar 500/Hylar 5000) premium finish:
- 20 ft metal roofing price: Add $15-$30 per panel over bare metal
- Material cost: $2.60-$5.00 per sq ft for 24-gauge
- Performance: Superior UV resistance, color retention, and chalk resistance
- Warranty: 30-40 years against fading and chalking
- Best for: Visible residential applications, coastal environments with salt exposure, commercial buildings
- Longevity: Maintains appearance 2-3 times longer than SMP coatings
- Industry standard: Preferred for premium residential metal roofing
Specialty and metallic finishes:
- 20 ft metal roofing price: Add $20-$40+ per panel
- Material cost: $4.15-$8.25 per sq ft
- Options: Copper penny, aged bronze, textured patterns, custom colors
- Applications: High-end residential, architectural projects, distinctive aesthetics
- Availability: May require special order with longer lead times
Cool roof coatings:
- 20 ft metal roofing price: Add $12-$25 per panel
- Technology: High solar reflectance (SR) and thermal emittance (TE) ratings
- Energy Star compliance: Meets or exceeds federal energy efficiency standards
- Benefits: Reduces roof surface temperature 20-40°F, lowers cooling costs 10-25%
- ROI: Energy savings recover coating premium in 5-10 years in hot climates
- Color options: Available in light colors (white, light gray, tan) for maximum reflectance
Color selection impact:
Within each coating tier, color choices affect 20 ft metal roofing price:
- Standard colors: Included in base painted pricing (white, light gray, brown, red, green, blue)
- Premium colors: Add $5-$15 per panel (darker shades, popular custom colors)
- Custom/special-order colors: Add $10-$25 per panel, may require minimum quantities
- Metallic finishes: Add $10-$20 per panel for copper, bronze, champagne effects
Coating value analysis:
Investment in quality coatings affects long-term 20 ft metal roofing price through:
- Lifespan extension: Premium coatings add 10-20 years to overall roof life
- Maintenance reduction: Better coatings resist fading, chalking, and corrosion requiring less recoating
- Energy savings: Cool roof coatings reduce HVAC costs $100-$400 annually in hot climates
- Resale value: Premium finishes maintain curb appeal supporting higher property values
For detailed coating specifications and comparisons, consult the Metal Roofing Alliance coating guide resources.
Total installed 20 ft metal roofing price including labor
Understanding complete project costs beyond material pricing prevents budget surprises.
Professional installation labor rates:
Labor represents 60-70% of total standing seam costs and 40-50% of exposed-fastener panel projects:
- National average labor: $4-$8 per sq ft
- Exposed-fastener panels (corrugated, R-panel): $2.50-$5.00 per sq ft labor
- Standing seam installation: $6.00-$12.00 per sq ft labor due to specialized equipment and techniques
- Regional variations: Urban/coastal areas command $1-$3 per sq ft premium over rural markets
Complete installed cost calculation example:
For a 2,000 square foot roof using 29-gauge Galvalume R-panel (20-foot panels):
Materials:
- R-panel 20-ft panels (40 panels needed @ 50 sq ft coverage): $40 each = $1,600
- Underlayment (synthetic, 2,000 sq ft): $0.50/sq ft = $1,000
- Fasteners and screws: $0.10/sq ft = $200
- Trim (ridge cap, eave, rake, valley): 150 linear feet @ $3/ft = $450
- Closure strips: 150 ft @ $1.50/ft = $225
- Material subtotal: $3,475 ($1.74/sq ft)
Labor:
- Installation (exposed-fastener): $3.50/sq ft × 2,000 sq ft = $7,000
Additional costs:
- Tear-off existing shingles: $1.50/sq ft × 2,000 = $3,000
- Permits and inspection: $350
- Delivery fee (20-ft panels): $150
Total project cost: $13,975 ($6.99/sq ft complete)
Standing seam comparison for same 2,000 sq ft roof:
- Materials: $3-$4/sq ft × 2,000 = $6,000-$8,000
- Labor: $6-$12/sq ft × 2,000 = $12,000-$24,000
- Total installed: $10-$16/sq ft = $20,000-$32,000
DIY installation cost savings:
Homeowners with construction experience can install exposed-fastener 20-foot panels, saving substantial labor expenses:
- Materials + accessories: $2,500-$4,000 for 2,000 sq ft project
- Tool investment: $200-$500 (metal-cutting blade, drill, tin snips, safety equipment)
- Time requirement: 3-5 days for two-person crew on straightforward roof
- Limitations: Avoid DIY on steep pitches (8:12+), complex roofs, or standing seam systems requiring specialized equipment
- Permit compliance: Even DIY installations require building permits in most jurisdictions
Factors increasing installation costs:
Several roof characteristics elevate the total 20 ft metal roofing price beyond baseline estimates:
- Steep pitch (8:12 to 12:12): Add 20-40% labor due to safety requirements and slower work
- Complex roof geometry: Valleys, dormers, multiple planes add 15-30% in material waste and labor time
- Tear-off requirements: Removing existing roofing adds $1.00-$2.50/sq ft
- Height and access challenges: Multi-story homes or difficult site access add 10-25% labor premium
- Structural repairs: Damaged decking replacement costs $2-$4/sq ft additional
- Custom flashing: Chimneys, skylights, complex transitions add $200-$800 per feature
Installed cost comparison by material (2,000 sq ft roof):
| Material & Profile | Material Cost | Labor Cost | Total Installed | Cost/Sq Ft |
|---|---|---|---|---|
| Corrugated galvanized 29-ga | $2,000 | $5,000-$7,000 | $7,000-$9,000 | $3.50-$4.50 |
| R-panel Galvalume 26-ga | $2,800 | $5,500-$7,500 | $8,300-$10,300 | $4.15-$5.15 |
| Painted R-panel (SMP) | $3,600 | $5,500-$7,500 | $9,100-$11,100 | $4.55-$5.55 |
| Painted R-panel (PVDF) | $4,400 | $5,500-$7,500 | $9,900-$11,900 | $4.95-$5.95 |
| Standing seam steel | $6,000-$8,000 | $12,000-$16,000 | $18,000-$24,000 | $9.00-$12.00 |
These figures assume standard-pitch roofs (4:12 to 6:12), moderate complexity, and include all materials, labor, and accessories.
According to This Old House roofing cost data, complete metal roof installations average $46,233 nationally in 2025, with range between $23,890-$68,575 depending on size, material, and complexity.
Calculating accurate 20 ft metal roofing price for your project
Proper estimation prevents material shortages and budget overruns.
Panel coverage mathematics:
Different profiles provide varying coverage from 20-foot panels:
Corrugated (26″ actual width):
- Actual dimensions: 20 ft × 26″ (2.17 ft) = 43.3 sq ft gross area
- Overlap deduction: 2-3″ side lap reduces coverage to approximately 24″ effective width
- Net coverage: 20 ft × 2 ft = 40 sq ft per panel
- Panels per roofing square: 100 sq ft ÷ 40 = 2.5 panels
R-panel (36″ actual width):
- Actual dimensions: 20 ft × 36″ (3 ft) = 60 sq ft gross area
- Overlap deduction: 3″ side lap = 33″ effective coverage
- Net coverage: 20 ft × 2.75 ft = 55 sq ft per panel (conservative estimate allowing for cuts)
- Panels per roofing square: 100 sq ft ÷ 50 = 2.0 panels (using 50 sq ft working coverage)
Price per square foot calculation workflow:
Step-by-step for determining material cost per square foot:
- Determine panel price: $40 per 20-ft R-panel
- Calculate coverage: 50 sq ft net coverage per panel
- Divide: $40 ÷ 50 sq ft = $0.80 per sq ft material cost
- Add accessories: Underlayment ($0.50), fasteners ($0.10), trim allowance ($0.25) = $0.85 additional
- Total material cost: $1.65 per sq ft
- Add labor: $3.50 per sq ft
- Complete installed price: $5.15 per sq ft
Estimating panels needed for your roof:
Accurate quantity calculation for 20 ft metal roofing price budgeting:
Step 1 – Measure total roof area:
- Calculate each roof plane separately: length × width
- For simple gable: 2 rectangles (front and back slopes)
- For complex roofs: measure each section independently
- Example: 40 ft × 25 ft home = 1,000 sq ft per slope × 2 = 2,000 sq ft total
Step 2 – Apply pitch multiplier:
- Roof pitch increases actual surface area beyond horizontal footprint
- 4:12 pitch = 1.06 multiplier
- 6:12 pitch = 1.12 multiplier
- 8:12 pitch = 1.20 multiplier
- Example: 2,000 sq ft × 1.12 (6:12 pitch) = 2,240 sq ft actual roof area
Step 3 – Determine panels required:
- Divide roof area by coverage per panel
- Example: 2,240 sq ft ÷ 50 sq ft coverage (R-panel) = 44.8 panels
Step 4 – Add waste factor:
- Standard waste: 10% for simple roofs, 15% for complex roofs
- Example: 44.8 panels × 1.10 = 49.3 panels
- Order quantity: Round up to 50 panels
Step 5 – Calculate 20 ft metal roofing price:
- 50 panels × $40 per panel = $2,000 material cost
Waste factor guidelines:
| Roof Complexity | Waste Factor | Reason |
|---|---|---|
| Simple gable, no penetrations | 5-8% | Minimal cuts, efficient layout |
| Standard complexity, few valleys | 10-12% | Normal cuts and fitting |
| Complex with valleys, dormers | 15-20% | Multiple cuts, odd angles, fitting challenges |
| Very complex, multiple planes | 20-25% | Extensive cutting, custom fitting |
Online calculation tools:
Many metal roofing suppliers offer free estimation calculators accepting roof dimensions and automatically calculating panel quantities and 20 ft metal roofing price estimates.
Review our metal roofing cost calculator tool for automated project estimates.

Typical 20 ft metal roofing price range: Mid-tier, $35-$65 for standard R-panel and corrugated
Big-box home improvement stores (Home Depot, Lowe’s, Menards):
National retailers offer convenience but variable selection:
Advantages:
- Competitive pricing on standard profiles and gauges
- Convenient locations and extended hours
- Easy returns and exchanges
- Some DIY installation support
- Pro-desk services for contractors
Disadvantages:
- Limited selection compared to specialty suppliers
- May not stock 20-foot lengths in all profiles (often carry 8′, 10′, 12′ standard)
- Special-order required for 20-foot panels at many locations
- Less specialized metal roofing expertise
- Delivery fees may apply for long panels
Availability note: Always verify 20-foot panel availability before planning trips; many stores stock shorter lengths requiring special order for 20-footers.
Example pricing: Lowe’s carries 20-ft ribbed metal panels starting around $30-$50 for basic galvanized options.
Online metal roofing retailers:
Internet-based suppliers ship nationwide:
Advantages:
- Widest selection of profiles, gauges, colors, and coatings
- Competitive pricing due to lower overhead
- Convenient ordering and comparison shopping
- Direct-to-site delivery
- Detailed product specifications and installation guides
Disadvantages:
- Cannot inspect panels before purchase
- Shipping costs add significantly to 20 ft metal roofing price for long panels
- Damage risk during shipping
- Returns are complicated and expensive
- No local support for questions
Popular online sources:
- Metal Depot (wide selection, competitive pricing)
- Direct Metals (national coverage)
- ABC Supply (contractor-focused, some retail)
- Bridger Steel (Western US specialty)
Manufacturer direct purchasing:
Buying from panel manufacturers offers volume advantages:
Advantages:
- Best per-panel pricing for large orders (500+ sq ft minimum typical)
- Custom lengths and colors available
- Factory-fresh materials with full warranties
- Technical support from engineers
Disadvantages:
- Minimum order quantities often required
- Longer lead times (2-6 weeks for custom)
- Must arrange own delivery
- Best for contractors or very large projects
Examples: McElroy Metal, MBCI, Berridge Manufacturing
Agricultural and farm supply stores:
Rural-focused retailers serve agricultural markets:
Advantages:
- Competitive pricing on utility-grade materials
- Understand agricultural applications
- Stock appropriate profiles for barns and shops
- Rural locations convenient for farm properties
Disadvantages:
- Limited residential-grade options
- Fewer color/coating choices
- Basic galvanized focus over premium Galvalume/painted
Typical 20 ft metal roofing price: Budget-friendly, $25-$45 for corrugated and basic profiles
Price comparison shopping strategies:
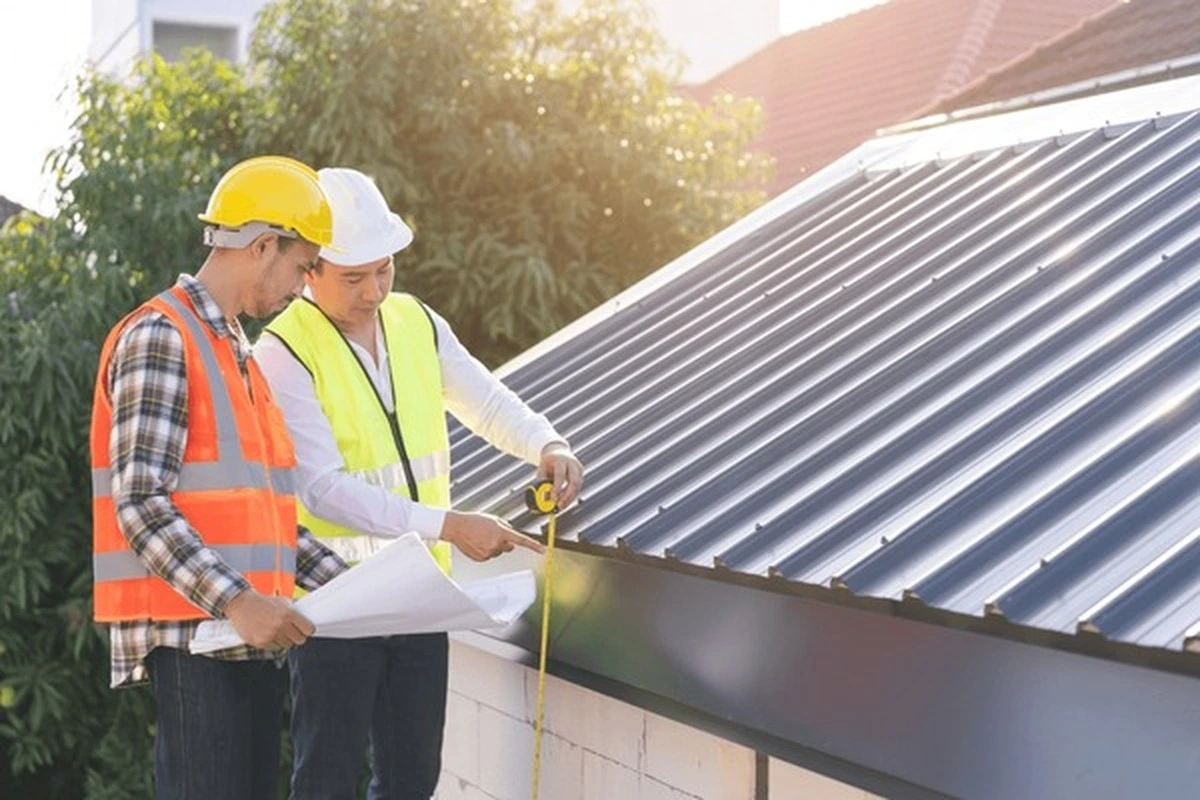
Maximizing value when sourcing 20-foot panels:
- Get 3-5 quotes from different supplier types (local, big-box, online)
- Verify specifications exactly (gauge, coating, warranty) for apples-to-apples comparison
- Ask about delivery fees for 20-foot panels requiring special transport
- Check bulk discounts when ordering 10+ panels or full project quantities
- Confirm return policies for defective or damaged panels
- Inquire about contractor discounts if you’re a licensed professional
- Request samples of painted finishes to verify color match
- Calculate total delivered cost including sales tax and shipping for true comparison
Seasonal purchase timing:
Buying during off-peak periods can reduce 20 ft metal roofing price:
- Late fall/winter: Contractors slow season offers 10-15% potential discounts
- Manufacturer promotions: Spring and fall often feature rebates or special pricing
- End of year: Suppliers clearing inventory may discount
- Avoid summer peak: Highest demand = highest prices and longest waits
Additional costs beyond panel purchase
Complete project budgets must account for accessories and installation materials.
Fasteners and screws:
Proper fasteners ensure weather-tight installation:
- Metal roofing screws: Self-drilling with neoprene/EPDM washers prevent leaks
- Cost: $0.05-$0.15 each depending on length and quality
- Quantity needed: Approximately 1 screw per square foot (80-100 screws per 20-ft panel)
- 2,000 sq ft roof requirement: 2,000 screws = $100-$300
- Color-matching: Painted heads cost $0.02-$0.05 more per screw
- Stainless steel: Premium corrosion resistance adds $0.10-$0.20 per screw, essential for coastal areas
Underlayment and moisture barriers:
Critical weatherproofing layer beneath metal panels:
- Synthetic underlayment: $0.50-$1.00 per sq ft, superior to felt paper
- Ice and water shield: $0.75-$1.50 per sq ft for eaves and valleys in cold climates
- 2,000 sq ft roof cost: $1,000-$2,000 for complete underlayment
- Benefits: Prevents water intrusion if panels damaged, reduces condensation issues, improves energy efficiency
Trim, flashing, and closure components:
Finishing accessories create professional, weather-tight installations:
- Ridge cap: $3-$6 per linear foot (matches panel profile)
- Eave/drip edge trim: $2-$4 per linear foot
- Gable/rake trim: $2-$5 per linear foot
- Valley flashing: $3-$7 per linear foot (wide panels for best protection)
- Outside corner trim: $3-$5 per linear foot
- Transition flashing: $4-$8 per linear foot
- Typical 2,000 sq ft roof: 150-200 linear feet total trim = $800-$2,500
Foam closure strips:
Seal gaps between panel profiles and roof deck:
- Purpose: Prevents weather, insects, and debris entry at eaves and ridge
- Types: Universal foam or profile-specific rigid closures
- Cost: $1-$3 per linear foot
- Quantity: Eave and ridge perimeter = 100-150 linear feet typical = $150-$450
Tools for DIY installation:
One-time investment for self-installation:
- Metal-cutting circular saw blade: $25-$60 (carbide-tipped for clean cuts)
- Aviation tin snips: $15-$40 (left, right, and straight cut)
- Cordless drill/impact driver: $100-$300 if not already owned
- Chalk line and tape measure: $15-$30
- Safety equipment: Fall protection harness, gloves, safety glasses = $75-$200
- Panel lifter/carrier: $30-$60 (helps maneuver long panels)
- Total tool investment: $260-$690 for complete setup
Delivery fees for 20-foot panels:
Long panels require specialized transport:
- Local delivery (under 25 miles): $75-$150
- Regional delivery (25-75 miles): $150-$300
- Long-distance shipping: $300-$800+ depending on quantity and distance
- Considerations: 20-foot panels don’t fit in standard pickup trucks; require long-bed trucks, trailers, or commercial delivery
- Bulk delivery: Full trailer loads (2,000+ sq ft) may include free or reduced delivery
Building permits and inspections:
- Residential roofing permit: $150-$500 based on project value
- Inspection fees: $50-$150 for required sign-offs
- Required: Even DIY installations need permits in most jurisdictions
- Variance: Fee structures differ by municipality; check local building department
Total accessory cost summary (2,000 sq ft project):
| Item | Cost Range |
|---|---|
| Fasteners | $100-$300 |
| Underlayment | $1,000-$2,000 |
| Trim and flashing | $800-$2,500 |
| Closure strips | $150-$450 |
| Delivery | $75-$300 |
| Permits | $150-$500 |
| Total accessories | $2,275-$6,050 |
Adding accessories to the 20 ft metal roofing price for materials ($1,600-$4,000 for panels) brings total material/accessory cost to $3,875-$10,050 before labor.
Is 20 ft metal roofing price better value than shorter panels?
Twenty-foot lengths offer specific advantages and limitations compared to shorter panel options.
Advantages of 20-foot panels:
Fewer seams and overlaps:
- Longer panels span from ridge to eave on many residential roofs (up to 18-20 feet maximum slope length)
- Reduced horizontal seams = better weather protection and fewer potential leak points
- Creates continuous, clean visual lines enhancing appearance
Faster installation:
- Covering more area per piece reduces handling time
- Fewer pieces to align, fasten, and seal
- Labor savings of 15-25% compared to multiple shorter panels
Better price per square foot:
- Economy of scale: 20-foot panels often cost 8-12% less per square foot than equivalent shorter lengths
- Example: One 20-ft panel at $40 ($0.80/sq ft) vs. two 10-ft panels at $22 each = $44 ($0.88/sq ft)
Material efficiency:
- Less overlap waste when panels run full slope length
- Reduced trim requirements at mid-roof seams
Disadvantages of 20-foot panels:
Transport challenges:
- Require long-bed pickup (8+ foot bed) or trailer for hauling
- Won’t fit in standard 6.5-foot truck beds
- Commercial delivery often necessary adding $75-$300 to 20 ft metal roofing price
Handling difficulty:
- Two to three people needed to safely maneuver panels
- More challenging in wind conditions
- Risk of bending or damaging during installation
Waste on shorter roofs:
- Roofs under 18-foot slope length require cutting 20-foot panels
- Cutoff pieces difficult to use elsewhere creating 10-20% waste
- Shorter panels (10′, 12′, 16′) more efficient for smaller projects
Storage and job-site management:
- Require significant clear space for staging
- More vulnerable to damage when stored on-site
- Need protection from foot traffic and construction activity
When to choose 20-foot panels:
Best applications for maximizing 20 ft metal roofing price value:
- Residential roofs with 16-20 foot slope lengths (standard two-story homes)
- Agricultural buildings with long roof runs
- Commercial structures with simple roof geometries
- Projects where continuous panel runs from ridge to eave are possible
- Situations with adequate labor for handling long panels
- Access to proper transport for 20-foot materials
When shorter panels are better:
Situations where 8′, 10′, 12′, or 16′ panels offer advantages:
- Small structures (sheds, porches, garage additions)
- Complex roofs requiring many cuts and custom fitting
- DIY solo installations without helpers
- Transport limitations (standard pickup truck only)
- Roofs with slope lengths under 14 feet
- Projects requiring frequent material repositioning
Cost comparison example:
2,000 sq ft roof with 10-foot average slope length:
Using 20-foot panels:
- Material cost: 50 panels @ $40 = $2,000
- Waste factor: 15% (cutting all panels in half) = +$300
- Transport: Delivery fee = +$150
- Total: $2,450 ($1.23/sq ft)
Using 12-foot panels:
- Material cost: 60 panels @ $26 = $1,560
- Waste factor: 8% (minimal cutting) = +$125
- Transport: Self-haul in standard pickup = $0
- Total: $1,685 ($0.84/sq ft)
In this scenario, shorter panels save $765 because the roof geometry suits their length better than 20-footers.
Frequently asked questions about 20 ft metal roofing price
How much does a 20 ft metal roofing panel cost?
A 20 ft metal roofing panel costs $25-$90 in 2025, with most homeowners paying $35-$60 for standard corrugated or R-panel options in galvanized steel or Galvalume. Basic 29-gauge corrugated galvanized panels start around $25-$45, mid-grade Galvalume R-panels run $35-$55, painted panels with premium coatings cost $50-$75, and standing seam panels reach $60-$90 per 20-foot panel.
What is the cheapest 20 ft metal roofing option?
The most economical 20 ft metal roofing is corrugated galvanized steel in 29-gauge thickness, typically priced $25-$35 per panel for bare mill finish. This translates to approximately $0.65-$0.95 per square foot of coverage, making it ideal for budget-conscious agricultural buildings, shops, and utility structures where appearance is secondary to weather protection and cost.
How many 20 ft metal panels do I need for my roof?
Calculate panels needed by dividing total roof area (in square feet, including pitch multiplier) by coverage per panel, then adding 10-15% waste. For example, a 2,000 sq ft roof using R-panels (50 sq ft coverage each) requires 2,000 ÷ 50 = 40 panels, plus 10% waste = 44 panels total. Corrugated panels covering 37-40 sq ft each would need approximately 50-55 panels for the same roof.
Can I install 20 ft metal roofing panels myself?
Yes, DIY installation of exposed-fastener 20-foot panels (corrugated, R-panel, 5V) is feasible for homeowners with construction experience, proper tools, and at least one helper to maneuver long panels safely. DIY saves $4-$8 per square foot in labor costs but requires metal-cutting tools, proper safety equipment, understanding of overlap/fastening patterns, and comfort working at heights. Standing seam systems require professional installation due to specialized equipment needs.
What gauge is best for 20 ft metal roofing?
29-gauge thickness works well for most residential roofs with standard 24-inch purlin spacing, balancing adequate strength with economical 20 ft metal roofing price ($25-$50 per panel). Upgrade to 26-gauge ($30-$65 per panel) for commercial applications, severe weather zones, or wider purlin spacing up to 5 feet, and choose 24-gauge ($35-$75 per panel) for maximum durability in areas with heavy snow loads, frequent hail, or high-traffic roofs.
Is galvanized or Galvalume better for 20-foot panels?
Galvalume offers superior value for residential applications, lasting 40-50 years versus 20-30 for galvanized while costing only 20-40% more ($35-$60 vs. $25-$45 per 20-ft panel). Galvalume’s aluminum-zinc coating provides better corrosion resistance, improved paint adhesion for coated panels, and enhanced heat reflectivity reducing cooling costs. Choose galvanized only when budget is extremely tight or for short-term agricultural structures.
How long do 20 ft metal roofing panels last?
20-foot metal roofing panels last 20-70+ years depending on material and coating quality. Galvanized steel provides 20-30 years, Galvalume delivers 40-50 years, painted Galvalume with PVDF coatings achieves 40-60 years, aluminum lasts 50+ years, and copper panels endure 100+ years. Actual lifespan depends on climate conditions, installation quality, coating selection, and maintenance practices.
Making informed 20 ft metal roofing price decisions
The 20 ft metal roofing price spectrum from $25 to $90 per panel reflects significant variation in material composition, gauge thickness, coating quality, and profile complexity—all directly impacting performance, longevity, and aesthetic outcomes. Understanding these cost drivers enables homeowners, builders, and contractors to select panels appropriate for their specific application, whether budget-focused agricultural structures requiring basic corrugated galvanized at $25-$35 per panel or premium residential installations demanding painted standing seam systems at $60-$90 per panel.
Complete project budgeting must extend beyond panel purchase price to encompass accessories ($2,000-$6,000 for typical residential projects), professional installation labor ($4-$8 per square foot), and delivery fees for 20-foot materials ($75-$300). Homeowners investing in 20-foot metal panels typically achieve material costs of $0.65-$2.70 per square foot, with total installed expenses ranging from $5-$16 per square foot depending on material grade and system complexity.
🏠 Roofing Tips & Updates
Get free roofing advice, cost guides, and seasonal maintenance tips.
Roofing content specialist with 5+ years researching U.S. residential and commercial roofing. Has documented 200+ projects covering installation costs, material selection, contractor vetting, and DIY guides for homeowners across all climate zones.
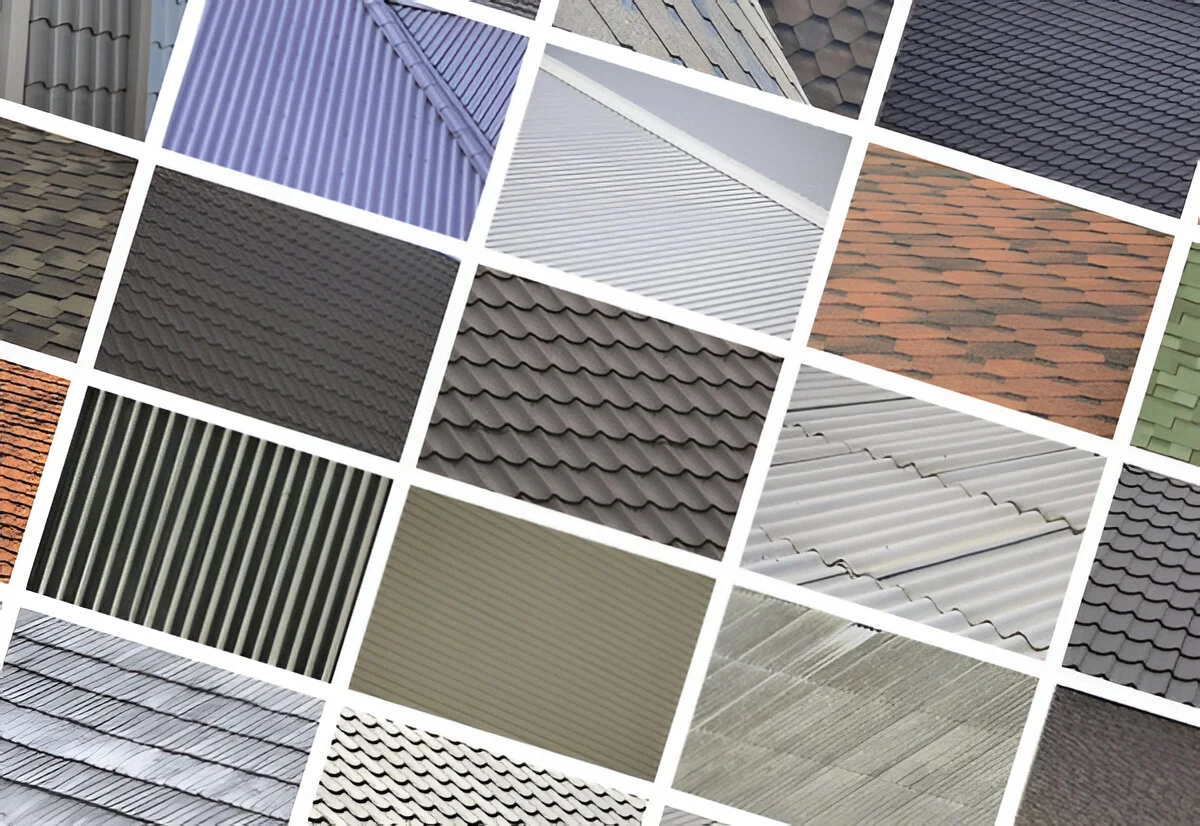
Roof Types: Guide to Residential Roofing Styles & Materials
Roof Types: Guide to Residential Roofing Styles & Materials
Roof types encompass both architectural styles (like gable, hip, and flat roofs) and roofing materials (such as asphalt shingles, metal, and tile), each offering distinct advantages for protection, aesthetics, and budget considerations. Understanding the different roof types helps homeowners make informed decisions when building new homes or planning roof replacements, as the right combination of style and material dramatically affects durability, energy efficiency, maintenance requirements, and curb appeal.
The most common roof types in residential construction include gable roofs valued for simplicity and affordability, hip roofs prized for wind resistance, and flat roofs favored in modern designs. Material choices span from economical asphalt shingles covering 80% of American homes to premium slate offering century-long lifespans. This comprehensive guide examines roof types by architectural style and material composition, helping you select the optimal configuration for your climate, budget, and aesthetic preferences.
Table of Contents
Roof types by architectural style
Architectural roof types refer to the structural design and shape of the roof system, independent of the covering material used. Each style offers different benefits for weather protection, interior space, construction complexity, and visual appeal.
Gable roof: America’s most popular choice

The gable roof ranks as the most common roof type in residential construction, featuring two sloping sides that meet at a central ridge creating a triangular end profile. This classic design appears on an estimated 60-70% of single-family homes across the United States due to its simplicity, affordability, and effective water drainage.
Advantages of gable roofs:
- Excellent rain and snow shedding due to steep pitch options
- Simple construction reducing labor costs and installation time
- Easy attic access and abundant storage space beneath the roof
- Cost-effective design with less complex framing than other roof types
- Versatile aesthetic fitting traditional, colonial, ranch, and craftsman styles
- Efficient ventilation through gable end vents and ridge vents
Disadvantages:
- Vulnerable to high winds, especially in hurricane-prone areas where panels can lift
- Not ideal for regions experiencing frequent extreme wind events
- Less stable than hip roofs in severe weather conditions
Gable roofs work best in moderate climates with seasonal weather but benefit from proper bracing and reinforcement in areas with occasional high winds.
Hip roof: superior wind resistance
Hip roofs feature four sloping sides that all meet at a central ridge or point, creating no vertical gable ends. This design provides exceptional structural stability and wind resistance, making hip roofs the preferred choice in coastal regions and hurricane zones.
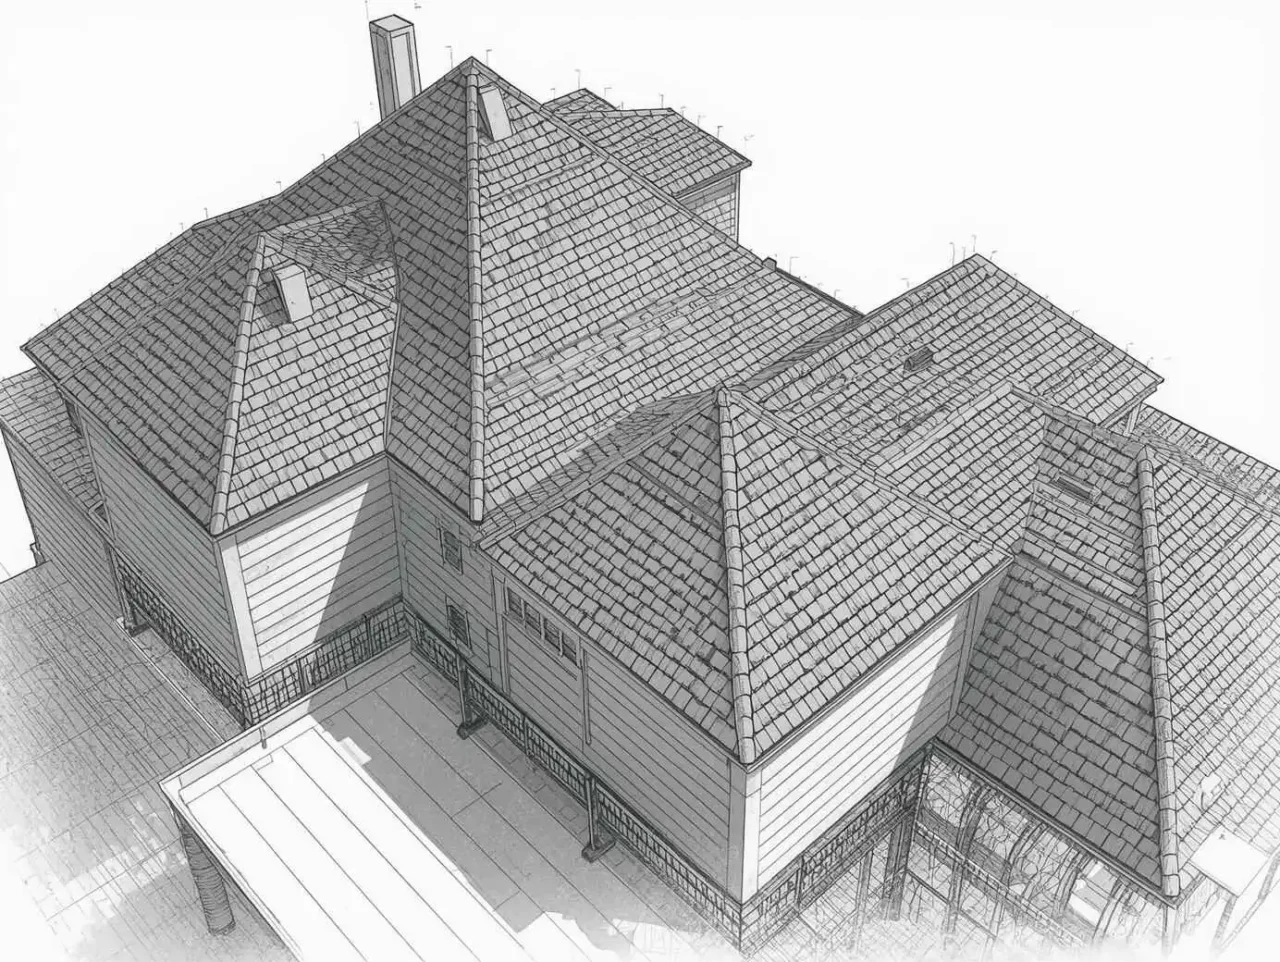
- Outstanding wind resistance due to inward slope on all four sides reducing uplift
- Self-bracing structure offering superior stability in extreme weather
- Even weight distribution across the building perimeter
- Elegant appearance adding architectural sophistication
- Excellent for covered porches and wraparound eave protection
Disadvantages:
- Higher construction costs due to complex framing requirements
- More challenging installation requiring skilled carpentry
- Reduced attic space compared to gable roofs
- More seams and valleys potentially increasing leak points if improperly flashed
According to Angi’s roof type comparison, hip roofs cost 20-35% more than comparable gable roofs but deliver measurably better performance in high-wind coastal environments.
Flat roof: modern minimalist design
Flat roofs feature minimal pitch (typically 1:12 to 2:12 slope) creating nearly level surfaces popular in modern, contemporary, and commercial architecture. While called “flat,” these roofs maintain slight slopes for water drainage.
Advantages of flat roofs:
- Contemporary aesthetic perfect for modern architectural styles
- Usable rooftop space for decks, gardens, or HVAC equipment
- Easy access for maintenance and inspection
- Potential for solar panel installation with optimal orientation
- Lower initial material costs due to less surface area
Disadvantages:
- Requires specialized waterproofing membranes (TPO, EPDM, PVC)
- More prone to ponding water and leak development
- Shorter lifespan than pitched roofs (15-25 years typical)
- Regular maintenance essential to prevent moisture infiltration
- Snow accumulation concerns in cold climates requiring structural considerations
Flat roofs have grown in residential popularity thanks to improved single-ply membrane technology and modern design trends emphasizing clean lines and minimalist aesthetics.
Mansard roof: French elegance
Mansard roofs feature two slopes on each of four sides, with the lower slope significantly steeper than the upper, creating distinctive French Second Empire styling. This design maximizes usable attic space often converted to living areas.
Advantages:
- Maximum attic or additional floor space potential
- Distinctive architectural character and curb appeal
- Dormers easily incorporated for natural lighting
- Historic charm for period-appropriate renovations
Disadvantages:
- Complex, expensive construction ($10,000-$60,000+ for residential applications)
- Poor performance in heavy snow regions due to lower slope retention
- Many seams and transitions requiring meticulous flashing
- Limited modern contractor familiarity increasing labor costs
Gambrel roof: barn-style classic
Gambrel roofs resemble mansard designs but feature two slopes only on two sides (like gables), commonly seen on barns, Dutch Colonial homes, and sheds. The steep lower slopes and gentle upper slopes maximize interior volume.
Pyramid roof: four-sided symmetry
Pyramid roofs bring all four sides to a single point at the peak, creating perfect symmetry ideal for square or nearly-square structures. This roof type offers excellent wind resistance and distinctive appearance but requires precise framing and costs $20,000-$50,000 for residential installations.
Jerkinhead roof: clipped gable hybrid
Jerkinhead (or clipped gable) roofs combine gable and hip characteristics, featuring gable-style slopes with the peak “clipped” or “hipped” back slightly. This design provides improved wind resistance compared to full gables while maintaining gable aesthetics.
Shed roof: simple single slope
Shed (or skillion) roofs feature a single sloping plane, creating the most economical roof type for small structures, additions, and modern designs. Installation costs run $6,000-$15,000 for typical residential applications, making shed roofs popular for budget-conscious projects.
Explore our complete architectural roof style comparison for climate-specific recommendations.
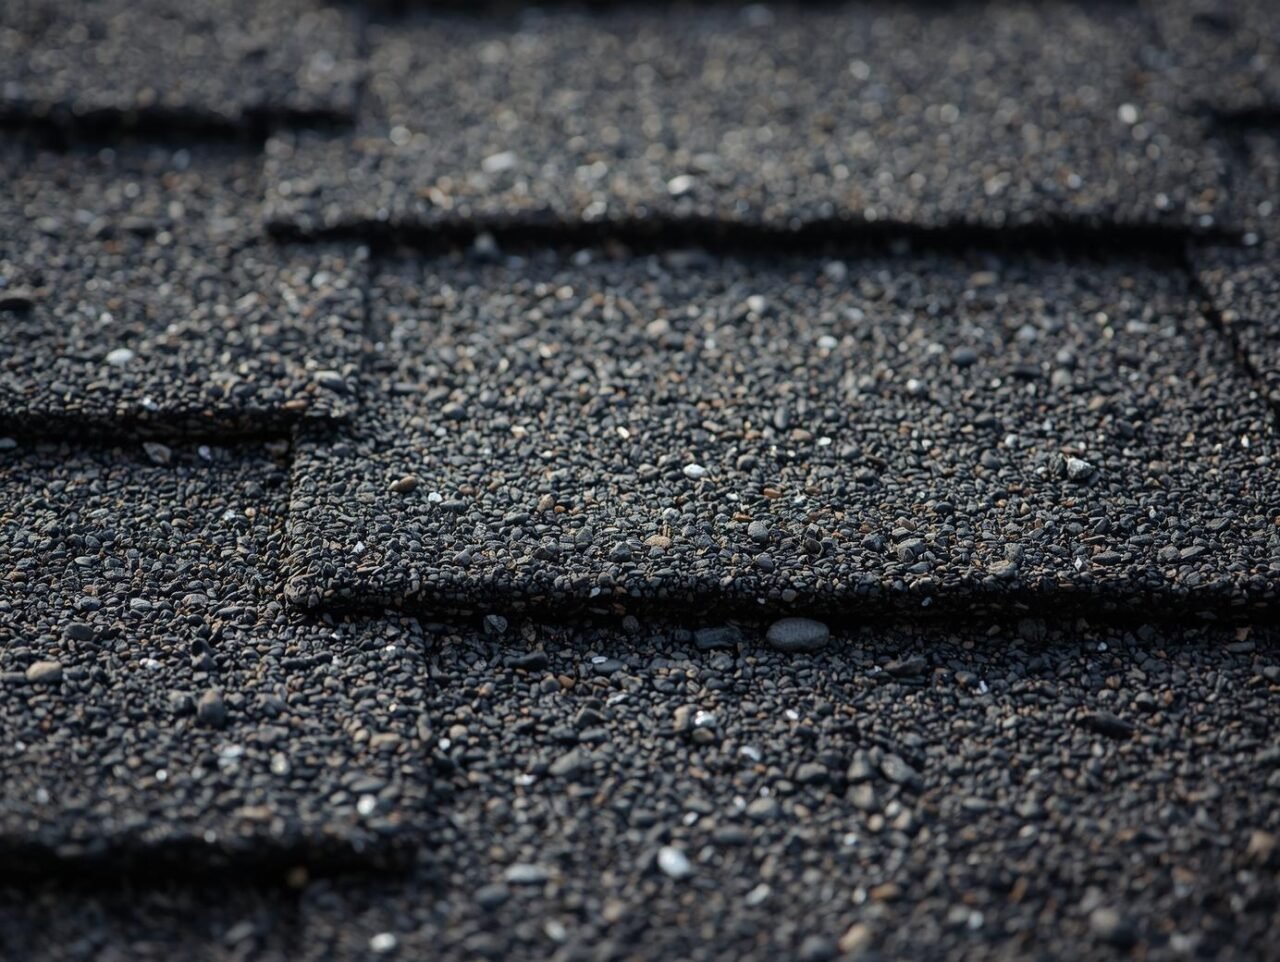
Asphalt shingles: dominant residential choice
Asphalt shingles represent the most common roof type in America, covering approximately 80% of residential homes due to affordability, versatility, and proven performance. Modern asphalt shingles use fiberglass-reinforced mats coated with asphalt and mineral granules providing weather protection and color.
Types of asphalt shingles:
- 3-tab shingles: Flat, uniform appearance with 15-20 year lifespan, cost $3.00-$6.00 per sq ft installed
- Architectural (dimensional) shingles: Multi-layered construction creating texture and depth, 25-30 year warranties, cost $4.00-$8.00 per sq ft installed
- Premium designer shingles: Specialized shapes mimicking slate or wood, 30-50 year warranties, cost $6.00-$12.00 per sq ft installed
Advantages of asphalt shingles:
- Most affordable roofing option for initial installation
- Widely available from multiple manufacturers (GAF, CertainTeed, Owens Corning)
- Extensive color and style selections matching any architecture
- Straightforward installation by most roofing contractors
- Adequate wind and impact ratings for most climates
- Easy repair with individual shingle replacement
Disadvantages:
- Shorter lifespan than premium materials (15-30 years)
- Susceptible to algae growth in humid climates requiring regular cleaning
- Less energy efficient than reflective metal or tile options
- Environmental concerns due to petroleum-based composition
According to Owens Corning’s roofing guide, asphalt shingles offer the best value proposition for homeowners prioritizing affordability and near-term performance.
Metal roofing: premium longevity
Metal roofing has surged in popularity over the past decade, now covering 15-20% of residential roofs thanks to exceptional durability, energy efficiency, and modern aesthetics. Common metals include steel, aluminum, zinc, and copper in various profiles.
Metal roof types:
- Standing seam: Concealed fasteners, vertical ribs, contemporary appearance, 40-70 year lifespan, $7.00-$15.00 per sq ft
- Metal shingles: Stamped to resemble asphalt or wood, easier installation, 30-50 years, $6.00-$12.00 per sq ft
- Corrugated/R-panel: Exposed fasteners, agricultural aesthetic, 30-50 years, $4.50-$9.50 per sq ft
- Metal tiles: Designed to mimic clay or slate, lightweight alternative, 40-60 years, $8.00-$14.00 per sq ft
Advantages of metal roofing:
- Exceptional longevity with 40-70+ year service life
- Superior energy efficiency reflecting solar heat and reducing cooling costs 10-25%
- Outstanding fire resistance with Class A ratings
- Withstands high winds (140+ mph when properly installed)
- Lightweight reducing structural load compared to tile or slate
- Low maintenance requiring minimal upkeep
- Recyclable at end of life supporting sustainability goals
Disadvantages:
- Higher upfront costs than asphalt shingles
- Noisy during heavy rain or hail without proper insulation
- Can dent from large hail or falling branches
- Expansion/contraction requiring appropriate fastening systems
- Professional installation essential for warranty compliance
Metal roofing delivers one of the highest ratings for hail resistance and performs exceptionally well in diverse climates from hot deserts to snowy mountains.
Clay and concrete tile: Mediterranean elegance
Tile roofing provides timeless beauty and remarkable durability, commonly seen in Spanish, Mediterranean, Southwestern, and coastal architectural styles. Clay tiles offer authentic terracotta aesthetics, while concrete tiles provide cost-effective alternatives in numerous colors and profiles.
Advantages of tile roofing:
- Exceptional lifespan of 50-100+ years for quality installations
- Outstanding fire resistance protecting homes in wildfire-prone regions
- Excellent thermal mass keeping homes cooler in hot climates
- Minimal maintenance beyond occasional inspection and repairs
- Unique aesthetic appeal enhancing curb value
- Color retention maintaining appearance for decades
- Wind and impact resistance when properly secured
Disadvantages:
- Heavy weight (850-1,100 lbs per square) requiring structural reinforcement
- High material and installation costs ($10.00-$25.00 per sq ft)
- Individual tiles can crack from impact or foot traffic
- Complex installation demanding specialized expertise
- Not suitable for low-pitch roofs requiring minimum 3:12 slope
Tile roofing excels in hot, dry climates where its thermal properties and longevity justify the premium investment. For detailed tile roofing information, visit the National Roofing Contractors Association resource library.
Slate roofing: ultimate premium
Natural slate represents the pinnacle among roof types, offering unmatched longevity and prestige found on historic homes, luxury estates, and architecturally significant buildings. Quarried stone cut into thin tiles provides authentic, varied coloration impossible to replicate with manufactured materials.
Advantages of slate roofing:
- Extraordinary lifespan of 75-200 years outlasting the buildings beneath
- Completely fireproof providing maximum safety
- Naturally resistant to rot, insects, and environmental degradation
- Timeless beauty and elegance enhancing property values
- Low lifecycle cost when amortized over century-plus service
- Environmentally sustainable using natural quarried stone
Disadvantages:
- Highest cost among all roof types ($18.00-$35.00+ per sq ft installed)
- Very heavy (800-1,500 lbs per square) demanding engineered roof structures
- Specialized installation requiring rare craftsman skills
- Fragile underfoot necessitating walking boards during maintenance
- Limited contractor availability for installation and repair
- Long-term commitment due to permanent nature and high replacement cost
Slate roofing makes economic sense for homeowners in historic districts, those planning multi-generational ownership, or anyone seeking the absolute premium in roofing materials.
Wood shakes and shingles: natural rustic charm
Wood roofing using cedar, redwood, or cypress provides organic beauty favored in mountain, craftsman, cottage, and traditional architectural styles. Hand-split shakes offer rustic texture, while sawn shingles provide smoother, more uniform appearance.
Advantages of wood roofing:
- Natural beauty with unique grain patterns and color variations
- Good insulation properties reducing energy costs
- Wind and impact resistance from quality materials
- Environmentally friendly using renewable resources
- Ages to attractive silver-gray patina over time
Disadvantages:
- Requires regular maintenance including cleaning and treatment
- Shorter lifespan (20-40 years) than premium materials
- Fire concerns in wildfire-prone areas requiring special treatments
- Susceptible to rot, moss, and insect damage without proper care
- Banned or restricted in many jurisdictions due to fire codes
- Higher cost than asphalt ($7.00-$13.00 per sq ft)
Wood shake roofs resist harsh climates when properly maintained and treated, making them suitable for most geographic areas. However, increasing fire restrictions limit availability in Western states and wildland-urban interface zones.
Synthetic roofing: engineered alternatives
Modern manufacturing produces synthetic materials mimicking premium roof types at reduced costs and weights:
- Synthetic slate: Rubber or plastic composites replicating slate appearance at 1/4 the weight and 1/2 the cost
- Composite shingles: Recycled materials formed into shake or tile profiles with enhanced durability
- Rubber roofing: EPDM membranes for flat or low-slope applications providing 20-30 year service
![roof types by material showing asphalt metal tile slate and woo
[Embed YouTube video: Comparing Roof Types – Materials and Styles Explained] (video placeholder)
Learn more about selecting appropriate materials in our roofing material selection guide.
Comparing costs across different roof types
Understanding cost ranges for various roof types helps homeowners budget accurately and evaluate return on investment for different material and style combinations.
Cost by architectural roof type (2,000 sq ft home):
| Roof Style | Complexity | Cost Range | Notes |
|---|---|---|---|
| Gable | Low | $6,000-$15,000 | Simplest, most economical design |
| Hip | Moderate | $8,000-$20,000 | 20-35% more than gable |
| Flat | Low-Moderate | $6,800-$18,000 | Membrane cost variable |
| Shed/Skillion | Low | $6,000-$15,000 | Most affordable pitched roof |
| Mansard | High | $10,000-$60,000 | Complex framing premium |
| Pyramid | High | $20,000-$50,000 | Requires precision framing |
| Gambrel | Moderate | $8,000-$25,000 | More complex than gable |
These estimates assume asphalt shingle covering; material changes significantly affect totals.
Cost by roofing material (per square foot installed):
| Material | Cost Range | Lifespan | Cost Per Year |
|---|---|---|---|
| 3-tab asphalt | $3.00-$6.00 | 15-20 years | $0.20-$0.30 |
| Architectural asphalt | $4.00-$8.00 | 25-30 years | $0.15-$0.27 |
| Metal (exposed fastener) | $4.50-$9.50 | 30-50 years | $0.11-$0.27 |
| Metal (standing seam) | $7.00-$15.00 | 40-70 years | $0.12-$0.30 |
| Wood shakes | $7.00-$13.00 | 20-40 years | $0.23-$0.50 |
| Tile (concrete) | $9.00-$21.00 | 50-75 years | $0.14-$0.35 |
| Tile (clay) | $12.00-$28.00 | 75-100 years | $0.13-$0.32 |
| Slate | $18.00-$35.00 | 75-200 years | $0.11-$0.35 |
Cost-per-year analysis reveals that premium roof types often deliver comparable or better long-term value despite higher initial investments.
For comprehensive budgeting, review our detailed roofing cost breakdown guide.
Choosing the right roof types for your climate
Geographic location and climate patterns significantly influence which roof types perform optimally and deliver best value.
Hot, sunny climates (Southwest, South):
Best roof types:
- Tile roofing: Reflects heat, provides thermal mass cooling, resists UV degradation
- Metal with cool coatings: Reflects 25-95% of solar radiation reducing cooling costs
- Light-colored asphalt: Reflective granules minimize heat absorption
Considerations: Fire resistance critical in dry regions; proper ventilation essential; avoid dark colors that absorb excessive heat.
Cold, snowy climates (Northeast, Mountain states):
Best roof types:
- Metal roofing: Sheds snow efficiently preventing ice dam formation
- Steep-pitch gable or hip: Facilitates snow sliding, reduces structural load
- Asphalt with ice barrier: Code-required waterproofing at eaves and valleys
Considerations: Minimum 4:12 pitch recommended for snow shedding; ice and water shield essential; avoid flat roofs prone to ponding and ice accumulation.
Humid, rainy climates (Pacific Northwest, Southeast):
Best roof types:
- Metal roofing: Resists moss, algae, and moisture-related degradation
- Steep-pitch designs: Maximizes water runoff, minimizes standing moisture
- Algae-resistant shingles: Copper or zinc granules prevent unsightly black streaks
Considerations: Proper ventilation prevents moisture accumulation; regular cleaning maintains appearance; avoid wood materials prone to rot.
Hurricane and coastal zones (Gulf Coast, Atlantic Coast, Hawaii):
Best roof types:
- Hip roofs: Superior wind resistance from four-sided inward slope
- Metal roofing: Withstands 140+ mph winds when properly fastened
- Concrete tile: Heavy weight resists uplift, excellent durability
Considerations: Building code requires enhanced fastening patterns; impact-resistant materials recommended; avoid large gable overhangs vulnerable to wind damage.
Wildfire-prone areas (California, Western states):
Best roof types:
- Class A fire-rated materials: Metal, tile, slate, treated asphalt
- Non-combustible options: Metal and tile provide ultimate protection
- Minimal combustible features: Avoid wood shakes and untreated materials
Considerations: Building codes may mandate specific fire ratings; ember-resistant venting required; regular debris removal prevents ignition sources.
According to 2025 roofing trends research, climate-appropriate roof types are increasingly prioritized as homeowners recognize the connection between material selection and energy efficiency, durability, and insurance costs.
Energy efficiency trends in roof types
Modern roof types increasingly incorporate energy-saving features responding to rising utility costs and environmental awareness.
Cool roofing technology:
Reflective roof types reduce heat absorption and lower cooling costs through:
- Metal roofing with cool coatings: ENERGY STAR-rated products reflecting 25-95% of solar radiation
- Light-toned asphalt shingles: Specialized reflective granules reducing attic temperatures 10-20°F
- Clay tiles with heat-resistant treatments: Natural light colors enhanced with reflective coatings
- TPO membranes for flat roofs: White thermoplastic surfaces achieving Solar Reflectance Index (SRI) ratings above 80
Homeowners in hot climates report 10-25% cooling cost reductions with cool roof types compared to traditional dark materials.
Solar integration:
Roof types designed for solar panel compatibility include:
- South-facing slopes: Gable and shed roofs optimizing panel orientation
- Flat roofs: Allow adjustable tilt arrays for maximum efficiency
- Standing seam metal: Facilitates clamp-on solar mounts avoiding roof penetrations
- Solar shingles: Integrated photovoltaic tiles blending seamlessly with traditional shingles
Proper ventilation:
All pitched roof types benefit from balanced ventilation systems preventing moisture accumulation and reducing cooling loads:
- Ridge vents with continuous soffit intake: Creates natural convection removing hot attic air
- Proper insulation barriers: R-38 to R-60 attic insulation depending on climate zone
- Radiant barriers: Reflective foil installed under roof decking reducing radiant heat transfer
For energy-efficient roofing strategies, consult the Cool Roof Rating Council for material comparisons and regional recommendations.
Maintenance requirements for different roof types
Ongoing care varies dramatically among roof types, affecting long-term ownership costs and lifespan realization.
Low-maintenance roof types:
- Metal roofing: Annual visual inspection, occasional debris removal from valleys, 40-70 years
- Tile roofing: Periodic inspection for cracked tiles, moss removal in humid climates, 50-100+ years
- Slate roofing: Minimal care beyond inspection, occasional tile replacement, 75-200 years
Moderate-maintenance roof types:
- Architectural asphalt shingles: Annual inspection, algae treatment in humid areas, gutter cleaning, 25-30 years
- Concrete tile: Regular inspection, tile replacement as needed, periodic sealing, 50-75 years
High-maintenance roof types:
- Wood shakes: Biennial cleaning and treatment, regular inspection for rot, moss control, 20-40 years
- Flat roofs: Quarterly inspection for ponding, membrane repairs, drainage maintenance, 15-25 years
- 3-tab asphalt: Frequent inspection after storms, earlier replacement needs, 15-20 years
Universal maintenance tasks:
Regardless of roof type, all systems benefit from:
- Annual professional inspections identifying minor issues before major failures
- Immediate storm damage assessment after severe weather events
- Gutter cleaning preventing water backup and ice dam formation
- Debris removal (leaves, branches) from roof surface and valleys
- Flashing inspection at chimneys, skylights, and penetrations
- Attic ventilation verification ensuring proper airflow
Explore our seasonal roof maintenance checklist for year-round care strategies.
Frequently asked questions about roof types
What is the most common type of roof?
Gable roofs represent the most common architectural style in residential construction, appearing on 60-70% of American homes due to their simplicity, affordability, and effective water drainage. For roofing materials, asphalt shingles dominate with approximately 80% market share thanks to low cost, wide availability, and adequate performance.
What roof type lasts the longest?
Natural slate roofing delivers the longest lifespan among all roof types, lasting 75-200 years depending on slate quality and installation. Metal roofing follows with 40-70 year service life, then clay tile at 75-100 years, concrete tile at 50-75 years, and architectural asphalt shingles at 25-30 years.
What is the most affordable roof type?
Shed (skillion) roofs offer the most economical architectural style due to simple single-slope construction requiring minimal framing. For materials, 3-tab asphalt shingles cost least at $3.00-$6.00 per square foot installed, though architectural shingles at $4.00-$8.00 provide better long-term value.
Which roof type is best for high winds?
Hip roofs excel in high-wind environments thanks to four-sided inward slopes that resist uplift forces better than gable designs. Combined with properly installed metal roofing or concrete tile secured with enhanced fastening patterns, hip roofs withstand hurricane-force winds exceeding 140 mph.
What roof type is best for snow?
Steep-pitched roofs (8:12 to 12:12 slope) facilitate snow sliding, preventing dangerous accumulations and ice dam formation. Metal roofing on steep gable, gambrel, or A-frame designs performs optimally in heavy snow regions by shedding loads quickly and resisting ice penetration.
Are flat roofs a good idea?
Flat roofs work well for modern architectural styles, commercial buildings, and rooftop deck applications in moderate climates. However, they require specialized waterproofing membranes, regular maintenance, proper drainage design, and aren’t recommended for areas with heavy snow or intense rainfall without additional considerations.
How do I choose the right roof type for my home?
Consider your climate (temperature extremes, precipitation, wind), budget (initial cost vs. lifespan value), architectural style (period-appropriate materials), local building codes (fire ratings, wind requirements), and long-term plans (how long you’ll own the property). Consult licensed roofing contractors familiar with regional performance requirements and obtain multiple estimates comparing appropriate options.
Making informed decisions about roof types
Selecting appropriate roof types requires balancing architectural style preferences, roofing material performance characteristics, budget constraints, climate requirements, and long-term value considerations. The most common roof types—gable roofs with asphalt shingles—remain popular for good reasons: proven performance, affordable costs, and widespread contractor familiarity make them safe default choices for most residential applications.
However, homeowners in specific climates, architectural styles, or with particular priorities often benefit from alternative roof types better suited to their unique circumstances. Metal roofing delivers exceptional value in areas with temperature extremes or severe weather, tile roofing enhances Mediterranean and Spanish designs while providing century-long service, and properly designed flat roofs enable modern aesthetics with functional rooftop spaces.
🏠 Roofing Tips & Updates
Get free roofing advice, cost guides, and seasonal maintenance tips.
Roofing content specialist with 5+ years researching U.S. residential and commercial roofing. Has documented 200+ projects covering installation costs, material selection, contractor vetting, and DIY guides for homeowners across all climate zones.
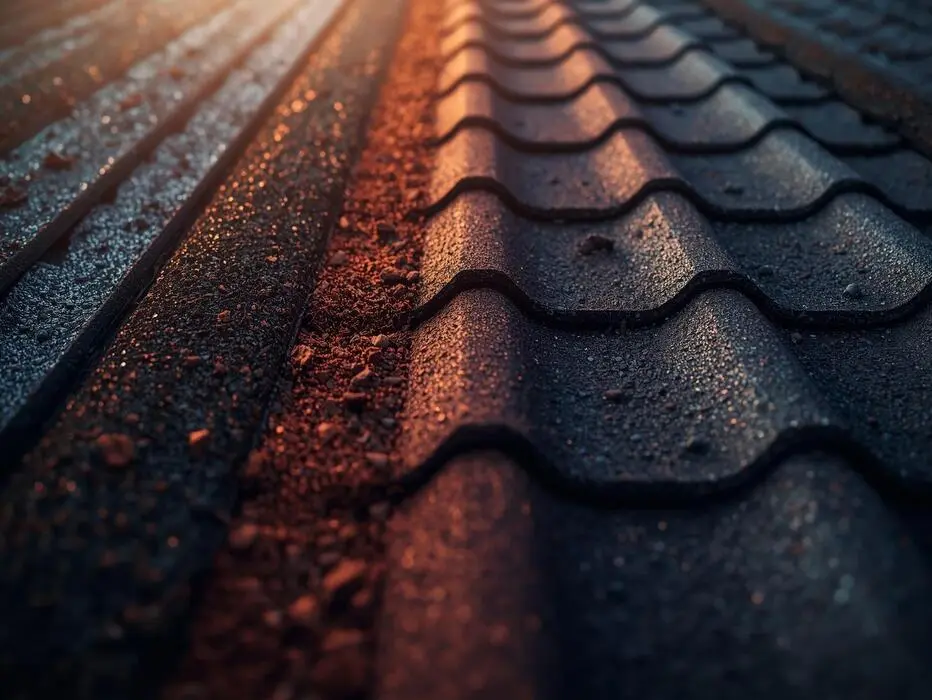
Roofing Materials Ranked By Longevity: Ultimate Comparison
Roofing Materials Ranked By Longevity: Ultimate Comparison
Table of Contents
Roofing materials vary dramatically in lifespan—slate roofing lasts 100+ years, making it the longest-lasting option, followed by clay and concrete tiles (50-100 years), copper and metal roofing (40-70+ years), synthetic composite shingles (40-50 years), wood shakes (30-50 years), architectural asphalt shingles (25-30 years), and standard 3-tab asphalt shingles (15-20 years). Material longevity depends on weather resistance, natural durability, installation quality, and maintenance practices—choosing longer-lasting materials reduces lifetime replacement costs despite higher upfront investment.
This comprehensive comparison ranks all major roofing materials by longevity, explains factors affecting lifespan, provides cost-per-year analysis, and helps you select the best material for your climate and budget.
Roofing Materials Ranked By Longevity (Longest to Shortest)
1. Slate Roofing: 100+ Years
Lifespan: 75-150 years (often exceeds 100 years)
Slate roofing is the undisputed champion of roofing longevity, with many slate roofs lasting well over a century. This natural stone material is quarried and split into thin tiles that provide unmatched durability and weather resistance.
Why Slate Lasts So Long:
- Natural stone composition resists all weather conditions
- Non-porous surface prevents water absorption and freeze-thaw damage
- Fireproof and pest-proof
- Does not decompose or deteriorate with age
Cost: $15-$30 per square foot installed
Cost Per Year: $0.15-$0.30 (over 100 years)
Pros:
- Longest lifespan of any roofing material
- Timeless, elegant appearance
- Extremely durable and weather-resistant
- Low maintenance requirements
- Increases home value significantly
Cons:
- Highest upfront cost ($30,000-$75,000 typical home)
- Extremely heavy (requires reinforced roof structure)
- Fragile during installation and repairs (tiles can crack if walked on)
- Requires specialized contractors
- Limited availability in some regions
Best For: Historic homes, luxury properties, owners planning long-term ownership (20+ years)
2. Clay and Concrete Tiles: 50-100 Years
Lifespan: 50-100 years
Clay Tiles: 75-100+ years
Concrete Tiles: 50-75 years
Clay and concrete tile roofing offers exceptional longevity second only to slate. Clay tiles, used for centuries in Mediterranean architecture, can last over 100 years, while concrete tiles typically reach 50-75 years.
Why Tiles Last So Long:
- Clay is fired at high temperatures, creating impervious ceramic
- Concrete gains strength over time through continued curing
- Both materials resist fire, rot, and insect damage
- Heavy weight provides wind resistance
Cost: $10-$25 per square foot installed
Cost Per Year: $0.15-$0.35 (over 70 years average)
Pros:
- Extremely long lifespan
- Fire-resistant (Class A rating)
- Energy-efficient (natural thermal mass)
- Low maintenance
- Distinctive Mediterranean or Spanish aesthetic
Cons:
- Heavy weight requires structural reinforcement
- Expensive initial investment
- Individual tiles can crack from impact (hail, fallen branches)
- Color fading over time (especially concrete)
- Installation requires specialized expertise
Best For: Spanish/Mediterranean architecture, warm climates, tile-style homes in Southwest U.S., Texas, Florida
3. Metal Roofing: 40-70+ Years
Lifespan: 40-80 years depending on metal type
Copper: 70-100+ years
Zinc: 60-100 years
Aluminum: 50-100 years
Stainless Steel: 50-100 years
Standing Seam Steel (Galvalume): 40-70 years
Corrugated Metal: 40-60 years
Metal roofing has surged in popularity due to its excellent longevity-to-cost ratio, energy efficiency, and modern aesthetic. Copper roofs can last as long as slate at a fraction of the weight.
Why Metal Lasts So Long:
- Resists rot, insect damage, and mildew
- Protective coatings prevent rust and corrosion
- Sheds water and snow effectively
- Expands and contracts without cracking
- Fire-resistant (Class A rating)
Cost: $7-$20 per square foot installed (steel/aluminum); $15-$40+ (copper)
Cost Per Year: $0.12-$0.40 (over 50 years average)
Pros:
- Excellent lifespan for the cost
- Lightweight (no structural reinforcement needed)
- Energy-efficient (reflects solar heat)
- Low maintenance
- Wide style variety (standing seam, metal shingles, corrugated)
- Recyclable at end of life
Cons:
- Can dent from large hail (depends on metal gauge)
- Noisy during rain/hail (unless insulated)
- Can be slippery when wet
- Color may fade over decades
- Requires professional installation for warranty
Best For: Modern homes, rural/agricultural buildings, areas with heavy snow, homeowners seeking energy efficiency
4. Synthetic/Composite Roofing: 40-50+ Years
Lifespan: 40-50+ years
Synthetic roofing materials engineered from polymers, rubber, or recycled plastics offer impressive longevity while mimicking the appearance of slate, wood shake, or tile at lower cost and weight.
Popular Synthetic Types:
Cost: $8-$18 per square foot installed
Cost Per Year: $0.18-$0.40 (over 45 years average)
Pros:
- Long lifespan without slate/tile weight
- Impact-resistant (Class 4 rating available)
- UV-stable through engineered additives
- Lightweight installation
- Wide aesthetic options
- Often made from recycled materials
Cons:
- Newer technology (less long-term data)
- Can fade faster than natural materials
- More expensive than asphalt shingles
- Not as long-lasting as natural slate/tile
Best For: Homeowners wanting slate/tile appearance without weight, eco-conscious buyers, areas with hail damage risk
5. Wood Shingles and Shakes: 30-50 Years
Lifespan: 30-50 years (40 years average)
Cedar Shakes: 30-40 years
Redwood Shakes: 30-40 years
Treated Wood: 40-50 years
Wood roofing, particularly cedar shake, offers natural beauty and good longevity when properly maintained. Cedar contains natural oils that resist insects and decay.
Cost: $8-$15 per square foot installed; $25-$30 for premium cedar
Cost Per Year: $0.25-$0.75 (over 35 years average)
Pros:
- Natural, rustic aesthetic
- Good insulation properties
- Biodegradable and renewable
- Ages to attractive silver-gray patina
Cons:
- Requires regular maintenance (preservative treatments)
- Susceptible to rot in humid climates
- Fire risk (unless treated—Class C or B rating)
- Can grow moss/algae in damp climates
- Shorter lifespan than most alternatives
- May be banned in fire-prone areas
Best For: Mountain cabins, rustic/craftsman homes, dry climates (Western U.S.), owners committed to maintenance
6. Architectural Asphalt Shingles: 25-30 Years
Lifespan: 25-30 years (up to 50 with premium products)
Luxury/Designer Asphalt: 30-50 years
Impact-Resistant Asphalt: 25-30 years
Standard Architectural: 25-30 years
Architectural (dimensional/laminate) asphalt shingles are thicker, more durable versions of basic 3-tab shingles, offering improved aesthetics and longer lifespan.
Cost: $3.50-$7 per square foot installed
Cost Per Year: $0.13-$0.25 (over 27 years average)
Pros:
- Moderate lifespan at affordable cost
- Wide color and style selection
- Easy to install and repair
- Available nationwide
- Good wind/impact ratings available
- Familiar to all contractors
Cons:
- Shorter lifespan than premium materials
- Granule loss over time reduces effectiveness
- Can blow off in extreme winds
- Heat absorption (not energy-efficient)
- Ends up in landfills
Best For: Budget-conscious homeowners, short-term ownership plans, standard suburban homes
7. Standard 3-Tab Asphalt Shingles: 15-20 Years
Lifespan: 15-25 years (20 years average)
Basic 3-tab asphalt shingles are the most economical roofing option and most common in North America, but offer the shortest lifespan among permanent roofing materials.
Cost: $2.50-$4.50 per square foot installed
Cost Per Year: $0.14-$0.25 (over 18 years average)
Pros:
- Lowest upfront cost
- Quick and easy installation
- Universally available
- Familiar product for all contractors
- Adequate for rental properties or short-term ownership
Cons:
- Shortest lifespan of permanent roofing
- Vulnerable to wind damage
- Basic flat appearance
- Granule loss accelerates aging
- Frequent replacement = higher lifetime cost
Best For: Rental properties, homes being flipped, extreme budget constraints, short-term ownership (5-10 years)
Factors That Affect Roofing Material Longevity
1. Climate and Weather Conditions
Temperature Extremes:
- Freeze-thaw cycles crack asphalt but don’t affect slate/metal
- Extreme heat ages asphalt shingles 30-40% faster
- Coastal salt air corrodes untreated metal
Precipitation:
- High rainfall areas reduce wood shake lifespan 20-30%
- Standing water damages flat-roof materials (EPDM, TPO)
- Snow load can break tiles without proper support
Sun Exposure:
- UV radiation breaks down asphalt binder
- South-facing slopes age faster (10-15% shorter life)
- Reflective coatings extend lifespan in hot climates
Wind:
- Sustained winds >60 mph lift shingles
- Heavy materials (tile, slate) resist wind better
- Proper fastening critical in hurricane zones
2. Installation Quality
Impact on Lifespan:
- Poor installation can reduce lifespan 30-50%
- Proper ventilation extends shingle life 20-30%
- Correct fastener spacing prevents blow-offs
- Flashing quality determines leak prevention
Critical Installation Factors:
- Adequate roof deck ventilation (prevents heat/moisture buildup)
- Proper underlayment (waterproof barrier)
- Correct nail/screw placement and quantity
- Quality flashing at valleys, chimneys, vents
3. Maintenance Practices
Maintenance Impact:
- Regular inspections catch problems early (extends life 10-20%)
- Cleaning debris prevents water pooling and rot
- Gutter maintenance prevents water backup
- Moss/algae removal prevents material deterioration
Recommended Maintenance:
- Annual inspections (spring and fall)
- Clean gutters quarterly
- Remove debris after storms
- Treat moss/algae promptly
- Replace damaged shingles/tiles immediately
4. Roof Pitch and Design
Pitch Impact:
- Steeper roofs (8:12+) shed water faster = longer life
- Low-slope roofs (<4:12) experience standing water
- Flat roofs require specialized membranes (shorter life)
Design Factors:
- Complex designs with valleys have more leak points
- Simple gable roofs last longer (fewer weak points)
- Proper drainage design critical for longevity
Cost-Per-Year Analysis: Finding True Value
| Material | Avg Lifespan | Installed Cost (per SF) | Cost Per Year |
|---|---|---|---|
| Slate | 100 years | $15-$30 | $0.15-$0.30 |
| Clay Tile | 75 years | $12-$25 | $0.16-$0.33 |
| Copper Metal | 70 years | $20-$40 | $0.29-$0.57 |
| Metal (Steel) | 50 years | $7-$15 | $0.14-$0.30 |
| Synthetic | 45 years | $10-$18 | $0.22-$0.40 |
| Wood Shake | 35 years | $10-$15 | $0.29-$0.43 |
| Arch. Asphalt | 27 years | $4-$7 | $0.15-$0.26 |
| 3-Tab Asphalt | 18 years | $2.50-$4.50 | $0.14-$0.25 |
Key Insight: Metal roofing often provides the best cost-per-year value when balancing upfront cost with longevity.
How to Choose the Right Material for Maximum Longevity
Consider Ownership Timeline:
- Selling within 10 years? Architectural asphalt sufficient
- Long-term home (20+ years)? Invest in metal, tile, or slate
- Forever home? Choose longest-lasting material affordable
Climate Matching:
- Hot/sunny: Metal (reflects heat), tile (thermal mass)
- Cold/snowy: Metal (sheds snow), slate (freeze-thaw resistant)
- Humid/rainy: Metal, slate, tile (not wood)
- Coastal: Aluminum or stainless steel (salt-resistant)
Budget Reality:
- Calculate cost-per-year, not just upfront cost
- Factor in replacement costs over 30-50 years
- Consider energy savings (metal, tile reduce cooling costs)
- Check insurance discounts (Class 4 impact-resistant materials)
FAQ
What roofing material lasts the longest?
Slate roofing lasts longest at 100-150+ years, followed by clay tiles (75-100 years) and copper roofing (70-100+ years).
Is metal roofing worth the investment for longevity?
Yes. Metal roofing lasts 40-70 years at $7-$15/sq ft, offering excellent cost-per-year value ($0.14-$0.30) while requiring minimal maintenance.
How long do asphalt shingles really last?
Standard 3-tab shingles last 15-20 years; architectural shingles 25-30 years. Premium luxury shingles can reach 40-50 years.
What factors reduce roofing material lifespan?
Poor installation (reduces life 30-50%), inadequate ventilation, neglected maintenance, extreme weather, steep sun exposure, and climate mismatches.
Are synthetic roofing materials as durable as natural?
Modern synthetics last 40-50+ years—longer than asphalt and wood, but not as long as slate (100+ years) or metal (50-70 years).
How much does a slate roof cost vs. asphalt?
Slate costs $30,000-$75,000 (typical home) vs. $8,000-$15,000 for asphalt. But slate lasts 100+ years vs. 20-30 for asphalt—lower lifetime cost.
What’s the best roofing material for hot climates?
Metal roofing (reflects heat) or clay/concrete tiles (thermal mass) perform best in hot climates while lasting 50-100 years.
Roofing materials ranked by longevity reveal slate as the undisputed champion at 100-150 years, followed by clay/concrete tiles (50-100 years), metal roofing (40-70+ years), synthetic composites (40-50 years), wood shakes (30-50 years), architectural asphalt (25-30 years), and standard 3-tab asphalt (15-20 years). While slate offers maximum longevity, metal roofing provides the optimal balance of lifespan, cost-per-year value ($0.14-$0.30), and low maintenance—making it the smartest investment for most homeowners planning long-term ownership. Choose materials based on ownership timeline, climate conditions, structural capacity, and lifetime cost analysis rather than upfront price alone to maximize your roofing investment.
🏠 Roofing Tips & Updates
Get free roofing advice, cost guides, and seasonal maintenance tips.
Roofing content specialist with 5+ years researching U.S. residential and commercial roofing. Has documented 200+ projects covering installation costs, material selection, contractor vetting, and DIY guides for homeowners across all climate zones.

5V Metal Roof vs Standing Seam: Costs & Durability
5V Metal Roof vs Standing Seam: Costs & Durability
Table of Contents
The choice between 5V metal roof and standing seam systems comes down to budget, aesthetic preference, and weather exposure: 5V crimp roofs cost $7–$12 per sq ft installed with exposed fasteners and a traditional ribbed appearance, while standing seam systems cost $12–$18 per sq ft with concealed fasteners and a sleek, modern look that offers superior wind resistance and longer lifespan. Both deliver 40+ year durability and energy efficiency, but the fastener type—exposed screws penetrating panels (5V) versus hidden clips beneath raised seams (standing seam)—defines their maintenance needs, leak resistance, and installation complexity.
This comprehensive comparison covers design differences, cost breakdowns, installation methods, weather performance, maintenance requirements, and decision criteria to help you select the right metal roofing system.
What Is 5V Metal Roofing?
5V crimp (also called 5-rib or V-crimp) is an exposed-fastener metal roofing system featuring five evenly-spaced “V” shaped vertical ribs running from eaves to ridge.
Key Characteristics:
- Panels typically 3 feet wide with 12-inch coverage per panel
- Ribs create traditional corrugated appearance
- Fasteners screw directly through panel face into purlins/deck
- Available in steel (most common), aluminum, or copper
- Standard gauges: 26-gauge (residential), 29-gauge (light commercial)
Typical Applications:
- Rural homes and farmhouses
- Barns and agricultural buildings
- Beach houses and coastal cottages
- Traditional/rustic architectural styles
- Budget-conscious new construction
What Is Standing Seam Metal Roofing?
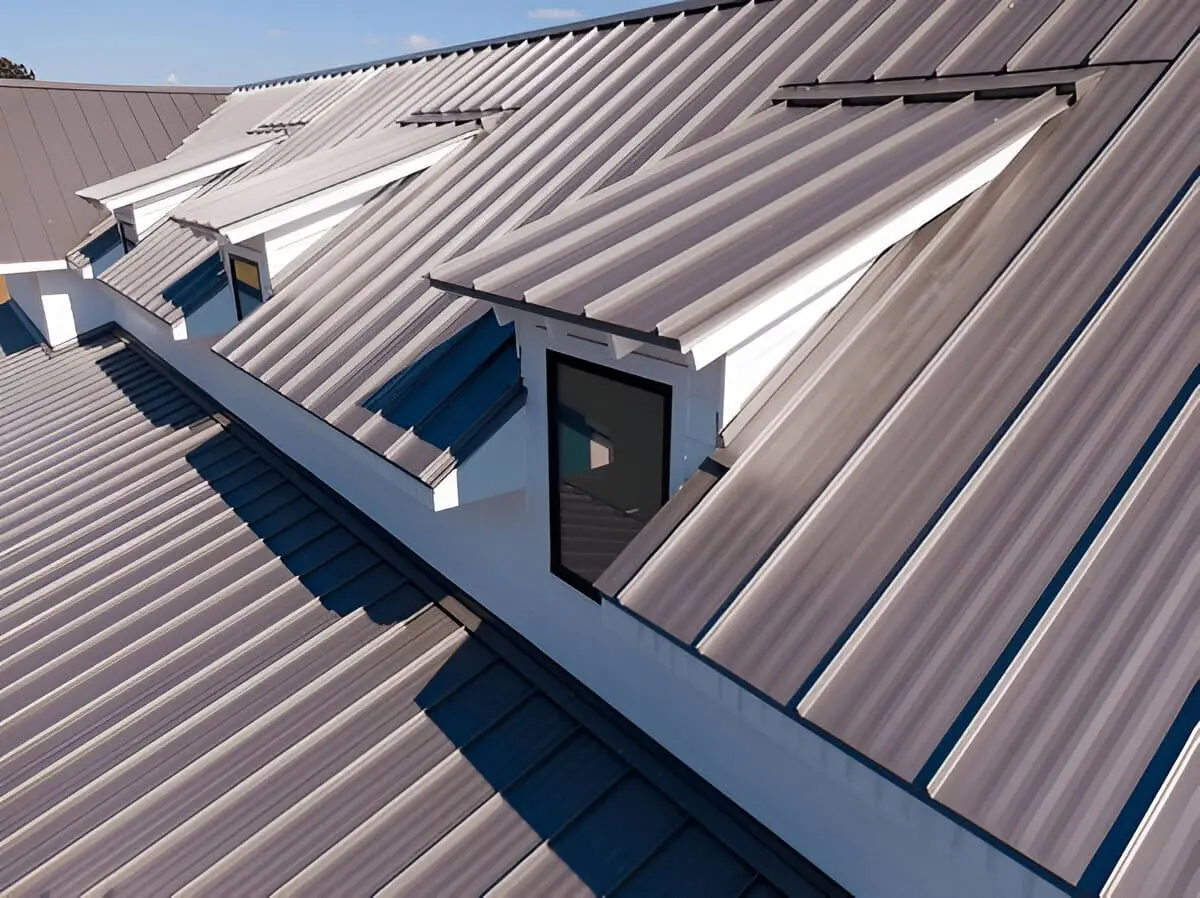
Standing seam is a concealed-fastener system featuring vertical panels with raised interlocking seams that hide fasteners beneath.
Key Characteristics:
- Panels range 12–24 inches wide
- Raised seams (typically 1–2 inches tall) run vertically
- Fasteners attach clips to deck; panels snap or crimp onto clips
- Flat panel surface between seams (smooth, uninterrupted)
- Available in mechanical seam (crimped) or snap-lock (interlocking)
Typical Applications:
- Modern/contemporary homes
- Commercial buildings
- High-end residential projects
- Hurricane/high-wind zones
- Architectural statements requiring clean lines
Design & Aesthetic Differences
5V Crimp Appearance
Visual Characteristics:
- Traditional, ribbed corrugated profile
- Visible fastener lines create texture
- Lower profile (ribs only 1 inch tall)
- Classic “metal barn roof” look
- Pairs well with farmhouse, cottage, rustic styles
Color Options: Wide range available (white, tan, brown, green, red, custom colors).
Curb Appeal: Less “obviously metal” due to lower profile; blends with traditional architecture.
Standing Seam Appearance
Visual Characteristics:
- Sleek, modern, minimalist profile
- Smooth flat panels with vertical seam lines
- No visible fasteners (clean, unbroken surface)
- Pronounced raised seams create shadow lines
- Contemporary/architectural aesthetic
Color Options: Same wide range as 5V, but often chosen in monochromatic schemes (black, charcoal, white) for modern homes.
Curb Appeal: High-end, sophisticated look; popular with architects and designers for contemporary projects.
Installation Methods & Complexity
5V Crimp Installation
Process:
- Install solid decking (plywood/OSB) or purlins over rafters
- Apply underlayment (synthetic or #30 felt)
- Position first panel at eave with 1-inch overhang
- Screw through panel ribs into deck/purlins every 12–18 inches
- Overlap next panel by one rib (conceals previous edge)
- Continue to ridge; install ridge cap with exposed fasteners
Fastener Type: Self-drilling metal roofing screws with neoprene washers (visible on surface).
Installation Time: Faster than standing seam (simpler attachment method).
Labor Cost: Lower ($2–$4 per sq ft labor) due to straightforward installation.
DIY Feasibility: More DIY-friendly for experienced builders; exposed fasteners easier than hidden clips.
Standing Seam Installation
Process:
- Install solid decking or purlins
- Apply high-temp synthetic underlayment
- Attach metal clips to deck/purlins at specified spacing (16–24 inches)
- Snap or crimp first panel onto clips
- Interlock next panel’s seam with previous panel
- Crimp seams together (mechanical seam) or snap-lock (snap-lock profile)
- No fasteners penetrate panel surface (all hidden)
Fastener Type: Concealed clips beneath raised seams.
Installation Time: Slower due to precise clip placement and seam crimping.
Labor Cost: Higher ($4–$7 per sq ft labor) due to complexity and specialized equipment.
DIY Feasibility: Requires professional installation; seam crimping tools and expertise needed.
Cost Comparison (2025)
5V Crimp Costs
Material Costs:
- Panels: $2.50–$5.00 per sq ft
- Fasteners/accessories: $0.50–$1.00 per sq ft
- Underlayment: $0.50–$1.00 per sq ft
Labor Costs: $2–$4 per sq ft
Total Installed Cost: $7–$12 per sq ft
Example (2,000 sq ft roof): $14,000–$24,000 installed.
Standing Seam Costs
Material Costs:
- Panels: $5–$9 per sq ft
- Clips/accessories: $1.00–$2.00 per sq ft
- Underlayment: $0.50–$1.00 per sq ft
Labor Costs: $4–$7 per sq ft
Total Installed Cost: $12–$18 per sq ft
Example (2,000 sq ft roof): $24,000–$36,000 installed.
Cost Difference Summary
Standing seam costs 30–50% more than 5V crimp due to:
- Higher material costs (specialty panels and clips)
- More complex installation (concealed fastening)
- Specialized equipment requirements (seaming tools)
- Longer installation time
Performance & Durability Comparison
Weather Resistance
5V Crimp:
- Good wind resistance (rated to 110–130 mph with proper fastening)
- Exposed fasteners can loosen over time in extreme wind
- Gasket seals on screws degrade with UV exposure (10–15 year replacement)
- More vulnerable to leaks at fastener penetrations
Standing Seam:
- Excellent wind resistance (rated to 140–180 mph)
- No fastener penetrations through panels (superior leak resistance)
- Interlocking seams create continuous weather barrier
- Better performance in hurricane/high-wind zones
Winner: Standing seam for severe weather; 5V adequate for moderate climates.
Lifespan
5V Crimp: 40–50 years with fastener maintenance every 10–15 years.
Standing Seam: 50–75 years; minimal maintenance due to no exposed fasteners.
Winner: Standing seam for longevity.
Energy Efficiency
Both systems offer comparable energy efficiency when coated with reflective finishes:
- Reflect 70–80% of solar radiation
- Reduce cooling costs 10–25%
- Energy Star certified options available
- Cool-roof coatings available for both
Winner: Tie (both excellent when properly coated).
Maintenance Requirements
5V Crimp Maintenance
Regular Tasks:
- Inspect fasteners annually; tighten loose screws
- Replace deteriorated neoprene washers every 10–15 years
- Check for rust at screw penetrations (touch up with paint)
- Clear debris from panel valleys
Maintenance Cost: $500–$1,500 every 10–15 years for fastener replacement.
Standing Seam Maintenance
Regular Tasks:
- Annual inspection for panel damage
- Clear debris from seams and valleys
- Check flashing at penetrations
- Minimal fastener maintenance (concealed clips rarely need service)
Maintenance Cost: $200–$500 annually for inspections; minimal repair costs.
Roof Pitch Requirements
5V Crimp: Minimum 3:12 pitch required (exposed fasteners need adequate slope for water runoff).
Standing Seam:
Winner: Standing seam offers greater flexibility for low-slope applications.
Pros & Cons Comparison
5V Crimp Pros
- Lower upfront cost ($7–$12 vs $12–$18 per sq ft)
- Faster, simpler installation
- More DIY-friendly
- Traditional aesthetic (suits rustic/farmhouse styles)
- Wide color/finish availability
- Good durability (40–50 years)
5V Crimp Cons
- Exposed fasteners require periodic maintenance
- Lower wind resistance than standing seam
- Visible screws detract from clean appearance
- Higher leak potential at fastener penetrations
- Shorter lifespan (40–50 vs 50–75 years)
Standing Seam Pros
- Superior weather resistance (140–180 mph wind ratings)
- No exposed fasteners (minimal maintenance, better leak protection)
- Longer lifespan (50–75 years)
- Sleek, modern aesthetic
- Works on lower slopes (0.5:12+)
- Higher resale value
Standing Seam Cons
- Higher upfront cost (30–50% more expensive)
- Requires professional installation
- More complex repairs if damaged
- Modern look may not suit traditional architecture
Decision Framework: Which Is Right for You?
Choose 5V Crimp If:
- Budget is primary concern (<$12/sq ft total)
- Your home has traditional/rustic architecture
- Roof pitch is 3:12 or steeper
- You’re in moderate climate (not extreme wind/hurricane zone)
- You’re comfortable with periodic fastener maintenance
- DIY installation is planned
Choose Standing Seam If:
- Budget allows premium investment ($12–$18/sq ft)
- Your home has modern/contemporary design
- You’re in high-wind or hurricane-prone area
- Low-slope roof (0.5:12–3:12 pitch)
- You want minimal maintenance
- Maximum lifespan is priority (50–75 years)
- Resale value and curb appeal matter
FAQ
What is the difference between 5V and standing seam metal roofs?
5V uses exposed fasteners screwed through panels with a traditional ribbed look, while standing seam uses hidden clips beneath raised seams for a modern, sleek appearance.
Is 5V metal roof cheaper than standing seam?
Yes. 5V costs $7–$12/sq ft installed vs standing seam at $12–$18/sq ft—approximately 30–50% less due to simpler installation and lower material costs.
Which metal roof lasts longer?
Standing seam lasts 50–75 years vs 5V at 40–50 years. Concealed fasteners reduce maintenance and leak risks, extending lifespan.
Can I install 5V metal roofing myself?
Yes, 5V is more DIY-friendly due to exposed fasteners and simpler installation. Standing seam requires professional tools and expertise.
Which is better in high winds?
Standing seam performs better in high winds (rated to 140–180 mph) due to interlocking seams and concealed fasteners. 5V is rated to 110–130 mph.
Do 5V metal roofs leak more than standing seam?
5V has higher leak potential at fastener penetrations. Standing seam has no panel penetrations, reducing leak risk significantly.
What roof pitch do I need for each system?
5V requires minimum 3:12 pitch. Standing seam works on 0.5:12+ (mechanical seam) or 3:12+ (snap-lock), making it suitable for lower slopes.
Conclusion
The 5V metal roof vs standing seam decision balances budget constraints against performance priorities: 5V delivers reliable 40–50 year performance at $7–$12 per sq ft with traditional aesthetics suited to farmhouse and coastal cottage styles, while standing seam justifies its $12–$18 per sq ft premium through superior wind resistance, 50–75 year lifespan, and maintenance-free concealed fasteners ideal for modern architecture and severe weather zones. Choose 5V for budget-conscious projects on moderate-slope roofs in temperate climates, or invest in standing seam for maximum longevity, low-slope capability, hurricane protection, and contemporary curb appeal. Both systems provide excellent energy efficiency and durability when properly installed by qualified contractors.
🏠 Roofing Tips & Updates
Get free roofing advice, cost guides, and seasonal maintenance tips.
For more on this topic, see Snap Lock Standing Seam Metal Roof: Installation Guide.
Roofing content specialist with 5+ years researching U.S. residential and commercial roofing. Has documented 200+ projects covering installation costs, material selection, contractor vetting, and DIY guides for homeowners across all climate zones.

How to Choose the Best Roofing Materials for Your Home
How to Choose the Best Roofing Materials for Your Home
Table of Contents
Choosing the best roofing materials for your home requires balancing budget, climate, lifespan expectations, and aesthetic preferences. Asphalt shingles dominate residential installations due to affordability ($5.50–$8.50 per sq ft) and 25–30 year lifespans, while metal roofing ($8–$16 per sq ft) delivers 40–70 years with superior energy efficiency. Premium options like slate ($15–$30 per sq ft) last 75–100+ years but demand structural reinforcement, making material selection a critical decision that impacts your home’s protection, resale value, and long-term costs.
This comprehensive guide walks through the decision-making process, comparing popular roofing materials across key factors—durability, cost, climate suitability, maintenance needs, and energy performance—to help you select the optimal roof for your specific situation.
Key Factors to Consider
1. Climate & Weather Conditions
Your local climate is the single most important factor in material selection.
Hot, Dry Climates (Southwest):
- Best: Clay/concrete tile, metal roofing, composite slate
- Why: Reflect heat, withstand intense UV exposure, don’t crack in dry conditions
- Avoid: Wood shakes (fire risk, dry rot)
Cold, Snowy Climates (Northeast, Mountains):
- Best: Metal roofing, slate, architectural asphalt shingles
- Why: Shed snow effectively, handle freeze-thaw cycles, resist ice dam damage
- Avoid: Clay tile (cracks in freezing temps)
High Humidity/Rain (Southeast, Northwest):
- Best: Metal roofing, composite slate, architectural shingles
- Why: Resist moisture penetration, prevent mold/algae growth, drain efficiently
- Avoid: Wood shakes (rot risk without treatment)
Hurricane/High Wind Zones (Coastal):
- Best: Metal roofing (140+ mph rated), impact-resistant shingles
- Why: Interlocking panels, secure fastening, wind-tested performance
- Avoid: Lightweight materials without proper fastening
Midwest (Extreme Temperature Swings):
- Best: Metal roofing, composite materials
- Why: Handle thermal expansion/contraction, resist hail damage
- Avoid: Natural slate (crack risk from thermal cycling)
2. Budget & Long-Term Value
Upfront Cost vs. Lifetime Cost:
- Cheapest initial: 3-tab asphalt ($5.50–$7.00/sq ft)
- Best long-term value: Metal ($8–$16/sq ft, lasts 50+ years)
- Premium investment: Slate ($15–$30/sq ft, lasts 100+ years)
Cost-Per-Year Analysis (2,000 SF Roof):
- Asphalt (25 years): $11,000 ÷ 25 = $440/year
- Metal (50 years): $20,000 ÷ 50 = $400/year (better value)
- Slate (100 years): $40,000 ÷ 100 = $400/year (if structural capacity allows)
Hidden Costs to Consider:
- Structural reinforcement ($2,000–$10,000 for heavy materials)
- Removal of old roofing ($1.50–$3.00 per sq ft)
- Specialized installation labor (slate, tile require expertise)
- Maintenance requirements (wood shakes need annual treatment)
3. Expected Lifespan
Material Longevity Comparison:
| Material | Lifespan | Replacement Frequency (50 Years) |
|---|---|---|
| 3-Tab Asphalt | 15–20 years | 2–3 times |
| Architectural Asphalt | 25–30 years | 1–2 times |
| Metal (Steel/Aluminum) | 40–70 years | 0–1 times |
| Composite/Synthetic | 40–50 years | 1 time |
| Wood Shake | 20–30 years | 1–2 times |
| Clay/Concrete Tile | 50–100 years | 0–1 times |
| Slate | 75–100+ years | 0 times |
Warranty Considerations:
- Asphalt: 20–30 year limited (prorated coverage)
- Metal: 30–50 year paint/finish, 50+ year materials
- Tile/Slate: 50–100 year materials (installation warranty separate)
- Composite: 50 year transferable (adds resale value)
4. Energy Efficiency
Cool Roof Technologies:
- Reflects 70–85% of solar radiation
- Reduces cooling costs 10–25%
- Ideal for hot climates or south-facing exposures
Reflective Asphalt Shingles:
- Cool-roof rated shingles reflect 25–40% more heat than standard
- Energy Star certified options available
- Lower cooling costs 7–15%
Clay/Concrete Tile:
- Natural thermal mass regulates temperature
- Air gap beneath tiles provides ventilation
- Reduces heat transfer to attic
Energy Savings Example (Hot Climate):
- Standard asphalt: $1,800/year cooling cost
- Metal roof: $1,350/year (25% savings = $450/year)
- 20-year savings: $9,000 (offsets higher upfront cost)
5. Aesthetic & Architectural Style
Match Material to Home Style:
Traditional Colonial, Farmhouse:
- Architectural asphalt shingles (dimensional texture)
- Wood shakes (natural, rustic)
- Metal shingles mimicking slate
Modern, Contemporary:
- Standing seam metal (clean lines, monochromatic)
- Large-format synthetic slate (minimalist)
- Flat concrete tiles
Mediterranean, Spanish:
- Clay barrel tiles (S-shaped profile)
- Concrete tile (Spanish/Mediterranean colors)
- Composite tile alternatives (lighter weight)
Craftsman, Bungalow:
- Cedar shakes (natural, authentic)
- Composite wood-look products (low maintenance)
- Dark architectural shingles
Victorian, Historic:
- Natural slate (period-appropriate)
- Synthetic slate (lighter, easier installation)
- Metal shingles (historical profiles available)
HOA Restrictions: Verify allowed materials, colors, and profiles before purchasing.
Detailed Material Comparison
Asphalt Shingles (Most Popular)
Cost: $5.50–$8.50 per sq ft installed
Lifespan: 25–30 years (architectural); 15–20 years (3-tab)
Pros:
- Most affordable option
- Wide color/style selection
- Easy installation and repairs
- Available everywhere
- DIY-friendly for experienced homeowners
Cons:
- Shorter lifespan than alternatives
- Less energy-efficient (absorbs heat)
- More frequent replacement cycles
- Moderate wind/impact resistance
Best For: Budget-conscious homeowners, moderate climates, homes with 20-year ownership plans.
Metal Roofing (Best Value Long-Term)
Cost: $8–$16 per sq ft installed
Lifespan: 40–70 years
Pros:
- Exceptional longevity (50+ years common)
- Energy-efficient (reflects heat)
- Fire-resistant, lightweight
- Wind resistance up to 140 mph
- Low maintenance requirements
- Supports solar panel installation
Cons:
- Higher upfront cost
- Noisy during rain (with proper underlayment, minimal)
- Can show denting from large hail
- Requires specialized installation
Best For: Long-term homeowners, hot climates, energy-conscious buyers, modern architecture.
Composite/Synthetic Materials (Innovation Leader)
Cost: $10–$16 per sq ft installed
Lifespan: 40–50 years
Pros:
- Authentic appearance (mimics slate, wood, tile)
- Lightweight (no structural reinforcement)
- Impact-resistant (Class 4 rated)
- 50-year transferable warranties
- Sustainable (recycled content)
- Low maintenance
Cons:
- Moderate to high cost
- Relatively new (less long-term data)
- Color options more limited than asphalt
Best For: Premium appearance on budget, eco-conscious buyers, homes needing Class 4 impact rating.
Clay & Concrete Tile (Premium Durability)
Cost: $12–$25 per sq ft installed
Lifespan: 50–100 years
Pros:
- Exceptional longevity (outlast homeowners)
- Fire-resistant, energy-efficient
- Distinctive Mediterranean aesthetic
- Low maintenance
- Increases resale value
Cons:
- Very heavy (requires structural reinforcement)
- Expensive upfront and installation
- Fragile during installation (walk carefully)
- Not suitable for freezing climates (concrete better than clay)
Best For: Hot, dry climates; Spanish/Mediterranean homes; luxury properties.
Slate (Ultimate Longevity)
Cost: $15–$30+ per sq ft installed
Lifespan: 75–100+ years
Pros:
- Longest-lasting material available
- Fire-resistant, beautiful natural stone
- Increases property value significantly
- Zero maintenance (except repairs)
- Timeless, elegant appearance
Cons:
- Most expensive option
- Extremely heavy (structural upgrades required)
- Specialized installation (few qualified contractors)
- Difficult/expensive repairs
- Limited color options (natural stone variations)
Best For: Historic homes, luxury properties, multi-generational homeownership.
Wood Shakes/Shingles (Natural Beauty)
Cost: $8–$14 per sq ft installed
Lifespan: 20–30 years (with maintenance)
Pros:
- Natural, unique appearance
- Excellent insulation properties
- Environmentally sustainable (if sourced responsibly)
- Ages gracefully to silver-gray patina
- Wind resistant (up to 245 mph with proper fastening)
Cons:
- High maintenance (annual treatment required)
- Fire risk (banned in some jurisdictions)
- Susceptible to rot, mold, insects
- Not suitable for humid climates without treatment
Best For: Mountain homes, heavily wooded areas, rustic/craftsman architecture.
Decision-Making Framework
Step 1: Establish Your Budget
Budget Tiers:
- Economy (<$8/sq ft): 3-tab or architectural asphalt
- Mid-Range ($8–$15/sq ft): Metal, composite, architectural asphalt
- Premium (>$15/sq ft): Tile, slate, high-end composites
Step 2: Assess Climate Requirements
Use climate chart above to eliminate unsuitable materials (e.g., no clay tile in freezing climates).
Step 3: Calculate Lifetime Cost
Compare cost-per-year over expected homeownership period, not just upfront price.
Step 4: Verify Structural Capacity
Heavy Materials Requiring Reinforcement:
- Slate: 800–1,500 lbs per square
- Clay tile: 850–1,000 lbs per square
- Concrete tile: 900–1,100 lbs per square
Lightweight Options (No Reinforcement):
Consult structural engineer if considering tile or slate on existing home.
Step 5: Match Aesthetic to Architecture
Review style guide above; choose material that complements home design and neighborhood character.
Step 6: Verify HOA Compliance
Check restrictions before purchasing materials.
Step 7: Get Multiple Quotes
Obtain 3–5 estimates from licensed contractors with experience in your chosen material.
FAQ
What is the best roofing material for your home?
Architectural asphalt shingles offer best balance of cost ($6.50–$8.50/sq ft), lifespan (25–30 years), and availability for most homeowners. Metal roofing provides best long-term value in hot climates.
What is the longest-lasting roofing material?
Slate lasts 75–100+ years, followed by tile (50–100 years) and metal (40–70 years). Asphalt shingles last 25–30 years.
Which roof material is most energy-efficient?
Metal roofing reflects 70–85% of solar radiation, reducing cooling costs 10–25%. Clay tile and cool-roof rated shingles also provide good efficiency.
What roofing material is best for hot climates?
Metal, clay/concrete tile, and composite slate excel in hot climates due to heat reflection and ventilation properties.
What is the cheapest roofing material?
3-tab asphalt shingles at $5.50–$7.00 per sq ft installed. However, metal roofing offers better cost-per-year value over 50 years.
Do I need to reinforce my roof for heavy materials?
Slate and tile require structural reinforcement ($2,000–$10,000) if your home wasn’t designed for the weight. Consult a structural engineer before installation.
Can I install any roofing material myself?
Asphalt shingles are most DIY-friendly. Metal, tile, and slate require professional installation due to specialized techniques and safety concerns.
Conclusion
Choosing the best roofing materials for your home balances climate requirements, budget constraints, longevity expectations, and aesthetic preferences. Asphalt shingles serve most homeowners well with 25–30 year lifespans at affordable costs, while metal roofing delivers superior long-term value through 50+ year performance and energy savings. Premium materials like slate and tile justify higher costs for luxury homes or multi-generational ownership. Evaluate materials using the decision framework—assess climate fit first, calculate lifetime costs, verify structural capacity, and obtain multiple quotes from licensed contractors. The right material protects your largest investment while enhancing curb appeal and resale value for decades.
🏠 Roofing Tips & Updates
Get free roofing advice, cost guides, and seasonal maintenance tips.
Roofing content specialist with 5+ years researching U.S. residential and commercial roofing. Has documented 200+ projects covering installation costs, material selection, contractor vetting, and DIY guides for homeowners across all climate zones.

Compare Metal Roofing Types: Materials, Styles & Costs 2026
Compare Metal Roofing Types: Materials, Styles & Costs 2026
Table of Contents
Comparing metal roofing types requires evaluating both material composition (steel, aluminum, copper, zinc) and profile style (standing seam, corrugated, metal shingles, R-panel). Steel dominates residential applications due to its cost-effectiveness and 40–50 year lifespan, while aluminum excels in coastal environments with superior corrosion resistance. Profile choices range from premium standing seam systems with hidden fasteners ($12–$18 per sq ft installed) to budget-friendly corrugated panels ($6–$10 per sq ft), each offering distinct aesthetics, installation complexity, and performance characteristics.
This comprehensive comparison breaks down metal roofing by material properties, style profiles, costs, and best applications to help you select the optimal system for your climate, budget, and design preferences.
Metal Roofing Materials Compared
Steel Roofing (Most Popular)

Types:
- Galvanized Steel: Zinc-coated for rust protection
- Galvalume Steel: Aluminum-zinc alloy coating (55% aluminum, 45% zinc) for enhanced corrosion resistance
Cost: $8–$14 per sq ft installed
Lifespan: 40–50 years
Weight: 1.5–2 lbs per sq ft
Pros:
- Most affordable metal option (2–3× cheaper than copper)
- Excellent strength-to-weight ratio
- Withstands heavy snow loads and hail
- Wide availability and color options
- Galvalume offers 3× better corrosion resistance than galvanized
Cons:
- Less corrosion-resistant than aluminum in coastal areas
- Heavier than aluminum or copper
- Can be noisy during rain (with proper underlayment, noise is minimal)
- Requires periodic inspection for scratches (paint touch-ups prevent rust)
Best For: Most residential and commercial applications; best balance of cost, durability, and performance.
Aluminum Roofing

Cost: $10–$16 per sq ft installed
Lifespan: 40–70 years
Weight: 0.5–0.7 lbs per sq ft (lightest metal option)
Pros:
- Superior corrosion resistance (won’t rust even in saltwater environments)
- Lightweight (reduces structural load requirements)
- Excellent thermal performance (less expansion/contraction than steel)
- Ideal for coastal, humid, or high-salt regions
- Energy-efficient reflective coatings available
Cons:
- Higher cost than steel (20–30% premium)
- Softer metal (more prone to denting from hail or foot traffic)
- Fewer color options than steel
- Can show oil-canning (visible waviness) on large panels
Best For: Coastal homes, high-humidity climates, salt-air environments, buildings requiring low roof weight.
Copper Roofing (Premium)
Cost: $18–$30+ per sq ft installed
Lifespan: 100+ years (outlasts building lifespan)
Weight: 1–1.5 lbs per sq ft
Pros:
- Exceptional longevity (longest-lasting roofing material)
- Develops attractive natural patina (green/blue-green) over 15–20 years
- Antimicrobial properties (prevents moss/algae growth)
- Highly malleable (ideal for complex architectural details)
- No painting or coating required (maintenance-free surface)
- Increases property value significantly
Cons:
- Highest upfront cost (3–5× more expensive than steel)
- Patina development may not suit all aesthetics
- Requires isolation from dissimilar metals (galvanic corrosion)
- Expensive to repair (specialty labor required)
- Can show denting from heavy hail
Best For: Historic homes, luxury properties, architectural landmarks, buildings where longevity justifies premium cost.
Zinc Roofing
Cost: $15–$25 per sq ft installed
Lifespan: 80–100 years
Weight: 1–1.5 lbs per sq ft
Pros:
- Self-healing properties (oxidation repairs minor scratches naturally)
- Develops protective patina (blue-gray finish)
- Environmentally sustainable (fully recyclable, low-energy production)
- Excellent corrosion resistance
- Minimal maintenance requirements
- Popular in Europe for centuries
Cons:
- Higher cost than steel or aluminum
- Limited availability in North America (fewer suppliers/installers)
- Requires specialized installation knowledge
- Patina appearance not universally appealing
- Lower strength than steel (needs thicker gauges)
Best For: Eco-conscious projects, modern architectural designs, coastal environments, long-term institutional buildings.
Material Comparison Table
| Material | Cost/SF Installed | Lifespan | Weight | Corrosion Resistance | Best Use |
|---|---|---|---|---|---|
| Steel | $8–$14 | 40–50 yrs | 1.5–2 lbs | Good (Galvalume better) | Most applications, best value |
| Aluminum | $10–$16 | 40–70 yrs | 0.5–0.7 lbs | Excellent | Coastal, humid climates |
| Copper | $18–$30+ | 100+ yrs | 1–1.5 lbs | Excellent | Premium/historic properties |
| Zinc | $15–$25 | 80–100 yrs | 1–1.5 lbs | Excellent | Eco-projects, modern design |
Metal Roofing Profiles & Styles Compared
Standing Seam (Premium Profile)
Description: Vertical panels with concealed fasteners; raised seams interlock adjacent panels.
Cost: $12–$18 per sq ft installed
Best For: Residential upgrades, modern architecture, commercial buildings
Pros:
- Sleek, contemporary appearance
- Hidden fasteners (no exposed screws to leak)
- Excellent weather resistance (interlocking seams)
- Allows thermal expansion without stress
- Long warranties (30–50 years)
- High wind resistance (tested to 140+ mph)
Cons:
- Highest installation cost
- Requires professional installation with specialized equipment
- Oil-canning visible on large flat panels
- Not DIY-friendly
Installation: Clips fasten to roof deck; panels snap or crimp onto clips.
Corrugated Metal (Budget-Friendly)
Description: Wavy, rippled panels with repeating rounded or angular profiles; exposed fastener system.
Cost: $6–$10 per sq ft installed
Best For: Agricultural, industrial, barns, sheds, budget residential
Pros:
- Lowest cost metal roofing option
- DIY-friendly installation
- Excellent water shedding (wave pattern channels water)
- Lightweight
- Fast installation
- Wide availability
Cons:
- Exposed fasteners (potential leak points)
- Industrial appearance (may not suit residential aesthetics)
- Less wind resistance than standing seam
- Fastener maintenance required (re-seal every 10–15 years)
Installation: Screws with neoprene washers penetrate panel into purlins.
Metal Shingles
Description: Individual metal pieces shaped to mimic traditional asphalt shingles, wood shake, or slate.
Cost: $10–$16 per sq ft installed
Best For: Homeowners wanting traditional look with metal durability
Pros:
- Traditional shingle appearance
- Lighter weight than standing seam systems
- Hidden or partially concealed fasteners (depends on system)
- Easier to blend with neighborhood aesthetics
- Moderate DIY feasibility
Cons:
- More seams than panel systems (increased leak potential)
- Labor-intensive installation (individual pieces)
- Higher cost than corrugated
- May show wear patterns at overlaps
Installation: Interlocking design with fasteners hidden by overlaps.
R-Panel
Description: Exposed-fastener panels with wide ribs (9-inch or 12-inch spacing); flat pans between ribs.
Cost: $7–$12 per sq ft installed
Best For: Agricultural, commercial, large residential, garages
Pros:
- Affordable (slightly more than corrugated)
- Fast installation
- Clean appearance (less “wavy” than corrugated)
- Good strength-to-weight ratio
- DIY-friendly
Cons:
- Exposed fasteners (maintenance required)
- Less architectural appeal than standing seam
- Moderate wind resistance
Installation: Similar to corrugated; screws through panel face into structure.
Stone-Coated Steel
Description: Steel panels coated with stone chips bonded to surface; mimics tile or shingle texture.
Cost: $12–$18 per sq ft installed
Best For: HOA-restricted neighborhoods, traditional aesthetics with metal benefits
Pros:
- Traditional appearance (clay tile, wood shake, shingle profiles)
- Stone coating reduces noise (quieter than bare metal)
- Excellent hail resistance
- Durable finish (30–50 year warranties)
- Fire-resistant
Cons:
- Higher cost than corrugated or R-panel
- Heavier than bare metal systems
- Stone can shed over time
- More maintenance than smooth metal
Installation: Individual panels or larger sections with concealed fasteners.
Profile Comparison Table
| Profile | Cost/SF | Aesthetic | DIY-Friendly | Wind Resistance | Best For |
|---|---|---|---|---|---|
| Standing Seam | $12–$18 | Modern, sleek | No | Excellent | Premium residential, commercial |
| Corrugated | $6–$10 | Industrial | Yes | Good | Barns, sheds, budget projects |
| Metal Shingles | $10–$16 | Traditional | Moderate | Good | Residential, HOA neighborhoods |
| R-Panel | $7–$12 | Clean, utilitarian | Yes | Good | Agricultural, garages, commercial |
| Stone-Coated | $12–$18 | Traditional tile/shake | No | Excellent | HOA areas, noise reduction needed |
How to Choose the Right Metal Roofing
By Budget:
- Tight (<$10/SF): Corrugated or R-panel steel
- Moderate ($10–$15/SF): Standing seam steel or metal shingles
- Premium (>$15/SF): Standing seam aluminum, copper, or stone-coated
By Climate:
- Coastal/Humid: Aluminum or Galvalume steel
- High Snow Load: Steel (best strength)
- Hot/Sunny: Reflective coatings on any material
- Hurricane Zones: Standing seam with engineered fastening
By Aesthetic:
- Modern: Standing seam
- Traditional: Metal shingles or stone-coated
- Rustic/Industrial: Corrugated or R-panel
- Historic: Copper or zinc
By Installation:
- DIY Projects: Corrugated, R-panel, some metal shingles
- Professional Required: Standing seam, copper, zinc
FAQ
What is the best type of metal roofing?
Steel standing seam offers the best balance of cost, durability, and performance for most homeowners. Aluminum suits coastal areas; copper is premium for longevity.
Is standing seam worth the extra cost?
Yes, for longevity and aesthetics. Standing seam costs 30–50% more than corrugated but offers hidden fasteners, better warranties, and superior wind resistance.
Which metal roofing is cheapest?
Corrugated steel panels are cheapest at $6–$10 per sq ft installed, followed by R-panel at $7–$12 per sq ft.
How long does metal roofing last?
Steel: 40–50 years; Aluminum: 40–70 years; Copper/Zinc: 80–100+ years. Lifespan depends on material, coating, climate, and maintenance.
Can you walk on metal roofing?
Yes, but carefully. Walk in flat sections, not ribs. Wear soft-sole shoes. Standing seam handles foot traffic better than corrugated.
What gauge metal roofing is best?
26-gauge for residential standing seam; 29-gauge for exposed-fastener panels. Thicker (lower number) is stronger but heavier and costlier.
Do metal roofs leak?
Properly installed metal roofs rarely leak. Most leaks occur at flashing, penetrations, or exposed fasteners if not maintained. Standing seam has fewest leak points.
Conclusion
Comparing metal roofing types reveals steel as the most versatile choice, balancing affordability ($8–$14/SF) with 40–50 year performance. Aluminum excels in coastal environments, copper delivers century-long elegance for premium projects, and zinc offers eco-friendly durability. Profile selection depends on budget and aesthetics: standing seam provides modern sophistication with hidden fasteners, corrugated delivers industrial simplicity at lowest cost, and metal shingles blend traditional looks with metal benefits. Match material corrosion resistance to your climate, profile style to your architecture, and installation method to your skill level for optimal long-term results.
🏠 Roofing Tips & Updates
Get free roofing advice, cost guides, and seasonal maintenance tips.
For more on this topic, see Installing Corrugated Metal Roofing: Step-by-Step Guide.
Roofing content specialist with 5+ years researching U.S. residential and commercial roofing. Has documented 200+ projects covering installation costs, material selection, contractor vetting, and DIY guides for homeowners across all climate zones.