Preloader Close

How to Repair Roof Shingles Blown Off: Homeowner Guide

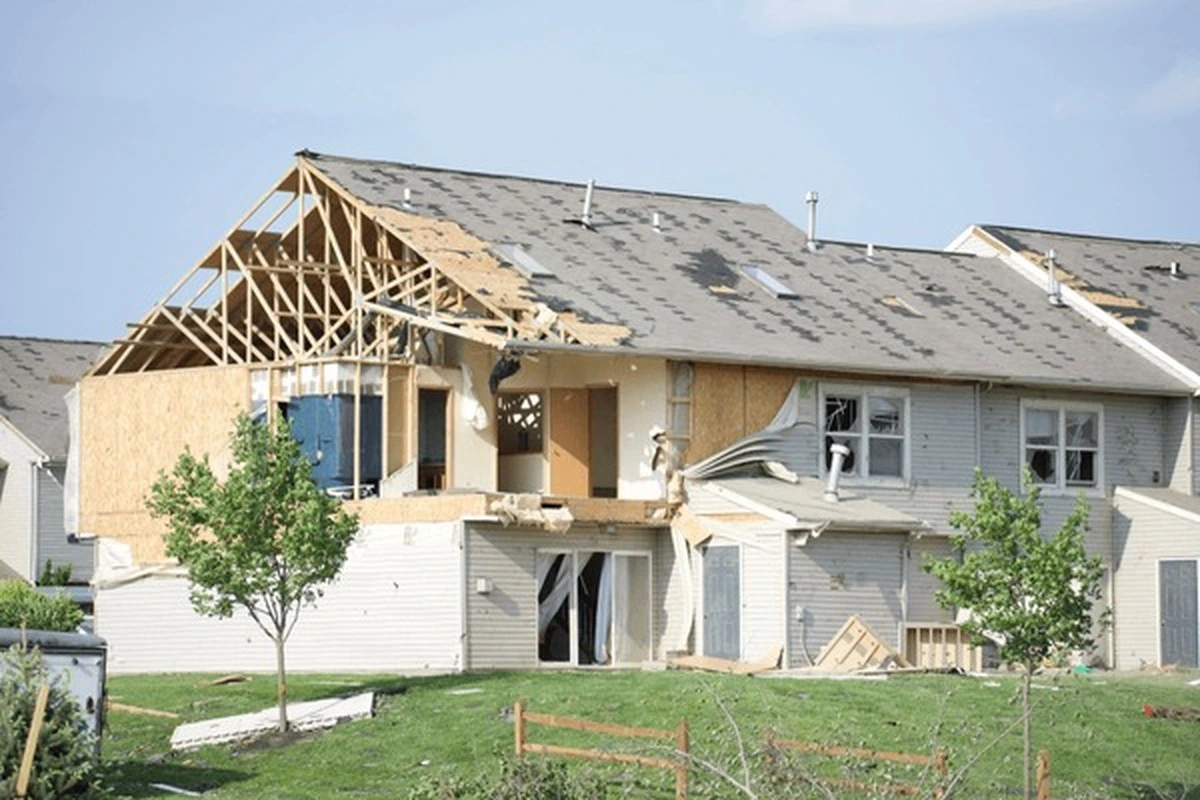
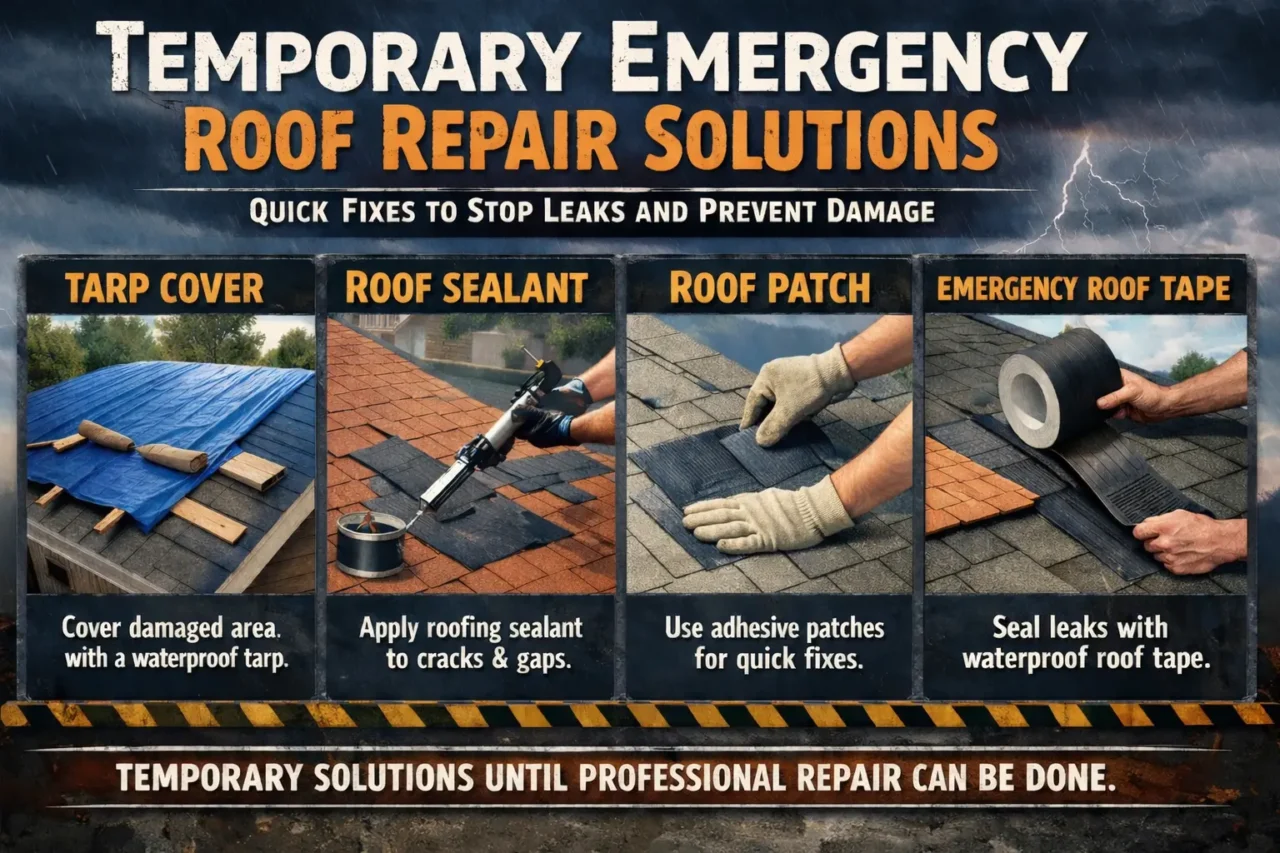
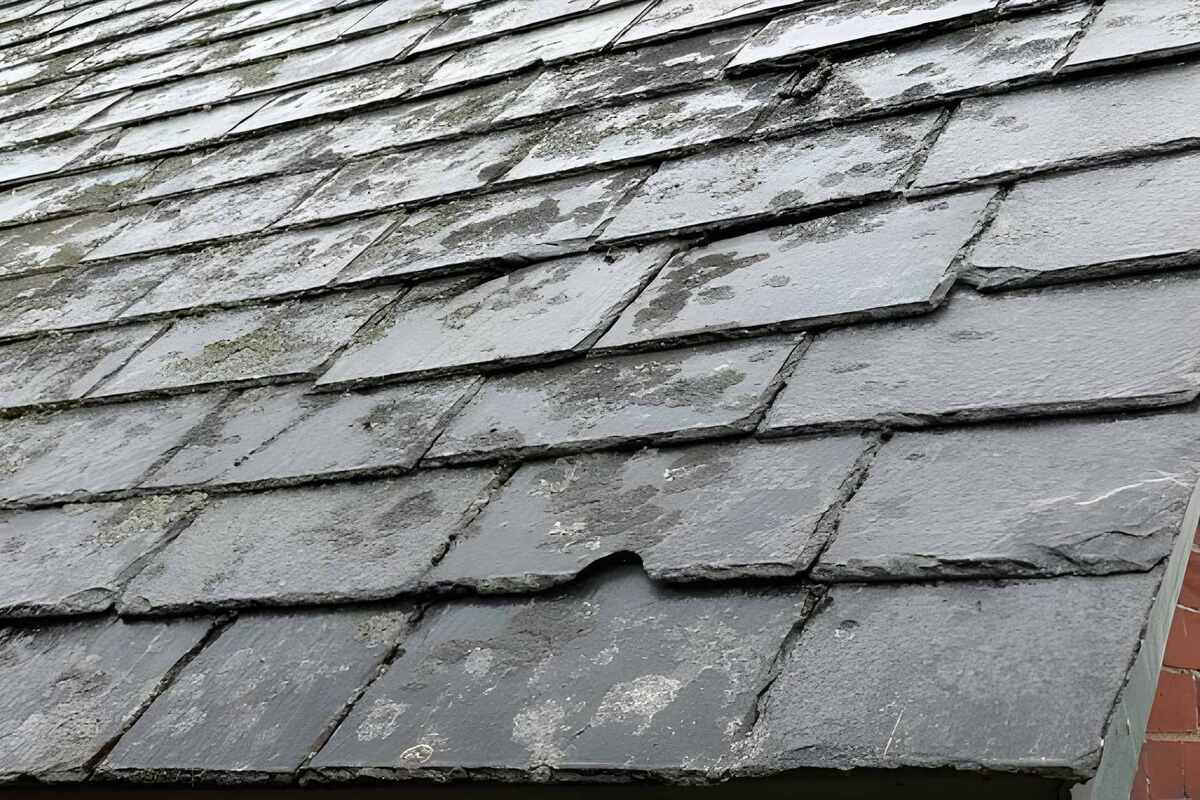
Wind storms can tear asphalt shingles from your roof, exposing underlayment and creating immediate leak risks that threaten ceilings, insulation, and structural integrity. Learning how to repair roof shingles blown off safely and correctly protects your home from water damage while saving hundreds compared to emergency contractor callouts. This comprehensive guide demonstrates proper repair techniques, explains the best way to adhere shingles to a roof to prevent future blow-offs, and clarifies when professional help becomes necessary.​

Most homeowners can successfully replace 1-3 blown-off shingles using basic tools and proper fastening techniques, though steep roofs, widespread damage, or heights exceeding two stories require licensed contractors for safety and warranty compliance. Understanding correct nail placement, supplemental adhesive application, and wind-resistant installation methods ensures repairs withstand future storms rather than failing weeks later.

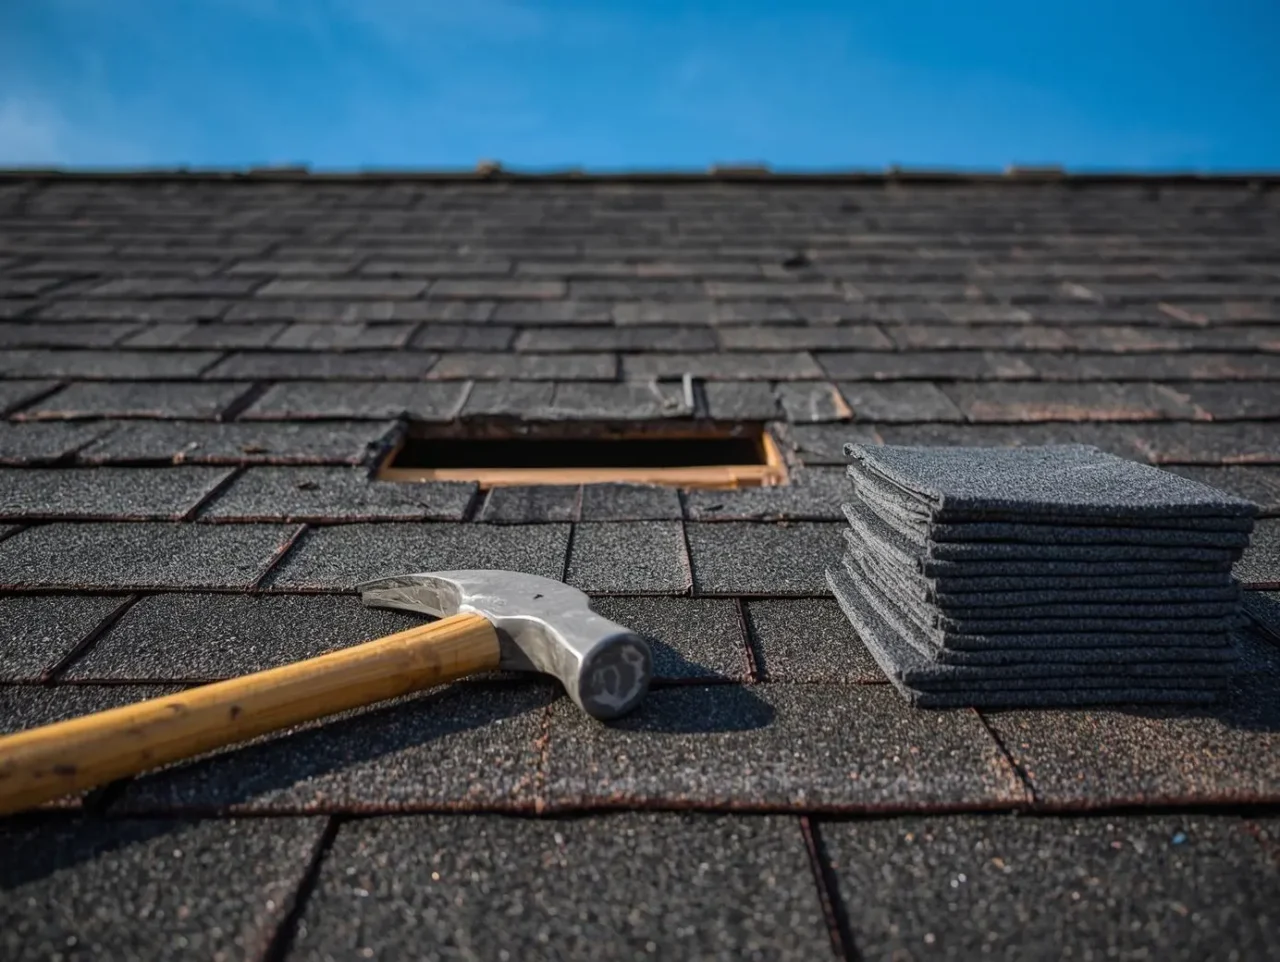
A roofing hammer and a bundle of replacement shingles sit nearby

Is it safe to repair blown-off shingles yourself?

Determining whether how to repair roof shingles blown off is a DIY project or requires professional contractors depends on roof accessibility, damage extent, and your physical capabilities.​

When to call professional roof installation companies

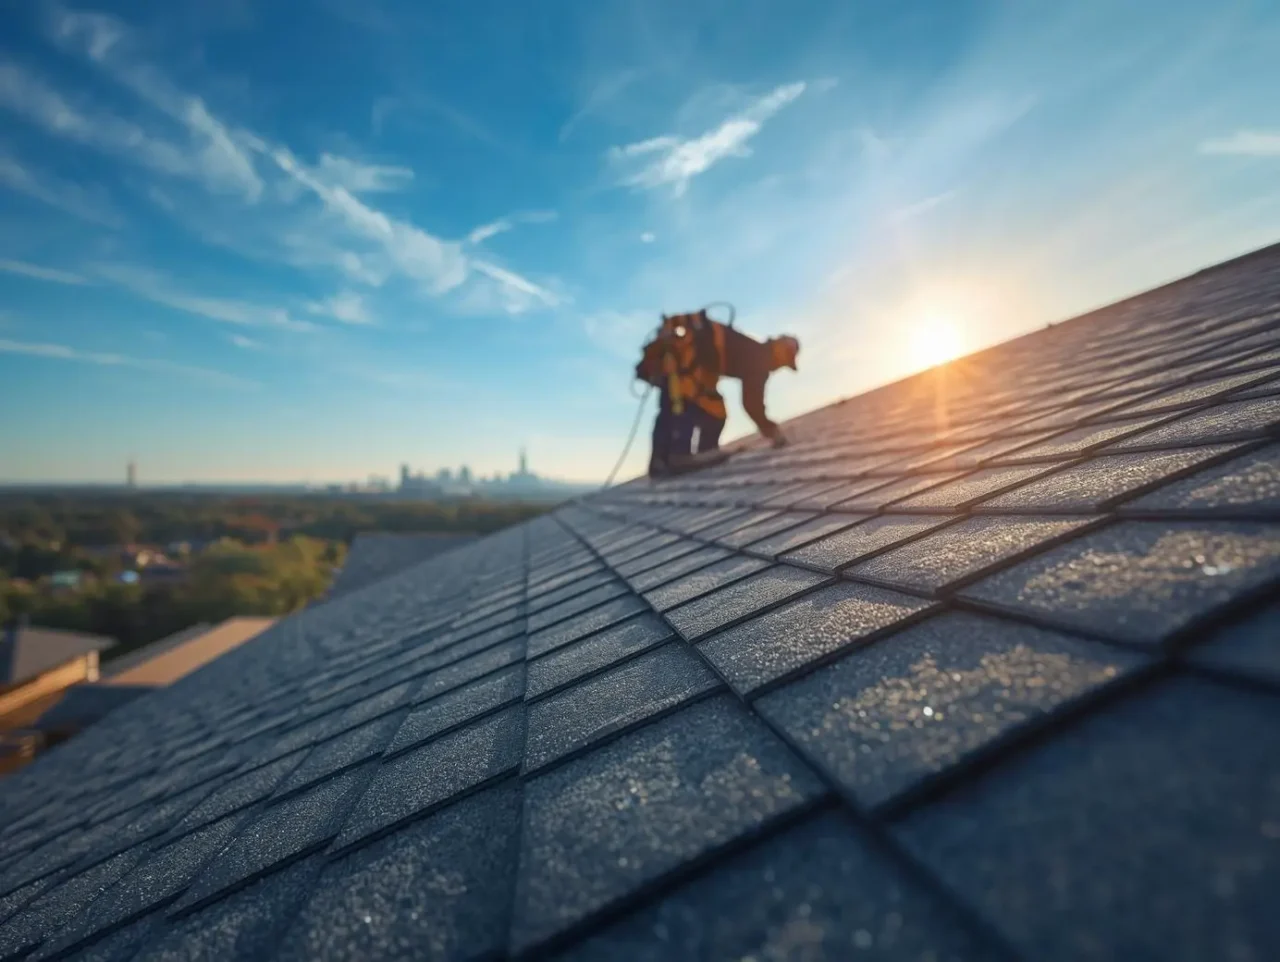
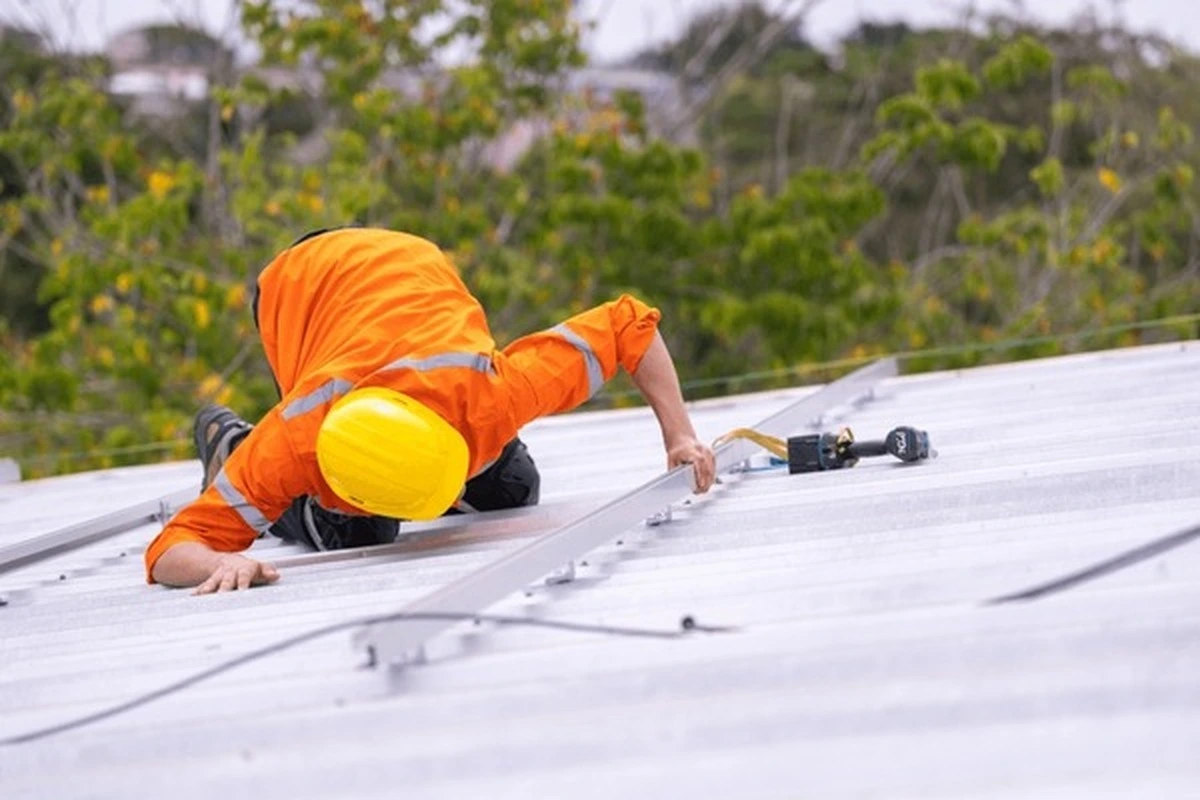
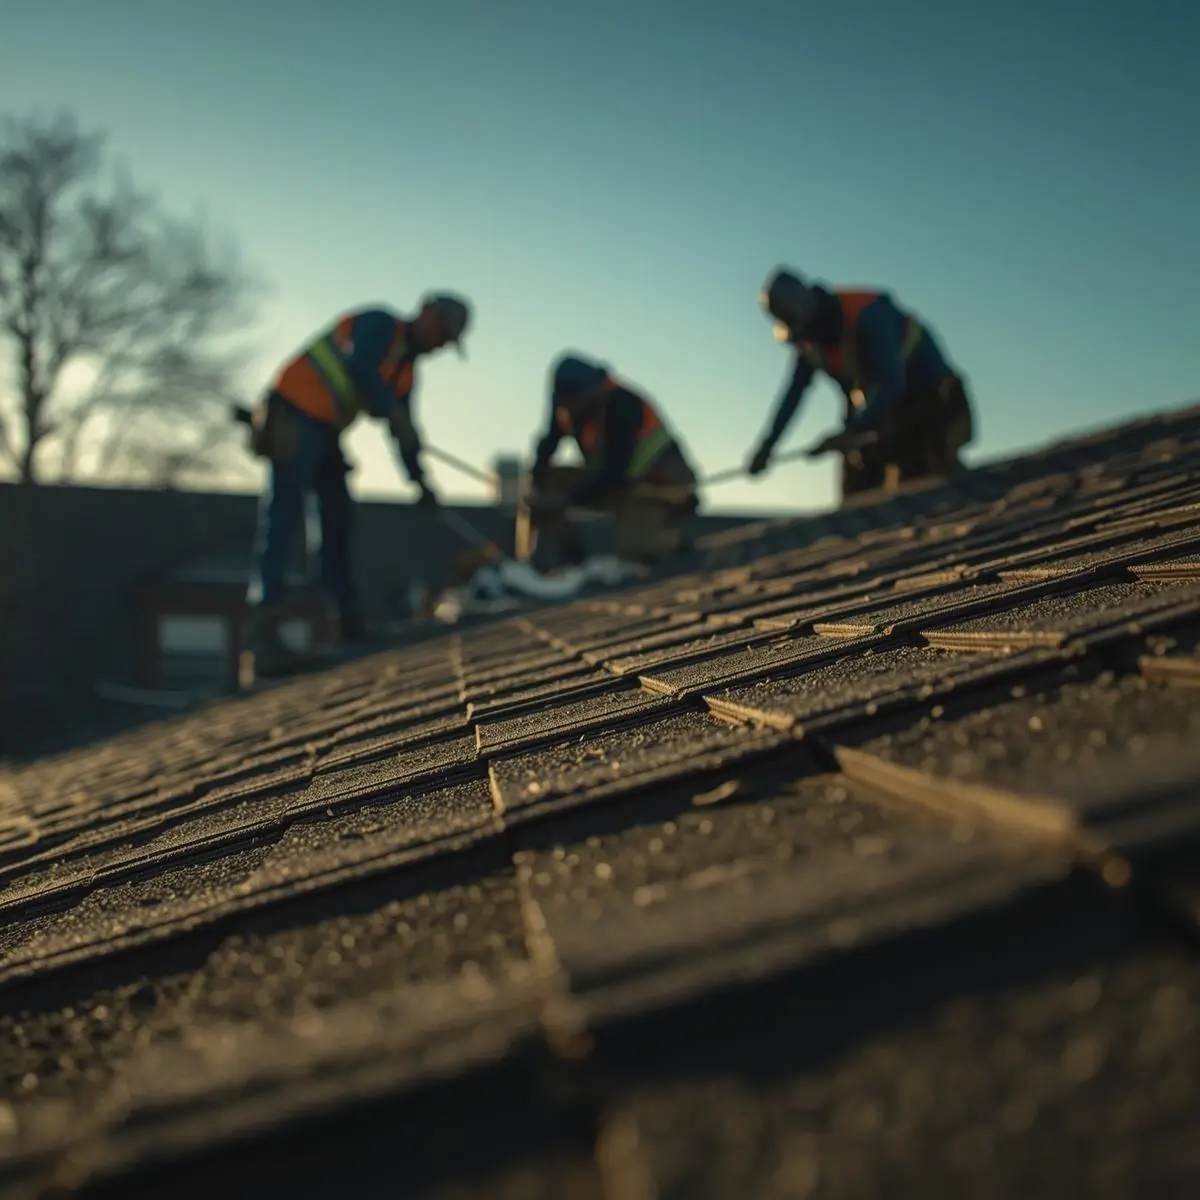
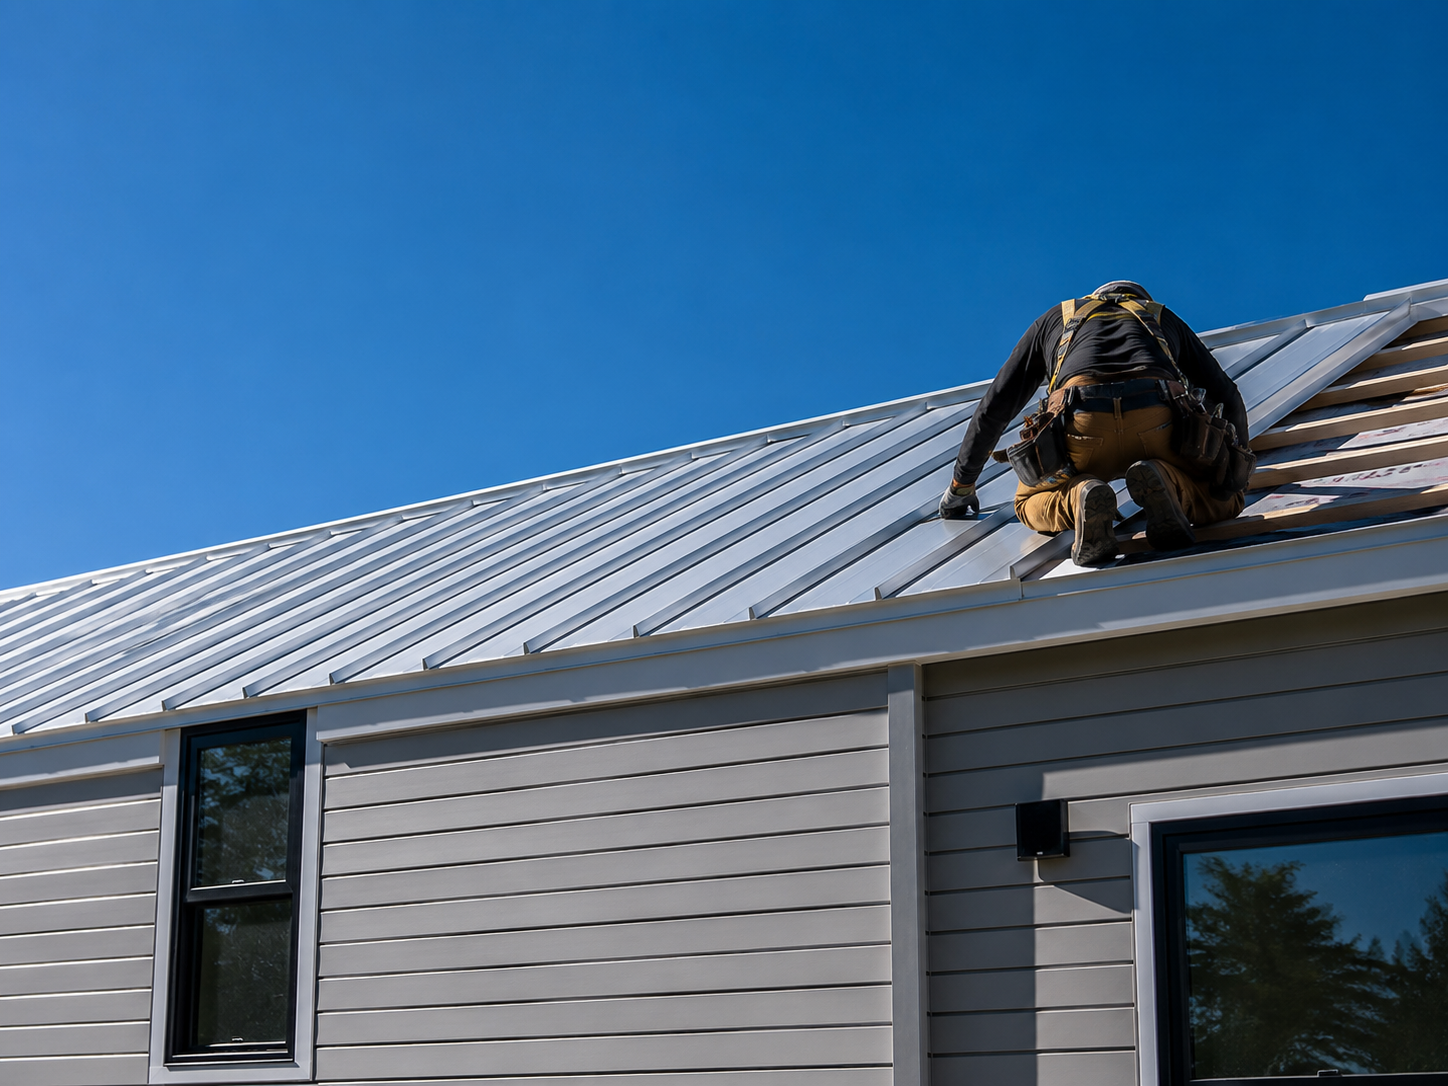
photograph of a professional roofing crew installing premium shingles on a modern residential home in Dallas

Professional roofing contractors should handle repairs when:​​

  • Roof pitch exceeds 6:12 slope (too steep for safe DIY work without fall protection equipment)
  • Building height reaches two full stories or higher above ground
  • More than 10-15 shingles have blown off across multiple roof sections
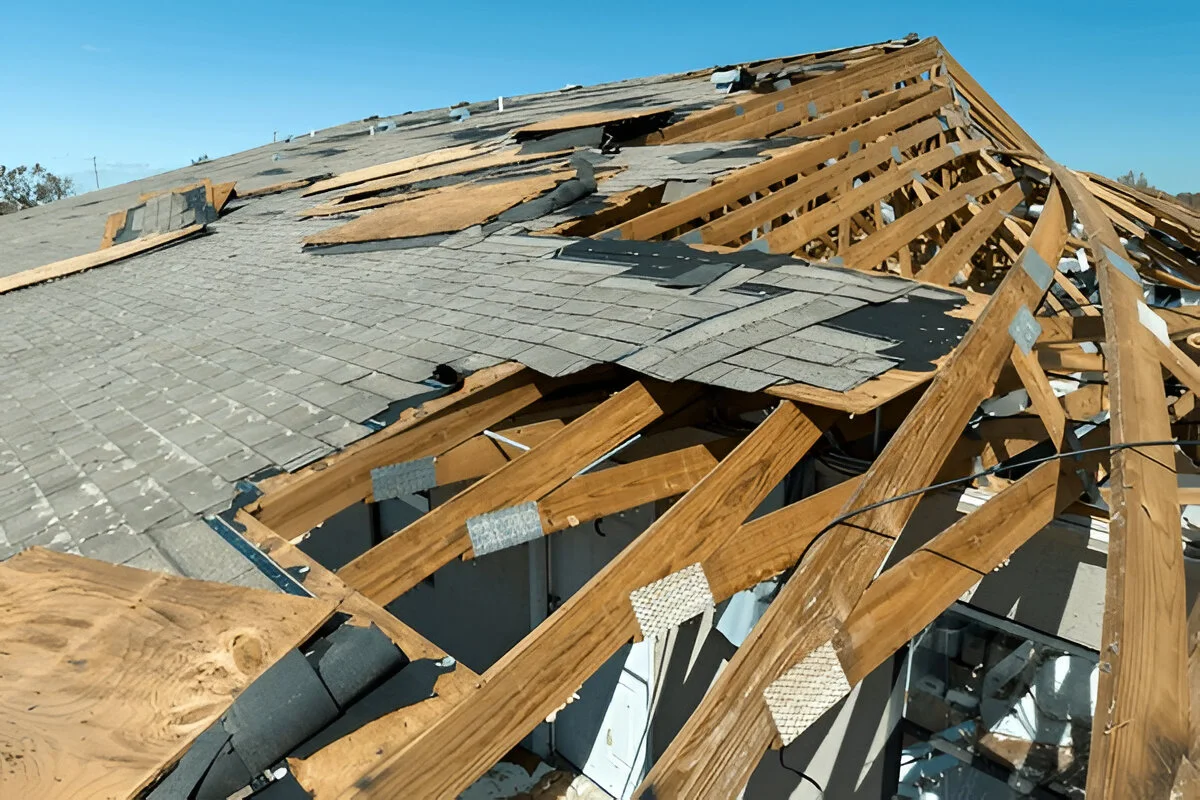
  • Visible roof deck sagging, soft spots, or dark discoloration indicating rot
  • Active interior leaking with ceiling stains, dripping, or wet insulation
  • Damage concentrated near chimneys, skylights, valleys, or complex flashing areas
  • You lack confidence, physical ability, or appropriate ladder equipment

Emergency tarping and permanent repairs by licensed contractors typically cost $300-$800 for small localized damage, providing professional workmanship and liability insurance protection if accidents occur.​

DIY may be reasonable when

Homeowner repairs make sense for:​

  • Damage limited to 1-5 shingles in easily accessible areas
  • Low-slope roofs (4:12 or less) allowing comfortable standing
  • Single-story homes with safe ladder access
  • Dry weather conditions with no precipitation forecast for 24-48 hours
  • No wind gusts exceeding 15 mph during repair work
  • Intact roof deck without soft spots or structural concerns

Essential safety equipment and practices

Never attempt roof work without proper safety precautions:​​

Ladder safety:

  • Position ladder on firm, level ground at proper 75-degree angle (1 foot out for every 4 feet up)
  • Extend ladder minimum 3 feet above roof edge for safe mounting
  • Secure ladder base and top to prevent shifting
  • Use ladder stabilizers on gabled ends to avoid gutter damage

Personal protection:

  • Wear rubber-soled work boots with aggressive tread (never smooth-bottomed shoes)
  • Use fall protection harnesses when pitch exceeds 4:12 or height exceeds 12 feet
  • Avoid working alone—have someone nearby to assist in emergencies
  • Never repair roofs when wet, icy, or in temperatures above 90°F (shingles become soft and tear easily)

Weather timing:

  • Schedule repairs during mild, dry conditions (60-75°F optimal)
  • Complete work during morning hours when roofs are coolest and least slippery
  • Avoid high-wind days when gusts can lift tarps or unsteady workers

Tools and materials needed to reattach shingles

Gathering all supplies before climbing eliminates dangerous mid-job ladder trips.​​

Required tools

Hand tools:

  • Flat pry bar or shingle ripper (thin profile for sliding under shingles without damage)​
  • Hammer or pneumatic roofing nailer (hammer adequate for small repairs)
  • Utility knife with hooked roofing blades (straight blades slip and cause injuries)
  • Caulk gun for tube roofing cement application​
  • Tape measure for shingle alignment verification
  • Broom or leaf blower for debris removal before sealing

Safety equipment:

  • Extension ladder rated for your weight plus materials
  • Work gloves protecting against sharp metal and hot shingles
  • Safety glasses preventing granule debris from entering eyes
  • Knee pads if working extensively on roof surface

Essential materials

Fasteners and adhesives:

  • Galvanized roofing nails (1¼” for standard ¾” decking, 1½” for thicker decking or multiple shingle layers)​
  • Ring-shank nails provide 40-50% better holding power than smooth-shank nails, especially critical for wind-resistant repairs​​
  • Roofing cement or bitumen-based adhesive (asphalt-based formulations bond properly to shingle backing)​​
  • Avoid silicone-based sealants which don’t bond to bitumen materials

Replacement shingles:

  • Match existing shingle brand, style, and color when possible (check attic or garage for leftover shingles from original installation)​
  • If exact match unavailable, select closest color and replace small cluster (3-5 shingles) rather than single mismatched shingle for better appearance
  • Standard three-tab shingles measure 12″ × 36″ with 5″ exposure
  • Architectural/dimensional shingles vary by manufacturer—measure existing shingles before purchasing

Supplemental materials if needed:

  • Roofing felt or synthetic underlayment patches for torn underlayment
  • Plastic sheeting or tarps for emergency weatherproofing
  • Lumber (2×4 boards) and screws for tarp securement if temporary protection required

Step-by-step: how to repair roof shingles blown off

Following proper sequence prevents additional damage while ensuring durable repairs.​

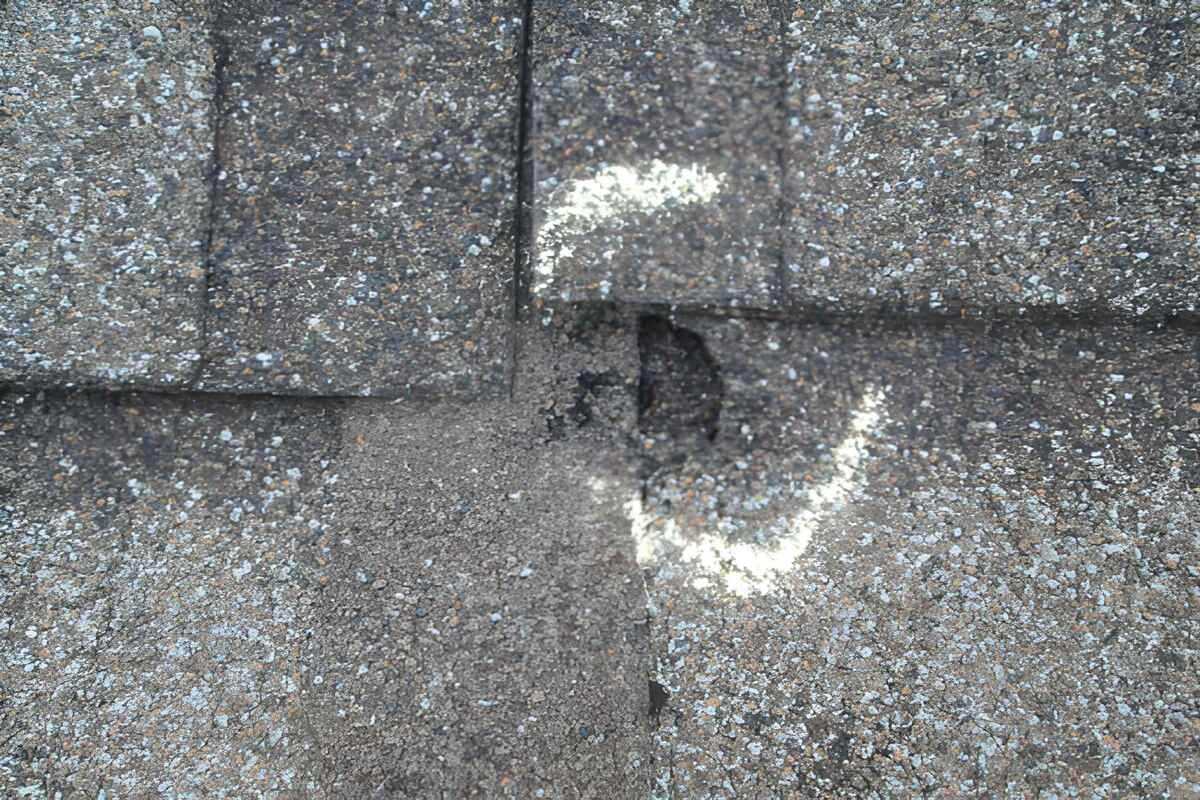
Step 1: Document damage for insurance

Photograph all damage thoroughly before repairs:

  • Take wide-angle shots showing overall roof and damage location
  • Capture close-up images of missing shingles, exposed underlayment, and nail holes
  • Photograph surrounding areas showing potentially loosened adjacent shingles
  • Record date, time, and weather conditions when damage occurred
  • Document any interior water damage (ceiling stains, wet insulation, dripping)

Insurance claims require comprehensive documentation, and repairs may void coverage if performed before adjuster inspection—contact your insurance company first if damage is extensive.​

Step 2: Inspect exposed area and surrounding shingles

Assess full repair scope before beginning work:​

Check underlayment condition:

  • Intact black felt or synthetic underlayment indicates minimal urgency
  • Torn, punctured, or missing underlayment requires immediate patching before shingle replacement
  • Visible wood decking demands professional evaluation—water may have penetrated interior

Examine adjacent shingles:

  • Lift edges of surrounding shingles gently to check for loosened nails or broken seal strips
  • Identify creased, cracked, or torn shingles requiring replacement beyond obvious damage
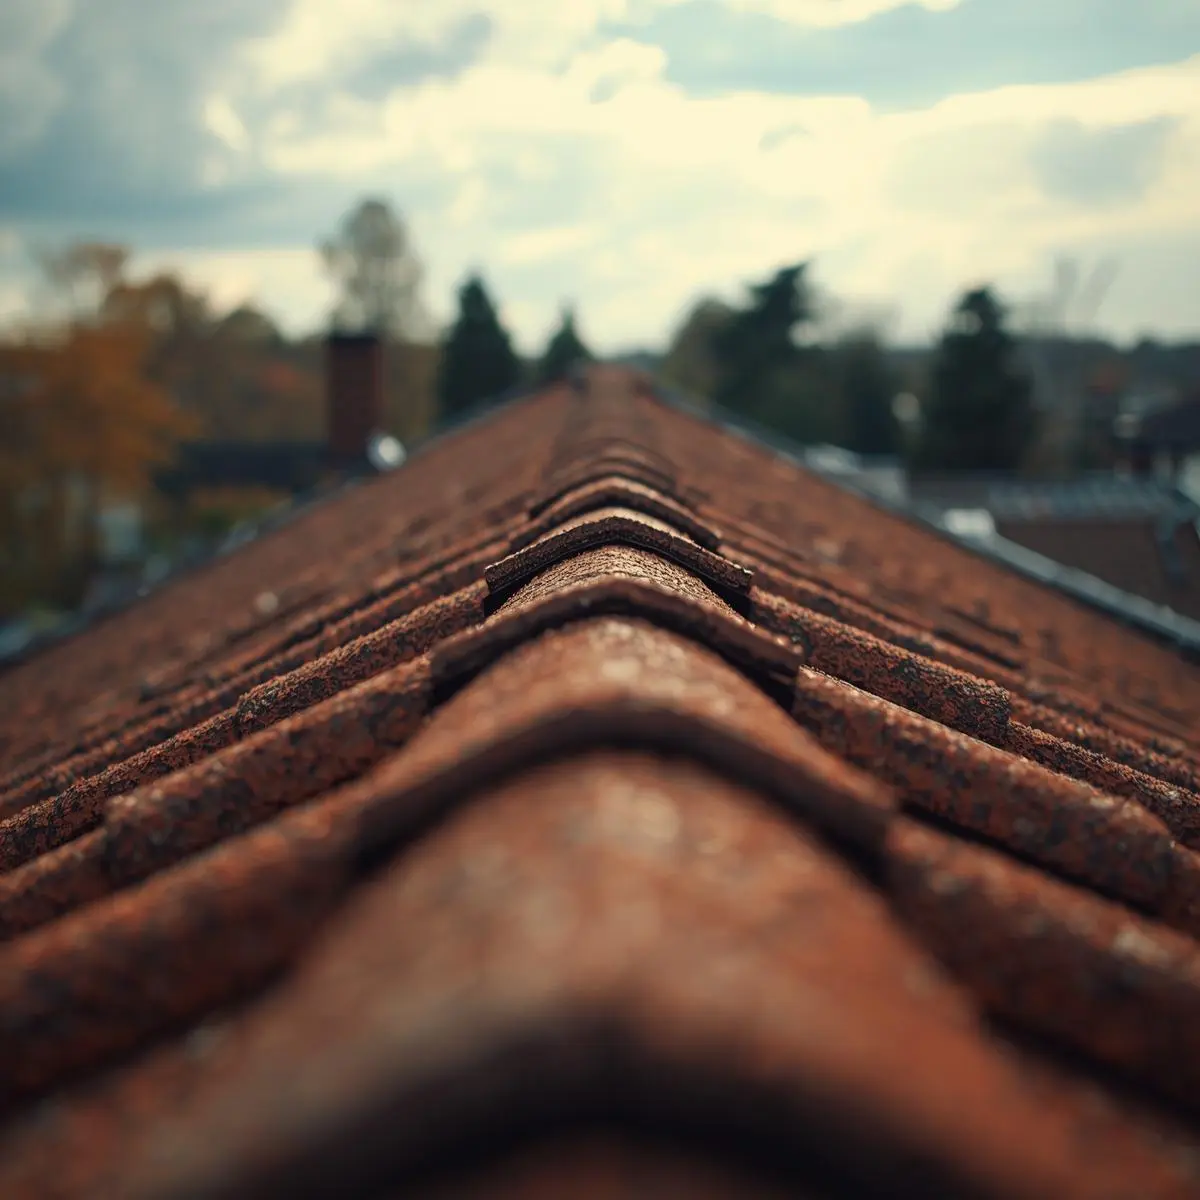
  • Look for missing granules indicating advanced age and reduced remaining lifespan

Step 3: Remove damaged shingle remnants completely

Eliminate all old material ensuring clean installation surface:​

  • Slide flat pry bar carefully under shingle above damaged area, lifting gently to access nails​
  • Locate and remove all nails securing damaged shingle (typically 4 nails at mid-span “common bond” line, plus 4 nails near top edge “headlap”)​
  • Pry nails upward by sliding bar under shingle, lifting together, then tapping shingle down to leave nail standing proud for easy removal​
  • Pull damaged shingle free once all fasteners are removed
  • Remove or pound down any remaining exposed nails creating puncture hazards​
  • Clear debris and granules from installation area so replacement shingle sits flat

Step 4: Patch underlayment if torn

Repair underlayment before installing replacement shingles:

  • Cut away loose, flapping underlayment pieces
  • Apply roofing cement around tear perimeter
  • Place underlayment patch overlapping torn area by 6″ on all sides
  • Orient patch so upper edge goes under existing underlayment (water flows downward without penetration)
  • Secure edges with roofing cement—avoid nailing through patches when possible

Step 5: Slide replacement shingle into position

Proper alignment ensures weather-tight seal and uniform appearance:​​

  • Position new shingle by sliding under shingle course above damaged area
  • Align bottom edge with exposure line of adjacent shingles (typically 5″ exposure for three-tab, 5⅝” for many architectural shingles)
  • Ensure side edges match neighboring shingles without gaps or overlaps
  • Verify shingle lies flat without buckling, folding, or raised edges

Step 6: Fasten shingle correctly using proper nailing technique

Correct fastening represents the best way to adhere shingles to a roof for long-term wind resistance:

Nail quantity and placement:

  • Use minimum 4 nails for three-tab shingles, 6 nails for architectural shingles in normal wind zones
  • High-wind areas require 6 nails per shingle regardless of type for enhanced holding power
  • Position nails in manufacturer-designated nail zone (usually ¾” to 1″ above shingle slots for three-tab, per instructions for architectural)
  • Space nails evenly across shingle width avoiding concentration at edges
  • Ensure nails penetrate both replacement shingle and shingle below at common bond line

Proper driving technique:

  • Drive nails flush with shingle surface—not overdriven (breaking through mat) or underdriven (sitting proud and creating snag points)
  • Ring-shank nails require careful hammering to avoid overdriving while ensuring proper seating​​
  • Angle nails perpendicular to roof surface for maximum holding power
  • Replace all nails in overlapping shingle above that were removed during damaged shingle extraction​

Step 7: Apply roofing cement to secure tabs

Supplemental adhesive provides immediate wind resistance while shingles develop full seal:​​

Where to apply adhesive:

  • Place quarter-sized dab (approximately ¾” diameter) of roofing cement under each shingle tab​
  • Position adhesive 1″ from tab edge to prevent squeeze-out when pressed
  • Apply four dabs per three-tab shingle, 5-6 dabs per architectural shingle depending on width

Proper application technique:

  • Lift tab gently with one hand while applying adhesive with other
  • Press tab firmly into cement for 10-15 seconds ensuring contact
  • Avoid excessive adhesive creating visible bumps or unsightly squeeze-out
  • Use asphalt-based roofing cement specifically formulated for shingle bonding
  • Never use construction adhesive, silicone sealants, or non-roofing products which fail to bond properly

Seal surrounding lifted shingles:

  • Check adjacent shingles for loose tabs lifted by same wind event
  • Apply roofing cement under any tabs that don’t lie flat against roof surface​
  • Press firmly after application ensuring full adhesive contact

Step 8: Final inspection and cleanup

Complete thorough check before considering job finished:

  • Verify all replaced shingles align properly with surrounding courses
  • Confirm no exposed nail heads remain in repair area
  • Check that overlapping shingles above are re-fastened if nails were removed
  • Ensure all tabs are pressed down and making contact with roof surface
  • Clean loose granules and debris from repair zone
  • Inspect surrounding area for additional damage requiring attention
  • Dispose of old shingles, nails, and materials properly

![Properly repaired roof shingles aligned flush with existing courses showing correct installation]


Best way to adhere shingles to a roof (preventing future blow-offs)

Understanding why shingles blow off prevents repeat failures after repairs.

Prioritize proper fastening over excessive adhesive

The most wind-resistant shingle installations rely on correct mechanical fastening as primary attachment method, with adhesive serving supplemental role:

Why nailing matters most:

  • Properly placed nails create 8-12 penetration points per shingle securing it to deck structure
  • Ring-shank nails increase withdrawal resistance by 40-50% compared to smooth-shank nails through mechanical grip​​
  • Six-nail patterns in high-wind zones double fastening points versus standard four-nail installation
  • Correct nail placement in manufacturer-designated zones prevents tearing through shingle when wind creates uplift forces

Adhesive limitations:

  • Roofing cement provides immediate holding power but degrades over 5-10 years from UV exposure and thermal cycling
  • Excessive adhesive application creates rigid bonds that crack rather than flex with thermal expansion
  • Adhesive alone cannot resist sustained wind loads without proper mechanical fastening

When roofing cement enhances wind resistance

Strategic adhesive use supplements proper nailing in specific scenarios:​​

Appropriate applications:

  • Hand-sealing newly installed shingles in temperatures below 60°F when factory seal strips won’t activate promptly​
  • Re-securing lifted tabs after wind events before seal strips can re-bond​
  • Reinforcing edge shingles along rakes and eaves experiencing highest wind pressures
  • Adhering shingles in high-wind coastal zones requiring supplemental tab bonding beyond factory seals

Application best practices:

  • Use bitumen-based roofing cement compatible with asphalt shingle backing
  • Apply sparingly—quarter-sized dabs provide adequate bonding without creating rigid spots that crack​​
  • Position adhesive away from visible shingle edges to prevent unsightly squeeze-out
  • Polyurethane sealants offer superior adhesion and flexibility for specialty applications

Common mistakes causing shingle blow-offs

Avoid installation errors that compromise wind resistance:

Improper nailing:

  • High nailing—placing fasteners above manufacturer nail zone reduces holding power by 50%+
  • Overdriving nails through shingle mat eliminates holding capacity
  • Underdriving nails leaves tabs elevated where wind can catch underneath
  • Using too few nails (only 4 in high-wind zones requiring 6)
  • Smooth-shank nails in areas requiring ring-shank nails for wind resistance

Inadequate edge detailing:

  • Missing or improperly installed starter strips along eaves and rakes
  • Insufficient adhesive application on edge shingles experiencing peak wind loads
  • Lack of drip edge allowing wind to get under shingle edges

Installation timing issues:

  • Installing shingles in cold weather (below 40°F) prevents factory seal activation
  • Failing to hand-seal tabs when temperatures don’t support self-sealing
  • Installing during high-wind conditions preventing proper tab sealing

Material degradation:

  • Attempting to glue down aging shingles with brittle, inflexible cement that cracks
  • Using non-roofing adhesives incompatible with bitumen materials
  • Applying excessive adhesive creating rigid bonds that fail rather than flex

If blow-offs keep happening

Repeated shingle loss indicates systemic problems requiring professional evaluation:​

  • Pattern nailing errors across entire roof (high nailing, insufficient fasteners)
  • Aged shingles with deteriorated seal strips and brittle composition unable to resist wind
  • Soft or damaged roof decking unable to hold fasteners properly
  • Severe wind exposure requiring upgraded wind-rated shingles or alternative roofing systems
  • Inadequate attic ventilation creating pressure differentials that lift shingles

Professional roof inspections cost $150-$400 but identify underlying causes preventing endless patch repairs.​

![Diagram showing correct nail placement zones and spacing for wind-resistant shingle installation]


When patch repairs aren’t enough

Recognizing when blown-off shingles indicate larger problems prevents throwing good money after bad.​

Signs requiring full or partial roof replacement

Consider comprehensive solutions when:​

Extensive damage:

  • More than 20% of roof surface has missing or damaged shingles
  • Multiple roof sections show blow-offs indicating widespread installation problems
  • Shingles continue blowing off after repairs using proper techniques

Age-related deterioration:

  • Roof approaches or exceeds expected lifespan (15-20 years for three-tab, 20-30 years for architectural)
  • Widespread granule loss exposing black asphalt substrate
  • Curling, cupping, or cracking across large areas beyond localized damage
  • Missing granules in gutters and around building perimeter

Structural concerns:

  • Visible roof deck sagging or soft spots when walking
  • Interior water damage including ceiling stains, mold growth, or wet insulation
  • Multiple layers of old shingles (building codes limit to two layers maximum in most jurisdictions)

Insurance claim considerations

Understanding coverage helps maximize benefits:​​

When to file claims:

  • Storm damage with documented weather event (high winds, hail, tornado)
  • Extensive damage exceeding policy deductible ($500-$2,500 typical)
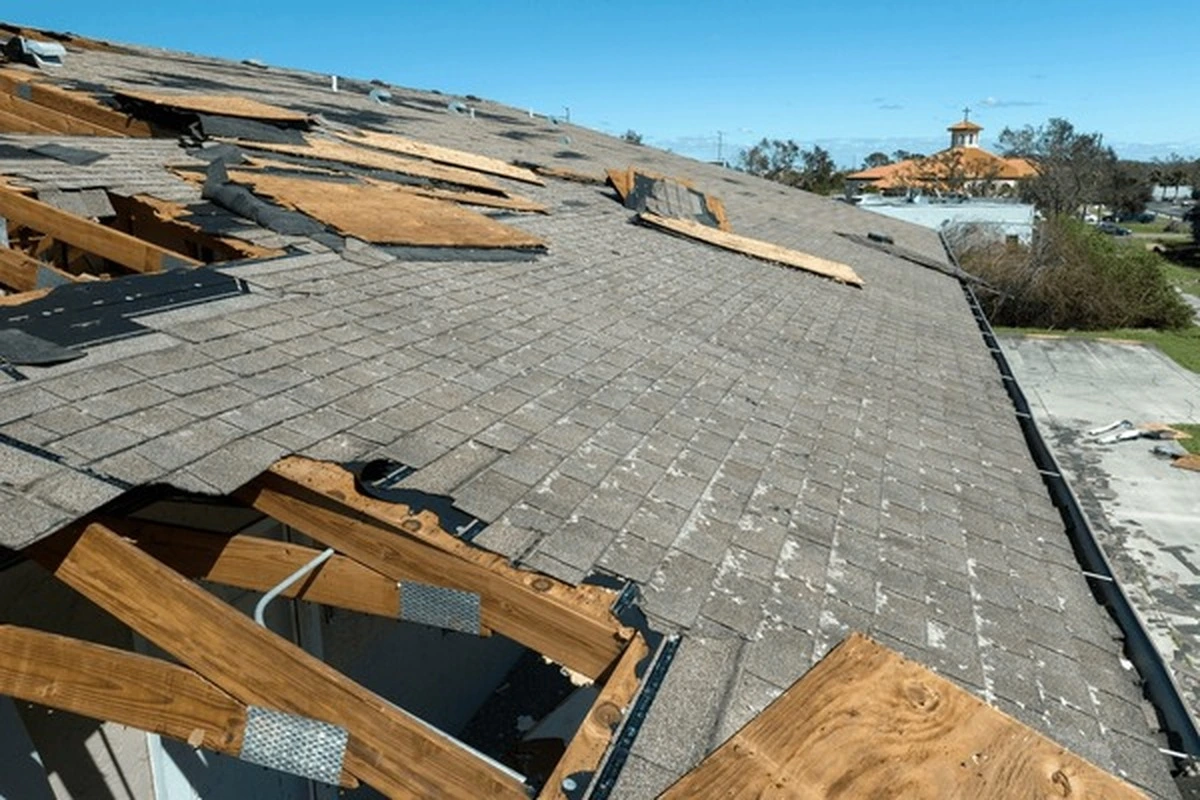
  • Multiple damaged roof sections requiring professional repairs

Claim process basics:

  • Document all damage with photographs before repairs or tarping
  • Contact insurance company within policy timeframe (typically 30-60 days of damage)
  • Obtain professional inspection report detailing damage extent and repair costs
  • Avoid permanent repairs before adjuster inspection unless emergency tarping necessary
  • Keep receipts for emergency tarping and temporary protection materials

Coverage limitations:

  • Normal wear and tear excluded from most policies
  • Lack of maintenance may void coverage for preventable damage
  • Cosmetic damage without functional impairment often not covered
  • Matching shingle colors for partial replacement may not be covered if exact match unavailable

Frequently asked questions about how to repair roof shingles blown off

Can I repair roof shingles blown off without replacing the whole roof?

Yes, small localized damage involving 1-10 blown-off shingles can be successfully repaired by homeowners or contractors through shingle replacement, proper fastening with 4-6 nails per shingle, and roofing cement application to seal tabs, provided underlayment and decking remain intact.​​

What’s the best way to adhere shingles to a roof after wind damage?

The most effective approach combines proper mechanical fastening using ring-shank nails placed in manufacturer-designated nail zones (6 nails per shingle in high-wind areas) with supplemental roofing cement applied under each tab to provide immediate wind resistance while factory seal strips develop full bond.​​

Should roofing cement go under the tab or on top?

Roofing cement should be applied under the shingle tab edge (not on top) using quarter-sized dabs positioned 1″ from tab edge, then pressed firmly for 10-15 seconds to create wind-resistant bond without visible squeeze-out or unsightly appearance.​​

How many nails should I use per replacement shingle?

Standard installations require 4 nails for three-tab shingles and 6 nails for architectural shingles in normal wind zones, while high-wind coastal or mountain regions require 6 nails for all shingle types regardless of design for enhanced wind resistance.

What type of nails work best for blown-off shingle repairs?

Galvanized ring-shank roofing nails provide optimal holding power, offering 40-50% greater withdrawal resistance compared to smooth-shank nails—use 1¼” length for standard ¾” decking or 1½” for thicker decking and multiple shingle layers.​

Can I use construction adhesive or Gorilla Glue instead of roofing cement?

No—construction adhesives and silicone-based sealants don’t bond properly to bitumen materials in asphalt shingles; use only asphalt-based roofing cement or specialized bitumen adhesives designed specifically for shingle applications to ensure proper adhesion.

Will insurance cover blown-off shingles from wind storms?

Most homeowner policies cover wind damage from documented storm events if damage exceeds your deductible, though normal wear, lack of maintenance, or cosmetic issues may be excluded—photograph damage before repairs and contact your insurance company within policy timeframes.​

When should I call a professional instead of DIY repair?

Professional contractors should handle repairs when roofs exceed 6:12 pitch or two-story height, damage involves more than 10-15 shingles, underlayment or decking shows water damage or rot, work requires near chimneys or complex flashing, or you lack appropriate safety equipment and physical capability.​​


Protecting your home from future wind damage

Understanding how to repair roof shingles blown off safely and correctly prevents water damage while saving hundreds in emergency contractor costs, though steep roofs, extensive damage, or safety concerns warrant professional installation companies. The best way to adhere shingles to a roof prioritizes proper mechanical fastening using ring-shank nails in manufacturer-designated zones (6 per shingle in high-wind areas) supplemented by strategic roofing cement application under tabs for immediate wind resistance.​​

Successful repairs require removing all damaged material and exposed nails, patching torn underlayment, aligning replacement shingles precisely, driving nails flush without overdriving, and hand-sealing tabs with asphalt-based roofing cement. Repeated blow-offs indicate systemic problems—improper nailing, aged shingles, inadequate ventilation, or severe exposure—requiring professional evaluation to prevent endless patch cycles.​​

Ready to tackle blown-off shingle repairs? Gather proper tools including flat pry bar, ring-shank nails, and bitumen roofing cement, verify safe working conditions and appropriate skill level, follow step-by-step techniques prioritizing correct fastening over excessive adhesive, and inspect surrounding shingles for hidden damage requiring attention. For extensive damage, steep roofs, or safety concerns, request quotes from licensed roof installation companies ensuring proper repairs backed by warranties and insurance protection.

🏠 Roofing Tips & Updates

Get free roofing advice, cost guides, and seasonal maintenance tips.

Roof Decking: What It Is, Lifespan & Replacement Costs

Roof decking ,also called roof sheathing ,is the flat panel layer nailed across your roof’s rafters or trusses. It is the structural platform that every layer of your roofing installation fastens to: underlayment, ice and water shield, and shingles all depend on a sound, dry deck to hold their fasteners and maintain a flat surface. When decking fails, the entire roof system above it fails with it ,no amount of premium shingles compensates for a compromised deck underneath.

Most homeowners never think about roof decking until a contractor opens up their roof and reveals rot, delamination, or soft spots that weren’t visible from the street. This guide covers everything you need to know before that moment ,what decking is made of, how to spot failure early, what replacement costs in 2026, and whether OSB or plywood is the right choice for your climate.

What Is Roof Decking?

Roof decking is the layer of sheet material ,typically 4×8-foot panels of plywood or oriented strand board (OSB) ,nailed directly to the structural rafters or trusses of your roof frame. It serves two functions: structural (distributing the weight of roofing materials, snow loads, and foot traffic across the rafter system) and functional (providing the continuous nailing surface that holds every layer of the roofing installation in place). Without a solid deck, nails and staples used to fasten underlayment and shingles have no substrate to grip.

Residential roof decking is most commonly installed in 5/8-inch or 3/4-inch thickness for rafters spaced 24 inches on center, and 7/16-inch or 1/2-inch for rafters spaced 16 inches on center. Thinner panels on wider rafter spacing create visible deflection between rafters ,a condition called “pillowing” ,which accelerates shingle wear and creates visible surface irregularities.

Signs Your Roof Decking Needs Replacing

Roof decking deteriorates from the inside out ,by the time damage is visible on your shingles from the street, the deck below has often been compromised for months or years. These five warning signs indicate decking that needs professional inspection or immediate replacement:

  • Soft or spongy feeling when walking on the roof ,healthy decking is rigid and firm underfoot. Any give, flex, or “soft spot” indicates water-saturated or delaminated panels that have lost structural integrity.
  • Visible sagging between rafters when viewed from the attic ,panels should lie flat between rafter bays. Any downward bow or wave pattern indicates panel failure, excessive moisture, or overloading.
  • Daylight visible through boards in the attic ,gaps between panels or at panel edges indicate decking that has shrunk, warped, or shifted. Any daylight path is also a water and pest intrusion path.
  • Mold, mildew, or water stains on attic ceiling ,dark staining, white mineral deposits, or active mold growth on the underside of decking panels is direct evidence of chronic moisture ,either from a roofing system failure above or condensation from inadequate attic ventilation.
  • Granule buildup from shingle deterioration above ,heavy granule loss from aging shingles accelerates UV exposure to the underlying deck. When shingles lose structural integrity, water infiltrates to the deck below. Excessive granules in gutters combined with an aging roof is an early indicator that deck inspection is overdue.
⚠️ Attic Inspection Tip: The best time to inspect your roof decking is during or immediately after a heavy rain ,water stains and active leaks are easiest to trace to their source while moisture is present. Bring a flashlight and inspect the full underside of the deck from the attic access hatch before calling a contractor.
National Roof Decking Replacement Cost Averages

The national average roof decking replacement cost in 2026 is approximately $5,500, though actual project costs range widely from a minimum of around $900 for small repairs to $12,800 or more for large, complex roofs. Most homeowners spend between $2,400 and $8,600 depending on roof size and material selection.​

Cost Ranges by Project Scope

Understanding roof decking replacement cost starts with knowing the typical price ranges for different project sizes:

  • Small projects (under 1,000 sq ft): $1,900-$2,400 for smaller roofs with basic OSB sheathing​
  • Average homes (1,500-2,000 sq ft): $4,000-$6,400 for standard materials and moderate complexity​
  • Large roofs (3,000+ sq ft): $8,000-$17,000 for bigger homes, premium plywood, or complex roof designs​

The wide variation in roof decking replacement cost reflects differences in material quality, regional labor rates, roof accessibility, and whether you’re replacing the entire deck or only damaged sections.​

What’s Included in Your Total Cost

A complete cost estimate typically includes:​

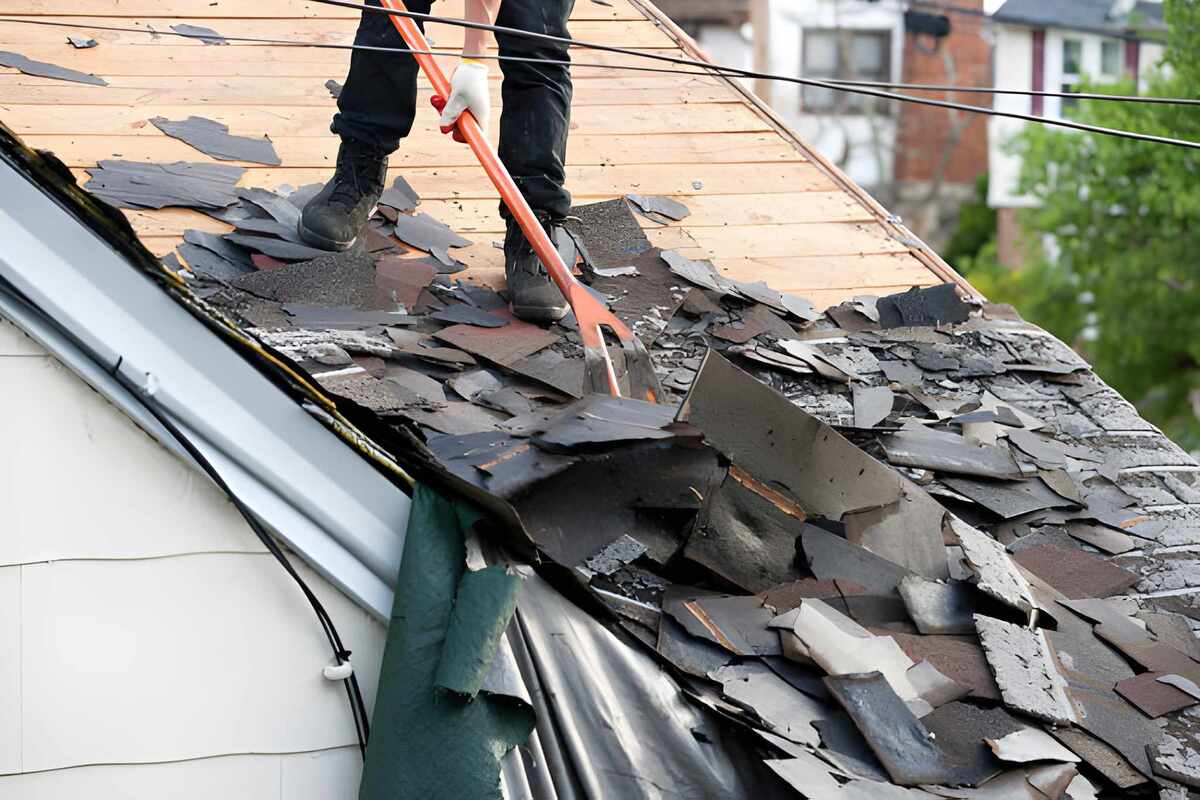
  • Tear-off and removal of old roofing materials (shingles, underlayment) to access damaged decking
  • Demolition labor to remove rotted or damaged sheathing boards ($25-$80 per worker per hour)​
  • New plywood or OSB panels cut to size and installed over roof rafters
  • Installation labor by professional roofing contractors ($30-$90 per hour or project-based fees)​
  • Disposal fees for old decking materials and debris
  • Permits if required by local building codes ($400-$1,500 depending on location)​

![Damaged roof decking showing rot and water damage requiring replacement](image if contractors discover unexpected damage to rafters, trusses, or other structural components during the tear-off process.​

Regional Price Variations

It varies significantly based on where you live:​

High-cost metro areas (New York City, San Francisco, Boston, Seattle) see labor rates exceeding $75-$90 per hour, pushing total costs 30-50% above national averages. Moderate-cost regions (most Midwest, Mid-Atlantic, Southeast) align with national averages of $45-$60 per hour. Lower-cost rural areas (parts of South, rural Midwest) have labor running $35-$50 per hour, reducing total project costs by 15-25%.​


Price Per Square Foot: Materials & Labor

Breaking down per square foot helps homeowners estimate project expenses more accurately. The total installed price combines material costs and professional labor rates.​

Material Costs for Roof Decking

Material TypeCost Per Square Foot (2026)Cost Per 4×8 Sheet
OSB (Oriented Strand Board)$0.50-$1.50​$30-$75​
Plywood (CDX or better grade)$0.75-$2.00​$40-$90​
Premium plywood (exterior grade)$1.25-$2.50​$65-$120​

OSB sheathing remains the most economical choice for minimizing roof decking replacement cost, with 4×8-foot sheets (32 square feet) costing approximately $30-$75 per sheet depending on thickness and market conditions. However, contractors typically purchase materials at wholesale prices closer to the lower end of these ranges.​

Plywood sheathing costs more but offers superior moisture resistance and strength, with contractors charging approximately $100-$135 per installed sheet including materials and labor. Some contractors report charging around $100 for OSB sheets and $110 for plywood sheets when installed, with discounts for larger projects requiring 20+ sheets.​

Labor Costs for Installation

Professional roofing contractors charge $1.50 to $3.00 per square foot for labor to install roof sheathing, or approximately $45 to $75 per hour for crew labor. Your roof decking replacement cost for labor depends on several factors:​

Roof pitch impact on labor:

  • Low pitch (3:12 to 4:12): Standard labor rates; roofers can walk safely with minimal equipment​
  • Moderate pitch (5:12 to 7:12): Requires roof brackets and planks; labor costs increase 10-25%​
  • Steep pitch (8:12 to 12:12): Demands extensive safety equipment; labor costs rise 30-50% or more​

Roof complexity: Multiple valleys, dormers, skylights, and irregular shapes add time and increase your roof decking replacement cost.​

Access difficulty: Multi-story homes or roofs surrounded by landscaping require extra care and equipment, raising labor expenses.​

Demolition and preparation labor adds another layer to your roof decking replacement cost at $25-$80 per hour for removal of old materials.

Total Installed Cost per Square Foot

Combining materials and labor, the total roof decking replacement cost averages $2 to $5 per square foot installed:​

Cost ComponentPrice Range Per Square Foot
Materials (OSB or plywood)$0.50-$2.00​
Installation labor$1.50-$3.00​
Total installed cost$2.00-$5.00

For context, if your roof measures 2,000 square feet and requires complete decking replacement, expect your roof decking replacement cost to be approximately $4,000-$10,000 for materials and labor combined.​


Roof Decking Replacement Cost by Roof Size

Roof Decking Replacement Cost by Roof Size

Roof decking replacement cost scales directly with roof size, though larger projects often benefit from slightly lower per-square-foot costs due to efficiency gains.​

Small Roofs (1,000-1,500 sq ft)

For smaller homes, garages, or sheds with roof areas under 1,500 square feet, roof decking replacement cost may range from $1,900 to $7,500 depending on material choice and accessibility.​

Roof SizePlywood Sheets NeededAverage Roof Decking Replacement Cost
1,000 sq ft30-35 sheets$2,000-$5,000​
1,500 sq ft45-50 sheets$3,000-$7,500​

Small projects sometimes incur higher per-square-foot roof decking replacement cost because contractors face similar setup and mobilization expenses regardless of project size.​

Average Residential Roofs (1,500-2,500 sq ft)

Most single-family homes fall into this category, with roof decking replacement costs between $3,000 and $12,500.​

Roof SizePlywood Sheets NeededAverage Roof Decking Replacement Cost
2,000 sq ft60-65 sheets$4,000-$10,000​
2,500 sq ft75-80 sheets$5,000-$12,500​

A typical 2,000-square-foot roof decking replacement cost using mid-grade plywood and professional installation averages around $5,500-$7,000 in moderate-cost regions.​

Large Roofs (3,000+ sq ft)

Larger roofs on two-story colonials, sprawling ranches, or homes with complex hip-and-valley designs can easily require a roof decking replacement cost of $8,000-$20,000 or more.​

Roof SizePlywood Sheets NeededAverage Roof Decking Replacement Cost
3,000 sq ft90-95 sheets$6,000-$15,000​
3,500 sq ft115-120 sheets$7,000-$17,500​
4,000 sq ft125-130 sheets$8,000-$20,000​

Multi-story homes add complexity due to safety requirements, scaffolding needs, and material hoisting, which increase roof decking replacement cost by 25-50%.​

![Professional roofers installing new roof decking on residential Plywood vs OSB: Which Costs Less?

Choosing between plywood and OSB for roof decking significantly impacts both roof decking replacement cost and long-term performance. Both materials meet building codes and serve as structurally sound roof sheathing, but they differ in cost, strength, moisture resistance, and durability.​

OSB: The Budget-Friendly Choice

OSB (Oriented Strand Board) consists of wood strands bonded with resin and compressed into solid panels. For roof decking replacement cost savings, OSB is typically 15-30% less expensive than plywood:​

OSB costs for roof decking replacement:

  • Material cost: $30-$75 per 4×8 sheet ($0.50-$1.50 per sq ft)​
  • Installed by contractor: $80-$100 per sheet​
  • Total per square foot: Approximately $2.00-$3.50 installed​

OSB advantages that lower your roof decking replacement cost:

  • Lower material cost reduces overall project expense by $500-$1,500 for average roofs​
  • Consistent quality eliminates gaps and voids, providing uniform strength​
  • Adequate structural performance meets building code requirements​
  • Wide availability at building supply stores​

OSB disadvantages to consider:

  • Heavier weight (78 lbs per sheet vs. 67 lbs for plywood) makes handling more difficult​
  • Slower drying time after moisture exposure can lead to swelling and delamination​
  • Lower nail retention over time, especially in high-wind environments​

Plywood: Premium Performance

Plywood is manufactured by gluing together thin sheets of wood veneer in alternating grain directions. While more expensive, plywood offers performance advantages:​

Plywood costs for roof decking replacement:

  • Material cost: $40-$90 per 4×8 sheet ($0.75-$2.00 per sq ft)​
  • Installed by contractor: $100-$135 per sheet​
  • Total per square foot: Approximately $2.50-$4.50 installed​

Plywood advantages worth the higher roof decking replacement cost:

  • Superior moisture resistance—dries faster after water exposure​
  • Approximately 10% stiffer than OSB, providing better resistance to deflection​
  • Better nail-holding capacity critical for shingle attachment in high-wind areas​
  • Lighter weight (67 lbs per sheet) easier to handle during installation​

Plywood disadvantages:

  • Higher material cost adds $500-$2,000+ to roof decking replacement cost for average roofs​
  • Potential for gaps or voids in lower-grade sheets​

Which Material Should You Choose?

Your decision impacts your roof decking replacement cost and long-term roof performance:

Choose OSB to minimize roof decking replacement cost when:

  • Budget is the primary concern
  • You live in a dry climate with minimal precipitation​
  • Your roof has standard asphalt shingles and moderate conditions
  • Building codes don’t specify plywood requirements

Choose plywood despite higher roof decking replacement cost when:

  • You live in humid climates or hurricane-prone regions​
  • Your area experiences frequent wind-driven rain or tropical storms
  • You want maximum moisture resistance and nail retention​
  • Building codes require plywood or enhanced fastening​

In humid climates or hurricane-prone regions (Southeast U.S., Gulf Coast), many contractors recommend plywood despite the 15-30% higher roof decking replacement cost because superior moisture resistance and nail retention provide better long-term performance.​


OSB vs. Plywood Decking: Cost & Durability Comparison

The two materials used in virtually all residential roof decking installations are oriented strand board (OSB) and plywood. OSB has become the dominant choice due to lower cost and consistent availability, but plywood retains significant performance advantages in humid climates and long-term durability. Here is how they compare on every factor that matters:

FeatureOSB DeckingPlywood Decking
Cost per sheet$15–$25$25–$45
Moisture resistanceModerate ,swells at edges when exposedBetter ,resists delamination when wet
Lifespan15–20 years20–30 years
Nail holding strengthStrong when dry; weakens if moisture cyclesConsistent across grain layers
WeightSlightly lighterSlightly heavier
EnvironmentalUses wood chips ,less wasteUses whole veneer sheets
Best forBudget-conscious; dry climatesHumid climates; long-term performance

Bottom line: In dry inland climates, OSB is the industry standard and performs well for the life of the shingle system above it. In the Southeast, Gulf Coast, Pacific Northwest, or any region with persistent humidity and summer storms, the $10–$20 per sheet premium for plywood decking pays back in longer deck lifespan and reduced leak risk at panel edges.

How Long Does Roof Decking Last?

Roof decking typically lasts 20–30 years under normal conditions. However, it degrades faster in humid climates, when shingles are compromised, or when ventilation is poor. Most homeowners replace decking at the same time as a full roof replacement ,tearing off aging shingles exposes the full deck surface, making it cost-effective to replace any soft or damaged panels while labor is already mobilized. Replacing decking panels as a standalone project ,without a full roof tear-off ,costs significantly more per panel due to the labor required to remove and reinstall shingles around the repair area.

Roof Decking Replacement Cost by Home Size

Roof decking replacement cost is calculated per square (100 square feet) and depends on home footprint, pitch, number of damaged panels, and whether replacement occurs during a full tear-off or as a standalone repair. The following figures reflect full deck replacement during a roof installation project in 2026 ,not isolated panel spot repairs:

Home SizeAverage CostTypical Range
Under 1,000 sq ft$800$600–$1,200
1,000–1,500 sq ft$1,200$900–$1,800
1,500–2,000 sq ft$1,800$1,400–$2,500
2,000–2,500 sq ft$2,400$1,800–$3,200
Over 2,500 sq ft$3,000+$2,500–$4,500
📋 Cost Factors That Move the Final Number:
  • Roof pitch: Steep roofs (6/12 pitch and above) add 10–25% to labor cost due to safety equipment and reduced installation speed
  • Partial vs. full replacement: Replacing only damaged sections costs $75–$150 per panel for materials plus a 2–4 hour minimum labor charge
  • Material choice: Plywood adds $10–$20 per sheet over OSB ,approximately $300–$600 extra for a 2,000 sq ft home
  • Region: Labor rates in Northeast and Pacific Coast markets run 15–30% above the national averages shown above
  • Disposal: Old decking removal and disposal adds $100–$300 to most projects


🏠

Need Your Roof Decking Replaced?

Get a free inspection and estimate from a certified roofing contractor. We’ll assess your deck condition, identify any damaged panels, and give you an honest 2026 replacement quote ,at no cost or obligation.

Free inspection  ·  No obligation  ·  Licensed & insured


8 Factors That Change Your Roof Decking Replacement Cost

8 Factors That Change Your Roof Decking Replacement Cost

Beyond basic material and labor expenses, several variables significantly influence your roof decking replacement cost:​

1. Roof Size and Square Footage

Larger roofs require more materials and labor hours, directly increasing your total roof decking replacement cost as detailed in the pricing tables above. However, economies of scale mean larger projects often achieve slightly lower per-square-foot costs ($2.00-$3.50) compared to small repairs ($4.00-$5.00+).​

2. Roof Pitch (Slope)

Roof pitch dramatically affects your roof decking replacement cost through labor expenses and safety requirements:​

  • Low pitch (3:12 to 4:12): Standard labor rates apply​
  • Moderate pitch (5:12 to 7:12): Roof decking replacement cost increases 10-25% for labor​
  • Steep pitch (8:12 to 12:12): Roof decking replacement cost rises 30-50% or more​

Extremely steep roofs (over 12:12) may require specialized rigging and add significant time to the project, pushing roof decking replacement cost well above average.​

3. Roof Complexity and Design

Simple gable or hip roofs with minimal valleys cost less than complex roofs featuring:​

  • Multiple dormers and roof planes
  • Numerous valleys and intersections
  • Skylights, chimneys, and vent pipes
  • Irregular shapes or custom details

Complex roofs may add 20-40% to your roof decking replacement cost due to increased installation time and material waste.​

4. Material Choice: Plywood vs OSB

Plywood costs 15-30% more than OSB for materials alone, adding $500-$2,000+ to your total roof decking replacement cost for average-sized roofs.​

5. Decking Thickness Requirements

Your chosen roof sheathing thickness affects roof decking replacement cost:​

  • 1/2 inch: Standard thickness for most residential roofs; baseline pricing​
  • 5/8 inch: Recommended for wider rafter spacing or heavy materials; adds 20-35% to material costs​
  • 3/4 inch: Premium thickness for extreme conditions; adds 40-60% to material costs​

Thicker sheathing increases your roof decking replacement cost by $0.15-$0.50 per square foot but provides superior performance and longevity.​

6. Geographic Location and Regional Labor Rates

Roof decking replacement cost varies significantly by region:​

  • High-cost metro areas: Labor often exceeds $75-$90 per hour, raising costs 30-50% above national averages​
  • Moderate-cost regions: Labor aligns with national averages of $45-$60 per hour​
  • Lower-cost rural areas: Labor runs $35-$50 per hour, reducing costs by 15-25%​

7. Extent of Damage

Partial roof decking replacement (replacing only damaged sections) may cost more per square foot than full replacement:​

  • Contractors must carefully work around intact sections
  • Frequent setup and teardown reduce efficiency
  • Per-sheet pricing for small quantities often exceeds bulk rates

Full roof decking replacement performed with a complete re-roof achieves maximum efficiency and lower per-square-foot roof decking replacement cost.​

8. Permits, Disposal, and Unexpected Repairs

Additional costs that impact your roof decking replacement cost:​

  • Permits: $400-$1,500 depending on local requirements​
  • Disposal fees: $50-$300 for old material removal​
  • Unexpected structural repairs: $500-$3,000+ if damaged rafters or rot discovered​


Warning Signs: When to Replace Roof Decking

Recognizing when roof decking requires replacement helps homeowners address problems before minor damage escalates, potentially saving on overall roof decking replacement cost by catching issues early.​

1. Water Stains on Ceilings or Walls

Water stains, discoloration, or dark spots on interior ceilings or upper walls clearly indicate roof system failure. The typical progression involves:​

  • Failed flashing or damaged shingles allow water penetration
  • Water soaks through decking repeatedly
  • Moisture travels along rafters or joists
  • Water reaches interior finishes, creating visible stains

While water stains don’t always mean immediate roof decking replacement cost is required, persistent or widespread staining suggests underlying sheathing deterioration requiring inspection.​

2. Sagging or Uneven Roof Lines

Sagging spots, dips, or waves visible from ground level or inside the attic indicate structural failure requiring immediate roof decking replacement. Roof decking should present smooth, even planes; any deviation suggests:​

  • Water damage causing rot and loss of structural integrity
  • Undersized or inadequately spaced sheathing
  • Failed rafters or trusses unable to support loads

Sagging is a serious warning sign demanding immediate professional evaluation to assess your roof decking replacement cost and options.​

3. Soft Spots or Sponginess When Walking

If you or a contractor can feel soft, spongy, or springy areas when walking on the roof, the underlying decking has likely rotted from prolonged moisture exposure. This condition requires immediate roof decking replacement to prevent structural collapse.​

4. Daylight Visible Through Roof Boards

Standing in your attic during daylight, you should see no exterior light penetrating through the roof deck. Visible daylight, cracks, gaps, or holes indicate severe problems requiring urgent roof decking replacement.​

5. Mold, Mildew, or Rot in Attic

Visible mold growth, musty odors, or rotting wood in the attic signal chronic moisture problems affecting decking and framing. Addressing these issues promptly can minimize your total roof decking replacement cost by preventing further spread.​

6. Worn, Curled, or Missing Shingles

While worn shingles don’t directly indicate decking problems, widespread shingle deterioration often coincides with aged, degraded sheathing that should be evaluated to determine roof decking replacement cost.​

7. Cracked, Warped, or Deteriorating Boards

During roof tear-off or repairs, contractors may discover:​

  • Cracking or splitting along board seams
  • Warping, cupping, or buckling from moisture
  • Delamination of OSB layers or plywood veneers
  • Crumbling, soft, or punky wood indicating rot

Any of these conditions warrant getting a roof decking replacement cost estimate from qualified contractors.​

8. Age of Existing Roof Decking

While age alone doesn’t determine roof decking replacement cost necessity, it provides context:​

  • Under 20 years: Typically sound unless damaged
  • 20-40 years: Evaluate during major roof work
  • Over 40 years: Consider replacement during re-roofing

![Close-up of rotted roof decking with visible water damage Guide: 1/2″ vs 5/8″ vs 3/4″

Selecting the appropriate roof decking thickness ensures structural performance, code compliance, and optimal roof decking replacement cost value.​

Common Thickness Options

ThicknessRafter SpacingBest ApplicationsImpact on Roof Decking Replacement Cost
7/16 inch16″ on center (OSB only)Minimum code; budget applications​Baseline/lowest cost
1/2 inch16″ on centerStandard residential; most common​Standard pricing
5/8 inch16″-24″ on centerHeavier roofing, severe weather​Adds 20-35% to material costs
3/4 inch24″ on centerHeavy tile/slate, extreme loads​Adds 40-60% to material costs

1/2-Inch Sheathing: Standard Choice

1/2-inch sheathing (both OSB and plywood) represents the standard for residential roofing with 16-inch rafter spacing, offering the best balance of roof decking replacement cost and performance.​

1/2-inch advantages:

  • Improved strength versus 7/16-inch minimum
  • Better nail retention for shingle attachment
  • Suitable for most standard roofing materials
  • Standard roof decking replacement cost without premiums

5/8-inch sheathing offers superior performance worth the 20-35% increase in roof decking replacement cost:​

5/8-inch advantages:

  • Handles rafter spacing up to 24 inches
  • Significantly less likely to sag over time
  • Superior strength under heavier materials
  • Better wind uplift resistance in hurricane zones
  • Recommended in Florida and coastal areas

While 5/8-inch increases roof decking replacement cost by 20-35%, it provides substantial long-term value through improved durability and storm performance.​

Building Code Requirements

Local building codes establish minimum roof sheathing thickness based on climate hazards:​

  • Hurricane-prone regions: Many counties require 5/8-inch minimum, raising roof decking replacement cost but ensuring safety​
  • Snow-load regions: Codes may specify thicker sheathing​
  • Moderate climates: 1/2-inch typically meets code​

Always verify local code requirements before selecting thickness to ensure your roof decking replacement cost includes compliant materials.​


DIY or Hire a Pro?

While some homeowners consider DIY to reduce roof decking replacement cost, this project presents significant challenges making professional installation the safer, more practical choice.​

Safety concerns are the primary reason to avoid DIY:

Roof work involves substantial fall hazards with potential for serious injury or death from falls of even 8-10 feet. Professional roofers undergo safety training, use appropriate harnesses and equipment, carry workers’ compensation insurance, and understand OSHA regulations.​

Technical expertise professionals bring:

  • Understanding structural load paths and rafter systems
  • Correctly identifying and addressing rot or damage
  • Proper nailing patterns and fastener selection
  • Knowledge of flashing, ventilation, and waterproofing
  • Ability to work safely on steep pitches

Warranty protection requires professional installation:

Manufacturer warranties on roofing materials typically require professional installation by licensed contractors. DIY installations void warranties, leaving you responsible for premature failures despite initial roof decking replacement cost savings.​

Time efficiency professionals deliver:

Professional roofing crews complete decking replacement in 1-3 days for most residential projects, while DIY attempts may take weeks of weekends, leaving the home vulnerable to weather.​

Cost-Benefit Analysis

While DIY eliminates labor costs (typically 50-60% of total roof decking replacement cost), savings may be illusory when accounting for:​

  • Tool and equipment rental (safety gear, nailers, scaffolding, dumpsters)
  • Material waste from errors
  • Retail material pricing (contractors pay wholesale 20-40% below retail)
  • Potential for costly mistakes requiring professional correction
  • Lost wages if taking unpaid time off
  • Increased insurance risk if injury occurs

Professional Cost Justification

Hiring professional roofers for roof decking replacement typically totals $2-$5 per square foot installed, or $4,000-$10,000 for an average 2,000-square-foot roof. This roof decking replacement cost investment provides:​

  • Expert installation meeting codes and specifications
  • Warranty protection on materials and workmanship
  • Completion in days rather than weeks
  • Professional liability insurance covering damage
  • Proper waste disposal and site cleanup
  • Peace of mind knowing the work is safe and correct

For most homeowners, the roof decking replacement cost difference between professional and DIY installation is well justified by safety, quality, warranty protection, and time savings.​


Frequently Asked Questions: Roof Decking

How much does it cost to replace roof decking on a 1,500 sq ft house?

Replacing roof decking on a 1,500–2,000 sq ft home costs an average of $1,800, with a typical range of $1,400–$2,500 in 2026. This assumes full deck replacement during a roof tear-off using OSB panels. Upgrading to plywood adds approximately $300–$600 to the total. Steep pitches and Northeast or Pacific Coast labor markets push costs toward the top of the range.

Can you replace roof decking without replacing shingles?

Yes ,but it costs significantly more per panel. Replacing isolated damaged panels without a full tear-off requires removing and reinstalling shingles around each repair area, adding 2–4 hours of labor per section. For localized damage affecting 5 or fewer panels, a spot repair makes financial sense. For widespread deck failure, combining deck and shingle replacement in a single project is almost always more cost-effective.

How do I know if my roof decking needs to be replaced?

The five most reliable indicators are: soft or spongy areas underfoot on the roof, visible sagging between rafters from the attic, daylight through board gaps, mold or water staining on attic ceiling panels, and heavy granule loss from aging shingles above. An attic inspection during or after heavy rain ,with a flashlight ,is the most direct way to identify active leak sources before calling a contractor.

What is the best material for roof decking ,OSB or plywood?

For dry inland climates, OSB is the industry-standard choice ,lower cost at $15–$25 per sheet with adequate performance for the life of the shingle system above it. For humid climates ,Southeast, Gulf Coast, Pacific Northwest ,plywood is the better long-term investment. It resists moisture delamination, maintains nail-holding strength through wet-dry cycles, and lasts 20–30 years versus 15–20 for OSB. The $10–$20 per sheet premium typically pays back in the first decade.

Does homeowner’s insurance cover roof decking replacement?

Coverage depends entirely on cause. Damage from a sudden, covered event ,storm, hail, falling tree, or fire ,is typically covered under standard homeowner’s policies. Gradual deterioration, age-related failure, or rot from long-term moisture intrusion is generally excluded as a maintenance issue. If a covered event caused your deck damage, photograph everything before repairs begin and file your claim before authorizing any work. Confirm coverage specifics with your insurer ,policy language on roofing sub-layers varies significantly by carrier and state.


Understanding roof decking replacement cost, typically $2 to $5 per square foot or $2,400 to $8,600 for most residential projects, helps homeowners budget accurately for necessary roof repairs or full replacements in 2026. Your roof decking replacement cost varies based on material choice (OSB versus plywood), roof size and complexity, regional labor rates, and sheathing thickness requirements.​

Recognizing warning signs like water stains, sagging roof lines, or soft spots enables early intervention that can minimize your eventual roof decking replacement cost by preventing extensive damage. For safe, code-compliant results backed by warranties, hire licensed roofing professionals to assess your roof decking condition and provide detailed roof decking replacement cost estimates for necessary repairs or replacement.​


🏠 Roofing Tips & Updates

Get free roofing advice, cost guides, and seasonal maintenance tips.

Emergency Roof Repair: Fast Solutions and Costs Guide

Emergency roof repair addresses urgent roofing damage requiring immediate professional intervention to prevent water intrusion, structural deterioration, and interior damage to your home. Common emergencies include severe storm damage with active leaks, fallen tree impacts, missing shingles exposing underlayment, and sudden failures allowing water to pour into living spaces situations demanding same-day or after-hours service to minimize property damage.

The average cost of emergency roof repair ranges from $379 to $1,755 nationally in 2025, with most homeowners paying between $300 and $1,500 depending on damage extent, repair complexity, and service timing. Emergency repairs typically cost 1.5 to 2 times more than scheduled repairs due to urgency premiums, after-hours labor rates, and rush material procurement, plus additional service fees of $100-$300 for immediate response.

Understanding when you need emergency roof repair, what temporary measures protect your home, how to find reliable 24/7 roofing contractors, and realistic cost expectations helps you respond effectively during roofing crises while avoiding unnecessary expenses or contractor scams.

emergency roof repair contractor tarping damaged roof
emergency roof repair contractor tarping damaged roof during storm

What qualifies as emergency roof repair?

Not all roof damage requires emergency response, so understanding the distinction between urgent repairs and issues that can wait for scheduled service helps you make appropriate decisions and manage costs effectively.

True roofing emergencies demanding immediate action:

  • Active water infiltration: Water actively dripping or pouring into your home through ceilings, creating immediate risk of electrical hazards, ceiling collapse, mold growth, and furnishing damage
  • Major structural compromise: Large holes from fallen trees or impacts, collapsed roof sections, or visible sagging indicating imminent failure
  • Complete shingle blow-off: Extensive shingle loss (25% or more of a roof section) exposing bare underlayment or decking to weather
  • Storm damage during ongoing weather: Damage occurring during hurricanes, severe storms, or high winds requiring immediate protection before conditions worsen
  • Fire damage: Partial roof burn-through requiring immediate tarping and securing
  • Ice dam flooding: Large ice accumulations forcing water under shingles and into attic spaces during winter storms

Roof issues that can wait for scheduled repairs:

  • Small leaks causing minor attic moisture without active interior dripping
  • Missing 3-5 shingles with intact underlayment beneath
  • Damaged flashing discovered during dry weather
  • Worn roof areas noticed during routine inspection
  • Moss, algae, or cosmetic deterioration
  • Minor hail damage not causing immediate leaks

According to This Old House emergency roof repair data, approximately 30% of homeowner-reported “emergencies” actually represent non-urgent repairs that contractors can address within 3-7 days at standard rates.

The key distinction: emergency roof repair applies when delaying service will cause significant additional property damage, safety hazards, or habitability issues.


Average emergency roof repair costs in 2025

Emergency roof repair pricing reflects both the actual repair work and premium charges for urgent, often after-hours service.

National cost ranges:

Based on 2025 industry data, homeowners pay:

  • Minimum emergency repair: $300-$500 for simple temporary tarping or minor patching
  • Typical emergency repair: $379-$1,755 for most leak repairs, shingle replacement, and flashing fixes
  • Average emergency cost: $1,147 nationally for standard emergency repairs
  • Major emergency repair: $1,500-$5,000+ for structural damage, extensive area coverage, or complex multi-point failures

Emergency premium pricing:

Emergency roof repair costs 50-100% more than identical repairs scheduled during business hours due to:

  • After-hours labor rates: Evening, weekend, and holiday service commands $75-$150 per hour versus $45-$75 standard rates
  • Emergency service fees: Additional $100-$300 flat charge for immediate response regardless of repair size
  • Rush material procurement: Contractors charge 15-25% premiums for same-day material delivery or after-hours supplier fees
  • Mobilization costs: Multiple trips (emergency assessment, temporary fix, permanent repair) increase overall project expense

Cost comparison: emergency vs. scheduled repairs:

Repair TypeScheduled CostEmergency CostPremium
Temporary tarp installation$150-$300$200-$50033-67%
Minor shingle replacement (5-10 shingles)$200-$500$300-$80050-60%
Flashing and leak repair$250-$600$400-$1,00060-67%
Structural framing repairs$800-$2,000$1,200-$3,000+50-100%

These emergency roof repair premiums compensate contractors for disrupting scheduled work, responding outside normal hours, and prioritizing your crisis above other commitments.

Breakdown by repair type:

Specific emergency roof repair costs vary by the nature of the damage:

  • Leak patching: $360-$1,550 depending on location and extent
  • Missing shingle replacement: $700-$1,500 for localized areas (10-20 shingles)
  • Damaged flashing repair: $400-$1,000 for chimney, valley, or skylight flashing
  • Ice dam removal and repair: $500-$700 for dam removal plus $300-$800 for resulting leak fixes
  • Hole patching (small to medium): $200-$1,000 depending on size and materials
  • Vent damage repair: $75-$250 per vent boot or exhaust vent
  • Ridge cap emergency repair: $200-$750 for damaged ridge sections
  • Hail damage emergency response: $700-$4,000 depending on affected area size

According to Angi’s 2025 emergency repair data, most homeowners spend $950-$1,400 for typical emergency roof repair addressing storm damage with temporary protection followed by permanent fixes.

For comprehensive cost information, visit the National Roofing Contractors Association cost guides and local contractor pricing databases.

Review our complete roof repair cost breakdown for scheduled repair pricing comparisons.

emergency roof repair contractor tarping damaged roof
emergency roof repair cost breakdown chart showing service fees and labor

When emergency roof repair professionals cannot arrive immediately, or when damage occurs outside business hours, temporary measures prevent additional damage until permanent repairs are completed.

Emergency tarping: primary temporary solution

Roof tarping provides the most effective temporary protection for emergency situations:

Proper tarping technique:

  1. Safety first: Only attempt roof access in safe conditions; avoid working during storms, on steep pitches, or when injured
  2. Tarp sizing: Use tarps extending 3-4 feet beyond damaged area on all sides, reaching from ridge to eaves when possible
  3. Securing method: Sandwich tarp between 2×4 boards and secure boards with screws (not nails that can back out) into solid roof decking
  4. Avoid penetrations: Place boards parallel to roof slope, securing at ends and every 18-24 inches to prevent wind uplift without excessive holes
  5. Weight distribution: Use sandbags or weighted boards on flat portions; never rely solely on weights on pitched roofs

Professional tarping costs: $200-$500 for contractor-installed temporary protection that may last several weeks until permanent emergency roof repair occurs.

Interior water damage mitigation:

When leaks are actively occurring before emergency roof repair:

  • Contain water: Place buckets, tarps, or plastic sheeting under leak points catching dripping water
  • Puncture ceiling bulges: If water is pooling behind drywall creating bulges, carefully puncture the center with a screwdriver allowing controlled drainage into a bucket (prevents spontaneous collapse)
  • Move furniture and valuables: Relocate items from leak zones, cover remaining furnishings with plastic sheeting
  • Document damage: Photograph all damage thoroughly for insurance claims before cleanup
  • Extract standing water: Use wet/dry vacuums removing pooled water from floors and carpets
  • Improve ventilation: Open windows, run fans, and use dehumidifiers preventing mold growth

Quick leak patching for accessible damage:

Minor emergency roof repair for small, accessible leaks can use temporary sealants:

  • Roof cement/tar: Apply thick coats around damaged areas, flashing gaps, or exposed nail heads
  • Roofing tape: Self-adhesive waterproof tape temporarily seals small tears or gaps in underlayment
  • Spray sealants: Aerosol roof sealers provide quick, temporary patches for pinhole leaks
  • Caulk tubes: Silicone or polyurethane caulk fills small gaps in flashing or around penetrations

Important: These temporary measures are NOT permanent solutions—professional emergency roof repair must follow within days to weeks.

When NOT to attempt temporary repairs:

Avoid DIY emergency measures when:

  • Roof pitch exceeds 6:12 (too steep for safe access without equipment)
  • Weather conditions are dangerous (active storms, high winds, wet surfaces)
  • Damage is extensive or structural
  • Multiple leak points exist across large areas
  • You lack experience working at heights
  • Darkness or poor visibility exists

In these situations, focus on interior damage mitigation and call professional emergency roof repair services immediately.


Finding reliable 24/7 emergency roof repair services

Locating trustworthy emergency roof repair contractors during crisis situations requires quick decision-making, but avoiding scams and price gouging remains essential.

Pre-emergency preparation (before you need it):

Smart homeowners identify emergency roof repair providers before damage occurs:

  1. Research local contractors: Identify 2-3 reputable local roofing companies offering 24/7 emergency services
  2. Verify credentials: Confirm licenses, insurance (general liability $1M+, workers compensation), and Better Business Bureau ratings
  3. Save contact information: Store emergency numbers in your phone and with home documents
  4. Review emergency policies: Ask about after-hours availability, response times, and emergency service fees
  5. Check insurance relationships: Some insurers maintain preferred contractor lists for emergency situations

During an emergency: vetting contractors quickly:

When you need immediate emergency roof repair:

Green flags (good signs):

  • Established local company with physical address and office
  • Verifiable license and insurance certificates
  • Clear pricing structure explaining emergency fees upfront
  • Willingness to work with your insurance company
  • References from recent emergency repairs
  • Written estimates even for emergency work
  • Professional appearance and branded vehicles/uniforms

Red flags (avoid these contractors):

  • “Storm chasers” soliciting door-to-door after weather events
  • Demand for full payment upfront before work begins
  • Pressure tactics (“I can only offer this price today”)
  • No physical business address, only cell phone contact
  • Cannot provide license or insurance verification
  • Extremely low bids (50%+ below others) suggesting inferior work
  • Offer to “handle your insurance claim” and sign claim proceeds over to them

Questions to ask emergency contractors:

Before authorizing emergency roof repair:

  1. “What is your emergency service fee, and is it separate from repair costs?”
  2. “Can you provide a temporary fix today and detailed estimate for permanent repairs?”
  3. “Do you offer any warranty on emergency repairs?”
  4. “Will you document the damage with photos for my insurance claim?”
  5. “What is your typical response time for emergencies?”
  6. “Are you licensed and insured; may I see current certificates?”
  7. “Can you provide references from recent emergency repair customers?”

Insurance claim coordination:

Most emergency roof repair costs are insurance-covered when caused by sudden, accidental events:

  • Contact your insurer immediately: Report damage within 24-48 hours of discovery
  • Document everything: Photograph damage from multiple angles before any temporary repairs
  • Save all receipts: Keep invoices for emergency repairs, tarping, water extraction, and temporary lodging if needed
  • Understand coverage: Storm damage is typically covered; wear-and-tear is not
  • Deductible applies: Expect to pay your deductible ($500-$2,500) before insurance coverage begins
  • Prevent further damage: Insurance requires reasonable steps to prevent additional damage, making temporary emergency roof repair necessary

Review our guide to working with roofing contractors for detailed vetting strategies.

24/7 emergency roof repair service truck arriving at damage


Common emergency roof repair scenarios and solutions

Emergency Roof Repair Complete Guide to Fast Solutions and Costs

Different types of damage require specific emergency roof repair approaches and cost different amounts.

Storm damage with missing shingles:

High winds frequently blow off shingles, creating immediate leak risks:

Emergency response:

  • Tarp exposed areas if shingle loss exceeds 10% of a roof section
  • Replace missing shingles with matching materials ($300-$800 for 10-20 shingles)
  • Inspect surrounding shingles for lifting or seal failure
  • Document extent for insurance claims with photos

Typical emergency roof repair cost: $400-$1,200 including service fees.

Fallen tree or debris impact:

Large impacts create holes or structural damage requiring immediate attention:

Emergency response:

  • Call professionals immediately—structural damage is dangerous
  • Tarp from interior if roof access is unsafe
  • Check for electrical hazards before entering damaged areas
  • Secure perimeter preventing additional collapse

Typical emergency roof repair cost: $1,200-$5,000+ depending on structural damage extent and tree removal needs.

Ice dam formation and leaks:

Ice accumulation forces water under shingles in cold climates:

Emergency response:

  • Remove snow from roof edges using roof rake (work from ground)
  • Create drainage channels through ice dams using warm water (not hammers/chisels that damage shingles)
  • Place fans in attic spaces melting dams from interior
  • Improve attic insulation and ventilation preventing future dams

Typical emergency roof repair cost: $500-$700 for ice dam removal plus $300-$800 for resulting leak repairs.

Flashing failures causing active leaks:

Chimney, skylight, and valley flashing commonly fail during storms:

Emergency response:

  • Apply temporary sealant around flashing gaps
  • Install tarp covering flashing area if leaks persist
  • Schedule permanent flashing replacement within days

Typical emergency roof repair cost: $400-$1,000 for flashing repair and sealing.

Hail damage with immediate leaks:

Severe hail creates multiple penetration points across large roof areas:

Emergency response:

  • Document damage with photos before any repairs
  • Tarp most severely damaged sections
  • File insurance claim immediately (hail damage is covered)
  • Expect adjuster inspection before permanent repairs

Typical emergency roof repair cost: $700-$4,000 depending on affected area; often leads to full insurance-funded replacement.

Flat roof membrane failures:

Punctures or seam separations in flat roof membranes cause immediate pooling leaks:

Emergency response:

  • Patch small holes with compatible membrane material and adhesive
  • Remove standing water with wet/dry vacuum or pump
  • Apply emergency coating over damaged area
  • Schedule professional membrane repair or replacement

Typical emergency roof repair cost: $350-$2,200 for flat roof emergency repairs.


Emergency roof repair vs. full replacement decision

Sometimes damage is extensive enough that emergency roof repair isn’t the most cost-effective solution.

Repair if:

  • Roof is under 15 years old with remaining service life
  • Damage is localized to specific area (less than 25% of total roof)
  • Underlying structure and decking are sound
  • Remaining sections show normal wear for age
  • Emergency repair cost is under 30% of replacement cost
  • No history of repeated leak problems in other areas

Replace if:

  • Roof is over 20 years old approaching end of expected lifespan
  • Damage affects 30%+ of roof area
  • Multiple leak points exist across different sections
  • Recurring emergency repairs have occurred over past 2-3 years
  • Water stains, sagging, or structural issues are visible
  • Insurance is covering replacement due to covered peril damage
  • Emergency repair cost exceeds 40-50% of replacement cost

Cost comparison:

  • Emergency roof repair: $300-$5,000 for most scenarios
  • Full roof replacement: $5,900-$20,000+ for typical residential roofs

When emergency damage is severe and the roof is old, insurance adjusters often approve full replacement rather than temporary fixes, making replacement the better economic choice.


Preventing future roofing emergencies

While some emergency roof repair situations are unavoidable, regular maintenance dramatically reduces emergency frequency.

Annual inspection and maintenance:

Professional roof inspections cost $75-$300 but identify minor issues before they become emergencies:

  • Schedule annual inspections in spring or fall
  • Inspect after major storms for damage
  • Address minor repairs promptly ($150-$700 range)
  • Clean gutters preventing water backup
  • Remove debris and overhanging branches

Off-season repair scheduling:

Planning repairs during contractor slow periods reduces costs 10-20% and prevents emergency escalation:

  • Address known issues in fall before winter weather
  • Replace aging roofs proactively before failure
  • Schedule repairs during dry weather when quality work is possible

Warning signs requiring attention:

Call for scheduled (non-emergency) roof repair when you notice:

  • Missing or damaged shingles
  • Curled, cracked, or brittle shingles
  • Granule loss creating bare spots
  • Sagging roof deck or ridge line
  • Interior water stains or attic moisture
  • Damaged or rusted flashing
  • Daylight visible through roof boards in attic
  • Excessive moss or algae growth

Addressing these issues proactively costs $250-$1,500 for typical repairs—far less than $800-$3,000 emergency roof repair when problems escalate.

Explore our preventive roof maintenance guide for year-round care strategies.


Frequently asked questions about emergency roof repair

How much does emergency roof repair cost?
Emergency roof repair costs between $379 and $1,755 nationally in 2025, with most homeowners paying $300-$1,500 depending on damage severity and repair complexity. Emergency repairs cost 50-100% more than identical scheduled repairs due to after-hours labor rates, urgency premiums, and additional service fees of $100-$300 for immediate response.

What should I do immediately when I discover a roof leak?
First, protect your interior by placing buckets under active drips, moving furniture away from leak zones, and covering valuables with plastic sheeting. Second, attempt to locate the leak source from inside the attic if safely accessible. Third, contact your insurance company and emergency roof repair contractor immediately. If safe to do so, cover exterior damage with a tarp to prevent additional water intrusion until professionals arrive.

Does homeowners insurance cover emergency roof repair?
Yes, homeowners insurance typically covers emergency roof repair when damage results from sudden, accidental events like storms, hail, falling trees, or fire. However, policies exclude damage from gradual wear and tear, lack of maintenance, or aging. Most claims require you to pay your deductible ($500-$2,500) first, then insurance covers remaining costs up to policy limits.

Can I repair my roof myself in an emergency?
You can safely perform temporary measures like interior water collection, tarping from the ground using extension poles, or applying emergency sealants to accessible areas on low-pitch roofs. However, avoid climbing on roofs during storms, working on steep pitches without proper equipment, or attempting structural repairs. Professional emergency roof repair is essential for safety and ensuring permanent, warrantied fixes.

How quickly can emergency roofers respond?
Reputable emergency roof repair services typically respond within 1-4 hours for true emergencies during business hours, or 2-6 hours for after-hours calls. Response times increase during major storm events when contractors are overwhelmed with calls. Some companies offer priority service agreements to existing customers guaranteeing faster emergency response.

Is tarping a roof enough to prevent water damage?
Properly installed tarps effectively prevent water intrusion for 2-4 weeks in moderate weather, giving time to schedule permanent emergency roof repair. However, tarps are temporary solutions only—high winds can dislodge poorly secured tarps, and extended tarp coverage (months) degrades materials and risks additional damage. Schedule permanent repairs within 1-2 weeks of tarping when possible.

Should I get multiple estimates for emergency roof repair?
In true emergencies with active leaks, prioritize immediate damage control over comparison shopping—one reputable contractor providing quick temporary protection is better than waiting for multiple bids while water damages your home. However, for permanent repairs following temporary fixes, obtaining 2-3 estimates ensures fair pricing and identifies the best contractor for final work.


Taking swift action during roofing emergencies

Emergency roof repair requires quick decision-making to minimize property damage while avoiding contractor scams and unnecessary expenses. True roofing emergencies—characterized by active water infiltration, structural compromise, or extensive storm damage—demand immediate professional response to prevent escalating interior damage that can cost thousands beyond the roof repair itself.

Understanding realistic emergency roof repair costs ($379-$1,755 typical range with 50-100% premiums over scheduled repairs), implementing effective temporary protection measures like proper tarping, and identifying reputable 24/7 contractors before emergencies occur positions homeowners to respond confidently when roofing disasters strike.

🏠 Roofing Tips & Updates

Get free roofing advice, cost guides, and seasonal maintenance tips.

How to Book a Professional Roof Inspection: Complete Guide

Booking a professional roof inspection service protects your home investment and prevents costly emergency repairs. A thorough inspection identifies problems early, extends roof lifespan, and ensures your roofing system performs optimally through all weather conditions. Understanding the booking process helps you select qualified professionals, schedule efficiently, and maximize the value of your inspection.

This guide walks through every step: researching contractors, evaluating credentials, scheduling appointments, preparing your property, and understanding what inspectors examine. Whether you need a routine maintenance check, pre-purchase evaluation, or post-storm assessment, following these proven steps ensures you hire the right professional for comprehensive service.


Why professional roof inspections matter

Before learning how to book a professional roof inspection service, understand why regular inspections are essential. Experts recommend scheduling inspections every 2-3 years for routine maintenance, even without visible problems. This proactive approach catches minor issues—loose shingles, failing flashing, deteriorating sealants—before they escalate into major damage requiring expensive repairs or full replacement.

Professional inspectors bring specialized knowledge and equipment that homeowners lack. They recognize subtle warning signs of underlying structural problems, ventilation issues, and water infiltration that aren’t obvious from ground level. Their trained eyes detect problems invisible to untrained observers, and comprehensive reports document roof condition for insurance claims, warranty coverage, or real estate transactions.

Timing matters significantly: schedule inspections after severe weather events, before listing your home for sale, after purchasing a property, when planning to re-roof, or if you notice interior water stains, missing shingles, or sagging areas. Strategic timing maximizes inspection value and prevents problems from worsening.


Step 1: Research qualified roofing inspection companies

The first step in how to book a professional roof inspection service is identifying reputable contractors with proper credentials and experience. Not all roofing companies provide equal quality, and choosing poorly can result in missed problems, incomplete reports, or even roof damage during inspection.

The first step in how to book a professional roof inspection service

Essential qualifications to verify:

Where to find candidates:

Ask for recommendations from friends, family, neighbors, or your local home builders association—personal referrals often lead to reliable contractors. Online research through Google searches, Angie’s List, HomeAdvisor, or roofing manufacturer directories helps identify licensed professionals serving your area.

Compile a list of 3-5 qualified companies before moving to the next step. This comparison shopping ensures competitive pricing and helps you recognize if one company’s estimate differs dramatically from others.

![professional roof inspector examining shingles during inspection](image quotes

Once you’ve identified qualified candidates, contact each company to discuss your needs and request inspection quotes. Most reputable roofing companies offer free initial inspections as part of their customer service, though comprehensive written reports may carry fees ranging from $75-$300 depending on roof size and complexity.

Information to provide when contacting companies:

Questions to ask the roofing company:

Taking notes during these conversations helps you compare offerings and identify which company provides the most comprehensive service for your budget. Beware of companies that pressure you to schedule immediately or insist on same-day repairs without proper documentation—reputable professionals provide detailed assessments before recommending solutions.

For tips on evaluating contractor quotes, visit our roofing estimate comparison guide.


Step 3: Schedule your inspection appointment

After selecting your preferred roofing company, the next step in how to book a professional roof inspection service is scheduling a convenient appointment time. Most inspections take 45 minutes to 2 hours depending on roof size, complexity, and accessibility.

the next step in how to book a professional roof inspection service is scheduling a convenient appointment time

Scheduling considerations:

Information the company will need to finalize scheduling:

Professional companies send confirmation emails detailing the appointment date, time, inspector name, what to expect, and how to prepare. Review this information carefully and add the appointment to your calendar with reminders.​


Step 4: Prepare your property for the inspection

Proper preparation ensures inspectors can conduct thorough examinations efficiently and safely. While professional roof inspection service providers handle most logistics, a few simple preparations maximize inspection effectiveness.

professional roof inspection service providers handle most logistics, a few simple preparations ma

Exterior preparation:

Interior preparation (for attic inspections):

Documentation to gather:

Collect any existing roof documentation: previous inspection reports, warranty information, contractor receipts from past repairs or installation, insurance claims related to roof damage, and age/specifications if you have original building records. This historical context helps inspectors understand your roof’s service history and identify patterns.

![inspector documenting roof condition with tablet


Step 5: Understand what inspectors examine

Knowing what professional roof inspection service includes helps you ask informed questions and understand the value you’re receiving. Comprehensive inspections follow systematic checklists covering both exterior and interior components.

Exterior roof inspection elements:

Interior attic inspection elements:

Professional inspectors document findings with photographs, measurements, and detailed notes that become part of your written report.

Learn about specific problem signs in our common roof damage identification guide.


Step 6: Review the inspection report and ask questions

After completing the physical examination, professional roof inspection service providers compile findings into written reports—typically delivered within 24-48 hours of the inspection. This documentation is crucial for planning repairs, filing insurance claims, or negotiating real estate transactions.

What comprehensive reports include:

Questions to ask when reviewing the report:

Don’t hesitate to request clarification on technical terms or ask for additional photos of specific areas. Reputable inspectors welcome questions and want you to fully understand your roof’s condition.

![detailed roof inspection report with photos and recommendations

For guidance on interpreting technical terminology, see our roofing terms glossary.


Step 7: Take action based on inspection findings

The final step after booking and completing a professional roof inspection service is acting on the recommendations. Inspection reports only provide value when you use the information to protect and maintain your roofing investment.

Immediate priorities:

Address any safety hazards or issues causing active leaks immediately—water infiltration damages roof decking, insulation, ceilings, and wall structures rapidly. Emergency repairs prevent exponential damage escalation that turns minor problems into major expenses.

Planning repairs:

For non-emergency repairs, obtain 2-3 competitive bids from licensed roofing contractors, providing each with a copy of your inspection report so they quote based on the same scope of work. This ensures you compare equivalent repairs rather than different interpretations of what’s needed.

Maintenance scheduling:

Implement recommended maintenance actions like gutter cleaning, debris removal, or minor caulking that prevent problems from developing. Schedule these tasks seasonally or annually as suggested in the report.

Documentation and monitoring:

File the inspection report with your home records for future reference, warranty claims, or real estate transactions. If the report recommends monitoring certain areas, schedule follow-up inspections at the suggested intervals to track problem progression.

Insurance and warranty considerations:

Submit inspection reports to insurance companies if storm damage is documented—many policies cover repairs for covered perils. Check if identified problems fall under manufacturer or contractor warranties that may cover repair costs.

For help planning repair priorities and budgets, visit our roof repair cost estimator.


Cost factors for professional roof inspections

Understanding pricing helps you budget appropriately when learning how to book a professional roof inspection service. Costs vary based on several factors, though many companies offer free basic inspections as customer service.

Typical inspection pricing:

Service TypeCost RangeWhat’s Included
Basic visual inspectionFree-$100Exterior examination, verbal findings, no formal report
Standard inspection with report$150-$300Exterior and interior inspection, written report with photos 
Comprehensive pre-purchase$300-$500Detailed documentation, measurements, estimated lifespan, repair costs
Commercial roof inspection$500-$1,500+Large format roofs, multiple buildings, detailed documentation 
Drone inspection (add-on)$75-$200Aerial photography, hard-to-access areas, comprehensive documentation

Factors affecting cost:

Many roofing companies waive inspection fees if you hire them for recommended repairs, though independent inspectors charging fees provide unbiased assessments without sales pressure.


Red flags when booking roof inspection services

Knowing warning signs of unreliable contractors protects you from poor service or scams. Watch for these red flags when learning how to book a professional roof inspection service:

Warning signs of unprofessional companies:

Questions that should concern you:

If a contractor suggests you need immediate total roof replacement without showing you specific problems or damage documentation, seek second opinions. Honest inspectors identify issues clearly and explain why recommendations are necessary, never using scare tactics or exaggerating problems to generate sales.


Frequently Asked Questions

How often should I book a professional roof inspection service?
Schedule routine inspections every 2-3 years for maintenance, plus additional inspections after severe weather events, before purchasing or selling a home, or when you notice problems like leaks or missing shingles.

Do I need to be home during the roof inspection?
While not required for the entire inspection, being present at the start and end allows you to point out concerns and ask questions about findings. Most inspections take 45 minutes to 2 hours.

What’s the difference between free and paid roof inspections?
Free inspections typically provide verbal findings without detailed written reports and may come with sales pressure. Paid inspections ($150-$300) deliver comprehensive written reports with photos, ideal for unbiased assessments or insurance/real estate purposes.

Can roof inspectors identify all problems?
Professional inspectors find most visible issues but cannot see beneath intact shingles or identify problems that only appear during rain events. They assess current condition and likely concerns based on experience.

How quickly can I schedule a roof inspection?
Routine inspections typically schedule within 1-2 weeks; emergency post-storm assessments may be available within 24-48 hours depending on contractor availability and local demand.


Taking the next step with confidence

Knowing how to book a professional roof inspection service empowers you to protect your home proactively and make informed decisions about roof maintenance and repairs. The seven-step process—researching contractors, requesting quotes, scheduling efficiently, preparing properly, understanding inspection scope, reviewing reports thoroughly, and taking appropriate action—ensures you maximize inspection value while avoiding common pitfalls.

Regular professional inspections extend roof lifespan, prevent expensive emergency repairs, and provide documentation supporting insurance claims or real estate transactions. Don’t wait for obvious problems to appear—proactive assessment catches issues early when repairs are simpler and less costly.

Ready to schedule your inspection? Use our roofing contractor directory to find certified professionals in your area, or download our free roof inspection preparation checklist to ensure you’re ready when inspectors arrive.

🏠 Roofing Tips & Updates

Get free roofing advice, cost guides, and seasonal maintenance tips.

Storm Damage Roof Repair: Costs, DIY Tips & Contractors

Storm damage roof repair requires immediate action to prevent secondary water damage that can cost thousands more than the initial storm impact. Common storm damage includes missing or lifted shingles from wind ($500–$2,500 repair), hail dents and granule loss requiring partial replacement ($2,000–$8,000), and fallen tree limbs puncturing roof decking ($3,000–$15,000 for structural repairs). Most homeowners insurance policies cover sudden storm damage under dwelling coverage, with the insurance company paying for repairs minus your deductible—but claims must be filed promptly with thorough photo documentation and professional damage assessments to avoid denials.

This comprehensive guide covers identifying storm damage types, emergency temporary repairs, the insurance claim process, repair costs, contractor selection, and prevention strategies to protect your roof from future storms.


Types of Storm Damage to Roofs

1. Wind Damage

Common Issues:

Signs to Look For:

Repair Costs: $500–$2,500 for localized shingle replacement; $5,000–$12,000 for extensive damage.


2. Hail Damage

Common Issues:

Signs to Look For:

Repair Costs: $2,000–$8,000 for partial roof replacement; $8,000–$25,000 for full replacement.

Note: Hail damage often isn’t visible from ground level—professional inspection required.


3. Fallen Trees/Debris

Common Issues:

Immediate Actions:

Repair Costs: $3,000–$15,000+ depending on structural damage extent.


4. Ice Dam & Snow Load Damage

Common Issues:

Repair Costs: $1,500–$5,000 for ice dam repairs; $5,000–$20,000 for structural repairs from snow overload.


Immediate Actions After Storm Damage

Step 1: Safety First

Do Not:

Safe Assessment:


Step 2: Document All Damage

Photo/Video Evidence (Critical for Insurance):

Written Documentation:


Step 3: Prevent Further Damage (Emergency Repairs)

Temporary Protection:

Professional Emergency Services:

Important: Insurance covers “reasonable steps” to prevent further damage—keep receipts for emergency services.


Step 4: Contact Insurance Company

When to Call:

What to Report:

What Insurance Will Do:


The Insurance Claim Process

Understanding Coverage

What’s Typically Covered:

What’s NOT Covered:


Working with Insurance Adjusters

Adjuster Inspection:

Adjuster’s Report:


Getting Contractor Estimates

Why Multiple Estimates Help:

Request 2–3 Estimates Including:


Negotiating Settlement

If Adjuster’s Estimate Is Too Low:

  1. Hire public adjuster (works for you, not insurance company)—typically 10–15% of settlement
  2. Provide contractor estimates showing higher costs
  3. Request supplement inspection if additional damage found during repairs
  4. Dispute through insurance company’s appeals process

Depreciation vs. Replacement Cost:


Storm Damage Roof Repair Costs (2025)

Repair Cost Ranges

Damage TypeRepair CostReplacement Cost
Minor wind damage (few shingles)$500–$1,500N/A
Moderate wind damage (section replacement)$1,500–$5,000$8,000–$15,000
Hail damage (partial roof)$2,000–$8,000$10,000–$25,000
Fallen tree (structural damage)$3,000–$15,000+$12,000–$35,000+
Ice dam damage$1,500–$5,000N/A
Emergency tarping$300–$800N/A


Insurance Deductibles

Typical Deductibles:

Example: $250,000 home with 2% wind deductible = $5,000 out-of-pocket before insurance pays.


Choosing Storm Damage Repair Contractors

Red Flags: Avoid Storm Chasers

Warning Signs:

  1. Door-to-door solicitation immediately after storm
  2. Out-of-state contractors with no local presence
  3. Pressure tactics (“Sign today or we leave town”)
  4. Offers to waive deductibles (insurance fraud)
  5. Requests for full payment upfront
  6. No physical address or temporary office setup

Why Storm Chasers Are Dangerous:


What to Look For

Qualified Storm Damage Contractors:

Insurance Assistance:


Preventing Future Storm Damage

Pre-Storm Preparation

Annual Roof Maintenance:

Property Preparation:


Roof Upgrades for Storm Resistance

Impact-Resistant Shingles:

Hurricane Straps/Clips:

Metal Roofing:


FAQ

Does homeowners insurance cover storm damage roof repair?
Yes, most policies cover sudden storm damage (wind, hail, fallen trees) under dwelling coverage, minus your deductible. Normal wear and tear or neglect are not covered.

How much does storm damage roof repair cost?
$500–$1,500 for minor repairs; $2,000–$8,000 for moderate damage; $10,000–$25,000+ for full replacement after severe storms. Insurance typically covers costs minus deductible.

How long do I have to file an insurance claim for roof damage?
File within 24–48 hours of discovering damage. Most policies require “prompt notification,” though specific deadlines vary (30 days to 1 year). Check your policy.

Can I choose my own roofing contractor for insurance repairs?
Yes. You are not required to use insurance company’s preferred contractors. Get multiple estimates and choose based on qualifications, not just price.

What should I do immediately after a storm damages my roof?
Document damage with photos/video, prevent further damage with emergency tarps, contact your insurance company within 24–48 hours, and get professional damage assessment.

Will insurance pay for a full roof replacement if only part is damaged?
Only if damage is extensive enough that partial repairs don’t make sense, or if matching materials are unavailable. Adjusters determine repair vs. replacement necessity.

How do I identify storm damage vs. normal wear?
Storm damage is sudden (dents, missing shingles, broken tiles). Normal wear is gradual (granule loss, cracking, curling over years). Professional inspection differentiates.


Conclusion

Storm damage roof repair demands immediate documentation, emergency protection, and prompt insurance notification to maximize coverage and prevent secondary water damage. Wind damage repairs cost $500–$5,000 for localized issues, while hail damage averages $2,000–$8,000 for partial replacement and $10,000–$25,000 for full roofs. Most homeowners insurance covers sudden storm damage under dwelling coverage minus deductibles, but claims require thorough photo evidence, professional damage assessments, and detailed contractor estimates. Avoid storm-chasing contractors offering immediate repairs and deductible waivers—work with licensed local professionals experienced in insurance coordination. Prevent future damage through annual roof inspections, tree trimming, impact-resistant shingles, and proper gutter maintenance.

🏠 Roofing Tips & Updates

Get free roofing advice, cost guides, and seasonal maintenance tips.

Repair Commercial Roof: Costs & Methods (2026)

Repairing commercial roofs requires prompt action to prevent minor issues from escalating into costly structural damage. Common repairs include membrane patches ($500–$1,500), flashing replacements ($800–$2,500), and ponding water solutions ($1,000–$5,000), while major restoration projects can cost $15,000–$50,000 depending on building size and damage extent. Commercial roofs—whether TPO, EPDM, PVC, or built-up systems—demand specialized knowledge of flat roof drainage, seam integrity, and membrane compatibility that differs significantly from residential steep-slope repairs.

This comprehensive guide covers common commercial roof problems, repair methods by roof type, cost breakdowns, preventive maintenance strategies, and decision criteria for repair versus replacement.


Common Commercial Roof Problems

Common Commercial Roof Problems , Costs and guide
Common Commercial Roof Problems , repair guide 2025

1. Membrane Punctures & Tears

Causes: Foot traffic, HVAC equipment vibration, falling debris, storm damage, UV degradation.

Signs: Visible holes, tears, or cracks in roofing membrane; interior water leaks; wet insulation.

Repair Cost: $500–$1,500 for small patches; $2,000–$8,000 for extensive damage.


2. Ponding Water (Standing Water)

Definition: Water remaining on roof >48 hours after rainfall.

Causes: Inadequate drainage slope, clogged drains/scuppers, roof sagging, settlement.

Risks: Membrane deterioration, increased leak potential, structural overload, shortened roof lifespan.

Repair Cost: $1,000–$5,000 for drain improvements; $5,000–$20,000 for slope correction.


3. Flashing Failures

Common Locations: Parapet walls, roof penetrations (HVAC units, vents, skylights), expansion joints, edge terminations.

Causes: Sealant degradation, metal corrosion, improper installation, thermal cycling.

Signs: Water stains on interior walls, rust on metal flashing, gaps between flashing and membrane.

Repair Cost: $800–$2,500 per location depending on complexity.


4. Seam Separation

Description: Heat-welded or adhesive seams pulling apart (common in TPO, EPDM, PVC roofs).

Causes: Inadequate installation, thermal expansion/contraction, wind uplift, age-related adhesive failure.

Signs: Visible gaps at seam lines, billowing membrane, water infiltration at seams.

Repair Cost: $600–$2,000 per seam depending on length and accessibility.


5. Blistering & Bubbling

Causes: Trapped moisture beneath membrane, poor adhesion, insufficient ventilation.

Signs: Raised bubbles or blisters on membrane surface, soft spots when walked on.

Repair Cost: $300–$800 per blister (cut, dry, patch); $5,000+ for widespread issues.


6. Clogged Drains & Gutters

Consequences: Ponding water, ice dam formation, overflow damage to walls and landscaping.

Causes: Leaf accumulation, debris buildup, bird nests, sediment from roofing materials.

Repair Cost: $200–$800 for drain cleaning/unclogging; $1,500–$4,000 for drain replacement.


Repair Methods by Commercial Roof Type

TPO (Thermoplastic Polyolefin) Roof Repairs

Common Issues: Seam failures, punctures, shrinkage.

Repair Techniques:

Materials Needed: Matching TPO membrane patches, cleaner/primer, hot-air welder, pressure roller.

Cost: $500–$2,000 for typical repairs.


EPDM (Rubber) Roof Repairs

Common Issues: Seam failures (adhesive failure), punctures, shrinkage.

Repair Techniques:

Materials Needed: EPDM patches, primer, bonding adhesive, EPDM seam tape, rollers.

Cost: $400–$1,800 for repairs.


PVC Roof Repairs

Common Issues: Seam failures, chemical degradation (grease exposure), punctures.

Repair Techniques:

Materials Needed: PVC membrane patches, cleaner, hot-air welder or chemical adhesive.

Cost: $600–$2,500 for repairs.


Built-Up Roof (BUR) Repairs

Common Issues: Cracking, blistering, gravel displacement, felt layer separation.

Repair Techniques:

Materials Needed: Roofing felt, hot asphalt or cold adhesive, gravel, roofing cement.

Cost: $800–$3,000 for repairs.


Modified Bitumen Roof Repairs

Common Issues: Seam failures, surface cracking, granule loss.

Repair Techniques:

Materials Needed: Modified bitumen sheets, torch or adhesive, primer, roller.

Cost: $500–$2,200 for repairs.


Commercial Roof Repair Costs (2025)

By Repair Type:

Repair TypeCost RangeTimeframe
Small Membrane Patch (<10 SF)$500–$1,5002–4 hours
Large Membrane Patch (>50 SF)$2,000–$8,0001–2 days
Seam Repair (per seam)$600–$2,0003–6 hours
Flashing Replacement (per location)$800–$2,5004–8 hours
Drain Cleaning/Repair$200–$1,5001–3 hours
Ponding Water Solution$1,000–$5,0001–3 days
Blister Repair (per blister)$300–$8002–4 hours
Roof Coating Application$2–$5 per SF2–5 days
Emergency Tarping$500–$2,0002–6 hours


>>> ROOFING COSTS CALCULATOR <<<


By Roof Size:


Repair vs. Replacement Decision Matrix

Repair When:

Replace When:

Example: If replacement costs $80,000 and repairs total $40,000 for a 15-year-old roof, replacement is better long-term investment.


Preventive Maintenance to Avoid Repairs

Monthly Inspections (In-House)

Visual Checks:

Documentation: Photograph issues with date/location stamps; track patterns over time.


Quarterly Professional Inspections

What Pros Check:

Cost: $200–$500 per inspection (often included in maintenance contracts).


Seasonal Maintenance Tasks

Spring:

Summer:

Fall:

Winter:


Maintenance Contracts

Typical Services:

Cost: $1,500–$5,000 annually depending on roof size and contract scope.

ROI: Preventive maintenance extends roof life 30–50%, saving tens of thousands in premature replacement costs.


Emergency Roof Repair Procedures

Immediate Actions When Leak Occurs:

  1. Contain Interior Damage: Place buckets, tarps, move equipment/inventory
  2. Document Damage: Photograph for insurance claims
  3. Contact Emergency Roofer: Available 24/7 for commercial facilities
  4. Temporary Tarping: Professional-grade tarps secured to prevent further water intrusion ($500–$2,000)
  5. Schedule Permanent Repair: ASAP to prevent mold, structural damage

Emergency Service Costs: +50–100% premium for after-hours, weekend, or immediate response.


How to Choose a Commercial Roofing Contractor

Verification Checklist:

Red Flags:


FAQ

How much does it cost to repair a commercial roof?
Typical repairs range from $500–$5,000 for localized issues, with major restorations costing $10,000–$50,000 depending on building size and damage extent.

Can commercial roofs be repaired or must they be replaced?
Most commercial roofs can be repaired if damage is localized and the roof is <15 years old. Replacement is better when repairs exceed 30–50% of replacement cost.

How long do commercial roof repairs last?
Properly executed repairs last 5–15 years depending on membrane type, repair quality, and maintenance. Coatings can extend life 10–20 years.

What is the most common commercial roof problem?
Ponding water due to inadequate drainage accounts for 40% of commercial roof issues, followed by flashing failures (30%) and membrane punctures (20%).

How often should commercial roofs be inspected?
Quarterly professional inspections (4× per year) plus monthly in-house visual checks. After major storms, inspect immediately.

Do commercial roof repairs require permits?
Minor repairs (<100 SF) typically don’t require permits. Major restorations, structural work, or >$5,000 projects often do—check local codes.

Can I repair a commercial roof myself?
Small temporary repairs (tarping, minor patches) are feasible for facility managers. Professional repairs are recommended for permanent solutions, seam work, and warranty compliance.


Conclusion

Repairing commercial roofs promptly prevents minor issues from becoming catastrophic failures that disrupt business operations and require expensive replacements. Common repairs—membrane patches ($500–$1,500), seam re-welding ($600–$2,000), and flashing replacements ($800–$2,500)—are cost-effective when addressed early through quarterly inspections and preventive maintenance. Choose repairs over replacement when roofs are <15 years old with localized damage, but replace when widespread deterioration affects >40% of the roof area. Partner with manufacturer-certified contractors, maintain detailed inspection records, and invest in preventive maintenance contracts that extend roof life 30–50% while avoiding emergency repair premiums.

🏠 Roofing Tips & Updates

Get free roofing advice, cost guides, and seasonal maintenance tips.

Roof Replacement Cost Guide: 2026 Prices by Material & Size

Roof replacement costs range from $5,500 to $28,000 for most homes, with the national average around $11,000–$16,000 for a standard asphalt shingle roof on a 2,000 square foot home. The final price depends on roofing material (asphalt shingles average $5.50–$8.50 per sq ft, metal $8–$16, tile $12–$25), roof size and complexity, tear-off requirements, labor rates, and structural repairs. Understanding these cost drivers helps homeowners budget accurately and compare contractor quotes effectively.

This comprehensive guide breaks down roof replacement costs by material, size, region, and project scope, with strategies to reduce expenses without compromising quality.


Average Roof Replacement Costs (2025)

National Averages:

By Roof Size:

These ranges assume asphalt shingle roofs with standard complexity. Premium materials, steep pitches, and structural repairs increase costs significantly.


Roof Replacement Cost by Material

Material selection is the single largest cost factor, accounting for 40–60% of total project expense.

Metal Roofing Types 2025
Metal Roofing Types Guide 2025

Cost: $5.50–$8.50 per sq ft installed
Total for 2,000 SF: $11,000–$17,000

Types:

Pros: Most affordable, wide availability, straightforward installation
Cons: Shorter lifespan than alternatives, less energy-efficient


Metal Roofing

Cost: $8–$16 per sq ft installed
Total for 2,000 SF: $16,000–$32,000

Types:

Pros: 40–70 year lifespan, energy-efficient, fire-resistant
Cons: Higher upfront cost, can be noisy during rain, specialized installation


Clay or Concrete Tile

Cost: $12–$25 per sq ft installed
Total for 2,000 SF: $24,000–$50,000

Pros: 50–100+ year lifespan, fire-resistant, distinctive aesthetics
Cons: Very heavy (may require structural reinforcement), fragile during installation, highest cost


Slate

Cost: $15–$30+ per sq ft installed
Total for 2,000 SF: $30,000–$60,000+

Pros: 75–100+ year lifespan, premium appearance, low maintenance
Cons: Extremely expensive, very heavy, requires specialized installers, difficult repairs


Wood Shakes/Shingles

Cost: $8–$14 per sq ft installed
Total for 2,000 SF: $16,000–$28,000

Pros: Natural aesthetics, good insulation, 20–40 year lifespan
Cons: Fire risk (unless treated), requires maintenance, rot susceptibility, banned in some areas


Material Comparison Table

MaterialCost/SF InstalledLifespanBest For
Asphalt (3-Tab)$5.50–$7.0015–20 yrsBudget-conscious, standard homes
Asphalt (Architectural)$6.50–$8.5025–30 yrsBest value, most homes
Metal (Steel)$8–$1640–70 yrsLong-term investment, energy efficiency
Tile$12–$2550–100 yrsPremium homes, hot/dry climates
Slate$15–$30+75–100+ yrsHistoric homes, luxury properties

Cost Breakdown: What You’re Paying For

Typical Cost Components (2,000 SF Asphalt Roof):

ItemPercentageCost Range
Materials (shingles, underlayment, fasteners)40%$4,400–$6,800
Labor35%$3,850–$5,950
Tear-Off & Disposal15%$1,650–$2,550
Permits & Fees5%$550–$850
Miscellaneous (flashing, vents, repairs)5%$550–$850
TOTAL100%$11,000–$17,000


Factors That Affect Roof Replacement Cost

How to Install Metal Roofing 2025
How to Install Metal Roofing guide 2025

1. Roof Size & Complexity

Roof Size: Measured in “squares” (100 sq ft each). Larger roofs cost more but have lower per-square-foot rates due to economies of scale.

Complexity Factors:


2. Geographic Location

Regional Labor Rate Variations (2025):

Climate Adjustments:


3. Tear-Off vs. Overlay

Tear-Off (Recommended): Remove existing roof to bare deck

Overlay: Install new shingles over old (if permitted)


4. Structural Repairs

Roof Repair 2025
Roof Repair 2025

Common Repairs & Costs:

Discovery: Contractors typically identify structural issues after tear-off, leading to cost increases. Budget 10–15% contingency for unexpected repairs.


5. Additional Features

Optional Upgrades & Add-Ons:


How to Reduce Roof Replacement Costs

1. Choose Cost-Effective Materials
Architectural asphalt shingles offer best value: 25–30 year lifespan at moderate cost.

2. Time Your Project
Off-season (late fall, winter) discounts: 10–20% savings. Avoid peak spring/summer demand.

3. Get Multiple Quotes
Obtain 3–5 estimates. Typical variance: 20–40% between lowest and highest bids.

4. Bundle with Other Work
Coordinate gutter, siding, or window projects for volume discounts.

5. Negotiate Payment Terms
Cash discounts or financing options may reduce total cost 5–10%.

6. DIY Tear-Off
Save $1,500–$3,000 on labor by removing old shingles yourself (requires dumpster rental, disposal fees, physical labor).

7. Verify Insurance Coverage
Storm damage may be covered; file claims before paying out-of-pocket for hail/wind damage.

8. Tax Credits & Rebates
Energy-efficient roofing (metal, cool-roof shingles) may qualify for federal tax credits or utility rebates.


Roof Replacement Cost by Home Size

Typical Costs (Asphalt Shingles, Standard Complexity):

Home SizeRoof AreaCost Range
1,000 SF (Small Ranch)1,200–1,500 SF$6,600–$12,750
1,500 SF (Medium Home)1,800–2,200 SF$9,900–$18,700
2,000 SF (Standard)2,400–2,800 SF$13,200–$23,800
2,500 SF (Large)3,000–3,500 SF$16,500–$29,750
3,000 SF (Very Large)3,600–4,200 SF$19,800–$35,700

Note: Roof area typically exceeds home square footage by 20–40% due to pitch and overhangs.


FAQ

How much does a roof replacement cost?
Average roof replacement costs $11,000–$16,000 for a 2,000 sq ft home with asphalt shingles. Range spans $5,500–$28,000 depending on material, size, complexity, and location.

What is the cheapest roofing material?
3-tab asphalt shingles at $5.50–$7.00 per sq ft installed. Lifespan is only 15–20 years. Architectural shingles ($6.50–$8.50/sq ft) offer better long-term value.

How long does a roof replacement take?
1–3 days for typical asphalt shingle roofs (2,000 sq ft). Complex roofs, tile, or metal installations take 3–7 days. Weather delays extend timelines.

Can I replace my roof myself?
Yes, but not recommended unless you have roofing experience and safety equipment. DIY saves $3,000–$6,000 in labor but risks improper installation, injuries, and voided warranties.

Does homeowners insurance cover roof replacement?
Only for sudden damage (storms, fire, falling trees). Gradual wear and age-related deterioration aren’t covered. Storm damage claims require prompt documentation and professional estimates.

How often should I replace my roof?
Asphalt: 20–30 years; Metal: 40–70 years; Tile/Slate: 50–100+ years. Actual replacement timing depends on condition, maintenance, weather exposure, and warranty coverage.

What time of year is cheapest for roof replacement?
Late fall and winter (October–February) offer 10–20% discounts due to lower demand. Avoid extreme cold (<40°F) for asphalt installation.


Conclusion

Roof replacement costs average $11,000–$16,000 for standard asphalt shingle roofs, with material selection, roof size, complexity, and regional labor rates driving final pricing. Asphalt shingles deliver the best value for most homeowners, balancing 25–30 year lifespans with moderate costs, while metal, tile, and slate justify premium pricing through exceptional longevity and performance. Obtain multiple quotes, time projects during off-peak seasons, and budget 10–15% contingency for structural repairs discovered during tear-off. Prioritize quality installation over lowest bid—proper workmanship ensures your roof delivers its full designed lifespan and protects your home investment for decades.

🏠 Roofing Tips & Updates

Get free roofing advice, cost guides, and seasonal maintenance tips.

Roof Leak Repair Cost Guide: Average Prices & Factors (2026)

Roof leak repair costs range from $150 for simple fixes to $8,000+ for extensive structural damage, with most homeowners paying $750–$1,500 for typical repairs. The final price depends on leak location, roofing material, extent of water damage, labor rates, and whether decking or structural components need replacement. Acting quickly when you notice leaks prevents minor $400 repairs from escalating into $5,000+ restoration projects involving rotted framing, mold remediation, and interior ceiling repairs.

This guide breaks down roof leak repair costs by damage severity, repair type, roofing material, and regional factors, helping you budget accurately and understand when professional help is necessary versus feasible DIY fixes.


Average Roof Leak Repair Costs (2025)

National Averages:

Cost Breakdown by Severity:

Minor Leaks ($150–$500):

Moderate Leaks ($500–$1,500):

Major Leaks ($1,500–$8,000+):


Cost by Repair Type

Common Leak Repairs & Pricing

Repair TypeAverage CostDescription
Clogged Gutters$90–$215Cleaning/unclogging gutters causing water backup 
Damaged Shingles$143–$1,433Replacing 5–50 shingles depending on damage extent 
Nail Pops$215–$700Securing protruding nails, sealing holes 
Improper Seals$220–$675Resealing vents, boots, and penetrations 
Cracked Vent Boot$250–$500Replacing rubber or plastic vent collars 
Cracked Flashing$250–$950Valley, chimney, or step flashing repair/replacement 
Skylight Leak$363–$775Resealing or reflashing skylight perimeter 
Ice Damming$417–$3,600Damage from ice buildup; includes insulation/ventilation fixes 
Chimney Damage$483–$5,667Flashing, crown, or masonry repairs 
Sagging Roof$1,250–$6,250Structural damage requiring framing reinforcement 
Decking Replacement$2,400–$8,600Rotted plywood/OSB replacement (labor-intensive) 

Cost by Roofing Material

Different materials require specialized repair techniques and replacement parts, affecting overall costs.

MaterialRepair Cost RangeReplacement Cost (if needed)Notes
Asphalt Shingles$150–$800$5,500–$10,000Most affordable; easy to source matches 
Metal Roofing$300–$1,200$8,000–$15,000Requires specialized fasteners, panel matching 
Tile (Clay/Concrete)$500–$2,500$15,000–$30,000Fragile; matching discontinued tiles costly 
Slate$500–$2,500$15,000–$30,000Specialty labor; historical matching expensive 
Flat Roof (TPO/EPDM)$300–$1,000$6,000–$12,000Membrane patching or section replacement 

Key Insight: Premium materials (tile, slate) cost 3–5× more to repair than asphalt due to specialty labor and material sourcing.


Factors That Influence Repair Costs

1. Extent of Damage

Minor Surface Issues: Quick patch jobs cost $150–$500 and take 1–2 hours.

Structural Damage: Water that penetrates decking, insulation, or framing requires extensive work:

The Rule: Every week you delay repair, water damage worsens exponentially. A $300 shingle fix becomes a $3,000 decking replacement if ignored.


2. Roof Pitch and Accessibility

Low Pitch (≤4:12): Standard labor rates ($50–$75/hour)

Steep Pitch (>7:12): Requires extra safety equipment, slower work:

Multi-Story Homes: Staging/scaffolding adds $300–$800.


3. Location and Labor Rates

Regional Variations (2025):

Seasonal Pricing:


4. Emergency vs. Scheduled Repairs

Scheduled Repairs: Normal rates, multiple quotes possible

Emergency Repairs:

Pro Tip: If leak isn’t active, wait for normal business hours and get 3 quotes to save 30–50%.


5. Underlying Water Damage

Leaks often cause hidden damage that increases costs:

Interior Damage Add-Ons:

Inspection Costs:


Labor Costs Breakdown

Hourly Rates: $45–$75 per hour (60% of total repair cost)

Minimum Service Charges: $150–$300 (even for 15-minute fixes)

Typical Labor Times:

Cost Example: $500 total repair = $300 labor (3 hours @ $100/hour) + $200 materials


DIY vs. Professional Repair Costs

DIY Feasible Repairs

When to DIY:

DIY Costs:

DIY Risks:


Hire a Professional When

Mandatory Pro Repairs:

Pro Benefits:


How to Reduce Roof Leak Repair Costs

1. Act Immediately
Small leaks become big problems. A $300 repair delayed 6 months becomes $3,000+.

2. Regular Inspections
Annual inspections ($150–$300) catch issues early, preventing major repairs.

3. Get Multiple Quotes
Compare 3 estimates to ensure fair pricing (typical variance: 20–40%).

4. Bundle Repairs
If multiple issues exist, bundling saves on mobilization/setup fees.

5. Preventive Maintenance

6. Insurance Claims
Storm/hail damage is often covered (minus deductible). Document damage immediately.


When to Replace vs. Repair

Repair Makes Sense When:

Consider Replacement When:

Break-Even Analysis:
If repairs exceed $4,000 and roof is >15 years old, replacement ($8,000–$15,000) often better long-term investment.


FAQ

How much does it cost to fix a roof leak?
Average roof leak repairs cost $400–$1,500. Minor fixes (single shingle) cost $150–$500; major repairs (water damage, decking) cost $1,500–$8,000.

Can I fix a roof leak myself?
Simple repairs (accessible shingle replacement, gutter cleaning) are DIY-feasible. Hire professionals for steep roofs, structural damage, flashing work, or interior water damage.

Does homeowners insurance cover roof leak repairs?
If caused by sudden storm damage (wind, hail), most policies cover repairs minus deductible. Gradual wear/neglect typically isn’t covered. Document damage immediately.

How long does roof leak repair take?
Simple repairs take 1–3 hours. Moderate repairs require 4–8 hours. Extensive water damage/structural work can take 2–5 days.

What’s the most common cause of roof leaks?
Damaged flashing (50% of leaks), followed by missing/cracked shingles (30%), and clogged gutters (10%). Regular inspections catch these early.

How do I know if my roof leak is serious?
Interior water stains, sagging ceilings, visible mold, or multiple leak points indicate serious damage. Call a professional immediately for inspection.

Can a roof leak cause mold?
Yes. Trapped moisture in attics, insulation, or walls promotes mold growth within 24–48 hours. Addressing leaks quickly prevents $500–$3,000 remediation costs.


Conclusion

Roof leak repair costs vary widely based on damage extent, roofing material, and labor rates, but most homeowners pay $400–$1,500 for typical fixes. Acting quickly when leaks appear prevents minor repairs from escalating into expensive structural restoration projects. While simple shingle replacements are DIY-feasible, most leak repairs benefit from professional diagnosis and execution to ensure all damage is addressed and warranties remain valid. Regular inspections, prompt repairs, and preventive maintenance are the most cost-effective strategies for protecting your roof investment.

🏠 Roofing Tips & Updates

Get free roofing advice, cost guides, and seasonal maintenance tips.

How to Choose the Best Roofer Near You: Expert Tips for Homeowners in 2025

When it comes to protecting your home, your roof is one of the most critical components. Whether you’re facing a repair, replacement, or a new installation, choosing the right roofer can save you time, money, and stress. With countless options available, how do you find the best roofing contractor near you? This guide provides expert advice on what to look for, questions to ask, and red flags to avoid when hiring a roofer in 2025.

Why Hiring the Right Roofer Matters

The National Association of Home Builders (NAHB) recommends verifying three things before hiring any roofing contractor: a current state license, general liability insurance, and workers’ compensation coverage for all employees on-site.

A professional roofer ensures the job is done correctly, safely, and in compliance with local building codes. Poor workmanship can lead to leaks, reduced durability, and premature roof failure. The right roofer also offers warranties, quality materials, and excellent customer service that give you confidence in your investment.


Steps to Finding the Best Roofer Near You

1. Start with Local Recommendations and Online Research

Begin by asking neighbors, friends, and family if they have reliable roofers to recommend. Online reviews on platforms like Google, Yelp, and the Better Business Bureau also provide valuable insights into customer satisfaction and professional reputation.

Make a shortlist of candidates who specialize in the type of roofing you need—be it asphalt shingles, metal roofing, tile, or eco-friendly options.

2. Verify Licensing, Insurance, and Credentials

Always verify that roofing contractors hold valid licenses to work in your area. Check if they have liability insurance and workers’ compensation coverage. This protects you from any accidents or damage during the project.

Look for certifications from roofing manufacturers. These “certified installers” often have access to better materials and extended warranties.

3. Request Detailed Written Estimates

Ask for detailed, written estimates from at least three contractors. A good estimate should include:

Avoid the lowest bid if it doesn’t come with clear explanations or seems too good to be true.

4. Meet the Contractors In-Person

Schedule in-person meetings to discuss your project. This gives you a chance to assess professionalism, communication skills, and preparedness. Ask to see photos of their past work and request references you can contact.

5. Understand the Contract Thoroughly

Before signing, carefully read the entire contract. It should cover the scope of work, payment schedule, start and completion dates, and cleanup responsibilities. Make sure any verbal promises are included in writing.


Key Questions to Ask Your Roofer


Warning Signs of a Roofer to Avoid


Additional Tips for a Successful Roofing Project


Conclusion

Choosing the best roofer near you involves careful research, verification, and clear communication. Don’t rush the process—your roof deserves expert care to protect your home and family for years to come. Use this guide as your roadmap to hire trusted roofing professionals with confidence.

🏠 Roofing Tips & Updates

Get free roofing advice, cost guides, and seasonal maintenance tips.

How to Spot and Repair Roof Damage Early Before It’s Costly

Your roof is your home’s first line of defense against the elements. Over time, weather, debris, and wear can lead to damage that threatens your home’s safety and value. Catching roof damage early is vital to avoiding expensive repairs or complete replacement. This in-depth guide helps you identify early signs of damage, understand repair options, and maintain your roof for lasting protection.

Why Early Detection is Essential

The Insurance Information Institute reports that wind and hail account for 40% of all homeowner insurance claims in the U.S., with roofing damage representing the largest share of those losses.

Roof damage often starts small—like a missing shingle or slow leak—but can quickly escalate with moisture intrusion, causing rot, mold, and structural issues. Addressing problems immediately minimizes repair costs and prolongs your roof’s lifespan, keeping your home secure and energy-efficient.


Common Warning Signs of Roof Damage

Visible Indicators

Interior Signs


When to DIY or Call Professionals

Repairs You Can Do Yourself

Call a Professional When…

Roofing professionals have the tools and expertise to ensure safe and durable repairs, protecting your home from further damage.


Best Materials for Roof Repairs


Maintaining Your Roof to Prevent Damage


Conclusion

Timely recognition and repair of roof damage protect your home, extend its life, and save money. Follow this guide to keep your roof in optimal shape and consult experts as needed for complex repairs.

🏠 Roofing Tips & Updates

Get free roofing advice, cost guides, and seasonal maintenance tips.

About

Our construction business is dedicated to delivering high-quality, innovative building solutions, every project is completed

Contact

+1 337 376 8664

7725 W 6th Ave unit b, Lakewood, CO 80214, USA

Roof Installation © 2026 All Right Reserved

📊 Free Cost Guide 🔢 Free Calculator