Flat Roof Installation Guide: TPO, EPDM & PVC Systems 2026
Table of Contents
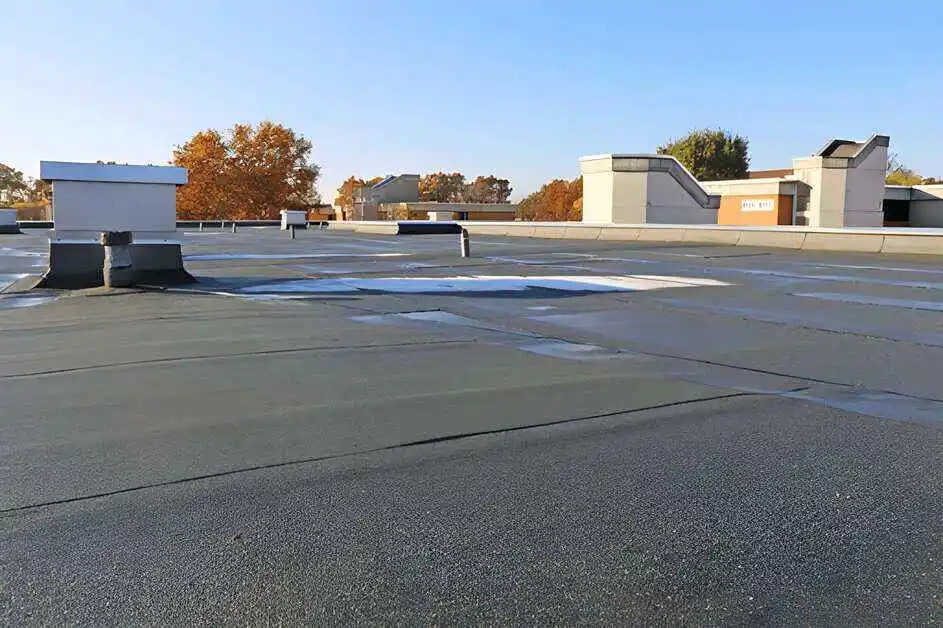
Flat roof installation requires specialized knowledge of membrane systems, drainage design, and waterproofing techniques that differ significantly from pitched roofing. Despite their name, flat roofs aren’t completely flat—they feature subtle slopes (typically ¼ inch per foot) to direct water toward drains and prevent pooling. This guide covers the three primary membrane systems (TPO, EPDM, PVC), installation methods, critical drainage and insulation considerations, costs, and common mistakes that lead to premature failure.
Whether you’re planning a modern low-slope home addition, garage, or commercial building, understanding proper flat roof installation ensures decades of leak-free performance.
Why Flat Roofs Need Different Installation Methods
The National Roofing Contractors Association (NRCA) recommends a minimum slope of 1/4 inch per foot for all flat roofing systems to ensure adequate drainage and prevent membrane damage from standing water.
Key Differences from Pitched Roofs:
- Membrane systems replace shingles (continuous waterproofing vs. overlapping layers)
- Drainage must be engineered (water doesn’t naturally run off)
- Substrate preparation is critical (seams and penetrations are vulnerable)
- Insulation placement affects condensation control
- Parapet walls and edge details require specialized flashing
Common Applications: Modern homes, additions, porches, garages, commercial buildings, rooftop decks.
Lifespan: 20–30+ years with proper installation and maintenance.
Flat Roof Membrane Types
TPO (Thermoplastic Polyolefin)
Description: Single-ply white or gray membrane, heat-welded at seams.
Cost: $5.50–$8.50 per sq ft installed
Lifespan: 20–30 years
Best For: Energy efficiency (reflective), commercial buildings, budget-conscious projects
Pros:
- Excellent UV and heat resistance
- Energy Star rated (reflective white surface reduces cooling costs)
- Heat-welded seams create permanent bonds
- Resistant to punctures and tears
- Affordable compared to PVC
Cons:
- Seam quality depends on installer skill
- Less chemical resistance than PVC
- Can shrink over time in extreme temperatures
Installation Method: Mechanically attached or fully adhered with hot-air welding at seams.
EPDM (Rubber Membrane)
Description: Black or white synthetic rubber membrane, adhered or mechanically fastened.
Cost: $4.50–$7.50 per sq ft installed
Lifespan: 25–30+ years
Best For: Budget projects, DIY-friendly, proven performance
Pros:
- Most affordable membrane option
- Extremely durable and weather-resistant
- Easy to repair (patches adhere well)
- Black absorbs heat (can reduce snow/ice in cold climates)
- DIY-friendly with adhesive systems
Cons:
- Black surface absorbs heat (higher cooling costs in hot climates)
- Seams require adhesive or tape (weaker than heat-welded)
- Can puncture more easily than TPO/PVC
- UV exposure degrades material over decades
Installation Method: Fully adhered with bonding adhesive or mechanically fastened with plates and screws.
PVC (Polyvinyl Chloride)
Description: Single-ply membrane, heat-welded seams, highly chemical resistant.
Cost: $6.50–$10.00 per sq ft installed
Lifespan: 20–30 years
Best For: Commercial kitchens, pools, high chemical exposure, premium residential
Pros:
- Superior chemical and grease resistance
- Heat-welded seams (strongest bond)
- Excellent fire resistance
- Energy Star rated (reflective)
- Long track record (50+ years in commercial use)
Cons:
- Highest cost
- Seams require skilled installation
- Less flexible in cold weather than EPDM
Installation Method: Mechanically attached or fully adhered with hot-air welding.
Comparison Table
| Membrane | Cost/SF | Lifespan | Energy Efficiency | Best For | Installation Difficulty |
|---|---|---|---|---|---|
| TPO | $5.50–$8.50 | 20–30 yrs | Excellent (reflective) | Commercial, residential, budget | Moderate (heat welding) |
| EPDM | $4.50–$7.50 | 25–30+ yrs | Poor (black absorbs heat) | Budget, DIY, proven performance | Easy (adhesive) |
| PVC | $6.50–$10.00 | 20–30 yrs | Excellent (reflective) | Chemical exposure, premium | Difficult (heat welding) |
Critical Design Considerations
Drainage (Non-Negotiable)
The Rule: Flat roofs MUST have a minimum slope of ¼ inch per foot toward drains or scuppers. “Flat” means low-slope, not zero-slope.
Drainage Methods:
- Interior drains: Most common, drains penetrate roof and connect to building plumbing
- Scuppers: Openings in parapet walls that channel water to downspouts
- Gutters: Edge-mounted systems (less common on commercial flat roofs)
Critical: Ponding water (standing >48 hours after rain) voids most warranties and accelerates membrane deterioration. Proper slope design is essential.
Insulation Placement
Options:
- Above-deck insulation: Rigid foam boards installed on top of structural deck, below membrane (most common)
- Below-deck insulation: Spray foam or batts installed below structural deck (less effective)
Why Above-Deck is Preferred: Keeps structural deck warm, prevents condensation, improves R-value, protects deck from thermal cycling.
Common Materials: Polyisocyanurate (polyiso), extruded polystyrene (XPS), expanded polystyrene (EPS).
Step-by-Step Flat Roof Installation
Step 1: Structural Assessment
Verify:
- Load capacity (roof must support membrane, insulation, drainage water, snow, foot traffic)
- Structural deck is solid, level, and free of rot
- Framing incorporates drainage slope (typically built into joists or tapered insulation)
Pro Tip: Consult structural engineer for additions or rooftop decks.
Step 2: Deck Preparation
Install Structural Deck:
- Use ⅝-inch plywood or OSB
- Run panels perpendicular to joists
- Leave ⅛-inch gaps for expansion
- Secure with appropriate fasteners at manufacturer-specified spacing
Surface Prep:
- Ensure deck is clean, dry, and smooth
- Remove all debris, dust, and protruding fasteners
- Repair any damage or soft spots.
Step 3: Install Vapor Barrier (If Required)
Purpose: Prevents moisture from interior spaces from migrating into insulation and causing condensation.
When Needed: Heated buildings in cold climates, buildings with high interior humidity.
Material: Self-adhering membrane or sheet goods installed directly on deck.
Step 4: Install Insulation
Method:
- Lay rigid insulation boards in staggered pattern (offset seams)
- Use two layers if thickness exceeds 2 inches (prevents thermal bridging)
- Create tapered insulation system if deck doesn’t have built-in slope
- Mechanically fasten or adhere per manufacturer specs
Critical: Insulation must stay dry during installation. Cover if rain threatens.
Step 5: Install Coverboard (Optional but Recommended)
Purpose: Protects insulation from foot traffic and membrane installation damage.
Materials: ¼-inch gypsum board, high-density polyiso, or fiberboard.
Step 6: Install Edge Flashing and Parapet Details
Before Membrane:
- Install metal edge flashing (drip edge equivalent)
- Flash parapet walls (vertical transitions)
- Install termination bars at edges
- Prepare drain openings with flashing collars
Critical: Edge details are primary leak sources. Follow manufacturer specs exactly.
Step 7: Install Membrane
TPO/PVC (Heat-Welded):
- Roll out membrane, cut to size with extra for edges
- Allow membrane to relax (avoid installing in extreme temperatures)
- Mechanically fasten or fully adhere base layer
- Overlap seams 3–6 inches
- Heat-weld seams with hot-air gun (600–700°F)
- Test seam strength (should not separate)
EPDM (Adhered):
- Roll out membrane, allow to relax 30+ minutes
- Fold back half of membrane
- Apply bonding adhesive to deck and membrane back
- Carefully roll membrane into adhesive (no air bubbles)
- Repeat for other half
- Seal seams with EPDM tape or liquid adhesive.
Pro Tip: Work in sections. “You only get one shot” when adhering membrane—repositioning damages bond.
Step 8: Install Flashing at Penetrations
Vent Pipes, Skylights, HVAC Units:
- Install flashing boots or prefab flashings
- Seal with membrane patches and compatible sealants
- Ensure watertight transitions
Parapet Walls:
- Extend membrane up wall (typically 8–12 inches)
- Install termination bar
- Apply counterflashing or metal cap.
Step 9: Seal and Test
Final Steps:
- Walk roof to check for loose areas, bubbles, or damage
- Perform flood test (fill low areas with water, inspect for leaks 24 hours later)
- Install walkway pads if roof has equipment or regular foot traffic
Inspection: Schedule final building inspection per local code.
Flat Roof Installation Costs
Material + Labor (2025):
- EPDM: $4.50–$7.50 per sq ft
- TPO: $5.50–$8.50 per sq ft
- PVC: $6.50–$10.00 per sq ft
Additional Costs:
- Tear-off (if replacing): $1.00–$2.50 per sq ft
- Insulation: $1.50–$3.50 per sq ft
- Tapered insulation system: +$2.00–$4.00 per sq ft
- Parapet flashings/edge details: $8–$15 per linear foot
- Drains (interior): $200–$500 each installed
Example: 1,000 sq ft flat roof with TPO, insulation, one drain = $7,000–$10,000 installed.
Common Flat Roof Installation Mistakes
- Inadequate drainage slope → Ponding water voids warranty, accelerates failure
- Poor seam quality → Most leaks occur at seams; heat-welded must be continuous and tested
- Skipping vapor barrier → Condensation rots deck from below
- Improper flashing → Parapets, penetrations, edges are leak-prone without proper details
- Installing in wrong weather → Rain during installation traps moisture; extreme temps affect adhesive/welding
- Ignoring substrate prep → Debris, moisture, or uneven deck causes membrane failure
- DIY without experience → Flat roofs are unforgiving; hire licensed professionals for best results.
DIY vs. Professional Installation
Hire a Professional When:
- Any commercial application
- Residential roofs >500 sq ft
- Complex drainage design needed
- Multiple penetrations (HVAC, skylights, vents)
- Warranty coverage required
- You lack membrane installation experience
DIY May Be Feasible When:
- Small shed or garage (<200 sq ft)
- Simple rectangular shape, no penetrations
- EPDM membrane with adhesive (most DIY-friendly)
- You’re comfortable working on roofs safely
- You follow manufacturer instructions exactly
Reality Check: Even experienced DIYers often hire pros for flat roofs. Mistakes are costly and difficult to repair.
Find Certified Flat Roof Installers
FAQ
How long does flat roof installation take?
1–5 days for residential projects (500–2,000 sq ft), depending on complexity, weather, and crew size. Commercial projects vary widely.
Can I install a flat roof myself?
EPDM systems are most DIY-friendly, but flat roofs demand precision. Hire professionals for roofs >200 sq ft or complex designs to avoid costly leaks.
What’s the best membrane for flat roofs?
TPO offers best value for most applications (energy efficiency, cost, durability). EPDM is budget-friendly. PVC excels in chemical-exposure environments.
Do flat roofs always leak?
No. Properly installed flat roofs with correct drainage slope and quality seams last 20–30+ years leak-free. Poor installation causes leaks, not the design itself.
How much slope does a flat roof need?
Minimum ¼ inch per foot toward drains. “Flat” is a misnomer; all low-slope roofs require drainage pitch to prevent ponding water.
What insulation is best for flat roofs?
Polyiso (polyisocyanurate) offers best R-value per inch. XPS (extruded polystyrene) resists moisture better. Use above-deck placement for optimal performance.
Can I walk on a flat roof?
Yes, but install walkway pads to protect membrane. Avoid sharp objects and excessive weight. Regular foot traffic requires durable coverboard.
Conclusion
Flat roof installation demands attention to drainage design, membrane selection, proper insulation placement, and precise seam work. TPO, EPDM, and PVC membranes each offer advantages depending on budget, climate, and application. While EPDM adhesive systems are approachable for small DIY projects, most flat roofs benefit from professional installation to ensure watertight seams, proper drainage slope, and long-term performance.
Get free roofing advice, cost guides, and seasonal maintenance tips.

Roofing content specialist with 5+ years researching U.S. residential and commercial roofing. Has documented 200+ projects covering installation costs, material selection, contractor vetting, and DIY guides for homeowners across all climate zones.

How to Install Asphalt Shingles: Complete DIY & Pro Guide
Table of Contents
Asphalt shingle installation is one of the most accessible roofing projects for experienced DIYers and the bread-and-butter skill for professional roofers. When done correctly, a properly installed asphalt shingle roof delivers 20–30 years of reliable protection against water, wind, and UV damage. This guide walks you through the complete process from preparation to final inspection, covering tools, materials, step-by-step techniques, nailing patterns, and critical mistakes to avoid.
Whether you’re tackling a simple gable roof or coordinating a contractor’s work, understanding proper asphalt shingle installation ensures your roof performs as designed and maintains warranty coverage.
Before You Begin: Is DIY Right for You?
According to the Asphalt Roofing Manufacturers Association (ARMA), architectural asphalt shingles are the most widely installed residential roofing product in North America, covering more than 75% of all new residential roofing.
DIY is feasible when:
- Roof pitch is low to moderate (4:12 to 6:12)
- Single-story with easy access
- Simple geometry (gable or basic hip)
- You have roofing experience and helpers
- Proper fall protection equipment available
Hire a professional when:
- Pitch exceeds 7:12 (steep, dangerous)
- Multi-story home
- Complex features (valleys, dormers, chimneys)
- Insurance or warranty requires licensed installation
- You lack time, tools, or physical capacity
Safety Warning: Roofing is one of the most dangerous home improvement tasks. Falls cause serious injury and death. Use proper fall protection (harness, anchors, lifelines) or hire professionals.
Tools & Materials Needed
Safety Equipment (Non-Negotiable)
- Full-body harness with shock-absorbing lanyard
- Roof anchors rated for fall arrest
- Extension ladder with stabilizers
- Non-slip work boots
- Gloves and safety glasses
Installation Tools
- Roofing nailer (pneumatic or coil) or hammer
- Air compressor (for pneumatic nailer)
- Utility knife with hooked blades (plenty of extras)
- Chalk line and measuring tape
- Rafter square or speed square
- Tin snips for flashing and metal work
- Roof jacks and planks (for steep pitches)
Materials
- Asphalt shingles (calculate roof area + 10–15% waste)
- Underlayment (felt or synthetic)
- Ice-and-water shield
- Drip edge (eaves and rakes)
- Starter strip shingles (or cut standard shingles)
- Ridge cap shingles
- Roofing nails (1¼” for new deck, 1½” for overlay)
- Flashing for valleys, chimneys, vents
- Roofing cement for sealing
Step-by-Step Asphalt Shingle Installation
Step 1: Prepare the Roof Deck
Inspect and Repair:
- Walk the deck after tear-off to check for soft spots, rot, or damage
- Replace damaged plywood or OSB panels
- Confirm proper deck thickness (minimum ½” for 16″ rafter spacing)
- Ensure flat, even surface with no warping
Pro Tip: Mark problem areas during tear-off so you don’t miss repairs when covered with underlayment.
Step 2: Install Drip Edge at Eaves
Purpose: Drip edge channels water into gutters and protects fascia boards from rot.
Installation:
- Start at one end of the eaves
- Overlap sections 2 inches
- Nail every 8–12 inches along the top edge (not the drip hem)
- Extend slightly past rake edges for later trimming
Critical: Install drip edge at eaves BEFORE underlayment; rake drip edge goes AFTER underlayment.
Step 3: Install Underlayment
Material Options:
- Felt (15# or 30#): Traditional, affordable, tears easily
- Synthetic: Lighter, stronger, longer exposure rating, better for DIY
Installation:
- Roll out horizontally from eaves to ridge
- Overlap each course 6 inches (2 inches for synthetic with marked overlaps)
- Staple or nail every 12–18 inches along seams and field
- Smooth wrinkles; avoid stretching in cold weather (will buckle in heat)
Pro Tip: Work on calm days; wind makes underlayment installation dangerous and frustrating.
Step 4: Apply Ice-and-Water Shield
Purpose: Self-adhering waterproof membrane at vulnerable areas prevents ice dam leaks and wind-driven rain penetration.
Where to Install:
- Eaves: 3–6 feet up from edge (varies by climate; check local code)
- Valleys: Full length, 18–36 inches wide
- Around penetrations: chimneys, vent pipes, skylights
Installation:
- Peel backing and press firmly to deck
- Overlap seams 6 inches
- Smooth out air bubbles
Code Note: Many northern jurisdictions require ice-and-water shield; verify your local requirements.
Step 5: Install Drip Edge at Rakes
Installation:
- Install OVER underlayment at rake edges
- Overlap eaves drip edge at corners
- Nail every 8–12 inches along top edge
Step 6: Install Starter Strip
Purpose: Starter strip fills gaps below first course tabs and provides adhesive seal at eaves to prevent wind uplift.
Options:
- Proprietary starter strip: Pre-manufactured with adhesive
- Cut-down shingles: Remove tabs from standard 3-tab shingles, flip upside down
Installation:
- Align flush with drip edge at eaves (½–¾” overhang)
- Extend full length of eaves and up rakes 6 inches
- Nail 3–4 inches from edge, above self-seal strip
- Overlap starter sections 6 inches
Step 7: Establish Layout Guidelines
Purpose: Chalk lines ensure straight courses and proper shingle alignment.
Horizontal Lines:
- Snap first line 5–7 courses up from eaves (measure shingle exposure)
- Repeat every 4–6 courses to prevent cumulative drift
Vertical Lines:
- For 3-tab: snap vertical lines at 6-inch intervals (half-tab offset)
- For architectural: follow manufacturer offset specs (typically 5–7 inches)
Pro Tip: Double-check measurements before snapping. Chased chalk lines waste hours.
Step 8: Install First Course
Placement:
- Align bottom edge with starter strip
- Overhang drip edge ½–¾ inch at eaves and rakes
- Start with full shingle at rake edge (or cut per manufacturer)
Nailing Pattern:
- Standard: 4 nails per shingle (6 in high-wind zones)
- Place nails 1 inch from edges, just above self-seal strip
- For 3-tab: nail above each tab cutout
- For architectural: follow manufacturer nailing zone (often marked)
Critical: Drive nails flush, not over-driven (breaks shingle) or under-driven (won’t hold). Angle perpendicular to deck, not slanted.
Step 9: Install Subsequent Courses with Proper Offset
3-Tab Offset Pattern:
- Course 1: Start with full shingle
- Course 2: Cut 6 inches off first shingle (half-tab offset)
- Course 3: Cut 12 inches off (full-tab offset)
- Course 4: Start with full shingle (pattern repeats)
Architectural Shingle Offset:
- Follow manufacturer specs (typically 5–7 inches, marked on shingle)
- Maintain consistent offset to avoid water channels
Installation Tips:
- Work horizontally across roof before moving up
- Check alignment with chalk lines every few courses
- Stagger seams between courses (never align vertically)
- Maintain consistent overhang at rakes
Common Mistake: Inconsistent offsets create vertical channels where water can penetrate. Always follow manufacturer offset specs exactly.
Step 10: Work Around Obstacles
Vent Pipes:
- Shingle up to base of pipe
- Install vent boot flashing
- Shingle over top half of flashing
Chimneys:
- Install step flashing at sides (one piece per shingle course)
- Install counterflashing into mortar joints
- Seal with appropriate sealant
Valleys:
- For closed valleys: weave or cut shingles at valley center
- For open valleys: install metal valley flashing first, cut shingles 2–3 inches from center
- Always seal cut edges with roofing cement
Skylights:
- Follow manufacturer flashing kit instructions
- Typically: install base flashing, shingle around sides with step flashing, top apron last
Step 11: Install Ridge Cap
Preparation:
- Cut ridge cap shingles from standard shingles (cut 3-tab into thirds) or use pre-cut ridge caps
Installation:
- Start at end opposite prevailing wind
- Overlap each cap 5–6 inches (exposing 5–6 inches)
- Nail twice per cap, one on each side, 1 inch from edge and 6 inches from exposed end
- Last cap: seal with roofing cement instead of nailing
Ridge Vent Option:
- Cut 1–2 inch slot along ridge peak
- Install ridge vent per manufacturer specs
- Cap with ridge shingles designed for venting
Step 12: Final Inspection & Cleanup
Inspection Checklist:
- All shingles nailed properly (flush, in nailing zone)
- Consistent alignment and offset
- Proper overhang at eaves and rakes (½–¾”)
- Flashing sealed at all penetrations
- No exposed nails
- Ridge cap secure
Cleanup:
- Magnetic sweep for nails in yard (multiple passes)
- Clear gutters and downspouts
- Remove debris and staging
Schedule Inspection: Contact building department for final inspection if required by permit.
Critical Nailing Best Practices
Proper Nail Placement:
- 1 inch from edges
- Just above self-seal strip (in manufacturer nailing zone)
- Through both shingle layers on laminated (architectural) shingles
Nail Depth:
- Flush: Head sits level with shingle surface
- Over-driven: Head breaks through granules (weakens seal, creates leak path)
- Under-driven: Nail head protrudes (next course doesn’t seal properly)
Nail Angle:
- Perpendicular to deck (90-degree angle)
- Angled nails reduce holding power and can split shingles
Nail Count:
- Standard zones: 4 nails per shingle
- High-wind zones: 6 nails per shingle (follow local code)
Pro Tip: Adjust pneumatic nailer pressure to achieve flush drive without over-driving. Test on scrap before starting.
Common Mistakes to Avoid
- Skipping starter strip → Edge shingles blow off
- Wrong nailing (too few, wrong location, over/under-driven) → Blow-offs, leaks, premature failure
- Inconsistent offset → Water channels, leaks
- Improper flashing → Most common leak source
- Working in wrong weather (too hot, too cold, rain) → Adhesive failure, damaged shingles
- Ignoring manufacturer specs → Voids warranty
- Poor ventilation → Shortens shingle life by 30–50%
Installation Checklist
Pre-Installation:
- Permits obtained
- Weather forecast checked (3+ dry days)
- Materials calculated with 10–15% waste
- Safety equipment ready
- Helpers lined up
During Installation:
- Deck inspected and repaired
- Drip edge at eaves installed
- Underlayment and ice shield applied
- Drip edge at rakes installed
- Starter strip installed
- Layout lines snapped
- Proper nailing pattern followed
- Correct offset maintained
- Flashing installed at all penetrations
- Ridge cap completed
Post-Installation:
- Final walk-through inspection
- Magnetic sweep completed
- Gutters cleaned
- Inspection scheduled (if required)
- Warranty registered
Download Installation Checklist PDF
FAQ
How many nails per asphalt shingle?
4 nails for standard installations; 6 nails in high-wind zones (typically 110+ mph rating areas). Always follow manufacturer specifications.
Can I install asphalt shingles myself?
Yes, if you have roofing experience, proper safety equipment, and a simple roof (low pitch, single story, basic geometry). Hire professionals for steep, complex, or multi-story roofs.
What temperature is best for shingle installation?
45–85°F is ideal. Below 45°F, shingles are brittle and adhesive doesn’t activate. Above 95°F, shingles scuff easily and become too soft to walk on.
Do I need a starter strip?
Yes. Starter strips are critical for sealing the first course and preventing edge blow-offs. Never skip this step.
What’s the correct nailing pattern?
Place nails 1 inch from edges, just above the self-seal strip, in the manufacturer’s designated nailing zone. Drive nails flush, perpendicular to the deck.
How do I maintain proper shingle offset?
For 3-tab: use 6-inch (half-tab) offset. For architectural: follow manufacturer specs (typically 5–7 inches, often marked on shingle). Use chalk lines to verify alignment.
Conclusion
Proper asphalt shingle installation requires attention to detail, the right tools, and strict adherence to manufacturer specifications. From preparing the deck and installing underlayment to maintaining correct nailing patterns and offsets, each step affects your roof’s performance and longevity. While experienced DIYers can successfully complete simple roofs, don’t hesitate to hire licensed professionals for complex projects or when safety is a concern.
Next Steps:
- Download Installation Checklist
- View Recommended Tools
- Calculate Your Project Cost
- Find Certified Contractors
Get free roofing advice, cost guides, and seasonal maintenance tips.
Roofing content specialist with 5+ years researching U.S. residential and commercial roofing. Has documented 200+ projects covering installation costs, material selection, contractor vetting, and DIY guides for homeowners across all climate zones.
Complete Guide to Roof Installation for Homeowners (2026)
Table of Contents
A new roof is one of the most important investments you can make in your home, safeguarding against water intrusion, structural damage, and energy loss while boosting curb appeal and resale value. This guide explains how to plan and execute a roof installation with confidence: when to replace versus repair, how materials differ, what the high-level installation steps look like, the real costs (and what drives them), DIY feasibility and safety, permits and inspections, and a structured resource library that links you to detailed how-tos, checklists, and tools. Whether you choose to hire a licensed contractor or take on manageable parts of the project, the sections below will help you achieve a durable, code-compliant result.
Why installation matters (durability, safety)
According to the National Roofing Contractors Association, proper installation by a qualified contractor is the single most important factor in roofing system longevity — more significant than material grade or brand selection.
A roof must withstand sun, wind, rain, snow, and daily thermal movement for decades; poor installation amplifies wear, voids warranties, and invites leaks that can rot framing, destroy insulation, and encourage mold. Correct flashing, underlayment, fastener placement, ventilation, and adherence to manufacturer specifications are as crucial as the shingle or panel itself. Beyond longevity, proper installation reduces ice dams, prevents blow-offs in storms, and lowers cooling loads in hot climates. Over the life of a roof, the quality of installation can be the difference between periodic minor maintenance and major repairs or premature replacement.
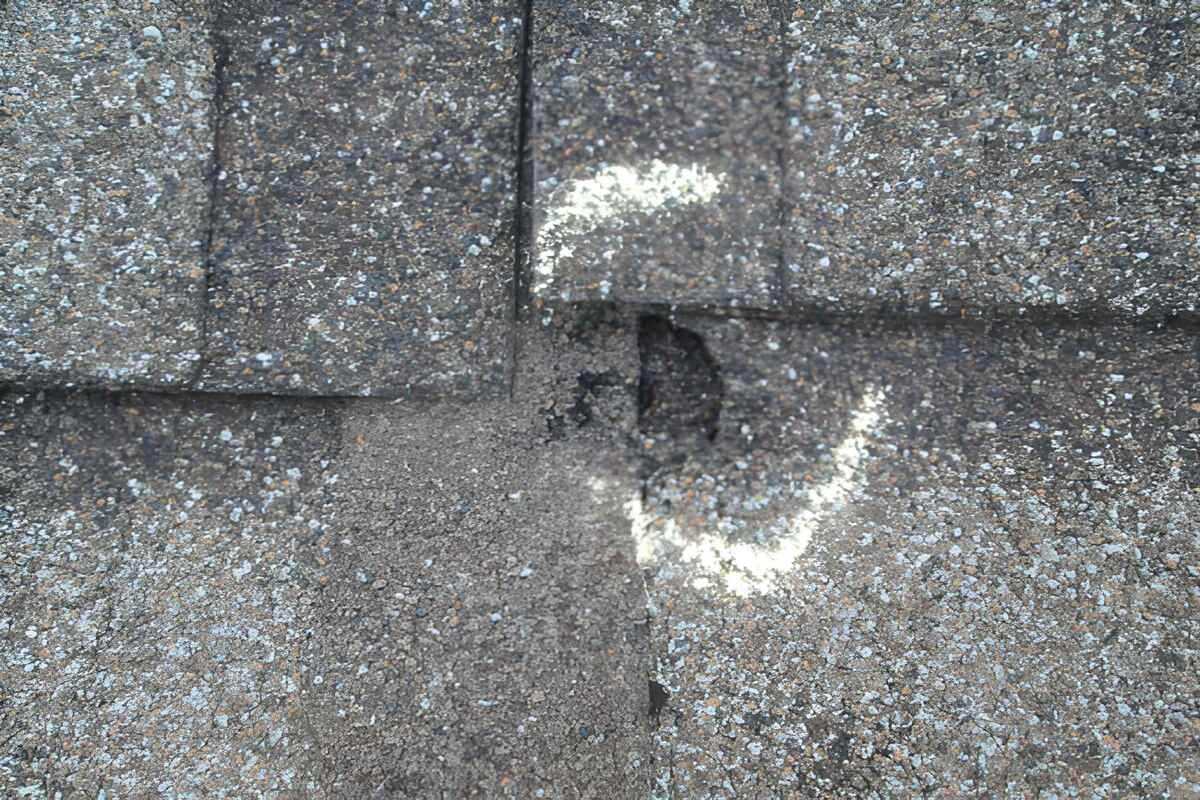
Signs you need replacement vs repair
- Replace when any of the following apply:
- Widespread shingle granule loss, curling, cracking, or bald spots across multiple slopes.
- Chronic leaks from multiple points (valleys, penetrations) despite past repairs.
- Soft or spongy roof decking underfoot, indicating rot or repeated water intrusion.
- Roof age exceeds typical lifespan for your material and climate.
- Multiple layers already installed (common code allows only one re-roof over a single layer).
- Repair when issues are localized and the rest of the roof is sound:
- Isolated storm damage (a few missing shingles, a single lifted flashing).
- A single problematic penetration (e.g., a leaking vent boot).
- Minor flashing defects that can be resealed or replaced without disturbing large areas.
Materials overview (asphalt, metal, tile, slate, flat)
Use this quick comparison to select materials that fit your climate, budget, structure, and design goals. Costs and lifespans are typical national ranges; local pricing varies.
- Asphalt shingles
- Pros: Affordable, widely available, straightforward install, many colors/styles.
- Cons: Shorter lifespan than premium materials; heat and UV accelerate aging.
- Typical lifespan: 15–30 years depending on grade and climate.
- Best for: Most residential pitched roofs; budget-conscious replacements.
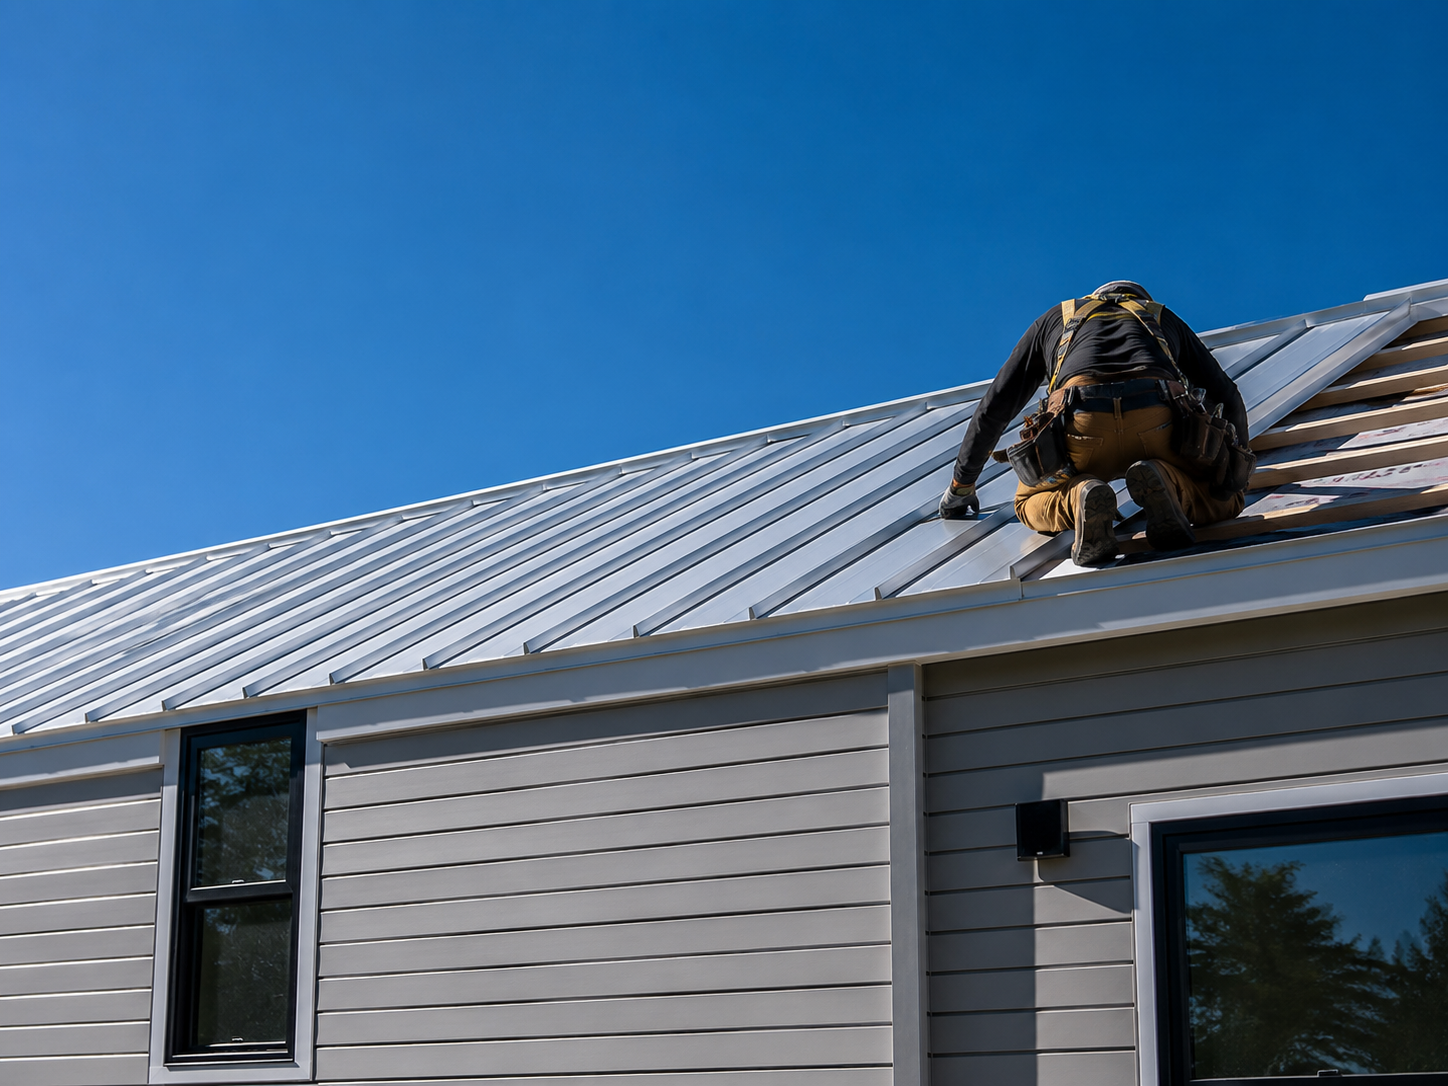
- Metal roofing (corrugated, metal shingles, standing seam)
- Pros: Long lifespan, high wind resistance, sheds snow, reflective finishes reduce heat gain.
- Cons: Higher upfront cost; details (fasteners, expansion) demand precision.
- Typical lifespan: 30–70+ years by alloy/profile/coating.
- Best for: Regions with snow, hail, or high winds; energy-conscious upgrades.
- Tile (clay/concrete)
- Pros: Very durable, fire-resistant, iconic aesthetics, excellent heat performance.
- Cons: Heavy (may require structural upgrades); higher install cost; fragile under foot traffic.
- Typical lifespan: 50–100 years+ depending on clay vs concrete and maintenance.
- Best for: Hot climates, Mediterranean/Southwestern styles, coastal regions.
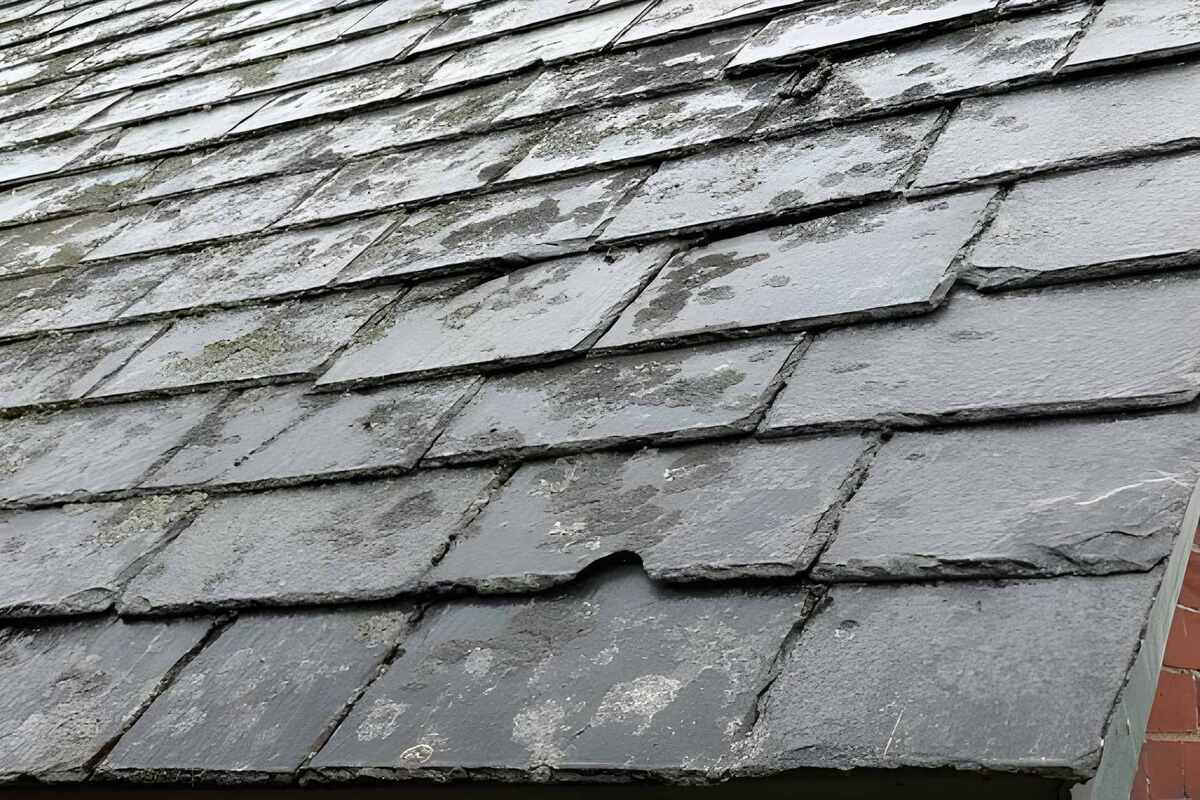
- Slate
- Pros: Exceptional longevity, natural stone look, fire and moisture resistance.
- Cons: Very heavy; highest material cost; requires specialized installers and structural capacity.
- Typical lifespan: 75–100+ years; often outlasts multiple owners.
- Best for: Historic/premium homes with adequate structure.
- Flat/low-slope systems (TPO, EPDM, PVC)
- Pros: Suitable for low slopes, continuous membranes limit seams; reflective options reduce heat.
- Cons: Substrate prep and detailing critical; punctures possible without protective walkways.
- Typical lifespan: 20–30 years; varies by membrane thickness and exposure.
- Best for: Modern low-slope designs, additions, porches, and commercial-style roofs.
The installation process (high-level steps)
Every manufacturer publishes specifications for their systems. At a high level, the process follows a predictable sequence:
- Planning and staging
- Confirm material, colors, accessories, ventilation design, and local code requirements.
- Order materials with 10–15% overage for waste on complex roofs.
- Schedule dumpsters, delivery, permits, and inspection windows. Watch the forecast.
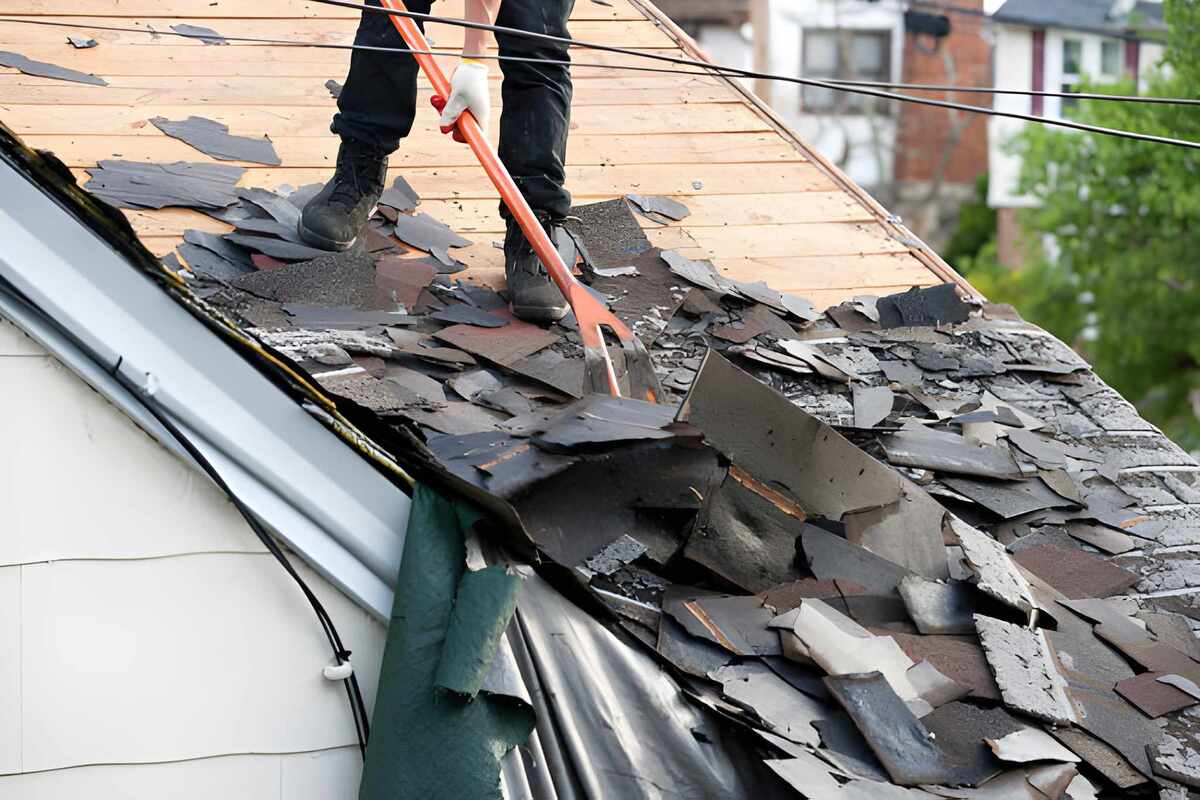
- Tear-off and surface protection
- Protect landscaping and siding with tarps and plywood.
- Remove existing layers to the deck. Keep debris managed to prevent damage and hazards.
- Decking inspection and repair
- Replace rotted/sheathing panels; confirm proper thickness and spacing.
- Confirm fastener withdrawal resistance and flatness across rafters/trusses.
- Edge metals and underlayment
- Install drip edge at eaves first. Apply underlayment from eaves upward with required overlaps.
- Apply ice-and-water shield at eaves (per climate), valleys, and around penetrations.
- Flashing and penetrations
- Install valley metal or membrane reinforcement.
- Flash vertical transitions (step flashing at sidewalls, counterflashing at chimneys).
- Install and seal vent boots and skylight kits per manufacturer instructions.
- Field installation
- For shingles: install starter strips, then courses with correct offsets and nailing zones.
- For metal: square the first panel, fasten per pattern, account for thermal expansion, and seal seams.
- For membranes: lay out and adhere/heat-weld sheets per substrate and system type.
- Ventilation and ridge finishing
- Cut ridge slot if using ridge ventilation; balance intake (soffit) and exhaust (ridge).
- Install ridge vent and cap shingles or metal ridge cap.
- Final detailing and cleanup
- Seal exposed fasteners where appropriate; touch up coatings.
- Clean gutters; magnetic sweep for nails; remove debris.
- Conduct final walk-through and schedule inspection as required.
Cost breakdown + calculator
Roofing budgets depend on material, roof size and complexity, regional labor, and scope (tear-off, structural repairs, ventilation upgrades). A simple framework:
- Materials: 35–50% (shingles/panels, underlayment, flashing, fasteners, ventilation)
- Labor: 35–50% (pitch, stories, complexity increase time and crew size)
- Tear-off/disposal: 5–15% (layers removed, dumpster, tipping fees)
- Permits/overhead/contingency: 5–15% (permits, admin, 10–15% buffer)
Try the Roofing Cost Calculator to model:
- Inputs: roof area (sq ft), material, pitch/complexity, tear-off, region.
- Outputs: low–high estimate with line items for materials, labor, tear-off, extras.
Use results to anchor quotes and spot outliers.
DIY vs pro: when and why
DIY can reduce labor costs significantly, but roofing carries fall hazards and technical risk. Consider a licensed contractor when:
- Roof pitch ≥ 7:12, multiple stories, complex valleys/dormers.
- Structural repairs are suspected (soft decking, sagging, rafter issues).
- Premium systems (standing seam, tile, slate) or membrane welding are involved.
- Insurance or warranty requires licensed installation.
DIY may be feasible when:
- Single-story, simple gable/hip roof with low pitch (≤ 6:12).
- You have helpers, safety equipment, and time (expect 2–4× pro timeline).
- You follow manufacturer specifications, obtain permits, and schedule inspections.
Permits, codes, inspections
Most jurisdictions require a roofing permit for full replacement and sometimes for re-roofing. Expect:
- Permit application: scope, materials, contractor credentials or owner-builder acknowledgment.
- Code compliance: ice barriers in cold zones, ventilation requirements, fire ratings in wildfire zones, wind resistance in coastal/hurricane regions.
- Inspections: often after tear-off (decking visible) and at final completion. Close your permit to avoid title or insurance issues.
Check your local building department for forms, fees, and inspection scheduling windows.
Tools and safety essentials
Safety (non-negotiable)
- Fall protection: harness, anchors rated for fall arrest, lifelines, rope grabs.
- Ladder safety: stabilizers, 4:1 angle, overhang above eaves; maintain 3 points of contact.
- Footwear and PPE: slip-resistant boots, gloves, eye/ear protection.
Core tools
- Layout: tape measures, chalk lines, rafter square.
- Cutting: utility knives with hooked blades, snips (for metal), circular saw for decking.
- Fastening: roofing nailer (shingles), approved screws/impact driver (metal), heat welder (membranes).
- Specialty: roof jacks and planks for steep pitches, magnetic sweeper for cleanup.
Consumables and accessories
- Drip edge, underlayment (synthetic or felt), ice-and-water shield, flashing kits, vent boots, sealants compatible with the system, ridge vents, starter strips, cap shingles.
Timeline and seasonal planning
- Typical pro timeline for a 2,000–2,500 sq ft simple roof: 1–3 days once materials arrive.
- Add 1–2 days for tear-off, decking repairs, and weather delays.
- DIY timelines often run 5–8+ days for the same scope, depending on crew size and experience.
- Seasonal guidance:
- Spring/fall often ideal (mild temperatures, predictable forecasts).
- Hot climates: avoid high-heat hours; shingles can scuff and membranes soften.
- Cold climates: adhesives may need warmer temps; ice barriers are mandatory per code.
Top mistakes to avoid
- Skipping the permit or final inspection, risking fines and insurance denial.
- Improper ventilation design (unbalanced intake/exhaust), leading to heat/moisture buildup and shingle failure.
- Wrong fastener placement or over/under-driven nails that compromise holding power and waterproofing.
- Inadequate flashing at valleys, sidewalls, chimneys, and penetrations—the most common leak points.
- Installing over damaged or uneven decking; trying to hide structural problems with new finishes.
- Disregarding manufacturer specifications, which can void warranties and reduce lifespan.
Resource library
- Roof Installation Steps: a detailed, step-by-step walkthrough with photos and diagrams.
- Roof Installation Cost: pricing tables, regional multipliers, hidden costs, and a calculator.
- DIY Roof Installation: safety, tools, phased timelines, and a realistic self-assessment.
- How to Choose a Contractor: credentials, questions to ask, red flags, and a quote comparison template.
- Underlayment Installation: synthetic vs felt, overlaps, fastening, and ice-barrier placement.
- Flashing Installation: valleys, step flashing, chimney counterflashing, vent boots.
- Roof Vent Installation: ridge, box, and turbine vents; ventilation ratios and layout.
- Roof Installation Timeline: planning, lead times, weather buffers, and inspection scheduling.
- Roof Installation Budget: cost baselines, contingency planning, and financing options.
Comparison table (materials)
Consider adding this table to help readers compare options at a glance.
| Material | Typical Lifespan | Relative Cost | Weight | Best For | Notes |
| Asphalt shingles | 15–30 years | $ | Light | Most pitched homes | Budget friendly; shorter life in high heat. |
| Metal (standing seam/shingles/corrugated) | 30–70+ years | $$–$$$ | Medium | Wind/snow zones; energy-conscious | Precise detailing; reflective finishes available |
| Clay/concrete tile | 50–100+ years | $$$ | Heavy | Hot/coastal climates | May require structural upgrades; fragile underfoot. |
| Slate | 75–100+ years | $$$$ | Very heavy | Premium/historic homes | Specialty installers; long-term value |
| TPO/EPDM/PVC (low slope) | 20–30 years | $$ | Light–Medium | Flat/low-slope roofs | Substrate prep and puncture protection critical |
Process
A horizontal 8-step flow: Plan → Tear-off → Deck repair → Edge + Underlayment → Flashing → Field Install → Vent/Ridge → Cleanup/Inspect.
Cost table (example)
| Roof Size (sq ft) | Asphalt Low–High | Metal Low–High | Tile Low–High | Flat Membrane Low–High |
| 1,500 | $7,000–$12,000 | $14,000–$24,000 | $24,000–$38,000 | $9,000–$15,000 |
| 2,000 | $10,000–$16,000 | $18,000–$30,000 | $30,000–$45,000 | $12,000–$20,000 |
| 2,500 | $12,000–$20,000 | $22,000–$36,000 | $36,000–$55,000 | $15,000–$25,000 |
- >> Try the Roofing Cost Calculator (estimate materials, labor, tear-off, and extras) <<
FAQs
Architectural asphalt shingles typically offer the best balance of cost and lifespan for pitched residential roofs; metal costs more upfront but lasts longer.
How long does installation take?
For a simple 2,000–2,500 sq ft roof, a professional crew often completes tear-off and installation in 1–3 days, weather permitting; complex roofs take longer.
Do I need a permit for roof installation?
Most jurisdictions require a permit for full replacement and sometimes for re-roofing; inspections at decking and final are common. Always check your local building department.
Get free roofing advice, cost guides, and seasonal maintenance tips.
Roofing content specialist with 5+ years researching U.S. residential and commercial roofing. Has documented 200+ projects covering installation costs, material selection, contractor vetting, and DIY guides for homeowners across all climate zones.
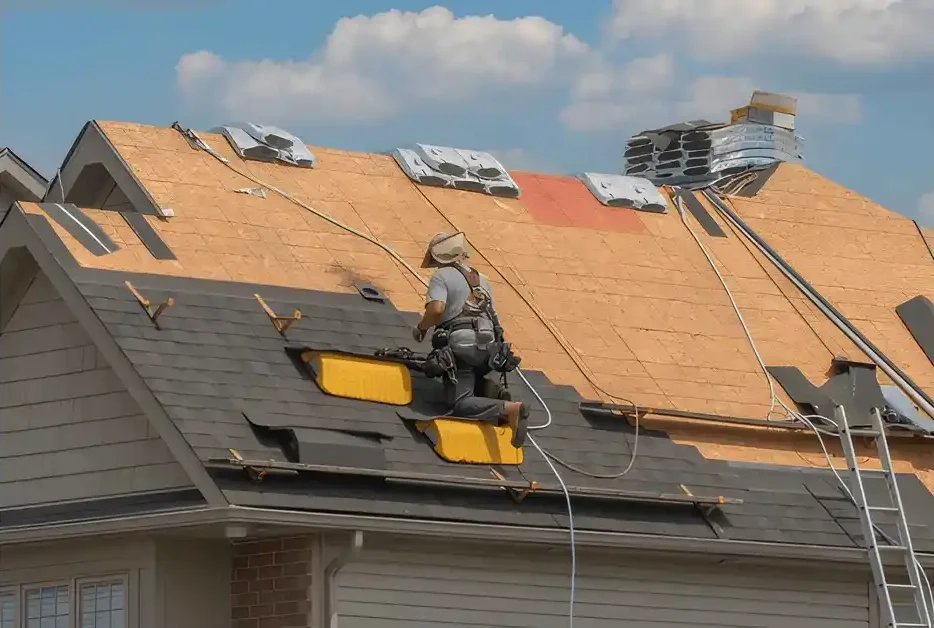
How to Install a Roof Vent for Better Attic Ventilation
Table of Contents
Proper roof ventilation is critical for extending shingle life, preventing mold, and keeping energy bills in check. Installing a roof vent boosts airflow, reduces heat buildup, and helps prevent costly damage from moisture or ice dams. This guide breaks down each step of roof vent installation, highlights key safety and material considerations, and helps you avoid common mistakes.
Why Install Roof Vents?
The U.S. Department of Energy recommends a minimum ventilation ratio of 1 square foot of net free ventilation area per 150 square feet of attic floor space — a standard that directly affects shingle warranty validity.
Roof vents work by allowing hot, moist air to escape from your attic, making your home more comfortable year-round. Adequate ventilation is especially critical in regions with hot summers or snowy winters. Without roof vents, you may notice problems ranging from warped shingles, peeling paint, mildew, higher AC costs, or even structural rot.
Planning and Preparation
Assess Your Ventilation Needs
- First, calculate attic square footage to determine how many vents you need. A common rule is one vent per 150 sq. ft. of attic space, though always consult local code or manufacturer recommendations for your roof’s pitch and design.
- Decide which type of vent you’re installing: box (static), ridge, turbine, or powered. This guide primarily focuses on installing a box/static vent, the most DIY-friendly option.
Choose the Right Tools and Materials
You’ll need:
- Roofing vent kit (for your roof type/material)
- Roofing nails, caulk/sealant, putty knife
- Pry bar, hammer, utility knife
- Measuring tape, chalk line, pencil
- Circular saw or jigsaw, drill with bits
- Roof harness, ladder, safety glasses, gloves
- Replacement shingles
Safety First
- Always use a roof harness on slopes >4:12.
- Work only in dry, mild weather.
- Don’t step on brittle, curling shingles.
- Avoid exposed electrical wires in attic spaces.
Locating and Marking the Vent Openings
- From the attic, choose your spot: Use a tape measure to locate the ideal vent location between rafters. Drive a long nail up through the roof deck at the chosen spot—visible from outside for accurate placement.
- Pro tip: Place vents evenly along the roof for balanced airflow, and stagger them to avoid blocking the natural path of rising air.
- On the roof, use a chalk line/pencil: Outline the vent opening according to the template supplied with your vent, typically just the inner opening, not the flange.
Removing Shingles and Cutting the Opening
- Remove the affected shingles: Carefully pry up (not tear) shingles above and around your marked opening using a pry bar and putty knife. Save them for reuse.
- Mark and cut the hole: Drill a pilot hole near the center, then cut out the traced opening using a circular saw or jigsaw. Work slowly and check for nails or wires. Remove any nails protruding into the area you’ll be cutting.
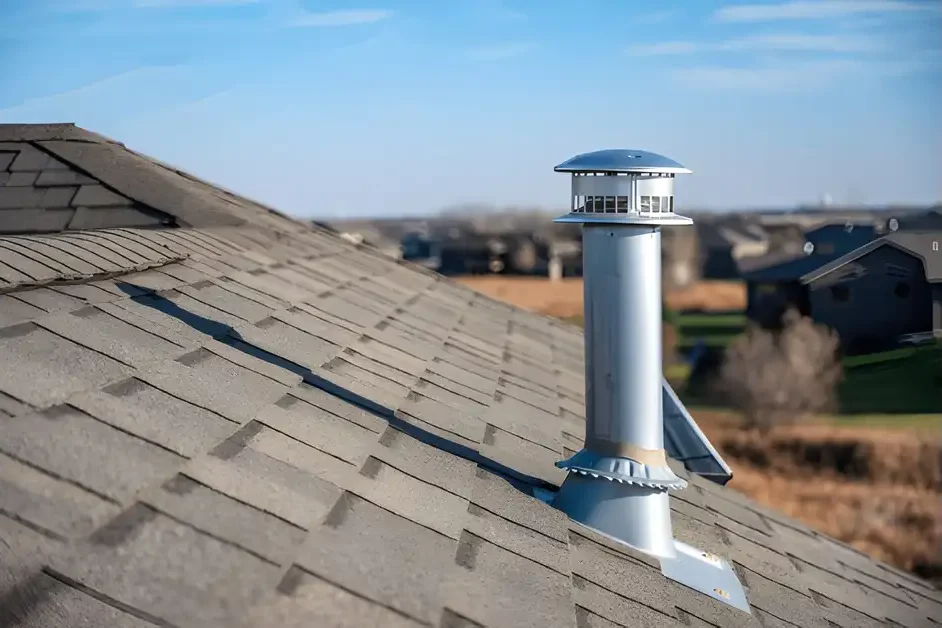
Installing Flashing and the Vent
- Install the flashing: Slide the vent’s flashing underneath the shingles above the hole and on top of those below (a “shingle sandwich” for proper drainage). This step is crucial for preventing leaks.
- Use roofing cement under the flashing edges.
- Place the vent: Position the vent on top of the opening, making sure the vent’s flange is flush on the roof surface and fits snugly with the opening.
- Nail it down: Use galvanized roofing nails around the edge or in pre-drilled holes in the flange (usually 4–6 nails). For additional protection, apply roofing cement over each nail head.
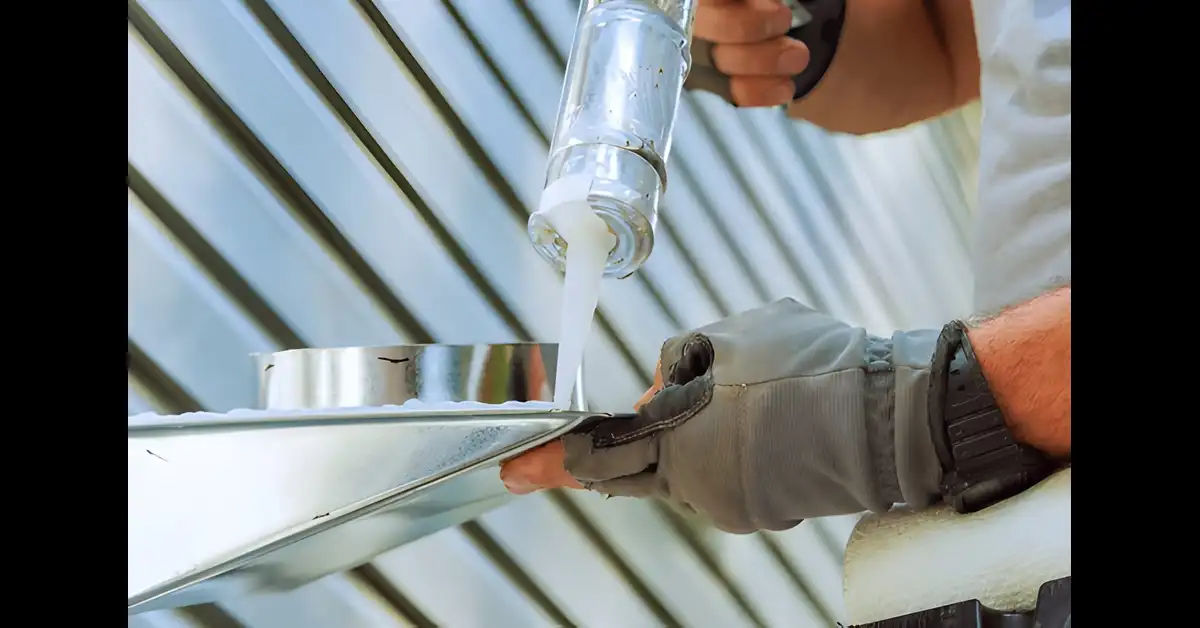
Sealing and Reinstalling Shingles
- Seal all edges: Before replacing shingles, run a bead of roofing sealant around the vent base. Carefully reinstall saved shingles, trimming as needed for a snug fit around the vent and overlapping the flashing properly.
- Fasten and seal: Nail shingles back in place and seal the new nail holes with more roofing cement to ensure durability and weather resistance. Double-check that all seams and shingle edges lay flat and watertight.
Attaching Ductwork (for exhaust/output vents)
If connecting to a bathroom/laundry/kitchen exhaust fan:
- Insert a duct connector through the opening before installing the vent cap.
- Secure the hose with a clamp, seal with aluminum tape, and connect the duct to the vent cap as per kit instructions.
Final Inspection and Cleanup
- Inspect both inside and outside for gaps or exposed nail heads and reseal if needed.
- Double-check that the vent is firm, flashing is secure, and shingles are flat.
- Safely remove all debris, extra nails, and tools from your worksite.
Special Scenarios and Customization
Ridge Vent Installation (Summary for Roofers)
- Cut a continuous slot (usually 1½” wide) along each side of the ridge.
- Place the vent roll, nail along the vent’s nailing strip every 12”.
- Install cap shingles over the ridge vent; nail and seal.
Multiple Vents or Upgrades
- Always stagger multiple box vents and maintain at least 2–3 feet between each.
- For powered or solar vents, wiring and additional mounting steps apply—follow specific manufacturer instructions and comply with codes.
Maintenance, Troubleshooting & Pro Tips
Maintaining Roof Vents
- Inspect yearly for leaves, debris, or nests.
- Check caulking/sealant and replace at the first sign of cracks or peeling.
- Ensure insulation in the attic is not blocking vent airflow.
Common Mistakes to Avoid
- Failing to overlap flashing and shingles correctly—leads to leaks.
- Not sealing nail heads—water can rust nails and seep into your attic.
- Cutting holes near rafters or existing vents—may weaken structure or reduce effectiveness.
- Forgetting intake ventilation—roof vents work best with clear soffit vents (intake) for true airflow.
When to Call a Pro
- Roofs with steep pitches, serious damage, or for ridge vent installations are safer for licensed roofers.
- Improper DIY installation can cause ventilation inefficiency, leaks, or invalidate warranties.
Visual and Further Learning
- Watch: YouTube: How To Properly Install Roof Vents (step-by-step visual)
- PDF: Broan-NuTone Roof Vent Kit Installation
- Expert Reads: IKO’s Roof Vent Guide
- Maintenance Tips: Roof Repair & Maintenance Hub
Get free roofing advice, cost guides, and seasonal maintenance tips.
Roofing content specialist with 5+ years researching U.S. residential and commercial roofing. Has documented 200+ projects covering installation costs, material selection, contractor vetting, and DIY guides for homeowners across all climate zones.

Roof Installation Guide 2025 | Complete Roofing Solutions & Savings
Table of Contents
Homeownership comes with plenty of responsibilities, and few are as important or expensive as replacing or installing a new roof. This guide breaks down all you need to make a confident, money-saving decision on your new roof installation.
What is Roof Installation?
Roof installation is the process of removing an old roof, inspecting and repairing the decking, and installing a brand-new roofing system that will protect your home for decades. A properly installed roof safeguards against water leaks, boosts curb appeal, and can save you money on energy bills.
- Thorough inspection and removal of the old roof.
- Selection of energy-efficient, durable materials.
- Installation by certified local roofing professionals.
- Process usually completed in 1–3 days for most homes.
- Safety protocols ensure homeowner and contractor protection.
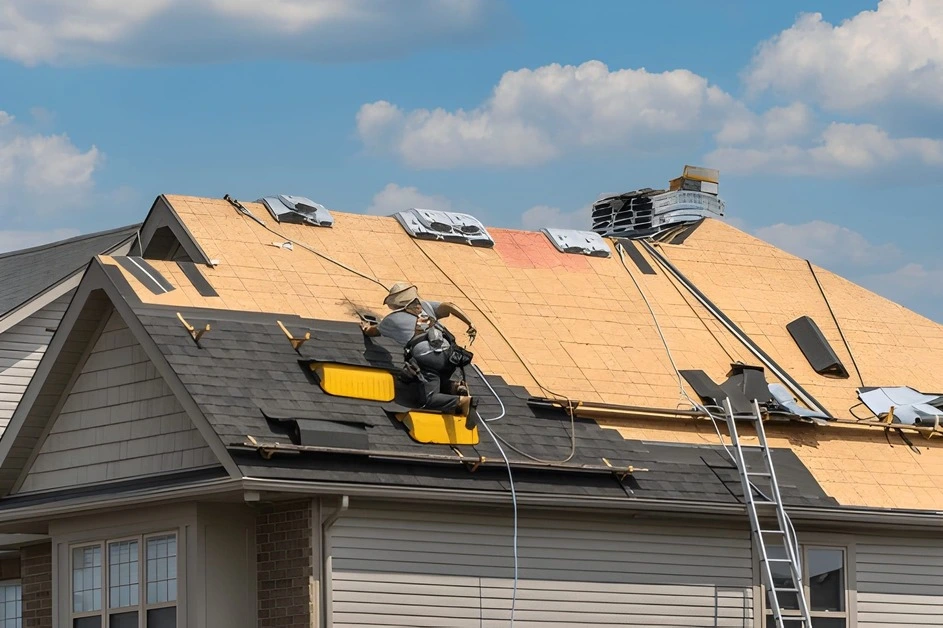
Image idea: Aerial shot of a professional crew working on a residential roof installation.

Choosing the Best Roofing Materials
Selecting the right roofing material can change your home’s look, lifespan, and savings potential!
- Asphalt shingles: Budget-friendly, 20–30 years lifespan, wide color range.
- Metal roofs: Extremely durable, energy-saving, last up to 50 years.
- Tiles and slate: Premium look, up to 75 years, withstands harsh weather.
- Composite roofs: Lightweight, resilient, eco-friendly options available.
Image with alt text: Comparison of roofing materials for roof installation.
Tip: Always ask for samples and check local building codes before choosing.
Roof Installation Costs & Savings
Worried about installation costs? Get peace of mind and save!
Typical residential costs range from $7,000 to $25,000 depending on:
- Roof size and complexity
- Chosen materials
- Local labor rates
- Additional features (gutter systems, skylights, etc.)
Quick calculator:
Total Investment = Roof Area (sq. ft.) x Price per Sq. Ft. (usually $4–$12)
- Try our Roof Installation Cost Calculator
Positive note: Many homeowners find that energy-efficient roofs can cut utility bills by 10–20% annually!
Step-by-Step Roof Installation Process
- 1. Site Prep: Protect landscaping, establish safety measures.
- 2. Tear-off: Remove old roofing materials safely.
- 3. Decking inspection: Repair/replace any damaged wood.
- 4. Underlayment application: Install waterproof barrier.
- 5. Material installation: Lay new shingles, metal, or tiles.
- 6. Flashings, vents, and trims: Prevent leaks and maximize longevity.
- 7. Final inspection and clean-up: Ensure quality and homeowner satisfaction.
Image suggestion: Timeline infographic, “7 Steps of Roof Installation.”
Maintenance & Longevity Tips
Maximize your investment and enjoy worry-free living.
- Inspect your roof at least twice a year.
- Clean gutters and remove debris promptly.
- Schedule professional checkups after severe weather.
Red flags: Curled shingles, granule loss, water stains, visible sagging.
Finding a Trusted Roofing Contractor
Choosing a certified, insured roofer is critical for safety, valid warranties, and peace of mind.
- Look for online reviews, manufacturer accreditations, and insurance.
- Always get at least 3 written quotes for comparison.
- Ask these questions: Are you licensed? Do you provide a detailed contract? Who will be on-site?
Image: Crew working with safety gear, meeting local building codes.
Frequently Asked Questions
How long does a new roof last?
Most modern roofs last 20–50 years, depending on material and climate.
When is the best time for roof installation?
Late spring and early fall offer mild weather and flexible scheduling.
Can roof installations lower energy bills?
Yes! Metal, tile, and light-colored roofs reflect sunlight, saving energy.
Customer Success Stories
“Our new roof was done in just 2 days and our energy bills dropped!” – Lisa D.
“Professional, fast, affordable—absolutely recommend roof-installation.com!” – Mark S.
Upload your own before/after images and reviews! Include images with alt text like “roof installation before and after.”
Call to Action
Ready for a safer, better-looking, and more energy-efficient home?
Get your free roof installation quote from certified experts today!
Get free roofing advice, cost guides, and seasonal maintenance tips.
Roofing content specialist with 5+ years researching U.S. residential and commercial roofing. Has documented 200+ projects covering installation costs, material selection, contractor vetting, and DIY guides for homeowners across all climate zones.