Preloader Close
When the shortest, most direct duct path runs straight up and down, a 4-inch rigid metal duct, proper roof flashing, a dryer vent installation through roof, and a maximum total duct run of 25–35 feet (with each 90-degree elbow adding 5 feet of run), it is possible and code-compliant to install the dryer vent through the roof. It costs $150 to $500 to have a professional install a dryer vent through the roof, depending on how deep the attic is, how steep the roof is, and how easy it is to get there. If you do it yourself, the materials will cost $80 to $200. Using a dryer-specific roof vent cap is the most important thing to do. Standard roof box vents create dangerous back pressure that can cut airflow efficiency by up to 60% and speed up lint buildup, which is a major cause of house fires.
Most homeowners don’t worry about where their dryer vents go until the day the laundry room layout makes it hard for the dryer to go out a wall, the dryer is in the middle of the house with no outside wall nearby, or the only way to get out is straight up through the attic and out the roof. In some cases, putting the dryer vent through the roof is not only okay, it’s typically the best and cleanest way to do it.
Table of Contents
A properly installed through-roof dryer vent lets air flow quickly, collects little lint, and makes a watertight hole in the roof that lasts for decades. If you don’t do it right, it makes a lint trap that holds moisture and slowly builds up to a dryer fire, a leaking roof, or both.
This full guide for 2026 has all the information you need, including when through-roof venting makes sense, building code requirements, how to choose duct material, how to install it step by step, how to flash and seal it, how to choose a roof cap, frequent problems, maintenance, and a full FAQ section.
When Should You Install a Dryer Vent Through the Roof?
When deciding how to route the dryer vent, you should always follow this rule: the shortest, straightest path to the outside.Every extra foot of duct run and every bend adds friction, which slows down the airflow, makes lint build up, and makes your dryer work harder on every load.
Through-roof venting is a good idea in several situations:
- The laundry room sits in the middle of the house, but there is no easy way to get to an outside wall that is close enough for the duct run.
- Stacked washer/dryer units in a closet or corridor on the second level, where vertical routing to the roof is shorter than horizontal routing to a wall.
- Laundry in a finished basement where laying duct horizontally through finished walls to reach an outside wall would need a lot of work to fix
- Townhomes and condos where the HOA rules say that venting from the side or back wall is not allowed or is not possible because of shared walls
- Renovation projects that need to open up finished drywall in several rooms to reroute existing ducts through walls
When you shouldn’t use through-roof venting
- When it’s easy to make a shorter, more direct wall escape
- In places where it snows a lot, roof cap dampers can get clogged by snow buildup.
- When the length of the vertical duct run goes over the code-allowed length without a booster fan
- When it’s hard or unsafe to get to the roof for yearly cleaning
Building Code Rules for Putting a Dryer Vent Through the Roof
Before you pick up a drill, make sure you know the code baseline. This will keep you from failing inspections, losing your homeowner’s insurance, and putting yourself at real risk of fire. The International Residential Code (IRC) Section M1502 and the International Mechanical Code (IMC) Section 504 are the main rules that govern the installation of dryer vents. However, some states and cities may have stricter local rules that apply.
Important Code Requirements
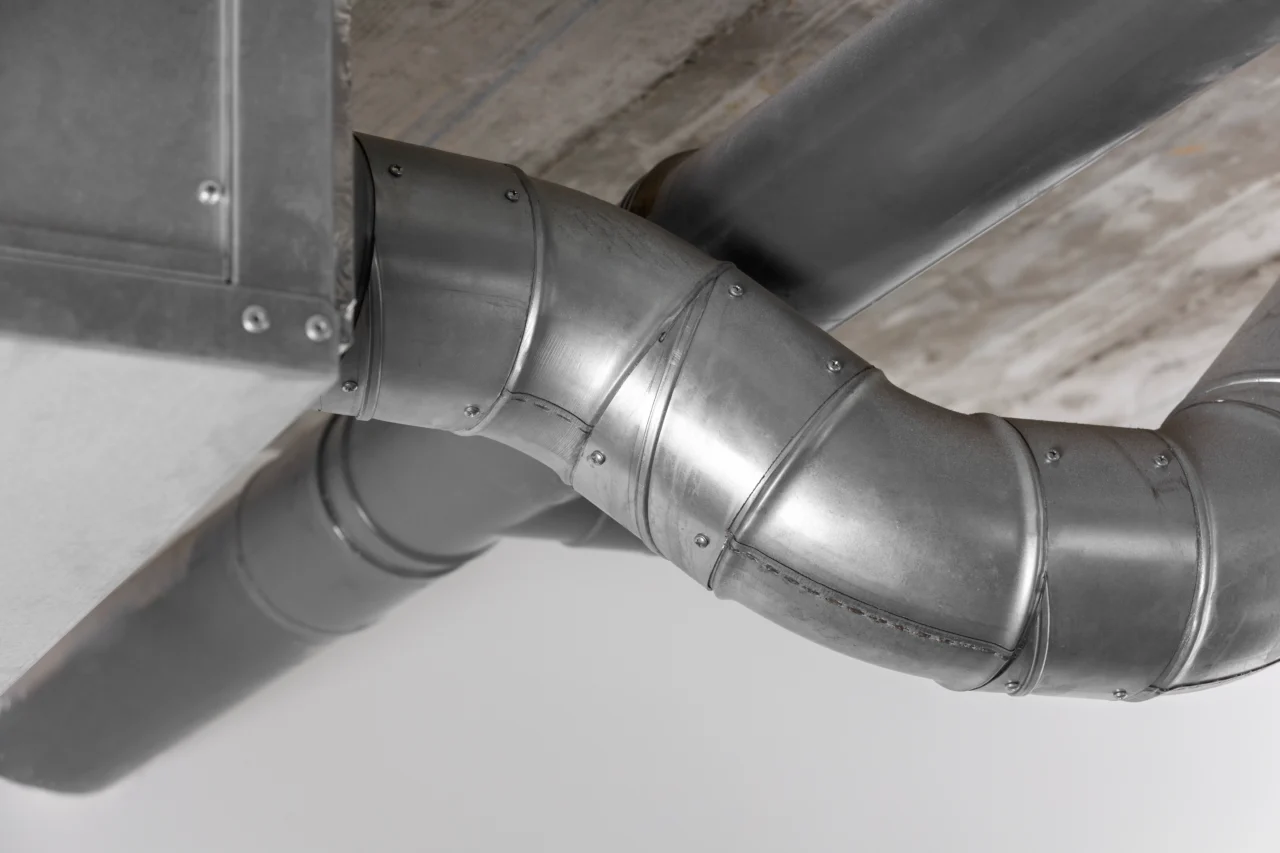
Material for the duct:
- The duct run needs to be made of rigid metal duct, like aluminum or galvanized steel. No plastic, foil flex, or vinyl is allowed.
- At least 4 inches wide on the inside
- Ribbed flex duct and smooth inside wall are not allowed for dryer venting because the ribs trap lint.
Maximum Length of the Duct Run:
- The maximum length is usually 25 to 35 feet, depending on municipal code.
- For every 90-degree elbow, take 5 feet off the maximum run length.
- For every 45-degree elbow, take away 2.5 feet from the longest run allowed.
- For example, if the maximum length is 25 feet and there are two 90-degree elbows, the actual duct can only be 15 feet long.
If the vertical runs are longer than the code allows or don’t have enough airflow at the end, they need an inline booster fan. This is usually a UL-listed unit that turns on automatically when the dryer runs.
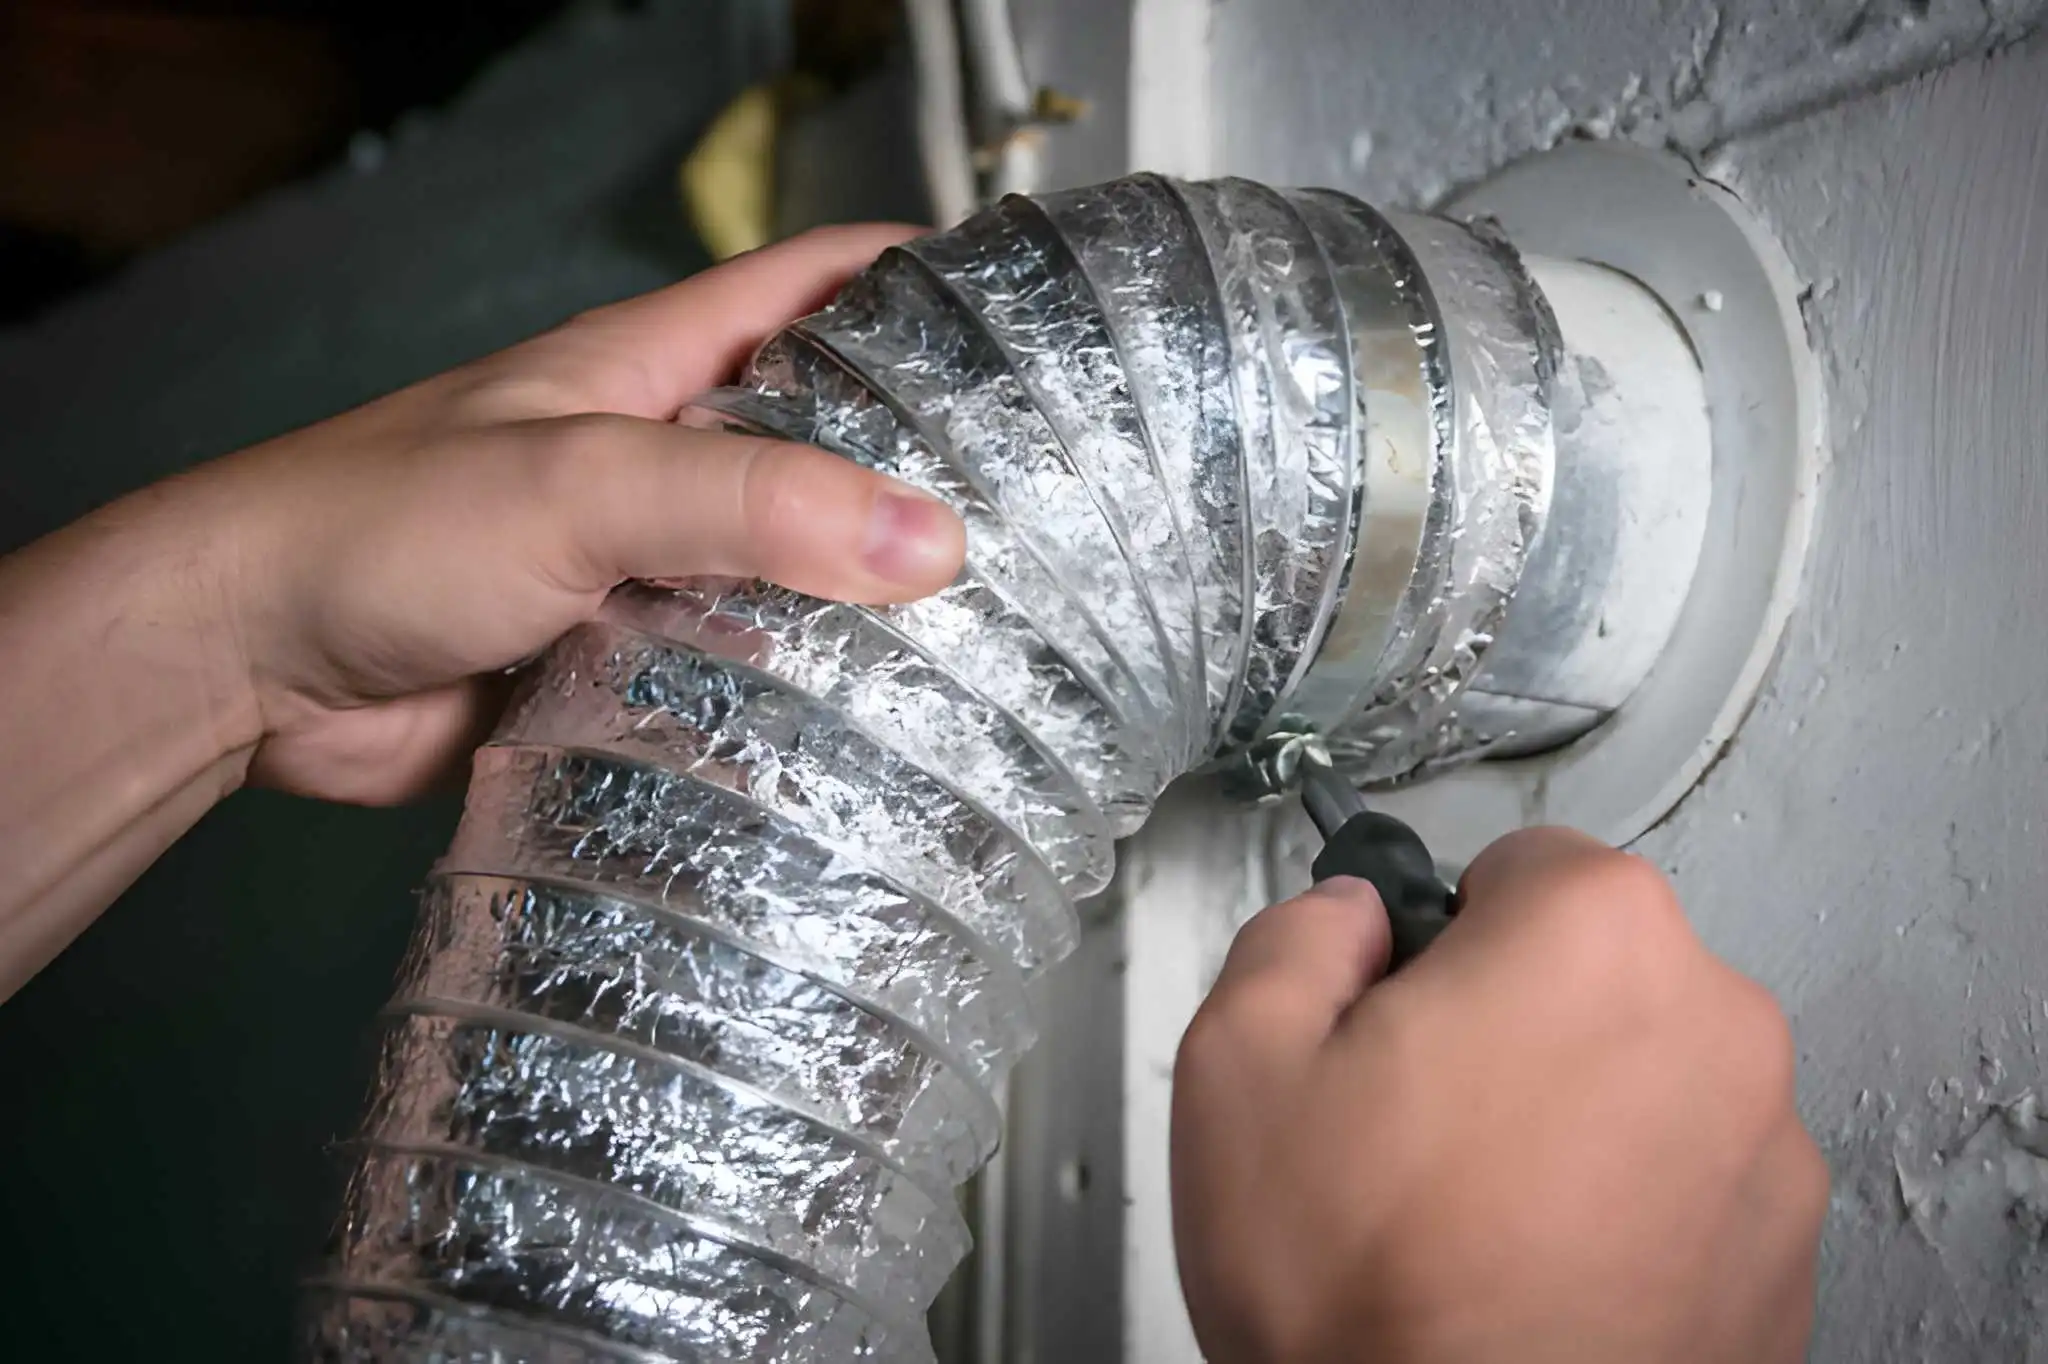
Connections for ducts:
All seams were held together with metal clamps or metal foil tape that could handle the heat of a dryer.
Don’t ever use regular duct tape. The glue breaks down when it’s hot and humid, which makes seams come apart.
Sheet metal screws are not allowed within the duct because the points of the screws trap lint.
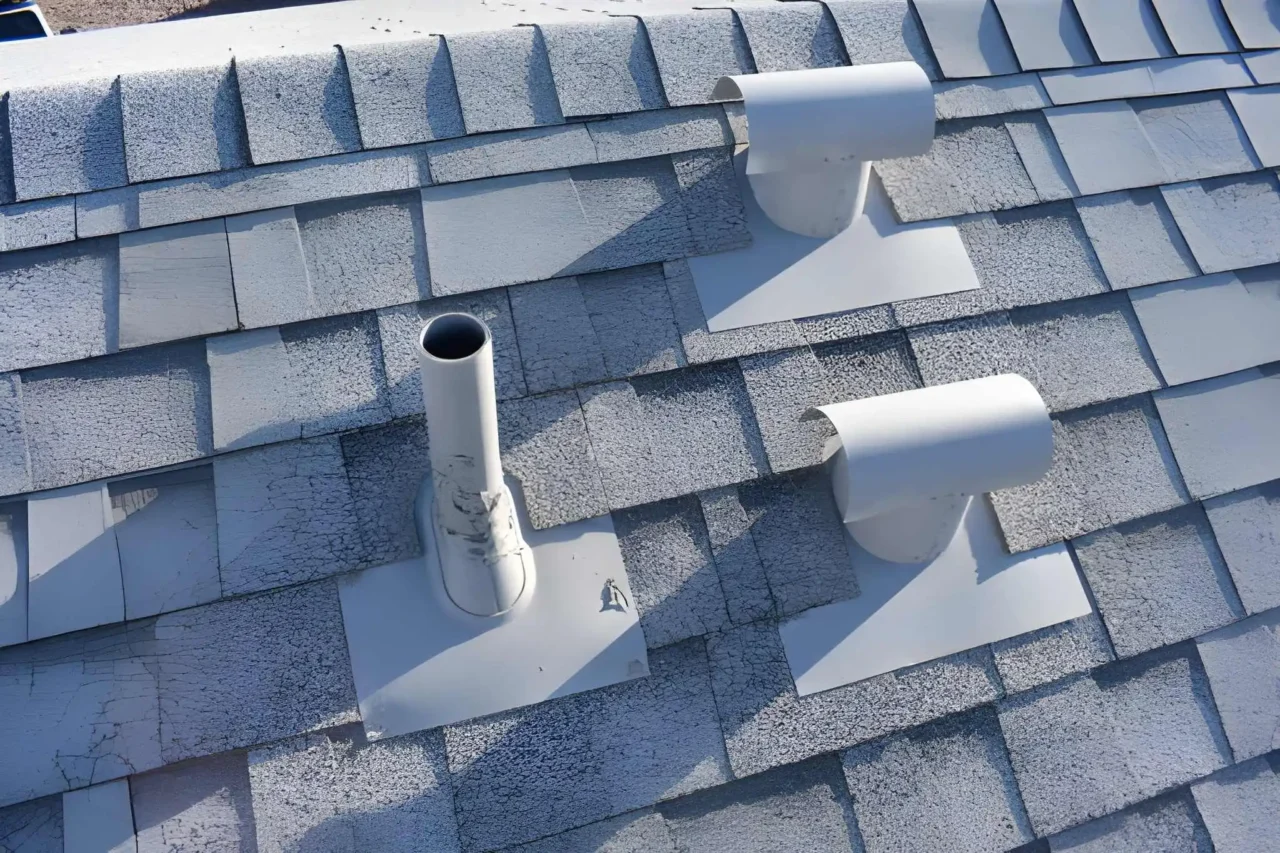
Termination on the Outside:
Vent must end outside the building, not in an attic, crawl space, or wall cavity.
A working damper that closes while the dryer is not running must be part of the roof vent cap.
The vent entrance must have a pest screen or damper that keeps animals from getting in.
No less than three feet of space between any building opening (windows, doors, vents)
Flashing:
A weatherproof flashing assembly that is made for dryer exhaust must cover all roof penetrations. Standard plumbing pipe flashing is not enough.
Why Picking the Right Dryer Vent Roof Cap Is More Important Than You Think
Most of the time, through-roof dryer vent installations fail not in the duct run itself, but at the end point.
When utilized as dryer vent terminations, standard roof box vents (the kind used for attic ventilation) make it very hard for air to flow back. In the lab, regular box roof vents create back pressure of 0.6 WCI (Water Column Inches) or more. This level of back pressure greatly reduces the efficiency of dryer airflow, speeds up lint buildup, and raises the risk of fire.
Dryer-specific roof vent covers are made to handle the amount of air and moisture that comes out of a dryer. The DryerJack and other products like it were designed because all of the normal roof vent types examined created dangerously high back pressure when utilized to vent dryer exhaust. The DryerJack’s aerodynamic damper design and improved hood geometry only slightly reduce airflow, making it the roof termination product with the least back pressure of those tested.
How to Choose a Roof Vent Cap
When choosing a roof cap for a dryer vent that goes through the roof, think about:
- Back pressure rating: Look for things that have been tested and found to have low back pressure (under 0.1 WCI is great; over 0.3 WCI starts to hurt efficiency).
- Damper mechanism: A spring-loaded or gravity-operated damper that completely seals when the dryer is off. This keeps cold air, animals, and rain from getting in.
- Pest screening: fine enough to keep out birds and rodents without trapping lint; may be taken off for cleaning
- Flashing compatibility: a built-in or compatible flashing base that fits your roof pitch range
- Material: Aluminum or galvanized steel; plastic covers break down when exposed to hot exhaust and UV light over and over again.
- Pitch range: Most caps fit specified pitch ranges (3:12–6:12 or 6:12–12:12), so make sure they work with your roof pitch.
Common Roof Vent Products for Dryers (2026)
| Product | Back Pressure | Pitch Range | Material | Price Range |
|---|---|---|---|---|
| DryerJack Premium | Lowest (lab-tested) | 3:12–12:12 | Aluminum | $45–$75 |
| Fantech Dryer Boost Cap | Low | 4:12–9:12 | Galvanized steel | $35–$60 |
| Master Flow Dryer Vent Cap | Moderate-low | 3:12–7:12 | Aluminum | $25–$45 |
| Lambro Industries Roof Cap | Moderate | 3:12–8:12 | Aluminum | $20–$40 |
| Generic box roof vent | Very high (dangerous) | N/A | Various | $8–$20 |
In short, don’t utilize a typical attic box vent or ridge vent as a dryer vent roof termination. The back pressure it causes makes the duct run a lint collection chamber, which greatly raises the risk of a dryer fire.
Things You Need to Install a Dryer Vent Through the Roof
List of Materials
Duct System:
- 60-inch lengths of 4-inch rigid aluminum or galvanized steel duct (number of sections depends on length of run)
- 4-inch 90-degree elbows (keep the number minimal; each costs 5 feet of permitted run)
- 45-degree elbows that are 4 inches long (use instead of 90-degree ones when you can)
- Aluminum foil duct tape, certified for 250°F or higher, for sealing all joints
- Metal duct clamps (2-inch band clamps) for all mechanical connections
- Duct hanger straps hold up the duct every 4 to 6 feet in the attic.
Going through the roof:
- A roof vent cover that fits your dryer and has a flashing base that fits your roof pitch
- If the cap doesn’t come with a roof flashing kit, it should come with base flashing and step flashing as needed.
- Nails or screws for roofing (to hold the flashing in place)
- Polyurethane roofing sealant or high-quality roofing cement
- Ice and water shield patch parts (for flashing underlayment)
- Matching roofing shingles (if the old shingles need to be taken off and put back on)
Duct insulation for attic runs:
- Wrap for duct insulation that can handle dryer temperatures (R-6 minimum in climate zones 4–8)
- Keeps condensation from forming on chilly duct surfaces in an attic that isn’t heated
Tools You Will Need
- Reciprocating saw or jigsaw (for making a hole in the roof)
- Use a hole saw (4¼ inch) to drill a hole in the ceiling or subfloor.
- Tin snips or aviation shears (for cutting and trimming stiff duct)
- Chalk line and tape measure
- Knife for utility
- Flat pry bar (for carefully pulling shingles that are already there)
- Gun for caulking
- Ladder (an extension ladder that is safe for roofs)
- Safety harness (needed for roofs with a slope of more than 6:12)
- Marker and straightedge
Step by Step: How to Install a Dryer Vent Through the Roof
Step 1: Decide on the route for the duct before cutting anything.
Planning the route is the most crucial part of putting in a dryer vent through the roof, and it’s also the part that people rush the most. Before you make any cuts, take the time to physically outline the path you want the duct to go from the dryer exhaust collar to the roof outlet.
The process of planning a route:
- Find the exhaust collar on the dryer. It is usually in the middle of the back bottom of the dryer and is 4 inches in diameter.
- Find the best place for the roof exit. The best place is right over the dryer. If possible, try to keep the horizontal offset in the attic to a minimum.
- Check the attic for things that might get in the way of the proposed route, like roof joists, cross-bracing, HVAC equipment, existing ductwork, and electrical runs.
- Measure the total planned duct length, which should include all sections and elbows that have been changed to feet.
- Make sure that the overall comparable length doesn’t go over the maximum set by your local code (usually 25–35 feet).
- If the total equivalent length is longer than the maximum, find out if the route can be shortened or if an inline booster fan is needed.
- Make sure that the roof departure point doesn’t get in the way of ridge vents, existing holes, skylight frames, or valley locations.
Important rules for planning:
- Plan for as few elbows as possible. Each 90-degree elbow costs you 5 feet of permitted run and makes a place for lint to build up.
- The roof exit point should be on a straight slope, away from valleys, ridges, hips, and places near flashings.
- Put the roof exit point where a ladder can reach it for yearly cleaning. Don’t put it on steep slopes that are hard to get to.
Step 2: Put in the attic duct run
Finish all of the ducting inside and in the attic before going on the roof. This lets you figure out the exact spot where the roof ends by looking at where the duct naturally ends in the attic.
- Put the first piece of ductwork on the dryer’s exhaust collar, use a metal clamp to hold it in place, and then tape it up with foil.
- Use the right wall sleeves to run stiff duct sections through the ceiling and into the attic where the duct goes through frame members.
- To connect duct pieces, crimp the smaller end (male end) into the bigger end (female end). The airflow should go from the dryer to the roof, with the male end facing toward the dryer and the female end pointing toward the roof.
- Use metal band clamps AND foil tape to make sure all connections are snug and won’t leak.
- Support the duct with hanger straps that are fastened to the attic structure every 4 to 6 feet. Sags trap lint and condensate.
- At the proposed exit location for the roof, the last length of duct should end about 6 inches below the roof decking.
- Wrap all of the duct sections that go through unconditioned attic space with insulation wrap. This is because condensation on cold duct walls causes moisture to build up and lint to stick faster.
Step 3: Mark and Cut the Hole in the Roof
This stage entails working on the roof, thus you need to follow all fall protection rules:
From the attic:
- To mark the center of the hole from below, put a nail or drill bit up through the roof decking at the anticipated exit location.
- Make sure the marker nail comes out of the roof in a clean spot, not on a rafter, ridge, or valley.
From the top:
- Find the marking nail on the roof.
- Use the vent cap flashing as a guide to draw the whole outline of the hole and flashing base on the roof.
- Carefully raise the shingles in the flashing zone with a utility knife, then slip a pry bar beneath the shingles to prevent cracking them.
- At the marker nail location, mark the center of the 4¼-inch hole.
- Cut through the roof decking using a jigsaw or reciprocating saw, but stay inside the lines you drew.
- Remove any dirt from the aperture and clean the cut edges.
Step 4: Put in the vent cap and roof flashing
Proper flashing is what makes the difference between a roof that stays waterproof for 20 years and one that leaks the first time it rains:
- Put a layer of roofing cement or polyurethane sealer around the edge of the hole you cut in the roof decking.
- If your roof cap has a built-in flashing base, slip the flashing base beneath the higher shingles and over the lower shingles. This is like the conventional step flashing principle: water must flow over the flashing, not under it.
- For dedicated flashing kits, follow the manufacturer’s instructions exactly when putting up base flashing first and then counter flashing.
- Use roofing nails to nail the flashing along the edges of the roof deck at the corners and at intervals set by the manufacturer.
- Put roofing cement under all the flashing edges that touch the roof surface, and make sure there is a perfect seal around all four sides.
- From above, push the vent cap through the flashing opening so that it connects to the duct below.
- Put the lifted shingles back over the top of the flashing and nail them back in place.
- Put roofing sealant around the top and side edges where the shingles meet the flashing to make a full weatherproof seal.
- Check that the damper on the vent cap can be opened and closed by hand.
Step 5: Attach the Roof Cap to the Duct and Seal It
Back in the attic:
- Connect the last part of the duct to the collar within the roof cap. From below, push the end of the duct into the collar of the cap.
- Use a metal band clamp to hold it in place and tighten it well.
- Use aluminum foil tape to seal the connection joint. Wrap it all the way around the junction, with at least 2 inches of overlap.
- Check to see sure the duct between the last hanger strap and the roof connection doesn’t have any sags, kinks, or unsupported parts.
Step 6: Close off the connections and holes on the dryer side.
- At the conclusion of the dryer, link the dryer transition hose (a short, flexible piece of aluminum) to the first rigid duct segment and the dryer collar.
- Use clamps and foil tape to hold both ends in place.
- If the duct goes through a rated assembly, use high-temperature fire-stop caulk or code-approved fire blocking to seal the gap.
- Check all the joints along the whole run one more time. Each junction should be taped with foil and clamped.
Step 7: Check the System
Before you clean up, testing makes sure the installation is correct before you seal off access to the attic:
- Set the dryer on a high-heat cycle for 10 minutes.
- Check the vent cap damper on the roof to make sure it is open and that you can feel warm, moist exhaust air coming out easily.
- You should be able to feel a strong, constant flow of air right away if you hold your hand 6 to 12 inches above the cap.
- While the system is running, go back to the attic and put your hand near each duct junction. You shouldn’t feel any air leaking.
- If the airflow at the roof cap is weak or the damper barely opens, look for: kinked duct sections, missed joint connections, or a total run length that is longer than code restrictions (a booster fan may be needed).
- After the drying cycle, look at the flashing area from the roof. There shouldn’t be any signs of water getting in.
- After the test run, look for condensation on the duct insulation from the attic. This means that the insulation is not thick enough or the duct is too long.
Dryer Vent Installation Cost Breakdown (2026)
Costs of DIY materials
| Item | Low Cost | High Cost |
|---|---|---|
| Rigid aluminum duct (per 5-ft section) | $8 | $18 |
| 90-degree elbows (each) | $6 | $14 |
| Dryer-specific roof vent cap | $25 | $75 |
| Roof flashing kit | $15 | $45 |
| Metal foil duct tape + clamps | $12 | $25 |
| Duct hanger straps | $8 | $15 |
| Duct insulation wrap (per 6 ft) | $10 | $22 |
| Roofing sealant/cement | $8 | $18 |
| Roofing nails/screws | $5 | $10 |
| Total DIY Materials (typical run) | $97 | $242 |
Professional Installation Costs
| Scenario | Cost Range |
|---|---|
| Simple vertical run (under 10 ft) | $150–$280 |
| Standard attic run (10–20 ft, 1–2 elbows) | $250–$400 |
| Complex run (20–30 ft, multiple elbows) | $350–$600 |
| With booster fan installation | Add $125–$250 |
| With fascia/wall repair (attic access) | Add $100–$200 |
| Two-story home (difficult attic access) | Add $75–$150 |
DIY or Professional: A Guide to Making a Choice
When to do it yourself:
- Comfortable working on the roof with safety gear
- One-story house with an easy-to-reach attic and a straight vertical run
- Confident in basic sheet metal work, putting up flashing, and sealing roofs
- Estimated savings: $150 to $400 compared to hiring a pro
When to hire a professional:
- Roof with two stories or a steep pitch
- Difficult attic routing with a lot of problems
- No experience with roof flashing or other roofing work before
- A booster fan is needed for the run length, and electrical work makes things more difficult.
- The roof is ancient or has flashing problems that need to be fixed at the same time.
Common Mistakes When Installing a Dryer Vent Through the Roof
Mistake #1: Using a regular roof box vent as the end point
Problem: When utilized for dryer exhaust, standard attic ventilation box vents create severe back pressure (0.6+ WCI), which greatly slows down airflow and speeds up lint buildup, which is a direct fire hazard.
Always use a roof vent cap made just for dryers that can handle the amount and temperature of dryer exhaust. The DryerJack and other similar items are made just for this use and cost only $25 to $75 more than a regular box vent.
Mistake 2: Putting Flex Duct or Plastic Duct on Roof Runs
Problem: The code says that flexible ribbed duct and plastic duct can’t be used for dryer venting because the ribs catch lint at every corrugation, plastic breaks down when it gets hot, and flex duct sags between supports, causing pools of moisture and lint.
Use only smooth-wall rigid aluminum or galvanized steel duct for the whole route as a solution. It is okay to have a small (less than 8 inches) piece of flexible aluminum transition hose at the dryer connection. Everything else must be solid.
Mistake 3: Going over the maximum length of the duct run
Problem: A duct run longer than 25 to 35 feet (including elbow equivalents) doesn’t let enough exhaust flow through, lint builds up quickly, drying cycles take longer, and the risk of fire goes up with time.
Answer: Before installing, figure out the total comparable run length by adding 5 feet for each 90-degree elbow and 2.5 feet for each 45-degree elbow. If your route is longer than the maximum, you need to either find a shorter one or put in an inline booster fan.
Mistake 4: Using regular duct tape instead of foil tape
Problem: The glue on regular cloth duct tape breaks down in 1 to 3 years when it is exposed to heat, humidity, and temperature changes from the dryer. Separated joints let lint into the attic, which slows down ventilation and makes a fire more likely.
Solution: Only use aluminum foil tape that is rated for high-temperature duct applications (look for a UL 181A or 181B designation). This tape will stay stuck even when the dryer is running.
Mistake 5: Not insulating the attic ducts
Problem: In cold areas, an uninsulated 4-inch metal duct that runs through an unconditioned attic becomes a condensation surface. The warm, moist dryer exhaust cools quickly, causing water vapor to condense inside the duct. This creates a wet lint paste that is very hard to remove.
Solution: Use duct insulation rated for dryer temperatures (at least R-6 in cold locations) to cover all the duct sections that go through the attic that isn’t heated. This keeps the temperature and speed of the exhaust gas steady during the run.
Mistake 6: Putting the Flashing on Backwards
Problem: Roof flashing needs to guide water over the flashing and away from the hole. If the flashing is put in wrong, with the upper shingles going under the top border of the flashing instead of over it, water will run straight into the roof opening.
The solution is that the upper shingles must always cover the top border of the flashing. The bottom border of the flashing is where the lower shingles go. Think of it like a shingle: water flows downhill, over every edge, and never under an edge that goes up.
Dryer Vent Installation Through Roof: Annual Maintenance
Cleaning a dryer vent that goes through the ceiling at least once a year is the very minimum. Households that do a lot of laundry or have extensive duct lines should clean it more often. According to the U.S. Fire Administration, lint buildup in dryer vents causes over 15,000 fires in homes each year. Administration of Fire.
Checklist for Annual Maintenance
From the top:
- Check the vent cap and make sure the damper can open and close easily. Remove any lint that has built up on the damper and screen.
- Look for raised edges, damaged sealant, or other evidence of water getting in on the flashing.
- Check the shingles around the vent cap right away to see if they are lifting or damaged.
- If you have them, take off the pest screens and remove the lint from them.
From the end of the dryer:
- Take out the transition hose from the dryer and put in a brush to clean the dryer vent.
- Work the brush through the whole duct line, pushing brush rods through all the sections until they reach the roof.
- Or, utilize a lint removal kit that runs on a drill (better for long vertical runs).
- Vacuum up the lint that has come loose from the duct’s inside.
If you see any of these signs, your dryer vent installation through the roof needs to be fixed right away:
- The dryer needs to run through several cycles to completely dry a load (lint buildup slows down airflow).
- The dryer gets hot to the touch, or the laundry area is particularly warm while it’s running.
- While the dryer is running, you can smell something burning or musty.
- The vent cap damper doesn’t move while the dryer is running.
- Water stains around the vent cap on the roof when the attic was checked from the inside
Frequently Asked Questions
Can you vent a dryer via the roof?
Yes, installing a dryer vent via the roof is a code-compliant, professionally approved method when the vertical route is the fastest and most direct way to get to the outside. It needs a 4-inch rigid metal duct, a roof vent cap made just for dryers (not a regular box vent), weatherproof flashing, and a total duct run that is no more than 25 to 35 feet, which is the code limit. Cleaning once a year is important for safety.
How long can a dryer vent go through the roof at most?
Most building regulations that follow IRC Section M1502 say that the maximum length of a duct that can be used is 25 to 35 feet from the dryer exhaust collar to the outside termination. Every 90-degree elbow takes away 5 feet from the maximum, while every 45-degree elbow takes away 2.5 feet. For instance, if the maximum length is 25 feet and there are two 90-degree elbows, the duct can only be 15 feet of straight flow. If the runs are longer than the maximum, an inline booster fan is needed to keep the exhaust speed up.
What kind of duct should you use to put a dryer vent through the roof?
Use 4-inch smooth-wall rigid metal duct, which can be made of either aluminum or galvanized steel. The code says that you can’t use flexible ribbed duct for dryer venting because the ridges on the inside catch lint. Plastic duct breaks down as it becomes hot in the dryer, and it is also against the law. A brief, flexible aluminum transition hose (less than 8 inches) between the dryer and the first stiff portion is fine, but the whole run into the attic and up to the roof must be made of hard metal.
Do I need special flashing for a roof vent for my dryer?
Yes, typical plumbing pipe flashing is not good for dryer vent roof penetrations. You need a weatherproof flashing system that fits 4-inch duct and seals the roof opening while letting exhaust flow freely. Most roof vent caps that are made for dryers come with a built-in flashing base. The flashing needs to be put in place so that the higher shingles cover its top border. Water should always flow over the flashing, not under it. Use roofing cement or polyurethane sealer to seal all the edges of the flashing.
What is the finest cap for a dryer roof vent?
The DryerJack is commonly thought to be the best dryer roof vent cap since it is specifically made for dryer exhaust and has been tested in a lab to have low back pressure that keeps airflow efficiency high. Standard attic box vents are unsafe alternatives that create back pressure greater than 0.6 WCI, which slows down airflow and speeds up the buildup of lint. A roof vent cap made just for your dryer should have a working damper, keep pests out, and have roof flashing that fits your roof’s pitch range.
Do I need a fan to help my dryer vent go through the roof?
You need a booster fan if your total comparable duct run length is longer than the local code maximum (usually 25–35 feet) or if testing shows that the airflow at the roof top is not good enough. A vent cap damper that hardly opens, longer dryer cycles, and lint buildup after only a few months of use are all signs that there isn’t enough ventilation. Booster fans for dryer vents are inline units that turn on by themselves when the dryer is running. They keep the exhaust speed up for lengthy vertical runs.
How often should you clean a roof vent for a dryer?
At least once a year, but more often for homes who do five or more loads of laundry a week or have runs longer than 20 feet. Many people put off cleaning their roof dryer vents for too long because they are tougher to get to than wall-exit vents. In the U.S., lint buildup in dryer vents starts about 15,000 house fires each year. If the vent is blocked, it will take longer for clothes to dry, it will get too hot, it will smell like burning, and the vent cap damper will hardly move when the dryer is running.
Should the attic have insulation on the dryer duct?
Yes, any duct sections that go through an attic that isn’t heated or cooled should be insulated with duct wrap that is rated for dryer temperatures (at least R-6 in climatic zones 4–8). Without insulation, warm, moist exhaust air cools quickly within a cold duct. This causes condensation, which gathers water inside the duct. Lint sticks to wet surfaces, and the resulting paste is very hard to get rid of. Insulation keeps the exhaust temperature and speed the same throughout the whole run, which cuts down on condensation and lint sticking to the surface.
What kind of tape should I use to connect the dryer vent ducts?
Never use regular cloth duct tape; only use aluminum foil tape that is rated for high-temperature duct work (UL 181A or 181B specified). Under the heat and humidity of a dryer, the glue on regular duct tape stops working after 1 to 3 years. This causes joints to come apart and lint to escape into the attic. Aluminum foil tape sticks to things permanently at the temperatures that dryers work at and makes an airtight seal at every junction. For extra safety, use metal band clamps along with foil tape at any mechanical connections.
Can I put a dryer vent through the roof by myself?
If you live in a one-story house and are comfortable working on the roof, making simple sheet metal parts, and putting up flashing, you can install a dryer vent through the roof yourself. The cost of materials is between $97 and $242, while the cost of having it professionally installed is between $150 and $600. The most important things to do are to use only rigid metal duct, put in a roof vent cap that is made just for dryers (not a conventional box), layer the flashing correctly so that water runs over it and never beneath it, and seal any holes with the right roofing sealant. Professional installation is helpful for homes with two stories, steep roofs, and complicated attic routing.
🏠 Roofing Tips & Updates
Get free roofing advice, cost guides, and seasonal maintenance tips.

Roofing content specialist with 5+ years researching U.S. residential and commercial roofing. Has documented 200+ projects covering installation costs, material selection, contractor vetting, and DIY guides for homeowners across all climate zones.
Leave A Comment