
Tin Roof Installation: Best Step-by-Step Guide
For most homes, the cost of installing a tin roof is between $5 and $14 per square foot. Corrugated panels cost between $5 and $9 per square foot, and standing seam systems cost between $10 and $14 per square foot. This means that the total cost of installing a tin roof on a 2,000-square-foot home ranges from $10,000 to $28,000, depending on the type of panel, the pitch of the roof, and the cost of labor. Modern “tin roofs” are nearly always steel or aluminum panels with protective coatings. Real tin roofing hasn’t been made commercially since the middle of the 20th century, but the moniker is still the most common one for metal panel roofing in homes. A tin roof that is put up correctly lasts 40 to 70 years, needs very little upkeep, and is more better at keeping out fire, wind, impact, and moisture than asphalt shingles at the same long-term cost.
A tin roof has a way of getting into your bones. Rain hitting corrugated metal panels makes a deep, pleasant sound that turns a thunderstorm into a lullaby. But aside from the romance, putting up a tin roof is a serious and very useful roofing choice that has real performance benefits. It is Class A fire resistant, can withstand winds of 120 to 160 mph, has energy-reflecting coatings that lower cooling costs by 10 to 25%, and will last longer than the people who put it up.
Table of Contents
This full guide for 2026 has everything you need to know to install a tin roof, including how to choose the right panels and underlayment, how to fasten them, how to add ridge and eave details, how to flash them, how to compare costs, how to avoid common mistakes, and a full FAQ for homeowners who are planning their first metal roof project.
What does a tin roof look like? (And What It Is Now)
The phrase “tin roof” has been used in American English for more than 150 years, but what it means has evolved a lot since Southern farmers started attaching corrugated iron sheets to barn roofs in the 1850s.
Real tin roofing, which is made of thin sheets of steel covered in a layer of real tin metal, was the most common type of metal roofing until the early 20th century. When galvanizing technology was still in its early stages, tin was able to resist rust. By the 1950s, hot-dip galvanizing (zinc coating) and subsequently Galvalume® (zinc-aluminum alloy coating) had taken the place of tin as the best protective coating. “Tin roofing” as a real material was no longer made.
When people say “tin roof” today, they mean one of three things:
- Galvanized steel panels are steel that has been coated with zinc to protect it from rust. They are the most common and commonly accessible type of metal roofing.
- Galvalume® steel panels are made of steel that has been coated with an alloy of zinc, aluminum, and silicon. They are better at resisting corrosion, especially in coastal and humid areas.
- Aluminum roofing panels are light, don’t need a coating, and are inherently resistant to corrosion. They are popular in coastal areas and for residential architecture.
People usually call all three “tin roofing,” and they are all put up using the same basic methods.
Different Types of Tin Roof Panels
The classic barn roof form is made up of wave-shaped panels that are usually 26 or 29 gauge steel and 36 inches wide. The cheapest alternative for a tin roof, easy to put up, and very well-known. Used a lot on buildings for farming, industry, and homes. Needs exposed fasteners (screws through the panel surface), which are the major thing that needs to be kept up on the roof over its life.
Standing Seam Metal Roofing: A high-end residential tin roofing system with panels that interlock at raised vertical seams. The fasteners are hidden under the seam, so there are no visible screw holes and the roof surface is smooth and clean. You can get them with snap-lock or mechanical-lock profiles. It costs more to install, but it is far better at withstanding the weather, needs almost no maintenance on the fasteners, and looks a lot more sophisticated.
5-V Crimp Panels: These panels have five V-shaped ridges and are a mix between corrugated and standing seam. The flat parts between the ridges have exposed fasteners. This style of Southern farm architecture is popular in farmhouses, cottages, and historic renovations. Because of the V-ridge shape, it is more resistant to weather than regular corrugated.
Metal Shingles and Tiles: Pressed metal panels that look like asphalt shingles, slate, or tile profiles. Give metal the look of traditional roofing while keeping its performance. Fasteners that are visible at the top of each shingle and buried by the following course were used to put them in place.
Cost of Installing a Tin Roof (2026)
Cost per square foot for each type of panel
| Panel Type | Material Cost (per sf) | Installed Cost (per sf) | Lifespan | Best Application |
|---|---|---|---|---|
| Corrugated steel (29 ga.) | $1.50–$3.00/sf | $5.00–$8.00/sf | 30–45 years | Agricultural, budget residential |
| Corrugated steel (26 ga.) | $2.00–$4.00/sf | $5.50–$9.00/sf | 40–50 years | Residential, commercial |
| 5-V Crimp steel | $2.00–$3.50/sf | $5.50–$8.50/sf | 40–50 years | Residential, farmhouse |
| Standing seam steel | $4.00–$7.00/sf | $9.00–$14.00/sf | 50–70 years | Premium residential |
| Standing seam aluminum | $5.00–$9.00/sf | $10.00–$16.00/sf | 50–70 years | Coastal, luxury residential |
| Metal shingles | $3.50–$6.00/sf | $8.00–$13.00/sf | 40–60 years | Residential, historic |
Total Project Cost by Home Size (Standard Corrugated Tin Roof)
Home Size | Roof Square Footage | Material Cost | Installed Cost |
|---|---|---|---|
| Small (1,000 sf home) | 1,100–1,300 sf | $1,650–$3,900 | $5,500–$10,400 |
| Medium (1,500 sf home) | 1,600–1,900 sf | $2,400–$5,700 | $8,000–$15,200 |
| Standard (2,000 sf home) | 2,100–2,500 sf | $3,150–$7,500 | $10,500–$20,000 |
| Large (2,500 sf home) | 2,600–3,100 sf | $3,900–$9,300 | $13,000–$24,800 |
| Estate (3,000+ sf home) | 3,200–3,800+ sf | $4,800–$11,400 | $16,000–$30,400 |
The Cost Comparison Over 50 Years
When you divide the cost of installing a tin roof by the number of years it will last, the math becomes clear:
Over 50 years, asphalt shingles (2 replacements and maintenance) will cost between $24,000 and $30,000.
The total cost of installing a tin roof and keeping it up for more than 50 years is $11,500 to $22,000.
Long-term savings of $2,000 to $18,000 or more with a tin roof
This figure doesn’t take into account the energy savings that come from reflective metal roofing coatings. The U.S. Department of Energy says that in warm climates, these coatings can save 7–15% on cooling costs each year, which adds up to an extra $100–$350 per year over the life of the roof. The Department of Energy says that in warm climes, the annual cooling cost can go down by 7–15%, which adds $100–$350 per year that adds up over the life of the roof.
How to Plan Your Tin Roof Installation
Check the roof’s load-bearing capacity
Before you order panels, be sure that your current roof can handle the extra weight of a tin roof:
- 40 to 80 pounds per square foot (100 square feet) of corrugated metal panels are similar to asphalt shingles and usually don’t need any further support.
- Standing seam systems weigh between 40 to 70 pounds per square foot, which is about the same as asphalt.
Metal over existing shingles: In most places, it is okay to add metal directly over one layer of existing asphalt (check local code). If there are two layers, you must remove the previous roofing first.
Most of the time, tin roofing is lighter than asphalt, thus it may be used with existing house structure without any changes to the engineering.
Minimum Requirements for Roof Pitch
There are certain minimum pitch requirements for each type of panel when installing a tin roof:
| Panel Type | Minimum Pitch | Notes |
|---|---|---|
| Standing seam (snap-lock) | 1:12 | Lowest minimum of any panel type |
| Standing seam (mechanical seam) | 0.5:12 | With proper sealant at seams |
| Corrugated panels | 3:12 | Lower pitches allow water to back up at laps |
| 5-V Crimp | 2:12 | With sealed laps |
| Metal shingles | 3:12 | Same as asphalt shingle minimum |
Pick the color and coating for your panel.
Most producers of modern tin roofing provide more than 40 colors and two main coating systems:
PVDF (Polyvinylidene Fluoride / Kynar 500®):
A high-quality coating technology that comes with a 40-year color fading warranty on most products. Better protection to UV rays, chemicals, and long-lasting shine. It costs 10–20% more for the panels, but it basically gets rid of the need to re-coat them for the life of the roof. This is what we suggest for all high-end residential tin roof installs.
SMP (Silicone Modified Polyester):
A standard coating technology that comes with a 30-year warranty on excellent items. Less expensive than PVDF, but still good at blocking UV rays and weather. Good enough for most home uses, especially in conditions that aren’t too harsh.
Cool Roof Colors:
You can get ENERGY STAR-rated reflecting pigment systems in darker colors that still reflect a lot of solar heat. This gives you more options for colors while still being energy efficient. For colors other than white, look for goods with Solar Reflectance Index (SRI) ratings of 29 or above.
Tools and Materials Required for Tin Roof Installation
List of Materials
System of Panels:
- The number of tin roofing panels you need is the roof area divided by the panel coverage plus 10% for waste.
- Ridge cap panels that are the same shape and color
- Drip edge or eave trim (goes all the way around the edges of the eaves)
- Rake trim goes all the way around the margins of the rake and gable.
- Valley flashing, which can be either a pre-formed W-valley or open valley metal
- Hip cap (for roofs with a hip shape)
- Flashing on the endwall and sidewall (where the roof meets the walls)
- Flashing at the transition point (when the pitch changes)
System for fastening:
- Exposed fastener screws: 1½-inch or 2-inch hex-head self-drilling screws with EPDM rubber washers (for corrugated and 5-V)
- Hidden clips: Standing seam clips (for systems with standing seams, made by a specific company)
- sealer: Use butyl tape or a sealer that works with all lap joints and trim situations.
- Closure strips: Pre-shaped foam closures for the eave and ridge that fill in the gaps in the corrugation.
Underlayment:
- Synthetic roofing underlayment (non-perforated and certified for high temperatures for metal roofs)
- Ice and water shield (in cold areas, eave zones and all penetrations)
- Optional: Vented metal roofing underlayment (lets moisture move from the deck)
Needed Tools
- Metal roofing shears or a circular saw with a blade that cuts metal (never an abrasive cutoff wheel, because sparks can produce rust patches).
- Cutting tin: straight, left, and right
- Hex-head bit cordless drill/driver
- Chalk line and measuring tape
- Square for speed
- Level (4 feet)
- Extension ladder and roof jacks (for steep roofs)
- Fall safety harness (needed for pitches higher than 6:12)
- Gloves, safety glasses, and ear protection
- Magnetic roller (to pick up metal shavings after cutting, which is very important for keeping rust spots from forming)
A Guide to Installing a Tin Roof Step by Ste
Step 1: Take off the old roof or get the deck ready
Tear-off (if needed): Take off all the old shingles, felt, and broken decking. Check the decking boards or plywood for rot, delamination, or broken places. If you find any, replace them before moving on. Putting a tin roof over a deck that is falling apart makes soft places, causes fasteners to pull out, and gives the completed product a wavy look.
If your local code allows it and your existing shingles are in good shape and only one layer thick, you can re-roof over them.
- Check for soft places or shingles that are significantly cupped or elevated, as these could show through metal panels.
- Put up furring strips (1×3 or 1×4 with 24-inch spaces between them) to make a smooth surface for nailing and a gap for air to flow through. This stops the metal from getting too wet and stops the drumming that can happen when you install bare-deck metal.
Step 2: Put in the underlayment
Underlayment is important for keeping water out and keeping metal from touching wood, which can trap moisture and speed up corrosion on both surfaces:
Put ice and water shield on all eave edges (at least 24 inches inside the outside wall line in cold climates), all valley areas, and all places where water can get in.
Install synthetic underlayment from the eave to the ridge, with each course overlapping by 6 inches.
Put cap nails 12 inches apart at the overlaps to hold it down.
For standing seam systems, use a synthetic underlayment that doesn’t have holes in it and can handle high temperatures. Standard felt isn’t good beneath metal since it lets out gases and doesn’t handle heat well.
Before identifying the locations of the penetrations (plumbing vents, skylights, chimneys), put ice and water shield on all of them.
“The underlayment is the last line of defense if any panel seam or fastener ever lets moisture in. Choosing the right high-temperature synthetic product and putting it in the right way is just as important as any other part of the tin panel installation above it.” — Metal Roofing Alliance Installation Standards, 2025
Step 3: Put up the eave trim and eave drip edge
The first metal parts to go on are the eave and rake trim. They make the smooth, completed edges that the panels will overlap:
Draw a chalk line 1 inch below the fascia face. This is the line that shows where your drip edge should go.
Put metal drip edge along all the eaves, making sure that the joints overlap by 2 inches and that the nails are spaced 12 inches apart.
Put metal rake trim (also called gable edge trim) on all the rake and gable edges, making sure it overlaps the drip edge at the corners.
Cut and fold trim pieces at the corners (where the eave meets the rake) to make overlapping joints that won’t let water in.
Before fastening, put butyl tape sealant under all of the trim overlaps.
Step 4: Put in the valley flashing
Before putting up the panels, put up pre-formed W-valley or open valley metal flashing:
Put a 12-inch-wide ice and water shield on each side of all the valley centerlines.
Put pre-formed metal valley flashing (at least 24 inches wide) in the middle of each valley.
Only fasten at the edges; never nail through the middle of the valley flashing.
Seal the valley parts using a sealer that works with the other materials and overlaps by at least 6 inches.
At the bottom, the valley flashing should stick out at least 4 inches past the eave line.
Step 5: Put in the eave closure strips
For corrugated and 5-V panels, the corrugated profile makes open spaces at the eave edge where the panel meets the eave trim. These spaces let birds and pests in, ice dams form, and rain blown by the wind get in:
Put pre-made foam or metal eave closure strips along the whole length of the eave, on the eave trim.
Closure strips must fit the profile of your panel. Corrugated closures are not universal; they are profile-specific.
Use construction adhesive or fasteners as the manufacturer says to hold it in place.
Put the ridge closing strips in place at the ridge in the same way (Step 8)
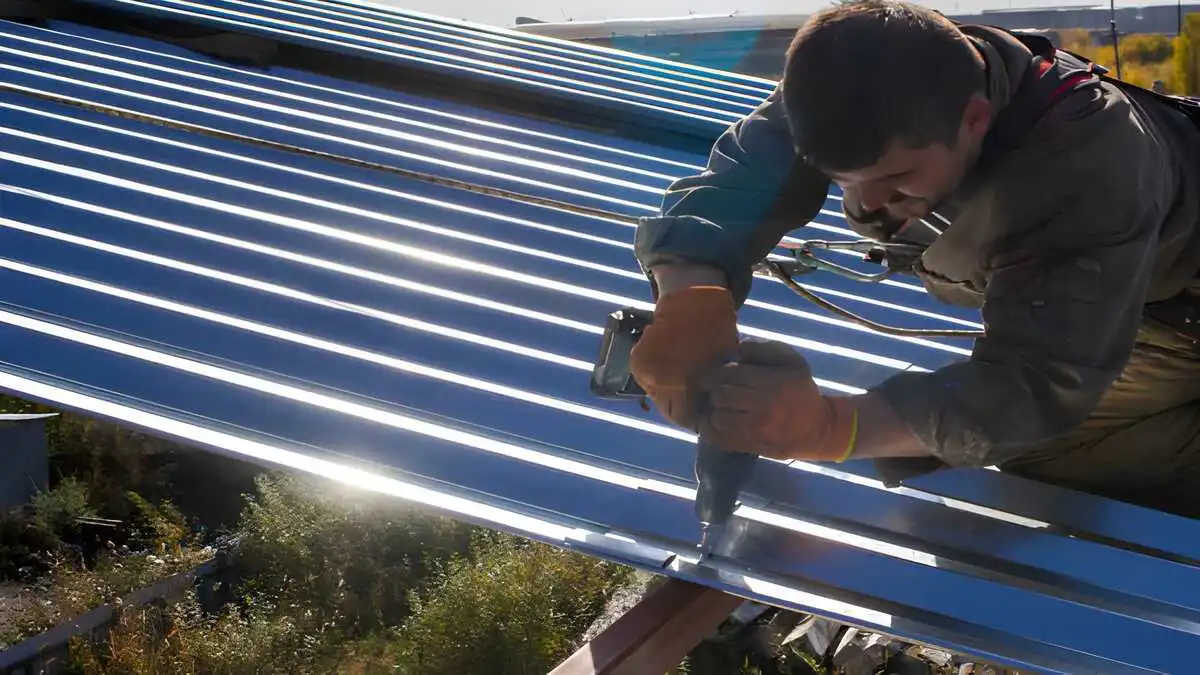
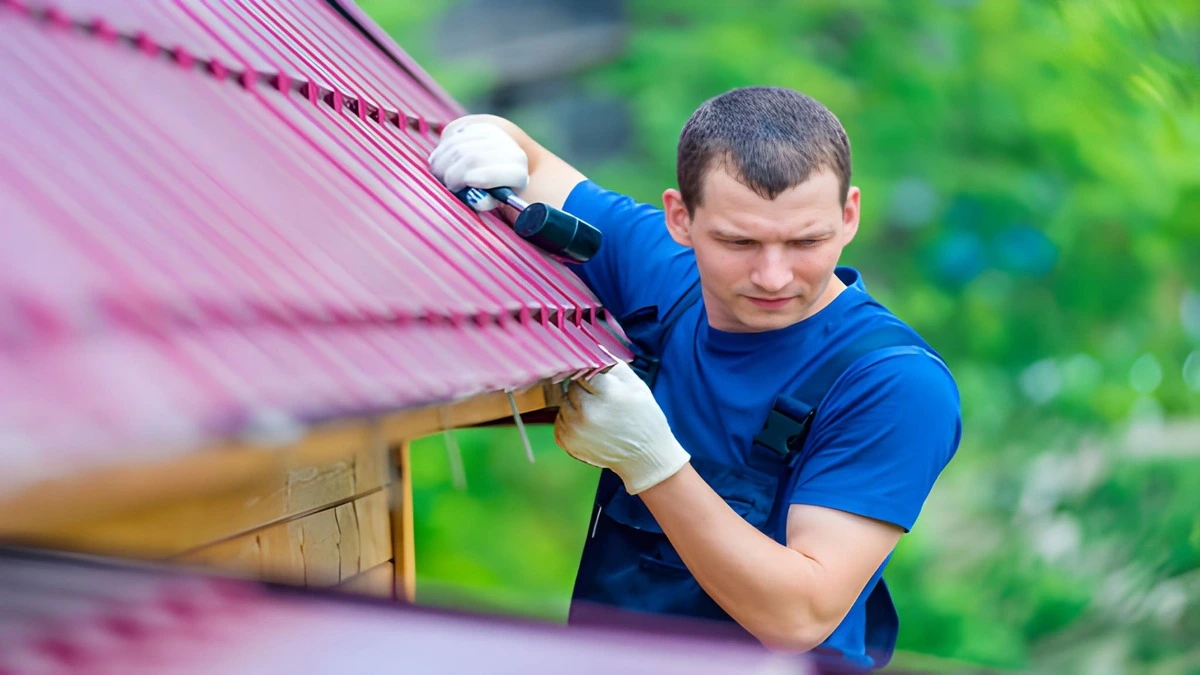
Step 6: Put up the tin roofing panels
This is the most important part of putting up a tin roof. The three things that decide if the finished roof appears professional or displays every mistake in the panel layout are direction, alignment, and where the fasteners go.
Arrangement and alignment:
Begin at one edge of the rake and go across the roof in the direction that puts the lapped (overlapping) panel edge downwind of the direction of the wind. This is very important for keeping the roof from blowing away or getting wet.
To keep the vertical alignment steady, snap a chalk line along the rake edge that is the same width as your first panel.
Place the first panel so that its rake edge is 1 to 1.5 inches above the rake trim and its eave edge is 1 to 1.5 inches above the eave trim/drip edge.
Make sure the panel is absolutely square to the eave by using a framing square at the bottom corner before putting in any screws.
Putting corrugated panels together:
Never drive screws into the valleys (low spots where water runs); instead drive them into the panel crests (high points).
For any structural supports (purlins or decking), the screws should be 12 to 24 inches apart on center.
At the eave and ridge, the spacing is 6 inches on center (closer at important weather boundaries).
At laps, use the same spacing to fasten through both panel layers.
The screw must compress the EPDM washer enough to make a little bulge, but not enough to crush it flat (over-driving makes leak sites) or too loose (under-driving lets water in).
Laps from panel to panel:
For slopes 4:12 and higher, there must be at least 1.5 corrugations on the side; for slopes lower than 4:12, there must be at least 2 corrugations.
End laps, which are the places where panels meet horizontally, must be at least 6 inches for slopes 4:12 and above and 12 inches for slopes lower than 4:12.
Before putting on the overlapping panel, put butyl sealant tape on all of the end laps.
How to fasten standing seam panels:
Install hidden clips by putting them at the right distances (usually 12 to 24 inches) according to the manufacturer’s instructions and attaching the clip base to the roof deck or purlins.
Fold the panel seam over the clip by snapping it or using a machine. The hidden clip floats in the seam to allow for thermal expansion.
Important: Never utilize exposed screws on the faces of standing seam panels. This makes the system’s leak-free seaming benefit useless.
Cutting panels:
Always cut teeth-forward with metal shears, aviation snips, or a circular saw with a metal-cutting blade. This means that the blade spins so that the teeth cut from below the panel instead of above it.
Never use an abrasive cutoff wheel. Sparks leave microscopic iron particles on the panel covering that corrode and stain the roof.
Use a magnetic roller or sweep to pick up all the metal filings from the roof after each cutting job. This will keep them from rusting.
Step 7: Flash All Openings
Plumbing vents, skylights, chimneys, and exhaust fans are all examples of penetrations through a tin roof. Each one needs the right flashing to keep water from going under it and over it:
Flashing for pipe boots and vents:
Use pipe boots that are made for metal roofing, not regular rubber boots, because they don’t work with metal panel thermal movement.
For panels with exposed fasteners, put the boot over the panel and move the seams around the base of the boot.
Use a roofing sealant that works with the boot to seal the edges.
For standing seam, utilize the pipe penetration equipment that comes with the product.
Flashing for chimneys and skylights:
Put step flashing on the sides, weaving it in with each panel course.
Put head flashing on the side that goes up (it should go at least 4 inches under the panels above).
Put a saddle or cricket below the chimney that is broader than 30 inches to guide water around the hole.
Use a sealant that works at high temperatures to seal all of the flashing counterflashing joints. Don’t use regular silicone; instead, use polyurethane or metal roofing-specific sealant.
Conditions for the end wall and side wall: where the slope of the roof meets a vertical wall surface:
Put flashing on the side of the wall that is at least 4 inches high and goes all the way up.
Use the right sealant to seal the wall counterflashing.
Cover the flashing with metal counterflashing that is attached to the wall and lets heat move.
Step 8: Put in the closure strips and ridge cap
The ridge cap is the last big part of the installation. It goes on top of the roof where two slopes meet and needs to be completely weatherproof:
Put foam or metal ridge closure strips on both sides of the ridge, making sure they match the panel profile.
Use butyl tape sealant on either side between the closing strip and the last panel course.
Place the ridge cap in the middle of the ridge so that it overlaps each slope by at least 4 inches.
Using the right screws, attach the ridge cap to the solid framework (rafters at the ridge) every 12 inches through the closure strips.
Minimum 6 inches of overlap between ridge cap pieces, with the lap going in the direction of the wind.
At the hip ridges, put in the pre-formed hip cap in the same order, starting at the eave and working your way up to the ridge peak.
Step 9: Put on the hip cap (for hip roofs)
For hip roofs with four slopes that all meet at the hip ridges:
To make trim cut lines, snap chalk lines on both panels where they meet at each hip ridge.
Use tin snips to cut the edges of the trim panels along the chalk lines.
Put butyl tape to the edges of both trimmed panels.
Place the hip cap in the middle of the hip ridge, making sure that each panel edge overlaps by at least 3 inches.
Starting at the eave and working your way up to the ridge, fasten every 12 inches.
Use a sealant that works with the fastener heads that are exposed.
Step 10: Last Check and Cleanup
Before saying that the installation of the tin roof is finished:
Walk around on the roof and check that all the screws that are sticking out are correctly pushed in, with the EPDM washer slightly squeezed and the head flush and snug.
Make sure that all of the overlaps between the ridge cap and the hip cap are sealed.
Check all penetration flashings to make sure they are fully sealed.
Check that all trim pieces are completely attached and that there are no corners that are raised.
Use a magnetic roller on the whole roof to pick up any metal shavings that are still there.
Use mild soap and water to clean all of the panels. This will get rid of fingerprints, chalk line residue, and construction debris.
Check the panels from the ground and from a ladder at the eave level to make sure they are straight and even.
Take pictures of all the places where the penetrations are so you can refer to them later for maintenance.
Tin Roof Installation vs Other Roofing Materials
| Factor | Tin Roof | Asphalt Shingles | Clay Tile | Wood Shake | Flat EPDM |
|---|---|---|---|---|---|
| Installed cost per sf | $5–$14 | $2–$6 | $10–$20 | $7–$12 | $5–$12 |
| Lifespan | 40–70 years | 15–30 years | 50–100 years | 20–30 years | 20–30 years |
| Weight per square | 40–80 lbs | 200–350 lbs | 600–1,000 lbs | 250–350 lbs | 60–100 lbs |
| Fire resistance | Class A | Class A (deck) | Class A | Class B/C | Class A |
| Wind resistance | 120–160 mph | 60–130 mph | 80–130 mph | 60–90 mph | 90–110 mph |
| Minimum pitch | 0.5:12 | 2:12 | 4:12 | 3:12 | 0.25:12 |
| Energy efficiency | High (reflective) | Moderate | Moderate | Low | Moderate |
| Maintenance | Minimal | Low-moderate | Low | Moderate-high | Annual inspections |
| Noise (rain) | Noticeable | Low | Low | Moderate | Low |
| 50-year total cost | $11,500–$22,000 | $24,000–$30,000 | $20,000–$40,000 | $25,000–$35,000 | $15,000–$25,000 |
Common Tin Roof Installation Mistakes
Using an abrasive cutoff wheel to cut panels is a mistake
Problem: When cutting galvanized or Galvalume steel panels, abrasive grinding wheels let forth sparks that contain iron. These sparks become stuck in the protective coating, rust nearly right away, and leave persistent rust stains on the panel surface within weeks of being put up. At first, the rust stains are just decorative, but with time, they might speed up the deterioration of the panels in the afflicted locations.
Always use metal shears, aviation snips, or a circular saw with a carbide-tipped metal cutting blade that is made just for sheet metal. After cutting, use a magnetic roller or a strong magnet to quickly sweep the whole work area to pick up all the metal dust before it rusts.
Mistake 2: Driving too hard or too little on exposed fastener screws
The EPDM rubber washer under each exposed screw head is the main water seal at every fastener penetration. Overdriven screws crush the washer flat, which ruins its capacity to seal and makes a compressed, permanently deformed gasket that lets water in. Screws that are not driven enough don’t compress the washer at all, leaving a space around the fastener shank.
To fix this, drive each screw in until the EPDM washer is slightly bulged. You should notice the washer grow about 1/16 to 1/8 inch wider than its original diameter. Change the settings on the drill clutch and keep the pressure the same. After finishing each area, do a last manual check on all the screws.
Mistake 3: Putting fasteners through the bottoms of valleys
Problem: Driving fasteners through the low areas (valleys) of corrugated panels puts screw penetrations right in the course of the water flow. Water runs through the valleys, right over the screw head, and if the washer compresses too much, it creates an immediate leak source.
Solution: Always fasten through the tops of the panels (the high corrugated peaks), not the troughs. This puts every fastener penetration at the top of the profile, where water can’t flow, which greatly lowers the likelihood of leaks during the life of the panel.
Mistake 4: Not taking thermal expansion into account when planning the layout of the panels
Problem: When the temperature changes, metal expands and contracts a lot. For example, a 10-foot steel panel can expand and contract 1/8 to 3/16 inch across a range of 100°F. In the summer heat, panels that are tightly attached against each other or trim without room for expansion can buckle, causing the surface of the panel to become permanently wavy and the fasteners to pull through.
Solution: When using exposed fastener systems, make sure to install panels with the gap required by the manufacturer at all fixed trim points. For standing seam, utilize hidden floating clips that let panels move freely in seams without putting stress on the fasteners. If your standing seam extends more than 30 feet, don’t use fixed clips without floating clips every now and then.
Mistake 5: Using the Wrong Sealant on Metal Roofing
Problem: Standard silicone sealant, which is common in construction, doesn’t work with painted metal roofing. It can’t be painted over, it breaks down faster than metal roofing coatings when exposed to UV light, and it loses its grip on many Kynar and SMP coating systems after 3–5 years.
Use only polyurethane-based roofing sealants (such Geocel, Sikaflex, or something similar) or metal roofing sealant that the manufacturer says to use at all trim conditions, penetrations, and exposed fastener heads that need touch-up. These materials stay stuck to painted metal finishes even after long periods of thermal cycling and UV exposure.
Mistake 6: Not using closure strips at the eave and ridge
Without eave and ridge closure strips, the corrugated profile of metal panels makes open channels at the eave edge and ridge. These are places where birds, bats, wasps, and rats can get into the attic and where wind-driven rain can get into the roof system at its weakest points.
Solution: Before putting up panels above, put pre-formed foam or metal closure strips (that fit the shape of your panels) at every eave and ridge. This tiny feature has big effects on how well the roof works over time and how well pests are kept under control.
Tin Roof Maintenance Schedule
One of the best things about installing a tin roof is that it doesn’t need much maintenance for 40 to 70 years.
Every six months
- Check the ground level for any panels that are plainly loose, trim edges that have lifted, or color changes that show rust.
- Remove leaves, branches, and pine needles from valleys, eave edges, and gutters. Debris buildup keeps moisture against metal surfaces.
Every year
- Check all of the exposed fastener screws. If any of the washers are cracked, flattened, or missing, replace them.
- Look for cracks or gaps in all sealant at penetrations, trim overlaps, and ridge/hip cap edges. If you find any, reapply the sealant.
- Check all flashings for edges that have come up or rust where different metals touch.
- Use a light detergent and a soft brush to clean the panels. This will get rid of biological growth, leaf stains, and deposits from the air that might speed up the breakdown of the coating.
Every five years
- A professional will look at the whole roof, including the trim, penetrations, and margins of the underlayment that are visible at the eave.
- If any exposed fasteners are loose, tighten them or replace them.
- Use touch-up paint from the manufacturer to fix any scratches or chips in the paint. Bare metal that is exposed to the elements may corrode and needs to be fixed right away.
Signs That Need Immediate Attention
- Rust streaks on the margins of panels below fastener heads or trim
- Panel gaps that can be seen at the ridge or eave (closure strip failure)
- Bubbling or flaking panel coating (unusual with good products, but it means the coating has failed)
- Any visible sunshine through attic-side penetration flashings

Frequently Asked Questions
How much does it cost to put up a tin roof?
In 2026, it will cost between $5 and $9 per square foot to install corrugated metal panels and between $9 and $14 per square foot to build standing seam systems. For a normal 2,000 square foot home, corrugated costs between $10,500 and $20,000, while standing seam costs between $18,900 and $35,000. The cost of a tin roof is higher up front ($4,000–$12,000), but it lasts 40 to 70 years, thus over 50 years, it costs less to have one tin roof than two asphalt roofs.
How long will a tin roof last?
If you install a tin roof correctly, it will last 40 to 70 years for steel systems with good coatings and 50 to 70 years or more for aluminum systems. Because there are no aged EPDM washers to replace, standing seam metal roofs with hidden fasteners usually survive longer than corrugated systems with visible fasteners. In coastal areas, Galvalume® steel and aluminum work far better than regular galvanized steel, which can rust in salt air in 20 to 30 years.
Is it possible to install a tin roof yourself?
If you know how to work on roofs and cut sheet metal, you can put up a corrugated tin roof yourself on a one-story house with a pitch that is easy to reach (under 6:12). Estimated savings for doing it yourself: $2,000–$6,000 in work. For appropriate seam formation, standing seam installation needs instruction from the manufacturer and certain tools. It is not a good idea to do it yourself. No matter what system you use, you must have fall protection and meet local permission requirements before you can start.
What kind of underlayment do I need for a roof made of tin?
When putting on a tin roof, you need a synthetic underlayment that doesn’t have holes and can handle high temperatures instead of regular 15 or 30-pound felt. Felt releases oils that can discolor the undersides of metal panels, and it doesn’t hold up well to temperatures under metal roofs that can reach 150–180°F in the summer sun. In cold areas, ice and water shield is needed at all eave edges, in all valley circumstances, and around all penetrations, no matter what the weather is like.
Does a tin roof make noise when it rains?
When you put tin roofs over solid plywood or OSB decking with underlayment, they are only a little bit louder than asphalt shingles. This is because the solid deck and underlayment absorb most of the sound. The sound of rain is loudest on tin roofs that are put over exposed purlins and don’t have a solid deck underneath. This is prevalent in agricultural and basic residential installations. For homeowners who are worried about the noise of rain, adding a layer of stiff insulation behind the metal panels or putting them over an existing shingle layer makes a big difference.
What is the lowest pitch that can be used to install a tin roof?
The lowest pitch depends on the type of panel. For example, standing seam snap-lock systems can be put on pitches as low as 1:12, while mechanical-lock standing seam can go as low as 0.5:12 with the right seaming. For regular end-lap circumstances, corrugated panels need at least 3:12.With sealed laps, 5-V crimp panels work up to 2:12. For any metal panel with a pitch of less than 3:12, the ends must be sealed with butyl tape, and the fastening patterns must be tightened to keep water from getting in during rainstorms that are blown by wind.
Is it possible to put a tin roof over shingles that are already there?
Most building codes allow for the installation of a tin roof over an existing coating of asphalt shingles, and this is a popular practice. Installing over existing shingles costs $1 to $1.50 less per square foot to rip off. Requirements: the shingles that are already there must be fairly level (no badly cupped, buckling, or elevated shingles), the roof deck underneath must be structurally sound, and local laws must allow re-roofing over existing shingles. Most of the time, you can’t install over two layers of shingles because the combined weight and unevenness of the surface are too much.
What makes standing seam and corrugated tin roofing different?
Wave-profile panels with exposed screws through the panel surface are used in corrugated tin roofing. This makes it faster and cheaper to install, and it can be done by a larger range of people. However, the screws and washers need to be checked and replaced on a regular basis. Standing seam uses flat panels with vertical seams that lock together and fasteners that are completely hidden. This means that there are no exposed screw penetrations, which means that there are no fastener points that need a lot of maintenance. This makes the roof much more weather-resistant and gives it a much longer effective service life, but it costs 30–50% more to install.
What hue of tin roof saves the most energy?
White and light-colored tin roofs reflect the most sunlight. A white metal roof with ENERGY STAR certification reflects 60–70% of solar heat, while a black asphalt roof only reflects 25–35%. Most big companies now sell “cool roof” pigment technology in deeper colors, though. This technology reflects 30–45% of solar heat even in charcoal, dark bronze, and old copper tones. No matter what color they are, search for ENERGY STAR-certified panels with Solar Reflectance Index (SRI) ratings above 29 for the best energy efficiency.
Does a tin roof make a house worth more?
Yes, according to Remodeling Magazine’s Cost vs. Value studies, installing a tin roof usually adds $1.09 to $1.35 to the resale value for every dollar spent. This makes metal roofing one of the best exterior improvement projects for getting a good return on investment. In most real estate markets, tin roofing is a great selling point because it lasts a long time (buyers like not having to repair the roof for decades), is energy-efficient, requires little upkeep, and looks good from the street.
Get free roofing advice, cost guides, and seasonal maintenance tips.

Roofing content specialist with 5+ years researching U.S. residential and commercial roofing. Has documented 200+ projects covering installation costs, material selection, contractor vetting, and DIY guides for homeowners across all climate zones.
Leave A Comment