TPO Roofing: Steps, Costs & Installation Methods (2026)
Table of Contents
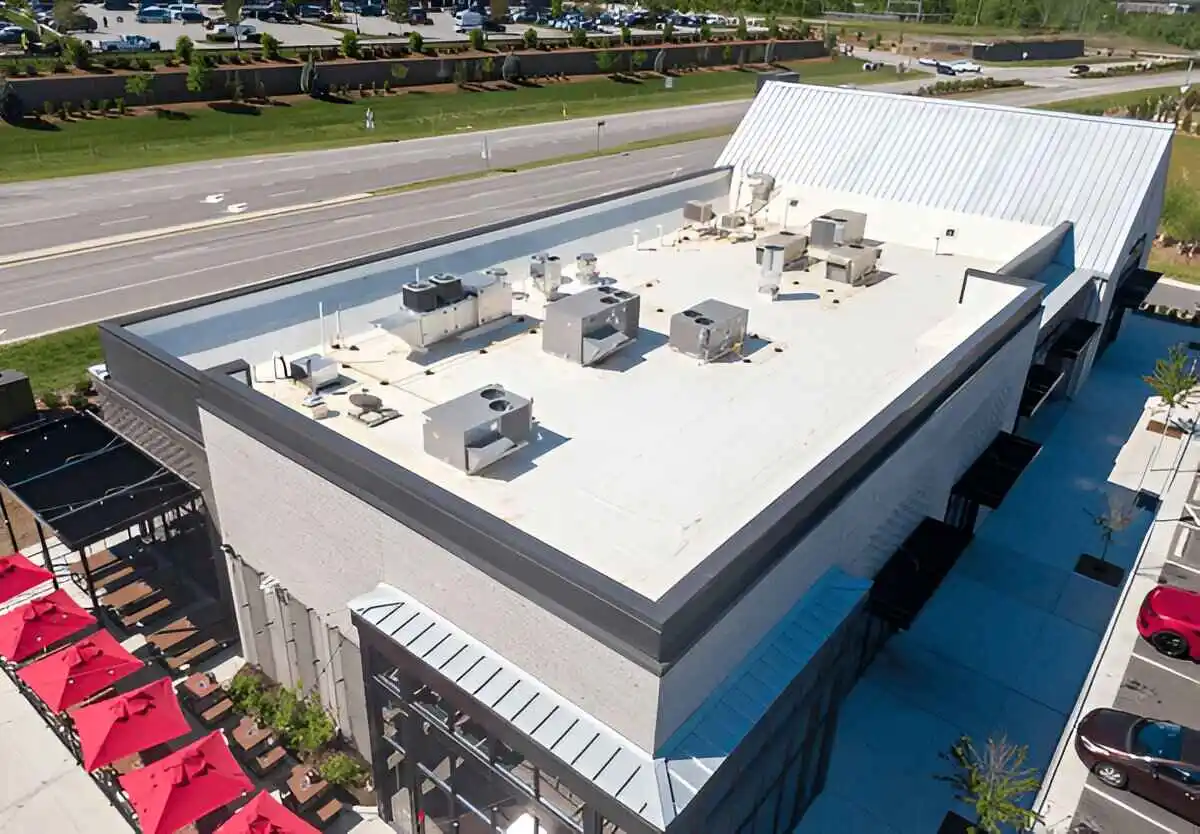
TPO roofing installation has become the preferred choice for commercial flat roofs due to its energy efficiency, durability, and cost-effectiveness. The process involves preparing the substrate, installing insulation, laying thermoplastic membrane sheets with proper overlaps, and heat-welding seams at 900°F to create watertight bonds. TPO systems last 15–30 years when installed correctly using mechanically fastened, fully adhered, or ballasted methods—each suited to different building requirements and budgets.
This comprehensive guide covers preparation, installation methods, heat welding techniques, flashing details, costs, and critical quality control steps that ensure your TPO roof performs reliably for decades.
What is TPO Roofing?
TPO (Thermoplastic Polyolefin) is a single-ply roofing membrane made from polypropylene and ethylene-propylene rubber. Its white reflective surface reduces cooling costs by up to 30%, and heat-welded seams create a monolithic, watertight surface stronger than the membrane itself.
Key Benefits:
- Energy Star certified (reflective white surface)
- Heat-welded seams (permanent bonds)
- Resistant to UV, ozone, chemicals, punctures
- 15–30 year lifespan with proper installation
- Lightweight (1/3 weight of built-up roofing)
- Recyclable at end of life
Common Applications: Commercial buildings, warehouses, retail centers, schools, hospitals, low-slope residential roofs.
TPO Installation Methods
1. Mechanically Fastened (Most Common)
How It Works: Membrane fastened to deck with plates and screws through insulation, overlapping seams hide fasteners.
Cost: $8–$12 per sq ft installed
Best For: Most commercial applications, high-wind zones, reroofing projects
Pros:
- Fastest installation (labor savings)
- No adhesive cure time
- Wind-resistant (engineered fastener patterns)
- Easy to inspect and repair
Cons:
- Visible fastener lines under membrane
- More penetrations through deck
- Slight thermal bridging at fasteners
Fastener Spacing: 6–12 inches apart along seams, engineered for local wind uplift codes.
2. Fully Adhered
How It Works: Membrane bonded directly to insulation or deck with water-based or solvent adhesive.
Cost: $10–$15 per sq ft installed
Best For: Occupied buildings (no noise), aesthetic preference, high-foot-traffic roofs
Pros:
- Smooth, aesthetically pleasing surface
- Superior wind resistance (no billowing)
- No deck penetrations
- Better for rooftop equipment areas
Cons:
- Higher material and labor costs
- Adhesive cure time required (weather-dependent)
- Substrate must be completely dry
- More complex application
Adhesive Application: Rolled or sprayed onto substrate; membrane pressed into place; seams heat-welded.
3. Ballasted
How It Works: Membrane laid loosely over insulation, held down with rounded river rock or pavers (10–15 lbs per sq ft).
Cost: $6–$10 per sq ft installed
Best For: Roofs with adequate structural capacity, minimal penetrations
Pros:
- Lowest installation cost
- No adhesives or fasteners
- Easy membrane replacement
- Ballast protects membrane from UV
Cons:
- Requires strong deck (extra weight)
- Difficult to locate leaks
- Ballast maintenance (displacement in wind)
- Not suitable for steep slopes or high-wind zones
Ballast Requirements: Minimum 10 lbs per sq ft; increased at edges/corners per wind calculations.
Step-by-Step TPO Installation Process
Step 1: Roof Deck Preparation
Critical Checks:
- Inspect deck for structural integrity, rot, soft spots
- Confirm adequate slope for drainage (minimum 1/4 inch per foot)
- Clean surface: remove debris, dirt, moisture
- Repair damaged decking (plywood, OSB, concrete, metal)
- Prime deck if required by manufacturer
Pro Tip: Deck must be completely dry before membrane installation. Trapped moisture causes blistering and delamination.
Step 2: Install Insulation
Purpose: Energy efficiency, thermal barrier, smooth substrate for membrane.
Insulation Types:
- Polyiso (Polyisocyanurate): Highest R-value per inch, most common
- XPS (Extruded Polystyrene): Moisture-resistant, moderate R-value
- EPS (Expanded Polystyrene): Budget option, lower R-value
Installation:
- Lay insulation boards in staggered pattern (offset seams)
- Use two layers if thickness exceeds 2 inches (prevents thermal bridging)
- Mechanically fasten or adhere per manufacturer specs
- Install tapered system if roof lacks drainage slope
- Add coverboard layer (gypsum or high-density polyiso) for puncture protection
Thickness: Typically 2–6 inches total, depending on climate zone energy codes.
Step 3: Lay TPO Membrane
Membrane Relaxation:
- Roll out sheets and allow to relax 15–30 minutes (reduces wrinkles)
- Cold weather requires longer relaxation time
- Start from low point, work toward high side
Layout Strategy:
- Position sheets perpendicular to slope for best water shedding
- Overlap seams 6 inches minimum (standard 6–8 inches)
- Plan layout to minimize seams around penetrations
- Use full-width sheets where possible (reduce seams)
Membrane Handling:
- Wear shoe booties to keep white surface clean
- Avoid dragging membrane (puncture risk)
- Keep membrane covered when not actively installing
Step 4: Fasten or Adhere Membrane
Mechanically Fastened Method:
- Install plates and fasteners along seam edges (6–12 inch spacing)
- Secure through membrane and insulation into deck
- Drive fasteners flush (not over-driven)
- Overlap next sheet 6 inches, covering fastener line
- Continue across roof in rows
Fully Adhered Method:
- Apply adhesive to substrate with roller or sprayer
- Allow adhesive to tack per manufacturer instructions
- Roll membrane into adhesive, working from center outward
- Use roller to ensure full contact and eliminate air pockets
- Overlap seams 6 inches for welding
Step 5: Heat Weld Seams
The Critical Step: Proper heat welding creates seams stronger than the membrane itself.
Heat Welding Process:
Equipment:
- Hot-air welders (hand-held or robotic)
- Temperature: 900°F (482°C) at nozzle
- Speed: 3–6 feet per minute (varies by conditions)
Technique:
- Insert welding nozzle between overlapping sheets
- Apply heat while moving at consistent speed
- Follow immediately with silicone roller to press seam
- Create 1.5–2 inch weld width
- Avoid over-heating (scorching) or under-heating (weak bond)
Quality Control:
- Probe seams after cooling with blunt tool
- Check 100% of seam length
- Re-weld any weak areas immediately
- Seams should not separate under moderate force
Pro Tip: Temperature, speed, and roller pressure must be calibrated daily for ambient conditions. Cold weather requires higher heat; wind affects cooling.
Step 6: Install Flashing Details
Critical Flashing Areas:
- Roof penetrations (vents, pipes, HVAC units)
- Parapet walls and curbs
- Drains and scuppers
- Edge details and corners
Flashing Installation:
- Cut TPO flashing pieces to fit
- Clean all surfaces thoroughly
- Apply primer where specified (porous substrates)
- Heat weld flashing to field membrane
- Secure top edges with termination bars
- Seal exposed edges with compatible caulk
Drain Preparation:
- Install drain sumps before membrane
- Flash with TPO boot or custom flashing
- Heat weld all edges
- Test for watertight seal
Step 7: Final Inspection & Quality Control
Inspection Checklist:
- All seams probed and watertight
- Flashing secure at penetrations and edges
- No membrane wrinkles, bubbles, or damage
- Fasteners tight and properly spaced
- Termination bars secure
- Drains clear and functional
- Site cleaned and materials removed
Testing:
- Flood test low areas (if feasible)
- Electronic leak detection on critical roofs
- Thermal imaging for fully adhered systems (checks bond quality)
TPO Roofing Installation Costs (2025)
National Averages:
- Mechanically Fastened: $8–$12 per sq ft installed
- Fully Adhered: $10–$15 per sq ft installed
- Ballasted: $6–$10 per sq ft installed
Cost Breakdown (2,000 sq ft roof, mechanically fastened):
| Component | Cost |
|---|---|
| TPO Membrane (60 mil) | $2,000–$3,000 |
| Insulation (4″ polyiso) | $3,000–$4,500 |
| Fasteners & Plates | $800–$1,200 |
| Labor (3–5 days) | $6,000–$9,000 |
| Edge Metal & Flashing | $1,500–$2,500 |
| Total | $13,300–$20,200 |
Factors Affecting Cost:
- Roof size (larger = lower per-sq-ft cost)
- Insulation R-value and thickness
- Attachment method (adhered costs more)
- Existing roof tear-off (adds $2–$4/sq ft)
- Flashing complexity (penetrations, parapets)
- Regional labor rates ($50–$125/hour)
Common TPO Installation Mistakes
- Insufficient Membrane Relaxation → Wrinkles cause weak seams and ponding
- Improper Welding Temperature/Speed → Weak seams fail prematurely
- Skipping Seam Probing → Undetected leaks cause water damage
- Poor Flashing Details → 80% of TPO leaks occur at flashings
- Installing on Wet Substrate → Moisture traps cause blistering
- Wrong Fastener Spacing → Wind uplift failures
- Ignoring Drainage → Ponding water voids warranties
FAQ
How long does TPO roofing installation take?
2–5 days for typical 2,000 sq ft roof, depending on complexity, weather, and crew size. Large commercial roofs may take 1–4 weeks.
Can I install TPO roofing myself?
No. TPO installation requires specialized heat-welding equipment, training, and experience. Improper installation voids warranties and causes leaks. Always hire certified professionals.
What’s the difference between mechanically fastened and fully adhered TPO?
Mechanically fastened uses plates and screws (faster, cheaper). Fully adhered uses bonding adhesive (smoother, better wind resistance, higher cost).
How long does TPO roofing last?
15–30 years with proper installation and maintenance. Lifespan depends on membrane thickness (45–80 mil), climate, and maintenance quality.
What thickness TPO membrane should I use?
60 mil is standard for most commercial applications. 80 mil for high-traffic or mechanically intensive roofs. 45 mil for budget-conscious projects with minimal foot traffic.
Is TPO better than EPDM or PVC?
TPO offers best balance of cost, energy efficiency, and performance. EPDM is cheaper but less energy-efficient. PVC is more chemical-resistant but costlier.
Do TPO roofs need maintenance?
Yes. Inspect twice yearly, clean drains, remove debris, check seams. Professional inspections every 3–5 years extend lifespan.
Conclusion
TPO roofing installation combines energy efficiency, durability, and cost-effectiveness when executed with proper substrate preparation, insulation, membrane attachment, and heat-welded seams. Mechanically fastened systems offer fastest installation and best wind resistance for most commercial applications, while fully adhered methods provide superior aesthetics and performance for occupied buildings. Always hire certified TPO installers with heat-welding expertise, verify quality control through seam probing, and maintain proper drainage to ensure your TPO roof delivers 15–30 years of reliable, leak-free performance.
Get free roofing advice, cost guides, and seasonal maintenance tips.

Roofing content specialist with 5+ years researching U.S. residential and commercial roofing. Has documented 200+ projects covering installation costs, material selection, contractor vetting, and DIY guides for homeowners across all climate zones.
Leave A Comment