Roofing COP: Essential Guide to Certificate of Occupancy for Roof Projects
A roofing COP (Certificate of Occupancy) is the official approval that confirms your roofing work has passed final building inspection and complies with local building codes. This crucial document validates that your roof replacement or installation meets structural safety standards, fire ratings, and manufacturer specifications required by your municipality. Without proper roofing COP certification, homeowners face serious risks including insurance claim denials, difficulty selling their property, and potential code enforcement penalties.
Understanding the roofing COP process protects your investment and ensures legal compliance. This comprehensive guide covers when you need a roofing COP, what inspectors examine during final inspections, common violations that cause failures, and proven strategies to pass on the first attempt. Whether you’re a homeowner planning a roof replacement or a contractor managing multiple projects, mastering roofing COP requirements saves time, money, and prevents costly complications.
Table of Contents
Understanding certificate of occupancy for roofing projects
A roofing COP represents the formal sign-off from your local building authority certifying that completed roof work complies with International Building Code (IBC) standards and approved construction plans. Some jurisdictions issue a specific Certificate of Occupancy document, while others record final approval as “permit closed” or “inspection passed” status in their building records database.
The roofing COP process originated from building safety regulations established by the International Code Council (ICC), which publishes model codes adopted by most U.S. municipalities. These codes ensure roofs can withstand local wind loads, snow loads, and fire exposure while providing adequate ventilation and weatherproofing to protect building occupants and structural integrity.
Key functions of roofing COP:
- Legal occupancy authorization: Confirms the building is safe for continued or renewed occupancy after major roof work
- Code compliance verification: Documents that installation methods, materials, and structural elements meet current building code requirements
- Property record documentation: Creates permanent municipal records that future buyers, appraisers, and insurance companies can verify
- Warranty activation: Many manufacturers require proof of code-compliant installation and final inspection approval before honoring warranty claims
- Insurance requirements: Carriers often request COP documentation for coverage renewals or claims related to recently replaced roofs
According to the National Association of Home Builders, properly permitted and inspected roof work adds measurable value to properties and reduces liability exposure for homeowners by 65% compared to unpermitted installations.
For detailed information about building codes and roofing standards, visit the International Code Council’s official resource center.
When roofing COP certification is required

Roofing COP requirements vary by jurisdiction, but most building departments mandate final inspection approval for substantial roof work that affects structural integrity, fire safety, or building envelope performance.
Projects typically requiring roofing COP:
- Complete roof replacements: Full tear-off and re-roofing projects on residential properties usually require permits and final COP approval regardless of square footage
- New construction: All new buildings need comprehensive inspections covering framing, decking, underlayment, and final roofing as part of overall COP issuance
- Structural modifications: Changes to roof pitch, framing system upgrades, additional load-bearing components, or dormer installations always trigger permit and COP requirements
- Major repairs exceeding threshold values: Many jurisdictions require permits when repair costs exceed 25% of the roof’s replacement value or cover more than specified square footage (commonly 100-200 sq ft)
- Commercial roofing projects: All commercial roof work requires permitting, multiple inspections, and formal COP approval due to life-safety implications
Projects typically NOT requiring roofing COP:
- Minor repairs under jurisdictional thresholds (usually 100 sq ft or less)
- Routine maintenance including cleaning, minor patching, or sealant replacement
- Cosmetic improvements that don’t affect structural or weather-resistant components
- Emergency tarping or temporary weatherproofing (though permanent repairs will require permits)
The safest approach is contacting your local building department before starting any roof work. Requirements differ significantly between counties, cities, and even neighborhoods with historic preservation districts or homeowner association rules. For guidance on local requirements, visit the National Association of State Contractors Licensing Agencies directory to find your regional building authority contact information.
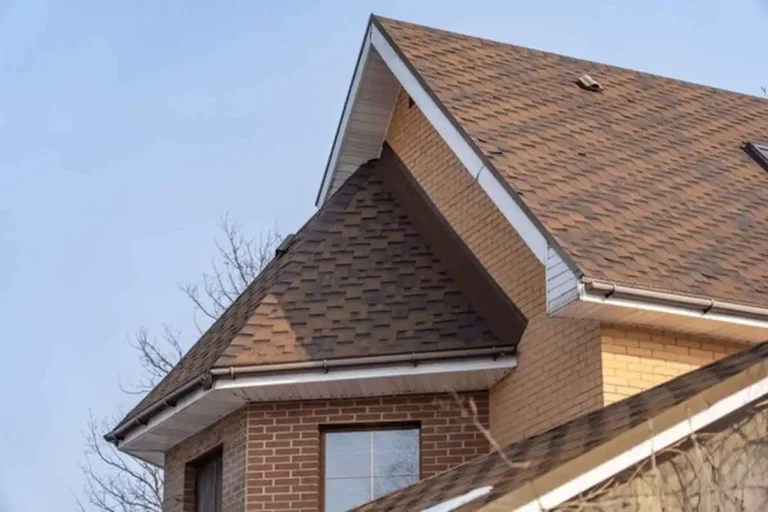
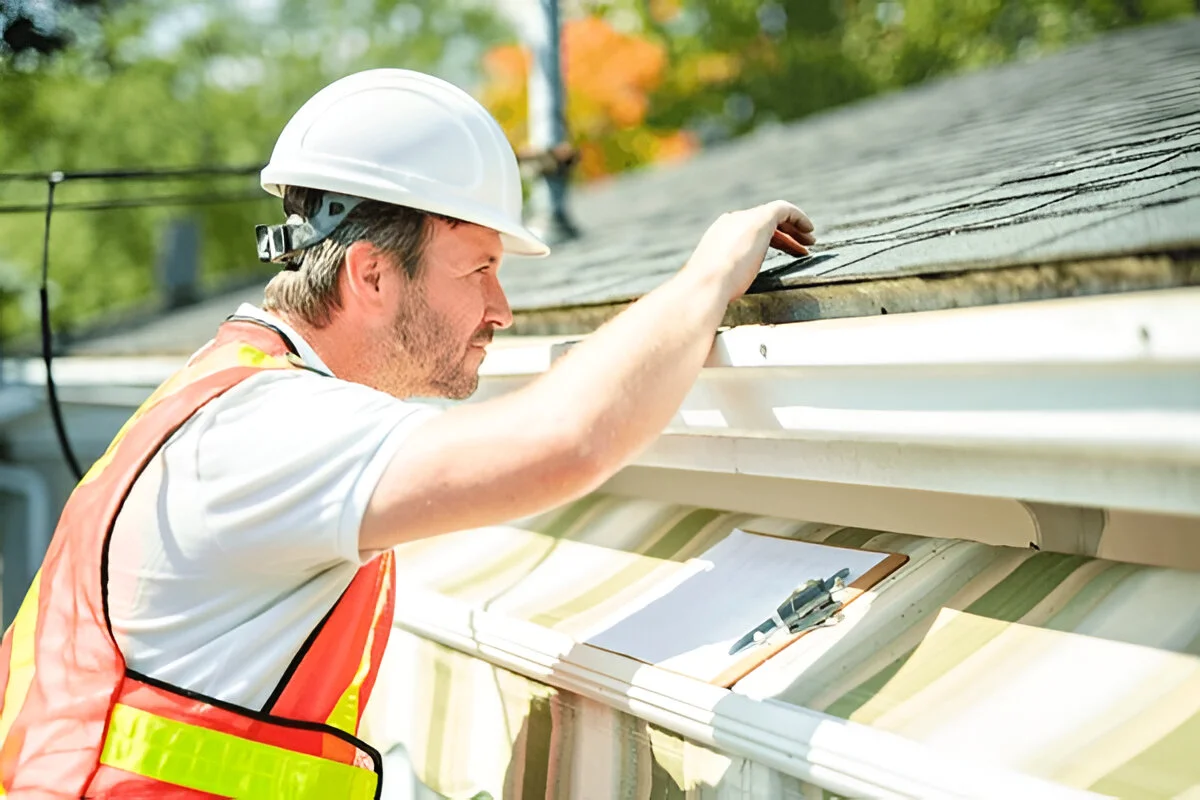
What inspectors examine during roofing COP inspections
Building inspectors follow comprehensive checklists based on International Residential Code (IRC) and International Building Code (IBC) standards when evaluating roofs for COP approval. Understanding these inspection criteria helps contractors and homeowners prepare properly and avoid common pitfalls.
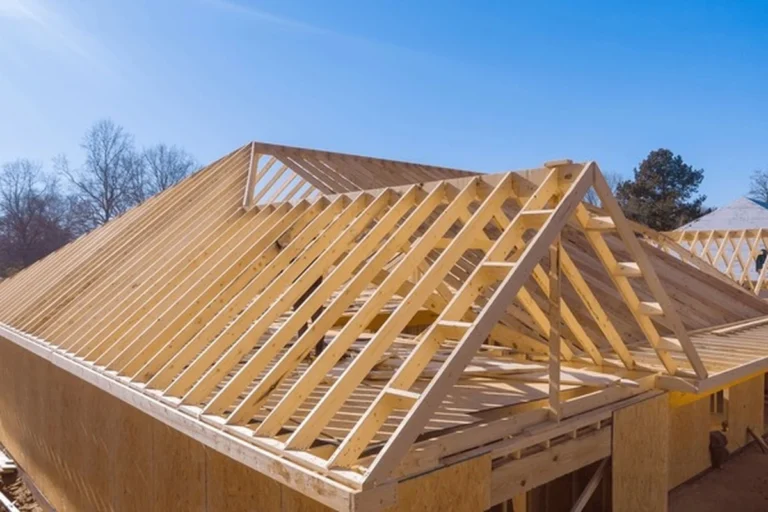
Structural and substrate inspection points:
- Roof deck integrity: Inspectors check for proper sheathing thickness (minimum 7/16″ OSB or 1/2″ plywood for most residential applications), correct fastener spacing (6″ on edges, 12″ in field), and no sagging or unsupported spans
- Framing compliance: Rafter or truss spacing, proper bearing on walls, adequate lateral bracing, and any structural repairs must match approved engineering plans
- Rot and damage remediation: All deteriorated wood must be replaced with matching or superior materials; inspectors reject installations that cover existing damage without proper repairs

- Underlayment type and installation: ASTM D226 felt paper or ASTM D4869 synthetic underlayment must be installed with proper overlap (2″ side laps, 6″ end laps) and correct orientation (upper courses over lower)
- Ice and water barrier placement: Cold climate jurisdictions require self-adhering modified bitumen membrane (ASTM D1970) at eaves extending 24″ minimum beyond interior wall line and in all valleys
- Drip edge installation: Metal drip edge must be installed at eaves (under underlayment) and rakes (over underlayment) in most jurisdictions, with proper laps and fastening
Roof covering installation compliance:
- Manufacturer specifications: All roofing materials must be installed exactly per manufacturer’s published instructions, including nail type, length, placement, and exposure measurements
- Fastener requirements: Asphalt shingles typically require 4-6 fasteners per shingle depending on roof pitch and wind zone; metal roofing needs specific screw spacing and placement patterns
- Fire rating verification: Inspectors confirm materials meet required fire classifications (Class A, B, or C) for the jurisdiction and building type
Critical flashing inspections:
- Step flashing at sidewalls: Each shingle course must have individual L-shaped flashing pieces interwoven and extending 4″ minimum up walls and under siding
- Chimney flashing systems: Base flashing, step flashing, and counter flashing must create complete weather-resistant assemblies with proper sealant and termination bars
- Valley treatment: Open valleys require metal flashing (24-28 gauge minimum) with proper underlayment; closed valleys must show correct shingle weaving or cut techniques
- Penetration flashings: Plumbing vents, exhaust fans, and other penetrations need code-approved flashing boots or manufactured flashings, not field-fabricated alternatives
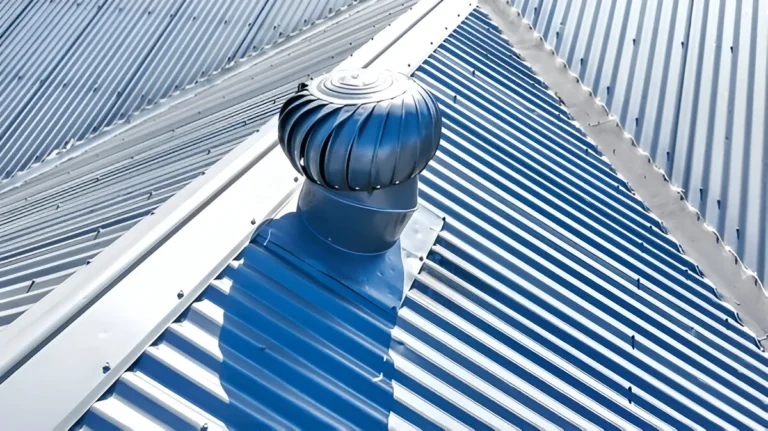
Ventilation system evaluation:
- Net free vent area calculations: IRC requires 1:150 ventilation ratio (1 sq ft vent per 150 sq ft attic space), or 1:300 if balanced intake/exhaust exists
- Balanced ventilation: Intake vents (soffit or eave vents) must equal or exceed exhaust vents (ridge, box, or turbine vents) to create proper airflow
- Ventilation path verification: Inspectors check that insulation doesn’t block soffit vents and that rafter bays have clear air channels from eave to ridge
Wind and weather resistance:
- Design wind speed compliance: Fastening patterns must meet engineered requirements for local design wind speeds (typically 90-150 mph depending on region and exposure category)
- Enhanced attachment zones: High-wind coastal areas require additional fasteners at roof perimeters and increased frequency throughout the field
- Sealed roof deck requirements: Some hurricane-prone jurisdictions mandate fully sealed roof decks with taped sheathing seams for enhanced weather resistance
For detailed roofing installation standards, consult the Asphalt Roofing Manufacturers Association (ARMA) installation guidelines.
Learn more about preparing for successful roof inspections in our comprehensive checklist guide.
Common violations that fail roofing COP inspections
Even experienced contractors occasionally overlook details that cause roofing COP inspection failures. Understanding frequent violations helps you avoid delays, re-inspection fees, and potential code enforcement actions.
Ventilation deficiencies (most common failure):
Inadequate attic ventilation ranks as the leading cause of failed roofing COP inspections nationwide. Inspectors reject roofs with:
- Insufficient total vent area based on attic square footage calculations
- Blocked soffit vents covered by insulation or vapor barriers
- Missing ridge vents or inadequate exhaust capacity
- Unbalanced systems with excessive exhaust but minimal intake creating negative pressure
Flashing installation errors:
- Missing step flashing: Using only caulk at sidewall transitions instead of proper metal step flashing interwoven with each shingle course
- Inadequate chimney flashing: Reusing old, corroded flashing or failing to install required counter flashing with proper reglets cut into masonry
- Valley flashing shortcuts: Insufficient width (minimum 24″ recommended), wrong gauge metal (26-gauge minimum), or missing underlayment beneath valley metal
- Improper pipe boot installation: Using plastic boots on high-temperature exhausts, damaged neoprene seals, or boots not properly integrated with shingle courses
Material and fastener violations:
- Wrong nail specifications: Using smooth-shank nails instead of required ring-shank fasteners, insufficient length to penetrate deck by 3/4″, or over-driven fasteners breaking shingle seal strips
- Inadequate fastener count: Missing the required 4-6 nails per shingle or improper spacing on metal roofing panels
- Unapproved materials substitution: Changing from permitted Class A fire-rated shingles to lower-rated alternatives, or using materials not approved for local wind zones
- Mixed incompatible materials: Installing dissimilar metals in contact (aluminum flashing on galvanized valleys) causing galvanic corrosion
Deck and structural issues:
- Unrepaired soft spots: Leaving deteriorated, spongy sheathing that should have been replaced during tear-off
- Improper sheathing spacing: Using incorrect panel thickness for rafter spacing or inadequate edge support at panel joints
- Excessive roof layers: Installing over multiple existing layers where codes limit installations to two total layers maximum
- Unsupported sheathing edges: Missing H-clips or blocking at panel edges causing potential sagging between rafters
Missing code-required components:
- No ice and water barrier: Omitting required self-adhering membrane at eaves and valleys in cold-climate jurisdictions
- Missing drip edge: Failing to install required metal drip edge at eaves and rakes, or installing in wrong sequence relative to underlayment
- Inadequate crickets: Not building required diverters behind chimneys wider than 30″ that channel water around obstacles
- Incomplete tear-off: Leaving portions of old roofing that should have been removed per permit specifications
Deviation from approved plans:
- Unpermitted scope changes: Adding skylights, changing vent types, or modifying structural elements without amended permits
- Wrong materials: Installing different shingle style, color, or weight than specified in approved permit documents
- Structural modifications: Cutting rafters, removing bracing, or altering truss components without engineering approval
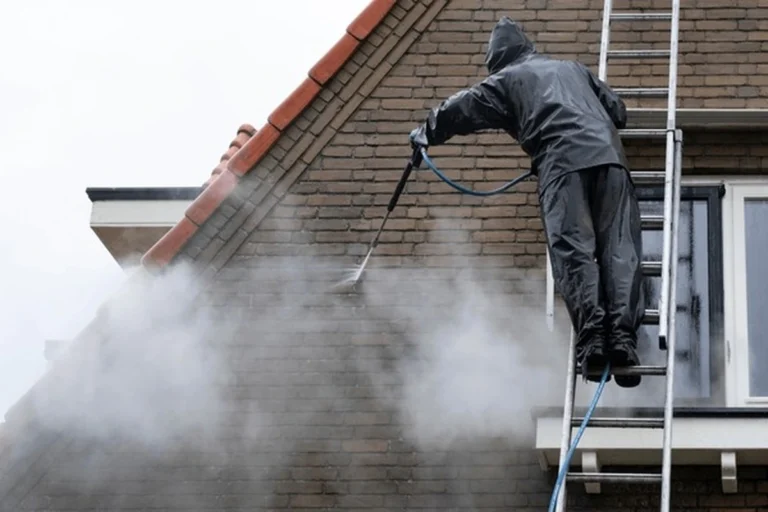
![common roofing code violations checklist with re
Addressing these issues before requesting final inspection dramatically improves first-attempt approval rates and accelerates roofing COP issuance.
Preparing for successful roofing COP inspection
Thorough preparation before scheduling your roofing COP inspection ensures smooth approval and avoids costly re-inspection fees averaging $75-200 per additional visit.
Pre-inspection checklist (7-10 days before scheduling):
- Conduct contractor walkthrough: Have your roofing contractor walk the completed job with you, explaining how each code requirement was addressed and pointing out critical details inspectors will examine
- Verify scope against permits: Compare finished work to approved permit documents ensuring all materials, methods, and structural elements match submitted plans; document any deviations and file permit amendments if necessary
- Inspect critical flashing details: Personally verify that step flashing exists at all sidewalls (not just caulk), chimney flashing includes all required layers, valleys have proper metal installation, and pipe boots are secure and sealed
- Check ventilation system: Calculate net free vent area (measure all intake and exhaust vents, multiply by manufacturer’s free area percentage) and confirm it meets 1:150 or 1:300 code ratios; verify soffit vents are unobstructed by insulation
- Examine fastener patterns: Spot-check fastener placement, count nails in several shingles, verify proper depth (flush, not over-driven), and confirm metal roofing screws penetrate high points with proper washer compression
- Review structural repairs: If decking was replaced, verify proper thickness, fastener spacing, and that repairs were photographed before covering with roofing materials
- Verify material specifications: Confirm installed products match permit specifications for fire rating, wind resistance, and manufacturer; keep packaging labels or cut samples showing product markings
- Clean and organize site: Remove all debris, unused materials, and equipment; rake ground areas for stray nails; ensure safe access to roof and attic for inspector; clear driveways for inspector parking
- Prepare documentation package: Organize permit documents, manufacturer specifications, engineering letters (if applicable), material receipts, and warranty registration forms in a folder ready for inspector review
- Schedule strategic timing: Request inspections for mid-morning (9-11 AM) when inspectors are typically most available and not rushed by end-of-day pressures
During the inspection (day-of best practices):
- Be present or available: Either you or your contractor should be on-site to answer questions, provide access, and receive feedback directly from the inspector
- Don’t hover: Allow inspectors to work independently; they’ll ask questions if needed and appreciate professional courtesy
- Take notes: Document any concerns or required corrections the inspector mentions, including specific locations and code section references
- Request clarification: If inspection fails, politely ask for written deficiency list and clarification on exactly what corrections are needed before re-inspection
- Photograph conditions: Take dated photos of all work before inspection as documentation of “as-completed” status in case disputes arise
If corrections are required:
- Address deficiencies promptly, typically within 30 days (jurisdictional requirements vary)
- Photograph all corrections showing before/after conditions
- Request re-inspection only after ALL items are fully corrected; partial corrections extend the process
- Expect re-inspection fees of $75-200 for each additional visit beyond the first inspection
Post-approval actions:
- Obtain copies of signed-off permit and final inspection report for your permanent home records
- Verify building department updated online permit status to “finaled” or “closed”
- File roofing COP documentation with homeowner’s insurance for updated coverage
- Provide copies to mortgage company if escrow included roof replacement funds
- Retain documents for future property sales, refinancing, or warranty claims
Discover our complete homeowner’s guide to working with roofing inspectors for additional preparation strategies.
Step-by-step roofing COP certification process
Obtaining roofing COP approval follows a structured timeline managed by your local building department. Understanding each phase helps contractors and homeowners coordinate efficiently and avoid delays.
Phase 1: Permit application (before work begins)
Submit building permit applications including:
- Completed permit forms with property legal description, owner information, contractor license numbers, and estimated project value
- Roof plan drawings showing dimensions, pitch, materials, ventilation layout, and flashing details
- Product specifications confirming fire ratings, wind resistance classifications, and manufacturer warranty information
- Contractor licenses and insurance certificates (general liability minimum $1M, workers compensation as required)
- Permit fees calculated on project valuation (typically $150-500 for residential roof replacements)
Permit review and approval timelines vary: simple replacements may approve within 1-3 business days, while complex projects requiring plan review take 5-15 business days.
Phase 2: Permit issuance and posting
Once approved:
- Pick up physical permit card or download electronic permit from jurisdiction’s online portal
- Post permit visibly at project site (typically front window or job box) as required by local ordinance
- Verify permit number, approved scope, and contractor information are correct before starting work
- Note any special inspection requirements listed on permit (some jurisdictions require rough inspections before final covering)
Phase 3: Construction and rough inspection (if applicable)
Some jurisdictions mandate intermediate “rough” or “dry-in” inspections before final roofing installation:
- Inspector examines roof deck, underlayment, ice barrier, drip edge, and flashing installations before shingles or metal panels cover these elements
- This inspection catches substrate issues early before they’re hidden and expensive to correct
- Schedule rough inspections within 24-48 hours of completing the rough stage; don’t proceed with final covering until approved
Phase 4: Final roofing installation
Complete all work exactly per approved plans and manufacturer specifications:
- Install roofing materials with proper fastener type, quantity, and placement
- Complete all flashing details at penetrations, valleys, sidewalls, and chimneys
- Install ridge vents, caps, and trim pieces
- Clean site thoroughly removing all debris, cutoffs, and stray fasteners
Phase 5: Final inspection request
When work is 100% complete:
- Contact building department via phone, online portal, or mobile app to schedule final inspection
- Provide permit number, property address, and preferred inspection date
- Most jurisdictions schedule within 1-3 business days of request
- Confirm inspection appointment time and ensure site access is available
Phase 6: Final roofing COP inspection
Inspector visits property and evaluates all elements discussed in previous sections:
- Typical inspection duration: 30-60 minutes for average residential roof
- Inspector may access roof surface, attic space, and exterior perimeter
- Pass: Inspector signs permit card, updates online system to “final” status, and provides approval documentation
- Fail: Inspector provides written deficiency list citing specific code violations requiring correction before re-inspection
Phase 7: Certificate of Occupancy issuance
Upon passing final inspection:
- Building department updates permit status to “finaled,” “closed,” or “approved”
- Some jurisdictions issue physical Certificate of Occupancy documents; others simply note approval in electronic records
- COP status becomes part of permanent property records accessible to future buyers, appraisers, and insurers
- Typical processing time: immediate for electronic systems, 3-5 business days for physical certificate generation
Phase 8: Record retention and documentation
Homeowners should:
- Obtain copies of signed-off permit, final inspection report, and any COP documents
- Photograph complete roof installation from multiple angles for future reference
- File documents with homeowner’s insurance, mortgage company (if applicable), and personal property records
- Retain manufacturer warranties, product specifications, and contractor completion certificates
- Keep all documentation for life of roof or until property sale (minimum 7-10 years recommended)
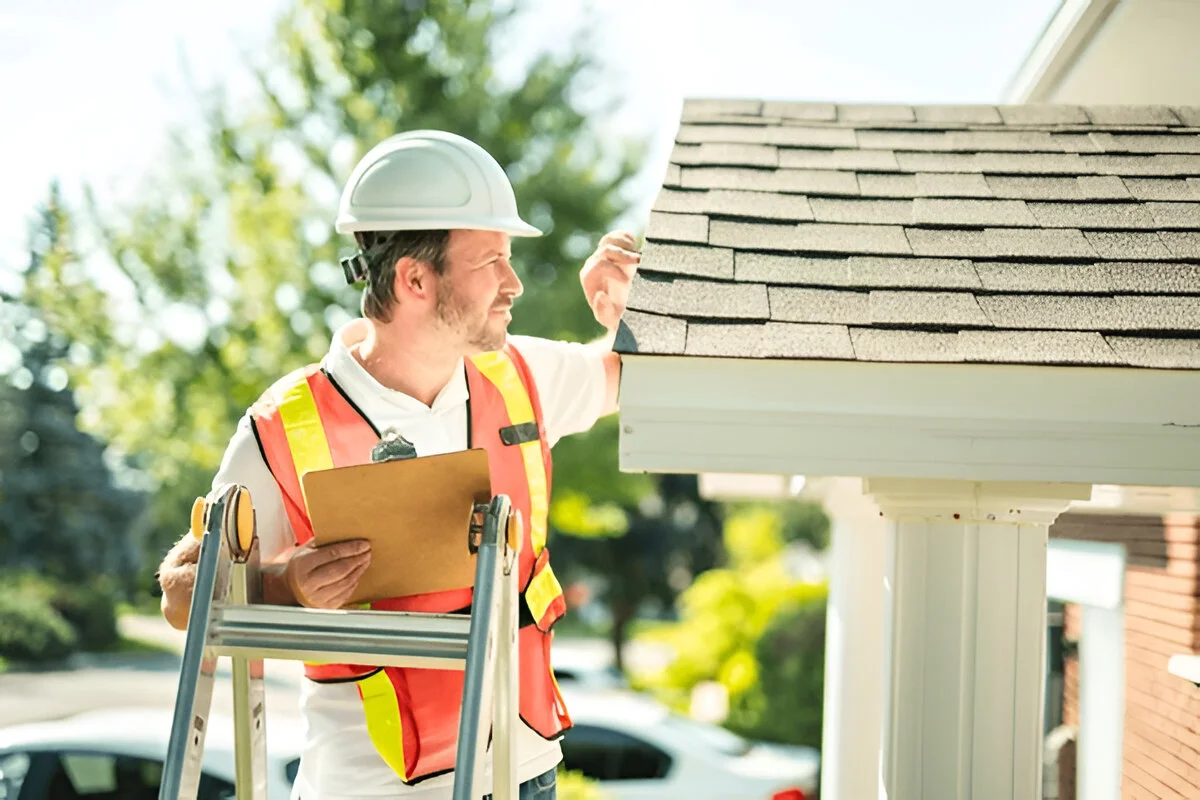
![roofing certificate of occupancy final
Timeline summary for typical residential roof:
- Permit application to approval: 1-10 business days
- Construction duration: 1-5 days depending on size and complexity
- Final inspection scheduling: 1-3 business days
- Re-inspection (if needed): 3-10 business days for corrections plus re-inspection scheduling
- Total timeline from application to roofing COP: 2-4 weeks for straightforward projects
[Embed YouTube video: How to Pass Your Roofing Final Inspection] (video placeholder)
Review our complete timeline guide for roof replacement projects for detailed scheduling strategies.
Legal and financial consequences of skipping roofing COP
Bypassing the permitting and roofing COP process creates substantial legal, financial, and insurance risks that far outweigh the time and cost savings contractors or homeowners perceive.
Code enforcement and legal consequences:
- Municipal fines: Code violations for unpermitted work range from $100-1,000 per day in many jurisdictions, accumulating until corrected
- Stop-work orders: Building departments can halt all construction and require exposure of completed work for inspection before proceeding
- Mandatory removal orders: Severely non-compliant installations may require complete tear-off and replacement at owner’s expense
- Property liens: Unresolved code violations create liens against property preventing sale or refinancing until satisfied
- Criminal penalties: Repeat violations or willful circumvention of permitting requirements can result in misdemeanor charges against contractors or property owners
Insurance coverage jeopardy:
Insurance companies increasingly use aerial imagery and public records databases to identify unpermitted improvements, leading to:
- Claim denials: Carriers routinely deny roof-related claims when significant work was completed without permits and inspections
- Policy cancellations: Discovery of major unpermitted improvements violates policy terms, allowing carriers to cancel coverage
- Coverage gaps: New roof installations that increase property value without notification create under-insurance situations
- Premium increases: Documenting unpermitted work during claim investigations often results in 15-30% premium surcharges or non-renewal
Real estate transaction complications:
Unpermitted roof work creates significant obstacles during property sales:
- Title insurance issues: Title companies flag permit violations preventing clear title transfer until resolved
- Buyer walk-aways: Home inspections revealing unpermitted work cause buyers to withdraw offers or demand major price reductions
- Lender requirements: Mortgage underwriters require proof of code compliance; unpermitted work prevents loan approval
- Appraisal deductions: Appraisers discount property values $3,000-10,000+ for unpermitted major improvements requiring retroactive approval
- Seller disclosure liability: Failing to disclose known permit violations exposes sellers to fraud claims and potential lawsuits from buyers
Financial and liability risks:
- Lost investment: Roofs requiring complete replacement due to code violations waste the entire original installation cost
- Contractor lawsuits: Homeowners can sue contractors who performed unpermitted work, seeking refunds plus corrective action costs
- Personal injury liability: If unpermitted, non-compliant roofs fail causing injury, property owners face increased negligence liability
- Warranty voidance: Manufacturers void warranties on installations lacking proof of code-compliant installation and proper inspections
- Refinancing barriers: Equity lines and cash-out refinancing require proof that improvements were properly permitted
Contractor consequences:
Professional roofing contractors face severe penalties for permitting violations:
- License suspension or revocation: State contractor licensing boards suspend or permanently revoke licenses for repeated unpermitted work
- Professional liability: Contractors face lawsuits, bond claims, and Better Business Bureau complaints from homeowners discovering permit issues
- Insurance problems: Contractor liability insurance may exclude claims arising from knowingly unpermitted work
- Reputation damage: Online reviews and word-of-mouth warnings about permit-skipping contractors devastate local business reputations
Cost comparison analysis:
Typical permitted roof replacement: $15,000 project + $350 permit fees + 2-3 weeks timeline = $15,350 total
Unpermitted work discovered at sale: $15,000 original + $5,000 buyer price reduction + $500 retroactive permit/inspection + $2,000 corrections + 6-8 week delay = $22,500+ total cost plus deal risk
The math clearly favors proper permitting and roofing COP from the start.
Working with contractors on roofing COP requirements
Homeowners must verify contractors handle permitting and inspections properly to protect their legal and financial interests. Clear contract terms and accountability measures prevent common disputes.
Red flags indicating permit problems:
- Contractor suggests “saving money” by not pulling permits or claims inspections are unnecessary
- Unable or unwilling to provide contractor license number for permit application verification
- Rushes work schedule claiming permits “take too long” or encourages starting before permit approval
- Can’t explain specific code requirements or dismisses inspection preparation as unimportant
- Offers suspiciously low bids that don’t include permit costs or inspection scheduling
Essential contract clauses for roofing COP protection:
Include these specific provisions in written roofing contracts:
- Permit responsibility: “Contractor shall obtain all required building permits and pay all associated fees before commencing work. Permit numbers shall be provided to Owner within 3 business days of issuance.”
- Inspection scheduling: “Contractor is solely responsible for scheduling and passing all required inspections including rough (if applicable) and final inspections. Owner shall receive 24-hour notice of all scheduled inspections.”
- Code compliance guarantee: “All work shall be performed in strict compliance with [jurisdiction name] building codes, manufacturer specifications, and approved permit plans. Contractor warrants work will pass all required inspections on first attempt.”
- COP contingent payment: “Final payment of [10-20]% of contract price is contingent upon Contractor providing Owner with proof that building department has issued final approval or Certificate of Occupancy for the roof work.”
- Correction costs: “If inspection failures occur due to Contractor’s workmanship or material deficiencies, Contractor shall bear all costs of corrections, re-inspection fees, and any resulting permit extension fees.”
- Timeline provisions: “Contractor shall request final inspection within 5 business days of work completion. If COP is not obtained within 45 days of substantial completion due to Contractor delays, Owner may withhold retained payment until approval is secured.”
- Documentation delivery: “Upon project completion, Contractor shall provide Owner with copies of: signed-off permit, final inspection report, manufacturer warranties, and Certificate of Occupancy or equivalent final approval documentation.”
Verification steps before signing contracts:
- Confirm contractor holds active license by checking state contractor licensing board online database
- Verify general liability insurance (minimum $1M) and workers compensation coverage through certificate requests
- Check Better Business Bureau ratings and online reviews for permit-related complaints
- Request references from recent projects and ask specifically about permitting and inspection experiences
- Visit your building department and ask if contractor has history of code violations or failed inspections
Best practices during construction:
- Request copy of building permit within one week of project start; verify it online through municipal permit portal
- Ask for inspection schedule and offer to be present during inspector visits
- Document work progress with photos showing underlayment, flashing details, and final installation before each stage is covered
- Maintain payment schedule that retains 10-20% until final roofing COP is secured and documented
- Request written updates if inspection failures occur, including specific deficiency descriptions and correction timelines
DIY project considerations:
Homeowners performing their own roof work (rare but legal in many jurisdictions) assume all contractor responsibilities:
- Owner must apply for permit as “owner-builder” with affidavit acknowledging code compliance responsibilities
- Owner schedules and coordinates all required inspections directly with building department
- Owner personally liable for all code violations, corrections, and passing final inspection
- Owner cannot hire unlicensed helpers for significant portions of work in most jurisdictions
- Mistakes or code violations become owner’s financial burden with no contractor recourse
Regional and jurisdictional variations in roofing COP requirements
Roofing COP requirements, processes, and enforcement intensity vary dramatically across jurisdictions based on local building codes, climate factors, and administrative resources.
Climate-driven code variations:
- Hurricane and coastal zones: Florida, Gulf Coast, and Atlantic coastal regions require enhanced wind-resistance fastening patterns, sealed roof decks, and strict compliance with HVHZ (High Velocity Hurricane Zone) standards exceeding base code
- Cold and snow regions: Northern states mandate ice barriers extending 24-36 inches beyond interior walls, enhanced insulation R-values, and ventilation systems preventing ice dams
- Wildfire interface areas: California, Colorado, and Western states require Class A fire-rated materials, ember-resistant venting, and defensible space around structures
- Seismic zones: West Coast jurisdictions may require engineering certification that roof systems won’t fail during earthquake events, especially for heavy tile installations
Jurisdictional permit threshold differences:
- Major cities: Typically require permits for any roof work exceeding 100 square feet or involving structural modifications
- Suburban municipalities: Often mandate permits for complete replacements regardless of size but may exempt minor repairs under 200 square feet
- Rural counties: Some rural jurisdictions have minimal permitting requirements or don’t require permits for single-family residential roof replacements
- HOA communities: Homeowner associations may impose additional approval requirements beyond municipal permits, including color/style restrictions and architectural review
Process efficiency variations:
- Electronic permitting: Progressive jurisdictions offer complete online permit application, plan submission, fee payment, and inspection scheduling through integrated portals
- Traditional systems: Many smaller municipalities still require in-person permit applications, paper plan submissions, and phone-based inspection scheduling
- Third-party inspection services: Some jurisdictions contract private inspection companies to handle routine residential inspections, speeding processes but adding coordination complexity
Finding your local requirements:
- Municipal building department websites: Most cities and counties publish permitting requirements, fee schedules, and inspection processes on official government websites
- Direct contact: Call building departments to ask specific questions about your project scope, permit requirements, and roofing COP procedures
- Licensed contractor knowledge: Reputable local contractors know jurisdictional requirements through daily experience and can guide compliance
- Building code references: Review adopted code version (IBC 2021, IRC 2021, or earlier versions) and local amendments published on municipality websites
Interstate variation examples:
- Texas: Many counties don’t require permits for residential roof replacements; Houston requires permits, Dallas depends on specific municipality
- Florida: Strict permitting statewide with engineering requirements for wind calculations and mandatory inspections including third-party private provider options
- California: Comprehensive permitting required with energy compliance (Title 24) documentation and steep permit fees reflecting higher administrative costs
- New York: Varies widely by county; NYC has intensive permitting, rural upstate counties have minimal requirements
Always research specific requirements for your exact property location before starting roof work to ensure proper roofing COP compliance.
Frequently Asked Questions about roofing COP
What is a roofing COP and why do I need one?
A roofing COP (Certificate of Occupancy) is the official approval from your building department confirming your roof work passed final inspection and complies with building codes. You need it to ensure legal occupancy, maintain insurance coverage, activate manufacturer warranties, and avoid problems when selling your property. Without roofing COP approval, you risk code violations, insurance claim denials, and difficulty refinancing or selling your home.
How long does it take to get a Certificate of Occupancy for roofing?
Typical timelines range from 2-4 weeks total: permit application approval takes 1-10 business days, construction requires 1-5 days depending on roof size, final inspection scheduling takes 1-3 business days, and COP issuance occurs immediately to 5 days after passing inspection. Delays occur if inspections fail, requiring corrections and re-inspection adding 1-2 additional weeks.
Can I sell my house without a roofing COP?
Technically you can list and market your property, but unpermitted roof work creates serious obstacles: title companies flag permit violations preventing clear title transfer, buyers withdraw offers after home inspections reveal compliance issues, and lenders refuse financing until permits are resolved. Most sales require retroactive permitting, inspections, and corrections costing $2,000-10,000+ beyond original installation expenses, often killing deals or reducing sale prices significantly.
What happens if my roof fails the final inspection?
The inspector provides a written deficiency list citing specific code violations requiring correction. You must address all items (typically within 30 days), then request re-inspection which usually incurs additional fees of $75-200. The permit remains open until all corrections are made and approved. Multiple failures can trigger additional plan reviews, engineering requirements, or in severe cases, removal and replacement orders for non-compliant work.
Do I need a COP for roof repairs or only replacements?
Requirements vary by jurisdiction and repair scope. Most building departments require permits and roofing COP for complete replacements, major repairs exceeding certain square footage (commonly 100-200 sq ft), or any structural modifications. Minor repairs, maintenance work like replacing a few shingles, and emergency tarping typically don’t require COP. Always verify with your local building department before starting work to avoid compliance problems.
How much does a roofing COP cost?
Permit fees typically range $150-500 for residential roof replacements based on project valuation (usually 0.5-1.5% of total cost). Additional costs include inspection fees often bundled with permits or charged separately at $50-150, plan review fees of $100-300 for complex projects requiring engineered drawings, and re-inspection fees of $75-200 if initial inspections fail. Total permitting costs represent small insurance against legal, financial, and safety risks of unpermitted work.
Securing your roofing COP with confidence
Roofing COP approval represents the critical final step validating that your roof replacement or installation meets building codes, protects your property investment, and satisfies legal occupancy requirements. The process—though sometimes perceived as bureaucratic inconvenience—provides essential protections for homeowners through independent verification of contractor work quality, code compliance, and structural safety.
Understanding roofing COP requirements, inspection criteria, common failure points, and proper preparation strategies empowers homeowners to work confidently with contractors and navigate municipal approval processes successfully. The modest time investment and permit costs deliver substantial value through insurance coverage protection, warranty activation, enhanced property values, and elimination of legal liabilities associated with unpermitted work.
Whether you’re planning a residential roof replacement, managing commercial roofing projects, or working as a contractor serving multiple clients, prioritizing proper permitting and roofing COP certification demonstrates professional standards and protects all parties involved. Take time to research your jurisdiction’s specific requirements, choose licensed contractors who embrace code compliance, and retain all approval documentation for future property transactions.