
Table of Contents
Installing roof vents on a metal roof requires specialized techniques to maintain the watertight integrity of metal panels while creating proper attic ventilation—mark vent location between ribs or on flat sections, cut opening with metal-cutting tools, install rubber boot or metal flashing base sealed with high-quality polyurethane sealant (never silicone on galvanized metal), secure vent with self-drilling metal screws with neoprene washers spaced every inch around perimeter, and apply additional sealant at all joints to prevent leaks. Professional installation costs $150–$400 per vent depending on type and roof complexity, while DIY projects save $100–$250 in labor but require metal-working tools and careful sealing.
This comprehensive guide covers vent types suitable for metal roofs, required tools and materials, step-by-step installation procedures for different vent types, critical sealing techniques, common mistakes, and when to hire professionals.
Types of Vents for Metal Roofs
1. Ridge Vents (Continuous Ventilation)
Description: Metal or low-profile ridge vent running full length of roof peak.
Best For: New metal roof installations, maximum ventilation, modern aesthetics
Installation Complexity: High (requires cutting ridge slot)
Cost: $3–$8 per linear foot installed
2. Turbine Vents (Wind-Powered)
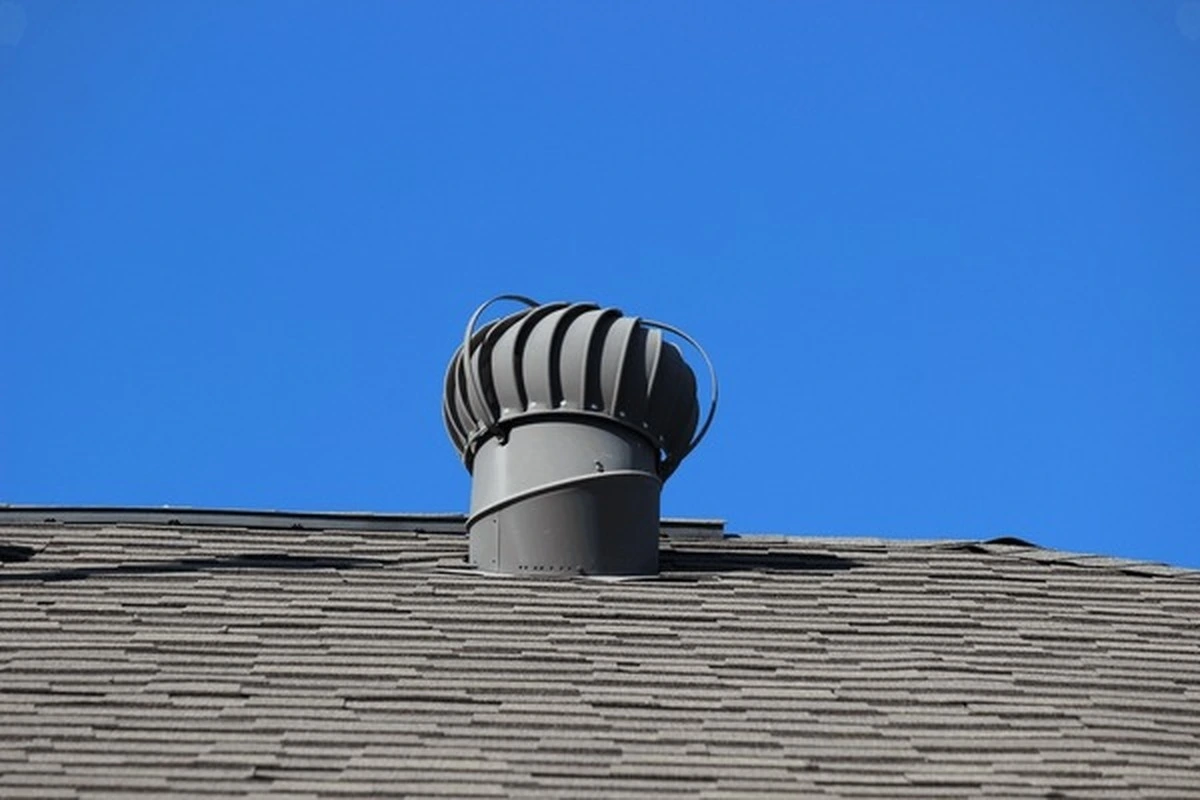
Description: Spinning aluminum turbine mounted on metal flashing base.
Best For: Hot climates, roofs with adequate wind exposure, visible ventilation
Installation Complexity: Moderate (circular hole in metal panel)
Cost: $150–$300 per vent installed
3. Static Box Vents (Mushroom Vents)
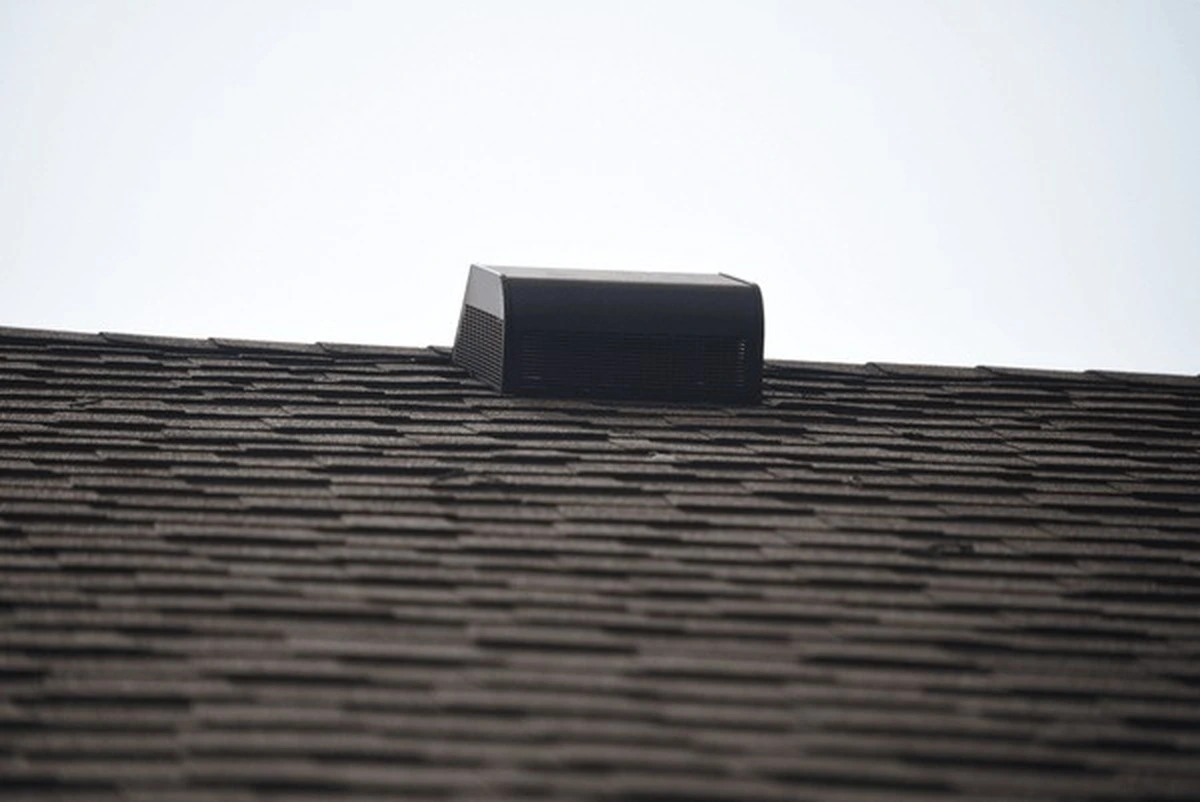
Description: Low-profile metal or plastic vent with rain hood.
Best For: Spot ventilation, existing metal roofs, budget installations
Installation Complexity: Moderate (circular or square cutout)
Cost: $100–$250 per vent installed
4. Plumbing/Pipe Vents (Penetration Boots)
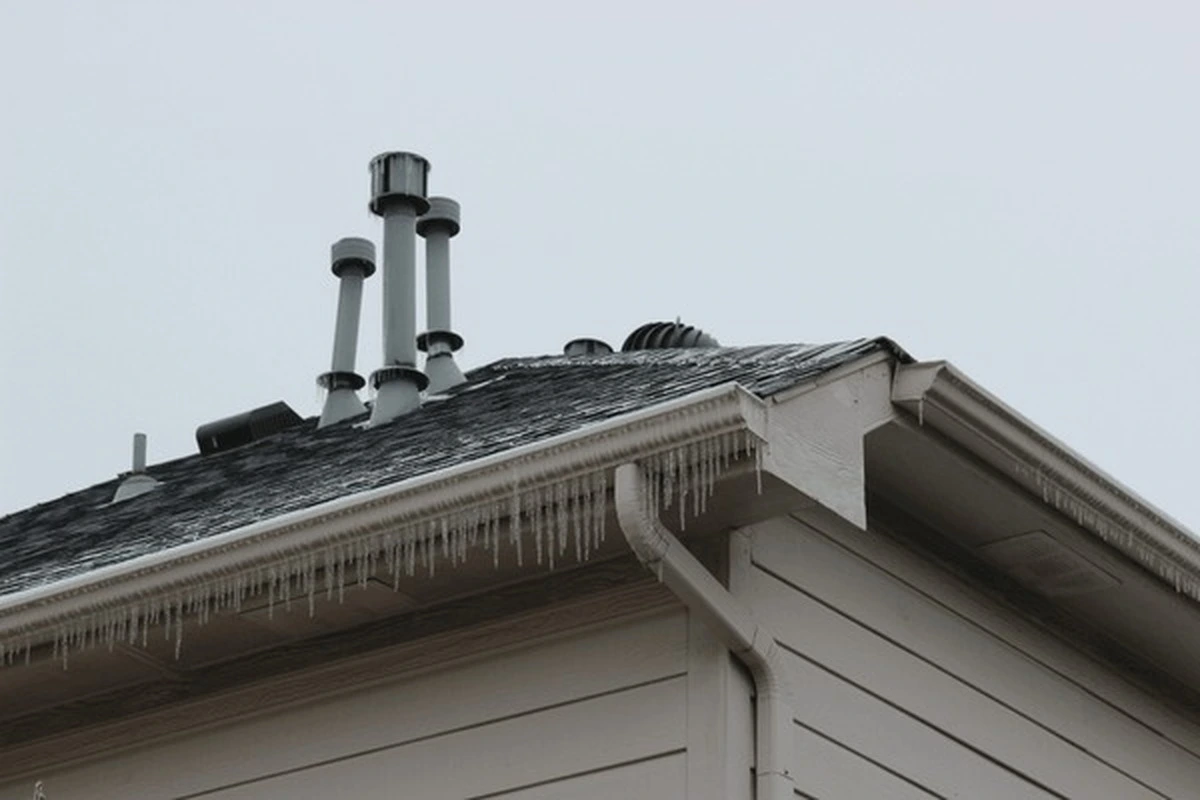
Description: Rubber or EPDM boot with metal base plate sealing around plumbing pipes.
Best For: Bathroom/kitchen vents, plumbing stack penetrations
Installation Complexity: Moderate (precise pipe fitting)
Cost: $50–$150 per boot installed
Tools & Materials Needed
Essential Tools
Cutting Tools:
- Cordless drill with metal hole saw or step bit
- Jigsaw with metal-cutting blade
- Tin snips (straight, left, right cuts)
- Utility knife
Fastening Tools:
- Impact driver or drill with hex head adapter
- Rivet gun (for some installations)
- Caulking gun
Layout Tools:
- Measuring tape
- Marker or grease pencil
- Vent template (often included with vent)
- Compass or circle cutter for round vents
Safety Equipment:
- Safety harness and roof anchors
- Non-slip boots
- Safety glasses
- Cut-resistant gloves
Required Materials
Vent Components:
- Roof vent unit (ridge, turbine, static box, or boot)
- Mounting flange or base plate
- Metal flashing (if not included)
Fasteners & Sealants:
- Self-drilling metal roofing screws with neoprene washers (#12 or #14, 1.5–2 inch)
- Polyurethane roof sealant (“Through the Roof” or equivalent)
- Critical: Never use standard silicone on galvanized metal—acid content corrodes coating
- Butyl tape for under-flange sealing
Optional:
- Latex gloves (sealant is very sticky)
- Roof boot (rubber pipe boot for plumbing vents)
- Insect screen
Step-by-Step Installation: Static Box Vent
Step 1: Determine Vent Placement
Optimal Locations:
- Near roof ridge (hot air rises)
- Between metal panel ribs (easier sealing)
- 5–10 feet from each gable end
- Spaced 10–15 feet apart for multiple vents
- Avoid valleys or low spots where water pools
Ventilation Requirements:
- 1 square foot of vent per 150 square feet of attic space
- Balance intake (soffit) with exhaust (roof vents)
Mark Location:
- Measure and mark center point
- Use vent template or trace vent base with marker
Step 2: Cut Opening in Metal Panel
For Circular Vents:
- Drill pilot hole at center mark using metal bit
- Insert hole saw or step bit into drill
- Cut circular opening matching vent diameter (typically 4–6 inches)
- Work slowly to prevent metal panel distortion
- Deburr edges with file or sandpaper
For Square/Rectangular Vents:
- Mark outline with template
- Drill corner holes with metal bit
- Cut between holes using jigsaw with metal blade
- Clean and deburr all edges
Pro Tip: If possible, position vent to utilize panel’s flat section rather than cutting through ribs.
Step 3: Prepare Vent and Apply Sealant
Inspect Vent:
- Check for pre-attached sealant tape on flange
- Ensure all parts included (screws, gaskets)
- Test-fit vent in opening before sealing
Apply Butyl Tape or Sealant:
- Clean metal surface around opening (remove debris, oil)
- Run continuous bead of polyurethane sealant on underside of vent flange
- Alternatively, apply butyl tape around entire flange perimeter
Critical: Do NOT skimp on sealant—this is primary leak barrier.
Step 4: Position and Secure Vent
Positioning:
- Lower vent through opening from inside attic (if accessible)
- Or carefully position from outside, aligning hole with vent opening
- Press flange firmly against metal roof to spread sealant
- Ensure vent sits flush with no gaps
Fastening Pattern:
- Start with top screw (uphill side) to anchor position
- Install screws around perimeter every 1 inch
- Use self-drilling metal screws with neoprene washers
- Drive screws perpendicular to roof surface
- Tighten until washer compresses slightly (not crushed)
- Typical vent requires 12–20 screws depending on size
Important: Screws must penetrate roof deck below metal panel (minimum 1/2 inch penetration).
Step 5: Apply Exterior Sealant
Final Sealing:
- Apply continuous bead of sealant around entire flange perimeter
- Cover all screw heads with dab of sealant
- Seal any gaps between vent and metal panel
- Smooth sealant with gloved finger or caulk tool
Sealant Application Tips:
- Work in temperatures above 40°F for proper adhesion
- Apply generous beads—excess is better than insufficient
- Allow 24–48 hours to cure before rain exposure
Step 6: Install Vent Cap/Screen
Attach Vent Cap:
- Some vents have separate rain cap that snaps on
- Secure with included screws or rivets
- Ensure insect screen is in place (blocks wasps, rodents)
Step-by-Step Installation: Plumbing Pipe Boot
Step 1: Determine Pipe Location
Pipe Penetration Considerations:
- Pipe typically 3–4 inches diameter
- Position boot to shed water downhill
- Avoid placing too close to roof ridge
Step 2: Cut Opening for Pipe
Sizing:
- Opening should match pipe diameter exactly (no extra clearance)
- Use hole saw matching pipe size
- Cut through metal panel only (not into pipe)
Step 3: Install Rubber Boot
Rubber Pipe Boot Installation:
- Select boot sized to pipe diameter (3-inch, 4-inch, etc.)
- Slide boot over pipe from top
- Position metal flange base flat against metal roof
- Apply thick bead of sealant under entire flange
Critical Sealing Points:
- Heavy sealant bead around pipe where boot meets metal
- Sealant under entire flange perimeter
- Sealant on all screw heads
Step 4: Secure Boot Base
Fastening:
- Install screws every 1–2 inches around boot flange
- Use metal roofing screws with neoprene washers
- Apply sealant generously at all screw locations
- Additional sealant bead around pipe-boot junction
Pro Tip: “Do your best, caulk the rest”—generous sealant application is key to leak-free pipe boots.
Special Considerations for Metal Roofs
1. Sealant Selection (Critical)
Correct Sealant:
- Polyurethane-based roof sealant (e.g., “Through the Roof,” “Geocel Pro Flex”)
- Specifically rated for metal roofs
- UV-resistant and flexible
NEVER Use:
- Standard silicone (acid corrodes galvanized coating)
- Cheap latex caulk (fails in UV/weather)
- Generic construction adhesive
Why This Matters: Standard silicone contains acetic acid that eats through galvanized metal coating, causing rust and leaks within months.
2. Panel Rib Considerations
Vent Placement Options:
Option A: Between Ribs (Preferred)
- Vent flange sits on flat panel section
- Easier sealing
- Less water flow interference
Option B: Spanning Ribs
- Requires additional sealing compound under flange at rib peaks
- More leak potential
- Sometimes necessary for turbine vents
Solution: Apply extra thick bead of sealant at rib peaks to eliminate gaps.
3. Screw Placement & Sealing
Best Practices:
- Always use screws with neoprene washers (create compression seal)
- Avoid over-tightening (crushes washer, reduces seal)
- Space screws evenly (prevents stress concentration)
- Cover every screw head with sealant dab
Installation: Ridge Vent on Metal Roof
Step 1: Measure Ridge Line
Preparation:
- Measure full ridge length
- Mark centerline along entire ridge
- Determine ridge vent type (metal-compatible model)
Step 2: Cut Ridge Opening
Cutting:
- Cut slot along ridge peak (width per manufacturer spec, typically 2–3 inches)
- Leave 6 inches uncut at each gable end (prevents weather infiltration)
- Use circular saw or reciprocating saw with metal blade
- Clean all metal shavings immediately (prevent rust)
Step 3: Install Ridge Vent
Installation:
- Apply sealant tape or butyl on both sides of ridge opening
- Center ridge vent over slot
- Fasten with screws every 8–12 inches on both sides
- Ensure vent aligns with roof slope on both sides
- Install end caps at gable ends
- Apply sealant at all seams and overlaps
Cost: $400–$1,200 for typical 40-foot ridge professionally installed.
Common Mistakes to Avoid
1. Using Wrong Sealant
Problem: Silicone corrodes galvanized metal
Solution: Use polyurethane sealant rated for metal roofs
2. Insufficient Sealant
Problem: Leaks at flange edges and screw penetrations
Solution: Apply generous continuous beads; cover all screws
3. Over-Tightening Screws
Problem: Crushed neoprene washers fail to seal
Solution: Tighten until washer compresses slightly, then stop
4. Cutting Too Large Opening
Problem: Gap between vent and opening allows leaks
Solution: Cut opening to exact size; test-fit before sealing
5. Skipping Interior Inspection
Problem: Vents installed where rafters block airflow
Solution: Check attic from inside; avoid placing vents directly over rafters
DIY vs. Professional Installation
When DIY Is Feasible
Acceptable DIY Scenarios:
- Single-story metal roof with easy access
- Static box vents or pipe boots (simpler than ridge vents)
- Experience with metal working and roof safety
- Proper tools available
DIY Cost Savings: $100–$250 per vent in labor costs
When to Hire Professionals
Hire Pros For:
- Multi-story or steep-pitch roofs (>6:12)
- Ridge vent installation (complex cutting and sealing)
- Multiple vent installations
- Lack of proper safety equipment
- Standing seam metal roofs (specialty fastening required)
- Uncomfortable working at heights
Professional Advantages:
- Proper safety equipment and training
- Experience with metal roof sealing techniques
- Warranty on workmanship (typically 1–5 years)
- Liability insurance coverage
Installation Costs (2025)
Professional Installation Costs
| Vent Type | Materials | Labor | Total Cost |
|---|---|---|---|
| Static Box Vent | $30–$80 | $75–$150 | $100–$250 |
| Turbine Vent | $50–$150 | $100–$200 | $150–$350 |
| Pipe Boot | $15–$40 | $50–$100 | $65–$150 |
| Ridge Vent (40 LF) | $120–$320 | $300–$800 | $400–$1,200 |
DIY Material Costs
Static Box Vent Kit: $30–$80
- Vent unit with flange
- Mounting screws
- Basic sealant
Additional Materials:
- Polyurethane sealant: $8–$15 per tube
- Self-drilling screws (box of 100): $15–$25
- Rubber pipe boot: $15–$40
Total DIY Cost: $50–$120 per vent
FAQ
How do you install a vent on a metal roof?
Mark location, cut opening with metal-cutting tools, apply polyurethane sealant under vent flange, secure with self-drilling screws with neoprene washers every inch, and apply additional sealant over all screws and seams.
Can you put roof vents on a metal roof?
Yes. Metal roofs accommodate ridge vents, static box vents, turbine vents, and pipe boots using proper metal-compatible mounting and sealing techniques.
What is the best sealant for metal roof vents?
Polyurethane-based roof sealants rated for metal (e.g., “Through the Roof,” “Geocel Pro Flex”). Never use standard silicone—acid corrodes galvanized coating.
How much does it cost to install a vent in a metal roof?
$100–$250 for static box vents; $150–$350 for turbine vents; $65–$150 for pipe boots; $400–$1,200 for ridge vents (40 LF). DIY saves $75–$200 per vent.
Do metal roofs need roof vents?
Yes. Metal roofs require proper attic ventilation (1 sq ft per 150 sq ft attic) to prevent condensation, reduce heat, and extend roof lifespan.
How many roof vents does a metal roof need?
Calculate attic square footage ÷ 150 = total vent area needed. Divide by vent NFA (net free area) rating. Example: 1,500 sq ft attic needs 10 sq ft ventilation.
Can I install roof vents myself on a metal roof?
Yes, for single-story roofs with proper tools and safety equipment. Ridge vents and steep roofs require professional installation.
Installing roof vents on a metal roof demands specialized techniques to maintain watertight integrity—mark locations between ribs when possible, cut precise openings with metal-cutting tools, apply generous polyurethane sealant (never standard silicone that corrodes galvanized coatings), secure vents with self-drilling screws with neoprene washers spaced every inch, and seal all screw heads and flange edges. Professional installation costs $100–$350 per vent depending on type, while DIY projects save $75–$200 in labor but require metal-working experience and proper safety equipment. Prioritize correct sealant selection, adequate fastener spacing, and generous sealant application at all penetrations to prevent leaks that damage insulation and structural components.
Get free roofing advice, cost guides, and seasonal maintenance tips.

Rinuom has researched and documented 200+ roofing projects across the U.S., helping homeowners understand costs, materials, and contractor selection since 2021
Leave A Comment