Installing Corrugated Metal Roofing: Step-by-Step Guide
Installing corrugated metal roofing transforms residential, agricultural, and commercial buildings with durable, weather-resistant coverage that lasts 40+ years. Corrugated panels—characterized by their distinctive wavy profile—offer lightweight construction, excellent water shedding, and fire resistance that makes them ideal for homes, barns, sheds, and warehouses.
The key to successful installation lies in proper substrate preparation, precise fastener placement, correct panel overlap, and attention to thermal expansion. When done correctly, installing corrugated metal roofing creates a watertight system that withstands decades of extreme weather while maintaining its appearance and structural integrity.
Table of Contents
Choosing the right corrugated metal panels and materials
Before installing corrugated metal roofing, selecting appropriate materials ensures optimal performance for your specific application and climate.
Panel material options:
- Galvanized steel: Most economical, zinc coating protects against rust, 20-30 year lifespan with proper maintenance
- Galvalume (aluminum-zinc alloy): Superior corrosion resistance, 40-50 year lifespan, excellent for coastal or humid climates
- Aluminum: Lightweight, rust-proof, ideal for coastal areas, higher initial cost
- Painted/coated finishes: Kynar 500 or SMP coatings add color and UV protection, extend panel life 10-15 years
Corrugated profiles available:
Standard corrugated features 2.5″ or 7/8″ spacing between waves, while deeper 3″ profiles provide greater strength for wider purlin spacing. R-panel and 5V crimp offer alternative aesthetic options with similar installation principles.
Gauge thickness considerations:
29-gauge (thinner) works for residential applications with 24″ purlin spacing, while 26-gauge or heavier suits commercial buildings, areas with heavy snow loads, or wider purlin spacing up to 30″ on center.
Calculate panel quantities by measuring roof area in square feet, dividing by individual panel coverage (accounting for overlap), and adding 10-15% for waste, cuts, and mistakes.
For comparing metal roofing types, visit our complete metal roofing materials guide.
Essential tools for installing corrugated metal roofing
Having the right equipment makes installing corrugated metal roofing safer, faster, and more accurate.
Safety equipment (non-negotiable):
- Fall arrest harness with anchor points rated for your weight
- Non-slip rubber-soled boots designed for metal surfaces
- Cut-resistant work gloves
- Safety glasses or goggles with side shields
- Hearing protection when cutting panels
Cutting and preparation tools:
- Circular saw with metal-cutting blade (avoid abrasive discs that damage coatings)
- Aviation tin snips for detailed cuts and trimming
- Angle grinder with cut-off wheel for thick gauge or long cuts
- Deburring tool or file to smooth sharp edges
Fastening and layout tools:
- Cordless drill/driver with adjustable clutch (critical for proper torque)
- Magnetic bit holders with hex driver bits
- Socket adapter for self-tapping screws
- 25-foot tape measure and chalk line
- Framing square and 4-foot level
- String line for maintaining straight panel alignment
Materials checklist:
- Corrugated metal panels (pre-cut to length when possible)
- Self-tapping metal roofing screws with EPDM or neoprene washers (#12 or #14 size)
- Synthetic roofing underlayment rated for metal roofs
- Ridge cap trim matching panel profile
- Foam closure strips (profile-specific)
- Eave trim, gable/rake trim, and valley flashing
- Butyl sealant tape and polyurethane caulk
Proper substrate preparation is critical when installing corrugated metal roofing to ensure long-term performance and prevent moisture problems.
Deck inspection and repair:
Examine existing roof decking (plywood, OSB, or board sheathing) for rot, soft spots, or structural damage. Replace any compromised sections before proceeding—metal roofing is only as good as the structure beneath it.
For pole barn or agricultural buildings using open purlin systems, verify purlins are straight, properly spaced (typically 24″ on center), and securely fastened to rafters or trusses.
Underlayment installation:
Install synthetic roofing underlayment horizontally from eave to ridge, overlapping each course by 6 inches. This barrier provides secondary moisture protection and creates a thermal break that reduces condensation on the metal underside.
Use underlayment specifically rated for metal roofing applications—standard felt paper can deteriorate from heat buildup under metal surfaces. Staple or nail underlayment every 12-18 inches to prevent movement during panel installation.
Eave trim and drip edge:
Install metal eave trim (drip edge) along the bottom edge of the roof before panels go on. This trim directs water into gutters, protects fascia boards, and provides a clean finished edge.
Secure eave trim every 12 inches with roofing nails or screws into the fascia board or roof deck edge, ensuring it extends 1-2 inches beyond the fascia to keep water away from wood components.
Marking purlin or rafter locations:
Snap chalk lines or mark the underlayment showing purlin/rafter locations so you know exactly where to place fasteners once panels are installed. Missing structural members with fasteners is a common mistake that causes loose panels and leaks.
Planning panel layout to minimize cuts and waste
Strategic planning before installing corrugated metal roofing saves time, reduces material waste, and creates better-looking results.
Starting point selection:
Begin installation on the rake (gable end) opposite the prevailing wind direction. This ensures wind-driven rain doesn’t infiltrate overlapping seams. For most locations, start on the side where storms typically approach from.
Panel orientation:
Corrugations always run vertically from eave to ridge—never horizontally. This orientation sheds water efficiently and provides proper structural strength.
Overhang calculations:
Plan for 1-2 inches of overhang at eaves and rakes. Eave overhang directs water into gutters, while rake overhang protects gable trim and prevents water from running down exterior walls.
Squaring the roof:
Use the 3-4-5 triangle method to ensure your first panel goes on square: measure 3 feet along the eave, 4 feet up the rake, and verify the diagonal distance is 5 feet. Adjust until measurements are exact—if the first panel is crooked, every subsequent panel compounds the error.
Measuring and cutting panels:
When cutting is necessary for valleys, hips, or panel length adjustments, measure twice and cut once. Support panels fully during cuts to prevent bending and use appropriate blade speeds to avoid melting protective coatings.
Always deburr cut edges with a file or deburring tool to prevent injuries and remove metal shavings that can rust and stain panels.
Check our roof pitch calculator and planning guide for determining optimal layouts.
Setting and fastening the starter panel correctly
The first panel is the most critical step when installing corrugated metal roofing because it establishes alignment for the entire roof.

Initial panel positioning:
Place the first panel at the starting rake with proper eave and side overhangs (typically 1-2 inches each). Use a framing square to verify the panel is square to both the eave and rake before driving any fasteners.
Foam closure installation:
Before fastening, install foam closure strips along the eave edge, positioned 1 inch from the eave trim edge. These profile-specific closures prevent birds, insects, and wind-driven rain from entering under the corrugations while allowing necessary ventilation.
Secure foam closures with double-sided butyl tape or the adhesive backing, then press firmly to ensure complete contact with the panel profile.
Fastener placement fundamentals:
This is where many DIYers make critical errors. For corrugated metal roofing, fasteners go through the high points (peaks) of the corrugations, not the valleys. This placement keeps screws above standing water and debris, reducing leak potential.
Place screws every third corrugation (every 7.5-8 inches across the panel width) and every 12-18 inches along the panel length at purlin/rafter locations. Coastal or high-wind areas may require tighter spacing—check local building codes.
Proper fastening technique:
Use a cordless drill with adjustable clutch set so the screw stops when the neoprene washer just compresses against the panel—not crushed, but snug. Over-tightening deforms panels and crushes washers, creating leak paths. Under-tightening allows movement and water infiltration.
Drive screws perpendicular to the panel surface—angled fasteners don’t seal properly and can cause panel distortion.
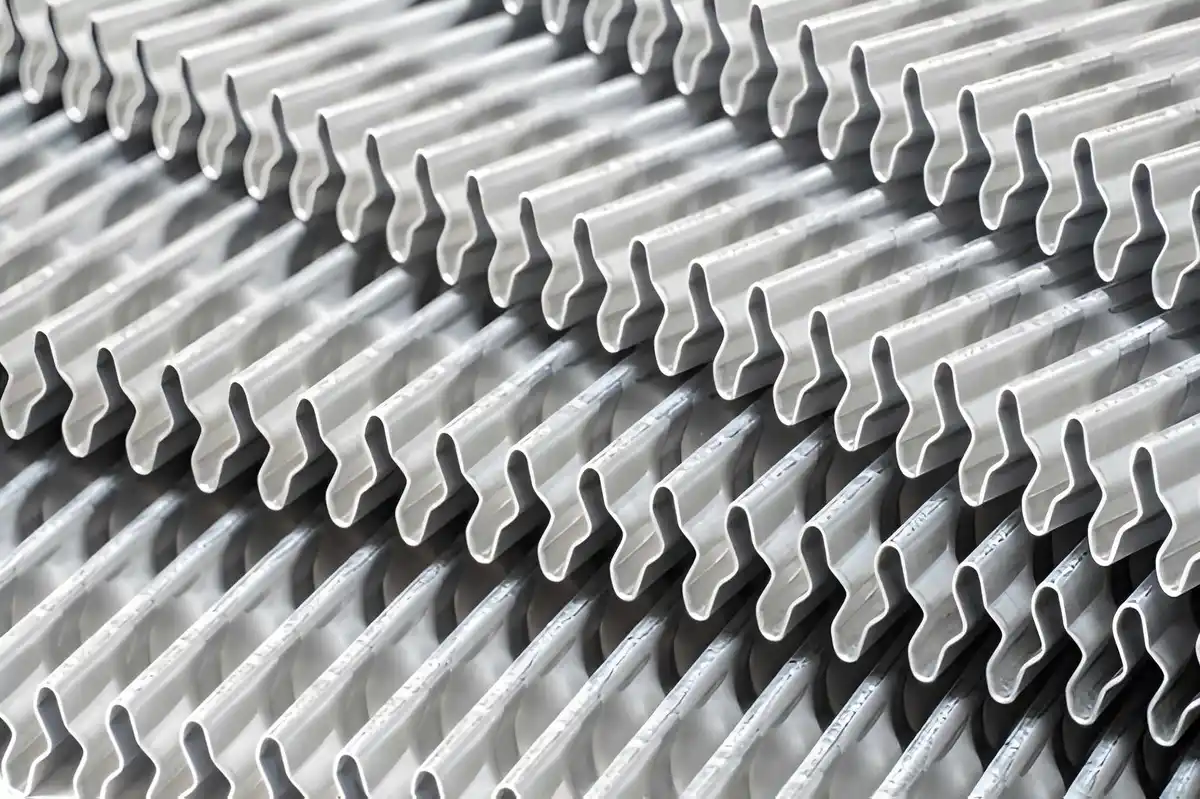
![proper fastener placement on corrugated metal high
Gable edge fastening:
Add extra fasteners along the gable/rake edge in the first low corrugation (valley), spacing them every 12 inches. These will be covered by gable trim but provide essential wind uplift resistance.
[Embed YouTube video: How to Install Corrugated Metal Roofing]
Systematic panel installation with proper overlap
Once the first panel is perfectly positioned, installing corrugated metal roofing proceeds methodically across the roof with careful attention to overlap specifications.
Side overlap (widthways):
Each subsequent panel overlaps the previous panel by one full corrugation for roofs with pitch greater than 10 degrees (approximately 2:12). For shallower pitches between 5-10 degrees, overlap two full corrugations to prevent wind-driven rain infiltration.
Position the new panel so it nests smoothly into the previous panel’s corrugation, maintaining alignment from eave to ridge.
Fastening overlap areas:
Drive fasteners through both overlapping panels into the structural support below. This secures the seam and prevents wind from lifting panel edges. Place these overlap fasteners in the high corrugation points, maintaining the same every-third-corrugation pattern.
Maintaining straight alignment:
Every 3-4 panels, stretch a string line from eave to ridge and check that panel edges align with the string. Metal panels can gradually drift out of square, and catching this early prevents having to remove and reinstall multiple panels.
End overlap (lengthways when necessary):
If your panels don’t span from eave to ridge in a single piece, overlap panel ends by a minimum of 6 inches, preferably 8-12 inches for better water resistance. The upper panel always overlaps the lower panel to shed water properly.
Seal end laps with a bead of butyl sealant tape or polyurethane caulk before overlapping, and fasten through both panels every 12 inches across the overlap width.
Working around obstacles:
When installing corrugated metal roofing around vent pipes, chimneys, or other penetrations, use appropriate pipe flashings or custom-fitted metal flashings. Cut panels to fit with 1-2 inch clearance around penetrations, then seal the gaps with flashing boots or custom-fabricated collars.
Panel installation progression:
Continue across the roof systematically, checking alignment every few panels and maintaining consistent overhang at eaves. Remove metal shavings from cutting or drilling immediately—they rust quickly and create permanent stains on panel finishes.
Finishing details: ridge caps and flashing installation
Professional finishing makes the difference between installing corrugated metal roofing that looks amateur versus contractor-quality work.
Ridge cap installation:
Ridge caps cover the peak where roof planes meet, preventing water infiltration and providing ventilation options.
- Install ridge closure strips: Place foam closures along both sides of the ridge, 1 inch below the peak, to prevent weather and pest entry while allowing ventilation airflow
- Position ridge cap: Center pre-formed ridge cap over the peak, ensuring equal overhang on both sides (typically 1-1.5 inches)
- Overlap sections: When using multiple ridge cap pieces, overlap each section by 6 inches minimum, with the downwind section on top
- Fasten through high points: Drive screws through the high points of the ridge cap into the ridge board or blocking every 12-18 inches, alternating sides
- Leave gap at peak: Don’t fasten panels within 4-6 inches of the actual peak to allow the ridge cap system to function properly
Valley flashing:
For roofs with intersecting planes, install pre-formed valley flashing before panels go on, running from eave to ridge over the underlayment. Cut panels to fit the valley angle, leaving a 1-inch gap from the valley centerline on each side, and seal panel edges with appropriate sealant.
Rake and gable trim:
Install gable trim over panel edges at rakes, fastening through the trim into the gable board or blocking every 12 inches. This trim protects panel edges from wind uplift and provides a finished appearance.
Eave closure and ventilation:
Use either solid foam closures (for fully vented attic systems with ridge and soffit vents) or ventilated closures (when additional eave ventilation is needed). The choice depends on your overall attic ventilation strategy.
See our metal roof flashing installation guide.
Critical sealing points to prevent leaks
Strategic sealant application during installing corrugated metal roofing prevents the most common leak sources without over-sealing areas that need drainage or expansion.
Where to apply sealant:
- Under ridge caps: Run a continuous bead of butyl tape along each side of the ridge before installing the ridge cap
- End lap seams: Apply sealant between overlapping panel ends before fastening them together
- Around penetrations: Seal the interface between flashing boots/collars and panels with polyurethane or butyl-based caulk rated for metal roofing
- At flashing transitions: Seal where valley flashing, sidewall flashing, or other trim pieces meet roofing panels
Where NOT to seal:
Never seal side lap overlaps (the corrugation-to-corrugation overlap between adjacent panels)—these areas must remain open to allow water drainage and thermal expansion/contraction. Sealing side laps traps water and prevents panels from moving naturally with temperature changes, leading to fastener failure.
Sealant selection:
Use butyl tape for horizontal seams and areas needing compression sealing. Choose polyurethane or silicone caulk rated for metal roofing for vertical seams and penetrations. Avoid generic household caulks that deteriorate quickly under UV exposure and temperature cycling.
Fastener inspection:
After installation, visually inspect every fastener to verify that neoprene washers are properly compressed and sealed against panel surfaces. Replace any fasteners with damaged or improperly seated washers immediately.
Critical errors that cause leaks and failures
Understanding common mistakes when installing corrugated metal roofing helps you avoid expensive callbacks and premature roof failure.
Wrong fastener placement:
Installing screws in the low corrugations (valleys) instead of high points is the most common error. Valley-placed fasteners sit in water flow paths and collect debris, leading to accelerated corrosion and leaks. Always fasten through the corrugation peaks where water flows around—not over—the fastener head.
Over-tightening or under-tightening screws:
Excessive torque crushes neoprene washers and dimples panels, creating leak paths and preventing natural thermal expansion. Insufficient torque leaves gaps where water infiltrates. Set your drill clutch properly and verify the first few fasteners before continuing.
Insufficient overlap:
Skimping on overlap dimensions—using less than one full corrugation on side laps or less than 6 inches on end laps—invites wind-driven rain penetration. Follow manufacturer specifications for your specific roof pitch.
No underlayment or wrong type:
Skipping underlayment eliminates condensation protection and backup moisture barriers, while using standard felt paper creates problems when heat buildup under metal causes deterioration. Always use synthetic underlayment rated for metal roof applications.
Poor fastener spacing:
Too few fasteners allow panels to lift in high winds; excessive fasteners create unnecessary penetration points and restrict thermal movement. Follow the recommended pattern: every third corrugation at 12-18 inch intervals along purlins.
Walking on panels incorrectly:
Stepping between purlins or supports dents panels and breaks finishes. Always walk directly on purlins/rafters or use walking boards spanning multiple supports to distribute weight.
Ignoring thermal expansion:
Metal expands and contracts significantly with temperature changes. Using fasteners that are over-tightened or failing to use proper washers prevents this movement, leading to fastener pull-through, panel buckling, and oil-canning (rippling).
Galvanic corrosion from mixed metals:
Using incompatible metals in contact—such as aluminum panels with uncoated steel screws, or copper flashing touching galvanized panels—causes rapid galvanic corrosion. Always use fasteners and accessories compatible with your panel material.
Budget and time investment for corrugated metal roof installation
Understanding costs helps plan projects and compare DIY savings against professional installation when installing corrugated metal roofing.
Material costs (per square foot):
| Component | Cost Range |
|---|---|
| Corrugated panels (29-gauge painted) | $1.50-$3.00 |
| Corrugated panels (26-gauge Galvalume) | $2.50-$4.50 |
| Synthetic underlayment | $0.25-$0.50 |
| Metal roofing screws with washers | $0.15-$0.30 |
| Ridge cap, trim, and closures | $0.50-$1.00 |
| Total DIY materials | $2.50-$6.00/sq ft |
Labor costs (professional installation):
- Installation labor: $3.00-$6.00 per square foot depending on complexity, pitch, and regional rates
- Total installed cost: $5.50-$12.00 per square foot including materials and labor
DIY timeline estimates:
| Project Size | Complexity | DIY Time (with helper) | Professional Time |
|---|---|---|---|
| Small shed/barn (500 sq ft) | Simple gable | 1-2 days | 4-6 hours |
| Average residential (2,000 sq ft) | Moderate with valleys | 3-5 days | 1-2 days |
| Large or complex roof (3,000+ sq ft) | Multiple planes, dormers | 5-8 days | 2-3 days |
These estimates assume good weather, familiarity with roofing work, and proper equipment. First-time installers should add 30-50% more time for learning curve and mistakes.
For comparing installation options, visit our metal roofing cost calculator.
Caring for your corrugated metal roof after installation
Proper maintenance extends the life of corrugated metal roofing well beyond the typical 40-year expectation.
Annual inspection schedule:
Walk the property perimeter each fall and spring, using binoculars to inspect for:
- Loose, missing, or backing-out fasteners
- Damaged, dented, or lifted panels
- Deteriorating sealant at penetrations or flashing
- Rust spots or coating damage
- Debris accumulation in valleys or behind obstacles
Cleaning procedures:
Hose down the roof once or twice annually to remove pollen, dirt, leaves, and debris. For stubborn staining, use mild detergent solution (avoid abrasive cleaners or wire brushes that damage finishes) and soft-bristle brushes.
Clear valleys and gutters of accumulated debris that traps moisture and accelerates corrosion.
Touch-up maintenance:
Address small scratches or coating damage promptly with manufacturer-matched touch-up paint to prevent rust from spreading. Clean the area, prime bare metal, and apply touch-up paint according to product instructions.
Tighten any fasteners that have backed out slightly (common during the first year as panels settle), and replace fasteners with damaged washers.
Gutter system maintenance:
Keep gutters and downspouts clear to prevent water backup at eaves that can force water under panels or rot fascia boards and underlayment.
Expected lifespan:
- Painted Galvalume or steel: 40-50 years with proper maintenance
- Bare Galvalume: 30-40 years
- Aluminum: 50+ years in non-coastal environments
- Galvanized steel: 20-30 years depending on coating thickness and climate
Regular care can extend these lifespans by 10-15 years in many cases.
Minimum roof slope and structural support for metal panels
Proper pitch and structural backing are essential when installing corrugated metal roofing to ensure longevity and performance.
Minimum pitch requirements:
Standard corrugated metal roofing requires a minimum pitch of 3:12 (14 degrees) for reliable long-term performance. This slope provides adequate water drainage and prevents standing water that accelerates corrosion.
Lower pitches from 1:12 to 3:12 are possible but require:
- Two-corrugation side overlap instead of one
- Additional sealant at all overlaps and fasteners
- Higher-quality underlayment with better waterproofing properties
- More frequent inspection and maintenance
Structural support requirements:
Purlin or rafter spacing depends on panel gauge, expected snow loads, and wind conditions:
- 29-gauge panels: maximum 24 inches on center for residential applications
- 26-gauge panels: up to 30 inches on center depending on load requirements
- High snow load areas (50+ psf): may require 18-24 inch spacing even with heavier gauge
Consult local building codes and manufacturer specifications for your specific conditions—structural failure from inadequate support is not covered by material warranties.
Ventilation considerations:
Adequate attic ventilation prevents condensation on the metal underside that can rot decking and deteriorate insulation. Provide minimum 1:300 ventilation ratio (1 sq ft vent per 300 sq ft attic space), balanced between intake (soffit/eave) and exhaust (ridge) vents.
For structural planning guidance, see our roof framing and support requirements.
Frequently Asked Questions
Can I install corrugated metal roofing over existing shingles?
While possible in some jurisdictions, it’s not recommended. Installing over shingles traps moisture, provides uneven substrate causing panel distortion, and makes it impossible to inspect and repair decking. Best practice is removing old roofing first.
What is the correct screw pattern for corrugated metal roofing?
Screws go through the high points (peaks) of corrugations, every third corrugation across the width, and every 12-18 inches along the panel length at purlin locations. Add extra fasteners at eaves, ridges, and gable edges for wind resistance.
Do I need underlayment under corrugated metal roofing?
Yes. Synthetic underlayment rated for metal roofs provides condensation control, thermal barrier, and backup moisture protection. It’s required by most building codes and manufacturer warranties.
How much overlap do corrugated metal panels need?
Side overlap: one full corrugation for roofs above 10-degree pitch, two corrugations for shallower pitches. End overlap (if required): minimum 6 inches, preferably 8-12 inches.
Can I walk on corrugated metal roofing during installation?
Yes, but only by stepping directly on purlins or structural supports, never between them. Use walking boards spanning multiple supports for safer movement. Wear soft-soled boots and avoid walking on panels during hot weather when coatings are soft.
Installing corrugated metal roofing successfully requires methodical attention to substrate preparation, precise fastener placement in corrugation high points, proper overlap dimensions, and strategic sealing at critical junction points. When combined with appropriate material selection and respect for thermal expansion principles, the result is a durable, weather-resistant roof system that can last 40-70 years with minimal maintenance.
Whether you’re a professional contractor streamlining techniques or a capable DIYer tackling a barn or shed project, following manufacturer specifications and industry best practices ensures your corrugated metal roof performs reliably for decades.
Get free roofing advice, cost guides, and seasonal maintenance tips.

Roofing content specialist with 5+ years researching U.S. residential and commercial roofing. Has documented 200+ projects covering installation costs, material selection, contractor vetting, and DIY guides for homeowners across all climate zones.
Leave A Comment