Capstone Shingles: Complete 2026 Cost & Installation Guide
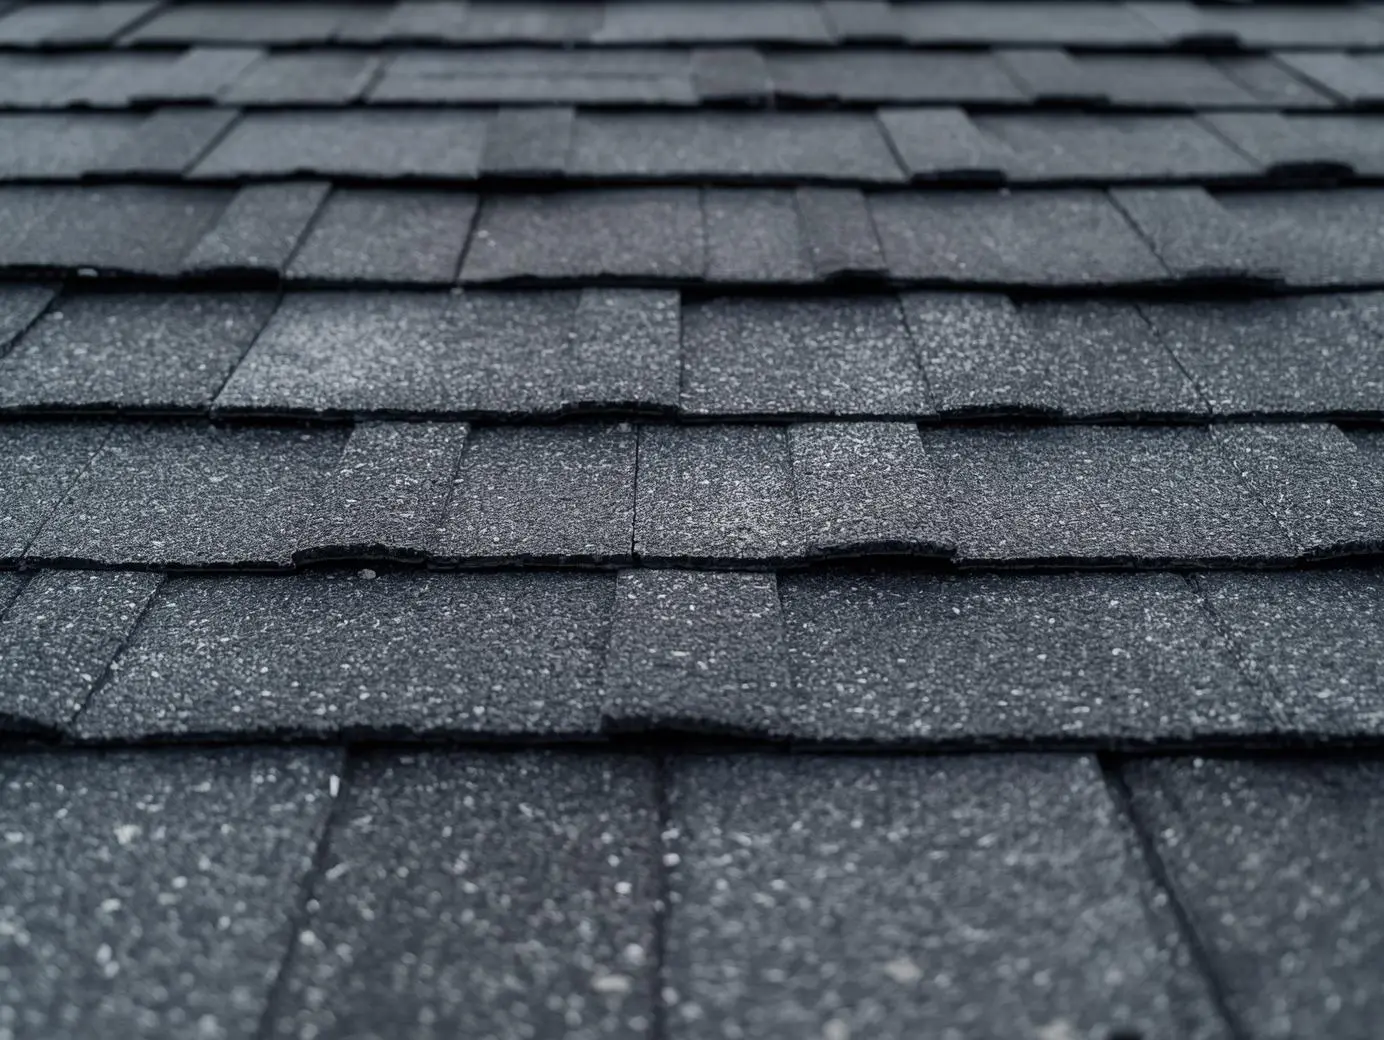
Capstone shingles, commonly known as ridge cap shingles or hip and ridge shingles, are specialized roofing products designed to finish and weatherproof the peaks, hips, and ridges where roof planes meet. These critical finishing components serve both functional and aesthetic purposes, creating watertight seals at vulnerable roof junctions while providing a polished, professional appearance that completes your roofing system.
In 2025, capstone shingles cost between $35 and $75 per bundle, with each bundle covering 20-33 linear feet depending on the product type and manufacturer. Installation costs add $1.50-$3.50 per linear foot for professional labor, bringing total installed pricing to $3.00-$7.00 per linear foot for complete ridge and hip finishing. Most residential roofs require 40-150 linear feet of ridge cap coverage, translating to total capstone shingle costs of $120-$1,050 for materials and labor combined.
Understanding capstone shingle types, proper installation techniques, brand options, and selection criteria ensures your roof receives the weather protection and visual appeal necessary for decades of reliable performance. This comprehensive guide examines everything homeowners and contractors need to know about selecting, installing, and maintaining capstone shingles for optimal results.
Table of Contents
Understanding capstone shingles and their purpose
Capstone shingles represent a specialized category of roofing materials engineered specifically for the unique demands of ridge and hip applications where standard field shingles cannot provide adequate protection.
What are capstone shingles?
Capstone shingles, technically called ridge cap shingles or hip and ridge shingles, are pre-scored roofing shingles designed to bend over roof peaks and hips, creating finished, weatherproof transitions at these critical junctions. Unlike flat field shingles that cover the main roof surfaces, capstone shingles feature center perforations or pre-bending that allows them to conform to the angle where two roof planes meet without cracking or breaking.
Critical functions of capstone shingles:
These specialized shingles perform several essential roles in complete roofing systems:
Weatherproofing vulnerable areas:
- Seal the exposed ridge where roof decking from opposite slopes meets, preventing wind-driven rain, snow, and debris from penetrating into the attic space
- Create overlapping layers that shed water away from the peak rather than allowing infiltration
- Protect against ice dam formation at ridge lines in cold climates
- Prevent wind uplift at the most exposed portions of the roof structure
Aesthetic finishing:
- Provide dimensional, textured appearance matching field shingle profiles
- Complete the roof’s visual presentation with professional-grade finishing
- Conceal exposed nails and rough edges at peaks and hips
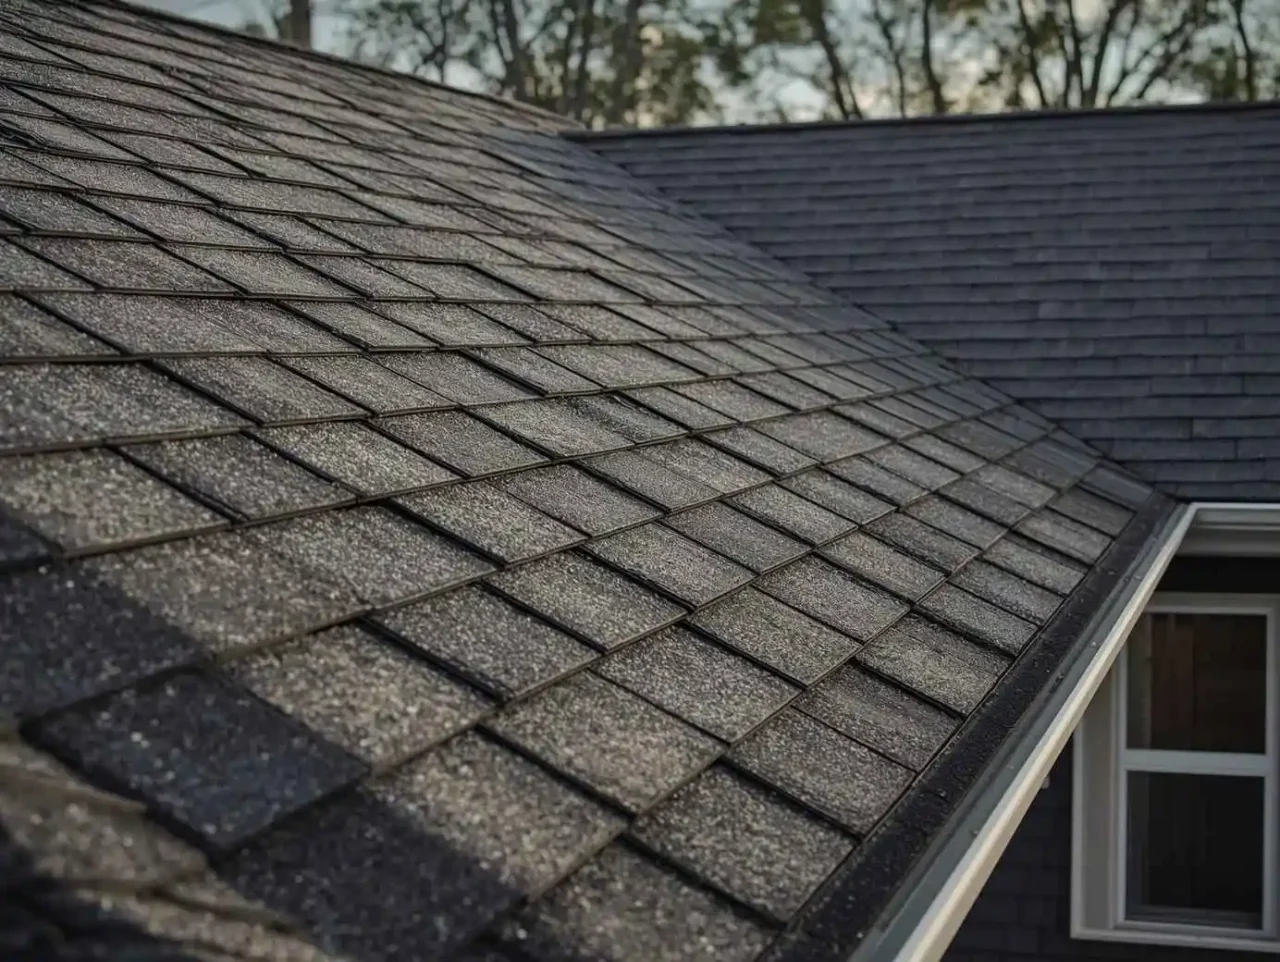
- Create clean, straight ridge lines enhancing curb appeal
Ventilation integration:
- Install over ridge vent systems creating exhaust pathways for attic air
- Allow proper airflow while maintaining weather protection
- Support balanced ventilation systems extending shingle lifespan
Structural protection:
- Cover and protect ridge boards and hip rafters from UV degradation
- Prevent moisture penetration into structural wood members
- Extend overall roof system longevity through comprehensive coverage
Differences from field shingles:
Capstone shingles differ from standard roofing shingles in several important ways:
- Thickness: Ridge caps are typically 30-50% thicker than field shingles, providing enhanced durability at high-wear locations
- Bendability: Formulated with more flexible asphalt compounds allowing bending without cracking
- Dimensions: Pre-cut to 12″ x 12″ or 12″ x 36″ (perforated into three sections) versus larger field shingle sizes
- Exposure rate: Designed for 5-7 inch exposure versus 5-5.67 inch for standard shingles
- Cost: Premium pricing reflecting specialized manufacturing and performance characteristics
According to IKO’s ridge cap installation guide, proper ridge cap shingles are essential for every sloped roof, as attempting to use field shingles at ridges and hips creates inferior weather protection and premature failure.
Different types of capstone shingles for various applications
Ridge cap shingle options range from basic economical products to premium architectural systems matching high-end designer roofs.
Standard 3-tab style ridge caps:
The most economical capstone shingle option uses basic 3-tab technology:
- Construction method: Often created by cutting standard 3-tab field shingles into individual thirds along pre-scored lines
- Cost: $25-$40 per bundle (approximately 20-25 linear feet coverage)
- Price per linear foot: $1.00-$2.00 for materials
- Appearance: Flat, uniform profile with minimal dimensional character
- Thickness: Standard single-layer construction (approximately 0.5 inches)
- Best applications: Budget-conscious projects, agricultural buildings, sheds, garages, rental properties where premium aesthetics aren’t required
- Advantages: Lowest cost, adequate weather protection, simple installation
- Limitations: Less visually appealing than architectural options, shorter lifespan (20-25 years typical)
Pre-formed architectural ridge caps:
Purpose-manufactured capstone shingles designed to complement architectural field shingles:
- Construction: Multi-layer laminated design creating pronounced dimensional profile
- Cost: $45-$75 per bundle (20-33 linear feet coverage depending on brand)
- Price per linear foot: $1.50-$3.00 for materials
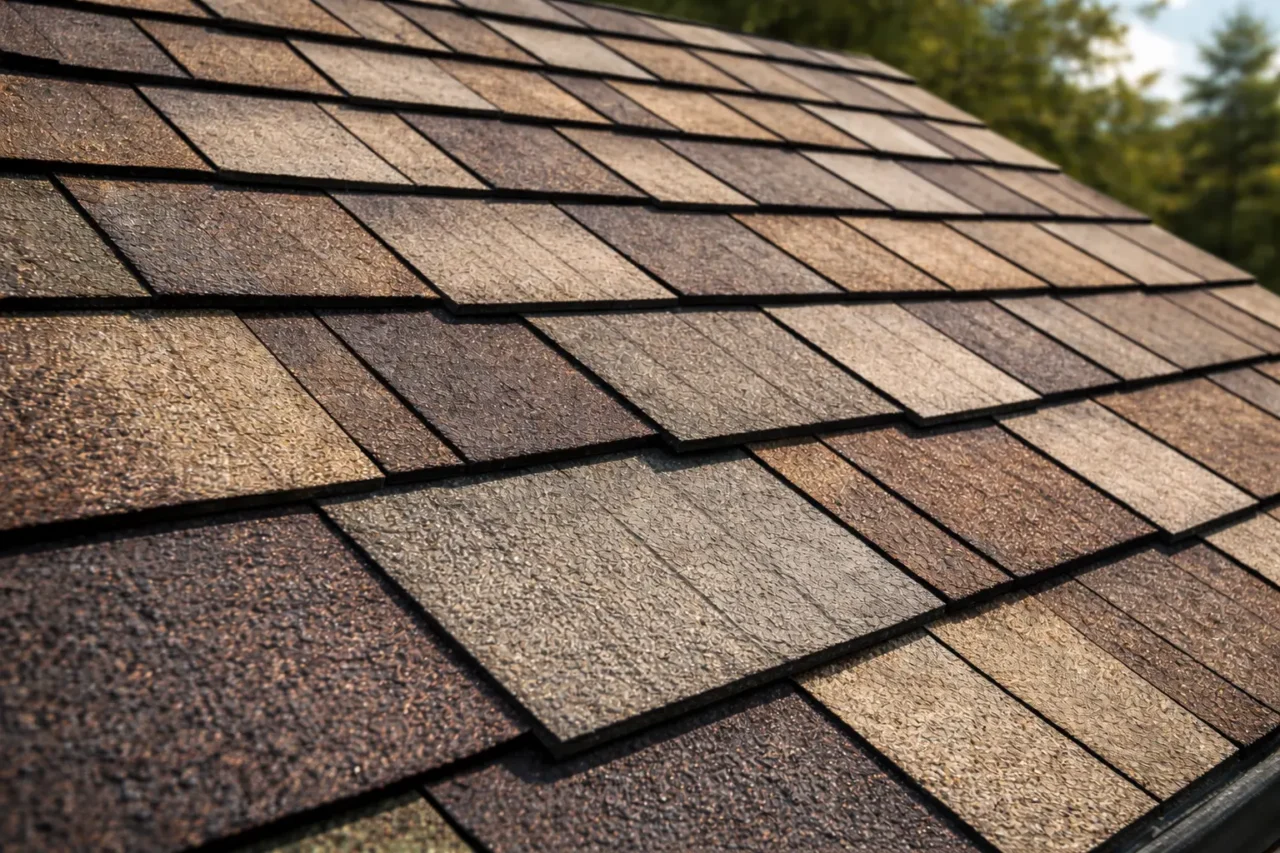
- Appearance: Thicker, more substantial look with enhanced shadow lines matching architectural shingles
- Thickness: 0.75-1.25 inches creating bold ridge presence
- Best applications: Residential homes with architectural field shingles, properties emphasizing curb appeal
- Popular products:
- Advantages: Enhanced aesthetics, better wind resistance, longer warranties (30-40 years), factory pre-scored for consistent installation
- Installation benefits: Pre-scored design eliminates difficult cuts saving labor time
Specialty designer ridge caps:
Premium capstone shingles matching luxury designer field shingle profiles:
- Construction: Ultra-thick multi-layer designs, specialized textures, unique profiles
- Cost: $60-$95 per bundle
- Price per linear foot: $2.50-$4.00 for materials
- Appearance: Maximum dimensional character, often 1.0-1.5 inches thick, distinctive shadow patterns
- Best applications: High-end residential projects, luxury homes, historic properties, architecturally significant buildings
- Examples:
- GAF Timbertex (wood shake appearance): $75-$95 per bundle
- CertainTeed Presidential Shake TL: $70-$90 per bundle
- Premium impact-resistant options: $65-$85 per bundle
- Advantages: Unmatched aesthetics, superior durability, enhanced impact and wind ratings
- Warranty: Often match premium field shingle warranties (40-50 years or lifetime limited)
Comparison table by type:
| Capstone Shingle Type | Cost Per Bundle | Coverage | Price/LF | Thickness | Lifespan | Best For |
|---|---|---|---|---|---|---|
| 3-tab cut caps | $25-$40 | 20-25 LF | $1.00-$2.00 | 0.5″ | 20-25 years | Budget projects |
| Standard architectural | $45-$65 | 25-30 LF | $1.50-$2.60 | 0.75-1.0″ | 30-40 years | Residential homes |
| Premium architectural | $60-$85 | 25-33 LF | $2.00-$3.40 | 1.0-1.25″ | 40-50 years | Upscale residential |
| Designer specialty | $75-$95 | 20-28 LF | $2.50-$4.00 | 1.0-1.5″ | 40-50+ years | Luxury homes |
These capstone shingle costs reflect materials only; professional installation adds labor charges discussed in the pricing section below.
How much do capstone shingles cost in 2025?
Complete capstone shingle project costs include materials, labor, and accessories for proper installation.
Material costs by product tier:
Actual 2025 pricing from suppliers and retailers:
Budget tier (3-tab style):
- Cost per bundle: $25-$40
- Coverage per bundle: 20-25 linear feet
- Material cost per linear foot: $1.00-$2.00
- Bundles needed for 100 LF: 4-5 bundles
- Total material cost (100 LF): $100-$200
Standard architectural tier:
- Cost per bundle: $45-$65
- Coverage per bundle: 25-30 linear feet
- Material cost per linear foot: $1.50-$2.60
- Example: GAF Seal-A-Ridge Charcoal $49.35 per bundle, 25 LF coverage
- Example: GAF Seal-A-Ridge (standard colors) $70.30 per bundle, 25 LF
- Bundles needed for 100 LF: 3.5-4 bundles
- Total material cost (100 LF): $175-$280
Premium architectural tier:
- Cost per bundle: $60-$85
- Coverage per bundle: 25-33 linear feet
- Material cost per linear foot: $2.00-$3.40
- Bundles needed for 100 LF: 3-4 bundles
- Total material cost (100 LF): $200-$340
Designer specialty tier:
- Cost per bundle: $75-$95
- Coverage per bundle: 20-28 linear feet
- Material cost per linear foot: $2.50-$4.00
- Bundles needed for 100 LF: 3.5-5 bundles
- Total material cost (100 LF): $265-$475
Professional installation labor costs:
Labor represents a significant portion of total capstone shingle expenses:
- Labor rate per linear foot: $1.50-$3.50 depending on roof complexity, pitch, and regional rates
- Simple gable roof (low pitch, straight ridge): $1.50-$2.25 per LF
- Standard complexity (moderate pitch, some hips): $2.00-$2.75 per LF
- Complex roof (steep pitch, multiple hips/ridges): $2.50-$3.50 per LF
- Ridge vent integration: Add $0.50-$1.00 per LF for vent installation beneath caps
Total installed cost calculations:
Combining materials and labor for complete project pricing:
Standard architectural capstone shingles:
- Materials: $1.80 per LF (average)
- Labor: $2.25 per LF (average)
- Total installed: $4.05 per LF
Premium/designer capstone shingles:
- Materials: $2.70 per LF (average)
- Labor: $2.75 per LF (average complexity)
- Total installed: $5.45 per LF
Typical residential roof requirements:
Linear footage varies dramatically based on roof style:
Simple gable roof:
- Ridge length: 30-50 linear feet (single ridge line)
- Material cost: $54-$150 (architectural caps)
- Labor cost: $60-$125
- Total project: $114-$275
Hip roof (standard home):
- Ridge + hips: 60-120 linear feet
- Material cost: $108-$360 (architectural caps)
- Labor cost: $120-$330
- Total project: $228-$690
Complex roof (multiple planes, dormers):
- Ridge + hips + valleys: 100-200+ linear feet
- Material cost: $180-$680 (architectural caps)
- Labor cost: $200-$700
- Total project: $380-$1,380
Proportion of total roof cost:
Capstone shingles typically represent 3-5% of complete roof replacement expenses. For a $12,000 total roof replacement, ridge caps account for $360-$600 of the project cost—a small percentage that shouldn’t be compromised given their critical protective function.
According to roofing industry standards, investing in quality capstone shingles matching your field shingle grade ensures comprehensive protection and maintains manufacturer warranty compliance.
Top capstone shingle brands and product options
Major roofing manufacturers offer specialized ridge cap products engineered to complement their field shingle lines.
GAF – Industry leader:
GAF commands approximately 25-30% market share in residential roofing with comprehensive capstone shingle offerings:
GAF Seal-A-Ridge:
- Profile: Standard architectural ridge cap with pre-scored design
- Dimensions: 12″ W x 36″ L, separates into three 12″ x 12″ pieces
- Coverage: 25 linear feet per bundle
- Pricing: $49-$70 per bundle depending on color
- Colors: Matches GAF Timberline HDZ and architectural shingle color palette
- Features: Pre-scored eliminates cutting, dual-layer construction, Scotchgard Protector for algae resistance
- Warranty: Part of GAF Lifetime Roofing System, transferable limited lifetime warranty
- Installation: Designed for easy separation and bending over ridge
GAF Timbertex:
- Profile: Premium designer ridge cap mimicking wood shake appearance
- Pricing: $75-$95 per bundle
- Best for: High-end homes, wood shake aesthetic without maintenance
- Unique feature: Ultra-thick profile creating pronounced shadow lines
GAF Pro-Cut:
- Profile: Basic 3-tab style for budget applications
- Pricing: $35-$50 per bundle
- Coverage: 20-25 linear feet
- Best for: Rental properties, utility buildings
CertainTeed – Quality alternative:
CertainTeed offers ridge caps known for excellent color matching accuracy:
CertainTeed Shadow Ridge:
- Profile: Architectural ridge cap matching Landmark series shingles
- Pricing: $48-$72 per bundle
- Coverage: 25-30 linear feet
- Colors: Full Landmark color range with exceptional match quality
- Warranty: 25-40 years depending on system components
CertainTeed Presidential Shake TL:
- Profile: Designer ridge cap for Presidential TL luxury shingles
- Pricing: $70-$90 per bundle
- Features: Triple-layer construction, ultra-thick profile
- Best for: Premium architectural installations
Owens Corning – Innovation focus:
Owens Corning emphasizes wind resistance and durability:
Owens Corning SureNail Hip & Ridge:
- Profile: Enhanced wind resistance through SureNail Technology
- Pricing: $52-$75 per bundle
- Coverage: 25-30 linear feet
- Features: Integrated reinforcement zone improving nail hold strength
- Wind rating: Up to 130 mph when properly installed
- Warranty: Matches Duration series warranties (25-50 years)
Owens Corning Duration STORM:
- Profile: Impact-resistant ridge cap for hail-prone regions
- Pricing: $65-$85 per bundle
- Class 4 impact rating: Highest residential impact resistance
- Insurance benefits: Often qualifies for premium discounts
IKO – Value-oriented:
IKO provides budget-friendly options with solid performance:
IKO UltraHP Hip & Ridge:
- Profile: Standard architectural ridge cap
- Pricing: $40-$65 per bundle
- Coverage: 25-33 linear feet
- Colors: Matches Dynasty and Cambridge series
- Advantages: Competitive pricing, adequate performance
IKO EZ-Ridge:
- Profile: Basic ridge cap with easy installation features
- Pricing: $38-$55 per bundle
- Best for: Budget-conscious projects
Atlas – Specialty options:
Atlas serves niche markets with unique offerings:
Atlas Pro-Cut Hip & Ridge:
- Pricing: $42-$68 per bundle
- Coverage: 20-28 linear feet
- Features: Good color range, reliable performance
Atlas StormMaster:
- Profile: Enhanced wind and impact resistance
- Pricing: $58-$78 per bundle
- Best for: Severe weather zones
Brand comparison summary:
| Brand | Product Line | Price Range | Coverage | Key Feature |
|---|---|---|---|---|
| GAF | Seal-A-Ridge | $49-$70 | 25 LF | Pre-scored, market leader |
| GAF | Timbertex | $75-$95 | 20-25 LF | Designer wood-look |
| CertainTeed | Shadow Ridge | $48-$72 | 25-30 LF | Superior color matching |
| Owens Corning | SureNail | $52-$75 | 25-30 LF | Enhanced wind resistance |
| IKO | UltraHP | $40-$65 | 25-33 LF | Budget-friendly |
For detailed specifications and installation guidelines, consult the GAF ridge cap product page and manufacturer installation manuals.
How to install capstone shingles properly
Correct installation techniques ensure weather protection and longevity from your capstone shingle investment.
Materials and tools needed:
Before beginning installation, gather necessary components:
Materials:
- Ridge cap shingles (calculate linear footage + 10% waste)
- Ridge starter strip or cut field shingles for starter course
- Roofing nails: 1.5″ minimum length, corrosion-resistant
- Roofing cement/sealant for final cap and repairs
- Ridge vent (if installing ventilated ridge system)
- Closure strips matching panel profile (if applicable)
Tools:
- Roofing hammer or pneumatic nailer
- Utility knife with hook blades
- Chalk line for alignment
- Tape measure
- Tin snips or shears
- Safety harness and roof jacks
- Extension ladder
Step-by-step installation process:
Professional techniques for weathertight ridge cap installation:
Step 1 – Prepare the ridge:
- Ensure ridge line is clean, straight, and free of debris
- Verify all field shingles are properly installed to within 6-8 inches of ridge
- Check that both roof slopes meet evenly at the peak
- Install ridge vent if using a ventilated system (before cap shingles)
Step 2 – Apply starter course:
- Cut field shingles into starter strips or use manufactured ridge starter
- Apply starter strip along entire ridge length
- Nail starter in place approximately 2 inches from ridge center on each side
- Purpose: Creates first layer preventing weather penetration
Step 3 – Begin cap installation:
- Start from the end opposite the prevailing wind direction (caps overlap toward wind)
- For hip applications, begin at the bottom of the hip working upward
- Separate pre-scored capstone shingles at perforations creating individual 12″ sections
- Bend each cap shingle along centerline (warm shingles on cool days to prevent cracking)
Step 4 – Set first cap:
- Position first cap at ridge end, overhanging edge by 1/4″ to 3/4″
- Ensure cap is centered over ridge with equal overhang on both sides
- Bend cap firmly into place following ridge angle
- Nail with 2 nails per side (4 total) positioned:
Step 5 – Continue installation:
- Apply second cap shingle overlapping first by 5-6 inches (exposing 5-7 inches of previous cap)
- Maintain consistent exposure throughout installation for uniform appearance
- Nail using same 4-nail pattern: two per side, positioned 1″ from edge and 5-5/8″ from butt
- Continue pattern along entire ridge length
Step 6 – Finish termination:
- At final ridge end, overhang cap by 1/4″-3/4″ matching starter end
- Apply dab of roofing cement under final cap edge
- Seal exposed nails on final cap with roofing cement
- Ensure clean, straight ridge line with consistent exposure
Critical installation techniques:
Professional best practices ensuring optimal performance:
Proper bending:
- Warm capstone shingles in sun before bending in temperatures below 50°F
- Avoid forcing cold shingles which crack at fold line
- Bend gradually over ridge achieving smooth, tight fit
- Ensure both sides drape evenly without gaps
Correct exposure:
- Maintain 5-7 inch exposure (varies slightly by manufacturer)
- Use consistent exposure for uniform appearance
- Excessive exposure (over 7″) reduces protection layers
- Insufficient exposure wastes materials and creates bulky appearance
Nailing pattern precision:
- Position nails 5-5/8″ from butt edge ensuring next cap covers nail heads
- Keep nails 1″ from side edges preventing crack initiation
- Drive nails flush, not overdriven (crushes shingle) or underdriven (leaves exposed heads)
- Use 4 nails per cap shingle for maximum wind resistance
Common installation mistakes to avoid:
Errors that compromise performance and appearance:
- Insufficient overlap: Less than 5″ overlap creates leak paths and wind vulnerability
- Wrong direction: Installing caps toward prevailing wind allows wind-driven rain under edges
- Field shingles as caps: Using unmodified field shingles lacks flexibility, cracks easily, provides inferior protection
- Improper nailing: High nails get exposed; low nails visible on finished roof; side-edge nails cause cracking
- Inconsistent exposure: Varies ridge appearance, looks unprofessional
- Cold-weather forcing: Bending brittle cold shingles causes center-line cracking
- Color mixing neglect: Not blending from multiple bundles creates color banding
[Embed YouTube video: How to Install Ridge Cap Shingles Properly – Step by Step Tutorial]
Capstone shingles and ridge vent compatibility
Integrating ridge ventilation with capstone shingles creates energy-efficient roofing systems.
Ridge vent systems explained:
Ridge vents provide continuous exhaust ventilation along roof peaks:
Purpose and benefits:
- Exhaust hot attic air through peak opening, drawing fresh air through soffit vents
- Reduce attic temperatures by 20-40°F in summer months
- Lower cooling costs by 10-20% in hot climates
- Prevent moisture accumulation reducing mold, mildew, and wood rot
- Extend shingle lifespan by minimizing thermal stress
- Eliminate need for box vents or turbines creating cleaner roof appearance
Types of ridge vents:
- Rigid plastic vents: Pre-formed channels with internal baffles, $3-$6 per LF installed
- Rolled membrane vents: Flexible synthetic mesh, $2-$4 per LF installed
- Aluminum vents: Metal construction for maximum durability, $5-$8 per LF installed
- Shingle-over vents: Low-profile designs specifically for capstone shingle installation
Installing capstone shingles over ridge vents:
Proper sequencing and technique ensure both ventilation and weather protection:
Installation sequence:
- Complete field shingle installation to within 6-8″ of ridge on both slopes
- Cut 6-8″ wide opening along ridge center removing decking/sheathing
- Install ridge vent product over opening following manufacturer specifications
- Apply ridge cap starter course over vent
- Install capstone shingles over vent using proper nailing pattern
Special considerations:
- Nailing zones: Ridge vents include designated nailing strips; avoid nailing through vent openings
- Low-profile vents: Shingle-over style vents maintain slim profile beneath caps
- Proper starter: Use ridge starter ensuring first cap layer doesn’t block vent openings
- Exposure maintenance: Consistent exposure keeps capstone shingles centered over vent
- Sealant caution: Never seal vent openings with roofing cement; blocks airflow
Performance benefits:
Combined ridge vent and capstone shingle systems deliver measurable advantages:
- Energy savings: $150-$400 annually in reduced cooling costs (hot climates)
- Shingle longevity: Cooler attic temperatures extend field shingle life 15-25%
- Warranty compliance: Many premium shingle warranties require adequate ventilation
- Moisture control: Prevents condensation damage to roof decking and insulation
- Ice dam prevention: Cooler roof decks in winter reduce melt-freeze cycles
Compatibility considerations:
Not all capstone shingles work equally well with all ridge vent types:
- Standard architectural caps: Compatible with all vent styles
- Ultra-thick designer caps: May require low-profile vents avoiding bulky ridge appearance
- 3-tab caps: Work with basic vents but provide less dimensional character
- Special-order caps: Some manufacturers offer vent-specific ridge cap products
Review our ridge vent installation guide for comprehensive ventilation strategies.
Choosing capstone shingles for appearance and style
Aesthetic decisions significantly impact overall roof presentation and property value.
Matching field shingles:
Color and profile coordination creates cohesive roofing systems:
Manufacturer matching:
- Same brand essential: Each manufacturer’s color formulations differ; mixing brands creates mismatches
- Example: GAF Charcoal field shingles require GAF Charcoal ridge caps for seamless integration
- Lot variation: Even same-brand products from different production runs may vary slightly
- Blending strategy: Mix shingles from multiple bundles during installation minimizing any color variation
Profile coordination:
- Architectural field = architectural caps: Match dimensional profiles for consistent appearance
- 3-tab field accepts 3-tab caps: Budget projects maintain uniform look with basic products
- Designer field requires designer caps: Premium shingles demand matching premium ridge caps
- Mixed profiles: Using thin caps on thick architectural roofs creates visual disconnect
Dimensional impact on appearance:
Capstone shingle thickness dramatically affects roof character:
Standard thickness (0.5-0.75″):
- Creates subtle ridge definition
- Blends smoothly with field shingles
- Appropriate for traditional styles and conservative aesthetics
- Less pronounced shadow lines
- Best for: Colonial, ranch, simple gable roofs
Enhanced thickness (0.75-1.25″):
- Pronounced ridge presence drawing eye to roof peaks
- Bold shadow lines adding dimension
- Popular on architectural shingle roofs
- Creates “premium” appearance
- Best for: Two-story homes, complex roofs, upscale neighborhoods
Ultra-thick designer (1.0-1.5″):
- Maximum visual impact and depth
- Heavy shadow patterns visible from street
- Luxury aesthetic emphasizing craftsmanship
- Can overwhelm small roofs; ideal for larger homes
- Best for: Estate homes, luxury properties, architecturally significant buildings
Color selection strategies:
Three approaches to capstone shingle color choice:
Monochromatic (matching):
- Ridge caps identical color to field shingles
- Most common approach creating unified appearance
- Safe choice for all architectural styles
- Advantages: Seamless look, traditional aesthetic, easy specification
- Example: Weathered Wood field with Weathered Wood caps
Contrasting (accent):
- Ridge caps in complementary color creating definition
- Emphasizes roof peaks and architectural features
- Modern or contemporary aesthetic
- Requires careful color selection avoiding clashing
- Example: Charcoal field with Pewter Gray caps for subtle contrast
Blended (multi-tonal):
- Ridge caps blending multiple field shingle colors
- Natural, organic appearance
- Popular with variegated architectural shingles
- Creates depth and visual interest
- Example: Mixed earth tones at ridge on multi-colored field shingles
Proportional considerations:
Roof size and style influence optimal capstone shingle selection:
Small roofs (under 1,500 sq ft):
- Standard thickness caps avoid overwhelming roof
- Subtle colors prevent ridge from dominating
- Proportional profile matching house scale
Large roofs (over 2,500 sq ft):
- Enhanced or ultra-thick caps provide appropriate visual weight
- Bold profiles visible from street enhance curb appeal
- Luxury homes justify premium designer options
Complex roofs (multiple planes, dormers):
- Consistent capstone shingles across all ridges and hips creates unity
- Color-matched caps tie together disparate roof sections
- Quality caps essential given extensive linear footage
How capstone shingles perform in different climates
Weather resistance varies by product quality and installation technique.
Wind resistance capabilities:
Proper installation determines wind performance:
Standard installation wind ratings:
- 3-tab caps: 60-90 mph wind resistance when properly installed
- Architectural caps: 110-130 mph typical ratings
- Premium caps with enhanced adhesive: 130-150 mph capabilities
Enhanced wind zone installation:
- Hurricane zones require 6-nail pattern (3 per side) instead of standard 4-nail
- Reduced exposure (4-5 inches) increases overlap layers
- Roofing cement dabs under each cap edge
- Special high-wind adhesive strips on premium products
Critical factors:
- Installation direction (caps overlap toward prevailing wind) prevents uplift
- Proper nailing pattern (5-5/8″ from butt, 1″ from edge) ensures subsequent caps cover fasteners
- Adequate adhesive strip contact between layers
- Quality materials with aggressive adhesives
Weather exposure challenges:
Ridge caps endure the harshest roof conditions:
UV exposure:
- Peaks receive maximum sun exposure accelerating granule loss
- Premium capstone shingles use enhanced UV-resistant granules
- PVDF coatings on high-end products maintain color 40+ years
- Standard caps fade noticeably after 15-20 years in intense sun climates
Temperature extremes:
- Daily thermal cycling (hot days, cool nights) stresses ridge materials
- Quality asphalt compounds resist cracking from expansion/contraction
- Designer caps with flexible formulations perform better in variable climates
Precipitation exposure:
- Ridge caps shed water down both roof slopes
- Proper overlap (5-6 inches minimum) critical for leak prevention
- Architectural profile channels water more effectively than flat 3-tab caps
- Ice and snow accumulation at ridges requires adequate sealing
Impact resistance:
Hail damage concentrates at exposed roof peaks:
Standard caps:
- Adequate resistance to small hail (under 1 inch)
- Damage likely from large hail (1.5+ inches)
- Granule loss, denting, cracking possible
Class 4 impact-resistant caps:
- Owens Corning Duration STORM, CertainTeed Impact Resistant options
- Cost premium: $15-$25 per bundle over standard
- Insurance discounts: 10-35% in hail-prone states
- Testing: Withstand 2-inch steel ball dropped from 20 feet
Climate-specific recommendations:
Optimal capstone shingle selection by region:
Hot, sunny climates (Southwest, South):
- Light colors reflecting solar heat
- Premium granules resisting UV degradation
- Cool roof rated options reducing attic temperatures
- PVDF coatings maintaining appearance decades
- Brands: GAF Timberline HDZ with reflective granules, CertainTeed Landmark Solaris
Cold, snowy climates (Northeast, Mountain states):
- Flexible compounds preventing cold-weather cracking
- Enhanced adhesive performing in low temperatures
- Proper ice and water shield beneath caps at eaves
- Brands: IKO Marathon Plus (cold-weather formula), Atlas StormMaster
Humid, rainy climates (Southeast, Pacific Northwest):
- Algae-resistant caps with copper or zinc granules
- Steep profile shedding water quickly
- Enhanced adhesive resisting moisture
- Brands: GAF with Scotchgard Protector, CertainTeed StreakFighter
Coastal, high-wind zones (Gulf Coast, Atlantic Coast):
- Architectural caps with superior wind ratings
- Enhanced nailing patterns required by code
- Corrosion-resistant fasteners essential
- Brands: Owens Corning SureNail (130 mph rating), CertainTeed Landmark Premium
Severe weather (hail belts, tornado alley):
- Class 4 impact-resistant caps reducing damage
- Insurance premium discounts
- Enhanced wind performance features
- Brands: Owens Corning Duration STORM, GAF Timberline HDZ RS
Should you install capstone shingles yourself?
DIY feasibility depends on experience, roof characteristics, and comfort with heights.
DIY installation assessment:
Ridge cap installation difficulty level: Moderate:
Skills required:
- Comfortable working at roof peak elevations
- Basic roofing knowledge (exposure, nailing patterns, sealing)
- Ability to maintain straight lines and consistent spacing
- Physical capability handling materials at heights
- Understanding of safety equipment and fall protection
Time investment:
- Simple gable roof (30-40 LF): 3-5 hours for experienced DIYer
- Hip roof (60-100 LF): 6-10 hours
- Complex roof (100+ LF): 1-2 full days
- Learning curve adds 30-50% time for first-time installers
Cost savings:
- Professional labor: $150-$500 for typical residential ridge/hip work
- DIY saves entire labor cost but requires tool investment
- Mistakes can cost more than hiring professionals initially
Tools and materials needed:
One-time investments for DIY capstone shingle installation:
Essential tools:
- Roofing hammer or pneumatic nailer: $100-$400
- Utility knife with hook blades: $15-$30
- Chalk line: $10-$20
- 25-foot tape measure: $15-$25
- Tin snips: $15-$30
- Tool subtotal (if purchasing): $155-$505
Safety equipment:
- Fall protection harness: $100-$250
- Roof jacks and planks: $75-$150
- Safety glasses: $10-$20
- Work gloves: $15-$30
- Extension ladder (if not owned): $150-$400
- Safety subtotal: $350-$850
Total tool/safety investment: $505-$1,355 if starting from scratch
When DIY makes sense:
Scenarios favoring self-installation:
- Simple gable roofs with easy access and low-moderate pitch (4:12 to 6:12)
- Homeowner experienced with basic roofing or construction
- Adequate time available (no rush deadline)
- Already own basic roofing tools and safety equipment
- Comfortable working at heights
- Desire to learn roofing skills
- Budget-conscious project where labor savings meaningful
When to hire professionals:
Situations requiring contractor expertise:
Roof characteristics:
- Steep pitch (8:12 or greater) creating dangerous working conditions
- High elevations (three-story homes, tall peaks)
- Complex geometries with multiple hips, valleys, dormers
- Ridge vent integration requiring specialized knowledge
- Large projects (100+ linear feet) benefiting from crew efficiency
Homeowner factors:
- No prior roofing experience
- Uncomfortable with heights or fall protection equipment
- Physical limitations preventing safe roof work
- Time constraints requiring fast completion
- Desire for warranty protection on both materials and workmanship
Warranty considerations:
- Some premium shingle warranties require licensed contractor installation
- Manufacturer may deny claims if DIY installation violates specifications
- Professional installation includes workmanship warranty (typically 1-5 years)
- Insurance claims require proper installation documentation
Professional installation advantages:
Benefits justifying labor costs:
- Proper technique: Experienced installers ensure weathertight seals, correct exposure, optimal nailing
- Efficiency: Professional crews complete in hours what takes DIYers days
- Warranty protection: Preserves manufacturer coverage, adds workmanship guarantees
- Safety: Professionals have proper equipment, training, insurance
- Quality materials: Contractors often access contractor-grade products and pricing
- Integrated service: Ridge caps installed during full roof replacement ensures system compatibility
Middle-ground approach:
Some homeowners hire professionals for field shingles but DIY ridge caps as learning experience on simpler portion of project. This works best on simple gable roofs where ridge cap runs are straight and accessible.
Review our DIY roofing safety guide before attempting any roof work.
Understanding capstone shingle warranties
Warranty coverage protects your investment and varies significantly by product tier.
Manufacturer material warranties:
Defect protection from major brands:
3-tab capstone shingles:
- Warranty period: 20-25 years limited
- Coverage: Manufacturing defects, excessive granule loss, premature failure
- Transferable: Usually yes, with reduced coverage (10-15 years typical)
- Pro-rata: Coverage decreases over time after initial 10-year full coverage period
Standard architectural capstone shingles:
- Warranty period: 25-40 years limited (GAF Seal-A-Ridge: part of Lifetime System)
- Coverage: Manufacturing defects, color fading beyond specified limits, material failure
- Transferable: Yes, often maintains full term for first transfer
- Pro-rata: Varies by manufacturer, many offer non-pro-rated extended periods
Premium/designer capstone shingles:
- Warranty period: 40-50 years limited or “lifetime” (defined as 50+ years)
- Coverage: Enhanced protection including algae resistance (10-25 years), wind damage (limited)
- Transferable: Full transfer with registration
- Pro-rata: Extended full-coverage periods before degradation begins
Installation workmanship warranties:
Separate coverage from contractors:
Professional installation:
- Standard workmanship warranty: 1-2 years covering labor and installation defects
- Enhanced warranties: 5-10 years available from premium contractors
- Coverage: Installation errors, improper nailing, leak resulting from faulty application
- Requirements: Often requires using contractor’s preferred materials, full roof replacement
DIY installation:
- No workmanship warranty
- Homeowner assumes all installation liability
- Manufacturer material warranty still applies if installation follows specifications
- Risk: Installation errors may void material warranty
What warranties cover:
Typical inclusions in capstone shingle warranties:
- Manufacturing defects (delamination, premature granule loss, cracking)
- Excessive color fading beyond manufacturer specifications (usually 10% maximum)
- Algae growth (if algae-resistant product within specified coverage period)
- Material failure under normal weather conditions
- Adhesive failure causing shingle blow-off
What warranties exclude:
Common exclusions homeowners must understand:
- Installation errors or workmanship defects
- Damage from severe weather events (hail, hurricanes, tornadoes – covered by homeowners insurance instead)
- Normal wear and weathering
- Foot traffic or mechanical damage
- Lack of maintenance (debris accumulation, moss growth)
- Improper ventilation damaging shingles
- Use of incompatible accessories or materials
- Alterations or repairs by unlicensed individuals
Maintaining warranty validity:
Required practices preserving coverage:
Installation compliance:
- Follow manufacturer installation instructions precisely
- Use recommended accessories (starter strips, underlayment, nails)
- Maintain proper nailing patterns and exposure rates
- Install over adequate ventilation systems
Documentation:
- Keep purchase receipts and installation records
- Register warranty with manufacturer (required for some benefits)
- Photograph installation for future reference
- Maintain contractor certifications if professionally installed
Ongoing maintenance:
- Perform annual inspections checking for damage or wear
- Address minor repairs promptly preventing escalation
- Keep gutters clean preventing water backup
- Remove debris, moss, and algae growth
- Document maintenance activities
Claiming warranty benefits:
Process for warranty claims on defective capstone shingles:
- Contact manufacturer: Report issue through customer service or online portal
- Provide documentation: Photos of damage, purchase receipts, installation records
- Inspection: Manufacturer may send representative or request contractor evaluation
- Determination: Manufacturer decides if issue is warranty-covered
- Resolution: Pro-rated credit, replacement materials, or repair authorization
- Timeframe: Most claims resolved within 2-4 weeks
Transferring warranties:
Selling your home with warranty coverage:
- Most manufacturer warranties transfer to subsequent homeowners
- Registration transfer sometimes required within specified timeframe
- Transferred coverage often reduced (lifetime becomes 20-30 years)
- Workmanship warranties typically non-transferable
- Warranty transfer enhances home value and marketability
For specific warranty terms, review manufacturer documentation or consult the National Roofing Contractors Association warranty guidelines.
Maintaining capstone shingles for maximum lifespan
Routine care extends performance and identifies issues before major failures.
Routine inspection schedule:
Regular evaluation prevents surprises:
Annual inspections:
- Conduct visual inspection from ground using binoculars
- Look for lifted, cracked, missing, or damaged capstone shingles
- Check for granule loss creating bare spots
- Identify sealant failure or exposed nail heads
- Examine ridge line straightness and consistent exposure
- Best timing: Spring and fall avoiding extreme weather
Post-storm inspections:
- Inspect within 24-48 hours after major weather events
- Check for wind damage (lifted or blown-off caps)
- Identify hail impact damage (dents, cracking, granule loss)
- Document damage immediately for insurance claims
- Photograph from ground and close-up if safely accessible
Professional inspections:
- Every 3-5 years for comprehensive evaluation
- Cost: $150-$300 for professional roof inspection
- Benefits: Expert identification of subtle issues, safety compliance, detailed reporting
Common capstone shingle issues:
Problems requiring attention:
Wind-lifted caps:
- Caps at ridge termination curl upward from wind exposure
- Typically occurs at gable ends facing prevailing winds
- Repair: Re-seal with roofing cement, add extra nail, replace if damaged
- Cost: $50-$100 per repair location
Cold-weather cracking:
- Center-line cracks from foot traffic or installation in cold weather
- Appears as splits along ridge fold line
- Repair: Replace cracked caps, seal with roofing cement temporarily
- Cost: $75-$150 per damaged cap section
Granule loss:
- UV exposure accelerates granule deterioration at peaks
- Creates bare spots exposing asphalt base
- Repair: Replace caps when 30%+ granules lost
- Cost: $3-$7 per linear foot for partial replacement
Moss and algae growth:
- Green moss or black algae streaks in humid, shaded climates
- Cosmetic issue initially, retains moisture shortening lifespan if untreated
- Treatment: Zinc or copper strip installation, algaecide application, soft washing
- Cost: $200-$600 for professional treatment
Sealant failure:
- Adhesive strips lose bond allowing cap movement
- Occurs in extreme temperature cycling or aging materials
- Repair: Apply roofing cement under lifted areas, add nails if necessary
- Cost: $25-$75 per location
Repair procedures and costs:
Common fixes extending capstone shingle life:
Individual cap replacement:
- Process: Remove damaged cap, install new cap matching existing
- Difficulty: Moderate, requires matching material and proper integration
- Cost: $50-$150 per repair including materials and labor
- When needed: Cracked, severely damaged, or missing individual caps
Re-sealing lifted corners:
- Process: Apply roofing cement under lifted edges, weight or nail down
- Difficulty: Easy DIY task if safely accessible
- Cost: $25-$75 per location (professional), $5-$15 DIY
- When needed: Wind-lifted caps, adhesive failure, minor damage
Partial ridge replacement:
- Process: Replace 10-20 foot section of damaged ridge caps
- Difficulty: Moderate, requires proper integration with existing caps
- Cost: $300-$700 depending on length and materials
- When needed: Storm damage, concentrated deterioration, color mismatch repair
Full ridge/hip replacement:
- Process: Remove and replace all capstone shingles maintaining field shingles
- Difficulty: Requires professional contractors
- Cost: $3-$7 per linear foot installed ($300-$1,500 typical project)
- When needed: Aging caps nearing end of life, widespread damage, aesthetic refresh
Preventive maintenance strategies:
Practices extending capstone shingle longevity:
Gutter maintenance:
- Clean gutters twice yearly preventing water backup
- Overflowing gutters saturate ridge area causing premature failure
- Install gutter guards reducing maintenance frequency
Debris removal:
- Remove leaves, branches, and organic material from ridge areas
- Trapped debris retains moisture accelerating deterioration
- Trim overhanging branches preventing constant shade and debris accumulation
Algae/moss prevention:
- Install zinc or copper strips below ridge caps releasing algae-inhibiting metals during rain
- Cost: $2-$4 per linear foot
- Apply preventive treatments every 2-3 years in humid climates
- Soft-wash cleaning removes growth without damaging shingles
Attic ventilation maintenance:
- Verify ridge vents remain clear and functional
- Check soffit vents aren’t blocked by insulation
- Proper ventilation reduces thermal stress extending cap life 15-25%
Proactive repair:
- Address minor issues immediately preventing escalation
- Replace 1-2 damaged caps promptly avoiding water infiltration
- Small repairs ($50-$150) prevent major replacements ($300-$1,500)
Review our seasonal roof maintenance checklist for comprehensive care strategies.
Frequently asked questions about capstone shingles
What are capstone shingles used for?
Capstone shingles, also called ridge cap shingles or hip and ridge shingles, are specialized roofing products designed to finish and weatherproof roof peaks, ridges, and hips where two roof planes meet. They create watertight seals at these vulnerable junctions, integrate with ridge ventilation systems, provide professional aesthetic finishing, and protect exposed ridge boards from weather damage.
How much do capstone shingles cost?
Capstone shingles cost $25-$95 per bundle in 2025, with most homeowners paying $45-$75 for standard architectural ridge caps covering 25-30 linear feet per bundle. Installation labor adds $1.50-$3.50 per linear foot, bringing total installed costs to $3.00-$7.00 per linear foot. Complete residential projects typically range from $120-$1,050 for materials and labor depending on ridge/hip length and product selection.
How many linear feet does a bundle of ridge cap shingles cover?
Most ridge cap shingle bundles cover 20-33 linear feet depending on the manufacturer and product line. GAF Seal-A-Ridge covers 25 linear feet per bundle, while some premium architectural products extend to 30-33 linear feet. Basic 3-tab style caps typically provide 20-25 linear feet coverage. Always check specific product specifications, as coverage varies by brand and style.
Can I make my own ridge cap shingles?
Yes, you can create basic ridge caps by cutting standard 3-tab field shingles into thirds along their pre-scored lines, producing three 12″ x 12″ cap pieces per shingle. This budget approach works adequately for utility buildings and simple projects but lacks the enhanced thickness, flexibility, and dimensional character of purpose-manufactured architectural ridge caps. Pre-formed caps also include warranties and pre-scoring for easier installation with better performance.
Do capstone shingles need to match my roof shingles?
Yes, capstone shingles should match both the color and profile style of your field shingles for optimal appearance and performance. Use the same manufacturer and exact color ensuring seamless integration—for example, GAF Charcoal field shingles require GAF Charcoal ridge caps. Architectural field shingles need architectural ridge caps for dimensional consistency, while 3-tab roofs accept 3-tab caps. Mixing brands or mismatching profiles creates noticeable visual discontinuity.
How long do ridge cap shingles last?
Ridge cap shingle lifespan matches field shingle warranties, ranging from 20-50+ years depending on product quality. Budget 3-tab caps last 20-25 years, standard architectural caps provide 30-40 years service, and premium designer caps deliver 40-50 years or more. Actual longevity depends on climate conditions, installation quality, maintenance practices, and exposure to severe weather. Ridge caps often wear faster than field shingles due to maximum UV and weather exposure.
Should I install ridge caps myself or hire a professional?
Hire professionals for steep roofs (8:12+ pitch), high elevations, complex geometries, or if you lack roofing experience. Experienced DIYers can successfully install capstone shingles on simple, accessible gable roofs with moderate pitch, saving $150-$500 in labor costs. Professional installation ensures proper technique, preserves warranties, provides workmanship guarantees, and typically completes in hours versus 1-2 days for DIY. Installation errors can create leaks costing far more than professional labor.
Making informed capstone shingle decisions
Capstone shingles represent essential finishing components for every sloped roof, providing weatherproofing at vulnerable ridge and hip junctions while creating polished, professional aesthetic presentation. Quality ridge caps cost $35-$75 per bundle ($1.50-$3.00 per linear foot for materials), with complete installed projects ranging from $3.00-$7.00 per linear foot including professional labor.
Selecting appropriate capstone shingles requires matching field shingle manufacturers and colors, choosing profile styles consistent with roof aesthetics, considering climate-specific performance features, and balancing budget with longevity expectations. While ridge caps represent only 3-5% of total roof replacement costs, compromising quality
Get free roofing advice, cost guides, and seasonal maintenance tips.

Roofing content specialist with 5+ years researching U.S. residential and commercial roofing. Has documented 200+ projects covering installation costs, material selection, contractor vetting, and DIY guides for homeowners across all climate zones.
Leave A Comment